





















The four Divine Beasts are giant Sheikah machines built to fight Calamity Ganon, piloted a century ago by the four Champions. Ganon seized them through four Blight Ganons, and the beasts now threaten the Zora, Gorons, Rito and Gerudo. Free the Divine Beasts, the main quest Impa gives you in Kakariko Village, sends you to all four. They can be freed in any order, and each one follows the same pattern: help the local hero disable the beast from outside, board it, take the map from its Guidance Stone, activate five terminals, beat the Blight Ganon at the main control unit, and claim a Heart Container and the Champion’s ability.
| Beasts | Vah Ruta, Vah Rudania, Vah Medoh, Vah Naboris |
|---|---|
| Started by | Free the Divine Beasts (Impa, Kakariko Village); one main quest per beast |
| Order | Any; each beast is independent |
| Inside each beast | A Guidance Stone (map and beast controls), five terminals, the main control unit and a Blight Ganon |
| Blight health | 800–2,000 inside a beast, rising with the number of beasts you have already freed |
| Rewards | Per beast: a Heart Container, a Champion ability and the Champion’s weapon from the settlement; in the final battle each freed beast removes one eighth of Calamity Ganon’s health |
Quick Reference: All Four Divine Beasts
Every beast at a glance. The beast name jumps to its section below; the guide link opens the full dungeon page.
| Divine Beast | Region and settlement | Champion | Blight Ganon (health) | Terminals | Ability | Reward weapon | Guide | |
|---|---|---|---|---|---|---|---|---|
 | Vah Ruta | Lanayru; Zora’s Domain | Mipha | Waterblight Ganon (800–2,000) | 5 | Mipha’s Grace | Lightscale Trident | Guide |
 | Vah Rudania | Eldin; Goron City | Daruk | Fireblight Ganon (800–2,000) | 5 | Daruk’s Protection | Boulder Breaker | Guide |
 | Vah Medoh | Tabantha (Hebra); Rito Village | Revali | Windblight Ganon (800–2,000) | 5 | Revali’s Gale | Great Eagle Bow | Guide |
 | Vah Naboris | Gerudo Desert; Gerudo Town | Urbosa | Thunderblight Ganon (800–2,000) | 5 | Urbosa’s Fury | Scimitar of the Seven, Daybreaker | Guide |
How Each Beast Starts and How You Get Aboard
| Divine Beast | Main quest | First contact | Settlement position | Getting aboard | Dungeon mechanic | |
|---|---|---|---|---|---|---|
| Vah Ruta | Divine Beast Vah Ruta | Prince Sidon | x 3272, z -401, height 426 (map square I-4) | Collect 20 Shock Arrows on Ploymus Mountain, then ride Prince Sidon and hit the four glowing orbs with Shock Arrows | Raise and lower the trunk to redirect water |
| Vah Rudania | Divine Beast Vah Rudania | Bludo | x 1685, z -2467, height 622 (map square G-2) | Rescue Yunobo from the Abandoned North Mine, then escort him past the Sentries and fire him from three cannons at the beast | Tilt the whole beast 90 degrees onto its side |
| Vah Medoh | Divine Beast Vah Medoh | Kaneli, the Rito Elder | x -3618, z -1808, height 532 (map square B-3) | Pass Teba‘s test at the Flight Range, then glide beside the beast and destroy its four cannons with Bomb Arrows | Tilt the wings left or right |
| Vah Naboris | Divine Beast Vah Naboris | Riju (after the Yiga Clan Hideout) | x -3835, z 2915, height 150 (map square B-7) | Recover the Thunder Helm from the Yiga Clan Hideout, then surf beside Riju inside her lightning shield and shoot the four feet with Bomb Arrows | Rotate the front, middle and back cylinders |
Recommended Order and Difficulty
There is no required order. Two things decide a good one: how far each settlement is from where you are, and the fact that every Blight Ganon gets tougher the more beasts you have already freed (800–2,000 health in the data). The order below is the one most players find smoothest. It starts close to Kakariko Village and Hateno, picks up Mipha‘s Grace (a free revive) and Revali‘s Gale (fast climbing) early, and leaves the desert, which needs the longest lead-up, for last. If you would rather face Thunderblight Ganon while he is at his weakest, do Vah Naboris first instead.
| # | Divine Beast | Difficulty | Why this place in the order | Bring | |
|---|---|---|---|---|---|
| 1 | | Vah Ruta | Medium | The closest beast to Kakariko. Gathering 20 Shock Arrows near a Lynel is the hardest part; Cryonis and Magnesis solve everything inside, and Waterblight Ganon is the most forgiving boss. | Zora Armor, a bow, 20 Shock Arrows, Cryonis, Magnesis and Stasis; Ice Arrows and Remote Bombs help |
| 2 | | Vah Medoh | Medium | Needs cold protection and good aim from the paraglider. The interior is short, and Windblight Ganon is fought mostly with a bow from the air. | Cold protection (Snowquill set or a spicy meal), a fast bow, the 20 Bomb Arrows from Teba, Remote Bombs, Magnesis and Stasis |
| 3 | | Vah Rudania | Medium | Needs two layers of flame guard and a stealthy escort past the Sentries. Wooden weapons burn on Death Mountain, so bring metal ones. | Two layers of flame guard (Flamebreaker pieces or Fireproof Elixirs), metal weapons, Remote Bombs, Magnesis and Stasis |
| 4 | | Vah Naboris | Hard | Requires the Thunder Helm from the Yiga Clan Hideout first. The cylinder puzzles are the most involved, and Thunderblight Ganon is the fastest and most dangerous Blight. | Shock protection (Rubber set, elixirs or food), the 20 Bomb Arrows from Riju, Sand Boots, Remote Bombs, Magnesis and Stasis |
The Champions’ Abilities Compared
Each freed Champion gives you a power that recharges on its own after use. All four recharge three times faster inside Hyrule Castle, and finishing that Champion’s song in The Champions’ Ballad DLC upgrades it to a “+” version that recharges much faster.
| Ability | Champion | Effect | How to use | Uses before recharge | Recharge | Upgraded in the DLC | |
|---|---|---|---|---|---|---|---|
| Mipha‘s Grace | Mipha | Revives you with full hearts plus temporary bonus hearts when you would fall | Automatic | One revival | 24 minutes (8 in Hyrule Castle) | Mipha’s Grace+ (recharges much faster) |
| Daruk‘s Protection | Daruk | While you hold guard, a barrier blocks the next attacks completely, even Guardian beams | Hold guard (ZL) | Three blocks | 18 minutes (6 in Hyrule Castle) | Daruk’s Protection+ (recharges faster) |
| Revali‘s Gale | Revali | Lifts you high on an updraft so you can glide or aim from the air | Hold jump (X) | Three uses | 6 minutes (2 in Hyrule Castle) | Revali’s Gale+ (recharges faster) |
| Urbosa‘s Fury | Urbosa | Calls down lightning on the area around you, stunning and damaging enemies | Charged attack | Three uses | 12 minutes (4 in Hyrule Castle) | Urbosa’s Fury+ (recharges much faster) |
The Four Blight Ganons Compared
Each Blight Ganon waits at its beast’s main control unit and appears when you activate it after the fifth terminal. All four fight in two phases, switching at half health, and all four are weak to arrows in the eye. Their health in the game data is 800–2,000 inside a Divine Beast, 2,000 when a Blight you skipped meets you in Hyrule Castle, and 1,500 in the Champions’ Ballad rematches. A Heart Container drops when each one falls: pick it up before you touch the control unit again.
| Blight Ganon | Divine Beast | Health in the beast | In Hyrule Castle | DLC rematch | Weapons and attacks | Key trick | Weak point | |
|---|---|---|---|---|---|---|---|---|
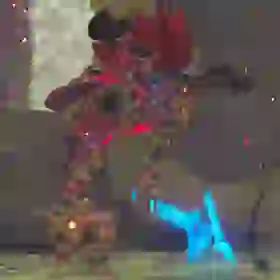 | Waterblight Ganon | Vah Ruta | 800–2,000 | 2,000 | 1,500 | Long spear; ice blocks and an eye laser in phase two | Cryonis pillars shatter his spear; Cryonis or Stasis on his ice blocks | Eye; Shock Arrows |
 | Fireblight Ganon | Vah Rudania | 800–2,000 | 2,000 | 1,500 | Huge flaming greatsword; fireballs and a giant flame vortex | A Remote Bomb into the vortex as he inhales breaks his fire shield | Eye; Ice Arrows |
 | Windblight Ganon | Vah Medoh | 800–2,000 | 2,000 | 1,500 | Arm cannon; tornadoes; floating turrets and an eye beam in phase two | Ride the roof turbines up and shoot his eye in slow motion | Eye; Bomb Arrows |
 | Thunderblight Ganon | Vah Naboris | 800–2,000 | 2,000 | 1,500 | Electrified scimitar and shield; teleport dashes, electric orbs, metal rods for lightning | Hold a metal rod beside him with Magnesis so his own lightning stuns him | Eye; shock protection |
Divine Beast Vah Ruta (Zora’s Domain)
Vah Ruta is the elephant-shaped Divine Beast of the Zora. It stands in the East Reservoir Lake above Zora’s Domain. The full room-by-room route is on the Vah Ruta guide; this section keeps the walkthrough with the tables you need at a glance.
| Vah Ruta | Details |
|---|---|
| Region | Lanayru; Zora’s Domain, x 3272, z -401, height 426 (map square I-4) |
| Champion | Mipha; memory Mipha’s Touch |
| Helpers | Prince Sidon, King Dorephan |
| Blight Ganon | Waterblight Ganon, health 800–2,000 (2,000 in Hyrule Castle) |
| Terminals | 5, plus the main control unit; mechanic: raise and lower the trunk to redirect water |
| Quests | Divine Beast Vah Ruta (main quest), part of Free the Divine Beasts |
| Champion ability | Mipha’s Grace: revives you with full hearts plus temporary bonus hearts when you would fall; one revival, recharge 24 minutes (8 in Hyrule Castle) |
| Divine Helm |  Vah Ruta Divine Helm (Swim Speed Up; Mipha amiibo) Vah Ruta Divine Helm (Swim Speed Up; Mipha amiibo) |
| Reward weapon |  Lightscale Trident (attack 22, durability 70) Lightscale Trident (attack 22, durability 70) |
| Heart Container |  Dropped by Waterblight Ganon Dropped by Waterblight Ganon |
| Bring | Zora Armor, a bow, 20 Shock Arrows, Cryonis, Magnesis and Stasis; Ice Arrows and Remote Bombs help |
| Walkthrough | Zora’s Domain |
Gathering Shock Arrows: The Perils of Ploymus Mountain
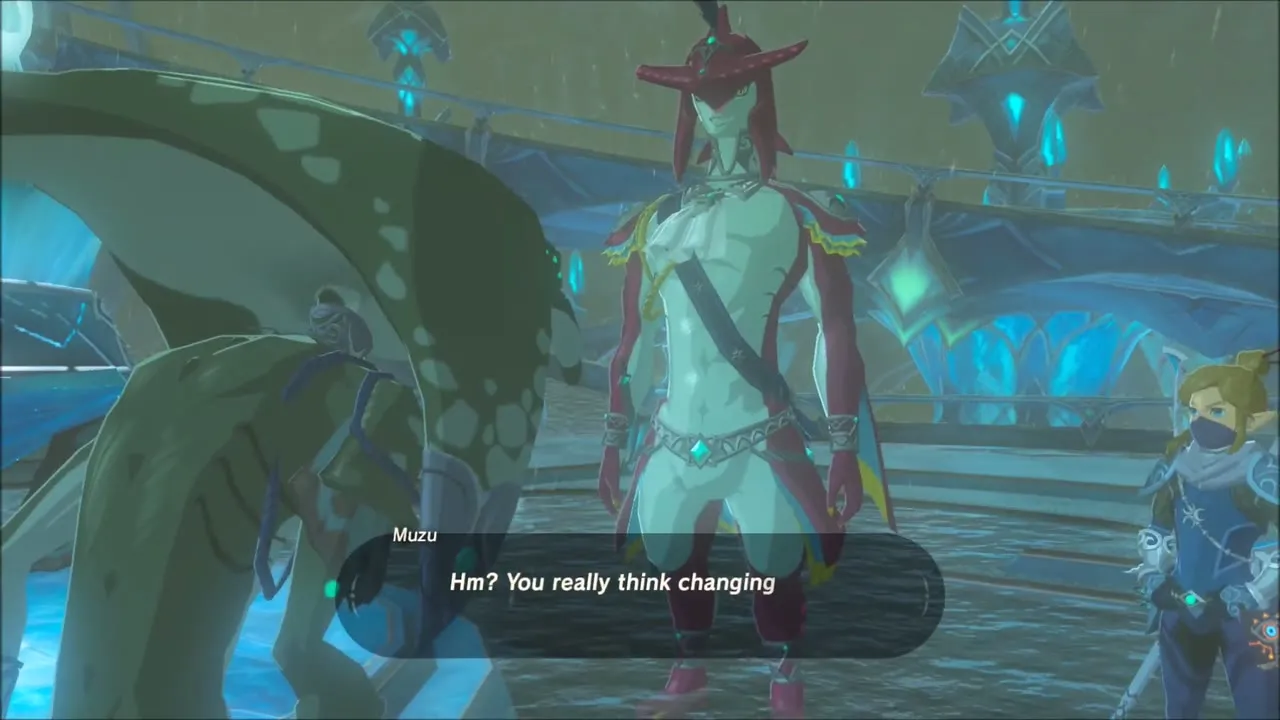
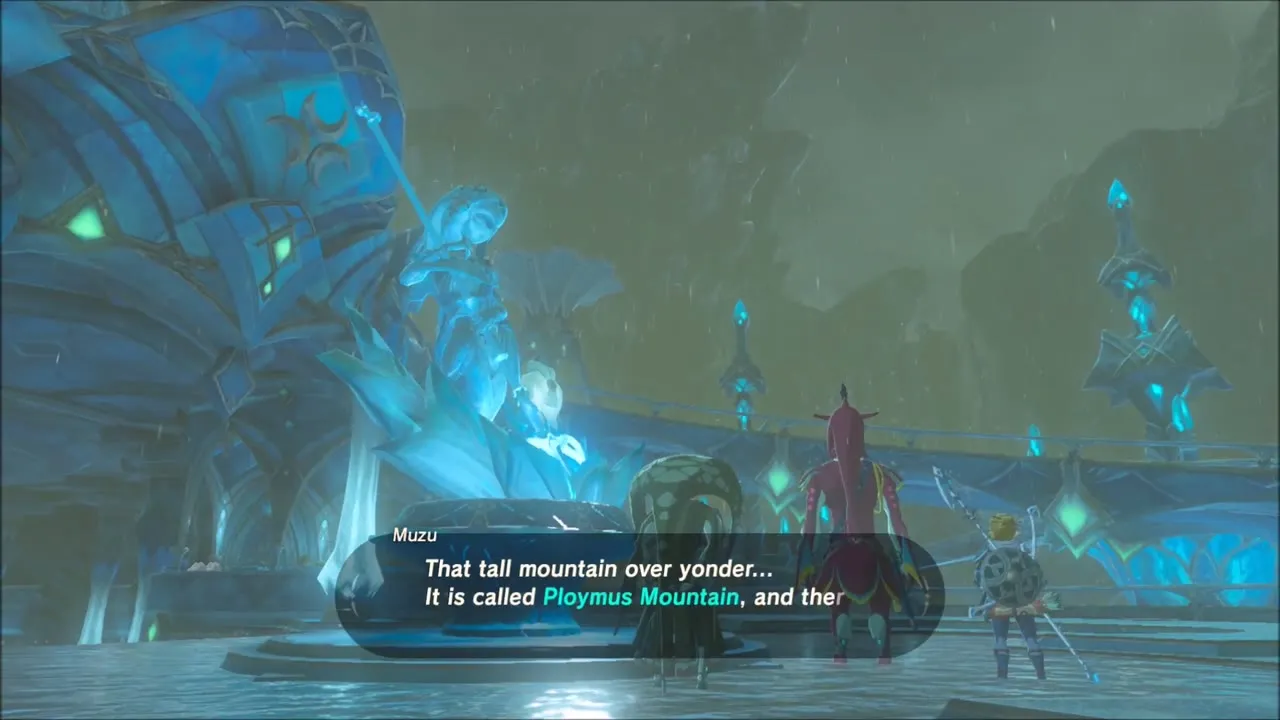
Muzu explains that the necessary Shock Arrows can be found on Ploymus Mountain, east of Zora’s Domain, but warns that a fearsome Lynel guards the peak. You need to collect at least 20 Shock Arrows.


The Ascent
Take the bridge leading east from the plaza level (Mipha statue level). The path leads towards Mikau Lake and Lulu Lake. Equip the Zora Armor and use its power to swim up the waterfalls cascading down from the east. This ability transforms the vertical landscape, turning impassable cliffs into scalable routes, showcasing a key traversal mechanic tied to the Zora region. As you ascend the path towards the peak, keep an eye out for stray Shock Arrows embedded in trees and rocks – remnants of the Lynel’s presence. Collect these as you go.
Optional: Zora Helm and Lynel Safari
- Zora Helm: Before ascending Ploymus Mountain, consider a detour north. An inscription hints at the Zora Helm hidden in Toto Lake. Swim up the large waterfall north of the Domain to reach Toto Lake. Use Magnesis to locate and retrieve an underwater chest containing the Zora Helm. This helm further enhances swimming speed and grants a spin attack while swimming, completing a valuable synergy with the Zora Armor.
- Lynel Safari: Before leaving Zora’s Domain, seek out the Zora named Laflat near the entrance. She offers a side quest, “Lynel Safari,” requiring you to take a picture of the Red-Maned Lynel atop Ploymus Mountain. You can complete this objective while gathering arrows.
The Lynel Encounter
At the summit of Ploymus Mountain, you’ll find the Red-Maned Lynel patrolling Shatterback Point. This powerful beast wields a bow and Shock Arrows. Direct confrontation at this stage can be extremely difficult, as the Lynel hits hard and fires devastating volleys of Shock Arrows.
Crucially, fighting the Lynel is optional for gathering the arrows. The game encourages a stealthier approach here, reflecting its design philosophy of allowing multiple solutions. Crouch and carefully move around the perimeter of the Lynel’s patrol area, using rocks and trees for cover. Keep the Lynel in sight to anticipate its movements. If it spots you (indicated by a question mark), quickly hide until it loses interest. Collect the Shock Arrows embedded in the environment – check trees, rocks, and the ground, especially around the edges and near the peak. Once you have gathered 20 arrows, you can proceed. There are often more than 20 available.
Optional: Alternative Shock Arrow Sources
If you struggle with the Lynel or prefer not to sneak, or if you already possess 20 Shock Arrows from previous exploration, you can skip the collection on Ploymus Mountain. Shock Arrows can be purchased from vendors in Gerudo Town, Lurelin Village, Kara Kara Bazaar, and the Korok Forest. Additionally, Lizalfos along the path to Zora’s Domain sometimes use and drop Shock Arrows. Some other Lynels across Hyrule also drop them upon defeat.
Once you have the required arrows, head to the cliff edge overlooking the East Reservoir Lake below, where Vah Ruta awaits. Glide down and meet Sidon on the northern pier to begin the assault. There’s a bed nearby if you need to recover health.
Assault on the Beast: Boarding Vah Ruta
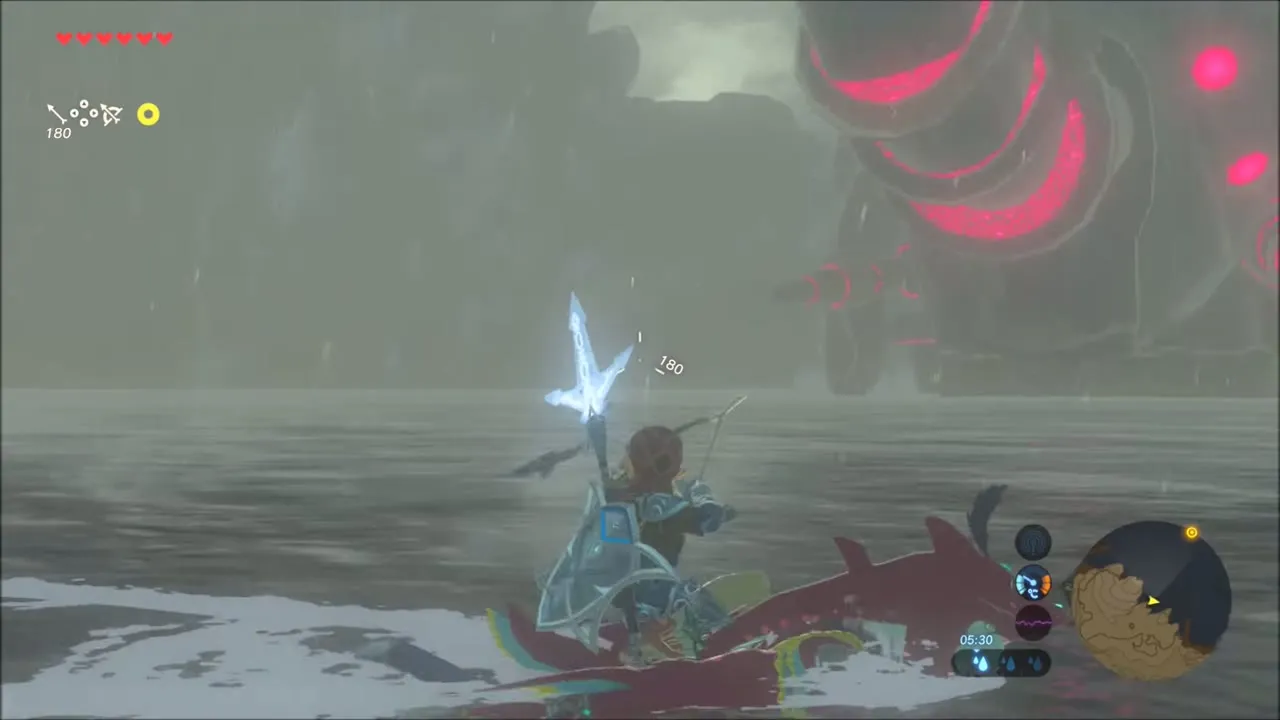
With Shock Arrows acquired, speak to Sidon at the reservoir. Link will hop onto Sidon’s back, and the prince will swiftly swim around the perimeter of the lake, maneuvering towards Vah Ruta.


Vah Ruta’s Defenses
The Divine Beast will immediately retaliate, launching massive blocks of ice from its cannons. Sidon will call out these attacks. You must destroy these ice blocks before they hit you. The most effective tool is your Cryonis Rune; aim it at the incoming blocks to shatter them instantly, even from a distance. Alternatively, you can shoot them with arrows if you’re quick, or even attempt to break them with melee weapons if they get very close, though this is riskier.
Targeting the Orbs
Your objective is to shoot the four glowing pink orbs on Vah Ruta’s shoulders with Shock Arrows. Sidon will swim close to waterfalls cascading off the beast. When near a waterfall, use the Zora Armor to swim up the torrent. At the apex of your ascent, deploy your Paraglider to gain airtime, draw your bow, and fire a Shock Arrow into one of the pink orbs.
After destroying two orbs, Vah Ruta intensifies its defense, adding spiked ice balls that arc through the air and chase you from behind. You’ll need to quickly turn and destroy these using Cryonis or arrows before they connect.
Continue the cycle: destroy ice defenses, wait for Sidon to approach a waterfall, swim up, glide, and shoot an orb with a Shock Arrow. Once all four orbs are hit, Vah Ruta’s assault ceases, the endless rain subsides slightly, and Sidon will deposit you onto the entrance platform of the now-accessible Divine Beast.
Inside the Mechanical Marvel: Divine Beast Vah Ruta
The interior of Vah Ruta is a complex, water-themed dungeon corrupted by Ganon’s Malice. Your goal is to activate five terminals to regain control.

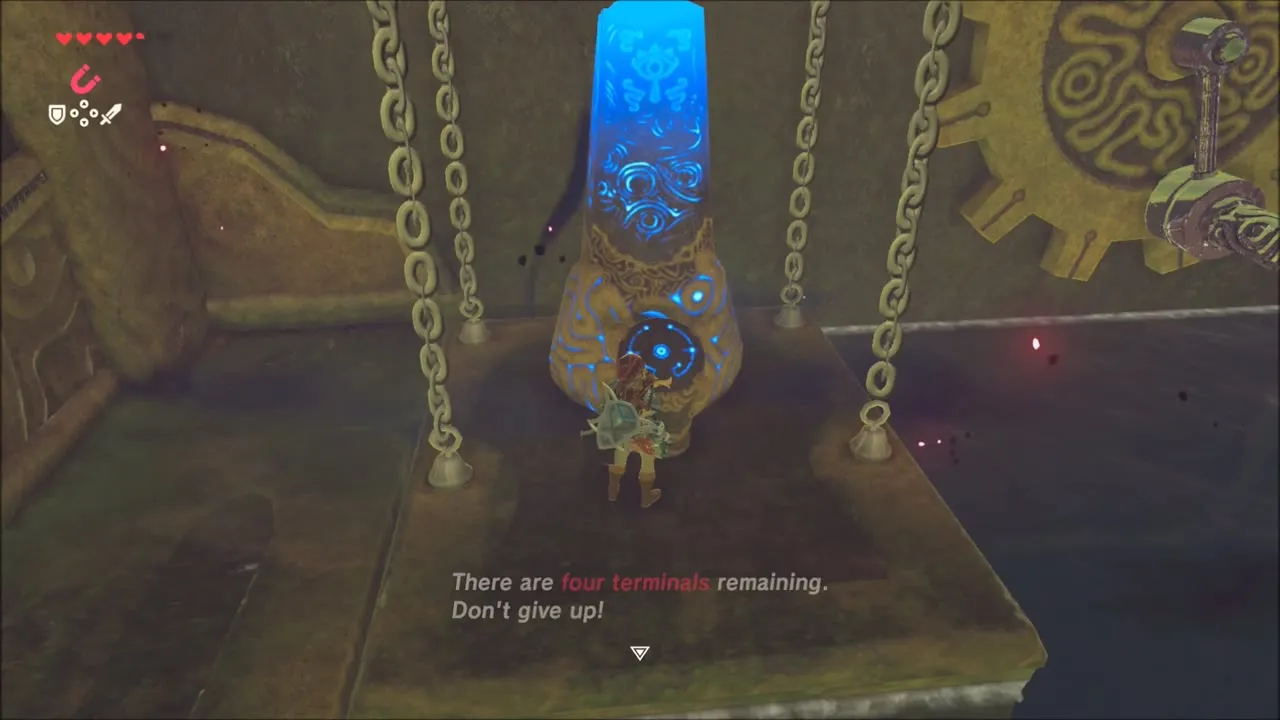
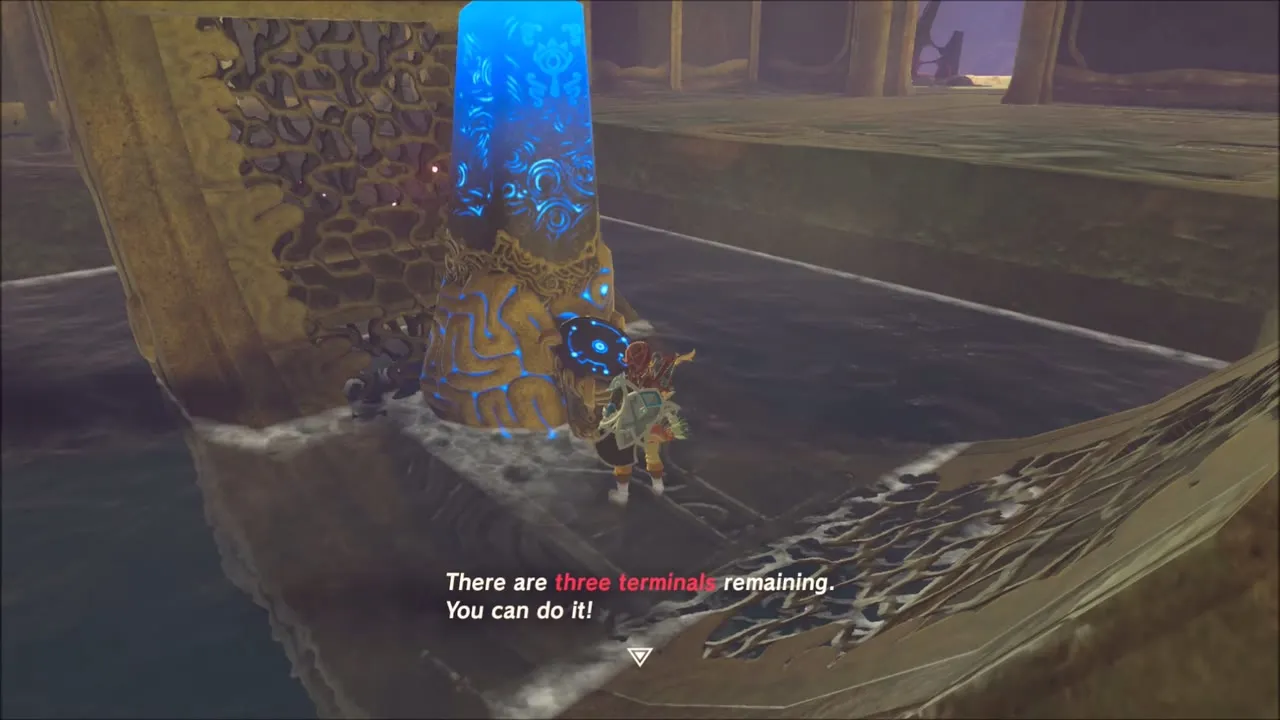


Finding the Map
Upon entering, you’ll see Ganon’s Blight (Malice) oozing on the floor and walls. This substance damages Link on contact. Look for glowing eyes within the Malice; shooting these eyes with an arrow will clear the corruption in that area. Shoot the first eye immediately inside to clear a path.
On the left side of the first chamber is a shut gate. Shoot the Malice eye near it. Use Cryonis to create an ice pillar beneath the gate, lifting it open. Proceed through to find the Guidance Stone. Activate it with your Sheikah Slate to download the dungeon map. This map is unique; it’s a 3D model of Vah Ruta, showing terminal locations and allowing you to remotely control the position of the Divine Beast’s massive trunk, altering water flow throughout the dungeon. This trunk manipulation is the central mechanic for solving Vah Ruta’s puzzles.
Optional: Hidden Treasures – Chest Locations, Chests 1 to 3
- Chest 1 (Map Room Area): In the water pool to the right just after leaving the Guidance Stone room, use Magnesis to pull up an underwater chest containing an Ancient Spring.
- Chest 2 (Second Terminal Area): In the room with the first water wheel puzzle (Terminal 2), glide from the top of the small wheel towards the entrance ramp to reach a ledge with a chest containing a Silver Rupee (100 Rupees). (Alternative method: Use Cryonis near the higher ledge on the left to climb up).
- Chest 3 (Large Water Wheel – Exterior): In the same room, adjust the trunk so water turns the large wheel. A chest covered in Malice is attached to the outside of this wheel. Shoot the Malice eye on it as it rotates into view to access 10 Fire Arrows.
Activating the Terminals
The five terminals are scattered throughout Vah Ruta, requiring clever use of Runes and trunk manipulation.
| Terminal | Location | Key Mechanic/Rune | Required Trunk Position(s) | Brief Strategy |
|---|---|---|---|---|
| 1 | Main Chamber (Ground Floor) | Magnesis | Any | Use Magnesis on the handle/gears on the wall to rotate them, raising the terminal platform from the water. Activate it. |
| 2 | Upper Level (Small Water Wheel Room) | Cryonis | Any | Use Cryonis on the water spout powering the small wheel. Time it to stop the wheel when the terminal inside is accessible at the bottom. |
| 3 | Upper Level (Large Water Wheel Room) | Stasis | Position 4 (from top) | Raise trunk (Pos 4) to make water turn the large wheel. Use Stasis on the large ball just before it rolls off the switch to keep the gate open. |
| 4 | Central Body (Accessed from Top Deck) | Magnesis | Horizontal -> Vertical | Go outside, raise trunk (Pos 3) to ride large wheel up. Hit switch for waterfall shortcut. Go to trunk base, set trunk horizontal, then vertical to ride up. Glide to top deck. Drop in hole. Shoot Malice eye on gear, use Magnesis on handle to open ceiling/stop flames below. Drop down. |
| 5 | Tip of the Trunk (Accessed from Top Deck) | Paraglider | Horizontal -> Various | From top deck, set trunk horizontal. Glide to the very end. Adjust trunk angle (Pos 2 or 3) to flatten the tip for landing. Activate. |
Detailed Steps for Terminals 3, 4, and 5:
- Terminal 3: Reach the upper level with the large, stationary water wheel and the Stasis puzzle ball. Go outside and climb the ramp to the third floor. Clear any Malice. Open the map and select the fourth trunk position from the top; this directs water onto the large wheel, causing it to rotate. Observe the large sphere rolling inside the wheel. As it rolls down towards the switch mechanism that opens the terminal gate, wait until it’s just about to fall off the switch plate on the right side. Freeze the sphere with Stasis at this precise moment. The wheel keeps turning, but the frozen sphere holds the switch down, keeping the gate open long enough for you to enter and activate the terminal.
- Terminal 4: Return to the second level, between the two water wheels. Set the trunk position to the third option from the top. Water will now flow onto the large wheel. Ride this wheel upwards. Defeat the Guardian Scout waiting there. Hit the nearby floor switch to create a waterfall shortcut back up to this level. Head towards the exterior base of the trunk. Set the trunk to be horizontal. Clear any Malice and climb onto the ledge above. Now, set the trunk position fully vertical. As the trunk rises, jump and glide onto Vah Ruta’s top deck. Find the square opening and drop down inside. You’ll see a gear mechanism covered in Malice; shoot the eye. Use Magnesis to turn the handle/gear; this opens the ceiling hatch above and simultaneously extinguishes flames guarding the terminal below. Drop down to activate the terminal.
- Terminal 5: This terminal is located at the very tip of Vah Ruta’s trunk, accessed from the outside top deck. While on the top deck, set the trunk to be horizontal. Carefully walk or glide towards the end of the trunk. Once near the tip, adjust the trunk’s position via the map (try the second or third lowest setting) to create a flatter surface to stand on. Land and activate the final terminal.
Optional: Hidden Treasures – Chest Locations, Chests 4 to 7
The numerous optional chests encourage thorough exploration, rewarding players who experiment with the trunk controls and Rune abilities beyond the main objectives.
- Chest 4 (Large Water Wheel – Interior): While solving the Terminal 3 puzzle, look for a chest on the central hub inside the large wheel. Use Stasis on the lower block mechanism when the chest is accessible to grab an Ancient Core. Be quick to avoid being crushed when Stasis wears off.
- Chest 5 (Waterfall Ledge): After activating the switch creating the waterfall shortcut near Terminal 3’s area, swim up the waterfall. From the top, paraglide across to the opposite ledge to find a chest containing a Knight’s Halberd or Royal Halberd (weapon scales with game progress).
- Chest 6 (Inside Trunk – Exterior): While manipulating the trunk for Terminals 4 and 5 from the outside decks, look inside the structure of the trunk itself. A chest containing an Ancient Shaft is nestled within and accessible when the trunk is positioned correctly.
- Chest 7 (Tip of Trunk – Exterior): While on the top deck near the trunk’s base (preparing for Terminal 5), raise the trunk high. Look towards the tip; a chest covered in Malice is visible on one side (left side when facing the front). The controlling eyeball is on the opposite side of the trunk’s exterior. Shoot the eye, then carefully adjust the trunk angle or glide to reach the chest, which holds 10 Ice Arrows.
Confronting the Corruption: Waterblight Ganon
Waterblight Ganon by phase
| Phase | Attacks | How to counter |
|---|---|---|
| One (full to half health) | Spear throw, lunge, wide sweep and ground slam with the spear | Dodge sideways, block, Flurry Rush; a Cryonis pillar shatters the spear and he must rebuild it; arrows to the eye stun him |
| Two (half health to defeat) | Floods the room to four platforms, hovers high, throws ice blocks (more as his health drops), Guardian-style eye laser | Break ice blocks with Cryonis, or Stasis one and knock it back; shoot the eye to bring him down, then cross on ice bridges and hit hard; parry the laser |
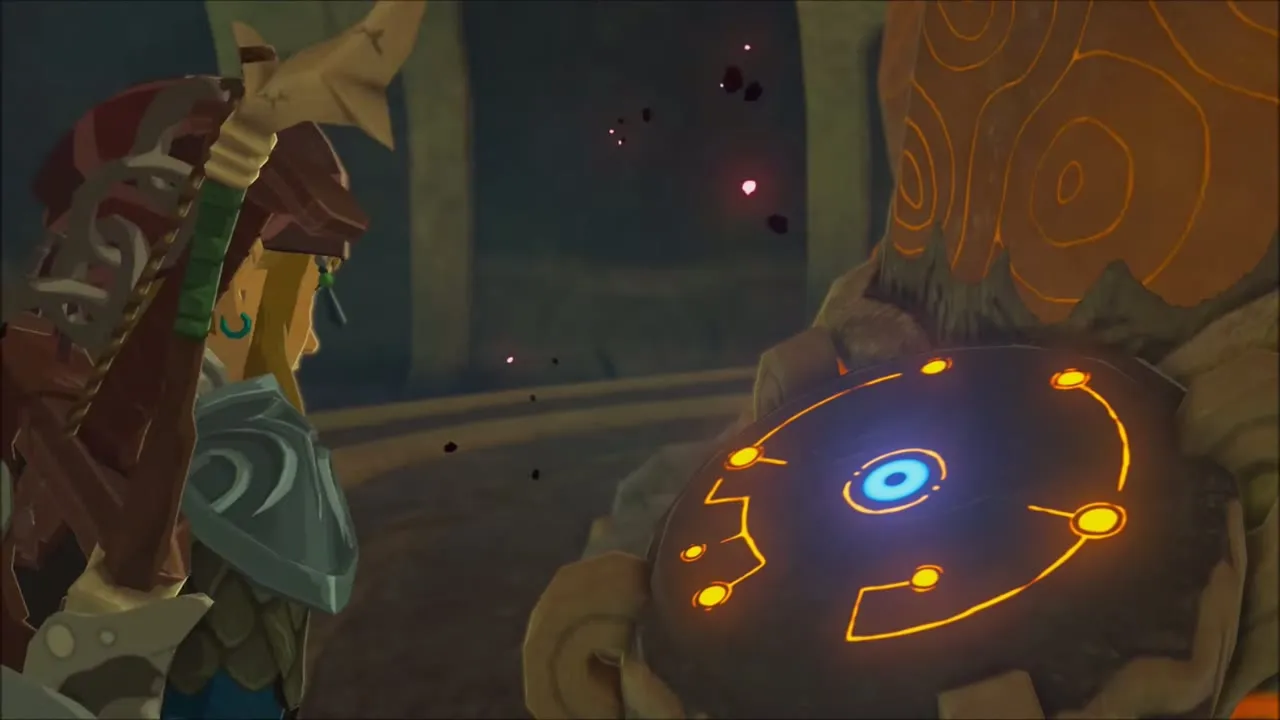
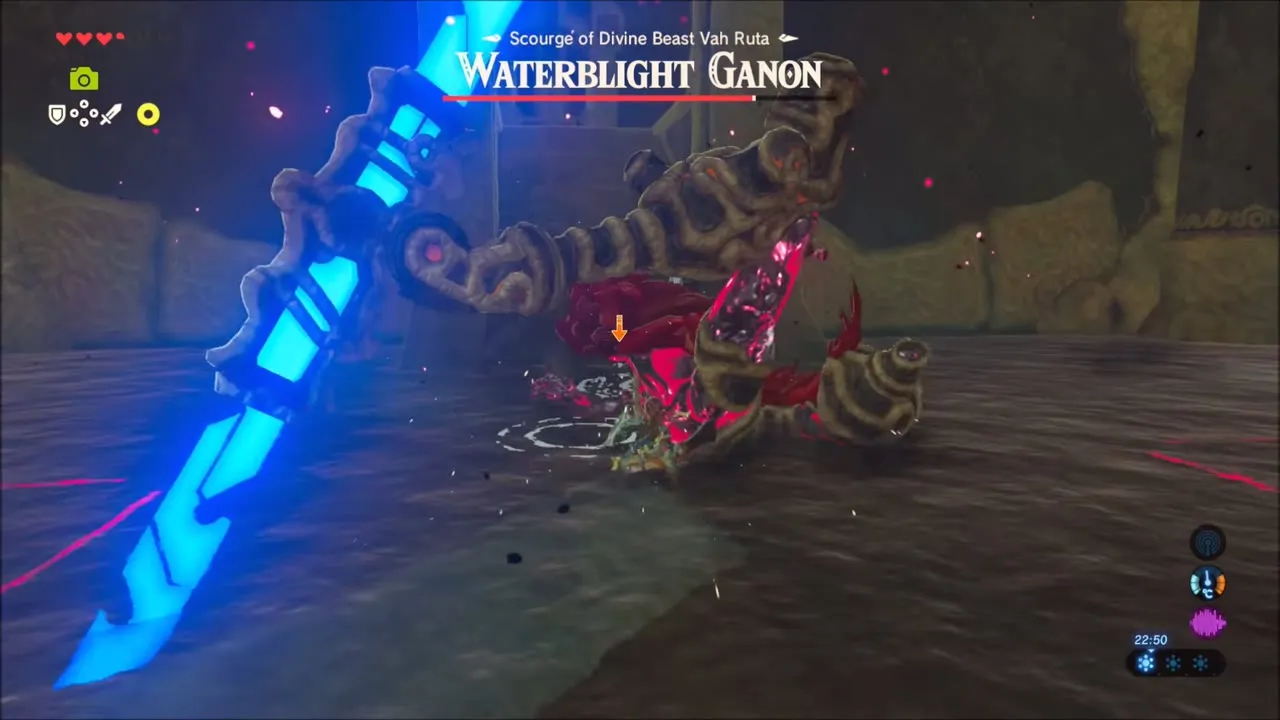
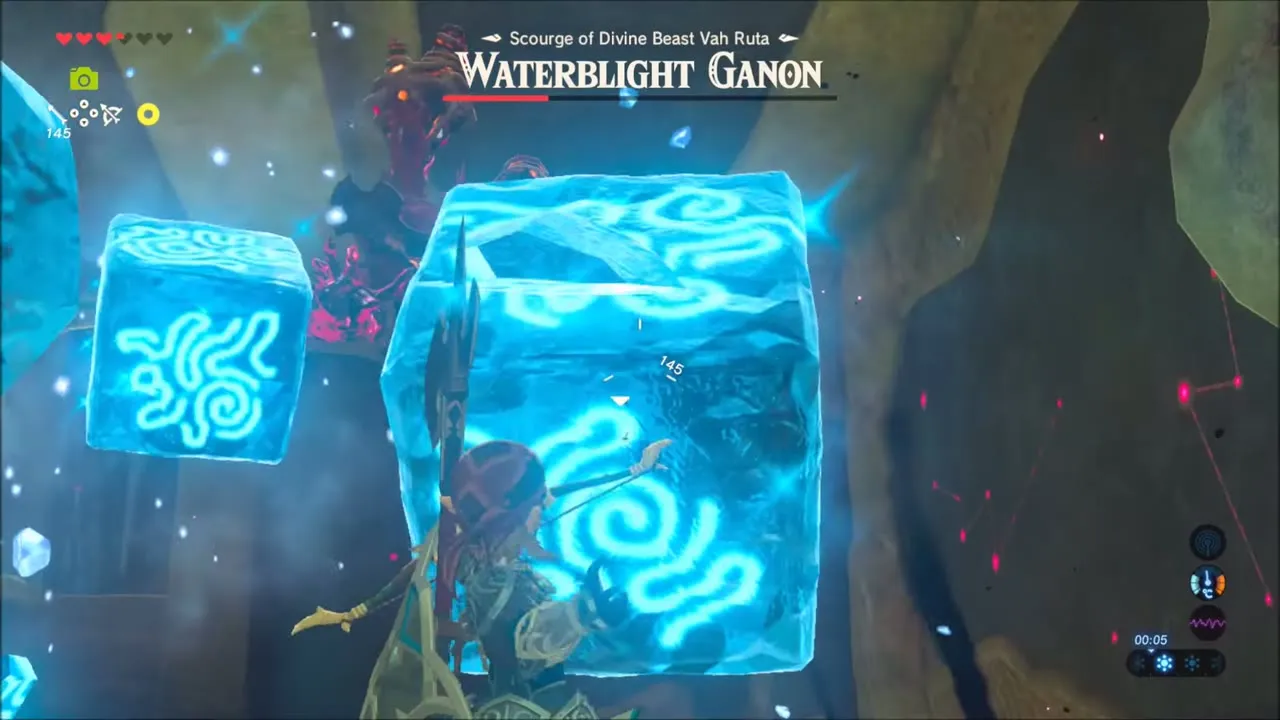

With all five terminals activated, the main control unit in the central chamber becomes operational. Return to the ground floor chamber where you first entered. Before interacting with the glowing main console, make final preparations: cook meals that restore hearts or boost attack power, equip your strongest weapons (Guardian weapons dropped by scouts inside are effective), a reliable bow, and a sturdy shield. Activating the console triggers the boss fight against Waterblight Ganon.
Phase 1 Strategy: Spear Tactics and Cryonis Defense
Waterblight Ganon appears, wielding a massive spear. The arena is partially flooded. It uses several attacks:
- Spear Throw: From range, it hurls its spear. Dodge sideways, not backward. It needs a moment to reform the spear, offering an attack window.
- Spear Lunge/Stab: A quick thrust at mid-range. Block or side-hop dodge.
- Spear Sweep: A wide horizontal slash. Backflip dodge or block with a strong shield.
- Spear Slam: Stabs the spear into the ground nearby, creating a shockwave. Quickly back away.
Employ these tactics:
- Melee: Keep your shield up. Bait an attack, dodge (side hop for thrusts, backflip for sweeps), and unleash a Flurry Rush if timed perfectly. Otherwise, rush in for a few hits after it attacks, especially after a spear throw.
- Ranged: Aim for its eye with arrows for critical damage and potential stuns. Bomb Arrows and any remaining Shock Arrows are particularly effective.
- Cryonis Defense: This Rune is invaluable. Create ice pillars from the water to block any of its attacks. If an ice pillar intercepts the spear itself, the spear may shatter, forcing Waterblight Ganon into a lengthy reformation animation, leaving it wide open. You can also use the main console structure for cover.
Phase 2 Strategy: Platform Hopping, Ice Breaking, and Arrow Barrage
At roughly half health, the battle shifts dramatically. The water level rises significantly, leaving only four raised platforms. Waterblight Ganon now floats high near the ceiling, favoring ranged attacks. Its primary attack becomes summoning and throwing multiple ice blocks, similar to those encountered during the approach on Sidon’s back. Later, it may employ a Guardian-style laser.
This phase highlights how the game integrates core Rune mechanics into major boss encounters, demanding more than just swordplay. Master these strategies:
- Destroy Ice Blocks: Use Cryonis to instantly shatter incoming ice blocks – this is the fastest and safest method. Alternatively, shoot them with arrows, waiting until they are closer for an easier shot. It will throw more blocks simultaneously as its health depletes.
- Stun and Attack: Immediately after clearing the ice blocks, quickly aim your bow at Waterblight Ganon’s eye. Shock Arrows are highly effective here, but Bomb, Ancient, or even regular arrows work. A critical hit to the eye will stun it, causing it to crash down onto a platform or into the water. Seize this opportunity: quickly swim, glide, or use Cryonis pillars to create a path to the downed boss and unleash powerful melee attacks.
- Platform Management: Use Cryonis to create ice bridges between the four platforms if you need to reposition quickly or reach the boss after stunning it. Standard jumping and gliding also works for shorter distances.
- Laser Defense: If Waterblight Ganon charges its laser, either dodge, block with a very durable shield, or attempt a Perfect Parry (press A just before impact) to reflect the beam back for significant damage and a potential stun.
- Alternative Tactics: If you run low on arrows or durable melee weapons, Remote Bombs can deal small amounts of damage, though getting close enough to throw them effectively can be tricky. You can also use Stasis+ on an ice block, hit it multiple times, and send it flying back at Waterblight Ganon to potentially stun it.
Persist with these strategies, focusing on destroying the ice blocks promptly and capitalizing on the stun openings after eye shots.
Chests Inside Vah Ruta
Every treasure chest in the beast, in the order you usually reach them. Weapons in chests follow difficulty scaling: the more enemies you have defeated, the better the version you find (for example Royal rather than Knight’s).

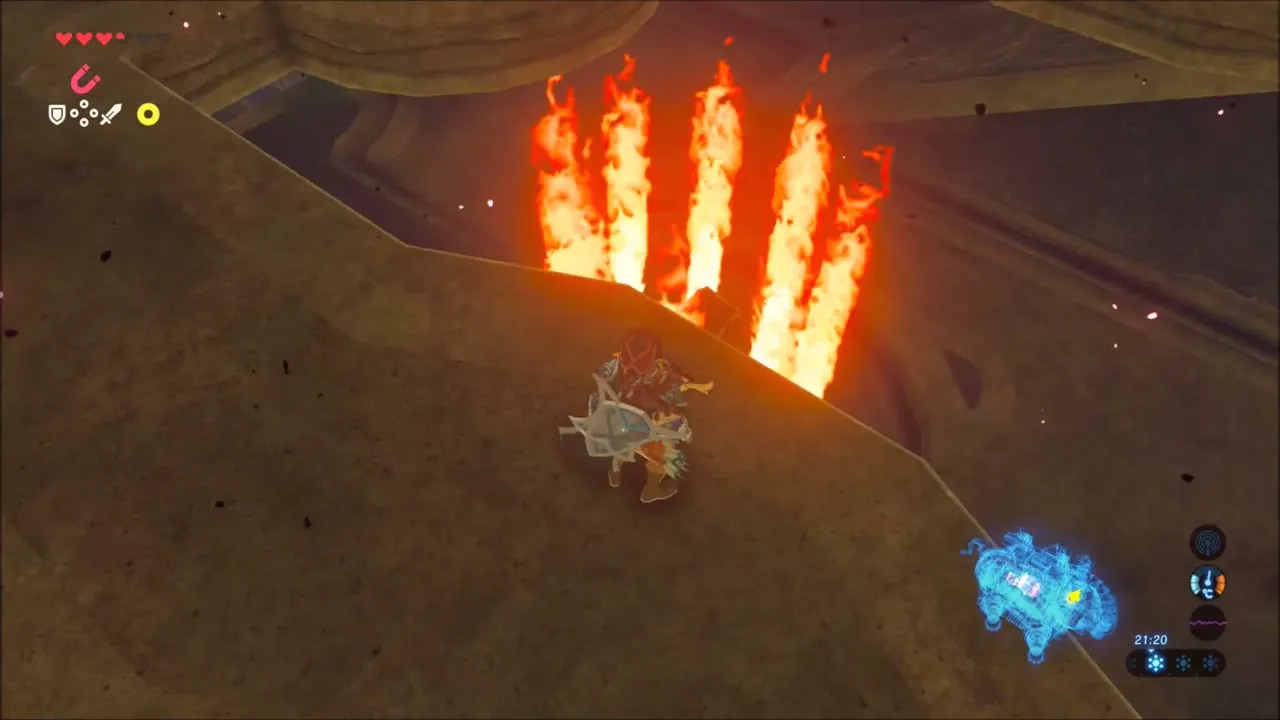
| Contents | Where | |
|---|---|---|
 | Ancient Spring | Underwater chest in the pool right of the Guidance Stone room (Magnesis) |
 | Silver Rupee | Ledge reached from the top of the small waterwheel (second terminal room) |
 | 10 Fire Arrows | Malice-covered chest on the outside of the large waterwheel; shoot its eye as it turns |
 | Ancient Core | Inside the large waterwheel; Stasis the block mechanism and grab it quickly |
 | Knight’s Halberd | Ledge across from the top of the waterfall shortcut (Knight’s or Royal Halberd, depending on difficulty scaling) |
 | Ancient Shaft | Inside the trunk structure, reached from the outer decks with the trunk set right |
 | 10 Ice Arrows | Blight-covered chest near the trunk tip; its eye is on the opposite side |
Triumph and Reward: Cleansing the Beast
Upon defeat, Waterblight Ganon dissolves into Malice, cleansing the Divine Beast.

Claiming the Heart Container
A Heart Container will appear where the boss fell. Crucially, pick this up before interacting with the main terminal again, as neglecting to do so might cause you to miss this permanent health upgrade.
Mipha’s Grace: An Ally’s Gift
With the Heart Container secured, approach and activate the main control unit one last time. This triggers a poignant cutscene where the spirit of the Zora Champion, Mipha, is freed. As thanks, she bestows upon Link Mipha’s Grace. This powerful ability acts as an automatic safety net: if Link falls in battle, Mipha’s Grace will activate (provided it’s recharged), instantly restoring all hearts and granting temporary bonus hearts. Vah Ruta, now free, takes its position overlooking the Lanayru Great Spring, ready to assist in the final battle against Calamity Ganon.
Return to the King: Completing the Quest
Warp back to Zora’s Domain via the Ne’ez Yohma Shrine. Ascend to the throne room and report your success to King Dorephan. The King and the Zora council express their gratitude, fully accepting Link. The King then presents you with the Lightscale Trident, Mipha’s signature weapon.
Optional: Claiming the Zora Greaves
If you undertook the “Lynel Safari” side quest and successfully photographed the Lynel on Ploymus Mountain, find Laflat in Zora’s Domain. Show her the picture, and she will reward you with the Zora Greaves, completing the Zora Armor set and its enhanced swimming capabilities.
With Vah Ruta appeased and Mipha’s spirit freed, one of the four Divine Beasts is back on Hyrule’s side.
Vah Ruta rewards
| Reward | Where you get it | |
|---|---|---|
| Heart Container | Dropped by Waterblight Ganon |
| Mipha’s Grace | Mipha’s spirit, at the main control unit | |
| Lightscale Trident (attack 22, durability 70) | King Dorephan, Zora’s Domain throne room |
Divine Beast Vah Rudania (Goron City)
Vah Rudania is the salamander-shaped Divine Beast of the Goron. It clings to Death Mountain above Goron City. The full room-by-room route is on the Vah Rudania guide; this section keeps the walkthrough with the tables you need at a glance.
| Vah Rudania | Details |
|---|---|
| Region | Eldin; Goron City, x 1685, z -2467, height 622 (map square G-2) |
| Champion | Daruk; memory Daruk’s Mettle |
| Helpers | Yunobo, Bludo |
| Blight Ganon | Fireblight Ganon, health 800–2,000 (2,000 in Hyrule Castle) |
| Terminals | 5, plus the main control unit; mechanic: tilt the whole beast 90 degrees onto its side |
| Quests | Divine Beast Vah Rudania (main quest), part of Free the Divine Beasts |
| Champion ability | Daruk’s Protection: while you hold guard, a barrier blocks the next attacks completely, even Guardian beams; three blocks, recharge 18 minutes (6 in Hyrule Castle) |
| Divine Helm |  Vah Rudania Divine Helm (Flame Guard; Daruk amiibo) Vah Rudania Divine Helm (Flame Guard; Daruk amiibo) |
| Reward weapon |  Boulder Breaker (attack 60, durability 60) Boulder Breaker (attack 60, durability 60) |
| Heart Container | Dropped by Fireblight Ganon |
| Bring | Two layers of flame guard (Flamebreaker pieces or Fireproof Elixirs), metal weapons, Remote Bombs, Magnesis and Stasis |
| Walkthrough | Death Mountain and Goron City |
Abandoned North Mine: Rescuing Yunobo
Leave Goron City via the north exit and follow the winding trail upward. Shortly, you’ll reach the Abandoned North Mine area, marked by lava pools and scaffolding. At the entrance, a panicked Goron named Drak will stop you. He warns that the North Mine is even hotter than Goron City – you’ll need Level 2 flame guard here. Make sure you have two pieces of Flamebreaker armor equipped, or one piece plus an active Fireproof Elixir, before proceeding beyond Drak. If you’re short on supplies, quickly return to Goron City to gear up; otherwise, press on.
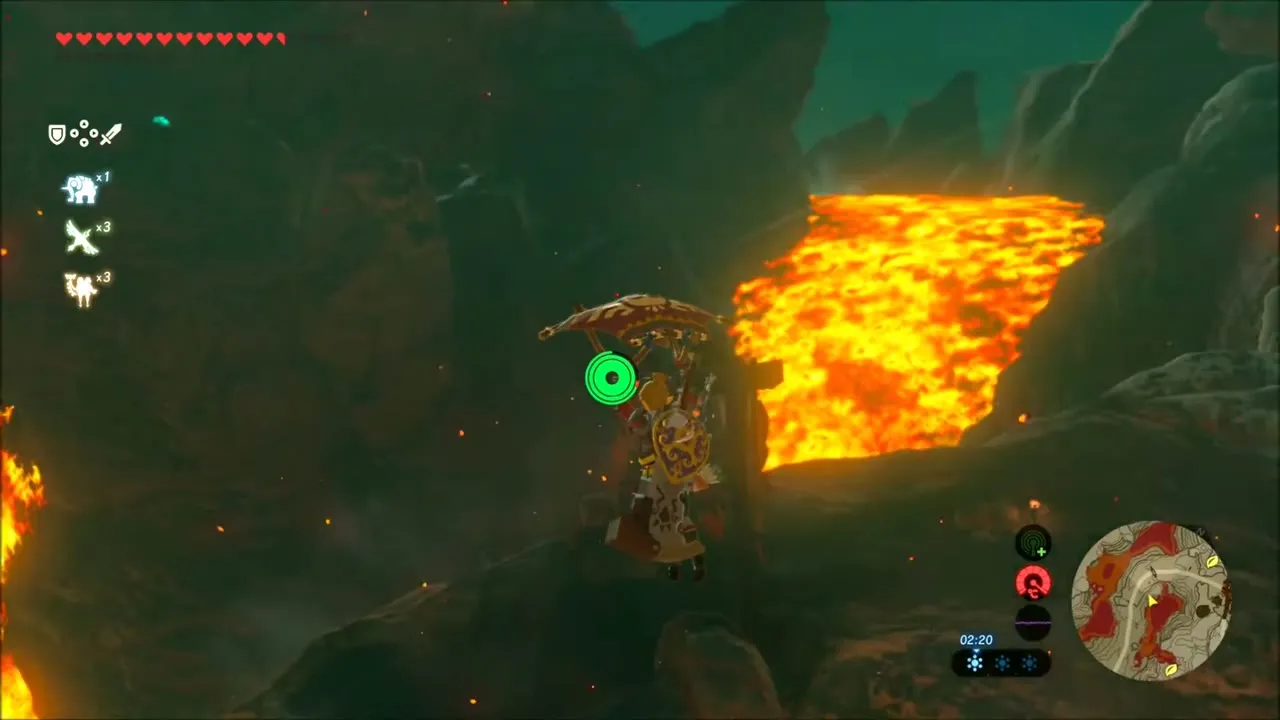


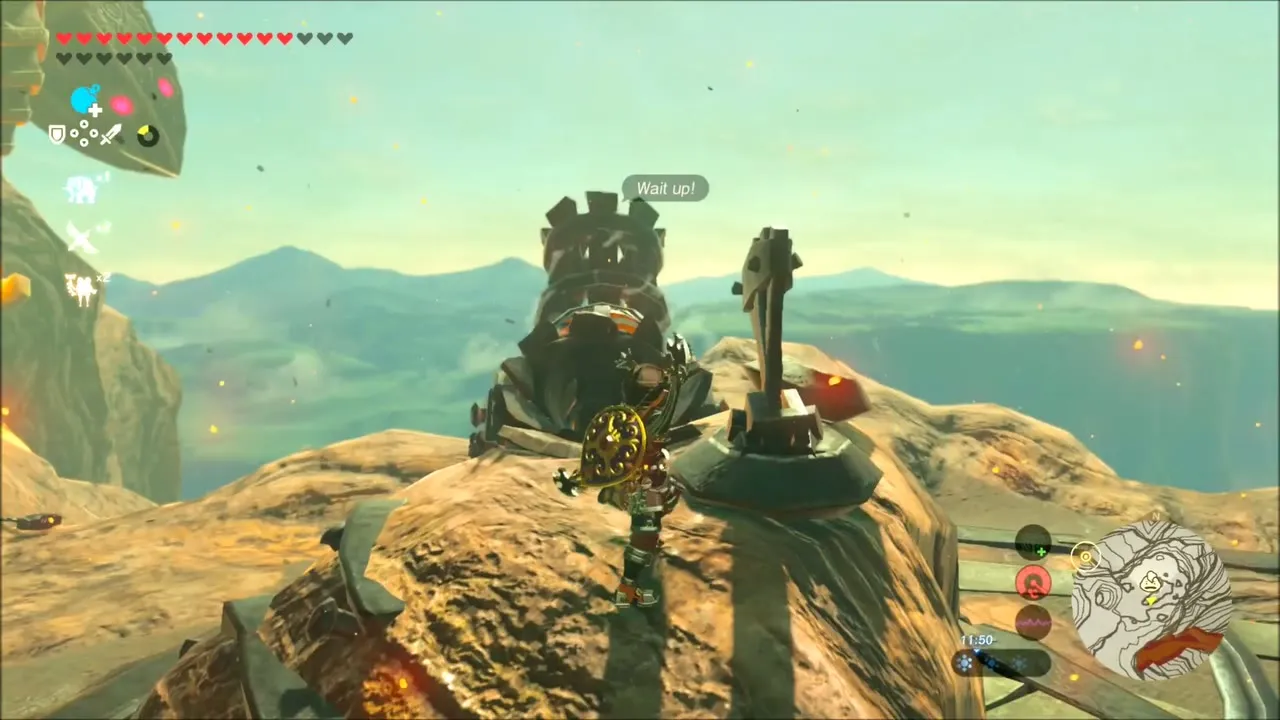
The Abandoned North Mine is a fiery gauntlet of lava islands connected by rickety bridges and mine tracks. Scattered around are large cannons – these will be your key to navigating the area. Immediately, you’ll notice enemies (Fire Bokoblins and Fire Lizalfos) on platforms and rocks blocking pathways in the lava. Use the cannons to clear a safe route. Here’s how the cannons work:
- Loading and Firing: Stand at the cannon’s rear and use your Bomb Rune to drop a round bomb into the open tube. The bomb will roll into the cannon’s barrel.
- Aiming: Nearby, a rotatable lever controls the cannon’s facing. Hit the lever with a weapon to swivel the cannon between set positions (usually pointing at an enemy outpost or a blockage).
- Fire! Once the cannon is aimed where you want, move back and detonate the bomb with L. KA-BOOM! The explosion launches a bomb straight ahead, obliterating rocks and foes in its path.
Use the first cannon to blast the enemies on the platform ahead to the east. The explosion creates a powerful updraft in the hot air – you’ll see flames shooting upward. Jump and paraglide on that thermal to lift yourself to the next rock island. Continue northward through the mine by leapfrogging from one safe zone to the next: glide between islands using updrafts, and whenever a wall of boulders or a fortified enemy camp blocks your way, look around for a cannon to blow the obstacle apart. Enemies will rain fire arrows at you from towers, but you can return the favor with the cannons. If you see a particularly tall enemy base, try to find a cannon that targets it and fire away.
Work your way towards the marker at the far end of the mine. Eventually, you’ll come to a cannon aimed at a massive pile of rocks sealing a cave. This is the entrance to the vault where Yunobo is trapped. Tip: Hit the cannon’s lever to adjust its aim if needed, then fire a bomb at the rubble when the cannon’s barrel swings over the cave entrance. Time the detonation just right, and the shot will shatter the boulders, freeing the way inside. A gust of wind will begin rising from the newly opened entrance – use it to glide over to the cave.
Head into the vault to find a young Goron curled up inside – Yunobo at last. A brief cutscene plays as Yunobo realizes the rock slide has been cleared. At first, he panics, mistaking you for a monster, but soon sees you’re a Hylian. Yunobo is immensely relieved and grateful. He explains he got stuck in here when a magma bomb triggered the cave-in. After thanking you, he asks if Bludo sent you. When he learns you came on Bludo’s behalf, Yunobo remembers his mission: he was fetching painkillers for Bludo’s back. He’ll hurry back to Goron City to deliver them (so Bludo can finally get some relief). Yunobo sprints off, urging you to claim a reward from Bludo for the help.
Before you leave the Abandoned Mine, take a moment to loot the vault. There are crates and treasure chests with goodies (weapons, ore, etc.) leaning against the walls. [Optional] Shora Hah Shrine: Now that Yunobo is safe, a shrine in this area becomes accessible. Look north from the cave – you’ll see a large hollow rock structure with minecart tracks leading into it. That’s where Shora Hah Shrine is hidden. To reach it, step outside the vault and paraglide north toward the opening of that rock structure. If you catch the updraft from the cave entrance, it should carry you right into the tunnel. Activate the Shora Hah Shrine inside for another warp point (solving it now or later as you wish). This shrine is [Optional] but handy for return visits.
When ready, either travel back on foot or simply fast-travel (use the Goron City shrine if you activated it) to return to Bludo. Speak with him again. Yunobo will already be there, having delivered the painkillers. Bludo is overjoyed and praises you for rescuing Yunobo. True to his word, he rewards you – three Fireproof Elixirs for your trouble. More importantly, with Bludo’s back feeling better and Yunobo safe, it’s time to deal with Vah Rudania once and for all. Bludo outlines the plan: drive off Vah Rudania from the mountain by using the city’s cannons, with Yunobo’s help. Yunobo (cheerfully volunteering despite some nervousness) will accompany you up Death Mountain. Bludo notes Yunobo can use Daruk‘s Protection to shield himself, so don’t worry about launching the young Goron from cannons – he can handle it! Just as you’re about to set out, Bludo’s back twinges again, preventing the old boss from joining the fight personally. “Of course…”, he grumbles, leaving the task to you and Yunobo.
Your new objective appears: escort Yunobo up Death Mountain to Rudania. Make sure you’re still equipped with Flame Guard (the path ahead is still in the volcanic zone), then follow the trail north of Goron City to begin the ascent. It’s time to take on the Divine Beast.
Scaling Death Mountain: Assault on Vah Rudania
Exit Goron City with Yunobo in tow. You’ll soon approach the Bridge of Eldin area, but the direct path is cut off. Instead, the road curves around past some old mining apparatus. Keep going and you’ll reach a high wooden bridge above Goron City and a dead end… except for a mining cart on the left track. It’s time to ride a minecart!
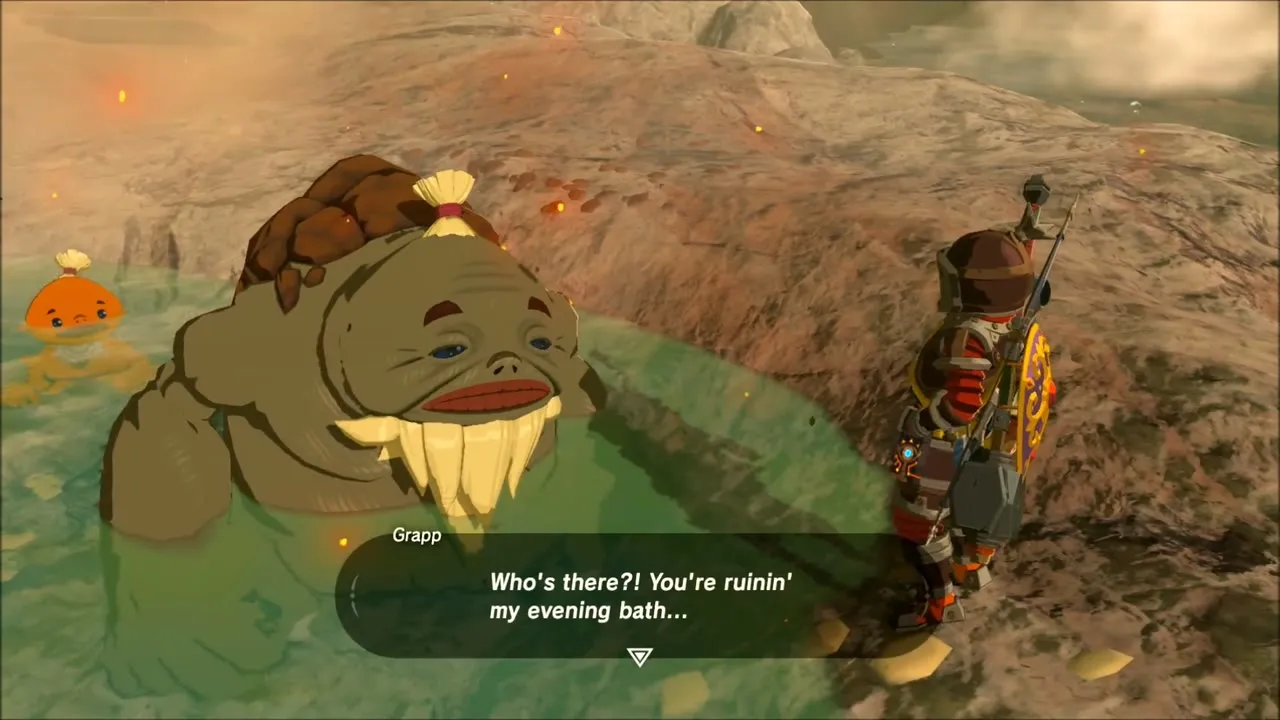
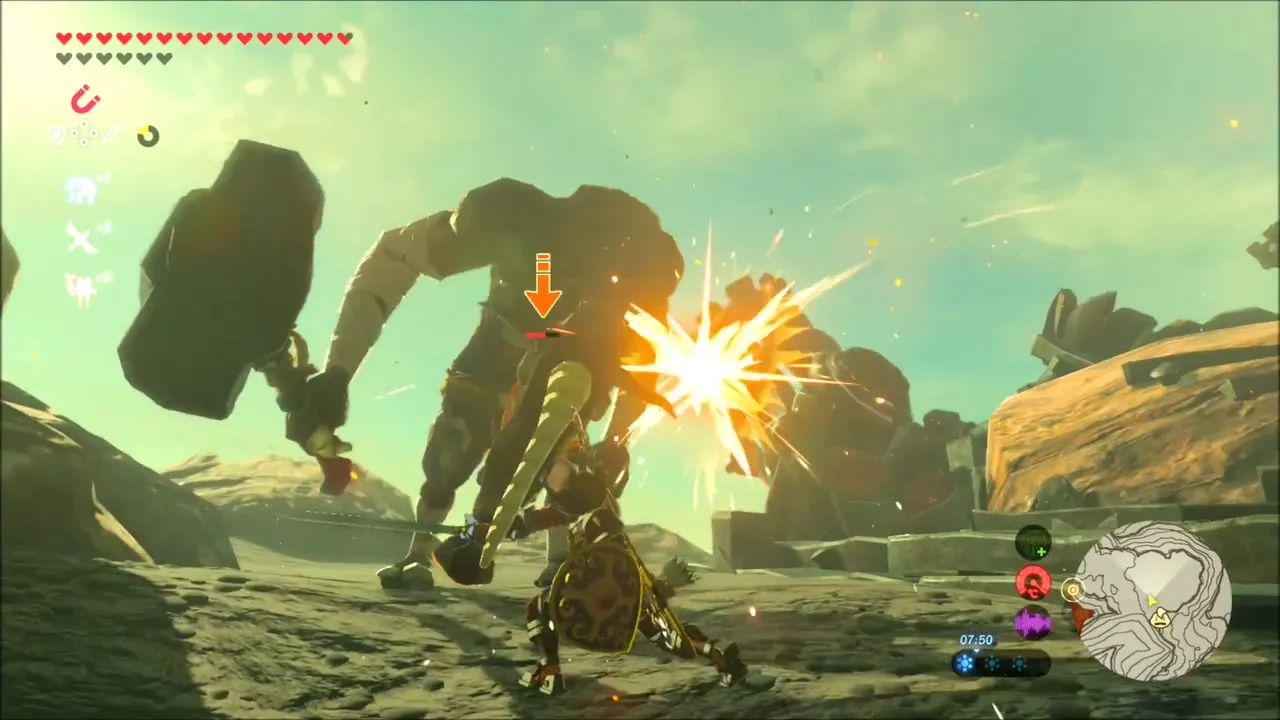
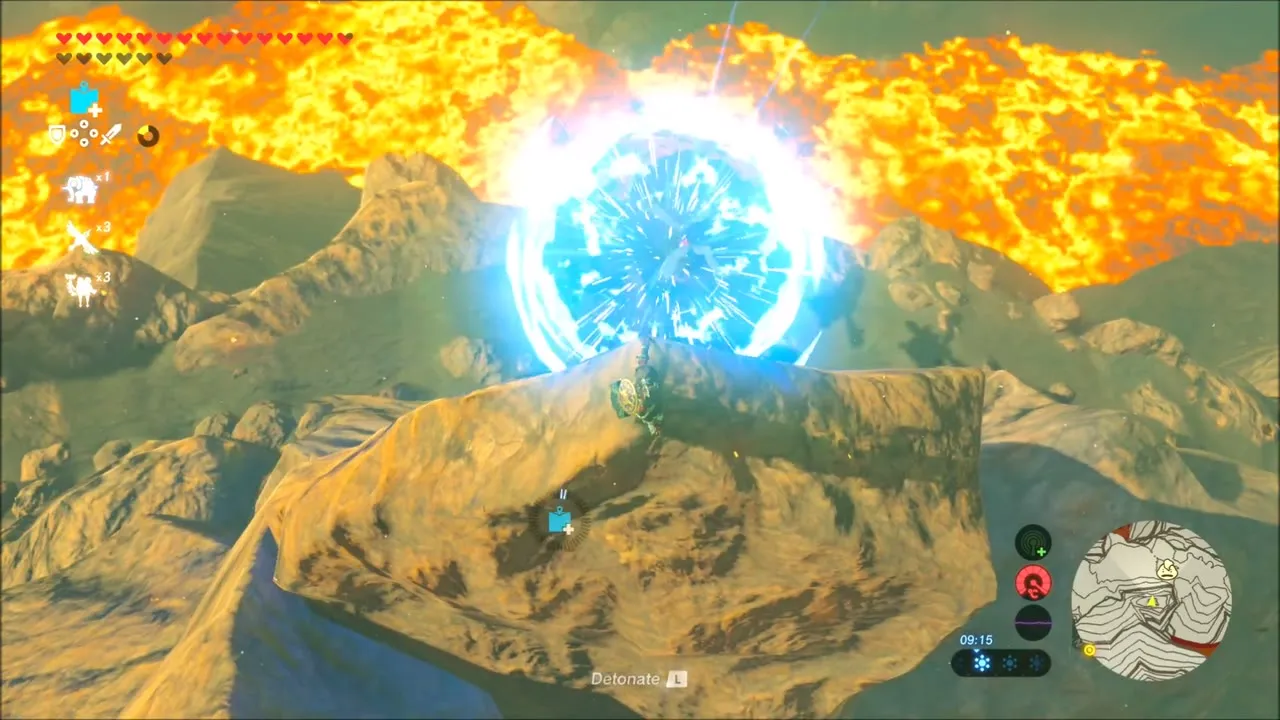
Minecart Ride #1: Use Magnesis to lift the metal minecart and place it onto the tracks if it’s not already there. Climb in with Yunobo. Just like the cannons, drop a round Bomb into the cart’s receptacle (a tube at the back), and detonate to propel the cart forward like a rocket-powered rollercoaster. Enjoy the ride as you blast past a group of enemies on the ridge. The cart will carry you across a huge gap and deposit you near the Goron Hot Springs. Here, you can hop out. [Optional] Goron Hot Springs: These small bubbling pools act like a fairy fountain – soak in them briefly to restore hearts for free. There’s also a Goron sunbathing here who offers a side quest (feel free to chat for some flavor). When you’re healed up, continue along the path.
Minecart Ride #2: Not far past the springs, on your left is another set of tracks with an overturned minecart nearby. Use Magnesis to set this cart back on the rails. Climb in, load a Bomb, and blast off again. This ride bypasses another enemy camp entirely, sparing you a difficult fight in the blazing heat. You’ll come to a stop at a fork in the road on the mountainside. Ahead (uphill) is our destination where Yunobo waits, but first consider a quick detour: just downhill from the fork is a shrine.
[Optional] Daqa Koh Shrine: Take the lower path at the fork and within a few steps you’ll see the Daqa Koh Shrine (called “Daha Quo” in some texts) tucked off the path. Activate it for a convenient fast-travel point near Death Mountain. (You can complete its “Stalled Flight” puzzle now or save it for later.) With the shrine registered, return up the slope to rejoin Yunobo.
Up the other path, you’ll find Yunobo cowering behind a rock, under attack by two Moblins. Time to protect our Goron friend! Engage the Moblin duo: try to draw them one at a time. Use ice arrows or stasis to slow them if you have to, as Moblins hit hard. Fortunately, one Moblin seems preoccupied, making it easier to take them one-on-one. Dodge their giant club swings and strike back, or use Yunobo as distraction. Once the Moblins are defeated (don’t forget to snag their Moblin guts quickly before they burn up in the heat), approach Yunobo. He’s shaken but okay.
Nearby you’ll see the colossal Bridge of Eldin hanging above a lava chasm – and a cannon pointed right at it. To lower the bridge, have Yunobo hop into the cannon (he does so automatically when you both approach it). Adjust the cannon’s aim if needed and drop in a bomb. Fire the cannon to launch Yunobo smack into the Bridge of Eldin’s supports! The explosion causes the metal bridge to slam down into place, forming a path across. Yunobo’s protective bubble makes him none the worse for wear. Now cross the Bridge of Eldin together.
On the far side, a cutscene triggers. Vah Rudania, alerted by all the commotion, climbs further up the mountain, and the sky darkens. Yunobo outlines the plan: Rudania is hiding partway up Death Mountain’s summit. You and Yunobo will advance up the trail in Rudania’s wake, using the mountain’s defensive cannons to fire Yunobo at the Beast whenever possible (each direct hit will drive Rudania further up). However, the path is guarded by floating Guardian Sentries – small drone-like sentinels scouting the area with searchlights. If they spot either of you, Rudania will rain down a barrage of magma bombs from above. Getting caught means scrambling for cover while molten rocks pummel the area – not good. Thus, you need to sneak Yunobo past the sentries or eliminate them. Luckily, Yunobo will follow your lead closely: whistle (press Down on the D-pad) to make him stop in place, and whistle again to signal him to follow. Use this to your advantage so he doesn’t blunder into a searchlight. It’s essentially an escort stealth mission now.
Proceed cautiously up the volcanic trail. Sentry #1: Almost immediately, you’ll see the first drone patrolling. There are two rocky overhangs providing cover on this stretch. Wait for the drone to face away, then run to the first overhang and hide. When its spotlight moves, dash to the second overhang. Once the drone looks away and the path ahead is clear, quickly sprint past its patrol route. If at any point you or Yunobo are spotted (an alarm will sound), magma bombs will start crashing down. If that happens, find shelter under a sturdy rock or ledge until the fiery rain stops, then carry on.
Sentry #2: Around the next bend, you’ll find a stationary sentry hovering above some bombable boulders blocking the path. There’s a slope to the right you can climb that leads above the drone. Sneak up there and you’ll notice a pile of round boulders perched just above the sentry. Push those boulders and watch gravity do the work – they’ll tumble down and smash the drone to bits. With the sentry destroyed, the path is clear. Use a Remote Bomb or Yunobo’s charge (tell him to follow and he’ll run into the rocks) to clear the boulder obstruction on the trail if the falling rocks didn’t already.
Move forward to the next cannon. As before, Yunobo will jump into the barrel eagerly. Rotate the cannon toward Vah Rudania (the Divine Beast might be visible higher up the volcano) and fire Yunobo at it. BOOM! Direct hit. Rudania roars and retreats further up, one “hit” down. (If Rudania wasn’t visible, it means you might have missed a cannon; Rudania only progresses when you’ve scored all hits in sequence. In that case, backtrack to ensure each cannon was used.)
Continue up the trail, which now winds under some cliffs. Sentries #3 and #4: The next area has two flying sentries circling ahead, covering the path in tandem. To the right, you’ll see metal crates and boxes lying around. Use Magnesis to grab a metal box and simply smash the sentries out of the sky with it! You can lift the box high and whack the drones – being spotted by the drone’s searchlight doesn’t matter if it’s the box that enters the beam. As long as you or Yunobo stay out of the light, you can destroy the drones without triggering the alarm. Two or three good thumps and the coast is clear. If one box breaks, there are a few spares around. (Don’t worry if the drone catches sight of the floating box; it won’t call down magma on a random crate.)
Past those sentries, you’ll come to a dead end of sorts – a sheer rock face to your left and right, with another sentry hovering between two tall pillars of stone ahead. Sentry #5: This one is tricky to get close to. Instead, use the same strategy: look around for a metal box (there should be one nearby). You may need to climb up one of the tall pillars to have line-of-sight; place the metal box on a pillar, climb up next to it, then use Magnesis to swat the drone from above. Knock it out and proceed.
Up ahead is another cannon, guarded by a lone Moblin on a ledge. Take out the Moblin (a quick arrow or two while it hasn’t noticed you does the job). Then call Yunobo forward and line up this second cannon. As before, rotate and fire Yunobo at Vah Rudania to score another hit. (Pro-tip: You can also aim this cannon at a pair of sentries further up – by moving the barrel between its two positions and detonating the bomb mid-swing, you might shoot down two drones with one blast. If you succeed, great! If not, no alarm will sound as long as you stay out of their lights, so you can handle them shortly.)
Press on after the second cannon blast. Final Sentry Cluster: The last challenge is a trio of drones (#6, #7, #8) hovering in a tight group over a narrow pathway, with intermittent lava updrafts shooting up behind them. This area is very open, making it hard to sneak Yunobo through. The best approach is to neutralize the drones. Do NOT bring Yunobo in yet – tell him to hold position. First, to the right of the path is a tall spire of rock. Climb it to get above the drones’ altitude. When the nearest drone turns away, paraglide from the high rock over the drone trio, using the updraft to boost higher. Glide to a ledge on the left side of the path, past the drones. Here you’ll find more metal crates. Use Magnesis to slam these boxes into the drones from behind, shattering them one by one. Take out as many as possible (even if you only get 1 or 2, it helps). With the sentries gone or their patterns broken, head back to fetch Yunobo and lead him safely through. Alternatively, if gliding is tricky, you can try to simply time running through the gusty path between their searchlight cycles, but removing them is safer.
At last, you reach the third and final cannon, overlooking Death Mountain’s fiery crater. Load up Yunobo and fire the final shot at Vah Rudania. With a direct hit, Rudania lets out a metallic bellow. Three cannon blasts have done the trick – the hulking Divine Beast finally succumbs. Rudania slinks further up and then plunges into the volcano’s caldera, disappearing into the depths of Death Mountain. A victory cutscene plays as Rudania is effectively neutralized on the outside. Yunobo cheers your success and thanks you profusely. Now it’s up to you, as Champion, to board the Divine Beast and free it from Ganon’s control.
Right at the crater’s edge, Rudania’s metal body lies still, with an entry point now accessible. Climb into the Divine Beast Vah Rudania to begin the dungeon segment.
Inside Divine Beast Vah Rudania
The five terminals at a glance
| Terminal | Where | Key mechanic or rune | How |
|---|---|---|---|
| 1 | Island in the first large room | Tilt | Tilt the beast so the terminal moves onto an island, tilt back and drop to it from the high ledge opposite |
| 2 | On the spine, outside | Bow, tilt | Exit onto the back, clear the Blight (shoot its eyes), tilt back and reach the terminal behind its skull-spitting maw |
| 3 | Rear legs, behind the burning plank | Blue flame arrow, Magnesis | Light an arrow at the blue flame, burn the plank and leaves, then pull the doors open with Magnesis |
| 4 | Rear legs, outside | Tilt, Stasis | Tilt the grate into a ramp, light the brazier outside, freeze the sphere with Stasis as you tilt so it rolls in, then stop the metal block so it empties into the receptacle |
| 5 | Tail | Fire arrow, Magnesis, tilt | With the beast on its belly, shoot a flaming arrow through the door hole to light the brazier, burn the ceiling leaves, move the metal box over the flame jet and crawl through |
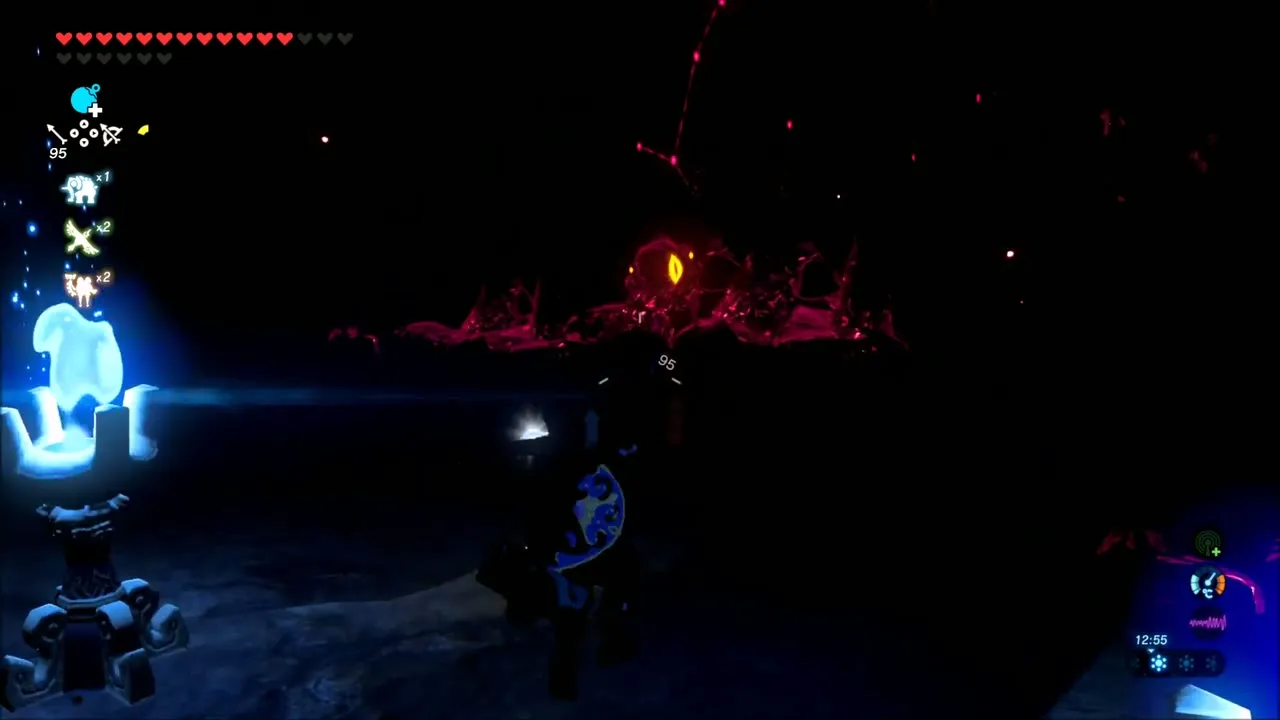

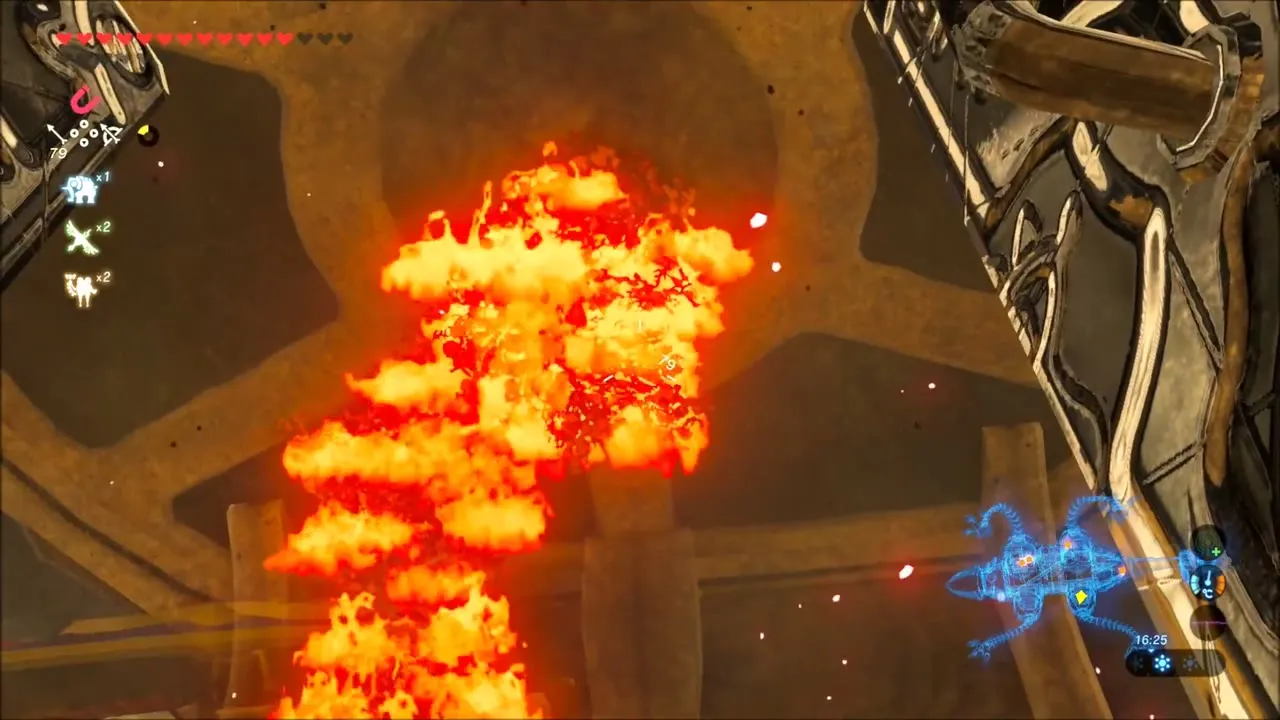
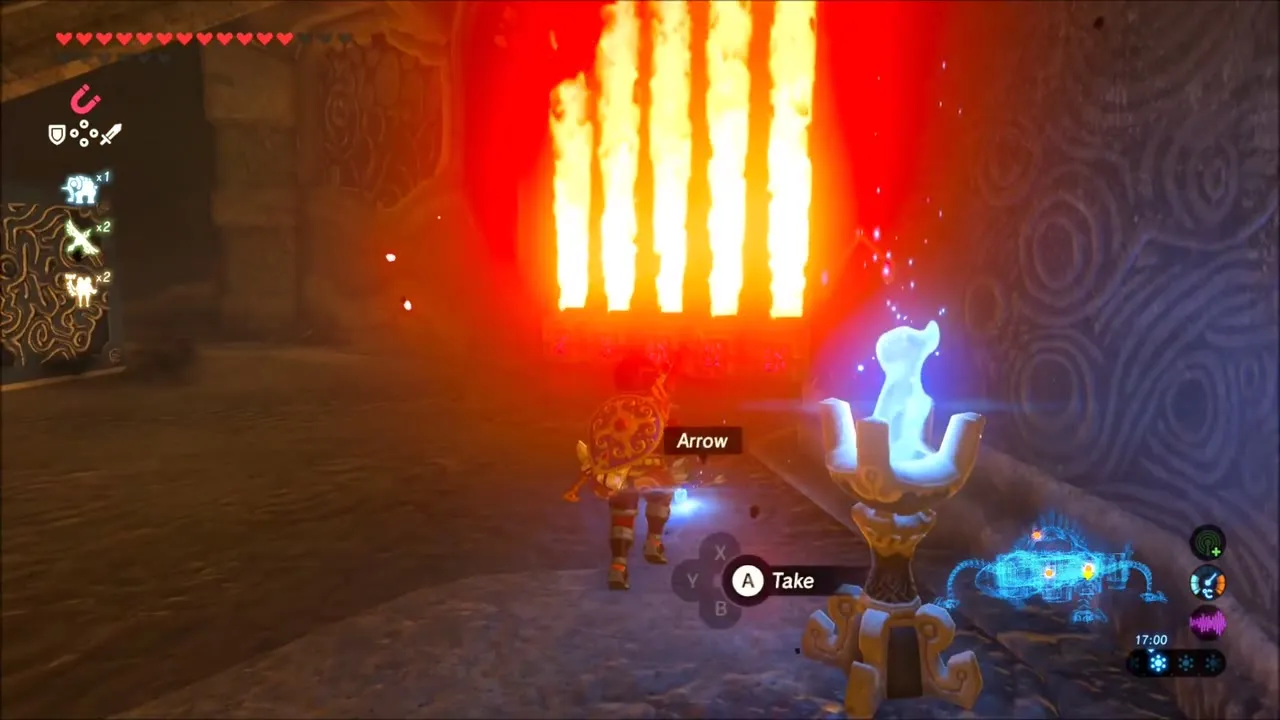

You drop down into Rudania’s interior and find yourself in pitch blackness. The only light comes from glowing red eyes of Calamity scattered around. Equip a torch if you have one (if not, feel your way around and open the nearby chest – it conveniently contains a Torch). Ignite the torch using one of the persistent blue flames on sconces near the entrance. The blue flame casts an eerie light, revealing gooey pools of Malice and several eyeball-like Calamity Eyes on the walls and ceiling. Shoot down those Calamity Eyes with arrows to clear the gunk; doing so will also drop a couple of treasure chests that were stuck in the sludge. Take care moving in the dark – avoid stepping in Malice puddles. With the eyes cleared, proceed deeper and find a locked door with an unlit furnace beside it. Light that torch pedestal with your blue flame to open the door.
In the next chamber, you’ll still be shrouded in darkness, navigating by torchlight. There are more Calamity Eyes here (two on the left wall, one on the right) – snipe them to clear out the room and possibly reveal supplies. Ahead, you’ll see another sealed door with a furnace. Before lighting it, note the inactive Guidance Stone (map terminal) visible through a window. When you’re ready, re-light your torch if needed and set fire to the second furnace. The door opens, granting access to the Guidance Stone. Use the Sheikah Slate on it to download Rudania’s map. This restores power to the dungeon and lights up the interior with a dim red glow. You can finally see your surroundings! More importantly, you now gain the ability to tilt/rotate Divine Beast Rudania 90 degrees at will. This will be central to solving the puzzles here.
Your goal is to activate five terminals inside Rudania to unlock the Main Control Unit. Each terminal is tucked behind clever obstacles involving fire and machinery. Take a moment to familiarize yourself with the map: by selecting the Divine Beast icon in your map screen, you can choose to tilt Rudania either level or on its side. Tilting essentially rotates the entire dungeon, turning walls into floors. This mechanic lets you traverse otherwise unreachable areas.
Terminal 1: From the Guidance Stone room, peer back out to the previous larger room. You might spot the first glowing terminal on a wall out of reach. To get it, stand in the doorway and activate Rudania’s tilt (choose the 90° position). As the Beast rotates, the whole room shifts. When the motion stops, you’ll find yourself literally walking on the wall that was once the floor! The terminal is now oriented above you. Find a sloped rock ramp in this chamber – when Rudania is rotated, it forms a makeshift path up to the terminal’s level. Climb up the slant, then drop down carefully onto the ledge with Terminal 1 and activate it. (You might lose a heart or two from the fall, but it’s worth it.) One down, four to go.
Next, tilt Rudania back to flat (upright position) and return to the central area. Terminal 2 lies somewhere on Rudania’s back outside. Find a high ledge or window that lets you go out to the Beast’s exterior. One way is to go back to the big starting room and look for a path upwards: there was a slanted concrete beam leading to an opening. Climb up and emerge on Rudania’s back under the open sky. Be cautious: outside, it’s still scorching hot (if you unequipped flame gear inside, put it back on). Also, any wooden weapons will ignite out here, so stick to metal gear. Now, on Rudania’s back, you’ll see rib-like structures (its “spines”) and pools of Malice blocking passage. Tilt Rudania 90° again to change the layout. This allows you to run along its side. Make your way across the Beast’s back, looking for an eye embedded in Malice. There is a large blob of Calamity Gunk on the spine – shoot the Calamity Eye in its center to clear it. This frees up movement and often reveals a chest. With the goo gone, tilt Rudania back if needed and climb onto that cleared spine. From here, you can spot another eye ABOVE you on a higher part of Rudania’s back (toward where you came). Shoot that eye to purge another patch of Malice, revealing Terminal 2 beneath it. Activate Terminal 2, which is now accessible on the spine.
Terminal 3: Head back inside the beast. (Use any open window or the path you came out; you can also tilt to create a slope leading back in.) Now that a lot of malice is cleared, new routes open up. Return to the starting area with the blue flame torches (near where you entered the Beast). Make sure Rudania is level. There’s a locked gate here you haven’t opened yet. Notice a small hole in the metal door and an unlit furnace beyond. The trick is to shoot an arrow through the hole lit with blue flame to ignite the furnace on the other side. Stand by one of the blue torches that is still burning, draw a regular arrow, and let the arrow tip catch fire from the blue flame. While keeping the arrow drawn (it’ll burn slowly, but you have time), aim through the gap in the door and release. If done right, the arrow passes through and lights the torch inside, opening the door. In the next room, you’ll see a wall of orange flames blocking a passage. There’s another unlit torch on the far end beyond the fire. Again, light an arrow on the blue flame you just activated and shoot it over or through the fire at some dry leaves you notice above the flames. The burning leaves drop a hidden metal cube from the ceiling. Use Magnesis to grab that metal cube. Now tilt Rudania 90°, causing the cube to slide or drop. Your goal is to use this metal cube to block the jet of flames. While tilted, maneuver the cube so it falls and wedges, then flip Rudania back if needed to place it firmly in the path of the fire jets. Once the flames are blocked by the metal crate, you can safely pass through. On the other side, claim Terminal 3.
Terminal 4: Backtrack to the area with the two blue starter torches (near the entry). Ensure Rudania is flat. Face toward the front of the Beast (where you haven’t been yet) – you should see a large sealed room with two giant metal doors. The doors have wooden planks and dried leaves covering their center. Just like before, light an arrow with a blue flame and shoot the flammable stuff. The leaves burn up, exposing the metallic door halves. Now stand close and use Magnesis to grab and slide each door apart. Pull them open like you’re unbarring a giant gate. Inside is Terminal 4, unguarded. Activate it. (Also, don’t miss a bonus: there are more leaves on the wall inside this room – burn them to drop a chest with an Ancient Gear.)
Terminal 5: The last terminal involves a small puzzle on Rudania’s top side. Return once more to the initial area with blue torches at the entrance. Confirm Rudania is level (flat). Grab a torch (there should be one or you still have yours) and light it with blue flame. Now, you need to carry this flame to an unlit furnace high up on Rudania’s back. This is tricky: You must move with the lit torch through a rotation. Stand at a spot where you have open sky above you (like near the entrance or under a hole) and will be on a surface after tilting – one good method is to go to the long slanted ramp that leads outside (the same ramp used for Terminal 1). Light your torch, then tilt Rudania 90° while holding the torch aloft. As the dungeon tilts, Link will shift but keep the torch lit as long as you don’t sheathe it. Now you’ll effectively be walking on a wall with the blue flame still burning. Carefully carry the flame up that long ramp all the way to the top outside. You should find an unlit furnace (torch pedestal) on Rudania’s curved back that wasn’t reachable before. Light it with your blue flame. This activates some ancient machinery: a giant metal orb is released and starts rolling down a track. Follow the orb as it travels through a chute back into the interior of Rudania.
Chase the orb inside. It will get stuck behind a barred gate at the bottom of a slope. To get it past the gate, you’ll need to manipulate the environment. Notice the gate can slide horizontally with Magnesis. Also notice there’s a slot in the floor nearby meant for that ball. Here’s the solution: While Rudania is still tilted, use Magnesis to pull the metal gate aside (to open the path for the ball). The moment you have the gate moved, quickly use Stasis on the gate to freeze it in the open position. Now immediately tilt Rudania back to flat orientation. Gravity will send the metal orb rolling forward, and with the gate frozen out of the way, the orb drops through and lands into the waiting socket. The door ahead opens, revealing Terminal 5 right behind where the gate was. Go activate the final terminal. You’ve done it – all five terminals are online.
With all terminals activated, the main control unit on Rudania’s back is unlocked. A message prompts you to return to the Main Control Unit (the glowing platform you’ll find topside, probably near the center of Rudania’s back). Make sure you’re prepared before you activate it – a boss fight is about to begin. If you need to heal or buff, do so now. Equip metal weapons and a sturdy shield, as you likely already have (anything wooden will burn). Also, grab any remaining treasure chests in the Beast if you want [Optional]. When ready, climb up to the Main Control Unit (it’s up on Rudania’s back, roughly where you lit the final blue flame, but now it’s glowing orange). Press A to activate it. Link will thrust the Sheikah Slate in… and darkness gathers as Fireblight Ganon materializes.
Boss Battle: Fireblight Ganon (Scourge of Divine Beast Vah Rudania)
Fireblight Ganon by phase
| Phase | Attacks | How to counter |
|---|---|---|
| One (full to half health) | Sweeping, overhead and spinning greatsword swings, telegraphed by how he holds the blade; small fireballs at range | Stay close, dodge at the last moment for a Flurry Rush, punish recovery with two-handed weapons; block or sidestep fireballs |
| Two (half health to defeat) | Wraps himself in a flame shield and draws in air for a huge fireball; then flame trails on the floor | Throw a Remote Bomb into the vortex and detonate it to stun him; ride the updrafts from his flame trails and shoot his eye |
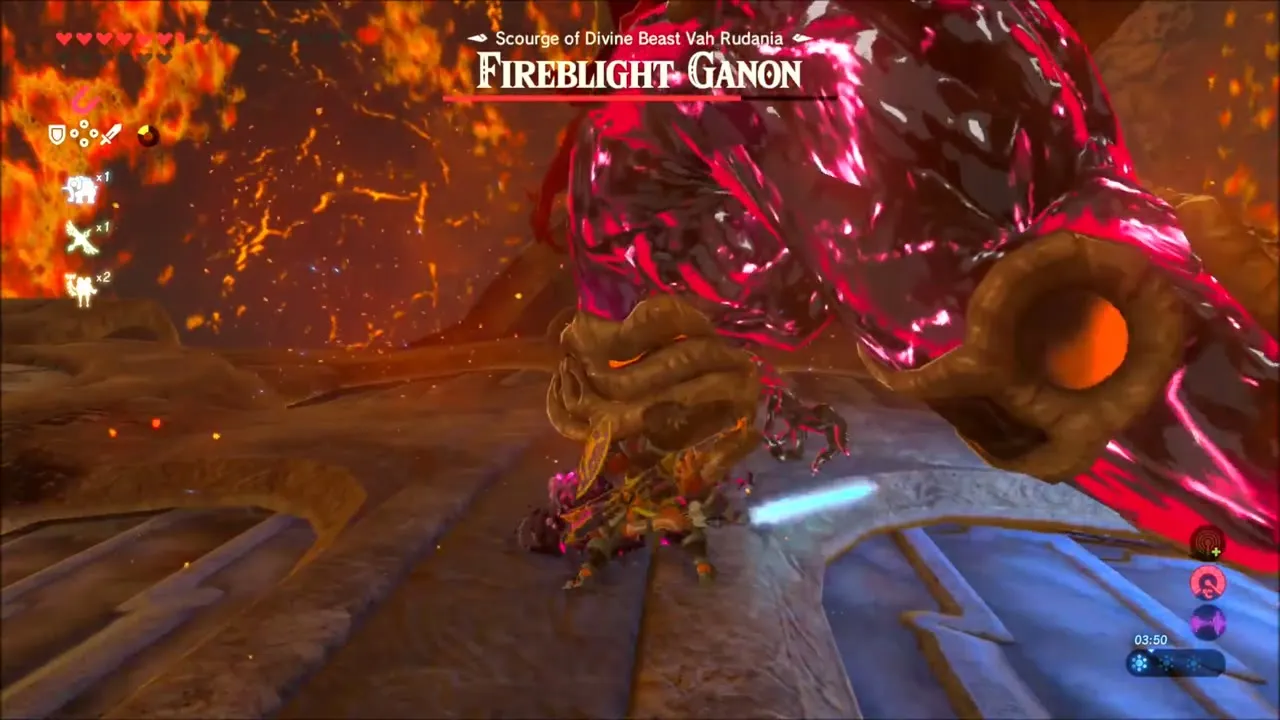


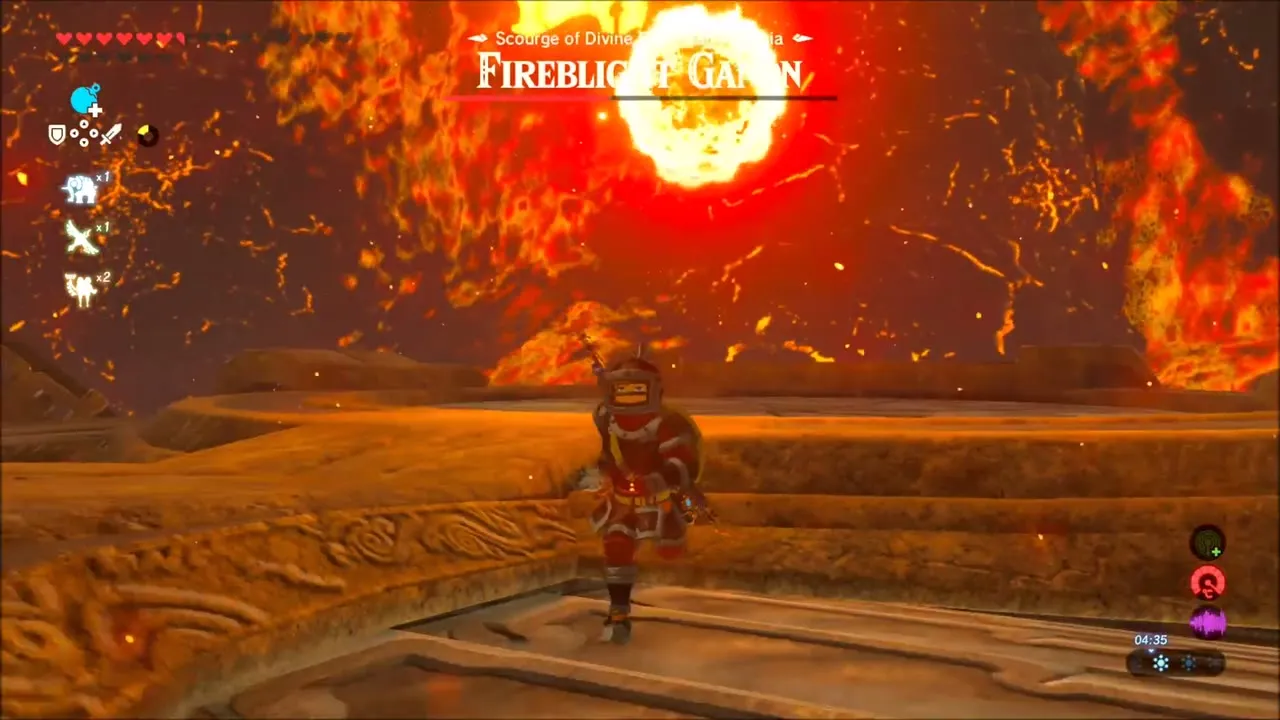
A fiery phantom of Ganon appears, brandishing a huge flaming cleaver. Fireblight Ganon has three phases, but with the right tactics you can take him down efficiently.
Phase 1 (100%–50% health): Fireblight Ganon lumbers toward you for close combat. His attacks are huge, overhead swings and sweeping strikes with his greatsword. These hits have massive range and can one-shot a careless player with low hearts, but they’re slow. The key is to stay very close to Fireblight – counterintuitive as it sounds, being near his body causes him to swipe downward where you can more easily sidestep. Keep your shield up to block any glancing blows. When you see him winding up, dodge to the side (a well-timed side hop may trigger a Flurry Rush). Get behind him or to his side and attack with your strongest melee weapon. Two-handed weapons work great for damage during his recovery frames. If you have Urbosa‘s Fury (from a different quest) it can also be used, but assuming you don’t, simple swordplay works. Whenever Fireblight jumps back and starts lobbing fireballs, raise your shield or sprint sideways – the small fire projectiles can be blocked or easily avoided. Keep whittling his health; after enough hits, he’ll be briefly stunned, allowing more free hits. By staying aggressive but defensive (shield up when not striking), you should carve him down to half health without too much trouble.
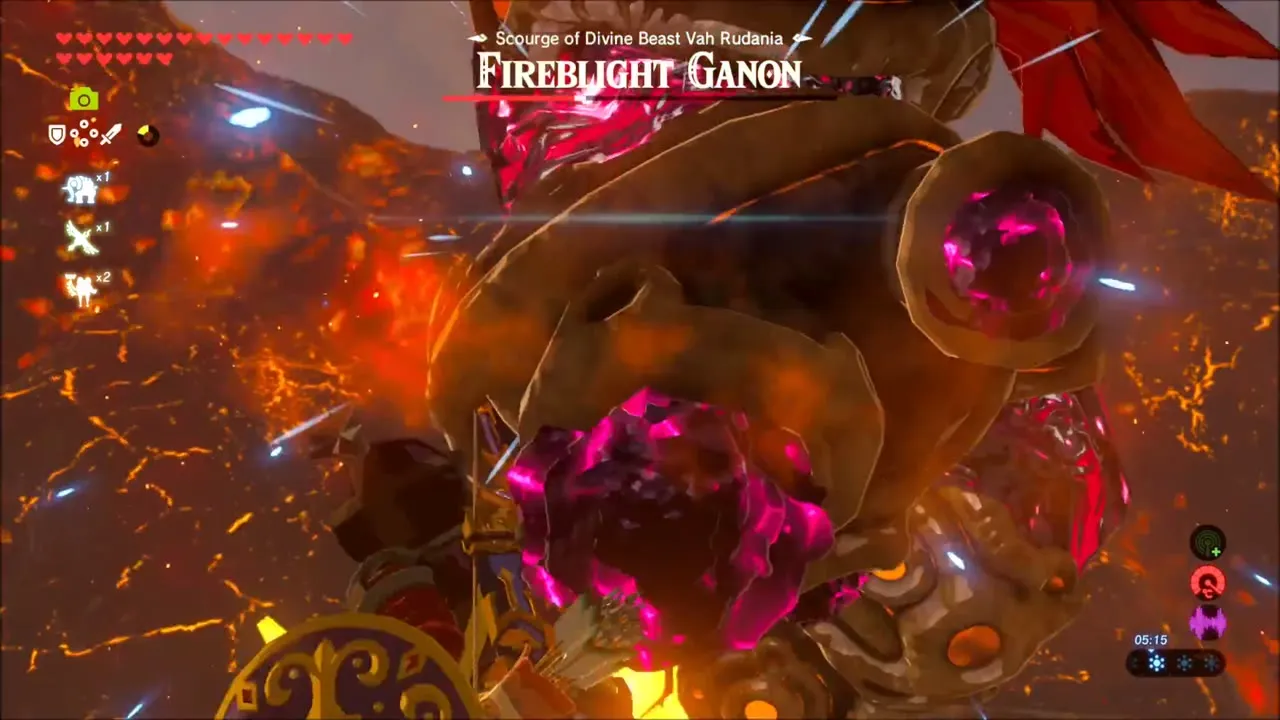
At 50% HP, Fireblight Ganon roars and initiates Phase 2. He floats to the center and envelops himself in a swirling flame shield, a huge ball of fire that surrounds his body. While in this fiery shell, he’s invulnerable to normal attacks; arrows just ping off. He also begins charging a gigantic fireball attack. You’ll see flames gathering into a single large orb above him as he sucks in air. Daruk’s voice warns you about the danger. If you let him finish, he’ll hurl the massive fireball which explodes in a wide radius – very painful to get caught in. To counter this, do what Daruk did 100 years ago: toss a Remote Bomb into the vortex! As Fireblight inhales, quickly switch to your Bomb rune, chuck a bomb towards him (you don’t have to be super precise; the vortex will pull objects in), and detonate it mid-air. The explosion will disrupt his fire shield, stunning Fireblight Ganon and canceling the super fireball. He’ll crash to the ground, giving you a big opening – rush in and land as many hits as possible. Two-handed weapon spin attacks or a flurry of blows work well here. Remove a good chunk of his health during this downed state.
Fireblight will recover and Phase 3 begins (around ~25% HP). This phase is similar to Phase 1 but with added tricks. Now his sword is super-heated and every swing can create trails of lingering flame on the ground. Don’t stand in the fire patches – they will continuously hurt you. However, these flames generate updrafts of hot air. You can use these updrafts to your advantage: if you need breathing room or a chance to shoot arrows, jump into an updraft with your paraglider. This will lift you high, enabling slow-motion bow shots from above. A well-placed arrow to Fireblight’s eye can stun him momentarily, bringing him to one knee. Or, simply use the height to reposition and avoid his rush. Fireblight will continue his normal melee combos, which you should still dodge and punish as before. He might also charge up a laser-like beam (similar to other Blights) – if you see him aiming a red laser, be ready to sprint or side jump out of its line because a fiery laser blast will follow. Keep moving at all times in this phase to avoid being cornered by fire on the ground. Stay patient, chip away when you see an opening, and use those updrafts if things get too hot underfoot.
After enough hits, Fireblight Ganon will collapse and explode in a burst of flames. You’ve defeated the scourge of Rudania! Collect the Heart Container that materializes (don’t forget to pick it up – leaving without it means it’s lost forever). With heart in hand, approach the Main Control Unit one last time. Activate it to finish the Divine Beast.
A cutscene plays as Daruk’s spirit is freed. In a heartfelt moment, the Goron Champion thanks you for saving Rudania and his people. He bestows upon you Daruk’s Protection, his signature power. This blessing encases you in an automatic red sphere when you guard: as long as you’re holding ZL to guard, the next three attacks that hit you will be completely nullified! It’s like a free super-shield that can block even devastating blows (including Guardian beams) – immensely useful for the trials ahead. Daruk’s Protection has 3 charges and will recharge on its own after use. With a final proud laugh, Daruk and Rudania turn their gaze to Hyrule Castle. Rudania climbs the volcano and takes position, ready to target Calamity Ganon when the final battle comes.
Chests Inside Vah Rudania
Every treasure chest in the beast, in the order you usually reach them. Weapons in chests follow difficulty scaling: the more enemies you have defeated, the better the version you find (for example Royal rather than Knight’s).

| Contents | Where | |
|---|---|---|
 | Ancient Screw | On the tail, outside, before you enter |
 | Dragonbone Boko Club | One of the three eye chests in the dark entrance room |
| Ice Arrows | another of the entrance eye chests |
 | Torch | Third entrance eye chest; light it at the blue flame |
 | Knight’s Bow | Second dark room, after shooting its four eyes (with a chest of arrows) |
| Ancient Core | On the spine, after clearing its Blight |
 | Ancient Gear | Burn the dry leaves above the third terminal; the chest drops |
| Knight’s Bow | Midway along the tilted grate on the way to the fourth terminal |
Aftermath in Goron City
You are transported back to Goron City, appearing just at the city entrance. Yunobo greets you eagerly, thrilled that Rudania has been tamed. He runs off to tell Bludo the good news. Head into the city to find Bludo and Yunobo celebrating. Talk to Bludo, who will cheerfully declare Divine Beast Vah Rudania conquered and the crisis resolved. Quest complete! Yunobo thanks you deeply, and Bludo, ever the generous boss, insists you take a reward for all your heroics. He leads you to the hut behind him (Bludo’s house). Inside, open the chest to obtain the Boulder Breaker, a massive 2-handed stone club that once belonged to Daruk. This weapon has a whopping 60 attack power and is super effective against rocks and Talus monsters. Bludo mentions that if it breaks, Rohan the Blacksmith in Goron City can reforge it for you (at the cost of a Cobble Crusher, diamond, and flint).
Vah Rudania rewards
| Reward | Where you get it | |
|---|---|---|
| Heart Container | Dropped by Fireblight Ganon |
| Daruk’s Protection | Daruk’s spirit, at the main control unit | |
| Boulder Breaker (attack 60, durability 60) | Chest in Bludo’s house, Goron City |
Divine Beast Vah Medoh (Rito Village)
Vah Medoh is the bird-shaped Divine Beast of the Rito. It circles in the sky above Rito Village. The full room-by-room route is on the Vah Medoh guide; this section keeps the walkthrough with the tables you need at a glance.
| Vah Medoh | Details |
|---|---|
| Region | Tabantha (Hebra); Rito Village, x -3618, z -1808, height 532 (map square B-3) |
| Champion | Revali; memory Revali’s Flap |
| Helpers | Teba, Kaneli |
| Blight Ganon | Windblight Ganon, health 800–2,000 (2,000 in Hyrule Castle) |
| Terminals | 5, plus the main control unit; mechanic: tilt the wings left or right |
| Quests | Divine Beast Vah Medoh (main quest), part of Free the Divine Beasts |
| Champion ability | Revali’s Gale: lifts you high on an updraft so you can glide or aim from the air; three uses, recharge 6 minutes (2 in Hyrule Castle) |
| Divine Helm |  Vah Medoh Divine Helm (Cold Resistance; Revali amiibo) Vah Medoh Divine Helm (Cold Resistance; Revali amiibo) |
| Reward weapon |  Great Eagle Bow (attack 28, durability 60) Great Eagle Bow (attack 28, durability 60) |
| Heart Container | Dropped by Windblight Ganon |
| Bring | Cold protection (Snowquill set or a spicy meal), a fast bow, the 20 Bomb Arrows from Teba, Remote Bombs, Magnesis and Stasis |
| Walkthrough | Rito Village and Vah Medoh |
Proving Yourself to Teba at the Flight Range
To reach the Flight Range, prepare for a cold journey. The air grows colder as you venture toward the Hebra Mountains, so equip warm clothing or eat a spicy meal for cold resistance. (In Rito Village’s shop you can purchase the Snowquill Armor set – tunic, trousers, and headdress – which completely negates cold weather effects. This investment is highly recommended before you proceed into the freezing heights.) When you’re ready, head to a high ledge on the northwestern side of Rito Village and leap off, paraglider open. The updrafts around the village carry you a long way. Glide northwest toward the Flight Range, following a line of tattered flags that mark the path through the canyon. Below, snow blankets the ground as you cross into the Hebra region, and jagged cliffs loom on all sides. [Optional] On the way, you can stop at the Sha Warvo Shrine nestled in a cliff – activating it provides a fast travel point right near the Flight Range for convenience.


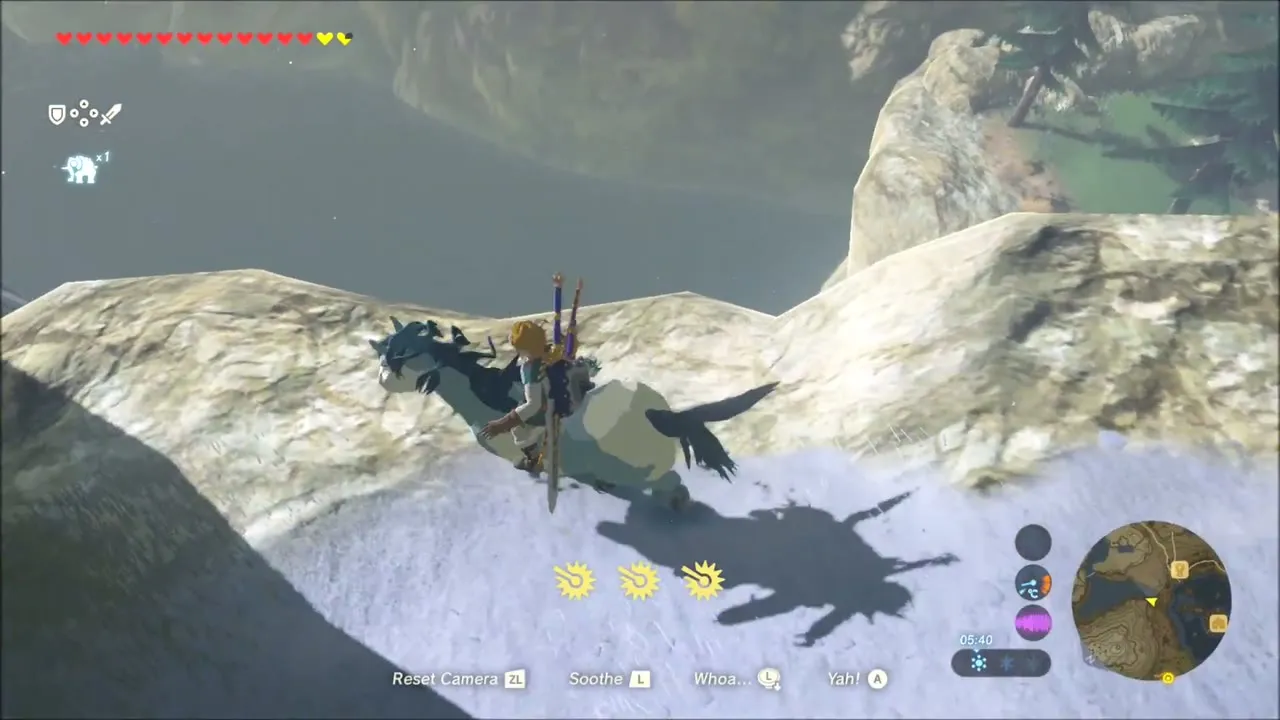
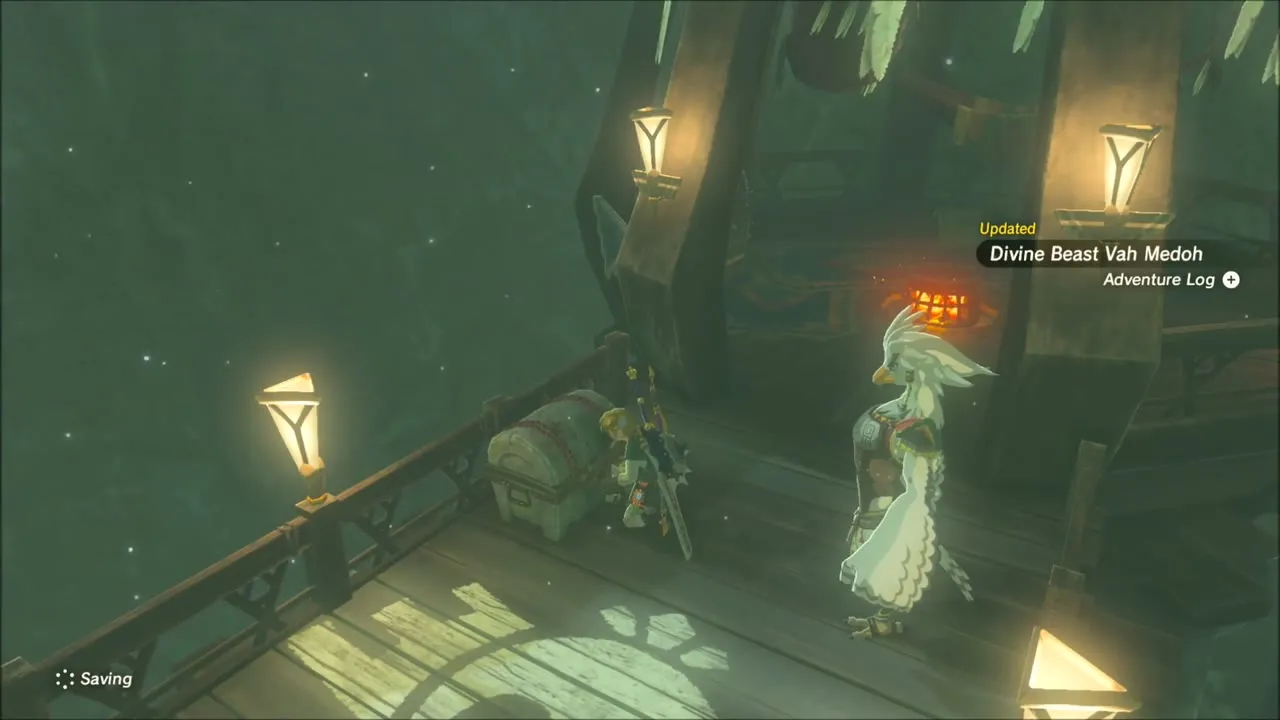
Land at the Flight Range, a lone wooden platform built beside a frozen lake in a steep valley. A small cabin and a tall archery platform denote this as the training ground for Rito warriors. A blue ring of targets hangs in the air, swaying in the breeze. Climb the ladder up into the wooden lodge and finally you meet Teba, the Rito warrior. At first, Teba is cautious and stoic. He has resolved to take down Vah Medoh himself and is skeptical of your abilities. Tell him Kaneli sent you, and that you want to help. Teba ultimately agrees to let you join his fight only if you can prove yourself. To earn Teba’s respect, you must demonstrate your skill in aerial archery – the same technique needed to attack Vah Medoh.
Teba’s test is straightforward but thrilling: destroy five targets within three minutes while mid-air. Grab the arrows from the barrel by the hut if you’re low, then step to the edge of the platform. Leap off into the canyon and immediately catch the updraft rising from the chasm below. The updraft propels you upward; at the peak of your ascent, draw your bow. Time seems to slow as you aim at the nearest target. One by one, you glide through the chilly air, lining up shots on the scattered practice targets. Release arrows in quick succession while hovering with your paraglider – the trick is to let go of the paraglider briefly to drop and then reopen it to gain height or adjust your angle as needed. The targets are spread around the cliffs and beneath the arch, but there are more than enough to hit. After puncturing five targets with well-placed shots (likely long before the time limit expires), you sail back to the platform. The exercise leaves a satisfying trail of shattered targets in your wake.
Impressed by your sharpshooting and aerial finesse, Teba concedes that you are ready to face the Divine Beast together. He commends your skill and opens a nearby treasure chest as a reward. Inside you find the Falcon Bow, a Rito-made bow designed for aerial combat, with a high rate of fire that will serve you well in the skies. Teba also hands you a bundle of 20 Bomb Arrows, precious explosives necessary to damage Vah Medoh’s defenses. Now that both of you are equipped and determined, Teba outlines the plan: he will fly you up as close as possible to Vah Medoh, and together you will assault the beast in mid-air. When you’re ready, speak to Teba and the two of you take to the sky, launching into the freezing air to confront the Divine Beast.
The Assault on Divine Beast Vah Medoh
High above the Hebra Mountains, Vah Medoh soars in wide circles. Its immense form is like a massive stone-and-metal bird with outstretched wings, emanating a menacing red forcefield that shimmers around it. Teba carries you up with a powerful flap of his Rito wings. The wind rushes past as you draw closer to the machine’s altitude. Soon, you are gliding on your own alongside Teba in the thin, frigid air, at eye-level with the Divine Beast. Below, the world is a carpet of clouds; ahead, Vah Medoh’s emerald-green hull creaks as it turns to face you. A protective barrier of ancient energy surrounds the beast, so you cannot land on it just yet. Instead, you must destroy the four Guardian cannons mounted on its wings to disable the forcefield.
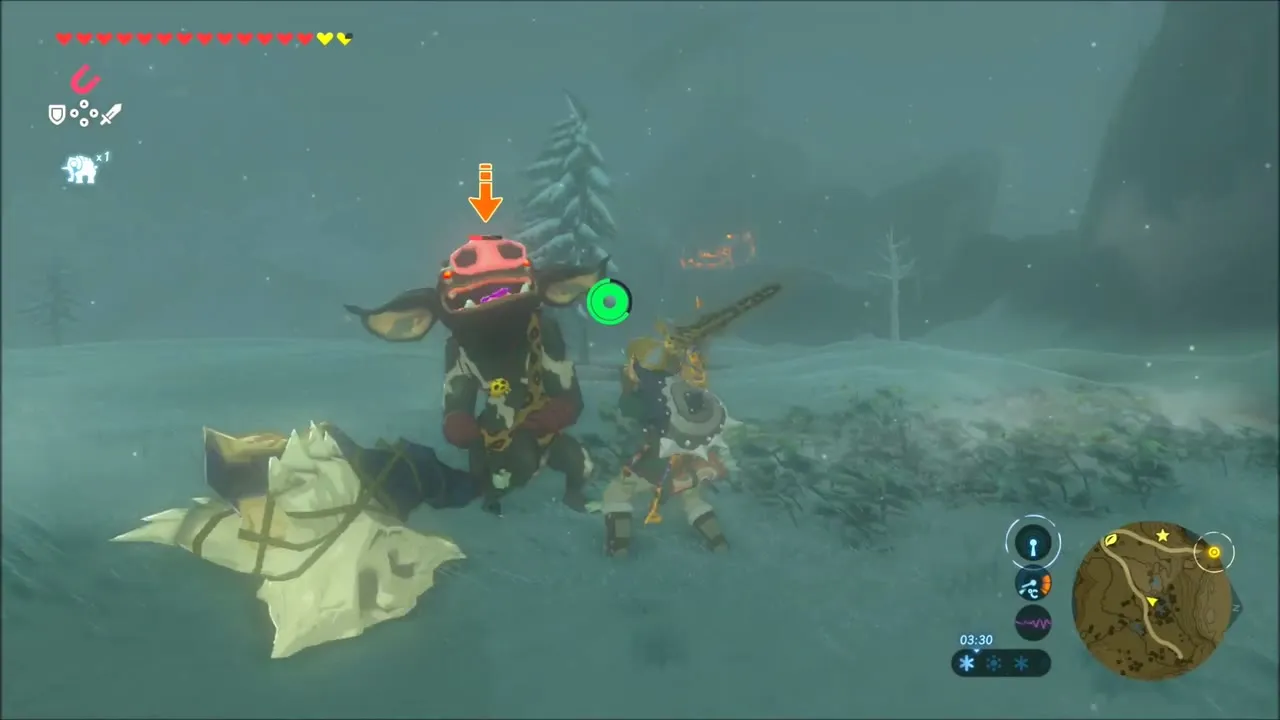

Teba cries out a warning as Vah Medoh’s defenses activate – the cannons begin to glow and track your movements. There are four cannons in total, two on each wing of the beast, and each must be taken out with your bomb arrows. You split up the targets: Teba will distract Medoh’s fire as much as he can, drawing some of the cannon blasts toward himself. Your job is to fly close to each cannon and bomb it. Steer yourself toward the first cannon, but be careful – once a cannon locks onto you, a thin red laser aims your way. A blinding energy beam sears out moments later. To avoid these deadly blasts, use the paraglider’s agility: if you see a cannon tracking you, suddenly drop by closing your glider, or sharply change altitude. The sudden shift causes the beam to miss by a wide margin. Immediately reopen your paraglider to regain lift and continue your attack run.
When you get within range of a cannon, draw your bow in mid-air. Time slows again as you line up a bomb arrow shot. Release, and boom! – a direct hit explodes against the ancient turret. Each cannon is tough and will take two Bomb Arrows to destroy. The air battle is fast-paced: you glide from one wing to the next, weaving around laser fire. The sky is lit with fiery explosions as one by one the cannons go down under your barrages. There is minimal cover in the open air, so rely on constant movement and the updrafts created by the beast’s wake to stay aloft. Teba provides covering fire and occasionally shouts encouragement when a cannon is destroyed. After a few intense minutes, the final cannon erupts in flame and plummets off Vah Medoh’s wing. With all four cannons disabled, the red forcefield enveloping Vah Medoh flickers and dissipates, clearing the way for you to approach safely.
His part in the mission complete, an injured Teba cannot continue (he may have taken a hit during the battle). He wishes you luck and retreats to safety, leaving the rest to you. You glide toward the now-unshielded Divine Beast and touch down on its back. At last, you have boarded Vah Medoh, high above the world. A brief calm follows as you stand on the enormous construct; eerie blue-lit interiors beckon through an opening in the hull. Steeling yourself, you step inside the Divine Beast to begin the next phase of the quest.
Exploring Vah Medoh – Wind Puzzles and Terminals
The five terminals at a glance
| Terminal | Where | Key mechanic or rune | How |
|---|---|---|---|
| 1 | Right wing | Tilt, fan switch, Magnesis | Tilt right and ride the middle slab into the right wing; press the orange switch to run the fan, tilt left and hold the second windmill with Magnesis so the stone slides into its receptacle |
| 2 | Middle room | Bow, tilt, paraglider | Shoot the Malice eye, glide across, clear the central maw, tilt back and glide to the terminal |
| 3 | Behind the sealed gate with a window | Remote Bomb, Magnesis, tilt | Drop a Remote Bomb through the hole while the beast leans left, expose the metal boulder, bring it to the receptacle with Magnesis and tilt so it hits the switch |
| 4 | Across the wings, outside | Tilt, paraglider | Level the beast, take the right door from the bottom floor outside, clear the eyes, tilt left and glide across |
| 5 | Wing tip, by the carousel | Tilt, bow | Ride the carousel under the wing, tilt toward the tip, shoot the eye above the Malice gate halfway and climb the stairs |
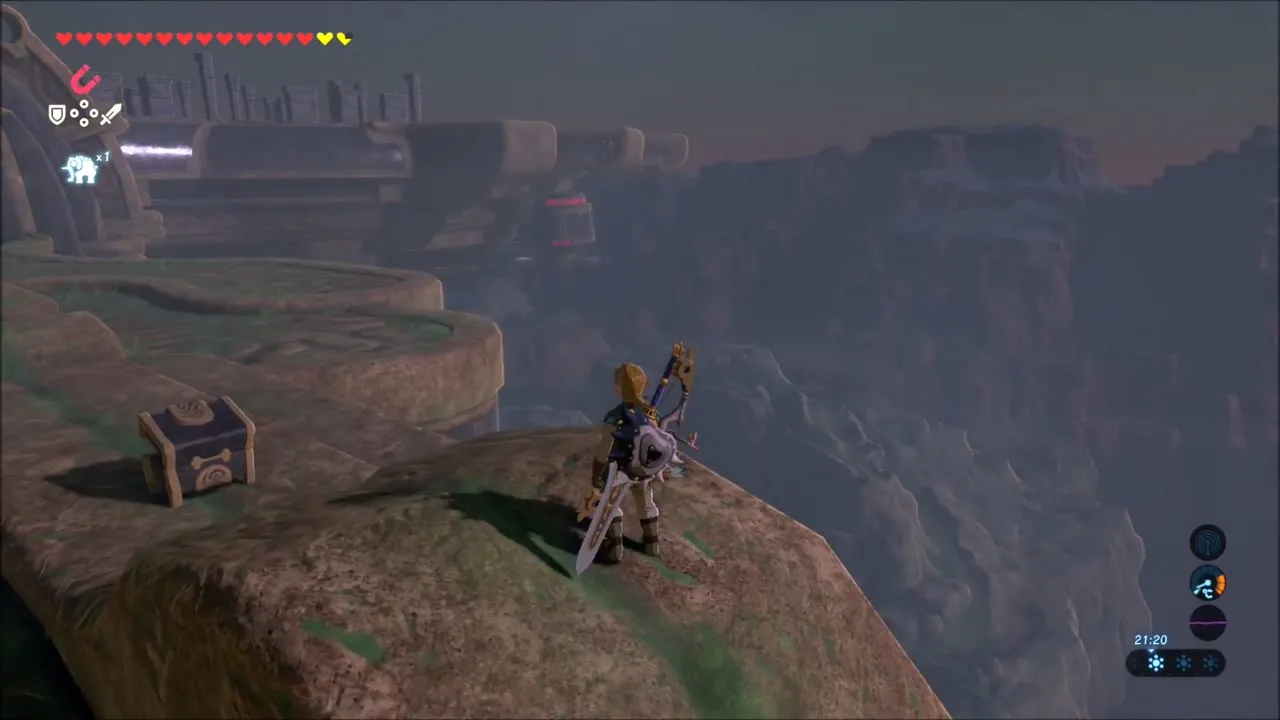
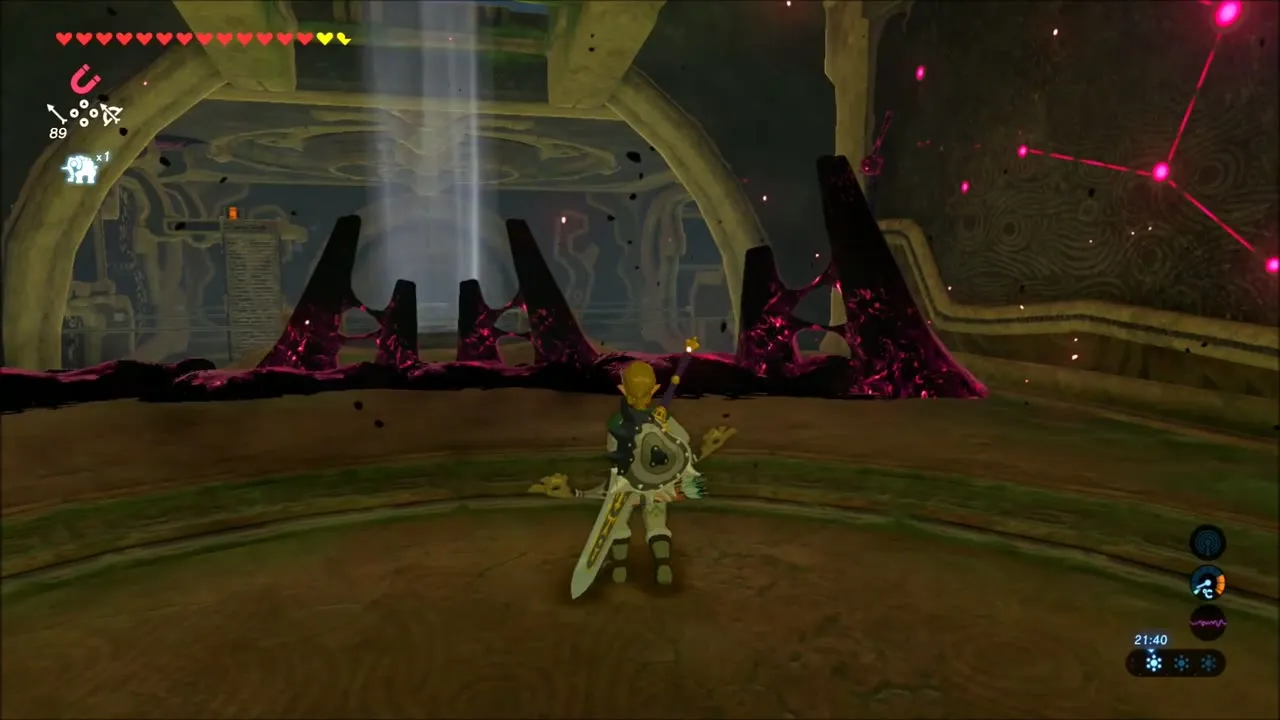


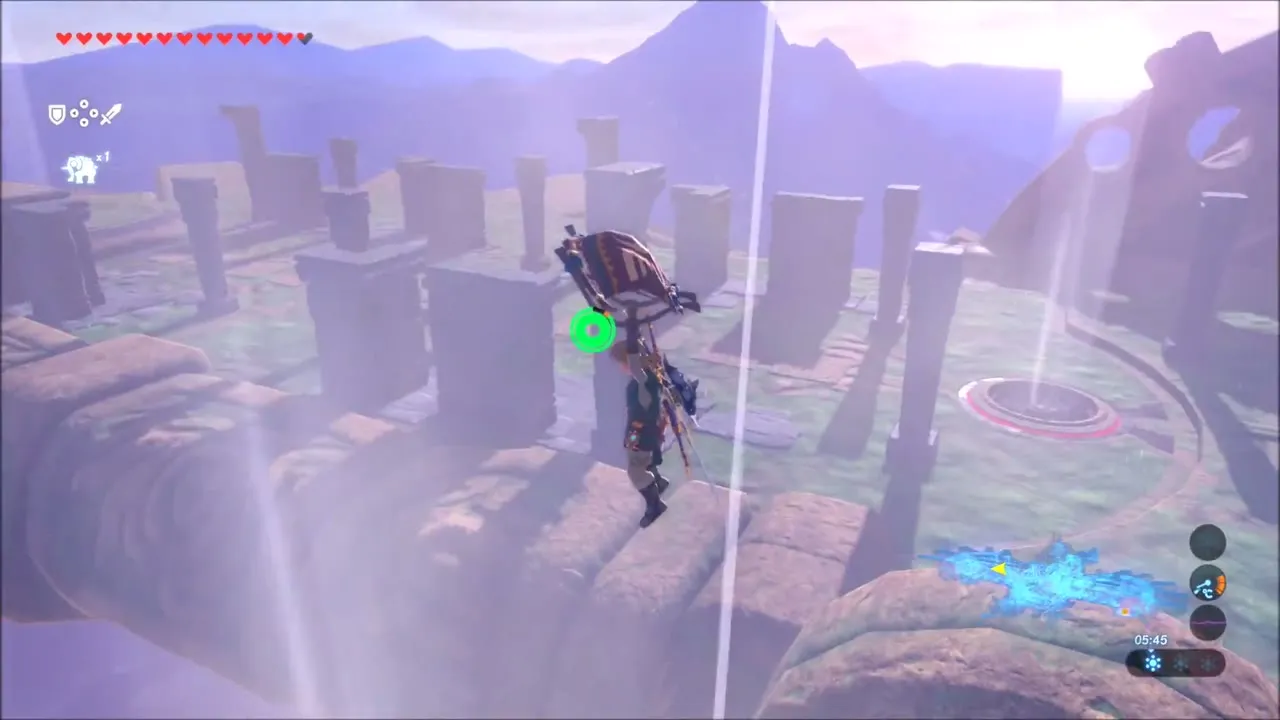
Inside the belly of the beast, the environment shifts to ancient technology – a mix of stone and Sheikah machinery humming with energy. Ghostly Guidance Stones and circuits line the walls. The moment you enter, a disembodied voice (Revali‘s, from 100 years past) echoes in your mind, guiding you to take control of the Divine Beast. Directly ahead, you find the glowing Guidance Stone map terminal. Activate it, and a detailed map of Vah Medoh appears on your Sheikah Slate, revealing the beast’s layout. The map shows the locations of five terminals that you must activate, each positioned along Vah Medoh’s wings. Crucially, the map also grants you the ability to tilt Vah Medoh at will. You can now rotate the Divine Beast’s wing alignment between three settings (level, tilted left or tilted right) by selecting the controls on your map. This ability to tilt the dungeon is key to solving the puzzles ahead.
With the entire dungeon as a massive mechanism, you proceed to explore Vah Medoh’s chambers. Immediately, you feel strong gusts of wind flowing through certain hallways – parts of the beast are open to the sky, letting in the air. In fact, wind is the central theme of Medoh’s puzzles. Use your paraglider in vertical shafts where updrafts are present to reach higher platforms or cross wide gaps. Early on, you enter a chamber with a giant shuttered window and a locked gate. You spy a switch connected to the window mechanism. Activating the switch causes the huge metal shutters to slide open, and frigid gales from outside rush into the chamber. The wind powers a set of turbines, which in turn open the gate, granting you access to a new area. In another room, you discover a large metal orb resting precariously on a track. By tilting Vah Medoh, you send the orb rolling along the track like a marble. The goal is to get it into a socket that will trigger a mechanism. For example, one puzzle requires you to stop an air current with a switch, then tilt the Beast so the ball rolls to one side, use Magnesis to reposition the ball, and tilt the other way – causing the orb to roll into a receptacle that opens a sealed gate. Solving these contraptions often involves a combination of manipulating wind (opening or closing vents) and altering gravity through tilting.
As you explore, you’ll encounter corruption in the form of eyeball-shaped blight scattered around. Take out these eyes with arrows to clear the gooey malice that blocks passages and chests. Step by step, you work your way through each wing of the Divine Beast. Some terminals are perched in hard-to-reach places: one might be on a wingtip accessible only when that wing is tilted downward, allowing you to glide across a gap. Another terminal might sit behind a turbine that blasts constant wind – you’ll have to disable or redirect the airflow by solving a small puzzle so you can approach it safely. Keep an eye out for metal grates, gust-producing fans, and moveable blocks; all of these are part of Medoh’s mechanisms. Whenever you’re stuck, remember to use the Divine Beast controls: changing the tilt can turn a wall into a floor or send objects sliding to new positions. Each time you activate a terminal, the voice of Zelda chimes in with encouragement, and one of the five glowing indicators on your map goes dark.
The interior of Vah Medoh has multiple levels, but thanks to the open design and updrafts, you can often glide between platforms or drop down carefully to backtrack. Work systematically from one wing to the other, using the central body as a hub. After activating the fifth and final terminal, a triumphant chime rings out and your map updates. The voice instructs you to activate the Main Control Unit, which has now appeared. This main control is located on a platform on Vah Medoh’s back (essentially on top of the dungeon). To reach it, make your way back to the central room. Use a powerful upward draft (enabled by the wind now flowing freely through Medoh’s body) to launch yourself up and out through an opening. Land atop the Divine Beast, where a glowing pedestal – the main control unit – is waiting. Take a moment to heal up, eat any stat-boosting meals, and prepare for a fight. The moment you activate this final control, the dungeon will cease operation and the boss will appear.
Boss Fight: Windblight Ganon
Windblight Ganon by phase
| Phase | Attacks | How to counter |
|---|---|---|
| One (full to half health) | Cannon-arm bursts from a distance, mini-tornadoes on the roof | Catch the turbine updrafts, slow time and shoot the eye; get under the cannon, which has a minimum range, for melee |
| Two (half health to defeat) | Floating turrets that bounce his shots, several tornadoes at once, a Guardian-style eye beam | Rise on updrafts and shoot the turrets down; keep hitting the eye, which also stops the beam |
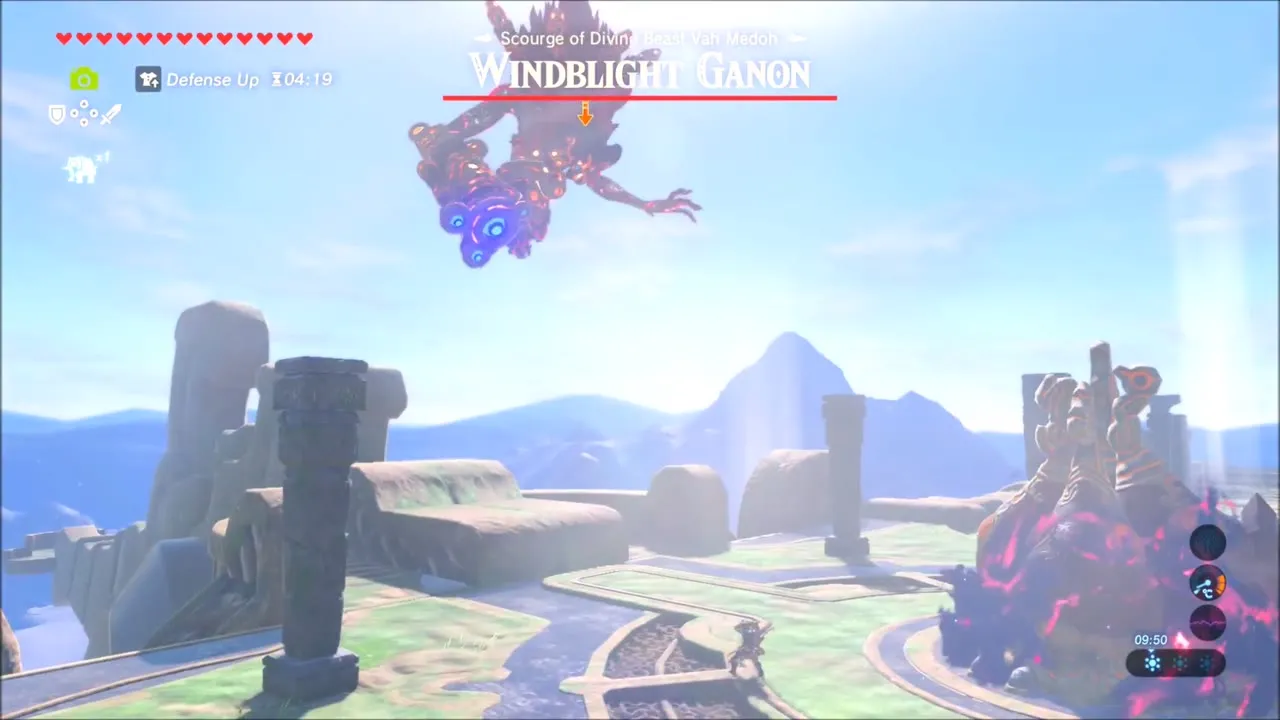

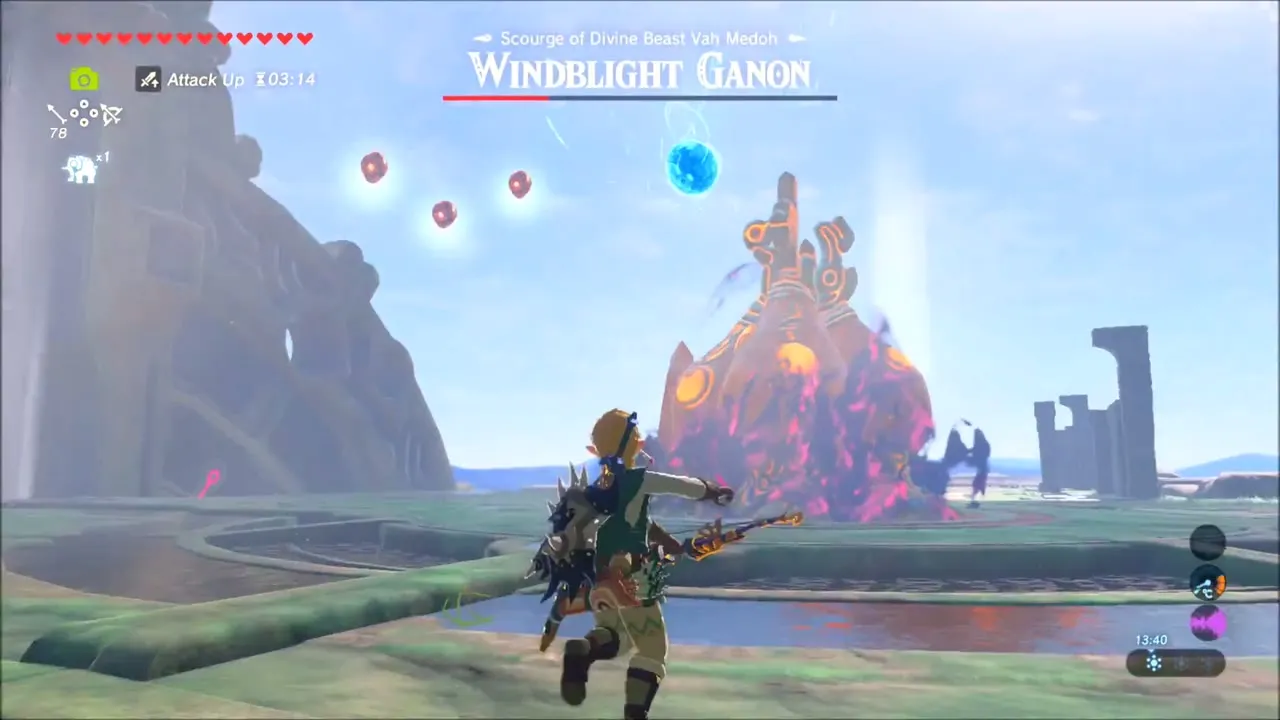

Activating the main control triggers a cutscene as the skies darken overhead. From the ether emerges Windblight Ganon, the monstrous phantom that controls Vah Medoh. This incarnation of Ganon’s malice is a lanky, floating horror with a single eye, an arm cannon, and a shroud of Sheikah technology swirling around it. It howls in fury at your presence, determined to protect the Divine Beast. Windblight Ganon immediately attacks, and the battle is on atop Vah Medoh’s back – an arena consisting of the Beast’s wide, flat surface with a few low walls and continuously generated updrafts at the edges.
Phase 1: Windblight Ganon uses the power of wind to its advantage. It will hover at a distance and fire barrages of energy bullets from its arm cannon. These projectiles travel quickly but you can dodge them by sprinting sideways or taking cover behind the stone scaffolds on the beast’s back. The boss also conjures mini-tornadoes that roam around the arena – if you see swirling winds forming on the ground, keep your distance to avoid being sucked in and thrown. To damage Windblight Ganon, use the updrafts that are naturally present (or created by the boss’s wind attacks) to your advantage. Catch an updraft with your paraglider, rise high, then draw your bow. In mid-air, time slows, giving you a clear shot at the boss’s eye. Nail Windblight in its big blue eye with an arrow – regular arrows work, but Bomb Arrows deal extra damage and stagger the foe. After a few well-placed hits, Windblight will reel and drop to the ground, temporarily stunned. Take this opportunity to rush in and strike with your strongest melee weapon, or continue raining arrows before it recover.
Keep moving to avoid the boss’s attacks. If Windblight Ganon cloaks itself or a tornado obscures your view, don’t panic. Glide to another updraft or drop to the ground and reposition until you spot the boss again. The arena is spacious enough to maneuver; use the entire area to keep a favorable angle. Patience and accuracy are key – whittling down about half its health will trigger the next phase.
Phase 2: Enraged, Windblight Ganon changes its tactics. It summons floating turrets that circle the arena and bounce the boss’s shots, meaning Windblight can now angle beams at you from unexpected directions. It may also unleash multiple tornadoes at once, turning the battlefield into a chaotic storm. Focus remains the same: use updrafts to get height and enter bullet-time, then aim for Windblight’s eye whenever you have a clean shot. The drones can be destroyed with a few arrows each, which might be worthwhile if they’re making the laser fire too difficult to dodge, but note that the drones respawn after a short time. It might be better to ignore them and concentrate on the main enemy. Continue strafing and gliding to avoid the crisscrossing laser beams; the same trick of dropping suddenly or changing altitude works against these as it did against Medoh’s cannons.
Despite Windblight Ganon’s menacing arsenal, your mastery of the updrafts and archery will eventually bring it down. Each successful hit to its eye interrupts its attacks and hastens its defeat. After enough punishment, Windblight Ganon lets out a final screech and collapses, exploding into dark mist. You’ve defeated the Divine Beast’s foe. In the aftermath, a Heart Container materializes – claim this to increase your maximum health by one. Approach the main control unit once more and activate it to finally free Divine Beast Vah Medoh from Ganon’s control.
In a moving finale, the spirit of Revali, the Rito Champion, appears before you. Though proud and headstrong in life, Revali now offers his grudging respect and gratitude. He grants you Revali’s Gale, a sacred ability of the Rito Champion. This powerful skill allows you to create your own updraft at any time – simply charge jump (hold X) and you’ll launch skyward on a gust of wind. It’s an invaluable ability for traversing Hyrule’s terrain and reaching high places with ease.
With Vah Medoh now under control, the giant Divine Beast flies off to perch atop the Rito homeland, aiming its laser toward Hyrule Castle in preparation for the final battle with Calamity Ganon. Back in Rito Village, the threat in the skies has passed. If you return to Chief Kaneli, he will express the village’s heartfelt thanks and present you with the Great Eagle Bow, a treasured weapon once wielded by Revali himself. This marks the end of the Rito Village questline. Victorious and empowered with Revali’s Gale, you set off with greater confidence – one more Divine Beast has been freed, and Hyrule is one step closer to liberation.
Chests Inside Vah Medoh
Every treasure chest in the beast, in the order you usually reach them. Weapons in chests follow difficulty scaling: the more enemies you have defeated, the better the version you find (for example Royal rather than Knight’s).
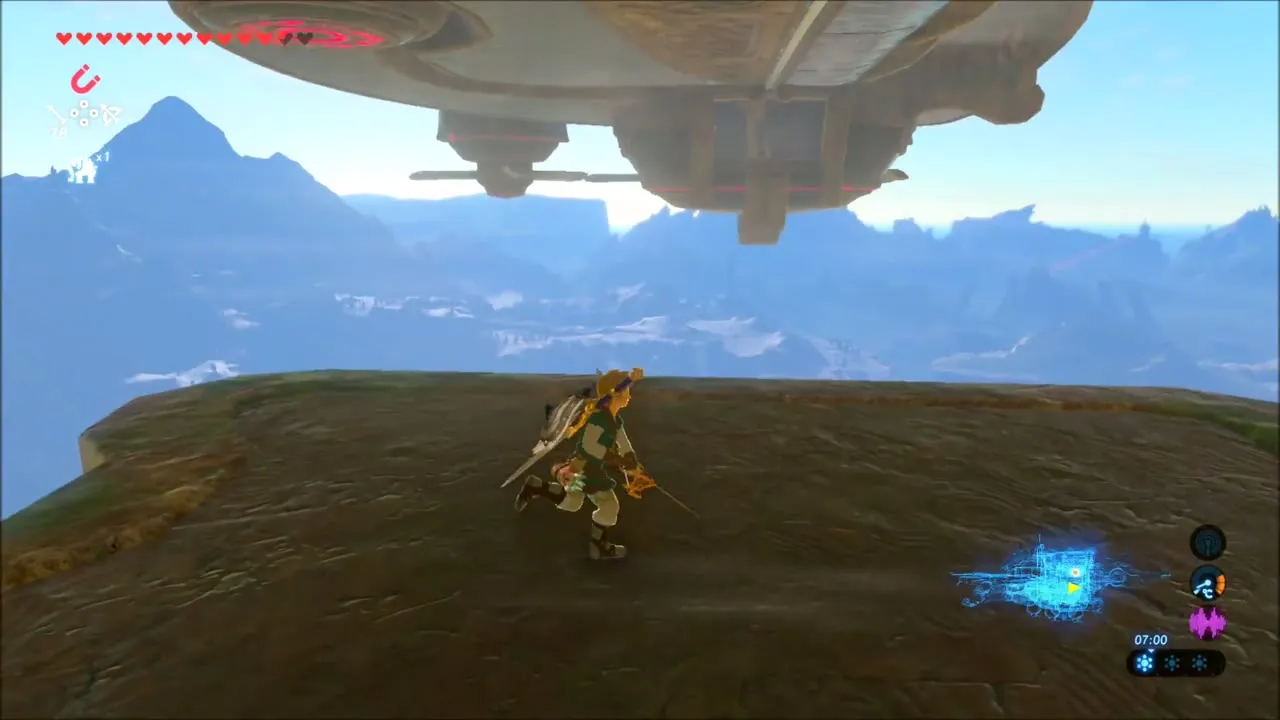
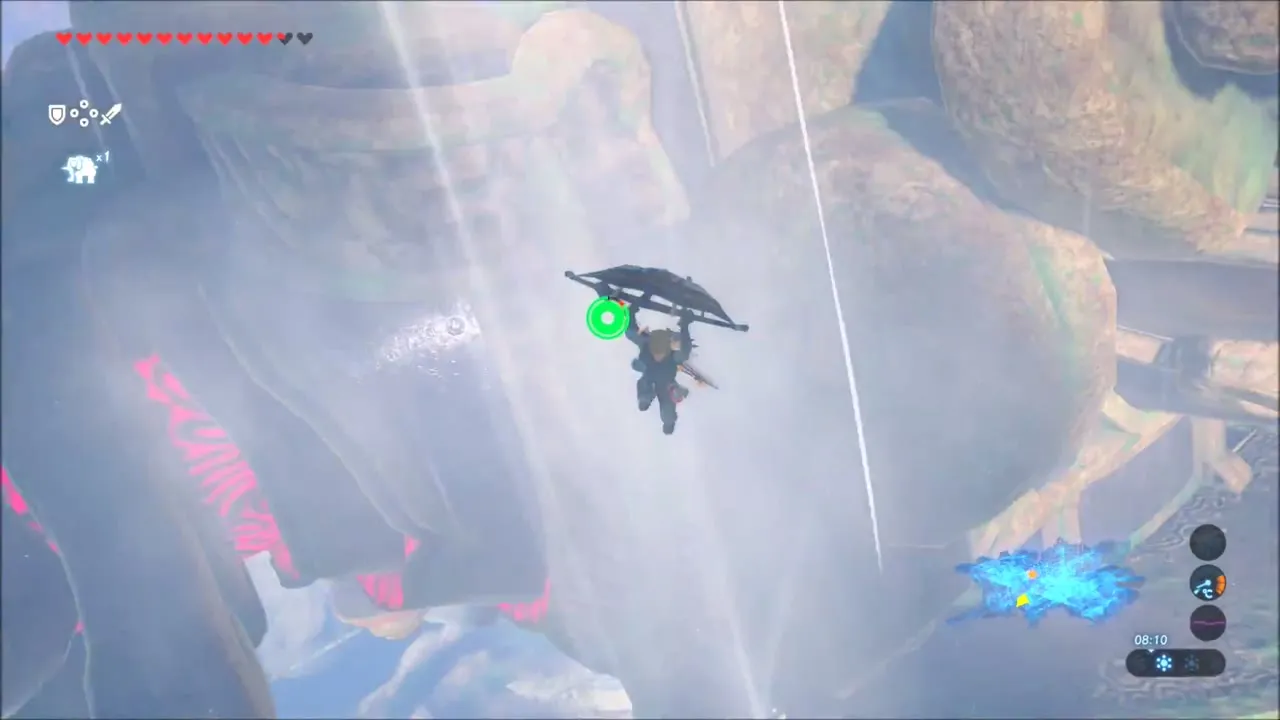
| Contents | Where | |
|---|---|---|
 | Sapphire | Malice-covered chest at the tail, before you go in; shoot its eye |
| Ancient Core | Up the ladder by the Guidance Stone hall, after lining up the slabs |
 | 5 Bomb Arrows | small balcony below the first slab |
| Ancient Shaft | Lowest level, under the Malice pool |
| Knight’s Bow | Right wing, reached on the gust while tilted (Knight’s Bow or better, depending on difficulty scaling) |
| Ice Arrows | by the sealed door, after killing the skull-spitting maw |
 | Knight’s Claymore | Far ledge of the middle room, glide across |
 | Giant Ancient Core | Tilt so the nose is higher and glide toward it from the roof, before the boss |
Vah Medoh rewards
| Reward | Where you get it | |
|---|---|---|
| Heart Container | Dropped by Windblight Ganon |
| Revali’s Gale | Revali’s spirit, at the main control unit | |
| Great Eagle Bow (attack 28, durability 60) | Chest beside Kaneli, Rito Village |
Divine Beast Vah Naboris (Gerudo Town)
Vah Naboris is the camel-shaped Divine Beast of the Gerudo. It walks the sands east of Gerudo Town. The full room-by-room route is on the Vah Naboris guide; this section keeps the walkthrough with the tables you need at a glance.
| Vah Naboris | Details |
|---|---|
| Region | Gerudo Desert; Gerudo Town, x -3835, z 2915, height 150 (map square B-7) |
| Champion | Urbosa; memory Urbosa’s Hand |
| Helpers | Riju, Master Kohga |
| Blight Ganon | Thunderblight Ganon, health 800–2,000 (2,000 in Hyrule Castle) |
| Terminals | 5, plus the main control unit; mechanic: rotate the front, middle and back cylinders |
| Quests | Divine Beast Vah Naboris (main quest), part of Free the Divine Beasts |
| Champion ability | Urbosa’s Fury: calls down lightning on the area around you, stunning and damaging enemies; three uses, recharge 12 minutes (4 in Hyrule Castle) |
| Divine Helm |  Vah Naboris Divine Helm (Electric Resistance; Urbosa amiibo) Vah Naboris Divine Helm (Electric Resistance; Urbosa amiibo) |
| Reward weapon |   Scimitar of the Seven (attack 32, durability 60) and Daybreaker (durability 60) Scimitar of the Seven (attack 32, durability 60) and Daybreaker (durability 60) |
| Heart Container | Dropped by Thunderblight Ganon |
| Bring | Shock protection (Rubber set, elixirs or food), the 20 Bomb Arrows from Riju, Sand Boots, Remote Bombs, Magnesis and Stasis |
| Walkthrough | Vah Naboris and the Gerudo Desert |
Infiltrating the Yiga Clan Hideout
Leaving Gerudo Town behind, head north toward the canyon lands. The Yiga Clan Hideout is tucked away in Karusa Valley, which lies in the cliffs north of the Gerudo Desert. As you travel, the lush palms and adobe houses of Gerudo Town give way once more to harsh terrain. You might encounter a sandstorm or two, and you’ll definitely run into roaming Yiga footsoldiers on the way – those masked assassins tend to pop up when you least expect it (often teleporting in with a cloud of smoke and a menacing laugh). Dispatch them or outrun them as you prefer. The path to Karusa Valley is marked by large red banners with the Yiga emblem, so you’ll know you’re on the right track when you see those crimson cloths flapping in the wind. The valley itself is narrow and rocky. Hug the path and prepare for a climb into their secret base.
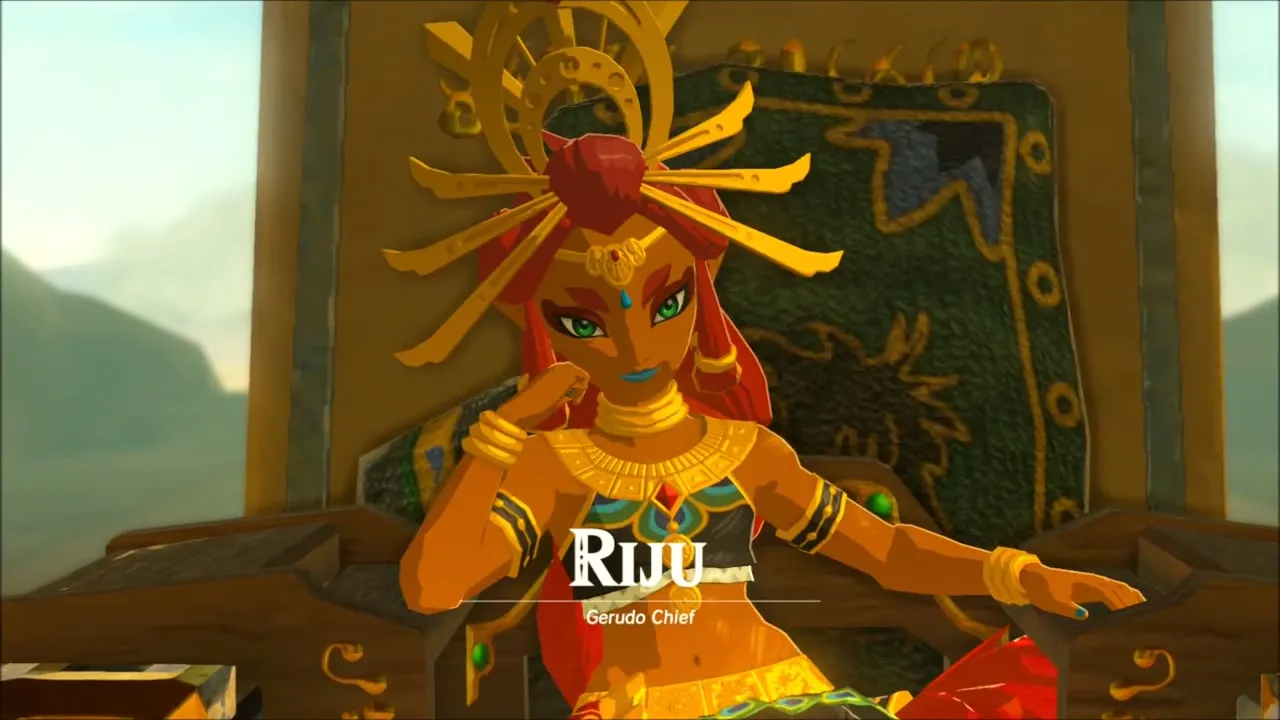

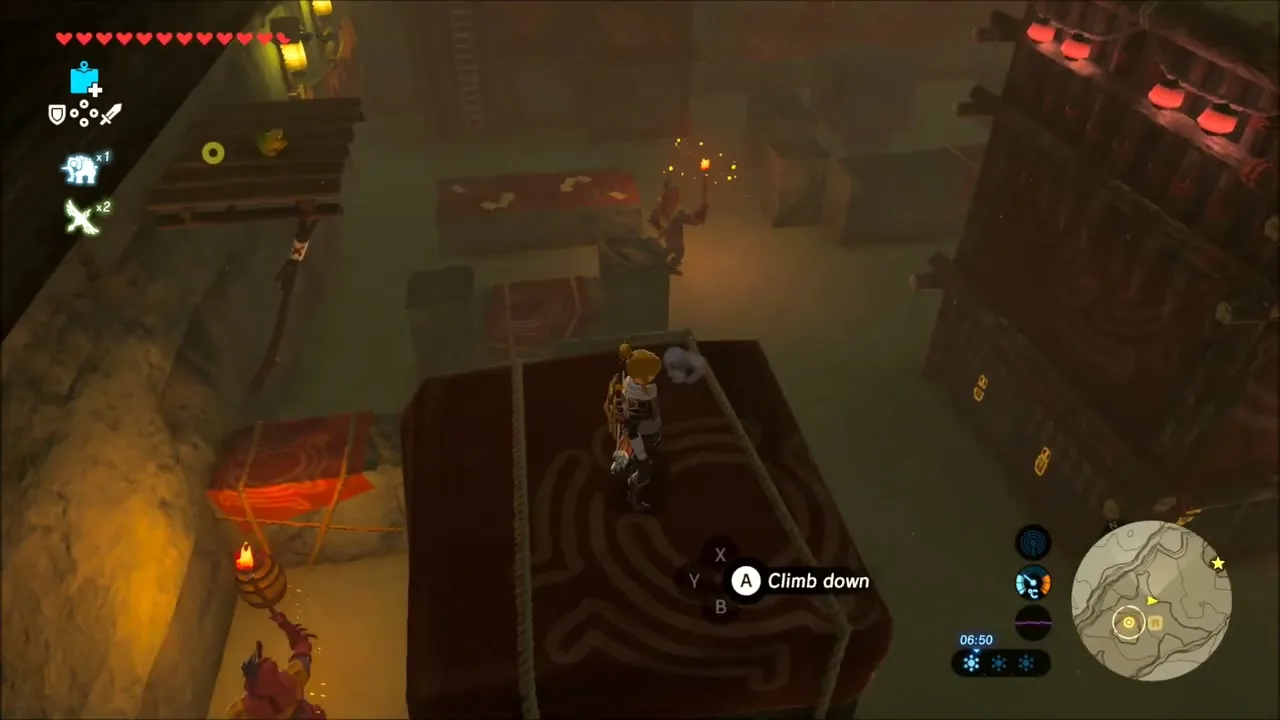

Eventually, you arrive at the mouth of a cave adorned with even more Yiga banners and two braziers. This unassuming cave is the entrance to the infamous Yiga Clan Hideout. Step inside and the atmosphere changes to an eerie quiet. Proceed forward and you’ll find an apparent dead end in a large chamber decorated with ominous black tapestries. The trick here is to burn the banners: grab a lit torch from the brazier outside (or shoot a fire arrow) and set those hanging tapestries alight. One of them conceals a hidden passage. As the cloth burns away, a doorway is revealed – your way into the heart of the hideout.
Beyond the hidden door, the real challenge begins. The Yiga Hideout is crawling with patrolling Yiga guards, and this time it’s not the low-level scouts, but formidable Yiga Blademasters. These are big, tough foes wielding hefty Windcleaver swords, and if they spot you, they will call in a swarm of reinforcements. Facing them head-on turns the hideout into a gauntlet of endless Yiga fighters (and it is overwhelming). The game encourages a stealthy approach here. The mood is tense and shadowy – perfect for sneaking. Immediately crouch to move quietly. There are tall stone walls, crates, and scaffolding that you can hide behind or even climb to stay above a guard’s line of sight.
Take it slow and observe the patrol patterns of the Yiga guards. You’ll notice each Blademaster patrols a set route, periodically pausing to look around. The key is to slip by when their backs are turned. If you’re feeling especially devious, you can use their one great weakness: Mighty Bananas! Scattered around the hideout (conveniently placed on pedestals and in crates) are loads of bananas – the Yiga just love these things. You can take advantage of that by holding a banana and tossing it in a guard’s line of sight (or shooting down a hanging bunch of bananas from a high spot). The guard will get distracted and wander over to the banana, giving you a window to sneak past while they’re daydreaming about their favorite snack. This tactic can be both effective and pretty funny to watch.
Move from cover to cover, room to room. At one point, you’ll come across a large central chamber with multiple tiered walkways and a few guards positioned around. Use ladders and climbable walls to get to higher ground – often you can bypass a guard entirely by moving above them. There are also alcoves with piles of bananas (a treasure trove if you want to snag some for your own cooking later) and a few treasure chests with goodies like rupees or arrows. Loot if you wish, but be careful not to get greedy and stumble into a guard’s view. If at any point you do get spotted, you can try to fight, but expect a tough battle. Alternatively, you can dash back to the previous room; if you break line of sight and hide, the Yiga will eventually give up searching. Patience is your friend here.
After navigating the maze of patrolling foes, you’ll descend into a deeper chamber lit by a single spotlight… and an impressive collection of bananas (yes, even more!). As you step forward, a cutscene triggers – you’ve been “caught” in a way, but not by a mere guard. Master Kohga, the leader of the Yiga Clan, makes his grand (and comedic) entrance. Kohga is a rotund, masked Yiga boss with an ego as big as Death Mountain. He’s annoyed that you’re poking around his lair, and now it’s boss fight time!
Boss: Master Kohga
This battle is equal parts humorous and dangerous. Kohga might not seem very serious – he complains about being disturbed and strikes over-the-top poses – but don’t underestimate him. In Phase 1, Master Kohga will float a giant boulder in the air above his head using his psychic powers. He’s preparing to hurl it at you, but notice how he momentarily exposes himself (glowing with energy as he lifts the rock). That’s your chance: hit him with an arrow (a swift headshot works great) or a remote bomb to break his concentration. Doing so will cause the boulder to drop right onto his own head with a thud, dealing damage and leaving him flustered. After a few hits like this, Kohga gets angry and ups the ante.
In Phase 2, Kohga conjures two boulders that spin around him like a deadly merry-go-round. He’ll send them hurtling in your direction one after the other. Keep moving to avoid these flying rocks. Again, watch for the moment he stands centered under the spotlight to direct his attack – that’s when he’s vulnerable. Pop him with another well-timed arrow to interrupt the cycle, which causes one of his own boulders to smack him from behind this time. He howls in frustration (cue some amusing Yiga banter from him) but he’s not done yet.
For Phase 3, Master Kohga decides to bring out the big guns – literally. He floats over the middle of a deep pit behind him and summons a gigantic spiked metal ball. This massive weapon swings over his head, crackling with energy. Since Kohga is now hovering out of melee range, you’ll need to get creative. Equip your Magnesis rune and target that giant metal ball. Yes, you can control it! Lift the ball high and then slam it directly into the unsuspecting Kohga. He’s so shocked (and probably regretting his life choices) that he doesn’t even dodge. One or two good smashes and the hapless leader is defeated in the most comedic way possible – in the final blow, Kohga loses control of his powers and tumbles into the pit beneath him, yelling vows of revenge on his way down. So much for the mighty Yiga leader!
With Kohga gone, a treasure chest appears on the platform. Open it to retrieve the prized Thunder Helm. This is the Gerudo chief’s stolen heirloom, a radiant golden helmet said to protect the wearer from lightning. Objective complete! Now you can make a quick exit from the hideout. There’s a convenient shortcut: a door opens that leads you back outside (no need to sneak out the way you came). Tip: Before leaving the valley, you might want to snag any extra treasure or bananas you left behind, and if you defeated any Yiga along the way, be sure to grab their Duplex Bows or swords as spoils. When ready, either fast-travel back (if you activated Daqo Chisay shrine or another nearby warp point) or simply hoof it through the desert to return to Gerudo Town. The stage is set to confront Divine Beast Vah Naboris at last.
Sand Seal Assault on Vah Naboris
Back in Gerudo Town, head to the palace and deliver the Thunder Helm to Riju. The young chief is impressed and deeply grateful to have her heirloom returned. With the Thunder Helm in Gerudo hands again, Riju is now ready to take on Divine Beast Vah Naboris, and she wants you to fight by her side. After a quick briefing, she asks you to meet her at the Gerudo Desert lookout post (situated just outside of town, in the direction of the Divine Beast). Make sure you’re prepared before you go – stock up on health-restoring meals and Bomb Arrows. In fact, when you rendezvous with Riju at the lookout post, she generously supplies you with 20 Bomb Arrows, knowing you’ll need explosive firepower. It’s also a smart idea to equip anything you have that resists electricity (for example, the Rubber Armor set or even just the Rubber Helm from the Faron region, if you’ve obtained them). The upcoming battle will involve a lot of lightning, so any shock resistance helps. When you’re all set, tell Riju you’re ready to begin the assault.


Riju dons the Thunder Helm, and together you each hitch a ride on a sand seal (Gerudo have tamed these adorable seal-like creatures to surf across the sand). The atmosphere is intense as you two launch off into the open desert, pulled swiftly by your seals. The night sky (if you opted to fight at night to avoid the heat) or the hazy day is suddenly split by a menacing sight: Divine Beast Vah Naboris itself in the distance. The gigantic mechanical camel marches relentlessly through a brewing sandstorm, each footstep sending shockwaves through the dunes. Lightning arcs around it, and dark clouds make it hard to see. Riju calls out to stay close – and activates the Thunder Helm’s power, projecting a large glowing forcefield around herself. This protective dome will repel the lightning bolts that Naboris fires. Your job is to surf within that dome alongside Riju. Stray outside its radius, and a lightning strike can easily blast you off your sand-seal or worse.
The approach to Naboris is a thrilling balance of speed and caution. Steer your sand seal to match Riju’s movements, effectively riding in tandem. As you get closer, Naboris becomes aware of your presence and bolts of lightning start raining down. You’ll see glowing warning circles on the sand where lightning is about to strike – do your best to stay within Riju’s protective bubble when those strikes hit. If you fall behind, press forward and maybe give your seal a gentle whack with your shield to spur it on. Once you’re near the towering legs of the Divine Beast, it’s time to go on the offensive.
Your targets are the four glowing feet of Vah Naboris. These serve as its power generators, and you need to disable all four to bring the beast down. Equip your Bomb Arrows (and make sure your bow is ready – a strong, long-range bow works great here). When you have a clear line of sight to one of Naboris’s leg mechanisms, draw your bow. You might find it easiest to do this in slow motion by jumping off your sand seal (holding ZL/L trigger to focus and then pressing X to leap from the seal, which triggers the slow-mo aerial aiming). Aim for the glowing section on the leg joint and fire a Bomb Arrow. BOOM! A direct hit will cause a burst of electricity and smoke as that leg takes damage. Each foot usually takes a couple of bomb hits to be disabled; you’ll know it’s disabled when the leg stops glowing and Naboris momentarily falters on that side.
Circle around the beast in tandem with Riju, focusing on one leg at a time. The desert wind howls and lightning explodes around you, making this fight feel like a scene out of a legend (which it is!). Keep your cool and time your shots. After you blast the first foot, Naboris will pick up speed and the beast’s movement might become more erratic, but Riju deftly keeps pace and so should you. One by one, take out the legs. Remember to stay in the protective radius when those lightning strikes come; if you do get hit, quickly heal up and get back on your seal (Riju will loop back to help you if you fall). With perseverance, you’ll nail the final leg. When the fourth foot is disabled, Vah Naboris lets out a mechanical groan and collapses, its massive hulk crashing into the sand. The raging sandstorm begins to subside. You’ve successfully tamed the titan from the outside.
Riju brings you in close to the now-stationary Divine Beast. This is your chance to board it. As you glide up beside Naboris’s body, leap from your sand seal onto the metal platform of the beast. (If you miss the jump, don’t worry – you can climb up its ledges or use Revali‘s Gale if you have it, or simply reattach to the seal and try again.) Climbing up, you’ll find an entrance hatch that your Sheikah Slate can interface with. Take a deep breath, bid Riju farewell for now (she’ll hang back outside with the sand seals), and step inside the Divine Beast. The true dungeon lies within.
Inside Divine Beast Vah Naboris
The five terminals at a glance
| Terminal | Where | Key mechanic or rune | How |
|---|---|---|---|
| 1 | Box room in the middle cylinder | Rotate, ride platforms | Ride the small platform into the door, rotate until the box room appears and ride it to the ceiling |
| 2 | Back cylinder | Rotate, wires | The terminal is right side up only at the top: rotate the back and centre cylinders to join the green wires, which spins the wall, and ride a ledge up |
| 3 | Neck and head | Crank | Through the rotating corridor of spikes and lasers to the top door; outside on the neck, push the large crank both ways until both switches turn blue to raise the neck to the head |
| 4 | Hump room | Magnesis, bow, crank | Line up the green wires at the top exit, slide the top and bottom slabs with Magnesis to lift the tail, shoot the eyes and push the crank to join the wires; shoot the eye under the Malice |
| 5 | Below the humps | Electric balls | Defeat the two Guardian Scouts below and set one electric ball from each hump room in the pedestals |
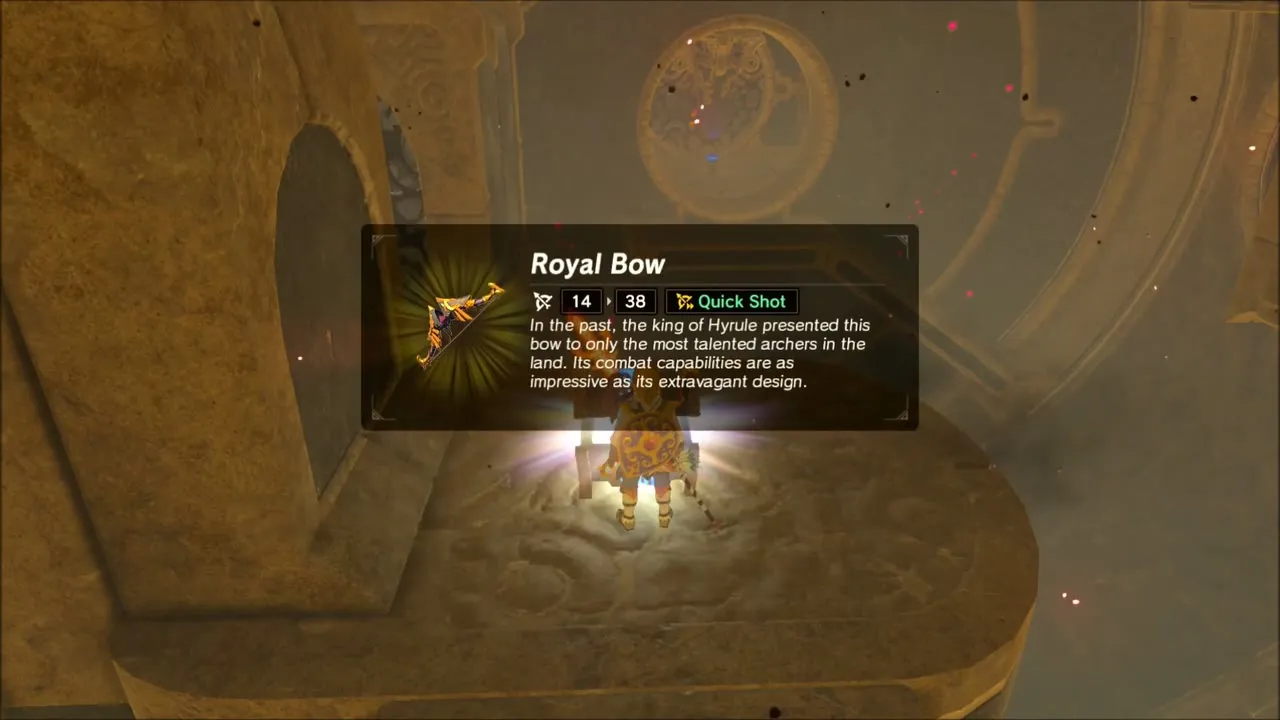
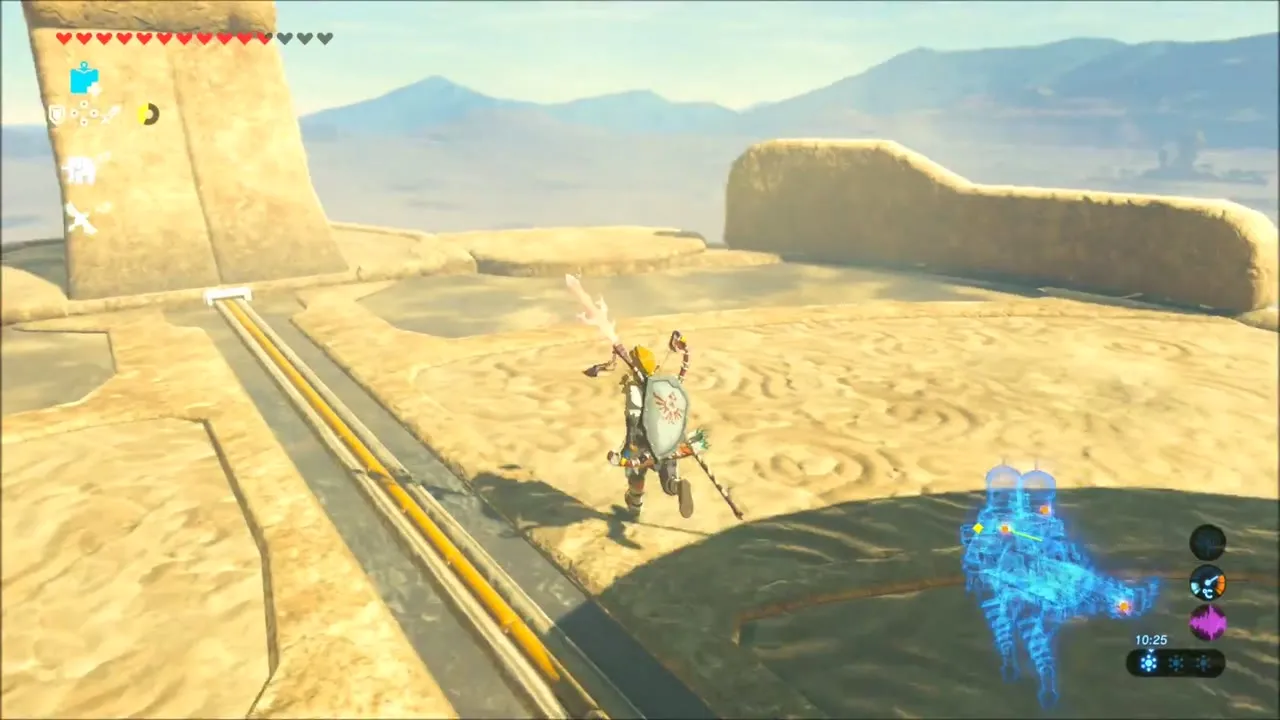
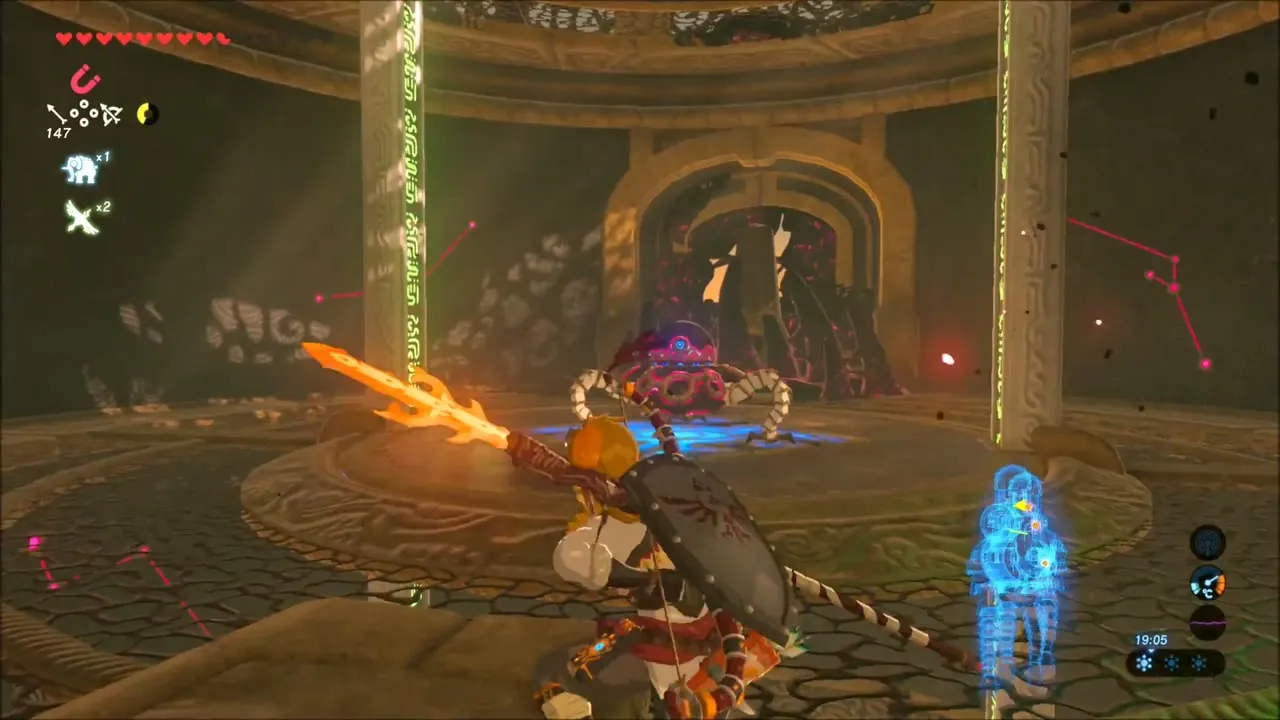
The interior of Vah Naboris is like stepping into an ancient, colossal machine. The halls are dimly lit with glowing Sheikah patterns, and parts of the beast’s inner walls are slick with ominous Malice (that gooey, evil substance – don’t touch it!). Right away, you’ll likely be greeted by a couple of small Guardian Scout enemies skittering about. Dispatch these mini-guardians with your weapon or a quick arrow shot. Once it’s safe, look around the entry chamber for a glowing pedestal – this is the Guidance Stone that contains the dungeon map. Activate it with your Sheikah Slate. The stone whirs to life and downloads the layout of Naboris, including a special ability: you can now manipulate the Divine Beast’s mechanisms via your map screen.
Bring up your map, and you’ll see Naboris has three large rotating cylinders (spanning its “hump” and mid-section). This is the core puzzle mechanic of Naboris: you can rotate these sections in 90-degree increments. Doing so will realign various internal passages and also connect electrical circuits. In essence, you’ll be using rotation to solve puzzles and direct electricity, which powers different devices inside the beast. Your overall goal is to reach and activate five terminals scattered throughout Naboris, and then get to the main control unit. Think of the terminals as checkpoints needed to regain full control of the Divine Beast.
Take a moment to study the beast’s anatomy via the map. Naboris is massive, with multiple levels – there’s a base floor, rotating middle, and upper areas including what corresponds to the neck/head of the camel. You can also spot orange glowing circuits which show how electricity would flow when sections are aligned. Now, let’s begin exploring systematically.
Map and the first terminal
Beat the spear-armed Guardian Scout, shoot the eye to clear the Malice on the right and cross to the Guidance Stone for the map, which lets you rotate the front, middle and back sections of the central cylinder. Use Stasis on the chest hanging by a rope, shoot the rope and pull the chest in with Magnesis for an Ancient Core. Rotate the centre section to expose the Malice eye above the pylon, then ride a section up to the platform with chests holding a Knight’s Bow and an Ancient Shaft. The first terminal sits in a box room with a hole in its floor: ride the small platform into the door, rotate until the box appears and ride it to the ceiling.
Second terminal
Rotate the back cylinder to bridge the door you opened to the sealed metal door, and then to the bombable wall for a chest with an Ancient Spring. The terminal is right side up only at the top. Rotate the back and centre cylinders so the green wires join; that spins the wall, and you ride a ledge up to it.
Third terminal: the neck
Take the middle door into the rotating corridor of spikes and lasers and run through it without stopping for a chest with a Knight’s Shield at the far end. Ride the rotating wall to the top door and go outside onto the neck. Push the large crank both ways until the two switches turn blue; the neck rises like an elevator to the head and the terminal.
Fourth and fifth terminals: the humps
Return to the Guidance Stone room, rotate to reach the top exit and line up the green wires, then use Magnesis to slide the top slabs one way and the bottom slabs the other, which lifts the tail. Ride it to the Malice door and shoot the eye. Inside, clear the Malice on the lower level, shoot the eye in the upper room and push the crank to join the wires to the switch, then shoot the eye under the Malice to open the fourth terminal. A chest with a Topaz sits on the far hump. For the fifth, defeat the two Guardian Scouts below and set the two electric balls, one from each hump room, in the pedestals.
Now all that’s left is the Main Control Unit. This is typically located back in the central area of the dungeon, often on the lower floor. Thanks to all your rotating and puzzle-solving, the control unit platform should now be accessible. Use your map one more time to rotate the cylinders into a position where you can easily walk to the glowing orange main control (you want it oriented upright). A common tactic is to line up the middle cylinder so that a ramp or path leads right up to the control unit. Once everything is aligned, head over to the main control unit and prepare for a fight. Make sure you’re healed up and have your best weapons equipped before activating it, because interacting with this control will trigger the boss battle of the dungeon. When you’re ready, hit the main control unit. The room darkens, ominous music swells… the threat inside Naboris reveals itself.
Defeating Thunderblight Ganon
Thunderblight Ganon by phase
| Phase | Attacks | How to counter |
|---|---|---|
| One (full to half health) | Teleports and dashes in for fast slashes, throws balls of electricity, guards behind a shield | Lock on, dodge at the last moment for a Flurry Rush or perfect-guard to stun him; Stasis+ freezes him briefly; shoot him while he reforms the shield |
| Two (half health to defeat) | Plants metal rods that draw lightning, electrified swings that make you drop weapons, an eye beam when low | Lift a rod beside him with Magnesis as he calls lightning so he stuns himself; wear shock protection; hide behind platforms or rush in to break his shield |
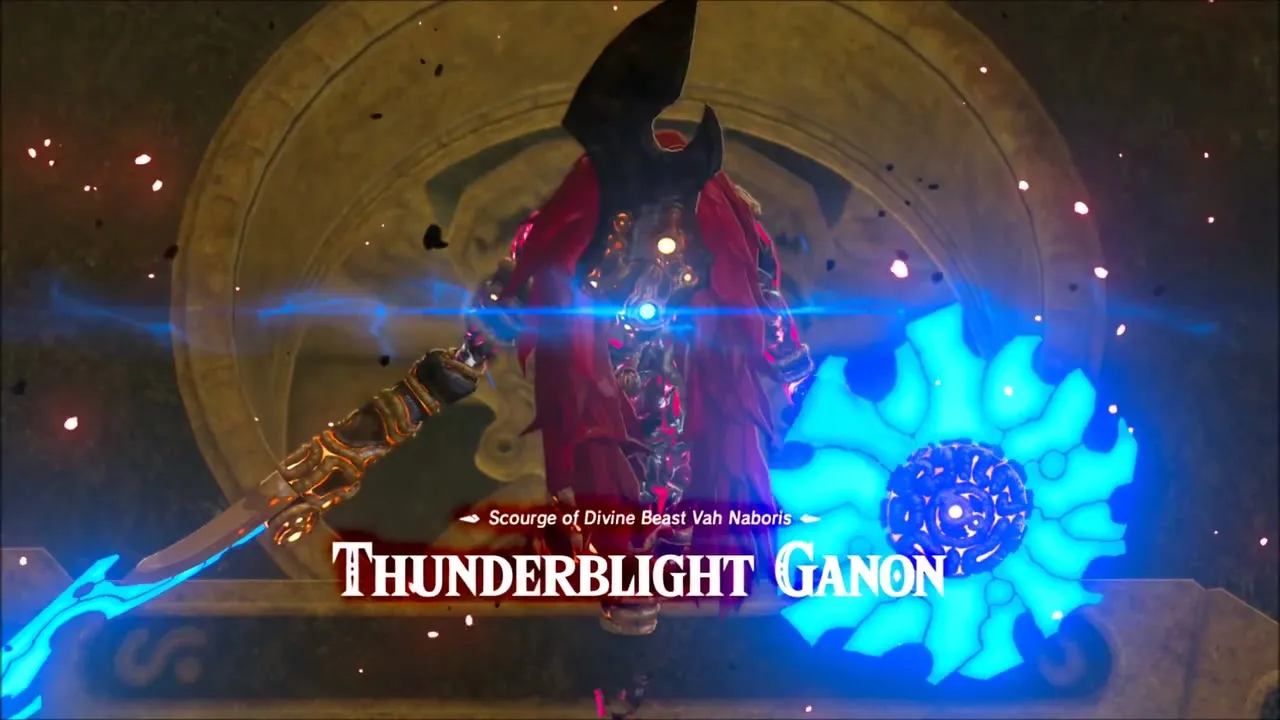
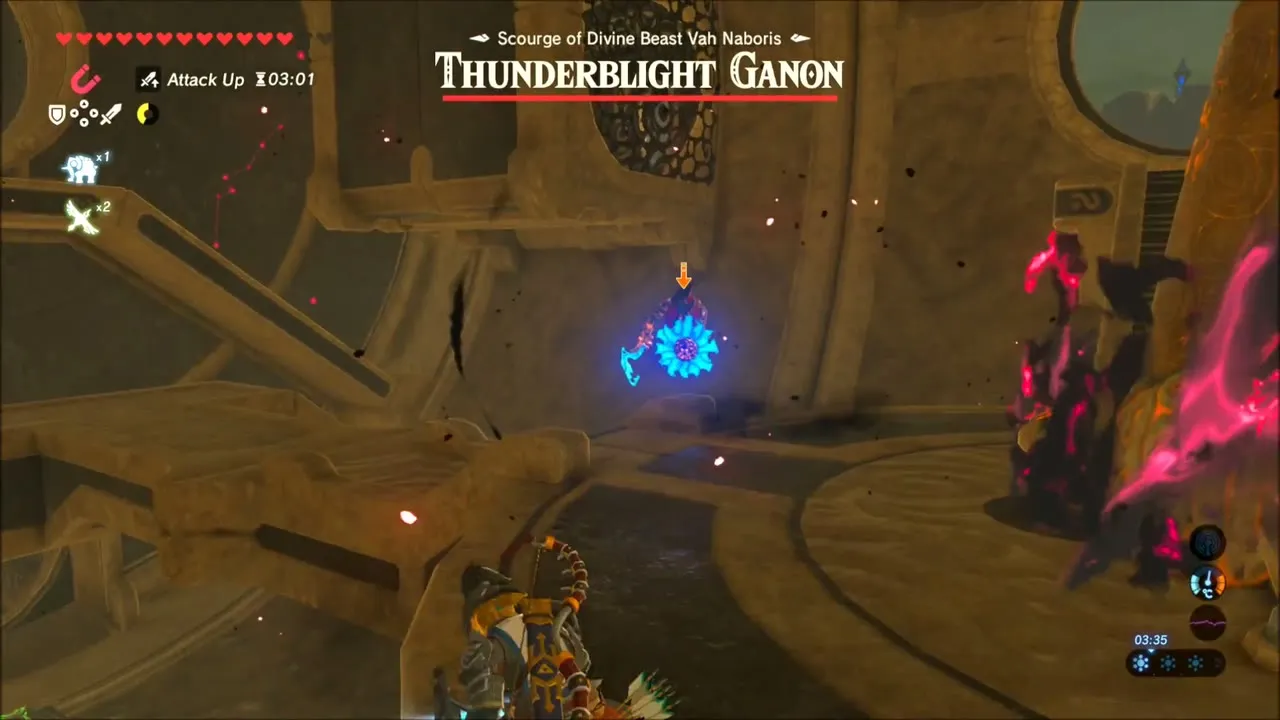
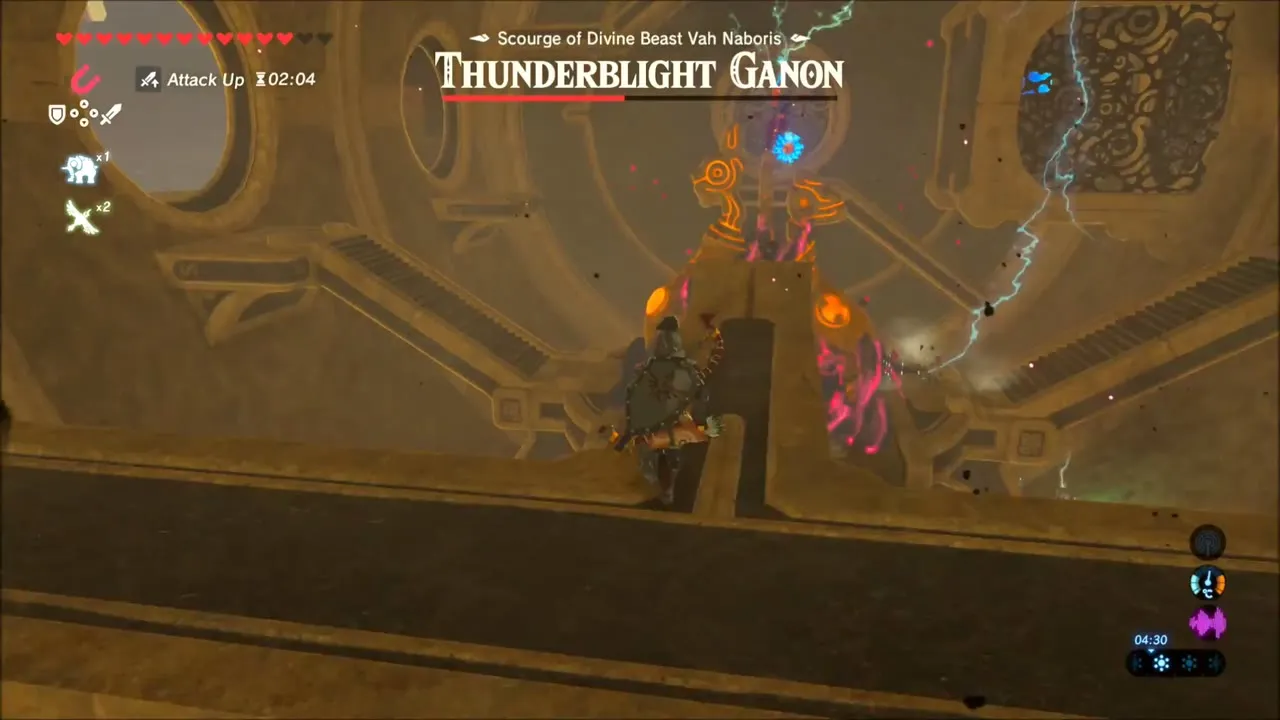
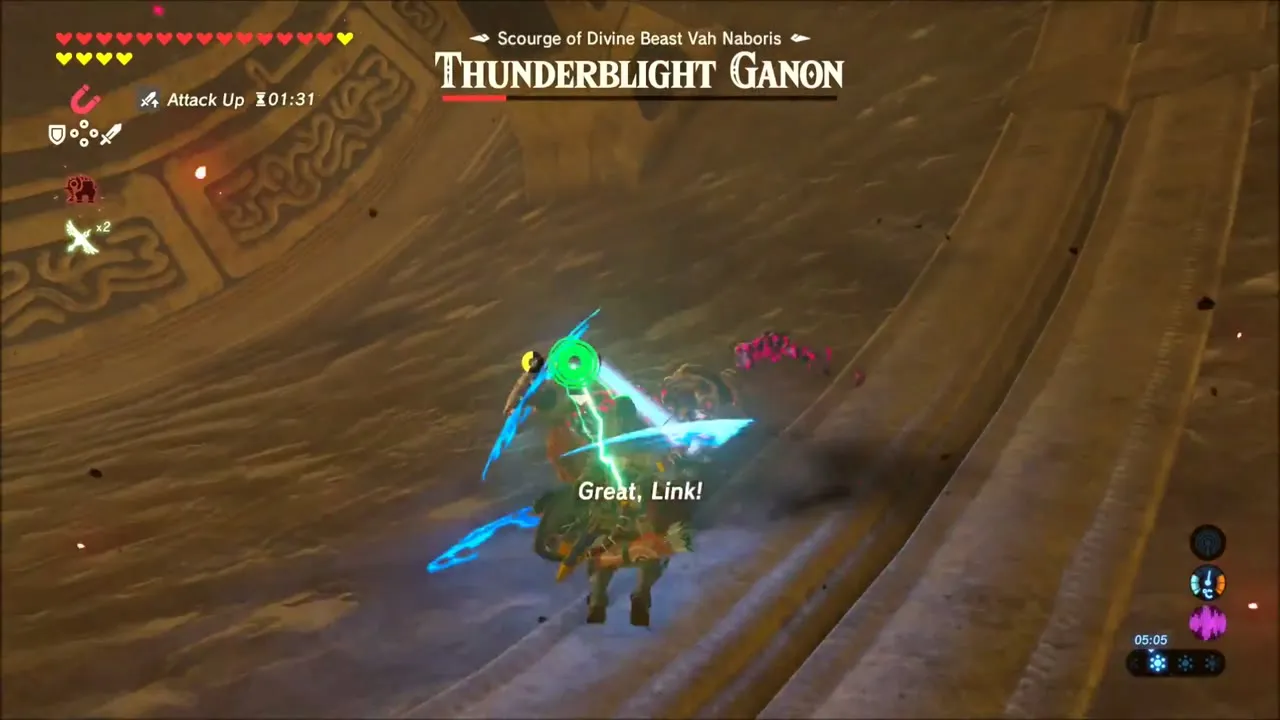
From the shadows emerges Thunderblight Ganon, the deadly scourge inhabiting Divine Beast Vah Naboris. This isn’t just any monster – it’s one of Ganon’s own blights, a phantom charged with the fury of lightning and the speed of a striking hawk. The moment it appears, you can feel the air crackle with electricity. Thunderblight Ganon is a lithe, armored figure wielding a glowing sword and shield, moving erratically with supernatural agility. But fear not – you’ve come prepared, and this battle, while challenging, is absolutely winnable with some savvy tactics.
Phase 1: Thunderblight Ganon wastes no time and lunges at you with blinding speed. It teleports around the room in flashes of light, often reappearing right above or behind you to deliver a quick slash. Keep your Lock-On (ZL) focused on the boss so you can track it as best as possible. The key here is defense and timing. Hold up your shield to block sudden attacks – if you have a metal shield, be cautious of the lightning (though the boss’s melee strikes won’t shock you through the shield, only its electric orbs can). The boss might also shoot out electrified energy blasts occasionally; you can strafe to avoid these or raise your shield to block.
Watch Thunderblight’s movements closely. When it pauses and gathers electricity on its blade, it’s likely about to dash forward in a straight line attack. This is your opportunity: just as it is about to strike, perform a side hop or backflip depending on the angle of attack. If your timing is spot-on, you’ll trigger a Flurry Rush, allowing you to rain counterattacks in slow-motion. A Flurry Rush with a decent sword or strong weapon can take out a good chunk of its health. Another approach during this phase is to use Stasis+ (if you’ve upgraded your Sheikah Slate). Hitting Thunderblight with Stasis will freeze it for a brief moment; while frozen, whack it a few times or line up a headshot with an arrow to deal damage. Just be aware it will break out quickly, so be ready to dodge again. Don’t be discouraged if you miss some openings – this foe is meant to be fast and test your reflexes. Keep chipping away at its health with careful hits whenever you safely can. After enough damage, roughly half its health bar, Thunderblight Ganon will roar and change its pattern.
Phase 2: Now the boss adds a new trick. Thunderblight will rise high and conjure several large metal spikes/drill bits, then fling them into the ground around the arena. These spikes will stick upright, usually in clusters near you. A second later, you’ll see them begin to surge with electricity and act like lightning rods. If you’re too close to one when it’s charged, you’ll get zapped, so try to keep some distance from the spikes once they land. The boss might hide above, out of reach, while doing this. So how to deal with this? This is where Magnesis comes into play again. Target one of those metal spikes with your Magnesis rune and pull it out of the ground. You can now move this metal rod freely through the air. Here’s the trick: use the spike against the boss. Thunderblight Ganon will soon draw lightning from the sky towards itself (a sphere of electricity will envelop it briefly before the strike). If you maneuver one of the magnetized spikes right up to the boss at that moment, the lightning will course through the metal object and shock the boss, causing it to fall to the ground stunned. It’s a bit poetic – turning the boss’s own weapon into its downfall.
If pulling off the Magnesis counter feels too tricky, you can also survive this phase by simply avoiding the spikes and waiting it out. Eventually Thunderblight will stop summoning lightning and come back down to fight you directly again, but as long as the spikes remain, the threat of random lightning strikes continues. So it’s best to deal with them. Once you do manage to stun Thunderblight (either via the Magnesis trick or by catching it off-guard with an arrow while it’s summoning lightning), it will crash down, momentarily defenseless. Rush in and mash your strongest melee attacks during this opening. Two-handed weapons like a claymore do massive damage here, or unleash a flurry of quick strikes with a one-handed sword. You want to capitalize on every stun to whittle down that health.
Thunderblight Ganon will rinse and repeat these tactics – zipping around with quick strikes, occasionally doing the lightning rod attack. Maintain your focus. Use healing items if your hearts get low (it’s wise to have a meal or two that grants shock resistance or extra hearts for this fight). Every time you knock it down, you’re closer to victory. In its final sliver of health, Thunderblight might get even more aggressive, but by now you’ve learned its patterns. A few more well-aimed hits and the furious blight is defeated. With a final roar, the creature disintegrates in a burst of light and dark mist.
As the dust settles, you’re rewarded with a Heart Container that materializes where the boss fell. Don’t forget to pick that up, boosting your health by one. Now approach the main control unit one last time. Activating it will pacify Divine Beast Vah Naboris for good. In a touching scene, the spirit of Urbosa, the Gerudo Champion of old, appears before you. She praises your bravery and thanks you for freeing her beloved city from Naboris’s threat. In a show of gratitude, Urbosa bestows upon you Urbosa’s Fury – a powerful Champion ability. This ability allows you to charge up a massive lightning strike by holding your attack button (after a charge, releasing unleashes a dome of lightning that obliterates most enemies around you). It’s an incredible power that will serve you well on the rest of your journey. Urbosa’s spirit then takes control of Naboris, and you’ll witness the giant Divine Beast climb atop a distant cliff in the Gerudo Desert. With a resounding ancient mechanism sound, it aims a red laser beam toward Hyrule Castle, ready to assist when the final battle with Calamity Ganon begins.
Link (you) are transported safely back to the ground at Gerudo Town’s entrance, where Riju and her people are waiting. The Gerudo chief is overjoyed and thanks you sincerely. In recognition of your heroism, Riju officially offers you the Treasure of the Gerudo: the Scimitar of the Seven, a regal curved sword once wielded by Urbosa herself, and the Daybreaker shield, an ornate Gerudo shield of exceptional craftsmanship. (Make sure to have a free weapon and shield slot to take these!). These items are not only powerful but also have great sentimental value in Gerudo lore. Surrounded by cheering Gerudo guards, you’ve completed the quest to calm Divine Beast Vah Naboris and have earned the Gerudo’s respect.
Optional: Post-Quest – “The Thunder Helm“ – Although you returned the Thunder Helm to Riju, did you know you can actually borrow it for yourself? After defeating Naboris, if you examine the Thunder Helm on display next to Riju and speak with her about it, she’ll mention that many Gerudo citizens still have unresolved troubles. Riju promises to loan you the Thunder Helm if you help every last person in town with their concerns. This initiates “The Thunder Helm” side quest. Essentially, you must complete all the Gerudo Town side quests (which include the optional ones listed earlier: solving Dalia’s water problem, helping Isha with her flints, delivering Molduga guts to Malena, finding the missing guard Barta out in the far desert, and uncovering the secret club code). Once you’ve proven yourself by doing all these good deeds, speak to Riju again. True to her word, she lets you keep the Thunder Helm. Wearing it gives you the power to nullify lightning strikes – a very fitting reward and a point of pride, showing that you’ve helped the Gerudo with every challenge they faced.
Chests Inside Vah Naboris
Every treasure chest in the beast, in the order you usually reach them. Weapons in chests follow difficulty scaling: the more enemies you have defeated, the better the version you find (for example Royal rather than Knight’s).
| Contents | Where | |
|---|---|---|
| Ancient Core | Chest hanging by a rope near the Guidance Stone: Stasis it, shoot the rope, pull it in with Magnesis |
| Knight’s Bow | Platform above the pylon (Knight’s Bow or Royal Bow, depending on difficulty scaling) |
| Ancient Shaft | Same platform above the pylon |
| Ancient Spring | Behind the bombable wall off the centre door |
 | Knight’s Shield | End of the rotating corridor of spikes and lasers (Knight’s or Royal Shield, depending on difficulty scaling) |
 | Topaz | Far hump, near a moving platform |
| Ancient Screw | High platform on the tail-side hump |
| Bomb Arrows | one of the chests reached by rotating the rooms |
Vah Naboris rewards
| Reward | Where you get it | |
|---|---|---|
| Heart Container | Dropped by Thunderblight Ganon |
| Urbosa’s Fury | Urbosa’s spirit, at the main control unit | |
| Scimitar of the Seven (attack 32, durability 60) | Chest beside Riju, Gerudo Town palace |
| Daybreaker (durability 60) | Stand beside Riju, with the scimitar |
How the Divine Beasts Help in the Final Battle
Once freed, each beast climbs to a lookout and aims at Hyrule Castle. When you enter the Sanctum during Destroy Ganon, every beast you freed fires a beam at Calamity Ganon, and each beam removes one eighth of his 8,000 health. Every beast you did not free releases its Blight Ganon, at 2,000 health, for you to beat first. The Champion abilities also recharge three times faster inside the castle. See the Hyrule Castle and Calamity Ganon walkthrough chapters for the route and the fight.
| Divine Beasts freed | Calamity Ganon’s health when the fight starts | Blight Ganons to beat first |
|---|---|---|
| 0 | 8,000 of 8,000 | 4 (2,000 health each) |
| 1 | 7,000 of 8,000 | 3 (2,000 health each) |
| 2 | 6,000 of 8,000 | 2 (2,000 health each) |
| 3 | 5,000 of 8,000 | 1 (2,000 health each) |
| 4 | 4,000 of 8,000 | None |
After Calamity Ganon falls, Dark Beast Ganon is fought on Hyrule Field with the Bow of Light; the Divine Beasts take no part in that last stage.
The Champions’ Ballad: Each Beast’s Divine Trial
In The Champions’ Ballad DLC, each Champion’s song has you clear three new shrines near that beast’s region to earn three emblems. With all three, return to the Divine Beast: instead of the interior, it pulls you into an illusory realm for a rematch with its Blight Ganon at 1,500 health. Win and Kass plays the Champion’s song, a new memory plays, and the Champion’s ability is upgraded. The full route is in the Champions’ Ballad walkthrough.
| Divine Beast | Quest | Shrines for the emblems | Rematch | Gear in the trial | Reward | |
|---|---|---|---|---|---|---|
| Vah Ruta | EX Champion Mipha‘s Song | Mah Eliya, Sato Koda, Kee Dafunia | Waterblight Ganon (1,500 health) | Provided only: tridents, a bow with a few arrows, Remote Bombs and Zora armor | Mipha’s Grace+ (recharges much faster) |
| Vah Rudania | EX Champion Daruk‘s Song | Rinu Honika, Kamia Omuna, Sharo Lun | Fireblight Ganon (1,500 health) | — | Daruk’s Protection+ (recharges faster) |
| Vah Medoh | EX Champion Revali‘s Song | Noe Rajee, Shira Gomar, Kiah Toza | Windblight Ganon (1,500 health) | — | Revali’s Gale+ (recharges faster) |
| Vah Naboris | EX Champion Urbosa‘s Song | Keive Tala, Takama Shiri, Kihiro Moh | Thunderblight Ganon (1,500 health) | Provided only: the Scimitar of the Seven, the Daybreaker, Desert Voe armor and a little food | Urbosa’s Fury+ (recharges much faster) |
Only the Vah Ruta and Vah Naboris trials take away your own gear and hand you a set kit; in all four, plan to win with what the trial allows, keep spare weapons for the rematch with Windblight Ganon, and lean on the Champion’s ability you are about to upgrade.
The Divine Helms
Each beast has a matching helmet that is only available from amiibo: scanning that Champion’s amiibo summons a chest, and the Divine Helm is one of the possible contents. All four start at 4 defense and reach 28 at four stars, give Guardian Resist Up on top of their own effect, and can stand in for the Ancient Helm in the Ancient Set bonus. Upgrade costs and fairy tiers are in the armor guide.
| Helm | Divine Beast | Effect | Defense (base → ★★★★) | How to get it | |
|---|---|---|---|---|---|
| Vah Ruta Divine Helm | Vah Ruta | Swim Speed Up, Guardian Resist Up | 4 → 28 | Scan the Mipha amiibo |
| Vah Rudania Divine Helm | Vah Rudania | Flame Guard, Guardian Resist Up | 4 → 28 | Scan the Daruk amiibo |
| Vah Medoh Divine Helm | Vah Medoh | Cold Resistance, Guardian Resist Up | 4 → 28 | Scan the Revali amiibo |
| Vah Naboris Divine Helm | Vah Naboris | Electric Resistance, Guardian Resist Up | 4 → 28 | Scan the Urbosa amiibo |
Champion Weapons
Each settlement leader hands over its Champion’s weapon after the beast is freed. If one breaks, the settlement’s blacksmith can forge a replacement for materials and Rupees.
| Weapon | Champion | Attack | Durability | Where you get it | |
|---|---|---|---|---|---|
| Lightscale Trident | Mipha | 22 | 70 | King Dorephan, Zora’s Domain throne room |
| Boulder Breaker | Daruk | 60 | 60 | Chest in Bludo‘s house, Goron City |
| Great Eagle Bow | Revali | 28 | 60 | Chest beside Kaneli, Rito Village |
| Scimitar of the Seven | Urbosa | 32 | 60 | Chest beside Riju, Gerudo Town palace |
| Daybreaker | Urbosa | — | 60 | Stand beside Riju, with the scimitar |
Notes
- Blight health in the data is 800–2,000 inside the beasts, so every boss gets tougher the later you fight it.
- All four beasts need Magnesis and Stasis; Cryonis is essential for Vah Ruta, and Bomb Arrows (handed to you by Teba and Riju) for Vah Medoh and Vah Naboris.
- Malice in the beasts hurts on contact. Shoot the glowing eye in each patch to clear it, and kill the skull-spitting maws before they surround you.
- Pick up the Heart Container before you touch the main control unit again after each Blight Ganon.
