


Alright, crew! So you’re exploring Koholint Island in the awesome Link’s Awakening remake for Switch, huh? Sweet! But let’s be real, some of those dungeon bosses can be a real pain if you don’t know their tricks. No worries, I got your back. Here’s the lowdown on how to take down every major baddie standing between you and waking the Wind Fish. Grab your sword, maybe a fairy or two, and let’s get wrecking!
Link’s Awakening Bosses
- Moldorm (Tail Cave – Level 1)
- Genie (Bottle Grotto – Level 2)
- Slime Eye (Key Cavern – Level 3)
- Angler Fish (Angler’s Tunnel – Level 4)
- Slime Eel (Catfish’s Maw – Level 5)
- Façade (Face Shrine – Level 6)
- Evil Eagle (Eagle’s Tower – Level 7)
- Hot Head (Turtle Rock – Level 8)
- Shadow Nightmare (Wind Fish’s Egg – Final Boss)
Okay, let’s start at the beginning and work our way through.
Moldorm (Tail Cave – Level 1)

First up is Moldorm in the Tail Cave. This slithery dude is pretty straightforward but super annoying. Your goal is simple: smack the glowing bit on its tail with your sword. The catch? Every hit makes Moldorm faster and angrier. Plus, the arena is tiny, and if it knocks you into the pit, you gotta start the damage count all over again! Use that Roc’s Feather you found to jump over Moldorm when it lunges – this helps you get behind it for a clean shot at the tail. Try using your shield too; sometimes it can block a hit and stop you from flying off the edge, but don’t count on it every time. Just be patient, dodge its charges, aim for the tail, and four good hits will send it packing.
Genie (Bottle Grotto – Level 2)

Next, deep in the Bottle Grotto, you’ll face the Genie. This guy hangs out in a bottle, chucking fireballs. This fight happens in two stages. For the first part, you need to dodge his fireballs. Keep moving! After a bit, he’ll hide back in his bottle and bounce around. Now’s your chance! Hit the bottle with your sword to stun it. Then, using the Power Bracelet you picked up earlier, grab that bottle and chuck it hard against a wall. You’ll need to do this three times.
Once the bottle shatters, the Genie is out for phase two! He’ll create a shadowy clone, and they’ll circle you before the real Genie throws a big fireball. Dodge that blast! Right after throwing, the real Genie (the one that looks solid, not see-through) will be stunned for a moment. Rush in and slash him! Three hits on the real Genie finishes him off for good.
Slime Eye (Key Cavern – Level 3)

Inside the Key Cavern waits Slime Eye, a giant eyeball monster dangling from the ceiling. This one looks nasty, and you need a specific move to even start the fight. You absolutely need the Pegasus Boots from this dungeon. See that cracked-looking wall section opposite the door? Equip those boots and ram into that wall full speed! This impact shakes the room and makes Slime Eye drop down.
Now the fight’s really on. Keep charging the slime with your Pegasus Boots and sword combo. Hit it enough, and it’ll start trying to split into two separate eyes. This is the crucial part: as it’s pulling apart, you must charge with your boots right through the slime connecting the two halves to cut them apart. If you miss this window, they’ll eventually rejoin. Once separated, you’ve got two smaller eyes bouncing around. Their weak spot is the actual eye. Slash ’em whenever you get a chance. Just watch out – when one jumps really high, it’s about to slam down, stunning you and possibly making rocks fall. Keep moving, keep slashing those eyes!
Angler Fish (Angler’s Tunnel – Level 4)
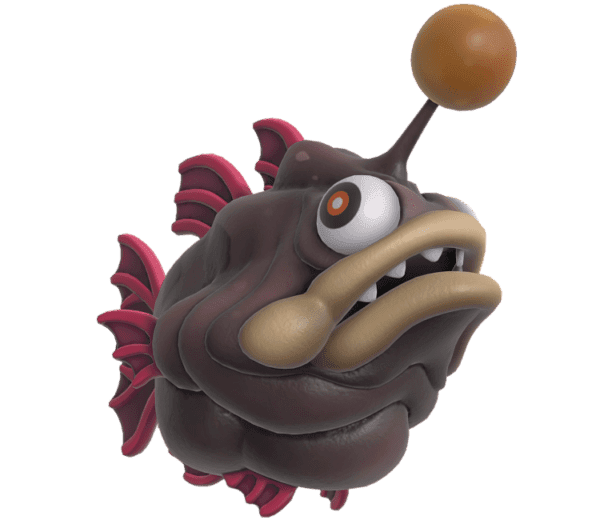
The Angler Fish in Angler’s Tunnel looks pretty mean, but honestly, this fight’s surprisingly straightforward. Make sure you have the Flippers to swim in this underwater area. Your strategy? Get aggressive! Swim right up to the fish’s face, near that dangly light on its head. Then just wail on it with your sword. Keep slashing!
It’ll sometimes charge towards the wall – just dodge out of the way and get right back in its face. It might also summon some smaller fish or cause blocks to fall from above, but don’t get too distracted. Your main focus should be constantly attacking the big fish’s weak spot. Stay on top of it, keep the pressure on, and this fishy foe will sink fast.
Slime Eel (Catfish’s Maw – Level 5)
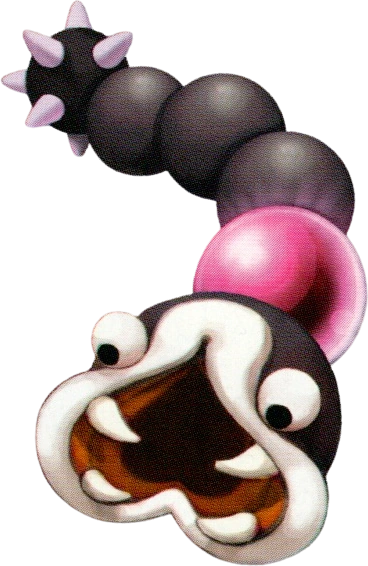
Welcome to Catfish’s Maw and the Slime Eel! This fight is a bit unique. There’s a central body hidden in the wall, a nasty spiked tail swinging through the middle of the room, and four holes where eel heads pop out. You absolutely need the Hookshot you find in this dungeon. Stay near the middle of the room so you have space to dodge that swinging tail – getting hit stuns you and hurts.
Keep an eye on the four holes. Randomly, an eel head will poke out. Quickly target its head or neck with your Hookshot and fire! You’ll snag it and pull its body partly out of the wall, revealing a glowing, vulnerable section. Rush over and slash that weak spot as many times as you can before it retreats. Sometimes two heads pop out; just focus on hooking one. Repeat this process – dodge the tail, hook the heads, slash the weak spots – until it’s done.
Façade (Face Shrine – Level 6)
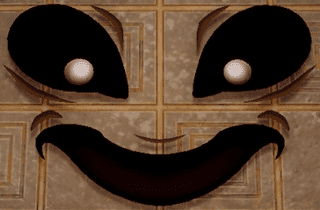
Get ready for Façade in the Face Shrine, a boss that is the room! It’s literally just a face that appears on the floor and attacks using the room itself. All you need here are your Bombs. First, floor tiles will peel off and fly straight at you. Keep moving or block them with your shield. After the tiles, pots might drop from above, so don’t stand still!
Eventually, the face, Façade, will appear somewhere on the floor and start taunting you. That’s your cue! Run over and quickly drop a Bomb right on top of it. Boom! It’ll disappear, and the cycle of flying tiles and falling pots starts again. Just keep dodging the hazards and planting bombs on the face whenever it shows itself. About five or six well-placed explosions will wipe that smug look right off its… well, face.
Evil Eagle (Eagle’s Tower – Level 7)

High atop Eagle’s Tower, you face the Evil Eagle, ridden by the Grim Creeper. This battle takes place on a platform with the wind howling – don’t get blown off! The Hookshot is useful here, and the Mirror Shield you find in the tower helps a ton. The fight shifts perspective a bit. When you see the Eagle from the side, stay near the middle. It’ll swoop down; jump with Roc’s Feather and slash it as it passes. It also shoots feathers – block these with your shield (Mirror Shield works best). If it hovers near the edge, quickly hit it with your Hookshot to stun it and deal some damage.
Sometimes the Eagle flies further back and starts flapping its wings like crazy, creating a strong wind to push you off the tower. When this happens, immediately hold up your Mirror Shield and brace yourself against the edge of the screen, facing the wind. Just hold your ground until it stops! After the wind, it might charge right at you. Jump and slash or use the Hookshot again. Keep repeating this pattern – dodge, block, attack when possible, and brace against the wind – and you’ll eventually ground this bird.
Hot Head (Turtle Rock – Level 8)

Inside Turtle Rock, the final Instrument guardian awaits: Hot Head! This boss is basically a living fireball that leaps out of the lava pool. You’ll need the Magic Rod you get from the dungeon’s mini-boss to even hurt this guy. Hot Head constantly spits fireballs or makes lava splash up, so keep moving to avoid getting burned.
Wait for Hot Head to leap out of the lava in its fiery ball form. As soon as it’s airborne, blast it with your Magic Rod! A direct hit will cool its outer shell, revealing its vulnerable core. Now you can damage it! Keep blasting it with the Magic Rod. It will eventually shatter, then reform in the lava. Just repeat the process: dodge the fire, wait for it to jump, hit it with the Magic Rod, then keep firing until it shatters again. Do this enough times, and Hot Head is toast!
Shadow Nightmare (Wind Fish’s Egg – Final Boss)
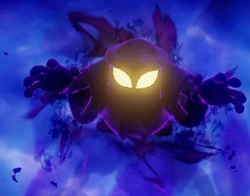
Alright, this is it! Inside the Wind Fish’s Egg lies the final challenge: the Shadow Nightmare. This boss is a shapeshifter, taking on forms based on enemies you’ve fought before (or from other Zelda games!). Get ready for a multi-stage marathon that tests everything you’ve learned.
First, it takes the form of a giant bouncing blob (Giant Zol). This part’s weirdly easy – just sprinkle Magic Powder on it three times. Seriously, that’s it for phase one.
Next, it morphs into Agahnim’s Shadow from A Link to the Past! He shoots energy balls at you. Time your sword swings perfectly to bat the balls right back at him. Avoid his other attack where four balls make an X pattern. Keep reflecting his main shot back until he changes form again.
Then, get ready for Moldorm’s Shadow. Yep, it’s like fighting Moldorm all over again, but faster and meaner. Same strategy applies: hit the tail! Use Roc’s Feather to dodge and get good angles.
After Moldorm, it shifts into Ganon’s Shadow, specifically his A Link to the Past pig form! He’ll throw his spinning trident and summon fiery bats. Dodge these! The best way to hit him is to use your Pegasus Boots combined with your sword for a dash attack right into him. Spin attacks work too if you can time them well.
The fifth form is a fast-moving Lanmola-like worm that burrows around. It’s tough to hit. Your best bet is to zap it with the Magic Rod right when it surfaces, or try to snag it with the Hookshot and then slash away quickly.
Finally, the Shadow Nightmare reveals its last form: DethI. A giant, single eye with two swinging arms. This is it! Equip Roc’s Feather and your sword. Jump over the swinging arms and slash downwards at the eye repeatedly. If you have the Bow and Arrows, you can also shoot the eye from a distance, which is much safer! Keep jumping, keep dodging those arms, and keep hitting that eye until it finally closes for good.
And there you have it! Every major boss on Koholint Island, broken down. It might take a few tries, especially on the later ones, but stick with these strategies, keep your cool, and you’ll conquer them all. Congrats on beating the game (or getting close!), and enjoy that bittersweet ending! Go wake that Wind Fish!