Welcome, brave adventurer, to the vast and vibrant Great Sea of The Legend of Zelda: The Wind Waker! While this ocean world is full of charming islands, colorful characters, and hidden discoveries, danger lurks around every corner and beneath every wave. Link’s epic journey to save his sister and confront the shadow threatening the world is challenged by a host of unique enemies and treacherous hazards, each brought to life with the game’s iconic cel-shaded art style.
This compendium is your essential guide to identifying, understanding, and conquering every foe you’ll encounter during Link’s seafaring quest. From the mischievous Miniblins swarming islands and the common ChuChus hopping across the land, to the imposing Moblins guarding fortresses, the intimidating Darknuts testing your swordsmanship, and strange magical entities like Wizzrobes and Poes haunting ancient ruins – knowledge is your greatest weapon. We also cover environmental hazards like deadly Blade Traps, watchful Beamos statues, and cannon-firing Warships that test your skill and awareness on the open sea.
Browse the comprehensive list below to find detailed information on each enemy. You’ll discover their descriptions, common locations, typical attack patterns, effective strategies and weaknesses, and the valuable spoils (like Rupees, Hearts, Joy Pendants, and more) they might leave behind.
Master these details, prepare your sword arm, and no creature of the Great Sea will stand in your way for long!
Table of Contents
Armos
Description: Small, gray, living statues that hop towards Link. They have spikes on their base.
Location: Common in dungeons (like Tower of the Gods) and caves across the Great Sea.
Attacks/Behavior: Remain still until Link approaches, then hop towards him attempting to damage him with their spiked base. Make grunting and hopping sounds.
Strategy/Weakness: Immune to most attacks from the front. Their weak point is the large, red jewel on their back. Stun them with an Arrow (even from the front), then quickly run behind and slash the jewel twice with the Sword. They will frenzy briefly before exploding.
Spoils: Rupees, Hearts, Bombs.
Armos Knight
Description: Much larger versions of Armos, resembling armored knights. They stand significantly taller than Link.
Location: Found as mini-bosses or strong enemies in dungeons like the Tower of the Gods and the Savage Labyrinth.
Attacks/Behavior: Stomp towards Link, attempting to crush him. Periodically open their large, mechanical mouths.
Strategy/Weakness: Invulnerable to standard sword attacks and arrows. Wait for them to open their mouth, then quickly toss a Bomb inside. The internal explosion causes them to go berserk before self-destructing. Roll away to avoid the final explosion.
Spoils: Rupees, Hearts, Arrows.
Beamos
Description: Stationary, statue-like turrets with a single eye that acts as a sensor and weapon. In Wind Waker, they often have a stone, ancient look. Some rotate their eye (Red), while others keep it fixed (Blue).
Location: Found as obstacles in dungeons, notably Dragon Roost Cavern and the Tower of the Gods.
Attacks/Behavior: When their eye detects Link, they charge up and fire a straight energy beam.
Strategy/Weakness: Most Beamos can be destroyed. Their weak point is the eye. The most common way is by throwing a Bomb near their base or hitting the eye with an Arrow from the Hero’s Bow (often only vulnerable just before or while firing).
Spoils: None.
Big Octo
Description: Giant octopus monsters lurking under the sea, usually indicated by a large flock of circling seagulls. They create large whirlpools when they surface. Come in 4-eye, 8-eye, and 12-eye variants.
Location: Found at specific locations on the Great Sea: Seven-Star Isles, Tingle Island, Fire Mountain, Private Oasis, Diamond Steppe Island, Two-Eye Reef.
Attacks/Behavior: Create a whirlpool to suck in the King of Red Lions. Eyes periodically open.
Strategy/Weakness: Use the Boomerang to target multiple eyes at once (up to 5). Arrows or the ship’s Cannon also work but are slower. Each eye takes two hits (Boomerang counts as one hit per pass). Defeat all eyes before being sucked in.
Spoils: After defeat, they leave a shimmering light circle. Use the Salvage Arm here to pull up treasure, often including Pieces of Heart, Treasure Charts, or large amounts of Rupees. The one near Two-Eye Reef reveals a Great Fairy Fountain.
Blade Trap
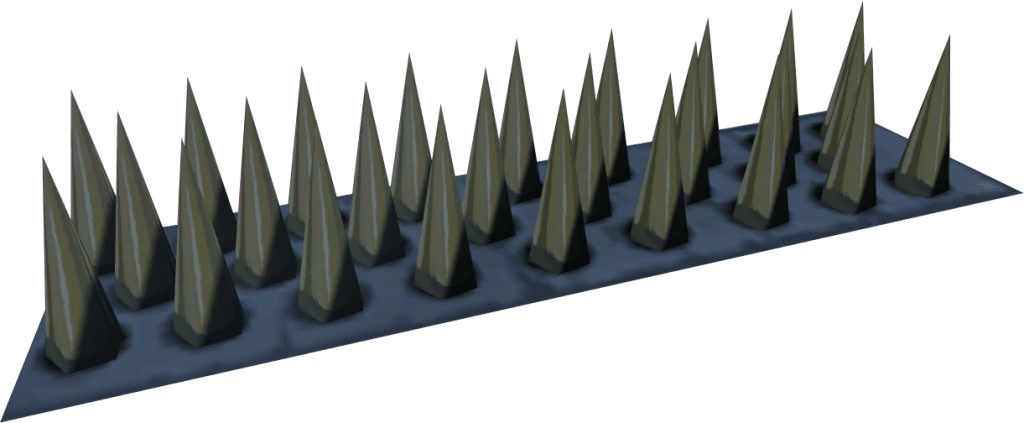
Description: (Hazard) Spiked metal traps, often square or rectangular, sometimes spinning. They slide or spin rapidly across the floor when Link approaches or crosses their path.
Location: Common hazard in many dungeons (e.g., Dragon Roost Cavern, Tower of the Gods, Earth Temple, Wind Temple).
Attacks/Behavior: Move predictably along set paths when triggered. Designed to damage Link on contact.
Strategy/Weakness: Usually indestructible. Observe their path and timing, then run past them when it’s safe. Sometimes they can be blocked by objects or triggered intentionally from a safe distance.
Spoils: None.
Blue Bubble
Description: Floating skulls engulfed in blue/purple mystical energy (sometimes referred to as cursed). Similar to Red Bubbles but with a different effect.
Location: Found in dungeons like the Tower of the Gods and the Earth Temple.
Attacks/Behavior: Float towards Link. Contact extinguishes the flame but inflicts a temporary curse that prevents Link from using his sword.
Strategy/Weakness: Use the Deku Leaf’s gust or the Boomerang to extinguish the cursed flame from a distance. This leaves the skull vulnerable, which can then be destroyed with the sword or other weapons.
Spoils: Rupees, Hearts.
Blue ChuChu
Description: The rarest variant of the ChuChu enemy, appearing as a blue gelatinous blob. (Note: In the Wind Waker HD remake, they possess an electric field, but this is not present in the original GameCube version).
Spoils: Blue Chu Jelly (required for valuable Blue Potions which restore health and magic), Rupees, Hearts.
Location: Very rare. Found only in specific hidden locations or challenging rooms across the Great Sea and certain dungeons. Tracking them down often requires guides or thorough exploration.
Attacks/Behavior: Hops towards Link to body-slam him. (In HD version, contact also causes electric shock).
Strategy/Weakness: Easily defeated with most weapons in the original GameCube version. (In HD version, stun with Boomerang or Deku Leaf first to negate electricity before attacking with the sword).
Boko Baba
Description: Carnivorous, plant-like enemies resembling venus fly traps, often found in grassy or wooded areas.
Location: Common in the Forest Haven area, Forbidden Woods, and various islands with vegetation.
Attacks/Behavior: Lie closed, resembling a large bud. When Link approaches, they snap open and lunge forward to bite or swallow him.
Strategy/Weakness: A few sword strikes will defeat them. However, a single hit from the Boomerang defeats them instantly.
Spoils: Boko Baba Seed (used for potions), sometimes leave behind a Boko Stick usable as a weapon/torch.
Bokoblin
Description: Common pig-like humanoid enemies, appearing in various colors (Green, Blue, Pink in Wind Waker). They often wield simple weapons like machetes or large sticks. Pink Bokoblins usually act as lookouts on rafts and platforms, using spyglasses.
Location: Found extensively throughout the Great Sea, including the Forsaken Fortress, various islands (like Forest Haven), dungeons, lookout platforms, and rafts. Some even hide in pots.
Attacks/Behavior: Primarily attack with their equipped weapon (sword swings, stick jabs). They may also kick. Green Bokoblins often carry shields. Pink Bokoblins sound alarms.
Strategy/Weakness: Relatively easy to defeat. Basic sword combos work well. You can stun them with the Boomerang. Landing a “Parry” counter-attack is effective. Use the Grappling Hook to steal their Joy Pendant before defeating them.
Spoils: Joy Pendant (often requires Grappling Hook), Rupees, Hearts. Boko Sticks can sometimes be picked up.
Cannon
Description: (Hazard/Weapon) Large cannons mounted on enemy Warships, lookout platforms, or within fortresses.
Location: Found on the Great Sea (Warships, platforms), Forsaken Fortress, Tower of the Gods (Gohdan fight).
Attacks/Behavior: Fire large cannonballs periodically or when the King of Red Lions boat comes within range. Gohdan’s hands shoot energy blasts, similar in function.
Strategy/Weakness: While sailing, use Link’s own ship cannon or Bombs (if close enough) to destroy them. Aim carefully as the boat rocks. Destroying them prevents further damage to Link’s boat.
Spoils: None directly, but destroying them aids survival and progression.
Dark ChuChu
Description: Amorphous, purple/black gelatinous blobs. They lack a defined shape compared to other ChuChus.
Location: Found in dungeons associated with darkness or curses, like the Earth Temple, Tower of the Gods, and the Savage Labyrinth.
Attacks/Behavior: Attempt to engulf or slam into Link. Immune to direct sword attacks in their normal state. Can divide or reform.
Strategy/Weakness: Immune to normal weapons. They solidify and turn to stone when exposed to bright light (either natural sunlight entering the dungeon or reflected light from the Mirror Shield). Once petrified, they can be picked up and thrown (which destroys them) or placed on floor switches. Light Arrows also defeat them instantly.
Spoils: Purple Chu Jelly (used for potions), Rupees, Hearts.
Darknut
Description: Formidable, heavily armored, Anubis-like knights wielding massive swords. They come in different armor colors signifying strength (White/Regular, Gold, Black/Mighty).
Location: Found in later-game dungeons like the Tower of the Gods, Hyrule Castle (especially the basement), Ganon’s Tower, and the Savage Labyrinth.
Attacks/Behavior: Powerful sword swings and thrusts. Heavily defended by their armor initially. Once armor is removed, they discard the heavy sword, draw a thinner blade, and become much faster and more agile.
Strategy/Weakness: Focus on removing their armor first. Use the “Parry” reaction command (press A just before they strike) to either knock off their helmet or slice the straps holding their body armor. With the helmet off, they are vulnerable to the Boomerang or Hookshot. With the body armor off, they are vulnerable to direct sword attacks. Be prepared for their faster second phase. Light Arrows can be effective, especially against the armored form. Ice Arrows can freeze them, allowing a Skull Hammer smash for an instant kill (especially useful late-game).
Spoils: Knight’s Crest (often requires Grappling Hook), Rupees, Hearts.
Dexivine
Description: Plant-like, pulsating blue tentacles ending in a purple claw or maw. They hide mostly underground or within tall grass.
Location: Found in grassy areas within the Forbidden Woods and the Wind Temple.
Attacks/Behavior: Emerge when Link approaches and attempt to grab him. If successful, they don’t deal direct damage but drain Link’s Magic Meter while slowly pulling him towards their base.
Strategy/Weakness: Cut them with the Sword, Boomerang, Bombs, or Skull Hammer. They are defeated easily but regrow almost immediately from the same spot. Best strategy is often to quickly cut them down and pass through the area before they respawn, or simply avoid them if possible.
Spoils: None.
Fire Keese
Description: Regular Keese (bats) that have become engulfed in flames.
Location: Found near torches, lava pools, or other fire sources, primarily in Dragon Roost Cavern and Fire Mountain.
Attacks/Behavior: Fly towards Link like normal Keese, but contact sets Link on fire and can burn his standard Wooden/Hero’s Shield.
Strategy/Weakness: Treat like normal Keese but maintain distance. Projectiles (Boomerang, Arrows) are safest. If they hit Link or a wall, the flame often extinguishes, reverting them to a normal (often stunned or defeated) Keese.
Spoils: Rupees, Hearts.
Floor Spikes
Description: (Hazard) Panels or sections of the floor from which sharp spikes periodically emerge and retract.
Location: Common trap in many dungeons.
Attacks/Behavior: Operate on a timer or trigger based on proximity/switches. Damage Link on contact when extended.
Strategy/Weakness: Indestructible. Observe the pattern and timing to safely walk or roll across when the spikes are retracted. Sometimes Iron Boots can prevent Link from being knocked back by them.
Spoils: None.
Floormaster
Description: Large, disembodied purple hands that emerge from dark, shadowy portals on the floor or sometimes the ceiling.
Location: Primarily found in dungeons like the Tower of the Gods and the Earth Temple. Also appears in the Savage Labyrinth.
Attacks/Behavior: Their main attack is to grab Link (or his partner in the Earth/Wind Temples) and forcibly drag him back to the entrance of the room or a previous area. They can sometimes throw objects. You can usually see their dark portal appear as a warning.
Strategy/Weakness: Attack the hand with the Sword when it fully emerges and becomes tangible. In the Earth Temple, they are particularly weak to light; shining light on them with the Mirror Shield can stun or destroy them. Defeat them quickly before they grab their target.
Spoils: Rupees, Hearts, sometimes Magic Jars.
Fog
Description: (Hazard) Areas of extremely dense fog on the Great Sea that severely limit visibility.
Location: Specific quadrants of the Great Sea, notably the area where the Ghost Ship initially appears before being charted. Sometimes associated with specific weather patterns or times of day.
Attacks/Behavior: Obscures vision, making navigation difficult without relying on the Sea Chart and Compass. Not an enemy to be fought.
Strategy/Weakness: Navigate carefully using the Sea Chart. Some fog banks may lift under certain conditions or after plot events. The Ghost Ship Chart helps navigate the fog associated with the Ghost Ship.
Spoils: None.
Green ChuChu
Description: Green variant of the common gelatinous blob enemy.
Location: Very common on islands, in caves, and dungeons.
Attacks/Behavior: Hops towards Link to body-slam him. Has the unique ability to temporarily flatten itself into an invulnerable puddle on the ground to avoid attacks.
Strategy/Weakness: Easily defeated with most weapons. Wait for it to reform if it flattens into a puddle before striking. Can be stunned with Boomerang or Deku Leaf.
Spoils: Green Chu Jelly (used for Green Potion), Rupees, Hearts.
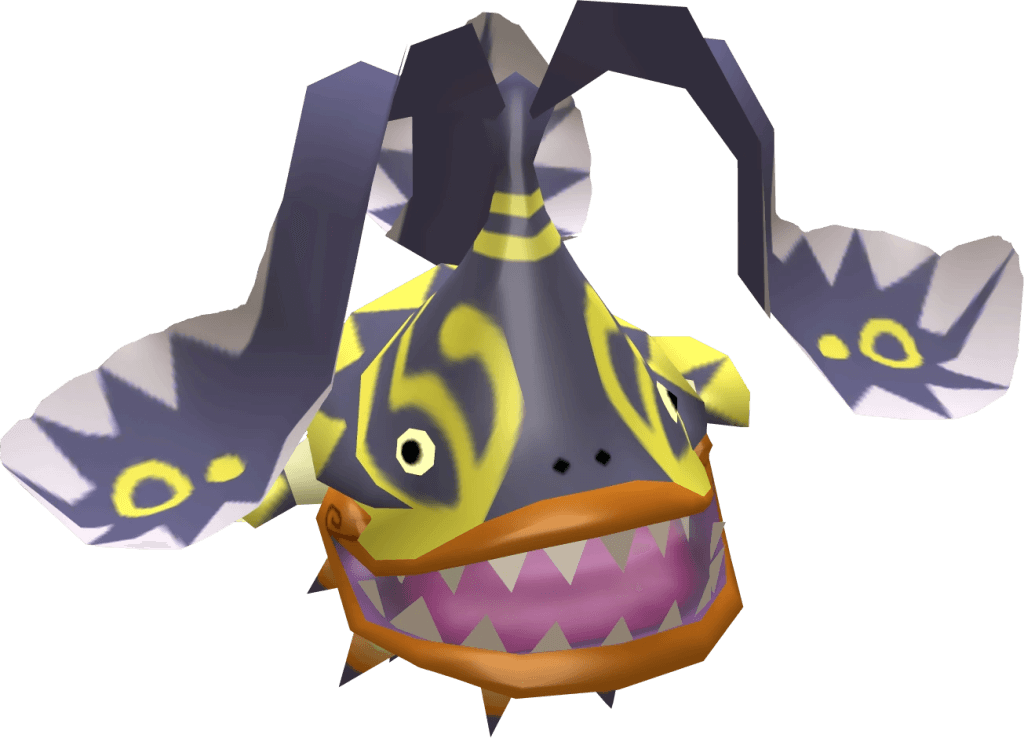
Gyorg
Description: Aggressive, purple shark-like enemies with armored heads. (Note: These are distinct from the boss Gyorg in Majora’s Mask).
Location: Found swimming in the Great Sea, often in packs near islands like Spectacle Isle or shadowing Warships.
Attacks/Behavior: Swim alongside the King of Red Lions, then leap out of the water in an arc to attack the boat or Link. Their armored heads protect them while swimming normally.
Strategy/Weakness: They are vulnerable when they leap out of the water. Hit them with the Boomerang (takes 2 hits) or shoot them with the Cannon or Arrows while they are airborne. Link can also sometimes jump over them using the boat’s hop function as they charge.
Spoils: Rupees, Hearts.
Kargaroc
Description: Large, aggressive bird-like creatures with colorful plumage.
Location: Found perched on cliffs or flying around islands, most notably Dragon Roost Island, but also appear elsewhere on the Great Sea and in the Wind Temple.
Attacks/Behavior: Circle in the air before swooping down to attack Link with claws or beak. Sometimes seen carrying Moblins or Bokoblins, dropping them into battle.
Strategy/Weakness: Can be defeated with sword strikes when they swoop low, or shot down with projectiles like the Boomerang or Arrows. The Hookshot also works well. Use the Grappling Hook to steal Golden Feathers.
Spoils: Golden Feather (collectible item used for rewards), Rupees, Hearts.
Keese
Description: Common bat-like enemies, typically black or dark blue.
Location: Abundant in dark areas like caves, dungeons (Dragon Roost Cavern, Forbidden Woods, etc.), and sometimes appear at night on islands.
Attacks/Behavior: Hang dormant from ceilings or fly around erratically, swooping down to bump into Link.
Strategy/Weakness: Very weak. Easily defeated with almost any weapon. Projectiles like the Boomerang or Arrows are effective for hitting them from a distance safely.
Spoils: Rupees, Hearts.
Magtail
Description: Large, fiery, centipede-like arthropods with a hard carapace.
Location: Found in volcanic environments, specifically Dragon Roost Cavern and Fire Mountain.
Attacks/Behavior: Slither around lava-filled rooms. When Link approaches, they rear up, exposing their single eye, and attempt to strike with large mandibles. Touching their fiery body deals damage.
Strategy/Weakness: Their body is heavily armored and fiery. Their only weak point is the large eye, vulnerable only when they rear up to attack. Hit the eye with the Sword or projectiles. Alternatively, dousing them with water from nearby pots or hitting them with an Ice Arrow will extinguish their flames and cause them to curl into a harmless, gray ball. In this state, they can be destroyed with further attacks or picked up and used to weigh down switches.
Spoils: Rupees, Hearts.

Mighty Darknut
Description: The strongest variant of Darknut, distinguished by their black armor, large shield, and flowing cape.
Location: Found late in the game, primarily in Hyrule Castle, Ganon’s Tower, and the deeper levels of the Savage Labyrinth.
Attacks/Behavior: Similar to regular Darknuts but more aggressive and better defended. Their shield blocks many frontal attacks, and the cape prevents Link from easily rolling behind to cut the armor straps using the standard Parry maneuver.
Strategy/Weakness: Removing the armor is harder due to the shield and cape. Focus on Parrying their attacks; sometimes the counter will knock the helmet off or provide an opening. Bombs can sometimes help. Once the armor is off, they fight like faster regular Darknuts. Ice Arrows + Skull Hammer combo is very effective.
Spoils: Knight’s Crest, Rupees, Hearts.
Miniblin
Description: Small, imp-like demons with purple skin, horns, and small tridents. Known for their annoying, distinctive “di-dink!” chatter.
Location: Appear in large numbers on certain islands (like Forsaken Fortress, Outset Island late-game, Private Oasis) and sometimes swarm the King of Red Lions boat.
Attacks/Behavior: Attack relentlessly in large groups, poking Link with their tridents. Individually weak but dangerous due to sheer numbers and persistence. They guffaw after attacking, leaving them briefly open.
Strategy/Weakness: Crowd control is key. Use the Spin Attack or Hurricane Spin to clear groups quickly. The Skull Hammer’s shockwave is also effective. They are easily distracted by All-Purpose Bait, allowing Link to bypass them.
Spoils: Rupees, Hearts (defeating large groups sometimes yields higher value Rupees).
Moblin
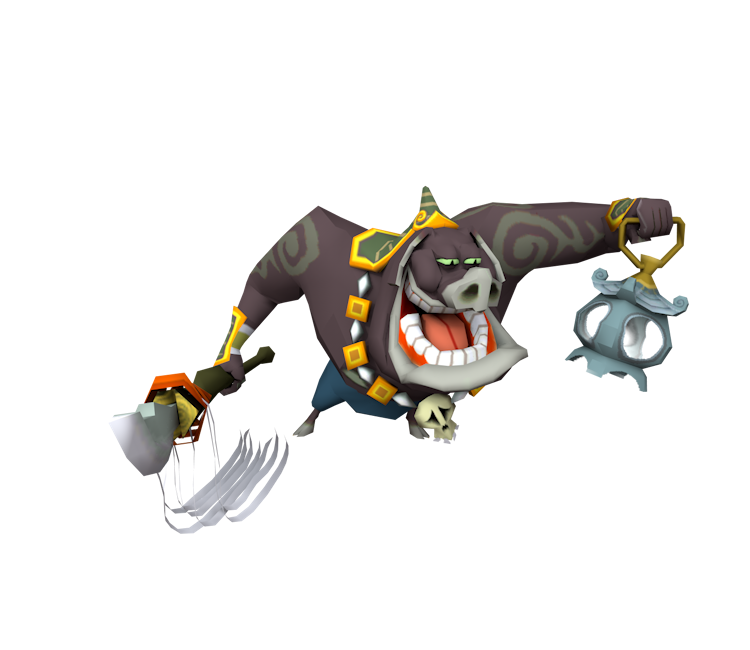
Description: Large, imposing, pig-snouted guards, significantly larger and tougher than Bokoblins. They wield long spears, and some carry glowing lanterns.
Location: Common guards in the Forsaken Fortress, also found on various islands, in caves, lookout platforms, and the Savage Labyrinth.
Attacks/Behavior: Patrol set routes or stand guard. Attack with powerful spear jabs and wide swings. Their lantern can be used to light Link on fire (?). They have a distinct, heavy footstep sound.
Strategy/Weakness: Their attacks are powerful but often slow. Use the Parry command to counter their spear thrusts effectively. Stun them with the Boomerang or Deku Leaf. Bombs can also be effective. Use the Grappling Hook to steal their Skull Necklace.
Spoils: Skull Necklace (collectible item used for rewards), Rupees, Hearts. The Lantern can sometimes be picked up after defeat (useful for lighting torches).
Molgera Larva
Description: Large, sand-dwelling snake or worm-like creatures with huge mouths. They are the offspring of the Wind Temple boss, Molgera.
Location: Appear exclusively during the Molgera boss fight in the Wind Temple.
Attacks/Behavior: Emerge from the sand pit where Molgera resides. Lunge at Link with their large, snapping jaws. Primarily serve as additional threats during the main boss encounter.
Strategy/Weakness: Defeated with standard sword attacks. Focus primarily on the main boss (Molgera), but dispatch the larvae quickly when they appear to avoid being overwhelmed. The Hookshot is used on Molgera’s tongue, not the larvae.
Spoils: None (part of the boss encounter).
Morth
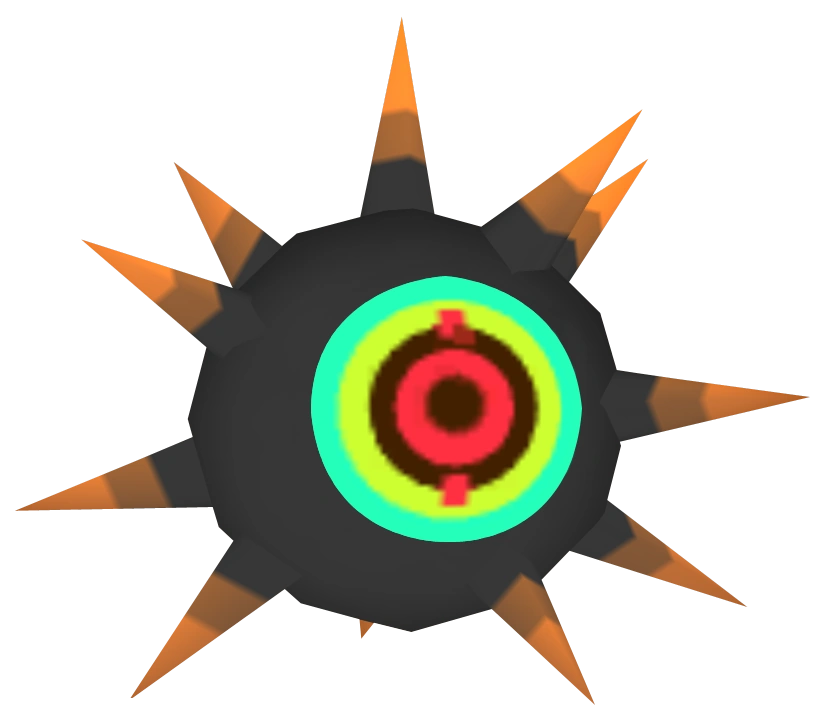
Description: Small, spiky, black fluffball-like creatures with a single large eye. They are Mothula larvae.
Location: Found mainly in the Forbidden Woods, often deployed by Mothulas or found clinging to surfaces.
Attacks/Behavior: Harmless individually. They launch themselves at Link and cling to him in large numbers. They don’t deal damage but weigh Link down, drastically reducing his movement and attack speed.
Strategy/Weakness: Easily removed with a Spin Attack, which detaches all clinging Morths simultaneously. A gust from the Deku Leaf also works. The Boomerang can defeat them from a distance.
Spoils: None.
Mothula
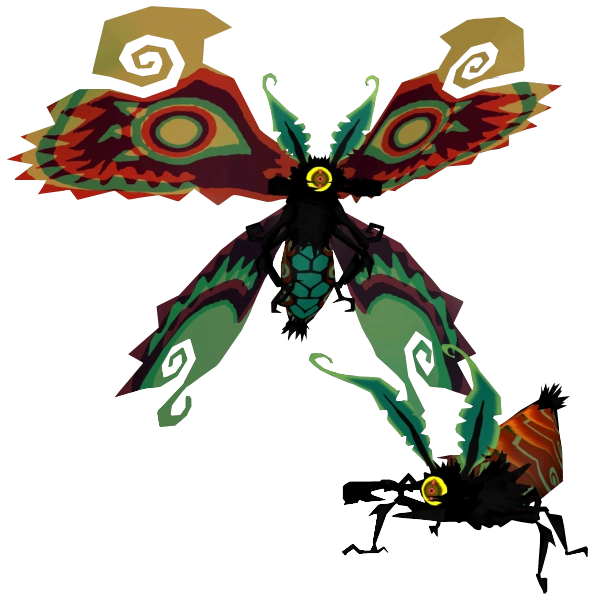
Description: Large, moth-like insects. Some variants have wings and can fly, while others are grounded.
Location: Found in the Forbidden Woods and the Savage Labyrinth. A winged variant serves as the mini-boss of the Forbidden Woods.
Attacks/Behavior: Grounded Mothulas charge at Link. Winged Mothulas fly erratically and can perform dive attacks. Both types periodically release swarms of Morths.
Strategy/Weakness: Use the Deku Leaf gust to stun winged Mothulas, causing them to fall to the ground where they can be attacked with the sword. Grounded Mothulas are vulnerable to direct attacks. Ice Arrows are highly effective against both types later in the game. Deal with spawned Morths using Spin Attacks.
Spoils: Rupees, Hearts, Magic Jars.
Ocean Octorok
Description: Aquatic variant of the Octorok, adapted for living in the Great Sea. Resembles an octopus.
Location: Found popping out of the water throughout the Great Sea, often near islands or shipping lanes.
Attacks/Behavior: Surface briefly to spit rock projectiles at the King of Red Lions or Link, then submerge again.
Strategy/Weakness: Defeated easily with projectiles while they are surfaced. The Boomerang, Arrows, or the ship’s Cannon work well. Sometimes deflecting their rocks with a shield works, but distance often makes this impractical from the boat.
Spoils: Rupees, Hearts.
Octorok
Description: Primarily land-based (or shallow water) octopus-like creatures, a classic Zelda enemy.
Location: Found on various islands, often near beaches or shallow water areas. Less common in TWW than Ocean Octoroks.
Attacks/Behavior: Pop out from hiding spots (bushes, ground) to shoot rock projectiles at Link. Retreat if Link gets too close.
Strategy/Weakness: Deflect their rock projectiles back at them with any shield (except Mirror Shield, which destroys projectiles). Can also be defeated with projectiles like the Boomerang or Arrows.
Spoils: Rupees, Hearts.
Peahat
Description: Flying, plant-like enemies with large, propeller-like leaves on top that allow them to fly. Smaller than Seahats.
Location: Encountered in the Forbidden Woods and on various islands across the Great Sea.
Attacks/Behavior: Fly around, sometimes hovering high. Invulnerable while their propeller leaves are spinning rapidly.
Strategy/Weakness: Use the Deku Leaf gust to temporarily stop their propeller, causing them to fall to the ground stunned. Attack with the sword while grounded. Alternatively, target their body directly with the Boomerang, Arrows, or Hookshot for an instant defeat.
Spoils: Golden Feather (collectible item), Rupees, Hearts.
Poe
Description: Lantern-carrying ghosts, often appearing translucent or invisible until approached or provoked.
Location: Primarily found in the Earth Temple and the Ghost Ship. Also appear in the Savage Labyrinth. The boss Jalhalla is composed of multiple Poes.
Attacks/Behavior: Float towards Link. Attack by swinging their lantern or throwing it, which creates a patch of fire on the ground. Can turn invisible to evade attacks.
Strategy/Weakness: Often invisible or intangible. Use light to make them solid and vulnerable. In the Earth Temple, reflect sunlight onto them using the Mirror Shield. Once solid, attack with the Sword. Light Arrows defeat them instantly.
Spoils: Rupees, Hearts, possibly Joy Pendants.
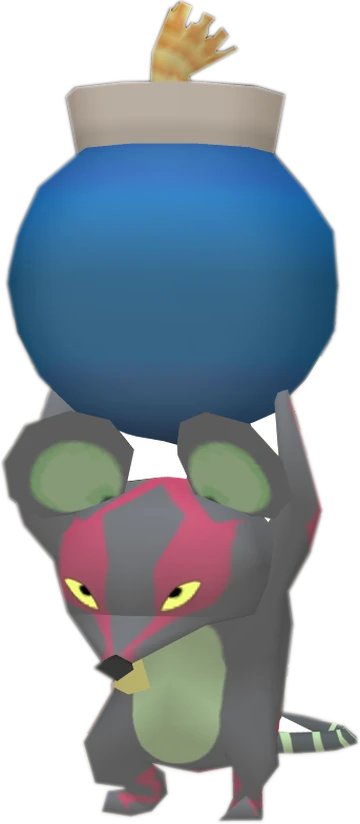
Rat
Description: Common rodents found in dark or dingy areas.
Location: Abundant in the Forsaken Fortress, also found inside some buildings on Windfall Island, and in various caves.
Attacks/Behavior: Scurry towards Link and bite him, stealing a small number of Rupees on contact. Retreat into small holes in walls.
Strategy/Weakness: Easily defeated with a single sword slash. To interact peacefully, place All-Purpose Bait near their hole; a rat may emerge and offer to sell items like Potions or Bombs.
Spoils: Return stolen Rupees upon defeat.
Real Bombchu
Description: A specific variant of Rat that utilizes Bombs. They look like regular rats but carry a Bomb.
Location: Primarily encountered in the Forsaken Fortress.
Attacks/Behavior: Emerge from holes, light a Bomb, and throw it towards Link before retreating to get another. Also steal Rupees on contact like regular Rats.
Strategy/Weakness: Defeat with sword slashes like regular Rats, being mindful of the thrown Bombs. Can potentially be baited with All-Purpose Bait to sell items, though their aggressive nature makes this less common than with normal Rats.
Spoils: Return stolen Rupees upon defeat.
Red Bubble
Description: Floating skulls engulfed in fire.
Location: Found in dungeons, particularly Dragon Roost Cavern and Tower of the Gods, often near lava or fire elements.
Attacks/Behavior: Float towards Link. Contact extinguishes the flame but sets Link on fire, potentially burning his standard Wooden/Hero’s Shield.
Strategy/Weakness: Use the Deku Leaf gust or the Boomerang to extinguish the flames from a distance. This leaves the skull vulnerable, which can then be destroyed with the sword or other weapons.
Spoils: Rupees, Hearts.
Red ChuChu
Description: The most basic and common variant of the ChuChu enemy; a simple red gelatinous blob.
Location: Extremely common, found on nearly every island, cave, and dungeon.
Attacks/Behavior: Hops towards Link to body-slam him.
Strategy/Weakness: Very weak, defeated easily with any weapon.
Spoils: Red Chu Jelly (used for Red Potion), Rupees, Hearts.
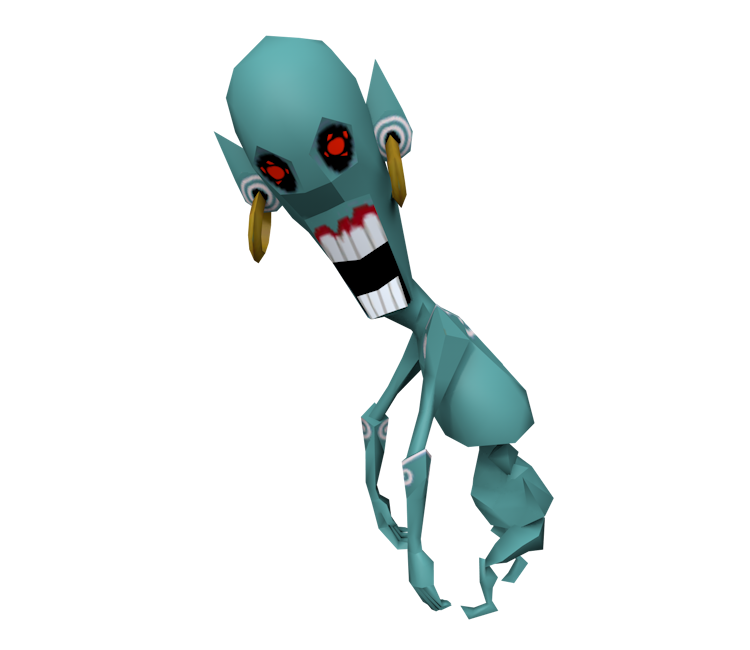
ReDead
Description: Terrifying, zombie-like humanoids with mask-like faces and stiff movements.
Location: Found in the Earth Temple and the Savage Labyrinth, often in dark, tomb-like areas.
Attacks/Behavior: Stand dormant or shamble slowly. When Link enters their range and line of sight, they emit a piercing scream that paralyzes him if he’s close enough. They then slowly approach the frozen Link to grab and bite him, dealing significant damage.
Strategy/Weakness: Their scream is their primary weapon; avoid facing them directly up close. Attack them from behind. Stun them with the Deku Leaf, Boomerang, or Ice Arrows to prevent the scream, then attack. They are extremely vulnerable to light; reflecting sunlight with the Mirror Shield paralyzes them, and Light Arrows destroy them instantly.
Spoils: Rupees, Hearts, Skull Necklaces.
Seahat
Description: Giant versions of Peahats found exclusively on the Great Sea. They possess a similar propeller structure but are much larger and more aggressive.
Location: Patrol certain areas of the Great Sea, often appearing in groups.
Attacks/Behavior: Target the King of Red Lions boat and attempt to ram it forcefully.
Strategy/Weakness: Use the ship’s Cannon to shoot them down from a distance. If they get close, the Boomerang or Arrows can also defeat them. Try to take them out before they can ram the boat.
Spoils: Rupees, Hearts.
Stalfos
Description: Large, imposing skeleton warriors wielding massive, spiked clubs.
Location: Found as strong enemies in later dungeons like the Earth Temple and Wind Temple, as well as the Savage Labyrinth.
Attacks/Behavior: Attack with slow but powerful swings and overhead slams with their club. Their bodies collapse into a pile of bones when dealt enough damage, but they will reassemble if the skull is not destroyed quickly. Their heads can detach and hop around independently.
Strategy/Weakness: Use sword combos and Parry/special attacks to knock them apart. Once collapsed, immediately throw a Bomb onto the bone pile to destroy them permanently before they reassemble. The Skull Hammer is also effective at shattering their bodies.
Spoils: Rupees, Hearts, possibly Knight’s Crests or Skull Necklaces.
Stone Statue
Description: (Hazard/Obstacle/Puzzle Element) Large statues made of stone, varying greatly in appearance and function.
Location: Common in dungeons like the Tower of the Gods, Earth Temple, and Wind Temple.
Attacks/Behavior: Most are inert obstacles. Some can be pushed or pulled. Others might be activated (e.g., shooting eyes with arrows) to reveal paths or trigger mechanisms. Some rare types might animate or attack, similar to Armos, but most in TWW are environmental.
Strategy/Weakness: Interact based on context: push/pull, destroy with Bombs/Skull Hammer if possible, activate with specific items (Arrows, Command Melody). Not typically ‘defeated’ like enemies.
Spoils: None.
Vines
Description: (Hazard/Obstacle) Refers to non-enemy plant life. Can be simple climbable vines providing vertical access, or thick, thorny vines that block pathways.
Location: Found on many islands (especially Forest Haven) and within dungeons like the Forbidden Woods.
Attacks/Behavior: Thorny vines block progress and may damage Link if touched. Climbable vines are traversal elements. Distinct from enemy plants like Boko Babas or Dexivines.
Strategy/Weakness: Thorny vines must usually be cut with the Sword or Boomerang, or sometimes burned away (if near a fire source or using Fire Arrows). Climbable vines are simply used for movement.
Spoils: None.
Warship
Description: (Hazard/Platform) Enemy-controlled wooden rafts or small ships patrolling the Great Sea, usually equipped with cannons and manned by Bokoblins or Moblins.
Location: Found patrolling various sectors of the Great Sea.
Attacks/Behavior: Fire cannons at the King of Red Lions. Enemies onboard may use projectiles or attempt to board Link’s boat if close enough (though boarding is rare in TWW).
Strategy/Weakness: Use Link’s cannon to destroy the Warship’s cannons first, then either sink the ship with further cannon fire or sail closer to defeat the enemies onboard with arrows or by jumping aboard.
Spoils: Defeating enemies yields their standard spoils (Joy Pendants, Skull Necklaces). Sinking the ship often leaves behind a cluster of Rupees or Hearts in the water.
Wizzrobe
Description: Bird-like sorcerers clad in robes, capable of teleportation and casting spells. Several types exist in Wind Waker.
Location: Found in dungeons like the Tower of the Gods, Wind Temple, Earth Temple (via Poes?), Ghost Ship, and the Savage Labyrinth.
Attacks/Behavior: Appear briefly, cast a spell, then teleport to another location.
- Red (Fire Wizzrobe): Shoots fireballs.
- Yellow (Summoning Wizzrobe): Summons other enemies (Bokoblins, Moblins, Darknuts).
- Mini-Boss (Red Robe): A stronger variant found in the Wind Temple, summons regular Wizzrobes and other powerful enemies.
Strategy/Weakness: Attack them quickly during the brief window they are tangible before they teleport. Arrows are highly effective due to their range. Fire Arrows work well against standard/summoning types, and Ice Arrows can freeze them. Prioritize defeating Summoning Wizzrobes to prevent being overwhelmed by reinforcements.
Spoils: Rupees, Hearts, Magic Jars.
Yellow ChuChu
Description: A yellow variant of the common gelatinous blob enemy. (Note: In the Wind Waker HD remake, they possess an electric field similar to Blue ChuChus, but this is not present in the original GameCube version).
Location: Found on various islands, in caves, and dungeons. More common than Blue ChuChus but less common than Red or Green.
Attacks/Behavior: Hops towards Link to body-slam him. (In HD version, contact also causes electric shock).
Strategy/Weakness: Easily defeated with most weapons in the original GameCube version. (In HD version, stun with Boomerang or Deku Leaf first to negate electricity before attacking with the sword).
Spoils: Yellow Chu Jelly (used for potions), often drop more Rupees compared to Red or Green ChuChus, Hearts.


