





















Some enemies are simple one-hit nuisances, while others require specific items such as the Bow, Bombs, Magic Powder, Roc’s Feather, Pegasus Boots, Hookshot, or Magic Rod. Use this guide as a quick reference for where enemies appear and how to deal with them.
Overworld Enemies
These enemies are mainly found outside on Koholint Island, including fields, beaches, mountains, swamps, graveyards, ruins, and other outdoor areas.

Armos
Found: Southern Face Shrine area
Looks like a statue until Link touches it. Once active, keep your distance and attack with arrows or the sword. Armos hit very hard, so avoid direct contact.

Beetle
Found: Near holes in the overworld
A weak enemy that pops out of the ground when Link gets close. One sword slash usually handles it.

Bomber
Found: Central Koholint Island
A flying enemy that drops bombs. Avoid standing still beneath it. Ranged weapons, the Magic Rod, or Boomerang are safest.

Buzz Blob
Found: Overworld areas
Do not strike it directly with the sword unless you want to get shocked. Use Magic Powder, Bow, Boomerang, or Magic Rod. Magic Powder can turn it into a Cukeman.
Crow
Found: Trees and rocky outdoor areas
Looks like a statue until Link touches it. Once active, keep your distance and attack with arrows or the sword. Armos hit very hard, so avoid direct contact.

Armos
Found: Southern Face Shrine area
Wait for it to swoop down, then slash it as it approaches. These enemies are easy to miss if you rush under them.

Cukeman
Found: Created from Buzz Blob
Created by sprinkling Magic Powder on a Buzz Blob. It behaves oddly and gives strange dialogue when talked to.

Dacto
Found: Desert areas
Heavily armored knight. Attack from the side or back when possible. Be patient and avoid trading hits.

Darknut
Found: Overworld and dungeon areas
A cactus-like enemy that rises from the sand. Strike when it emerges and stay mobile.

Ghini
Found: Desert areas
Ghost enemy that drifts around gravestones. Use the sword or ranged attacks, and watch for groups.

Giant Ghini
Found: Desert areas
Larger Ghini that can summon or appear with smaller ghosts. Focus attacks on the large one when possible.

Giant Goponga Flower
Found: Goponga Swamp
A stronger flower blocking swamp paths. Use BowWow during the story sequence or return later with stronger equipment.

Goponga Flower
Found: Goponga Swamp
Stationary flower enemy that blocks movement. BowWow can eat them during the swamp rescue segment.

Leever
Found: Sand and desert areas
Burrows underground and pops up near Link. Keep moving and strike as it surfaces.

Like Like
Found: Overworld and caves
Dangerous because it can swallow Link and steal his shield. Attack quickly from a distance or mash away before it traps you.

Mad Bomber
Found: Overworld cave or special encounters
A bomb-throwing enemy. Keep moving, avoid the blast radius, and attack during openings.

Moblin
Found: Forests, caves, and Moblin areas
Basic enemy that attacks directly or patrols. Use standard sword strikes and shield positioning.

Monkey
Found: Near Kanalet Castle
Not a normal combat enemy in the same way as monsters. Appears during progression near the castle and bridge sequence.

Mutt
Found: Madam MeowMeow’s house area
Usually not treated like a normal enemy. Avoid bothering it unless required by the situation.

Octorok
Found: Common overworld areas
Shoots rocks in straight lines. Block with the shield, then close in for a sword attack.

Pig Warrior
Found: Overworld areas
Also commonly treated as a pig-like Moblin/Boarblin type. Blocks or fires projectiles depending on the variant. Attack when its guard is down.

Pincer
Found: Beaches and sandy areas
Hides in holes and snaps when Link gets close. Approach carefully and strike after it appears.

Piranha
Found: Swamp or water-adjacent areas
Usually stationary or semi-stationary. Use the sword, Bow, or ranged items if it is difficult to reach.

Pokey
Found: Desert
Cactus enemy made of stacked body segments. Strike it repeatedly to remove segments.

Sand Crab
Found: Toronbo Shores
Small beach enemy. Easy to defeat with the sword, but can surprise Link early in the game.

Sea Urchin
Found: Beach and water areas
Spiky enemy that damages on contact. Push or destroy carefully, depending on available items.

Spiny Beetle
Found: Overworld areas
A beetle protected by spikes. Flip or expose it before attacking, depending on the situation.

Sword Moblin
Found: Overworld and Moblin areas
Carries a sword and fights more directly than basic Moblins. Use shield spacing and attack after it commits.

Tektite
Found: Tal Tal Mountains and rocky areas
Hops around unpredictably. Attack right after it lands.

Winged Octorok
Found: Overworld areas
Hops into the air when Link gets close. Wait for it to land before striking.

Zombie
Found: Graveyard
Crawls out of the ground and approaches Link. Keep moving and slash as it rises.

Zora
Found: Rivers and water
Fires projectiles from the water. Use ranged attacks when possible and avoid fighting while stuck in water.
Underworld Enemies
Underworld enemies appear in dungeons, caves, side-scrolling areas, hidden rooms, and interior combat spaces.

Angler Fry
Found: Angler’s Tunnel and water areas
Small fish enemy. Strike while swimming or use available dungeon items when positioned safely.

Anti-Kirby
Found: Eagle’s Tower
Cannot be harmed by the sword. Use the Magic Rod or Boomerang. Anti-Kirby is rare and more of a novelty enemy than a major threat.

Arm-Mimic
Found: Dungeons
Mirrors Link’s movement in reverse. Line it up carefully and use a Spin Attack or Pegasus Boots dash.

Ball and Chain Soldier
Found: Kanalet Castle
Swings a ball and chain. Wait for the throw, dodge, then move in for quick hits.

Battle Bat
Found: Caves and dungeons
Basic flying bat enemy. Slash when it swoops near.

Blazing Bat
Found: Late-game areas and boss fights
Fire-based bat enemy. Avoid contact and attack when it moves into sword range.

Bloober
Found: Side-scrolling underwater areas
Mario-style squid enemy. Move carefully underwater and strike when it drifts close.

Blue Camo Goblin
Found: Color Dungeon
Color-based goblin enemy. Defeat like other Camo Goblins while watching movement patterns.

Blue Orb Monster
Found: Color Dungeon
Orb enemy tied to the Color Dungeon’s color-themed rooms. Attack when safe and avoid being cornered.

Bombite
Found: Dungeons
Comes in different forms. Some count down before exploding, while others bounce around after being struck. Hit and back away.

Bone Putter
Found: Dungeons
Small skeletal enemy. Usually simple to defeat with sword strikes.

Boo Buddy
Found: Dungeon rooms
Ghost-like enemy that often requires lighting or environmental interaction to handle safely.

Cheep-Cheep
Found: Side-scrolling water areas
Fish enemy from Mario-style sections. Avoid contact or strike while passing.

Gel
Found: Dungeons
Small slime enemy. Often splits from larger Zols. They can slow Link down if they latch onto him.

Gibdo
Found: Dungeons
Mummy enemy with higher durability than basic Stalfos. Keep attacking and avoid being grabbed or cornered.

Goomba
Found: Side-scrolling sections
Can be stomped from above like in Mario or defeated with standard attacks.

Green Camo Goblin
Found: Color Dungeon
Color Dungeon enemy. Defeat with sword attacks while watching its movement.

Green Orb Monster
Found: Color Dungeon
Orb enemy variant. Use normal combat spacing and avoid touching it unnecessarily.

Hardhat Beetle
Found: Dungeons
Usually cannot be damaged normally. Knock it into pits or use positioning to remove it from the room.

Iron Mask
Found: Dungeons
Shielded enemy. Attack from behind or the side, as frontal attacks are blocked.

Keese
Found: Caves and dungeons
Bat enemy. Wait for it to fly toward Link, then slash.

Mask-Mimic
Found: Dungeons
Mimics Link’s movement. Attack from the correct angle or use special movement to line up a hit.

Mini-Moldorm
Found: Dungeons and caves
Small worm enemy that moves erratically. Attack the body while keeping distance from its movement path.

Pairodd
Found: Dungeons
Teleports or shifts position while attacking. Watch its pattern and attack after it appears.

Peahat
Found: Dungeons and overworld-like rooms
Vulnerable when it lands. Avoid attacking while it is spinning or flying.

Piranha Plant
Found: Side-scrolling areas
Pops out of pipes. Wait until it retracts or strike when it appears.

Pols Voice
Found: Dungeons
Rabbit-like enemy. In the original Game Boy version, special sound/microphone behavior is part of its identity, but standard weapons and items vary by version.

Red Camo Goblin
Found: Color Dungeon
Color Dungeon goblin variant. Fight like the other Camo Goblins.

Red Orb Monster
Found: Color Dungeon
Orb monster variant. Keep moving and attack when open.

Rope
Found: Dungeons
Snake enemy that rushes Link when aligned. Bait the charge, then slash.

Shrouded Stalfos
Found: Dungeons
Covered skeletal enemy. Fight cautiously and avoid being boxed in.

Spark
Found: Dungeons
Travels along walls and blocks. Usually best avoided unless you can safely convert or remove it with the right item.

Spiked Beetle
Found: Dungeons
Protected by spikes. Use the shield or movement to flip/expose it, then attack.

Stalfos
Found: Dungeons
Skeleton enemy. Basic versions jump or move around; strike after they land or pause.

Star
Found: Dungeons
Moves quickly around rooms. Avoid contact and attack only when it is safe.

Sword Stalfos
Found: Dungeons
Armed skeleton enemy. Use shield spacing and strike after it attacks.

Three-of-a-Kind
Found: Dungeons
Slot-machine-like enemy group. Defeat or manipulate them so all three match to solve the room.

Vire
Found: Dungeons
Flying demon enemy that may split into smaller bats. Use sword or ranged attacks and finish off the smaller enemies quickly.

Water Tektite
Found: Water rooms
Hops across water. Time sword strikes when it lands or comes close.

Wizzrobe
Found: Late dungeons
Teleports and fires magic. The sword is usually ineffective, so use bombs, arrows, Hookshot setups, or other items.

Zol
Found: Dungeons and caves
Slime enemy. Green Zols are simple, while red Zols may split into Gels when attacked.
Traps and Hazards
These are not always “enemies” in the normal sense, but they damage or obstruct Link throughout dungeons and caves.

Beamos
Found: Dungeons
Rotating statue that fires lasers when it sees Link. Avoid its line of sight or block with the stronger shield when possible.

Blade Trap
Found: Dungeons
Slides quickly when Link lines up with it. Bait it, step aside, then pass after it retracts.

Boulder
Found: Tal Tal Mountain Range
Falling hazard. Keep moving and watch the bounce pattern.

Bubble
Found: Dungeons
Often moves diagonally or along set paths. Avoid it or use Magic Powder if the version/item interaction allows.

Eye Guard
Found: Dungeons
Statue-like hazard that reacts when Link approaches or lines up. Stay alert and avoid its attack path.

Face Lamp
Found: Dungeon rooms
Environmental hazard often tied to fire or room mechanics. Avoid contact and solve the room around it.

Flame Fountain
Found: Dungeons
Shoots fire in a set pattern. Wait for openings before crossing.

Flying Tile
Found: Dungeons
Floor tiles lift and fly at Link. Hold the shield, stand safely, or slash them as they approach.

Flying Pot
Found: Dungeons
Pot that launches at Link. Shield or dodge it, then continue through the room.

Giant Bubble
Found: Face Shrine
Large moving hazard. It cannot be defeated normally, so avoid its path.

Mega Thwomp
Found: Side-scrolling areas
Large crushing hazard. Watch timing and pass underneath when safe.

Podoboo
Found: Lava areas and side-scrolling rooms
Fireball hazard that jumps from lava. Time your jumps and movement.
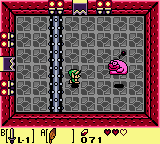
Rolling Spike Trap
Found: Dungeons
Rolling spiked obstacle. Jump with Roc’s Feather or wait for the correct timing.

Spiked Thwomp
Found: Side-scrolling areas
Drops when Link passes underneath. Bait it, then move once it rises or lands.

Stone Elevator
Found: Side-scrolling areas
Moving stone platform. Ride carefully and avoid being crushed.

Thwomp
Found: Side-scrolling areas
Drops straight down when Link approaches. Bait, wait, and pass.

Vacuum Mouth
Found: Dungeons with pits
Pulls Link and enemies toward holes. Move against the pull and avoid fighting too close to pits.
Pre-Dungeon Bosses
These larger enemies are fought before entering or unlocking key areas.

King Moblin
Location: Moblin Cave
Keep your shield ready, dodge his charges, and attack after he crashes or leaves himself open.

Lanmola
Location: Yarna Desert
Stay mobile as it emerges from the sand. Strike the head or body when it surfaces.

Armos Knight
Location: Southern Face Shrine
Use the Bow or sword while avoiding its jumps. Roc’s Feather helps avoid shockwaves and body contact.

Turtle Rock
Location: Tal Tal Mountain Range
This living entrance blocks the path to the final dungeon. Use the correct item sequence and attack its exposed head to open Turtle Rock.
Mini-Bosses
Mini-bosses appear inside dungeons and often guard key items, doors, or progression routes. The main Link’s Awakening mini-boss list includes Rolling Bones, Hinox, Dodongo Snakes, Cue Ball, Master Stalfos, Gohma, Smasher, Grim Creeper, and Blaino across the major dungeons.

Rolling Bones
Dungeon(s): Tail Cave, Turtle Rock
Jump over the rolling spike bar with Roc’s Feather and slash Rolling Bones when he is exposed.

Hinox
Dungeon(s): Bottle Grotto, Eagle’s Tower, Turtle Rock
Avoid bombs and grabs. Attack between throws and keep enough distance to dodge.

Dodongo Snakes
Dungeon(s): Key Cavern, Face Shrine, Turtle Rock
Feed each snake Bombs. Place Bombs in their path so they swallow them.

Cue Ball
Dungeon(s): Angler’s Tunnel, Turtle Rock
Attack the weak point from behind as it moves around the room. Keep circling and avoid being rammed.

Master Stalfos
Dungeon(s): Catfish’s Maw
Fight him across multiple encounters. Knock him down, then use Bombs to finish each phase.
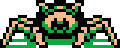
Gohma
Dungeon(s): Catfish’s Maw
Wait for the eye to open, then shoot arrows. Avoid its movement and projectiles.

Smasher
Dungeon(s): Face Shrine, Turtle Rock
Pick up the heavy ball and throw it back at him. Avoid letting him land a direct hit.

Grim Creeper
Dungeon(s): Eagle’s Tower
Defeat the bats he summons. After enough failures, he retreats and later returns with Evil Eagle.

Blaino
Dungeon(s): Turtle Rock
A boxing mini-boss with dangerous punches. Dodge carefully and strike when he leaves an opening.
Dungeon Bosses
The main dungeon bosses in Link’s Awakening are the Nightmares guarding the Instruments of the Sirens. Zelda Wiki lists the eight main Nightmares as Moldorm, Genie, Slime Eye, Angler Fish, Slime Eel, Facade, Evil Eagle, and Hot Head.

Moldorm
Dungeon: Tail Cave
Strike the tail while avoiding the edges of the arena. Moldorm speeds up after being hit, so stay calm and keep your distance.
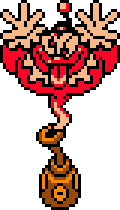
Genie
Dungeon: Bottle Grotto
Dodge fireballs, then attack the bottle when Genie hides inside. After breaking the bottle, attack Genie directly.

Slime Eye
Dungeon: Key Cavern
Use Pegasus Boots to ram the wall and start the fight. Split the eye with repeated sword attacks, then finish both halves.

Angler Fish
Dungeon: Angler’s Tunnel
Swim around the arena and strike the glowing lure. Avoid falling rocks and contact damage.

Slime Eel
Dungeon: Catfish’s Maw
Pull the correct head from the wall with the Hookshot, then slash the exposed weak point. Avoid the tail sweeping around the room.

Facade
Dungeon: Face Shrine
Avoid flying tiles and holes, then use Bombs on Facade’s face when it appears.

Evil Eagle
Dungeon: Eagle’s Tower
Fight from the top of the tower. Use the sword, Hookshot, or shield positioning to avoid being blown off the platform.

Hot Head
Dungeon: Turtle Rock
Use the Magic Rod to damage it as it jumps from lava. Keep moving and avoid fire splashes.
Shadow Nightmares
The final boss inside the Wind Fish’s Egg is a sequence of Shadow Nightmare forms. The final Nightmare takes six forms, ending with DethI/Dethl.

Shadow Nightmare: Giant Zol / Giant Gel Form
Use Magic Powder to damage it. Sword strikes alone will not properly finish this form.

Shadow Nightmare: Agahnim’s Shadow
Reflect the large magic projectiles back with the sword. Dodge the projectiles that cannot be reflected.

Shadow Nightmare: Moldorm Form
Strike the tail, just like the Tail Cave boss. Stay near the center so it cannot pin you.

Shadow Nightmare: Ganon Form
Dodge the trident and fire bats. Use Spin Attacks or Pegasus Boots sword charges when there is an opening.

Shadow Nightmare: Lanmola Form
A fast-moving worm-like form. Use a Spin Attack, Magic Rod, Hookshot, or another effective item when it passes near.

DethI
Jump over the swinging arms with Roc’s Feather and shoot the eye when it opens. Arrows work, and the Boomerang is especially effective in the original/DX versions.
Color Dungeon Enemies
The Color Dungeon appears in Link’s Awakening DX, not the original monochrome Game Boy release. Its unique enemies and bosses are built around color-based mechanics. The Color Dungeon enemy list includes Stone Hinox, Giant Buzz Blob, and Evil Orb.

Stone Hinox
Location: Color Dungeon
Similar to Hinox, but tougher. Avoid boulders and spikes. Bombs are very effective against it.

Giant Buzz Blob
Location: Color Dungeon
The sword will not hurt it at first. Sprinkle Magic Powder to make it vulnerable, then strike with the sword. Repeat until defeated.

Evil Orb
Location: Color Dungeon
Final Color Dungeon boss. Attack according to its color-based pattern and keep moving to avoid projectiles.