
























Hyrule
The first eight pages stay in Hyrule. You run errands for the Captain and Zelda, clear the Eastern Palace, collect Ravio’s rentals and the Pegasus Boots and Zora’s Flippers, finish the House of Gales and the Tower of Hera for the three Pendants, and pull the Master Sword.
- Opening and Sanctuary: Wake in Link’s House, deliver the captain’s sword, cross the Graveyard passage with the Lamp and meet Yuga.
- Hyrule Castle and Kakariko Village: Ravio’s Bracelet, Zelda’s Pendant of Courage, Kakariko shops, Sahasrahla and the free Bow rental.
- Eastern Palace: Every key, chest and rupee, the Compass, Big Key, Yuga boss fight and your first Heart Container.
- Pegasus Boots and Zora’s Flippers: Get the Pouch, Irene’s Bell, Power Glove, Pegasus Boots, Zora’s Flippers, Ravio’s rentals and Hyrule Heart Pieces.
- House of Gales: Rent the Tornado Rod, swim to Lake Hylia’s island, beat Margomill and take the Pendant of Wisdom.
- Death Mountain: Climb the boulder caves, find two Heart Pieces and a Bottle, and reach the Tower of Hera.
- Tower of Hera: Every floor, both Small Keys, Compass, Big Key, Moldorm boss fight, Heart Container and Pendant of Power.
- Master Sword and Lost Woods: Walkthrough for pulling the Master Sword in the Lost Woods, breaking the Hyrule Castle barrier.
Lorule
Once Yuga drops you into Lorule, the story opens up. After the Lorule and Dungeon Order page you free the seven Sages in six Lorule dungeons and Hyrule’s Desert Palace, mostly in an order of your choice, then climb Lorule Castle.
- Lorule and Dungeon Order: Hilda, the Blacksmith, fissures, Ravio’s Shop, Thieves’ Town side content and the dungeon order.
- Dark Palace: The guard maze, every key, the Compass, Big Key, Master Ore, Gemesaur King, Heart Container and Sage Gulley.
- Skull Woods: Keys, Compass, Big Key, Master Ore, Knucklemaster boss fight, Sage Seres and the Master Sword upgrade.
- Ice Ruins: The Hookshot route to Lorule’s Death Mountain, every floor, keys, the Stamina Scroll and Dharkstare.
- Thieves’ Hideout: The password song, the Thief Girl escort, Master Ore, Stalblind, Sage Osfala and the Sand Rod.
- Swamp Palace: Big Bomb Flower, Hookshot, water levels, keys, Compass, Blue Mail, Big Key, Arrghus and Sage Oren.
- Turtle Rock: Rescue the baby turtles, use the Ice Rod, find every key, beat Grinexx and free Sage Impa.
- Desert Palace: Reach it with the Sand Rod, find the Titan’s Mitt, beat Zaganaga and rescue Sage Irene.
- Lorule Castle: The Triforce of Courage, all four mini-bosses, the Compass, Red Mail and the way to the Throne Room.
The Finale
The last page is a single boss fight in the Throne Room. Nothing can be collected there, so complete your lists first.
| # | Walkthrough | Dungeon | Boss | Key items |
|---|---|---|---|---|
| 18 | Final Boss: Yuga Ganon | Throne Room | 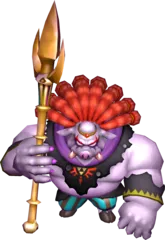 Yuga Ganon | Bow of Light, Hero Mode |
Sage dungeon order
Seven dungeons hold the seven Sages, and you may clear them in any order with one exception: the Desert Palace needs the Sand Rod, and Ravio only stocks it after you have freed Osfala in the Thieves’ Hideout. The other six (Dark Palace, Skull Woods, Thieves’ Hideout, Swamp Palace, Ice Ruins and Turtle Rock) never depend on one another. The Titan’s Mitt from the Desert Palace is not required for any of them.
Start with the Thieves’ Hideout, because it is the only dungeon that gates another and its Sage releases the Sand Rod. The Swamp Palace comes next: its chest holds the Blue Mail, which halves the damage you take. The Dark Palace, Skull Woods, Ice Ruins and Turtle Rock follow in any sequence, and the Desert Palace is a good last stop.
Rent only what the next dungeon needs. If you fall, Ravio’s bird Sheerow takes every rented tool back to the shop, so you pay again; bought tools stay with you. Your first purchase is half price, so spend it on a tool you will use often. See Ravio’s Shop for the full price list.
The Dark Palace, Skull Woods, the Thieves’ Hideout and a cave in Lorule’s graveyard each hold one chunk of Master Ore. The Hyrule Blacksmith tempers the Master Sword to Lv2 for two chunks, and the Lorule Blacksmith takes the next two for Lv3. Details are on the Master Ore Locations page.
- Dark Palace: The guard maze, every key, the Compass, Big Key, Master Ore, Gemesaur King, Heart Container and Sage Gulley.
- Skull Woods: Keys, Compass, Big Key, Master Ore, Knucklemaster boss fight, Sage Seres and the Master Sword upgrade.
- Ice Ruins: The Hookshot route to Lorule’s Death Mountain, every floor, keys, the Stamina Scroll and Dharkstare.
- Thieves’ Hideout: The password song, the Thief Girl escort, Master Ore, Stalblind, Sage Osfala and the Sand Rod.
- Swamp Palace: Big Bomb Flower, Hookshot, water levels, keys, Compass, Blue Mail, Big Key, Arrghus and Sage Oren.
- Turtle Rock: Rescue the baby turtles, use the Ice Rod, find every key, beat Grinexx and free Sage Impa.
- Desert Palace: Reach it with the Sand Rod, find the Titan’s Mitt, beat Zaganaga and rescue Sage Irene.
What a 100% file holds
By the end you should have 28 Pieces of Heart and 10 Heart Containers for 20 hearts, all 100 Lost Maiamai, all 4 Master Ore, 5 Bottles and the 9 Ravio tools with their Nice upgrades. The 100% Completion Checklist adds these up with the mini-game prizes, and the collection pages list every location: Heart Pieces, Maiamai, Bottles and the Treacherous Tower.
New to the game? Begin with Opening and Sanctuary. If you are mid-game, jump to the page that matches your current dungeon from the tables above.
100% Checklist
| Walkthrough pages | 18: eight in Hyrule, nine in Lorule and Hyrule’s desert, and the final battle |
|---|---|
| Dungeons | Eastern Palace, House of Gales and Tower of Hera, then seven Sage dungeons (six in Lorule, one in Hyrule’s desert), Lorule Castle and the Throne Room |
| Free choice | The Dark Palace, Skull Woods, Ice Ruins, Thieves’ Hideout, Swamp Palace and Turtle Rock can be played in any order; the Desert Palace needs the Thieves’ Hideout first |
| Totals | 20 hearts, 100 Lost Maiamai, 4 Master Ore, 5 Bottles |
