


Welcome to the bestiary for The Legend of Zelda: Ocarina of Time! Hyrule, in both its peaceful past and Ganondorf’s dark future, is teeming with dangerous creatures and formidable foes that stand in the Hero of Time’s way. This guide covers the common monsters Link will encounter, tougher mini-bosses guarding secrets, and the terrifying bosses lurking at the heart of each dungeon. Knowing your enemy is the key to survival!
(Note: This page contains spoilers regarding enemies and bosses found throughout the game.)
Common Enemies
These monsters are frequently encountered in the fields, caves, and dungeons of Hyrule.
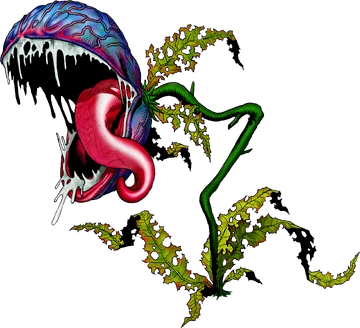
Deku Baba
Aggressive plant monsters that lunge at Link. Easily defeated with sword strikes or a Deku Nut. Some drop Deku Sticks or Nuts. Withered variants appear after being cut down but can be destroyed. Found primarily in forest areas and early dungeons.

Deku Scrub
Small plant creatures that pop out of the ground to spit nuts at Link. Reflecting the nut back with a shield usually stuns or defeats them, sometimes causing them to offer items or information. Different types exist (Mad, Business). Found in various locations, often near trees or underground.

Keese
Bat-like creatures that swoop down to attack. Common in caves and dungeons. Fire Keese and Ice Keese (found in respective themed dungeons) inflict elemental damage and can temporarily ignite/freeze wooden shields. Easily dispatched with swords, slingshot, or arrows.

Skulltula
Spider-like enemies, often found dangling from ceilings or hiding on walls/vines. Attack their vulnerable underside (marked with a skull) when they turn around. Gold Skulltulas are part of a major sidequest, dropping tokens when defeated. Big Skulltulas block passages and require a strong hit to destroy.
Tektite
One-eyed, spider-like creatures that hop erratically. Red Tektites are found on land (like Death Mountain), while Blue Tektites skim across water surfaces. Their unpredictable movement makes ranged attacks (Slingshot/Bow) effective.

Peahat
Large, flying plant-like enemies with propeller leaves found in Hyrule Field (as Child Link). Vulnerable at their root when they land. Peahat Larvae swarm Link if he gets too close to a landed Peahat.

Stalfos
Undead skeletal knights wielding a sword and shield. They block attacks effectively and employ jump attacks. Circle around them and strike when they drop their guard, or use bombs/Deku Nuts. Often appear in pairs. Found in various dungeons and Ganon’s Castle.

Lizalfos
Agile, lizard-like warriors armed with short swords. Known for their evasive jumps and quick strikes. Often fought in pairs, tagging in and out. Parry their attacks or strike quickly between their movements. Found in Dodongo’s Cavern, Spirit Temple, and Ganon’s Castle. (Dinolfos are a stronger variant in Ganon’s Castle).

Dodongo (Small)
Lizard-like creatures that inhale before breathing fire. Attack their tail from behind or throw a bomb into their mouth while they inhale for an instant kill. Found in Dodongo’s Cavern and Goron City.

Leever
Sand-dwelling creatures that spin up from the ground to attack Link. They burrow and reappear nearby. Block with a shield and strike when they surface. Found in Haunted Wasteland and Desert Colossus.

Poe
Ghostly enemies found in graveyards and certain dungeon rooms. Often become invisible and intangible. Z-target them and attack when they solidify to attack. Some drop flames. Big Poes are larger, rarer variants found in Hyrule Field (as Adult Link) and are part of a sidequest. The Poe Sisters (Joelle, Beth, Amy, Meg) are unique mini-bosses in the Forest Temple.
ReDead / Gibdo
Slow-moving, zombie-like undead. Their paralyzing gaze freezes Link in place, allowing them to latch on and drain health. Play the Sun’s Song to stun them temporarily, then attack from behind. Gibdos are mummy-wrapped versions found in the Spirit Temple and Bottom of the Well, functionally identical to ReDeads.

Wallmaster / Floormaster
Creepy, disembodied hands. Wallmasters drop from the ceiling in certain dungeon rooms; if they grab Link, they carry him back to the dungeon entrance. Listen for their eerie sound cue. Floormasters glide along the floor, splitting into smaller hands when struck, which can also grab Link. Defeat all small hands quickly before they reform.

Like Like
Disgusting, slug-like tubes that attempt to swallow Link. If successful, they can steal equipped tunics or shields (which can sometimes be recovered upon defeat). Attack from a distance with arrows or the Hookshot, or carefully with the sword. Found in various dungeons, often near water or pits.

Shabom
Small, floating bubble enemies found inside Lord Jabu-Jabu’s Belly. Easily popped with the sword or Slingshot.

Biri / Bari
Jellyfish-like enemies found inside Lord Jabu-Jabu’s Belly. Biri emit electricity when struck with the sword; use ranged attacks like the Boomerang. Bari split into multiple Biri upon defeat.

Tailpasaran
Parasitic worms found inside Lord Jabu-Jabu’s Belly. Attack their vulnerable tails.

Torch Slug
Fiery slugs that crawl along walls and floors, leaving trails of fire. Often found in fire-themed areas like Dodongo’s Cavern and Fire Temple. Can be extinguished temporarily with Hookshot/sword strikes, then finished off.

Bubble
Flying skulls, often wreathed in elemental flames (Red = Fire, Blue = Ice/Magic Drain, White = Normal). The flames must often be doused with the shield before the skull can be damaged. Found in various dungeons.

Wolfos / White Wolfos
Wolf-like enemies that circle Link and attack with claws. Block their attacks and counterattack when they are vulnerable. White Wolfos are found in icy areas.

Armos
Animated statues that come to life when approached. They hop or charge towards Link. Stun them with Deku Nuts or throw a bomb behind them; they explode upon defeat.

Beamos
Stationary statues with a rotating eye that fires a laser beam. Destroy them by throwing a bomb at their base or shooting their eye with an arrow.

Shell Blade
Giant clams found underwater. Attack the fleshy interior with the Hookshot or Iron Boots + sword when their shell opens.

Spike
Rolling, spiked metal balls found primarily in the Spirit Temple. Stop them with the Hookshot or bombs.

Anubis
Floating, dog-headed enemies in the Spirit Temple that mirror Link’s movements and are vulnerable only to fire-based attacks (Din’s Fire, Fire Arrows).

Gerudo Guard / Thief
Human enemies found in Gerudo Fortress. They patrol specific routes and attack with twin scimitars if they spot Link. Defeat them or stun them with the Hookshot/arrows to proceed. Getting caught sends Link to jail.

Guay
Crow-like birds that swoop down to attack Link. Often found in Hyrule Field or near Lake Hylia. Easily defeated with most weapons.

Octorok
Octopus-like enemies that pop out of water to spit rocks. Reflect the rocks back with a shield to defeat them.
Mini-Bosses
These challenging enemies often guard crucial paths or items within dungeons.

Big Octo
A large Octorok encountered inside Lord Jabu-Jabu’s Belly. Runs around a circular platform. Stun it with the Boomerang when its back is turned (revealing a weak spot), then attack.

Iron Knuckle
Powerful, heavily armored knights wielding massive axes. Their attacks are slow but devastating. Found in Spirit Temple (including the brainwashed Nabooru), Ganon’s Castle, and Gerudo Training Ground. Dodge their attacks and strike after they swing. Their armor eventually breaks away.

Flare Dancer
A fiery entity encountered in the Fire Temple. Use the Hookshot to pull its core out of the flames, then attack the vulnerable core before it reignites and runs around the platform.

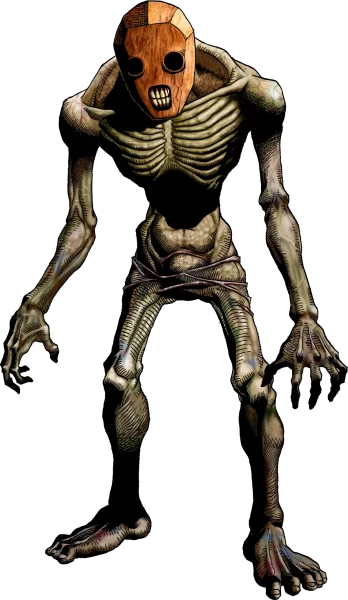
Dead Hand
A grotesque mini-boss found Bottom of the Well and in the Shadow Temple. Multiple hands restrain Link, allowing the main body to emerge and bite. Lure the hands, escape their grasp, and attack the main body’s head when it lowers.

Dark Link
A shadow replica of Link encountered in an illusory room in the Water Temple. Mirrors Link’s movements and sword attacks, making him difficult to hit directly. Use non-targeted sword attacks (like thrusts), Din’s Fire, or the Megaton Hammer to damage him effectively.
Dungeon Bosses
Each major temple culminates in a battle against a powerful guardian corrupted by Ganondorf.

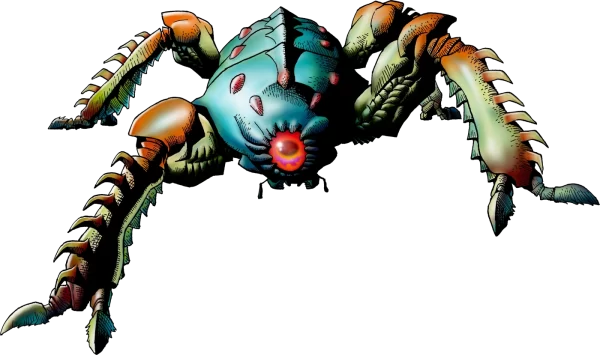
Queen Gohma (Inside the Deku Tree)
A giant, one-eyed arachnid. Strategy: Wait for her eye to turn red, then shoot it with the Slingshot to stun her. Attack vigorously with the Kokiri Sword while she’s down. Avoid the Gohma Larvae she drops from the ceiling.

King Dodongo (Dodongo’s Cavern)
A colossal, fire-breathing dinosaur.
Strategy: Throw a Bomb into his mouth when he inhales deeply to stun him, then attack with the sword. Avoid his fiery breath and rolling attack.

Barinade (Inside Lord Jabu-Jabu’s Belly)
A large bio-electric anemone parasite.
Strategy: Use the Boomerang to cut the tentacles connecting it to the ceiling. Then, target the main body with the Boomerang to stun it, allowing Link to attack the surrounding jellyfish (Biri) before damaging the core. Repeat, avoiding electric attacks.
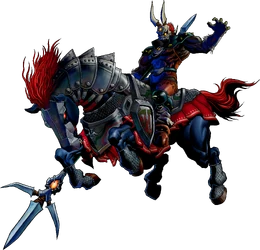
Phantom Ganon (Forest Temple)
Ganondorf’s phantom projection, fought on horseback (initially) and on foot.
Strategy (Paintings Phase): Shoot the real Phantom Ganon with arrows as he rides out of the paintings (listen for the sound cue).
Strategy (Floating Phase): Volley his energy ball back at him with the sword, then attack when he’s stunned on the ground.

Volvagia (Fire Temple)
A serpentine lava dragon.
Strategy: When Volvagia pops its head out of one of the lava pits, stun it with the Megaton Hammer, then attack its head with the sword or Hammer. Avoid its fiery breath and falling rocks. Use Z-targeting to track its position.

Morpha (Water Temple)
A water amoeba with a solid nucleus.
Strategy: Stay on the platforms around the pool. Use the Longshot to target and pull Morpha’s nucleus out of its watery body when it surfaces, then slash it with the sword. Avoid the water tendrils it creates.

Bongo Bongo (Shadow Temple)
A giant, invisible spirit creature with detached hands, playing a bongo drum (the arena floor).
Strategy: Use the Lens of Truth to see the boss. Shoot both hands with arrows to stun them, then shoot the creature’s revealed red eye with arrows to damage it. Avoid its hand attacks (slams, grabs, sweeps). Iron Boots help resist the drum’s bounce.

Twinrova (Spirit Temple)
The twin Gerudo witches, Koume (ice) and Kotake (fire).
Strategy (Phase 1): Use the Mirror Shield to absorb one sister’s elemental attack (ice or fire) and reflect it at the other sister. Repeat several times.
Strategy (Phase 2 – Combined Form): Absorb the same element three times in a row with the Mirror Shield, then unleash the stored energy at Twinrova when she casts the opposite element. Attack her stunned form with the sword.
Final Boss
The ultimate confrontation at the end of the game.

Ganondorf / Ganon
Link first faces Ganondorf in his human form in a magical duel, followed by the monstrous beast form, Ganon, requiring the Master Sword, Light Arrows, and the aid of the Sages to ultimately defeat and seal away.
From the weakest Deku Scrub to the mighty Ganon, the enemies of Ocarina of Time provide constant challenge and require Link to use his full arsenal of weapons, items, and skills to prevail and restore peace to Hyrule.