In The Legend of Zelda: A Link to the Past, mastering boss encounters is essential to conquering dungeons and claiming the Triforce. This guide dives into proven boss strategies, including efficient weapon use to optimal positioning—designed to help players defeat the toughest foes.
Table of Contents
Hyrule Castle Mini Boss: Ball and Chain Trooper
This mini-boss requires either skillful swordplay or clever use of the environment. One strategy is to use your Boomerang from a distance to stun the guard (a direct hit will freeze him momentarily). While he’s stunned, rush in and land a few sword slashes, then back off before he recovers.


Alternatively, notice the two pots in the corners of the room – these can be your best weapons. Quickly lift a pot (stand over it and press A) and throw it at the trooper. Pots deal heavy damage; two pot throws will defeat this guard outright on the SNES version.
Eastern Palace Boss: Armos Knights
Six giant soldier statues – the Armos Knights – spring to life and begin bounding around the circular arena. They first hop in unison in a wide clockwise circle pattern. Stand near the bottom of the room and fire arrows straight ahead; you can often hit multiple Knights as they loop around.


After a few seconds of circling, the Armos Knights line up in a horizontal row and charge downward toward you. Keep moving to avoid being trampled, and fire more arrows from the side. The Bow is the ideal weapon here – each Knight takes only three arrows to kill (versus a whopping 16 sword strikes each). One by one the statues will fall and explode.
When only a single Knight remains, it enrages and turns red. The last Armos Knight will start leaping high and trying to crash down on your position. Watch its shadow to see where it will land and quickly sidestep. One or two more arrows (or a few sword slashes) to its eye will finish it off.


Desert Palace Boss: Lanmolas
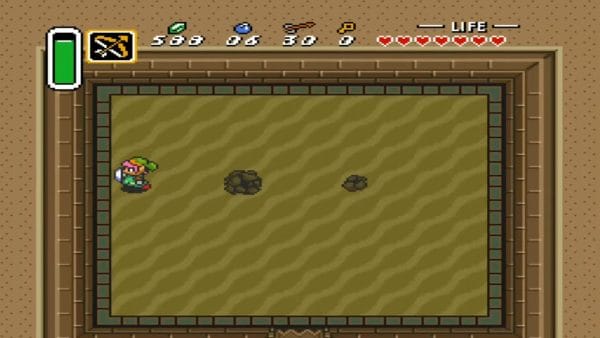
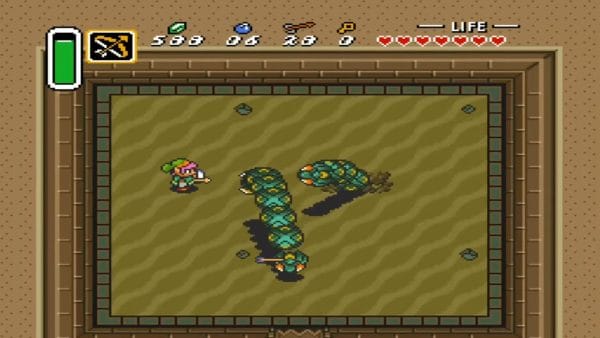
Lanmolas is three giant worms that emerge from the sand. As they surface, they scatter rocks in multiple directions. Their heads are vulnerable; attacking them deals significant damage. Using the Bow or Ice Rod can expedite the battle.
Suddenly, one by one, the massive worms burst out of the earth in an arc. As each Lanmola erupts, it flings a plus-shaped spread of rocks in four diagonal directions. Stay out of those diagonal lines to avoid being pelted by debris. The Lanmolas then dive back underground, only to repeat the cycle.
When the battle is down to the final Lanmola, be alert: the last worm becomes enraged. It moves faster and, upon erupting, scatters eight rocks instead of four (covering both diagonal and cardinal directions). Quickly sidestep or move between the gaps of these larger volleys. Continue striking its head whenever it surfaces. After a flurry of blows, the third Lanmola will also crumble apart, vanquished at last.


To damage the Lanmolas, target their heads right as they surface or just as they begin to burrow back down. These moments are brief but predictable if you watch the sand shifts. A well-timed sword slash is effective, and a charged spin attack can hit hard while keeping you safely knocked back from the ensuing rock spray. Some heroes find the Ice Rod or arrows useful here, but landing those shots can be challenging. Focus on one worm at a time if possible; each Lanmola requires multiple hits to defeat. Stay on the move to dodge erratic rock projectiles and keep positioning yourself a safe distance from where the next worm will pop up. After enough hits, one Lanmola will explode into dust. With two remaining, the fight gets a bit easier – there are fewer projectiles to dodge.

Tower of Hera: Moldorm
To engage the boss, you must leap off the ledge to drop into the central arena. Bracing yourself, you hop down onto the platform – and Moldorm, the giant armored worm, erupts into action.


Moldorm is an enormous version of the Mini-Moldorms you’ve battled, but don’t underestimate it. It whips across the platform with erratic, unpredictable movements, its long body slithering rapidly. The creature’s only weak point is the bright red tail; striking any other part of its body merely bounces your sword off harmlessly. You must chase and corner Moldorm carefully, but the true danger isn’t its bite – it’s the arena. The platform has no walls, and Moldorm’s bulk will knock you back with tremendous force, much like a Hardhat Beetle. One careless hit and you’ll tumble off the edge into the floor below, forcing you to climb back up and restart the battle from scratch (Moldorm will fully recover health each time you fall). To avoid this fate, use the arena’s layout to your advantage: stick near the center or against the southern wall, where a railing can catch you so you don’t bounce into the abyss.
Adopt a patient strategy. Rather than chasing Moldorm recklessly, let it come to you. One effective tactic is to wait on the right side of the platform, which offers a bit more room to maneuver. When Moldorm charges or turns its tail toward you, quickly swipe at the tail. A well-timed spin attack (hold your sword to charge) can deal double damage, but it leaves you momentarily vulnerable, so use it only if you’re confident. Alternatively, you can even use the Pegasus Boots: a daring dash through Moldorm from behind can clip its tail, though this is risky. After a few hits, Moldorm grows agitated – its speed increases, bouncing around frenetically. Stay focused and keep your footing. It takes six sword strikes with the basic Fighter’s Sword to defeat Moldorm, so count your hits and remain calm. With persistence and careful movement, you will land the final blow on the giant pest.


Hyrule Castle Roof Boss: Agahnim (First Encounter)
The storm rages around the open-air chamber as you confront Agahnim. This is a battle of magic and reflexes. Remember Sahasrahla’s advice: your sword itself cannot harm this sorcerer – but it can turn his own spells against him. Agahnim begins to float around the room, teleporting to different positions. Keep your eyes on him and get ready.
Agahnim attacks in cycles, using three different spells:
- Energy Orbs: The most common attack is a crackling blue orb of magical energy that Agahnim hurls directly at you. This is your opportunity – swing your Master Sword to strike the orb just as it reaches you. If timed correctly, you will reflect the projectile back at Agahnim, and it will hit him, counting as a damaging blow. Position yourself so that when you bat the orb, it will sail toward the wizard. Each successful hit will stagger Agahnim.
- Spinning Orb (Splitter Attack): Occasionally, Agahnim conjures a large spinning orb that crackles distinctly. This one is dangerous to reflect – if you try to hit it with your sword, it will burst into a circle of smaller bolts, which can be nearly impossible to dodge. The wise move is to avoid this spinning attack altogether. Recognize it by the way it spirals as he releases it, and simply move out of its trajectory (or if you have the Bug-Catching Net, know that some heroes have cheekily used it to reflect this attack safely, though it’s not necessary).
- Lightning Strike: After several volleys, Agahnim may teleport to one of the room’s upper corners (often the top-center) and begin a silent incantation. If you notice he stays at the top of the room facing straight down without turning side to side, it means he’s summoning a powerful lightning attack. Quickly move yourself to the extreme left or right side of the room, avoiding the direct line below him. A bolt of lightning will blast down the center of the chamber, striking the floor where you might have been. Stay out of the middle during this attack to remain safe.
Maintain constant movement to dodge unpredictable projectiles, and position yourself to capitalize on the regular energy orbs. Each time you successfully reflect an orb into Agahnim, he will flinch and teleport to a new location. The Master Sword’s power ensures the reflected magic hurts him. It will take a handful of direct hits (typically four successful reflected strikes on Agahnim) to subdue the wicked wizard on this rooftop. Keep cool and watch his patterns. When he appears at a spot, face him and be ready to swing at the next orb (you can also use diagonal positioning to more easily redirect shots).
After a series of well-timed deflections, Agahnim will be overwhelmed by his own dark magic. With a final hit, the sorcerer lets out a cry as his physical form starts to fade. Victory is yours… or so it seems. Agahnim’s shadowy spirit rises from his fallen body – and before you can react, it shoots upward, merging into the darkness overhead. A swirling portal of blue and black opens above the battlefield. The dark vortex expands and suddenly envelops you, wrenching you from the rooftop. You feel yourself pulled into a dimensional rift. The world around you swirls and vanishes. Agahnim may be defeated here, but he has dragged you into the Dark World as a final act of revenge!


Dark Palace Boss: Helmasaur King
The boss of the Palace of Darkness is the formidable Helmasaur King, a giant dinosaur-like monster wearing a massive spiked mask. This fearsome beast guards the first crystal and maiden. The arena is a rectangular platform surrounded by a pit, so watch your footing. Here’s how to take it down:
The Helmasaur King’s thick mask makes its face invulnerable, so your first objective is to break the mask. Equip the Magic Hammer and move in towards its head. When the Helmasaur King isn’t swinging its tail at you, get close and hammer the mask repeatedly. It takes a lot of hits – around 17 hammer strikes on SNES – to crack the mask. (Alternatively, you can use Bombs: five well-placed Bomb explosions on its face will also destroy the mask. This tactic lets you keep distance, but bombs require timing and leave you open to attacks, so use whichever method you prefer.)
The Helmasaur King has two main attacks. It will shoot fireballs from its mouth that split into spreading fire fragments – these fireballs always break apart diagonally, so try to stay at right angles (above/below or left/right) relative to the projectiles to dodge the fragments safely. The boss also lashes out with a spiked tail whip if you linger near its back. You can avoid the tail by staying either very close to its face (right in front of it, where the tail can’t reach) or keeping a good distance away when you see the tail start to swing. If you’re directly in front of the Helmasaur, be ready to move if it starts charging forward.
Aim to hammer the mask between fireball volleys. One strategy is to circle around the Helmasaur, bait a fireball shot, dodge it, then rush in to hit the mask a few times. When it steps back or prepares another fireball, back off. Keep an eye on the tail – if you see it raise the tail, quickly move toward the Helmasaur’s front or far away to avoid the swipe.
After enough damage, the Helmasaur King’s mask will shatter dramatically. Now its green, gem-like forehead is exposed – this is its weak point.
Switch to your Bow or Sword at this stage. The Helmasaur King will become a bit more aggressive without its mask. It may move around faster and continue using fireballs and tail swipes. Shoot the green gem on its forehead with Arrows – each hit will damage the boss. Silver Arrows (if you somehow have them early) will slay it in one hit, but otherwise it takes roughly 4–5 standard arrows or a series of sword slashes to finish the job. You can also strike the gem with your Master Sword if you’re in close range; just be cautious of its movements.
After enough hits to the forehead gem, the Helmasaur King will let out a final roar and explode in a flash of flames. Congratulations! The giant beast is defeated.
Swamp Palace Boss: Arrghus
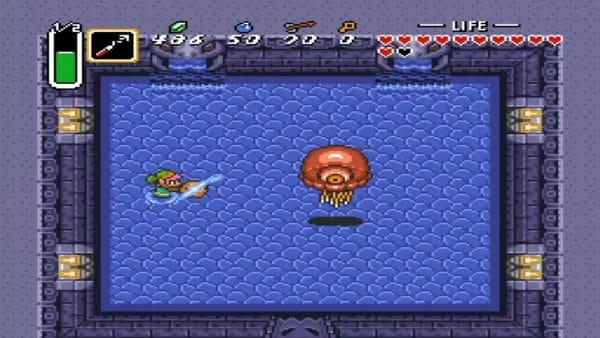
As you step into the boss chamber, the door seals shut and you stand knee-deep in a round pool. From the water rises Arrghus, a colossal one-eyed jellyfish-like creature. Its huge central eye glares at you from within a cluster of smaller orange blobs. These twenty or so miniature minions, called Arrgi, orbit Arrghus in a protective ring.
As long as Arrghus is surrounded by these Arrgi, direct attacks on its body won’t hurt it. The room itself has a shallow water floor, which will slow your movement slightly, but you’re still agile enough to dodge and maneuver.
Phase 1: Destroying the Arrgi
Immediately equip your new Hookshot – this is the key to breaking Arrghus’s defense. Keep a medium distance from the boss as it moves slowly around the room. One by one, target the orbiting Arrgi: fire the Hookshot at a nearby Arrgi to latch onto it and yank it off of Arrghus. The pulled Arrgi will be momentarily stunned (and turn blue) as it lands in front of you. Quickly slash it with your sword twice to destroy it.


Each Arrgi takes two hits with the Master Sword. Work methodically: Hookshot an Arrgi, slash it to bits, then move away from Arrghus if needed and repeat the process. Be mindful of your spacing; Arrghus will occasionally spin its remaining Arrgi in a wide circle outward like a spinning razor barrier. Back off when you see them start swirling to avoid getting hit. The Arrgi then retract back to the boss.
Also, Arrghus itself will drift around the room trying to bump into you, so don’t stay too close to its body. Keep using the Hookshot to peel off and kill all the little orbiting blobs. If you find yourself surrounded, move to an open spot in the pool – you can even run between the Arrgi when they spread out, just avoid touching them directly. With patience, the number of Arrgi will dwindle until you’ve plucked off every last one. Once all the minions are gone, Arrghus lets out an angry wail and shifts tactics.
Phase 2: Arrghus Unleashed
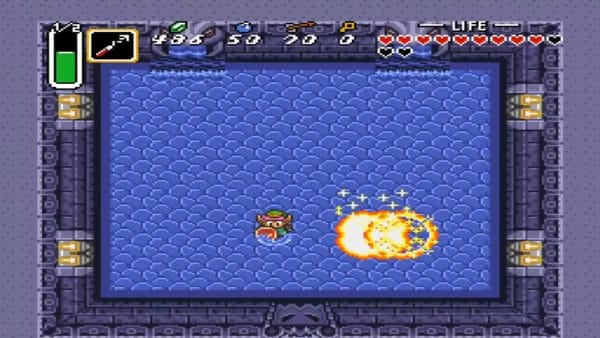
With its protective blobs gone, Arrghus itself turns a pinkish-red and begins a more aggressive assault. The giant eye will leap high into the air, disappearing off-screen for a second. It’s trying to crush you from above! Run (or swim) out of the way until Arrghus comes crashing down into the water. Upon landing, it will always bounce toward a corner of the room (often heading to the bottom-right first), then it starts skating rapidly around the pool, ricocheting off the walls in a diagonal pattern. Think of it like a giant pinball zipping around the room. Now is your chance to damage it – whenever Arrghus swoops near you, smack it with your sword. The Master Sword will hurt it, and you should be able to land a hit or two each pass if you position yourself well. After a few seconds of zooming around, Arrghus will pause and repeat the cycle: jumping up, slamming down, and then zipping about.


Stay alert and keep moving. If you’re directly under Arrghus when it comes down, it can be hard to dodge, so watch its shadow on the water to gauge where it will land. Also be aware that in this phase Arrghus might shoot out fast-moving needle-like projectiles or water droplets, but these are relatively rare and often missed if you’re circling the room. Focus on getting in sword strikes when it gets close. It takes roughly 8 hits with the Master Sword to bring Arrghus down for good. After enough punishment, Arrghus will flash and explode in a spectacular splash, finally defeated.
Skull Woods Boss: Mothula
You land on the floor of a macabre chamber lined with spikes and moving floor panels. Mothula, a giant demonic moth, awakens and attacks immediately. The entire boss room is a hazard: the floor conveyor belt shifts in alternating directions, threatening to push you into the rows of Blade Traps that slide along the walls.


Mothula itself flits around unpredictably, shooting rings of fire beams in three directions. Each of those fireballs packs a punch, so do your best to dodge or block them with your shield. Contact with Mothula’s body is also dangerous, so try not to get cornered. If you’ve been following our guide and/or have the Magic Cape, using it can make the fight easier.
To defeat Mothula, use the newly acquired Fire Rod – it’s the most effective weapon here. Each direct hit with the Fire Rod scorches Mothula, and about eight shots will burn the boss to ashes. Stay mobile on the shifting floor, and time your shots when Mothula hovers near the center of the room. If you run low on magic or prefer to conserve it, the Master Sword works as well, though it requires getting closer to the boss, which is risky. An unexpected but very effective tactic is the Magic Hammer: four well-placed hammer strikes will kill Mothula. However, landing those hits amid the chaos can be challenging. Focus on avoiding the spikes and fire patterns first – it’s often better to take a hit from a small moving spike (which causes less damage) than to be grabbed by a Wallmaster or slammed by Mothula’s body. After a tense battle, a barrage of strikes brings Mothula down. The giant moth bursts into a cloud of dust and flames.


Gargoyle’s Palace Boss: Blind the Thief
The room is flooded with the beam of sunlight you let in earlier. The instant the maiden steps into the light, she freezes. “Gyahh! Too bright!” she cries – and then transforms right before your eyes. The innocent girl was a disguise all along. The true boss, Blind the Thief, reveals himself: a red-skinned demon with a flowing white cloak. The doors slam shut, locking you in together. Blind – a notorious master thief from Kakariko turned monster – attacks with fury.


Tip: Activating the Cane of Byrna makes you temporarily invincible and will even damage Blind if you walk into him, while the Magic Cape lets you go invisible (invulnerable) so you can strike freely with your sword. These artifacts consume magic, but they can significantly simplify the fight. Without them, just keep moving and swinging.
Phase 1
Blind moves side-to-side across the room in a fixed pattern, all the while shooting three fireballs in a spread pattern from his mouth. These fireballs fly fast and will ricochet off walls, so keep an eye on their trajectory. Blind also occasionally stops to fire a laser beam from his eyes directly at you. He tends to hover near the top of the room, then shift to the bottom; when he’s at the upper edge, it’s tricky to hit him, so wait until he comes lower to engage. Your target is Blind’s “head” – essentially, hit anywhere on his covered body. Whack him with your Master Sword as rapidly as you safely can. After about three hits, Blind’s cloak falls away and his head separates from his body! The flying head continues to spit fireballs while circling the room, but it can no longer be damaged. Blind’s body will regenerate a new head on its shoulders moments later.


Phase 2
Now Blind resumes the fight with a second head attached, meaning he can shoot two sets of fireballs at once (the new head on his shoulders, plus the original head that’s now flying around). Focus your attacks still on Blind’s body (the one wearing the white robe) – the detached head(s) are invulnerable, so try to dodge their fire and ignore them. After another few strikes, the second head pops off and joins the first floating around! Blind grows a third (and final) head.


Phase 3
With two disembodied heads orbiting and Blind now sprouting his third, the room becomes a chaotic storm of fireballs. Stay determined and keep slashing at Blind’s body whenever you get an opening. If you have the Cane of Byrna or the Magic Cape, now is a great time to use them for safety. After sustaining enough total hits (each phase takes three sword strikes or so), Blind’s third and final form is defeated. All the free-floating heads vanish, and Blind’s red body explodes in a spectacular flurry of flames.
Ice Palace Boss: Kholdstare
You land in a spacious frozen chamber, and the door seals shut behind you. Kholdstare, the icy terror of the Ice Palace, appears at the center of the room. In the first phase of the fight, Kholdstare is encased in a huge block of solid ice.
It’s completely impervious to your sword at this stage. Meanwhile, large icicles begin to fall from the ceiling. Upon hitting the floor, each icicle shatters into four sliding shards that shoot out diagonally. Keep moving to avoid these falling ice chunks – their pattern is random, so stay alert.
To break Kholdstare’s icy shell, you must use a fire-based attack. The intended method is the Fire Rod: it takes about 8 shots from the Fire Rod to melt the giant ice block completely. If you’ve been conserving magic (or picked up the half-magic upgrade earlier), you should have enough energy to do this. Aim carefully and don’t get too close while shooting. Alternate Strategy: If you’re low on magic or want a quicker solution, using the Bombos Medallion once will also destroy Kholdstare’s ice casing instantly. Bombos costs a lot of magic power, but it’s very effective here – the entire first phase will be over in one spectacular blast.
Once Kholdstare’s protective shell is gone, the boss reveals its true form – or rather, forms. The single eye splits into three floating eyeball creatures, each surrounded by a frosty cloud. The room is now filled with three independent Kholdstare orbs bouncing around unpredictably. To make matters more hectic, ice chunks are still falling from above for the remainder of the fight. There’s a lot happening, so stay on the move and keep an eye on the shadows of falling icicles to dodge them.
Try to keep your distance from the trio so you have more time to react to their movements and the falling ice. Use spin attacks or dash attacks if an eye corners you. If you have the Cane of Byrna (or Magic Cape), this is a perfect time to use it: activate the cane to envelop Link in a protective magical field. While Byrna’s magic won’t harm Kholdstare directly, it makes you invulnerable, allowing you to aggressively chase and slash the eyeballs without fear of taking damage. Just watch your magic meter if you use this tactic, as it drains energy steadily. Between the Blue Mail’s defense boost and some smart play, you should be able to tank a hit or two if necessary, but don’t hesitate to gulp a potion or let a bottled fairy revive you if your health gets low.


During this second phase, you can damage the eyeballs with your sword or with weapons. The Fire Rod remains a great choice: it will take 4 direct Fire Rod hits to destroy each Kholdstare eye. If you prefer melee combat, your brand new Tempered Sword will dispatch an eye in 6 sword slashes. (If you only had the Master Sword, it would take even more hits, so you can appreciate that upgrade now!) It’s often easiest to focus on one eyeball at a time—deal as much damage as you can to one target to remove it from the fight, which reduces the chaos a bit.
Keep up the assault, avoid the ice blasts, and systematically pick off Kholdstare’s eyes. After enough hits, the last eyeball will explode in a burst of snow. Kholdstare is defeated!

Boss: Vitreous – Misery Mire
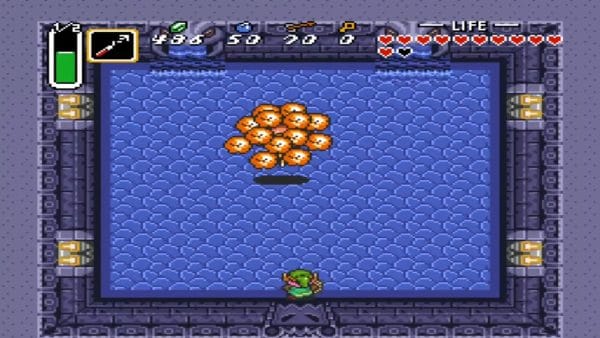
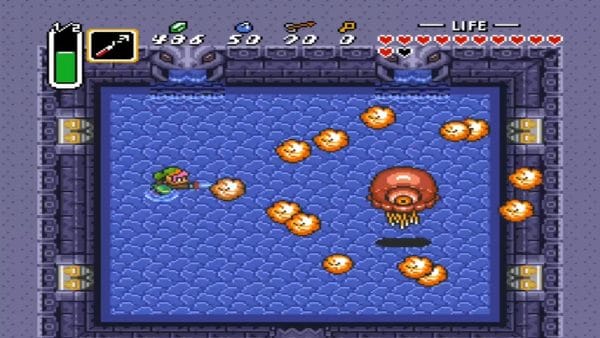
Vitreous is a gigantic gelatinous eyeball residing in a pool of electrified slime. From the bottom of the screen, you’ll see the big eye and a swarm of smaller eyeballs half-submerged in the muck.
Phase 1 begins immediately: clusters of the small eyeballs will detach and fly at you in waves. Keep to the lower wall and slash rapidly with your sword to fend them off, or shoot arrows to pick them off from a distance (each minion eye can sustain three arrow hits or about six sword hits with the Tempered Sword). If you have the Cane of Byrna or Magic Cape, this is a good time to use it for added protection while you hack away. Be mindful of Vitreous’s telltale lightning attack: when the big eye flashes white, it’s about to call down lightning bolts. Immediately move toward the bottom-left or bottom-right corners to avoid the strike. Continue destroying the lesser eyeballs one by one. With persistent slashing (or shooting), you’ll whittle down the horde.


Once all the tiny eyeballs are defeated, Phase 2 begins. Vitreous, now alone, will haul its massive eye-body out of the goo and bound around the room in an effort to crush you. The giant eye takes a lot of punishment – roughly 16 sword slashes with the Tempered Sword to bring it down. However, a much quicker method is to use your Bow: eight well-placed arrows will do the job. A safe strategy is to stand near the bottom of the room, directly south of Vitreous, and fire arrows straight up. Each hit will knock the boss back. Keep an eye on Vitreous’s movement and continue pelting it with arrows (or aggressively slash when it gets close). With a steady offense, the gooey fiend will run out of steam. After a flurry of hits, Vitreous explodes in defeat, showering the chamber with slime. Congratulations – Misery Mire is conquered!


Turtle Rock Boss: Trinexx
Trinexx is a formidable three-headed dragon trapped in the rock. The central head is flanked by a red head (fire) and a blue head (ice). Each of the two elemental heads will attack with its element: the red head spits waves of fire, while the blue head breathes ice that can freeze sections of the floor into slippery slicks. Meanwhile, the middle head occasionally lunges out like a snake to strike at you (its tail will wiggle rapidly to telegraph this attack).
To defeat Trinexx, you must exploit each head’s weakness. Target the blue (ice) head first – hit it with the Fire Rod, which will stun it, then follow up with sword slashes before it recovers. It’s wise to eliminate the ice head first because any frozen floor patches it creates will remain for the rest of the fight, limiting your mobility. Once the blue head takes enough damage, it shatters.


Next, turn to the red (fire) head and blast it with the Ice Rod to stun it. Again, strike with your sword while it’s frozen in place. If you’re low on magic, you can use just one rod shot to stun and then get multiple sword hits in; otherwise, a few rod blasts will destroy each head outright. After a few rounds, the red head will be destroyed as well.


With both outer heads defeated, Trinexx’s shell collapses, revealing the boss’s true form: a giant snake-like creature (the central head on a long, spiked body). The arena floor starts to crumble at the edges, so watch your step. The serpentine Trinexx will aggressively chase you around the room, trying to ram into you. Its only weak point is a blinking segment in the middle of its body.
Deliver sword strikes to that flashing segment whenever you get a chance. This final phase can be hectic – Trinexx is fast, and the room geometry can make it hard to avoid contact. Focus on surviving: if you have an extra potion or fairy, you can afford to be a bit bold; otherwise, prioritize evasion and hit the weak spot opportunistically rather than charging up a spin attack (which slows you down). After enough hits, the writhing monster will explode in defeat. Congratulations, Trinexx is defeated!


Ganon’s Tower Boss: Agahnim
You enter the top chamber of Ganon’s Tower, where the evil wizard Agahnim awaits. This is a rematch of your earlier battle in Hyrule Castle, but Agahnim has a new trick up his sleeve: he creates two mirror images of himself.


As the fight begins, Agahnim splits into three forms that spread around the room. Don’t panic – only one of these is the real Agahnim, and the other two are weaker copies. The real Agahnim has a slightly darker color or shade than the clones, so you can tell them apart if you look closely. He’ll also be the one whose attacks actually damage you if they connect.
The fight strategy remains similar to last time: Agahnim (and his clones) will fire orbs of magic at you, and you must reflect Agahnim’s own spells back at him with your sword. Position yourself such that when Agahnim (the real one) shoots a blue orb, you can swing your sword and bat the energy back in his direction. A successful hit will damage him. The clones’ orbs can’t hurt Agahnim directly, but here’s a tip: you can reflect the clones’ orbs as well and angle them so that they might strike the real Agahnim, effectively using the fake Agahnims’ shots against the true one. This can be tricky but rewarding if you pull it off, as it allows you to land hits faster.
Be careful: some of the orbs that Agahnim and his shadows throw are not the standard ones – occasionally they will toss an orb that crackles and splits into multiple projectiles when hit (these you might remember from the first battle). If you strike those, they will burst into smaller shots that scatter, so it might be better to simply dodge those or use the Shield (your Mirror Shield can block a few, but not all directions). However, none of Agahnim’s forms can be harmed by anything except their own magic, so arrows or other weapons won’t work here, only the rebound trick.
Also, watch Agahnim’s positioning: just like before, if the real Agahnim moves to the center top of the room and aligns with you vertically, that’s the sign he’s about to unleash his lightning attack (a bolt straight down the middle). The clones don’t do the lightning, only the real one does. As soon as you see him teleport to the top-center and raise his arms without summoning an orb, move out of the center to avoid the lightning strike.
Keep an eye on all three copies’ motions and try to predict their shots. Often, one or two will shoot an orb towards you. Prioritize reflecting the real one’s projectile. If a clone’s shot is conveniently lined up to hit the real Agahnim, swipe at that too to ricochet it into him. Use the room’s space to your advantage; you can move around freely, and with the Red Mail, any stray hits you take will be less punishing. Still, avoid getting cornered by the clones and their crossfire.
It takes a total of four good hits on Agahnim (the real one) to defeat him in this second encounter. After a few rounds of magical tennis, you’ll land the final blow. Agahnim’s three forms will converge and he collapses, defeated at last.
As Agahnim expires, a shadowy figure rises from his body – it’s Ganon! The King of Evil has been hiding within Agahnim all along. Ganon transforms into a bat and flies off, smashing through the ceiling of the tower. Link automatically uses the Magic Mirror’s teleport (or the loyal bird, in the original SNES version) to give chase. You’ll be taken outside to the Pyramid of Power in the Dark World, where a gaping hole has appeared in the roof… the final battle awaits below.


Final Boss: Ganon (Pyramid of Power)
You’ll find yourself in a desolate, corrupted area – the Pyramid of Power. This is his stronghold, and there’s no turning back now. Ganon will appear, likely after some menacing words, and the battle will begin.
He’ll kick things off by throwing his powerful Trident across the room, then teleporting to catch it. Dodge that trident, move in close, and unleash a few sword strikes. After you’ve dealt enough damage, he’ll create a ring of fiery balls that encircle him before spreading outward. These will transform into fiery bats and fly directly at you while Ganon teleports around the room. Sometimes, he’ll even summon a single fiery bat to create a spiraling flame around him as he teleports away again. Stay agile and keep pressing your attack!


As the fight progresses, Ganon will begin to jump and slam into the ground, causing the floor tiles at the edge of the room to crumble away. He’ll do this four times, once for each wall. Be incredibly careful here; if you fall into a pit, you’ll plummet to a different part of the Pyramid of Power. You’ll have to climb all the way back up to the top to restart the fight. (You might even find a Telepathy Tile urging you to use the Silver Arrows to finish him!)
Once all four walls have pits, Ganon will boast about his “secret technique of darkness,” and the room will plunge into total blackness. While it’s dark, Ganon is both invisible and invincible. You can only track him by the fiery bat that trails flames behind it. To make him vulnerable again, you must light both torches in the room. The Fire Rod is perfect for this. As soon as both torches are lit, Ganon will be momentarily stunned and turn a light blue. This is your chance! Slash him with your sword, and while he’s stunned, immediately shoot him with a Silver Arrow! After you land a hit, Ganon will recover and extinguish the torches again. You’ll need to periodically relight them to continue your assault. After landing four Silver Arrow hits, Ganon will finally fall.
You’ve done it! You’ve triumphed over Ganon, and the way to the Triforce will open before you. All that’s left is to step forward and claim your victory!


