


Table of Contents
- Prologue: Escape from Hyrule Castle: Step-by-step guide to escaping the castle, introducing basic mechanics.
- Chapter 1: Suthorn Forest & The Mysterious Rifts: Navigating Suthorn Village and completing the Suthorn Ruins dungeon.
- Chapter 2: Gerudo Desert: Guidance on completing quests and dungeons in the Gerudo Desert region.
- Chapter 3: Jabul Waters: Strategies for tackling quests and dungeons in the Jabul Waters region.
- Chapter 4: Return to Hyrule Castle: Progressing the main storyline upon returning to the castle.
- Chapter 5: Eldin Volcano: Strategies for navigating the Eldin Volcano region and its challenges.
- Chapter 6: Faron Wetlands: Guidance on completing quests and dungeons in the Faron Wetlands.
- Chapter 7: Hebra Mountains: Navigating the Hebra Mountains region and overcoming its challenges.
- Chapter 8: The Eternal Forest & Endgame: Preparation and strategies for the final challenges and boss encounters.
Navigating the Eternal Forest
After clearing the three Goddess Temples (Hebra, Eldin, and Faron), Princess Zelda’s next destination is the mysterious Eternal Forest, located northwest of Hyrule Castle. As you enter the forest, a thick fog will set in, obscuring visibility. Simply follow the winding path north until you reach a clearing where Captain Wright and his guards are gathered (they initially appear unconscious from an earlier encounter). Speak with them and witness a brief cutscene.
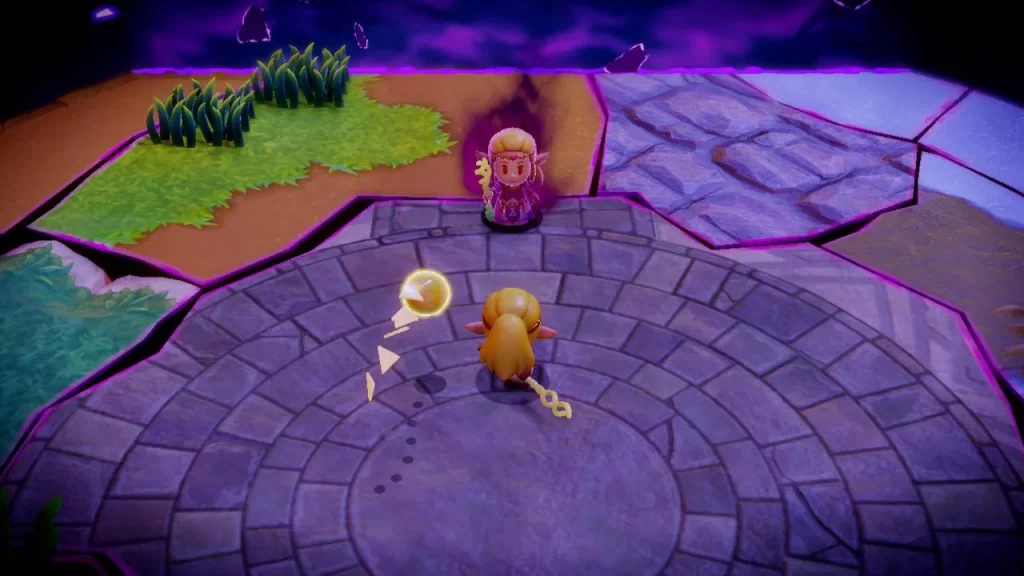
In the clearing, examine the ancient stone pedestal at the center. This triggers a puzzle: the monument rises to reveal six circular slots and produces an Ancient Orb Echo (an echo of a golden orb) for Zelda to pick up. Your task is to place the orb echo onto six pedestals hidden around the Eternal Forest to unlock the way forward. The layout of the pedestals forms a large triangular pattern across the forest (hinting at a familiar Triforce shape). Use the orb echo on each pedestal you find. The six pedestal locations are as follows:
- Central Pedestal: Right in front of the stone tablet where you obtained the Ancient Orb echo. (This is the northmost point of the triangle.)
- Southwest Pedestal: Head southwest from the clearing along a path. Near a Blue Sword Moblin enemy, you’ll find a pedestal by some trees. Defeat the Moblin if needed and place the orb.
- Western Pedestal: Continue further southwest into a small clearing on the west side to discover the third pedestal.
- South Pedestal: Along the southern edge of the forest, tucked among some trees, sits the fourth pedestal.
- Southeast Pedestal: In the southeastern corner of the forest, hidden between dense trees, you’ll find the fifth pedestal.
- Northwest Pedestal: Loop around toward the northwest side of the woods. A large Deku Baba plant is sitting on the final pedestal – defeat or pull away the Deku Baba, then place the orb on pedestal six.
Once all six orb echoes are placed, return to the central stone tablet. The monument will glow with a triangular symbol and reveal a hidden path leading deeper into the forest. Proceed north along this newly opened pathway. In the next area, you will encounter the ancient Deku Tree, who speaks to Zelda and explains the situation. The Deku Tree will confirm Null’s meddling and then grant you access to the Stilled Ancient Ruins, the dungeon hidden within the forest.
After Zelda enters the Ancient Ruins, a dramatic cutscene plays. Zelda’s evil Echo (a dark doppelgänger of herself created by Null) appears and tries to claim the sacred Prime Energy (Triforce) inside. Null’s plan is revealed as it steals one piece of the Prime Energy and plunges the area into a massive rift between worlds. Before Null’s Echo can harm Zelda, Tri (your ethereal companion) intervenes and opens a portal, warping Zelda into the Stilled Ancient Ruins Rift in pursuit of the Echo and the kidnapped hero Link. Now the true endgame begins as you venture into the final dungeon.
Dungeon & Puzzle Solutions – Stilled Ancient Ruins
The Stilled Ancient Ruins is the final dungeon-like area, a surreal rift composed of floating terrain pieces from all across Hyrule. It’s essentially a gauntlet that tests everything you’ve learned: you’ll traverse multiple environments that echo previous regions and use many of your Echo abilities to progress. Below is a step-by-step breakdown of each section of the Ruins and how to solve its challenges:
- Grassy Plains (Suthorn Region) – The first area resembles Hyrule Field/Suthorn Forest, with grassy platforms and common enemies (Peahats, Moblins, etc.). Fight or avoid these relatively weak foes as needed. There are no complex puzzles here – simply defeat the enemies or run past them and proceed north. Use any combat Echoes you like to clear the area quickly.
- Fork in the Path – Water or Desert – After the grassy zone, the path branches and you have a choice: head right into a water-themed area or left into a desert-themed area. Right/Water Path: You’ll enter a Jabul Waters-like section with pools of water. Navigate around large bodies of water and be ready to fight aquatic enemies like Biri (jellyfish) and river Zols. Use water-friendly tactics – for example, freeze water with an Ice Echo or create lily pads if you have such abilities – or simply swim carefully. Left/Desert Path: You’ll traverse a Gerudo Desert-like sandscape. Beware of quicksand and enemies such as Sand Piranhas and Leevers popping up. Use Echoes that help on sand (a hovering Echo or creating platforms) to avoid getting bogged down. Both routes have minor obstacles, but neither path has a unique puzzle – it’s about combat and navigation preference. Choose either route (or explore both if you want extra treasure), as they converge ahead.
- Icy Mountain (Hebra Region) – Whichever path you took, they merge into an icy area modeled after Hebra Mountain/Lanayru. Here you’ll face freezing winds and ice enemies like Freezards. Progress is hindered by frozen blocks and icicles. Use fire-based Echoes (like a Red Chuchu jelly or a Torch Echo) or bombs to melt icicles and thaw frozen obstacles. Freezards will breathe frost at you; either destroy them quickly (fire Echoes work well) or block their icy breath by placing solid echoes as barriers. The key is to keep moving and clear a path upward through the snowy terrain.
- Thunder Marsh (Faron Wetlands) – Next is an area resembling the Faron Wetlands, filled with shallow water and electrically charged enemies. Buzz Blobs (jiggling creatures) sit in puddles, periodically releasing electric shocks across the water, and can be dangerous in groups. It’s often easier to avoid or outrun these enemies rather than fight them, because attacking them at the wrong time might shock you. If you do fight, use ranged attacks or an Echo that isn’t conductive (e.g. throw a wooden crate Echo to stun a Buzz Blob safely). Navigate to the right/east through the swamp, dodging lightning and hopping across safe spots. This section tests your agility more than your combat skills.
- Volcanic Caverns (Eldin Volcano) – The wetlands transition into a fiery Eldin Volcano area. Bubbling lava pools and geysers of flame block your path. Lava Rocks (stepping-stone platforms) will be your best friend here: use the Lava Rock Echo (if you have it) to create platforms on molten surfaces. In some spots, stepping on a geyser with a rock will launch it upward, creating makeshift moving platforms. Alternatively, take advantage of updrafts by using a flying Echo like the Ghirro (a flying creature) to glide over danger. This area also features Lizalfos warriors lurking around the lava. These lizard-like enemies are quick and like to hop between platforms, spitting fire. Engage them carefully: use your strongest combat Echoes or your bow to hit them from a distance, since close combat on small platforms can be risky. Work your way upward through the volcanic chambers, using whichever method (rock platforms or gliding) feels safer for each lava pool.
- Ascending the Plateau – After braving the lava, you’ll reach a large floating plateau that appears to be a patchwork of all terrain types (grass, sand, ice) – a literal mash-up of every region in Hyrule. This is the final stretch before the boss. Activate the Waypoint statue here (this is the last fast-travel point, handy if you need to leave and restock). To reach the boss arena, you’ll need to climb to the plateau’s summit. Look around for Echo-able objects to create a makeshift staircase: for example, you can stack Echoes of crates or rocks to build steps, or use a tall Echo (like a tree) to gain extra height. Another trick is to use a flying Echo to get onto higher ledges and then drop down Echoes as platforms for Zelda to climb. There isn’t a single required solution – use your creativity with the tools you’ve gathered. Once you clamber up to the very top, heal up at the fairy circle if available and get ready – the final boss lies ahead.
Atop the plateau, prepare for a major boss battle. Proceed through the ominous portal or door to initiate the confrontation and a cutscene. Zelda will finally catch up to her corrupted Echo and the captive Link, triggering the penultimate fight of the game.
Final Boss Strategy – Showdown with the Echo & Null
Before facing the true final enemy, Zelda must first defeat Echo Zelda (her imposter). This dark version of Zelda is empowered by Null and stands between you and the final confrontation. Echo Zelda serves as a multi-phase boss fight that tests your ability to use echoes in combat. Once you triumph and rescue Link from his crystal prison, the final battle against Null itself begins in a new arena. Below is a breakdown of each phase of the endgame battles, including attack patterns and strategies:
 Zelda confronts her own corrupted Echo in the heart of the Stilled Ancient Ruins, a necessary battle before she can enter Null’s body and save Hyrule.
Echo Zelda (Imposter) – Phases 1–3:
Phase 1: The imposter floats around the arena and summons weak monster Echoes to attack you – expect groups of Octoroks and Moblins, and occasionally a Darknut knight. Focus on crowd control: bring out your strongest Echoes (the Lynel Echo is highly effective if you obtained it) to fight these minions while you keep moving and dodging. Whenever you have an opening, switch to Swordfighter Form (Zelda’s combat stance) and use the Bow of Might (a fully upgraded bow) to shoot the Echo Zelda as she hovers overhead. A charged arrow shot will chip away at her health from a safe distance. Eventually, after enough damage or minions defeated, Echo Zelda will stun and fall to the ground, momentarily vulnerable. Rush in and land a few sword strikes or a powerful Echo attack on her while she’s down. This will trigger the next phase.
Phase 2: The imposter gets back up with new strength. This phase plays out similarly to Phase 1, but now the boss summons stronger Echoed monsters. You’ll face more robust enemies like Redeads (which can freeze you with fear) and higher-level Moblins own Echoes to keep the enemies busy, and stay on the move. If your energy gets low, drink a potion or smoothie to recover Tri’s energy so you can continue summoning helpers. Keep pelting Echo Zelda with arrows when you can. After you withstand the onslaught and deal enough damage, she’ll collapse a second time. Get in close and unleash a flurry of attacks to push her into the final phase.
Phase 3: As expected, the third phase is the toughest – Echo Zelda will summon her strongest minions now. Powerful monsters like Level 3 Lizalfos (fast, sword-wielding lizards) join the fray. However, you can even the odds by summoning your own high-level echoes – for example, use your Lv.3 Lizalfos Echo to duel the enemy one, or bring out the Lynel Echo to trample lesser foes. The imposter herself continues the same pattern of flying around and occasionally launching attacks (like dark energy orbs), but she doesn’t introduce new moves beyond calling tougher helpers. Rinse and repeat your tactics from before: prioritize taking out or distracting the summoned enemies, shoot the boss when she’s exposed, and top off your health/energy as needed. With patience, you will whittle down her health. Eventually, Echo Zelda falls for good, ending the battle.
After defeating your doppelgänger, a quick sequence plays: switch to Swordfighter form and shoot an arrow at the glowing crystal imprisoning Link. The crystal shatters, finally freeing Link from Null’s hold. You’ve saved the hero! But Hyrule isn’t safe just yet – Null itself now manifests for the final showdown. A portal will open as Null drags Zelda (and Link) into its domain. Heal up and get ready to face the final boss, Null.
Null – Phase 1: The Many-Handed Beast
Null’s true form is an abomination with a colossal body and multiple long arms. In the Phase 1 arena (a circular platform in the void), Null uses its five clawed hands to attack. Its primary move is slamming a hand down to create a tracking shockwave that snakes along the ground towards Zelda. Keep moving laterally to dodge the shockwaves as they approach. The key to this phase is the use of Bind (an ability of Tri): whenever a hand crashes down and lingers, use Bind to grab the arm and pull. This will hold the hand in place and prompt Link to rush in and strike, dramatically damaging and eventually severing Null’s arm. Do this three times – after you’ve pulled and cut off three of Null’s hands, the boss will be stunned and collapse to the ground. While Null is down, seize the chance to inflict damage: summon your strongest Echoes to attack Null’s main body and fire arrows or slash away with your sword.
Null will soon recover and retaliate by altering its tactics. It disappears from the center and its remaining arms emerge from the walls around the arena, swiping at you. These wall-hands also repeat the shockwave attack, and now there can be multiple shockwaves from different directions. Keep an eye on the floor and position yourself carefully to avoid getting boxed in. Continue using Bind on each arm as it reaches out from a wall; each time you yank an arm, Link will cut it down. During this sequence, Null’s hands will sometimes generate pools of dark miasma on the arena floor – purple, poisonous puddles that deal damage over time if you stand in them. Watch for the telltale glow on the ground and stay out of the miasma pools. After you’ve pulled and destroyed a few more hands, Null reappears in full and the cycle repeats. Stick to the strategy of dodging shockwaves and ripping out its arms one by one. Once all five hands have been severed, Null is completely vulnerable – strike its core with everything you’ve got to end Phase 1.
Null – Phase 2: Underwater Chase
Enraged, Null opens a portal and attempts to flee. Zelda (now accompanied by Link) dives in after it, leading to a very unique Phase 2: an underwater side-scrolling chase. The perspective shifts to a 2D view as you swim through a flooded tunnel pursuing Null’s shadowy form. Here, maintaining your oxygen is a new concern. Make sure you have the Zora’s Flippers and Zora’s Scale equipped to improve your swimming speed and breathing time underwater. Throughout this phase, Null attacks by summoning whirlpools and aquatic monsters. Notably, it will call forth Vocavors – giant carnivorous fish bosses you faced in Jabul Ruins – which charge across the screen. These Vocavors come in various sizes; avoid direct contact as they deal heavy damage. Keep your distance or slip between them when there’s an opening.
While swimming, dodge the whirlpools that appear (they will pull you off course or hold you in place, potentially causing you to miss precious air bubbles). If you’re low on breath, look for bubbling fissures or jars – touching an air bubble will refill Zelda’s oxygen meter so you can continue the chase. The strategy to damage Null here is similar to before: Null will extend several tentacles (or serpentine arms) toward you as it retreats. Use Bind on these tentacles when you get close, and Zelda’s Echo allies or Link will automatically strike at them. Summon underwater-capable Echoes to help fight off the smaller foes – for example, a Lizalfos Lv.3 (lizard warrior) or Chompfin (a chomping fish enemy) can operate underwater and distract Vocavors. You cannot directly hit Null’s main body in this phase; you mostly focus on surviving and tearing away its tentacles bit by bit. Keep pulling tentacles and avoid taking damage as you swim after Null. This phase can be a bit lengthy – be patient and concentrate on not getting hit. If Zelda’s health drops too low, use a potion, and if Tri’s energy runs out, use a smoothie to recharge mid-swim (just remember you have to stand on a platform or the sea floor to actually drink items). Eventually, after enough tentacles are ripped out, Null will roar and dart ahead, creating another portal. Swim into that portal to transition to the final phase.
Null – Phase 3: Final Form Chaos
Back in the main arena, Null reveals its final form. It now sprouts six arms (all regenerated) and appears even larger and more menacing. This last phase is a chaotic battle where Null throws everything it has at you. The core strategy remains: use Bind on its arms to hold them in place so Link can cut them off, and then attack Null’s body when you get the chance. However, Null will continuously summon dangerous illusions and echoes of previous bosses to interfere, and it has a few new attacks of its own. Here’s what to watch out for in Phase 3:
- Initial Boss Summons: As the phase begins, Null’s arms will attack as before, but now Null also intermittently summons dark versions of bosses you fought earlier in the game. In the early part of this phase, it may summon a Seismic Talus (a giant rock golem that spins in the center of the arena) or a Mogryph (an air elemental that unleashes sandstorms). The Seismic Talus will try to roll or spin into you – keep to the edges of the arena to avoid it. The Mogryph’s sandstorms move across the arena; dodge or use a solid Echo as a windbreak. Focus on pulling Null’s arms whenever they slam down, and let Link or your Echo allies damage these boss spawns as much as possible while you concentrate on the hands. After you cut off a couple of arms, Null will withdraw briefly.
- Second Wave & Phantom Ganon: Null hides in the walls again and becomes more aggressive with summons. It can now call forth multiple illusions of Ganon – these phantoms will charge through the arena, one after another, in a straight line. Watch for the telltale silhouette and be prepared to sprint out of their path when they come roaring by. Null may also summon a pair of Skorchills, fiery insect-like creatures that multiply and ricochet around, bouncing off walls. These are fast-moving threats; keep moving to avoid collisions. During this time, Null’s hands will attack from the walls again, potentially accompanied by smaller shadow enemies (Bokoblins, Keese, etc.). Use the same method: Bind and pull each hand so Link can cut them down. Take care of any smaller enemies with area-of-effect Echoes (the Lynel Echo’s area attack or a Bombchu Echo can be great for clearing groups). Survive this gauntlet and Null will reappear on the floor once more. Cut down any remaining arms and strike Null’s body when it’s exposed.
- Final Wave & Gohma: With most of its arms gone, Null goes berserk. It will start mixing all of the above attacks at once, and now adds even more foes: expect high-level Lizalfos, Darknuts, and other strong enemies spawning alongside another round of phantom Ganons and Skorchills. Null can even summon the giant spider Gohma, which drops sticky webs around the arena. The webs will slow you down or root you in place, which is deadly amidst so many threats, so burn them with fire or destroy them with your sword as soon as possible. This sequence is extremely chaotic – multiple boss illusions can overlap their attacks. Keep moving at all times to avoid getting cornered. Prioritize survival: use your Lynel Echo or other powerful Echoes to distract and damage the adds, and heal whenever necessary. Don’t hesitate to use your stocked fairies or smoothies here; it’s the final battle, so expend everything for an advantage. Meanwhile, continue the objective: pull Null’s six arms whenever they slam down, one by one, until none are left. Each time you yank an arm, Link will leap in to cut it off, significantly weakening Null. After enduring the onslaught and removing all six arms, Null will finally collapse in the center of the arena.
This is your moment – unleash all remaining firepower on Null’s core. As you and Link attack in tandem, a prompt will initiate a cinematic quick-time event: follow it to have Zelda use Bind one last time to pull out Null’s segment of the Prime Energy (the final Triforce piece) from its body. Link joins in, and together they rip the energy out, utterly defeating Null. With a final blow, Null is destroyed, bringing the battle – and the war for Hyrule – to an end. Congratulations, you have vanquished the final boss and saved Hyrule!
Echoes & Key Collectibles
Chapter 5 offers a few last important Echoes and collectibles that can significantly aid you in the endgame. Here are the key ones to grab before or during the Eternal Forest and final battles:
- Lynel Echo: This is arguably the most powerful combat Echo in the game, and it’s found in the Eternal Forest as an optional challenge. After reaching the Eternal Forest, look for hoof-shaped footprints on the ground just south of the forest’s Waypoint statue. By following these hoofprints west, then south, then east in a winding trail, you’ll be led to a hidden clearing in the northeast part of the forest – here a wild Lynel will spawn. Lynels are extremely tough centaur-like beasts (a Zelda series staple), so be prepared for a fierce fight. A good strategy is to use a Level 3 Sword Moblin Echo as a decoy; summon the Moblin to keep the Lynel busy and attack from a distance with your bow or spells. The Lynel has a devastating spin attack that can one-shot your Echo allies, but you can resummon them as needed. Keep your distance, chip away at the Lynel’s health, and it will eventually fall. Defeating the Lynel rewards Zelda with the Lynel Echo, a new Echo form that costs a full six units of energy (all six of Tri’s triangles) to summon due to its immense power. The Lynel Echo is worth the cost – it’s a powerhouse that can crush smaller enemies easily, making it incredibly useful in the final boss fights. If you haven’t obtained it before, be sure to slay the Lynel and grab this Echo before heading to the final confrontation.
 By following the hoofprints through the misty woods, Zelda encounters a mighty Lynel. Defeating this optional boss rewards the Lynel Echo, one of the strongest echoes in the game.
- Ancient Orb Echo: This Echo isn’t for combat but is crucial for the Eternal Forest puzzle. You automatically obtain the Ancient Orb Echo when you inspect the stone monument in the forest clearing (it appears as a glowing orb that Tri can copy). The Orb Echo is used to activate the six pedestals scattered in the forest. Make sure to collect the orb echo from the monument; without it, you can’t solve the pedestal puzzle. After you open the path to the Deku Tree, the Orb Echo’s main purpose is fulfilled. However, you can still use it as a normal Echo to create a temporary orb – occasionally useful if a pressure switch or weighted plate needs an object (though in combat it has no effect). Consider it a key item for the forest section. (Note: Once all pedestals are activated, the orb slots back into the monument and the echo might not be usable beyond that point.)
- Heart Pieces: By Chapter 5, you should ideally have collected most (if not all) Pieces of Heart in the game to maximize Zelda’s health. The Eternal Forest itself contains a Piece of Heart hidden in a treasure chest (check a small side clearing behind some trees in the southern part of the forest). The Stilled Ancient Ruins rift also has at least one Piece of Heart tucked away on an optional floating platform, rewarding exploration. If you’re missing any hearts, now is the time to get them – many side quests and mini-games across Hyrule reward Heart Pieces, and having that full life meter will greatly improve your survivability against Null. Before entering the final battles, you should complete any remaining Heart Piece hunts so that Princess Zelda’s hearts are at maximum.
- Might Crystals: Throughout your adventure, you’ve been collecting Might Crystals, which are used to upgrade Zelda’s Swordfighter form and weapons. By the endgame, you can cap out at Level 4 energy and Level 3 weapon upgrades if you’ve gathered enough crystals. There are 150 Might Crystals in total; around 125 are needed to fully upgrade the Swordfighter energy gauge to hold six triangles and to max out weapon strength, and all 150 allow installing an Energy Recharger at Lueberry’s workshop for faster energy regeneration. In the Eternal Forest region, you’ll find a few last Might Crystals (for example, in chests or as rewards for repairing the final rifts). Ensure you’ve repaired all the world’s rifts and collected these crystals before the final fight. A fully powered Tri (Level 10+ for Tri) means you can summon high-cost Echoes like the Lynel more freely and frequently. If you are short on Might Crystals, consider completing any region’s leftover rift quests now.
- Rupees and Supplies: The Eternal Forest contains some valuable treasures, including Purple Rupees in hidden chests, which can bolster your wallet. Use these rupees to stock up on endgame supplies. By Chapter 5, money has limited use except to buy potions, arrows, and ingredients, so don’t be shy about breaking open every bush and chest for extra rupees. It’s wise to visit a shop (or better yet, a cooking pot) to prepare healing items. Brew some Green Potions or Stamina Smoothies for energy restoration and Red Potions for health. If you have empty bottles, fill them with Fairies from Great Fairy fountains – a Fairy will revive you automatically if you fall in battle, which is a great safety net for the tough final boss.
- Other Echoes and Upgrades: Chapter 5 doesn’t introduce brand-new echoes aside from the Lynel and Orb, but make sure you haven’t missed any from earlier. By now, Zelda can have up to 127 Echoes in her collection– check the All Echoes list if you’re aiming for 100%. Key utility echoes (like the Hook Beetle Echo for grabbing distant items or the Gale Boomerang Echo for hitting switches) should be in your arsenal and fully upgraded if possible. Additionally, try to obtain extra Accessory Slots for Zelda. Normally she can equip one accessory (such as a defensive ring or an attack-boosting gem), but a certain side quest (“Accessories and Trinkets” via the merchant in Hyrule Castle Town) and Great Fairy rewards can increase the number of accessories you can equip. Having more accessories means you can stack buffs (for example, a Health Ring for extra hearts and a Might Bracer for higher attack). These little enhancements from collectibles and upgrades will collectively make a big difference in the final battle.
Side Quests & Optional Content
Before you charge into the final boss fight, it’s highly recommended to tie up any loose ends in Hyrule. At this point in the game, numerous side quests should be available, many of which offer helpful rewards for the endgame. Here are some notable side quests and optional activities worth completing in Chapter 5:
- The Great Fairy’s Request: This side quest, which can be started near Lake Hylia, tasks you with retrieving a Floral Seashell and a Magma Stone for the Great Fairy. Completing it rewards you with a significant boon (the Great Fairy enhances one of Zelda’s abilities). In fact, the game guide explicitly recommends finishing Great Fairy’s Request before the end. The reward will allow Zelda to equip an additional accessory, greatly boosting her stats if you have spare rings/amulets. If you haven’t done this quest yet, make it a priority – not only for the reward but also for the touching story closure it provides.
- Mini-Game Challenges: Chapter 5 is the last chance to beat the various mini-game challenges around Hyrule for extra prizes. In Hyrule Ranch, try the Flag Race – completing all time trial tiers can net you a Piece of Heart and unique gear. Over in Gerudo Desert, visit the Tough Mango Lab (run by the inventive Gerudo scientist). She offers the “Mango Rush” puzzle challenges. Finishing the final Mango Rush challenge rewards a special accessory and a hefty rupee prize. In Kakariko Village, take on the last rounds of the Slumber Dojo combat training; succeeding in the hardest difficulty grants you another Heart Piece and unlocks the recipe for a powerful smoothie. By completing both the Mango Lab and Slumber Dojo final challenges, you also gather all the parts needed to build Dampé’s Automatons (little collectible figurines of monsters) if you’ve been pursuing that side activity. These mini-games are not required, but their rewards (hearts, money, accessories) can be very helpful. Plus, it’s satisfying to see “100% Complete” on these activities before finishing the game.
- Optional Overworld Bosses: Check if you’ve defeated all the hidden overworld minibosses. Each major region had one – for example, the White-Maned Lynel in Eternal Forest (covered above), a Sand Worm in Gerudo Desert, a Giant Octorok in Jabul Waters, etc. Defeating these bosses often yields Monster Stones or special echoes, and beating all of them might have triggered the Lynel appearance in the forest. If any are left roaming, now is a good time to hunt them down for completion’s sake and extra rewards (like rare crafting ingredients).
- Collectibles and Cleanup: Use this opportunity to gather any remaining collectibles:
- Stamp Rally: If you’ve been collecting Hyrule Stamps (a fun side activity), the final few stamps might be in the Eternal Forest or other endgame areas. Completing the stamp rally doesn’t impact combat, but it offers lore and bragging rights.
- Automaton Figures: As mentioned, if you help Dampé by finding all Automaton parts (often from side quests and bosses), you can build all of his little mechanical figurines. It’s mostly for a 100% completion trophy, but it’s a neat piece of content for fans.
- Might Crystal Cleanup: Ensure you repaired any remaining rifts (for example, there’s an optional rift in Holy Mount Lanayru and others) to get all Might Crystals. Not only does this maximize Tri’s power, but finishing all rift quests often ties up character side stories as well.
- All Echoes: For the completionists, Chapter 5 is your last chance to collect any Echoes you missed. Some echoes only appear in specific regions or after doing certain quests. Use the Echo Logs or the All Echoes list to see if you’re missing any. For instance, the General’s Insignia Echo is obtained from helping General Wright in a side quest, and Ganon’s Echo can be learned briefly during the final battle (though it’s not usable outside that context). While not necessary for beating the game, collecting them all is part of the endgame content for those who want to see everything.
Remember, none of these side activities must be completed to finish the story, but doing them will enrich your experience and make Zelda as strong as possible. The game explicitly encourages you to explore freely and tackle side quests before the “point of no return” at the end. So if you want every heart, every echo, and every upgrade, take a detour to wrap up these adventures. Once you enter the final dungeon and boss, you won’t be able to turn back until Null is defeated.
Post-Game & Unlockables
After the dramatic finale and credits, The Legend of Zelda: Echoes of Wisdom offers a modest post-game experience. There is no extra story epilogue or additional main quests after beating Null (the ending wraps up the plot conclusively). However, the game will place a star on your save file to mark that you’ve completed the story, and you’ll be able to continue exploring Hyrule from before the final boss (with some changes):
- Free Roam to 100%: You can reload your cleared save, and Zelda will be back in Hyrule (usually positioned just before the final dungeon or at Hyrule Castle). All your collected items, echoes, hearts, etc., are intact. This allows you to freely roam the world to finish anything you missed. The world is effectively open-ended: you can complete remaining side quests, find missing Heart Pieces, echoes, or stamps, and challenge mini-games at your leisure. There are a few minor changes – for example, any story-specific obstacles (like the fog in Eternal Forest or barriers at dungeon entrances) will be gone, so you can traverse areas more easily. NPCs might have new congratulatory dialog recognizing that Zelda saved the world. If you’re aiming for 100% completion, the post-game is the time to do it. (Check the Post-Game Content Checklist for Echoes of Wisdom to see all tasks for 100%.)
- No New Game Plus, but Hero Mode: Echoes of Wisdom does not have a New Game+ where you restart with all your items. Once you beat the game, you can either continue the same file (as mentioned) or start a fresh file. However, the game does feature a Hero Mode (hard difficulty) for added replay value. Hero Mode can either be selected from the beginning or toggled on after beating the game (depending on the version – check the options menu). In Hero Mode, enemies deal double damage and hearts no longer drop from grass or foes, making health management much more challenging. If you found the game too easy or want to experience it again with a tougher challenge, Hero Mode is your reward. Many players tackle Hero Mode on a second playthrough to fully savor the game’s mechanics. Keep in mind, Hero Mode does not give you any new items or story changes; it’s purely a difficulty tweak.
- No Secret Bosses or Alternate Endings: Unlike some Zelda titles, Echoes of Wisdom doesn’t hide any extra bosses after the final fight. Once Null is gone, there are no new enemies stronger than what you’ve already faced. There’s also no alternate ending or post-credit scene to unlock by completing everything (aside from perhaps a congratulatory message on the save selection screen). The satisfaction in the post-game comes from tidying up side quests and enjoying Hyrule free of the threat of Null. Notably, despite Link’s rescue, playable Link is not unlocked – the adventure remains focused on Princess Zelda. (This was a common question among fans: the answer is that Link remains an NPC ally in cutscenes; you continue playing as Zelda even after beating the game.)
- Completion Rewards: While there isn’t a new game+ or extra bosses, achieving 100% in Echoes of Wisdom can grant some minor bonuses. For example, if you collect all Echoes, the Gallery menu unlocks concept art and a sound test as a reward. Finishing all side quests might earn you a certificate item or a special thank-you from an NPC (the Great Fairy sends you a letter, for instance). Additionally, having a fully completed save file with a star might carry over certain cosmetic distinctions if the game ever receives DLC or an update (though as of now, none is announced). These are small perks – the true reward is knowing you saw everything the game has to offer.
In summary, the post-game lets you continue adventuring in Hyrule to mop up any unfinished business, but doesn’t introduce new storylines. It’s a great opportunity to appreciate the world you saved – visit townsfolk who now praise Zelda, revisit beautiful locations without urgency, and perhaps try out combinations of echoes just for fun. Once you’re satisfied, you can always start a Hero Mode run to relive the journey with added difficulty. Echoes of Wisdom doesn’t usher in a new chapter after the credits, but it solidifies Princess Zelda’s heroic journey and gives completionists the tools to fully conquer the game.
Preparation & Combat Tips for the Final Chapter
Facing the endgame content can be daunting, but with the right preparation and tactics, you’ll dramatically increase your chances of success. Here are the top tips to help you navigate Chapter 5 – from the Eternal Forest through the final battles – as smoothly as possible:
- Max Out Your Health and Gear: Before entering the Eternal Forest (and certainly before the final boss), maximize Princess Zelda’s health by obtaining all available Heart Containers and Pieces of Heart. Completing side quests and mini-games will often yield those last few pieces. Every extra heart gives more buffer to survive strong attacks. Likewise, ensure you have the best equipment: by now you should have the Master Sword Echo (or equivalent highest sword upgrade) and the Bow of Might fully upgraded for ranged damage. If you’ve collected enough Might Crystals, upgrade Tri’s forms and your weapons to their highest levels – a Level 3 sword and Level 3 bow do significantly more damage. Equip your strongest armor or robes (if the game offered any defense-boosting outfit), and double-check your accessories. If you unlocked extra accessory slots, equip items that complement your playstyle – for example, a Defense Ring to reduce damage and a Quick Charge Brooch to speed up your arrow charge shots. Being fully upgraded can mean the difference between victory and defeat in the final gauntlet.
- Leverage High-Level Echoes: By Chapter 5, you should have a wide array of Echoes – make sure to bring your most powerful ones into battle. The Lynel Echo is highly recommended as a summoned ally in the final fights due to its strength and durability. Level 3 Echoes of combat creatures (Lizalfos, Darknuts, etc.) can distract and damage bosses while you focus on objectives like pulling arms or shooting weak points. Don’t forget utility echoes too: for instance, bring a Healing Fairy Echo if one is available, or a Shield Moblin Echo that can provide cover. Set up your quick-select wheel with a balanced mix: at least one melee fighter Echo, one ranged or flying Echo, and one defensive Echo. During the final boss phases, continuously summon and re-summon Echoes to take pressure off Zelda – they can draw aggro from Null’s summons and give you breathing room. Also, remember Tri’s Bind ability is your greatest tool against Null. Practice the timing of using Bind on enemy limbs (the visual cue is a glow on a grabbable object or hand) so that you can execute it quickly when Null attacks.
- Stock Up on Potions and Smoothies: The last battles are long and can drain your health and energy. Visit Beedle’s shop or any potion brewer and fill your bottles with the best potions you can afford. Health potions (or red Chu Jelly mixtures) will heal you in a pinch – having 2–3 on hand is advisable. Even better, cook up some Smoothies at a cooking pot using berries and monster parts; high-level Smoothies restore a ton of Tri’s energy, allowing you to keep using Echo abilities non-stop. Stamina or energy restoration is crucial because echoes and Bind use Tri’s power – you don’t want to be caught in a boss phase with an empty energy gauge and no way to summon help or Bind an arm. If available, also carry a Guardian Elixir (which reduces damage taken for a short period) into the final fight, or a Might Elixir to boost your attack – these can be brewed from monster guts and rare insects. Essentially, treat the final chapter like a war: go in fully stocked with recovery items and buffs. It’s wise to save your game at the last waypoint on the plateau, use stat-boosting potions (like an armor-up drink), then charge into the boss arena.
- Learn the Attack Patterns: Each boss in Chapter 5 telegraphs its moves in some way. In the Echo Zelda fight, pay attention to the types of enemies she summons in each phase so you’re not caught off guard – for example, the moment you see a ReDead, be ready to mash buttons if it screams (to break free of paralysis). In the Null battle, watch the boss carefully: when Null raises an arm high, it’s about to slam down for a shockwave – start running to the side. When you notice Null’s head or body glowing, it might be preparing to summon an illusion – get ready for extra enemies to appear. Listening to audio cues and observing patterns will help you dodge effectively. Also use your targeting feature (L-trigger) to keep the camera on the boss as much as possible; this can alert you to incoming attacks from off-screen. Knowing what’s coming allows you to react in time – for instance, you’ll learn that after cutting a couple of Null’s arms, it always goes into the wall-phase where multiple arms strike from all sides, so position yourself near the center so you have room to dodge from any direction.
- Stay Mobile and Prioritize Survival: During the endgame fights, it’s easy to get tunnel vision on attacking the boss, but remember: staying alive is the top priority. Null and its minions hit hard, especially in Hero Mode. Focus on defensive play: keep moving constantly (circle strafe around the arena), jump or backflip away from heavy attacks, and use your shield or defensive Echoes to block where possible. Only go on the offensive when you see a clear opening (like the boss is stunned or busy). If you get down to less than a quarter health, don’t risk it – use a healing item immediately. It’s better to use up a potion than to fall and have to retry a lengthy battle. If you have a fairy in a bottle, that gives you one free revive, but still try not to rely on it; save it for an absolute emergency. In multi-phase fights, conserve resources in earlier phases if you can – for example, you might not need to use your best potion in phase 1 of Null, but have it ready for phase 3 when things get truly chaotic. Use the environment to your advantage too. In the Null fight, when arms are coming out of walls, you can stand in a corner in such a way that a protruding bit of wall geometry actually blocks some shockwaves or enemy spawns, giving you a breather. Little tricks like this can reduce the pressure on you.
- Use Link’s Assistance: One unique aspect of the final battle is that Link is fighting alongside you (mostly automatically). Whenever you Bind an arm of Null, Link will jump in and strike it. Keep this in mind – you don’t always have to deliver the damage yourself. Focus on enabling Link by binding targets for him. In the rare moments when Link stands by your side (like between phases), he can also draw some aggro from minor enemies. While you cannot command Link, you can position yourself such that enemies might go after him instead of Zelda. Don’t rely on this heavily, but it’s good to know that you have an ally. Essentially, think of Link as your ultimate Echo in the final fight: indestructible and powerful, but you “activate” him by binding Null’s limbs or exposing vulnerabilities. This tag-team dynamic is the key to defeating Null efficiently.
- Quick Swap Forms and Echoes: Master the quick menu to swap echoes and forms on the fly. For example, in the underwater phase, immediately switch to Zora form (flippers equipped) as you enter, then switch back to your combat form for binding tentacles, etc. In the forest and final dungeon, being able to quickly pull out the right Echo to solve a puzzle (like a fire echo for ice, or a box echo to create a platform) will save you health and time. If you haven’t already, adjust your favorites wheel before entering the final areas: include an Orb Echo (for pedestal use), a Lava Rock Echo (for the Eldin section), a flying Echo (Ghirro or Roc) for traversal, and your top 2–3 combat echoes for boss fights. During boss fights, don’t panic-pause to switch echoes if you can avoid it; instead, run to a safe spot, then use the quick-select to summon what you need. Practice this in a safe area if you find yourself fumbling during combat. The final boss especially can punish you if you stand still too long in the menu.
By following these preparation tips – maxing out health, gathering powerful echoes, stocking supplies – and applying smart combat tactics – learning patterns, maintaining mobility, and using all the tools at your disposal – you’ll greatly increase your odds of success in Chapter 5: The Eternal Forest & Endgame. This final chapter is challenging, but it’s also the ultimate test of all the skills and wisdom you’ve accumulated as Princess Zelda. Good luck in navigating the Eternal Forest’s trials, conquering Null’s chaotic onslaught, and emerging victorious as the hero of Hyrule!