


Table of Contents
- Prologue: Ganon Boss, Castle Escape, and Suthorn Village
- Legend of Link: Play as Link through Suthorn Ruins to reach Ganon’s sanctum.
- Boss: Ganon: Reflect energy orbs and punish openings to fell the King of Evil.
- ESCAPE!: Control Zelda and flee the collapsing fortress to daylight.
- Hyrule Castle Town: Return to the castle, witness the rift, and Zelda is imprisoned.
- Metal Gear Zelda: Use the Tri-Rod and stealth to break out of the dungeon with Impa’s help.
- Suthorn Beach: Wash ashore, learn new echoes, and practice combat on the coast.
- Suthorn Village: Restock, learn useful echoes, and prepare to head toward Suthorn Forest.
- Chapter 1: Suthorn Forest & The Mysterious Rifts: Navigating Suthorn Village and completing the Suthorn Ruins dungeon.
- Chapter 2: Gerudo Desert: Guidance on completing quests and dungeons in the Gerudo Desert region.
- Chapter 3: Jabul Waters: Strategies for tackling quests and dungeons in the Jabul Waters region.
- Chapter 4: Return to Hyrule Castle: Progressing the main storyline upon returning to the castle.
- Chapter 5: Eldin Volcano: Strategies for navigating the Eldin Volcano region and its challenges.
- Chapter 6: Faron Wetlands: Guidance on completing quests and dungeons in the Faron Wetlands.
- Chapter 7: Hebra Mountains: Navigating the Hebra Mountains region and overcoming its challenges.
- Chapter 8: The Eternal Forest & Endgame: Preparation and strategies for the final challenges and boss encounters.
Legend of Link
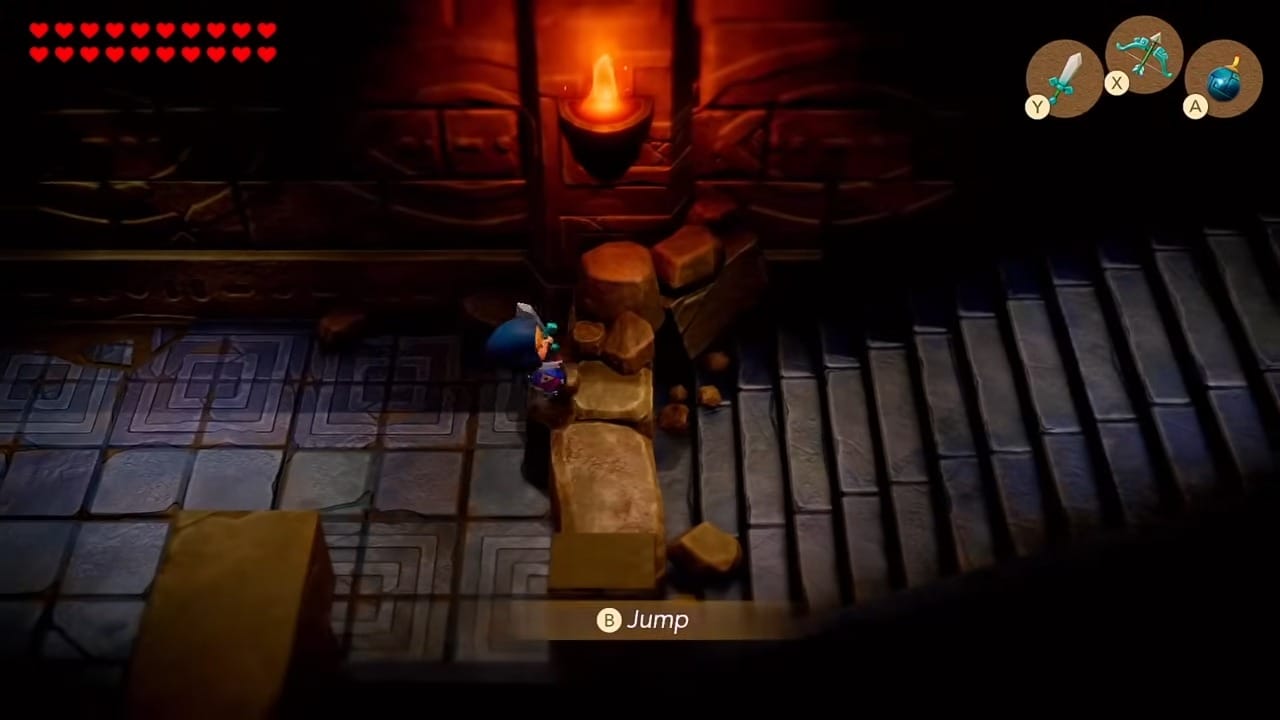
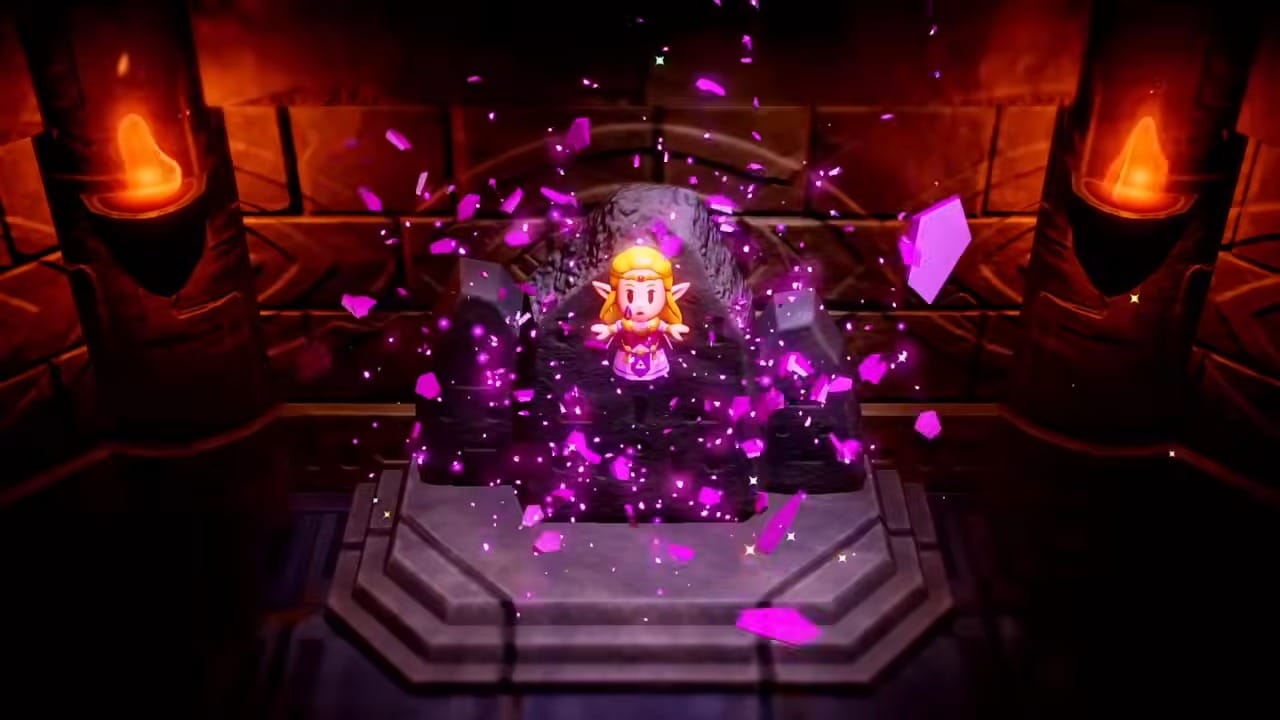
A sweeping orchestral theme plays as the adventure begins. You find yourself in control of the legendary hero Link, charging through the ancient Suthorn Ruins in pursuit of Princess Zelda. Ganon has kidnapped the princess and sealed her in a crystal, and it’s up to Link to save her. The ruins are dimly lit by torches on mossy stone walls, and the air is thick with dust and tension. Sword in hand, you venture north through the crumbling halls. Rubble blocks parts of the path, but Link nimbly jumps over fallen stone and shattered pillars as needed. Keep moving forward, cutting down patches of overgrown grass for the occasional heart or rupee, and climb the old staircases deeper into the fortress.


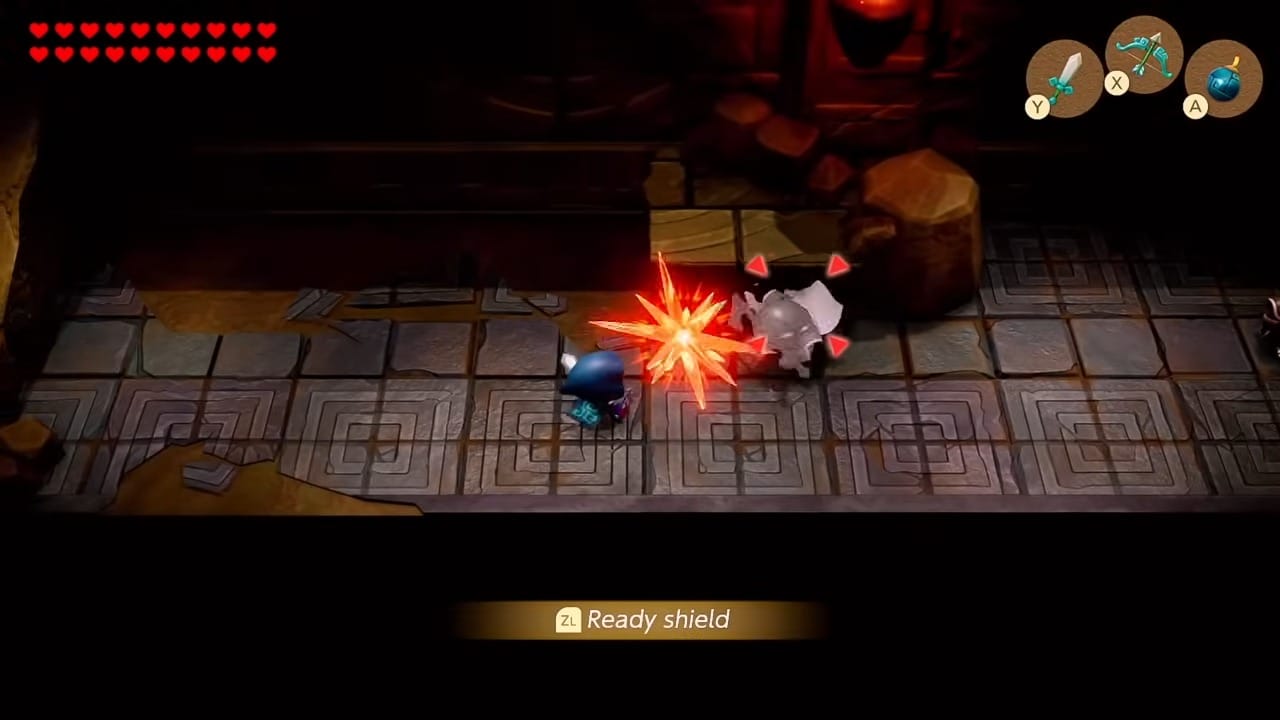
Almost immediately, you encounter resistance: a pair of armored Darknut guards block a doorway ahead, their heavy blades gleaming. Lock onto the first Darknut by holding your shield at the ready – the Darknut lunges, but its strike bounces off your shield with a clang, leaving it momentarily stunned. Seize that moment and strike with your sword, felling the foe. A second Darknut approaches; alternatively, you can try one of Link’s clever tricks. By pressing and holding the bomb button, Link pulls out a Bombchu – a small mechanical bomb that scurries along the ground. Release it and watch it race under the Darknut’s defenses, exploding at its feet. With both guards defeated, proceed up the stairs and into the next chamber.


Defeat the 3 Darknut guards in the next room in the same fashion. Proceeding north, fluttering Keese bats swoop at you from the shadows. One dive-bombs toward Link – target it and swat it down with a swift sword swing or a quick arrow shot from your bow. Clear the room of Keese (a few well-aimed arrows can take them out before they even get close) and continue westward.


You’ll have to navigate some crumbled flooring here: run across a makeshift bridge of fallen rocks, jumping over a small gap. On the other side, another group of monsters awaits – more Darknuts accompanied by an eerie blue warrior wielding a massive axe. The axe-wielder spins in a menacing attack, but if you keep your shield up it will tire itself out. Move in and land a flurry of blows to dispatch it, along with any remaining Darknuts. Finally, after battling through these trials, ascend the last flight of stairs. At the top, a heavy door creaks open and a cutscene takes over: Link strides into Ganon’s inner sanctum.


Inside the sanctum, an imposing figure towers before you – Ganon, King of Evil, stands with a wicked grin. Princess Zelda is here too, suspended mid-air inside a shimmering crystal prison behind him. “You’re too late, hero!” Ganon sneers, brandishing a menacing trident. Link, however, is fearless. He tightens his grip on the Master Sword as the battle with Ganon commences.


Ganon
The fight with Ganon is intense and tests your skills right from the start. Ganon’s first move is to teleport in a burst of dark smoke, then reappear suddenly to thrust his great spear forward. The moment you notice Ganon vanishing, be ready: dodge to the side or jump back as he lunges. His trident whooshes past harmlessly if you time it right, leaving Ganon open for a brief window. Counterattack quickly – rush in and strike with your sword (or shoot arrows) while he’s recovering from the missed lunge. Your blade finds purchase, and Ganon roars in anger before warping away to prepare his next attack.


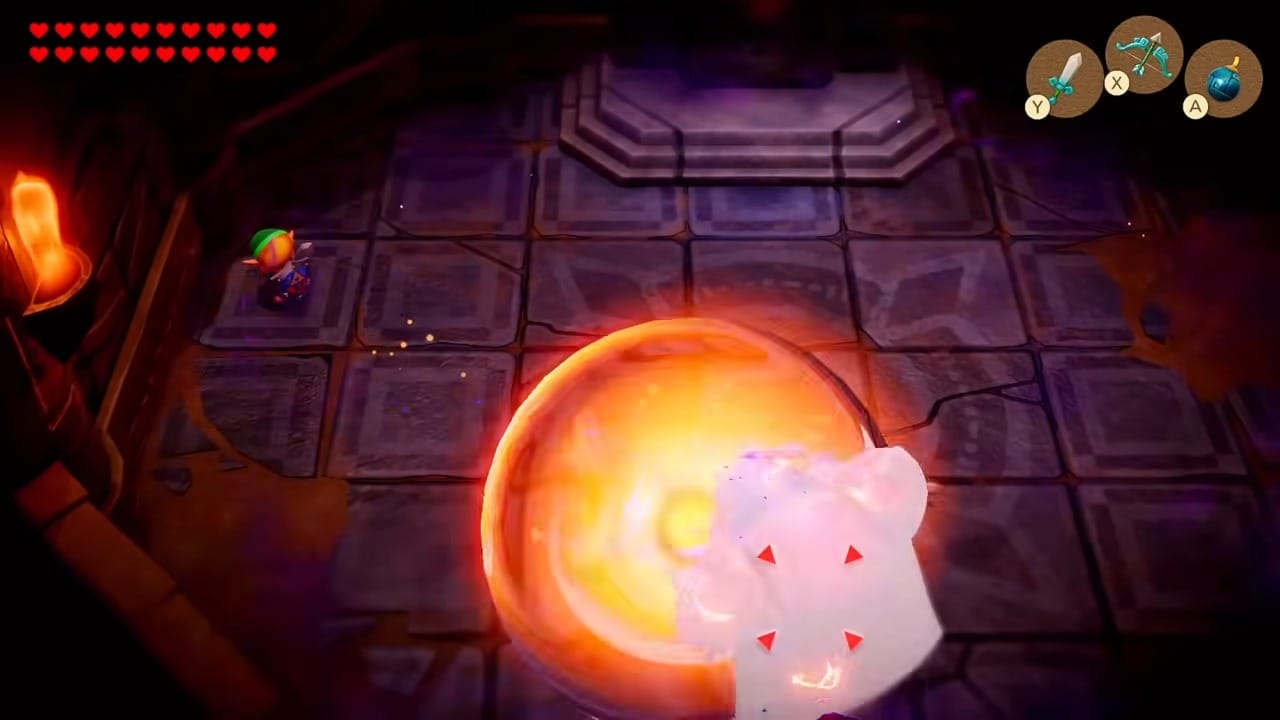
Ganon’s second phase is a classic test of reflexes and timing. Raising his trident, he conjures a crackling orb of red energy and hurls it across the room at Link. Rather than dodging this fiery projectile, you stand your ground and swing your sword at the perfect moment, batting the orb back toward the King of Evil. Ganon wasn’t expecting that – the deadly magic bounces off his chest and back toward you again. It’s a Dead Man’s Volley! Engage Ganon in this dangerous tennis match, knocking the orb back and forth. After three successful hits, the blazing orb slams into Ganon and explodes in his face, stunning him. This is your chance: rush forward and unleash a combo of sword slashes while he’s incapacitated.


Furious, Ganon recovers and alternates between these two attack patterns – spear lunges and energy orbs. Stay light on your feet: dodge the spear strikes and keep reflecting his magic attacks. With each volley returned and each opening exploited, Ganon weakens. A final set of sword strikes brings the evil king to his knees. Ganon lets out a bellowing cry as purple flames erupt from his body. In a flash, Ganon is defeated; his physical form bursts into a cloud of dark smoke, and all that remains is his sinister trident.


Link has triumphed… or so it seems for a fleeting moment. Without warning, the discarded trident starts to tremble on the floor, glowing with a malevolent energy. Suddenly it rips open a swirling dark rift in the center of the room – a portal of void magic! Link barely has time to react as tendrils of shadow coil around him, threatening to pull him in. Realizing what’s happening, Link uses his last moments of freedom to help Zelda: with a desperate aim, he fires a light arrow that shatters the crystal holding the princess. Zelda drops to the ground, finally free, just as Link himself is sucked into the void. His eyes lock with Zelda’s in a silent promise before he vanishes into the darkness.


Zelda is safe from Ganon, but now Link is gone. The victory is bittersweet and short-lived – and the danger isn’t over yet. The ground starts to shake violently. With Ganon’s magic gone awry and that mysterious rift destabilizing reality, the entire ruin begins to collapse around you. It’s time to run!
ESCAPE!
You now take control of Princess Zelda for the first time, and you must escape the collapsing dungeon. The camera shakes as debris rains down. Zelda has no weapon in hand (Link was the swordsman, after all), but she does have agility and courage – and a strange golden light hovering near her. This glowing orb flits forward, wordlessly beckoning you to follow. (Unbeknownst to Zelda, this is the fairy Tri, watching over her, but it hasn’t introduced itself just yet.) Start by wiggling the control stick to help Zelda break outside of the crystal trap. The crystal shards around her feet crumble as she stands.

All of Link’s gear is gone with him, but a single item lies on the floor amid the rubble: Link’s travel cloak, a sturdy green Swordsman’s Cloak that must have fallen off in the chaos. It shimmers with a faint light, as if deliberately drawing your attention. Hurry over and grab it (press the action button) – this cloak could prove useful for staying unnoticed later.


No sooner do you secure the cloak than the dark vortex left by the rift expands with a hungry roar, tearing the room apart. Zelda shields her face from a rush of hot air and takes off running. Follow the glowing fairy light as it darts out through the only exit – a doorway now cracked open from the earlier blast.


Dash through the doorway into an adjacent hall. The ceiling is crumbling, so zigzag past fallen beams and jump over large chunks of floor that collapse underfoot. A chunk of masonry crashes down just inches behind you as you leap clear of it. Keep your momentum! The fairy’s light guides you around a corner to a downward staircase. Sprint down the steps two at a time. A fiery crack splits the wall beside you, sending sparks flying – the ruin is literally coming apart at the seams.
At the base of the stairs is a half-open wooden door. Squeeze through it and you’ll emerge outside, onto a narrow stone bridge linking to an outer tower. Rain (or is it debris?) splatters your face. Far below, turbulent waters from a subterranean river churn – not a fall you’d survive. The bridge itself is breaking apart behind you, stones tumbling into the dark gorge below. Don’t slow down: race across the bridge as it crumbles, jumping over a gaping hole in the middle where part of the span has already fallen away. Zelda gasps but keeps her balance, landing safely on the other side of the gap.
Finally, you reach the far end of the bridge and barrel through an archway into the relative safety of a small watchtower. The ground heaves and a deafening crash signals the collapse of the bridge you just crossed. There’s no going back now. Up ahead, daylight filters in – an opening to the outside! Climb a short ladder and emerge out of the ruined fortress. Zelda throws herself forward onto the grass as the last remnants of Ganon’s lair cave in behind her with a thunderous roar. You’ve made it out by the skin of your teeth.
Breathing hard, Zelda stands and looks back at the dust cloud rising from the fallen ruins. Link is gone, taken by that rift… but she can’t mourn now. Title card – “The Legend of Zelda: Echoes of Wisdom” appears as the camera pans over the scene of Zelda, determined, silhouetted against the morning sun. It’s a brief moment of respite. After the title fades, you regain control in a new area just outside Hyrule Castle Town. The princess knows what she must do: return home to Hyrule Castle and warn everyone about the rifts – and find a way to save Link.
Hyrule Castle Town
You arrive on the outskirts of Hyrule Castle Town, the bustling capital city, which lies just south of the castle itself. Zelda’s royal gown is tattered and dusty from her ordeal, and in her hand she still grips Link’s green cloak. The town is alive with normalcy – townsfolk chat in the streets and merchants hawk their wares in the market square – blissfully unaware of the calamity that just occurred in the ruins. Despite the tempting safety of familiar sights and the urge to catch your breath, there’s no time to lose. Zelda pulls the hooded Swordsman’s Cloak over her blonde hair, concealing her identity for now, and pushes forward. (It wouldn’t do for the princess to cause a scene in her current state, and who knows what dangers might lurk after those rifts.)
Skirt around the busy marketplace and head north toward Hyrule Castle at the far end of town. As you move through Castle Town’s central avenue, you note the many shops and amenities – a potion shop, blacksmith, and even some minigame stalls – which promise useful goods and fun diversions. You make a mental note to explore them later, but right now Zelda has a singular focus: reaching her father, the King, to explain what has happened. Keep following the main road north. The castle’s gates loom ahead, flanked by vigilant guards. Just before you reach the gate, an elderly woman steps out from a side alley and gently calls, “Princess!”
It’s Impa, Zelda’s loyal caretaker and advisor, recognizable even under a simple cloak. She must have been waiting and watching for your return. In a hushed voice, Impa checks Zelda for injuries and, seeing the state she’s in, insists she keep the hood up to stay low-profile. “These are troubled times,” Impa warns softly. She presses a small leather-bound notebook into Zelda’s hands – the Adventure Log, complete with a map tucked inside. “Use this to record your journey and keep track of your quests,” Impa says. On the map, she quickly marks a location in southern Hyrule with a tiny X, whispering that Zelda should head there next when she can – but first, the King must be informed about the rifts. Before Zelda can ask more, a shout interrupts the reunion: a pair of castle guards have spotted you two.
“There she is! The princess escaped!” the guard captain yells, sprinting toward you. In an instant, Impa moves with astonishing speed and grace for her age. “Go! I’ll handle this,” she urges. Impa darts forward and in a blur knocks the approaching soldiers unconscious with a few precise strikes from her walking staff. More armored boots can be heard clanking on the cobblestones nearby – reinforcements will arrive any second. Impa gives Zelda a firm nod. This is your chance. Zelda steels herself and slips through the castle gates while the path is clear, leaving Impa behind to delay the guards further.
Inside the castle corridors, make your way straight to the Throne Room (continue north through the entrance hall). Zelda bursts into the throne room where her father, the King of Hyrule, is in council with his top advisors. Relief floods her face upon seeing him safe. She starts to explain everything in a rush – Ganon’s defeat, Link’s disappearance into the mysterious void, the strange rifts – but before the King can fully grasp the tale, tragedy strikes. A swirling rift suddenly tears open right behind the King’s throne, crackling with otherworldly energy. Everyone in the room freezes in shock. “Father, look out!” Zelda cries, but it’s too late. The King and his two advisors (General Wright and Minister Lefte) are engulfed by a vortex of darkness that materializes out of thin air. With a flash of light, all three vanish, sucked into the Still World beyond the rift. Zelda stands horrified and heartbroken, hand outstretched futilely toward where her father stood just a second ago.
Before anyone can react, shadowy figures emerge from the very same rift – dark, twisted imposters of the King, Wright, and Lefte. These doppelgängers stride forward with malicious intent. The false King’s eyes glow red as he points an accusatory finger at Princess Zelda. “Seize her!” the phony King bellows to the guards now rushing in. “Zelda is the one responsible for these rifts! She has betrayed Hyrule!”
Zelda is staggered by this sudden betrayal and the surreal sight of her father’s form being used against her. She barely musters a protest as armored hands grab her arms from both sides. “N-no! That’s not true!” she pleads, struggling against the grip of the castle guards. But confusion and fear grip the room; the soldiers hesitate only a moment before obeying what appears to be their monarch’s command. The imposters smirk at Zelda’s plight. Without ceremony, the guards force Zelda down into the castle’s dungeon below. The last thing you see is the imposter King’s cold gaze and a satisfied grin on his face as Zelda is dragged away in chains.
The screen fades to black as the princess is thrown into a dim stone jail cell deep beneath Hyrule Castle. A text overlay reminds you: accused of a crime she didn’t commit, Zelda faces execution at dawn unless she can escape. It seems your adventure is just beginning, and now it’s truly Princess Zelda’s turn to become the hero.
Metal Gear Zelda
Zelda awakens in the darkness of her cell, the heavy clank of the door locking still echoing in her ears. A single torch outside the bars casts flickering light on the cold walls. Left alone, falsely accused, and unarmed – things look grim for the princess. But as she resolves not to give in to despair, a soft chiming sound draws her attention. In the still air of the cell, a tiny glowing figure appears: it’s the golden fairy light that guided her out of the ruins. The glow grows brighter and takes form… Tri, a curious little fairy-like automaton, reveals itself fully at last.
Hovering in front of Zelda, Tri introduces itself in a gentle, echoing voice and offers its help. In a flash of light, Tri conjures an ornate scepter and presents it to Zelda through the cell bars. This is the Tri-Rod, a magical rod imbued with the power of echoes. Zelda grasps the rod and immediately senses its strange power. Tri explains quickly: with the Tri-Rod, you can create “Echoes” – magical copies of objects or even enemies you’ve encountered. This new ability will be the key to escaping and surviving. Zelda nods, determination returning, and thanks Tri for the gift. It’s time to put it to use and get out of this cell.
Take a look around Zelda’s cell. Inside, there’s little of use except a simple wooden table pushed up against the wall. However, the table’s surface is shimmering with a subtle aura, an indication (visible to Zelda now thanks to the Tri-Rod’s power) that it can be copied as an echo. Stand next to the table and focus with the Tri-Rod (press the button Tri indicated) – Zelda memorizes the table’s form, essentially “learning” the Table Echo. Now for the fun part: face the center of the cell where there’s a bit of open space, and use the Tri-Rod to project an echo of the table (press the summon button). With a whoosh of light, an identical wooden table materializes out of thin air!
Zelda’s eyes widen, but she remains calm and climbs atop the conjured table. The cell’s walls are high, but there’s a section on the left side where the stones have crumbled, leaving a rough hole high up near the ceiling. If only she could reach it… No problem – cast another Table Echo while standing on the first one, effectively stacking a second magical table on top of the first. The two tables form a makeshift staircase. Climb up and shimmy through the broken wall into the adjacent empty cell. You’ve slipped out of the locked room without even using a key! The moment Zelda drops into the neighboring cell, her conjured tables quietly fade away (Tri can only maintain a limited number of echoes at once, and you’ll often let older ones vanish as you move forward).
Stepping out of the open cell, you find yourself in a dim dungeon corridor. Now the real stealth challenge begins. The castle dungeons are patrolled by Hylian soldiers searching for the escaped princess. Getting caught will throw you right back in jail – but don’t worry, Tri will help you break out again if that happens. The key is to move silently and stay out of the guards’ sight. Think of this like a classic stealth mission (hence the playful nickname “Metal Gear Zelda”). Use the environment and your new echo powers to your advantage.
From the cell, head west down the hall. Immediately, you spot a lone guard up ahead, facing away from you. There’s a tall shelf to your right filled with barrels and boxes; if you could get on top of that shelf, you might sneak past the guard unseen. Time for some echo creativity: cast a Table Echo next to the shelf, then another table on top of the first. This stacked pair of tables forms a crude ladder. Climb up them and you’re now atop the shelf, high above the guard’s line of sight. Carefully walk along the top of the shelf, crouching if you can. The guard down below continues his slow patrol, oblivious to the princess crawling overhead.
At the end of the shelf, you notice some shimmering wooden crates. These crates can be learned as a new echo type. Creep close to one (still on the shelf, but near enough) and press the Tri-Rod’s copy trigger to learn the Wooden Box Echo. Now you have a new tool: you can summon sturdy wooden boxes at will. These will come in handy for manipulating patrol routes.
Drop down quietly on the far side of the patrolling guard (he’s still pacing in the other direction). Up ahead, two more guards are patrolling a perpendicular hallway, each walking in a loop on opposite sides of a square formation of crates and barrels. They occasionally cross paths but leave a small gap between them. It’s nearly impossible to dash through without being seen – time to put that Wooden Box Echo to use. Target the corridor where one of the guards will soon walk and summon a wooden box right in his path. The large crate pops into existence, causing the guard to halt and frown, confused by the sudden obstacle. His partner, on the other side of the loop, doesn’t notice and continues his route. The two guards are now out of sync, leaving an opening in their patrol pattern. Quickly but silently slip through the middle of the room, using the stack of crates in the center as cover. Thanks to the box you placed, the nearer guard’s line of sight is blocked at just the right moment, and you pass undetected. Once you’re safely by, you can let the echo fade (Tri can only maintain three echoes at a time initially, so it will disappear on its own when you create new ones, or you can dismiss it).
Around the corner, you find a ladder leading up to a higher storage ledge. Climb it carefully. Up here is a small cache of supplies – and more importantly, a cluster of big clay pots which shimmer invitingly. Copy one with the Tri-Rod to gain the Hyrule Castle Pot Echo. These pots are about as tall as Zelda herself, and they present two clever options for stealth: distraction or concealment.
First, the distraction method: You can lift a pot (just as Link would lift objects, Zelda is strong enough to heft these) and toss it across a hallway. The pottery shatters with a loud crash, which will attract any nearby guard to investigate that spot. This trick is great for luring a guard away from their post.
The second method is even sneakier – and a little bit comical: Zelda can hide inside a pot and tip-toe around while concealed! To do this, summon a Pot Echo on the ground, then simply walk into it; the princess will automatically tuck herself inside, with only a slight waddle of the jar to indicate anything unusual. While in the pot, you can inch along the floor unnoticed, effectively camouflaged as ordinary decor. Important: If a guard is looking in your direction, stay perfectly still – if they see a clay jar mysteriously sliding around on its own, they’ll surely become suspicious. Move only when their backs are turned or when they’re not looking directly at you. It truly feels like something out of a spy movie, hence “Metal Gear Zelda”!
Put these tactics to use in the next hallway. There’s a single guard blocking the exit door to freedom. He’s standing at attention, occasionally turning his head side-to-side. If you retained a real pot from the shelf, you can try throwing it against the far wall. The guard, hearing the smash, exclaims “Huh? What was that?” and walks over to check it out. The moment he moves from his post, slip quietly around him on the opposite side and make a break for the door. Alternatively, if you prefer the covert approach, summon a Pot Echo right where you are, hop inside, and scoot forward bit by bit. Stop whenever the guard glances your way, and he’ll be none the wiser – to him, it’s just another pot in the dungeon. Inch past him, then pop out of the pot once you’re safely behind and dart through the door to the west. Either approach works; choose whichever suits your style. (It’s incredibly satisfying to outsmart these guards using creativity instead of brute force!)
Once through that door, you can breathe a sigh of relief – you’re out of the immediate jail area, and no more guards are patrolling this section. Zelda finds herself in a narrow antechamber lit by dusty windows. The fresh air is a welcome change from the damp dungeon. A familiar silhouette steps from the shadows – Impa is here, waiting for you just as she promised. Zelda smiles with profound relief, and Impa gives an approving nod.
In this safe moment, Impa properly equips Zelda for the journey ahead. She returns the Adventure Log if you dropped it, and shows Zelda how to use the map inside to chart objectives and even teleport to certain points (Tri’s waypoint magic will come in handy later). Impa then fastens the Swordsman’s Cloak snugly around Zelda’s shoulders. “This disguise will help you travel unnoticed,” Impa says. With a flourish, she demonstrates a defensive spin attack you can perform with the cloak (press the designated button to have Zelda spin in place – the cloak flares out, knocking back anything too close; it’s not as lethal as a blade, but it can disorient enemies and cut tall grass in a pinch). Zelda practices the spin move once, the green cloak twirling gracefully. It will serve as her initial means of offense/defense until she finds a proper weapon.
Impa has one last gift: she produces a small rune-like stone and hands it to Zelda – this enables fast travel by marking waypoints, an innovation Tri will handle. Tri, who has been quietly hovering at Zelda’s side, chimes and sets the first waypoint for you automatically (likely the castle town for now). Impa then opens a hidden hatch in the floor – beneath it lies a secret escape route known only to the royal family and a few Sheikah agents. “This tunnel will take you out of the castle safely,” Impa explains. “Follow it to the end, and it will lead you near the Suthorn region I marked on your map. You must mend the rifts and find those who were lost to them – including Link and the King. I’ll do what I can from here to maintain order and mislead the impostors.”
Zelda’s eyes fill with gratitude and determination. She knows Impa is risking much by staying behind. The two share a brief, heartfelt moment – Impa places a hand on Zelda’s shoulder: “Your courage will see you through, Your Highness. Go now, and stay safe.” With a final nod, Zelda descends the ladder into the darkness of the Royal Family’s Shortcut. Impa seals the hatch above her, presumably just as more guards arrive in the antechamber (you hear muffled shouts, but Impa’s stern voice holds them off – “The princess? No, I haven’t seen her. Perhaps she doubled back!”).
Now control shifts back to you in the tunnel. The passage is almost pitch-black, save for the faint glow of Tri illuminating the way ahead. Begin moving forward – the ground is wet, and you quickly realize why: this tunnel doubles as an escape waterway. Only a few steps in, the floor gives way to an underground stream. Zelda loses her footing on the slick rock, and the current grabs hold. She lets out a surprised yelp as the water knocks her off balance and carries her swiftly away through the winding subterranean channel. Hold on tight! You can vaguely control her position to avoid hitting rocks as she’s swept along, but mostly this is a wild ride. After a minute of twisting through darkness, the tunnel spits Zelda out through a rocky opening – she’s hurled into open air and drops into a body of water below with a splash. Thankfully, it’s not too high of a fall.
Suthorn Beach
Zelda awakens to the sound of waves gently lapping and seagulls crying overhead. She’s lying on her back in damp sand inside a shallow sea cave. Sunlight streams in from the cave’s mouth a short distance away, and beyond, you can see the bright blue sky and ocean. Tri flutters nearby, its glow a bit dimmer (perhaps conserving energy or recovering from the tumble through the tunnel). This peaceful shoreline is a far cry from the chaos of Hyrule Castle. Suthorn Beach – as the map would label it – is the southernmost coast of Hyrule, and it appears Impa’s escape tunnel has done its job delivering you far from danger.
When you’re ready, stand up and survey the cave. Sea water pools around your ankles, and the cavern floor is strewn with shells and bits of seaweed. In one corner of the cave glints a strange, jagged rock formation that sparkles as if enchanted – another clue for your Tri-Rod. Approach the shimmering boulder and press the Tri-Rod’s copy button. You learn the Rock Echo, meaning Zelda can now conjure heavy stones on demand. This will be particularly useful for puzzles and for arming yourself in lieu of traditional weapons (a solid boulder dropped on an enemy’s head is quite effective!).
Head to the right and make your way southward to the cave’s exit. Zelda shields her eyes as you step out onto the open beach – warm sun and a salty breeze welcome you to freedom. The beach is a strip of golden sand with gentle waves washing ashore. To your left (eastward), you notice the coastline curves and leads towards what looks like a grassy path. According to the map, just beyond that path lies Suthorn Village, your next destination. But before rushing off, it’s wise to get your bearings and maybe practice using your new echo powers in this safer environment.
Venturing a little south from the cave, the tranquility is broken by a sudden disturbance in the sand. A quivering mound of green slime oozes up – an enemy, a lowly Zol, appears in front of you with a gurgling hiss. This jelly-like monster starts hopping toward Zelda aggressively. Time to fight back, even without a sword. Look around for a weapon: scattered on the beach are plenty of ordinary rocks. You can pick up a rock with the action button, or even better, use the Rock Echo you just learned: summon a Rock Echo at your feet, then grab it. Lock on to the Zol with ZL and toss the rock. With a satisfying thud, the rock smacks the Zol, splattering the creature into oblivion.
In the spot where the Zol fell, something shimmers – much like objects do. Approach the glistening puddle and press the copy button to learn the Zol Echo. Yes, you can even duplicate monsters! Tri explains excitedly that by creating an echo of a monster, that echo will obey your commands. It’s like summoning a friendly version of the creature to fight on your side. Try it out: with the Zol Echo selected, cast it (press Y). A blob of green jelly materializes next to Zelda, wiggling harmlessly. It will follow you around and, if you target another enemy and press attack, your summoned Zol will leap to attack them. Keep in mind, a weak monster like a Zol won’t last long against tougher foes – your echo might get destroyed after a hit or two. But you can always make another as long as you have enough “Tri” energy (the Tri-Rod starts with energy to maintain three small echoes at once). In a pinch, summoning a monster to distract or soften up enemies can give you an edge.
Continue south along the beach. A couple more wild Zols pop up from the sand. They’re easy targets – you can whack them with another thrown rock, or let your Zol echo companion engage them while you hang back. Either way, dispatch them and move on. The beach widens and curves east here. Just ahead, you spot a wooden treasure chest sitting on a rock ledge a bit off the ground to your north. How did it get there? Who knows, but treasure is treasure! If you’re feeling adventurous, take a moment to grab it. The ledge is too high to simply jump, so use your echoes creatively: perhaps conjure a table (if you still remember the Table Echo from earlier) next to the rock and climb up, or stack a couple of your new Rock Echoes to make a platform. Zelda clambers up and opens the chest to find 20 Rupees inside. Not a huge fortune, but every bit helps a princess on the run. Pocket the green rupees and hop back down to the sand.
As you proceed eastward, the sand transitions back into rocky ground. Suddenly, out of a tide pool, a cluster of spiky creatures called Sea Urchins wiggle toward you. These urchin monsters have spines that bristle defensively, making it dangerous to touch them up close. No problem – just summon a rock and hurl it at each Sea Urchin from a safe distance. The heavy stones crush the spiky foes easily. After clearing them out, copy the glowing remnants to gain the Sea Urchin Echo. Summoning an Urchin Echo creates a spiky mine-like ally that can be thrown or left in an enemy’s path – great for setting traps or rolling into enemies that hate sharp objects. Keep that in mind for later.
Now the beach path opens into a small lagoon area. The crystal-clear water gleams under the sun. You can see a few rupees sparkling beneath the shallow waves. Zelda can swim here: wade in and dive by holding the action button to grab the submerged rupees if you’d like, then surface with the jump button. As you swim, you might notice something else glinting to the west – on a distant rocky pillar rising from the shallows, there sits a Heart Piece! It’s a quarter of a Heart Container, a valuable find that will increase your maximum health once you collect four of them. Reaching it looks tricky, however, as it’s on a high ledge surrounded by water.
Optional: If you’re up for a clever puzzle and an early health boost, you can claim this Piece of Heart now. You’ll need to use the Tri-Rod to create some makeshift platforms in the water. For example, one strategy is to summon large, flat objects (perhaps echoes of something buoyant or sturdy) to serve as stepping stones. Stacking a few crates or other echoes on top of each other can form a staircase across the water. One approach might be to position an echo platform partially in the water near an outcrop, then another on top of that closer to the Heart Piece’s ledge, effectively building a walkable bridge. It’s a bit of magical engineering: conjure an object, jump onto it, then create another in front of you, and so on. With careful placement and some trial and error, Zelda can hop from echo to echo and reach the rocky pillar. Snag the Piece of Heart as your reward! (If this proves too challenging or you’re unsure of your current echo toolkit, you can always make a note and come back later when you have more types of echoes at your disposal.)
After taking in the sea breeze and perhaps collecting that heart piece, swim back to shore and continue east. On the far side of the water, a narrow trail leads north up a grassy incline. Climb out of the beach and follow this trail – it winds through a small verdant area known as Suthorn Prairie, connecting the coast to the village. Right at the entrance to the prairie, Tri suddenly chimes and encourages you to look around with your camera stick. By tilting the stick, you can survey your surroundings in this 3D space, which helps spot hidden goodies. Sure enough, peeking above some treetops is another treasure chest perched on a ledge.
That chest looks enticing, and as a plus it’s on the way to the village. To reach it, head a bit south into the cluster of trees where the ground elevates slightly. There’s a small ledge you can jump onto. From there, consider using your echoes to go higher – perhaps summon a sturdy table or crate at the base of the next ledge, then another on top of that. With a couple of leaps, Zelda can reach the top. Open the chest to collect 50 Rupees! This generous haul will be extremely useful for stocking up in the village (maybe even enough to afford something special). With your wallet a bit heavier, drop back down.
Now turn and head eastward through Suthorn Prairie. The landscape here is peaceful: tall grass sways and a few butterflies flutter by. Stay alert, though – monsters often hide in grass. In fact, you might notice the grass rustling suspiciously in spots. Those could be lurking Ropes (Hyrule’s infamous snakes) or more Zols waiting to ambush. If you wish, you can avoid the suspicious patches by giving them a wide berth. Alternatively, if you learned a fiery echo later (like an Ignizol, a fire variant of the Zol), you could burn the grass to expose or eliminate threats – but that comes later in your journey. For now, simply continue east; you’re only a few steps from safety.
As the trees thin out, a welcome sight greets you: the humble cottages and dirt paths of Suthorn Village come into view. You’ve made it! Zelda has escaped danger and arrived at a friendly outpost where she can gather supplies and information for the challenges ahead.
Suthorn Village
Crossing a small wooden bridge over a stream, you step foot into Suthorn Village. The atmosphere here is calm and inviting. A few villagers glance up from their chores – just seeing a cloaked traveler arriving from the west. They don’t recognize their princess under the hood (which is a relief, given recent events at the castle), but they smile in polite greeting. Children are playing tag near the village well, and a gentle breeze carries the scent of cooking stew from a nearby house. It’s hard to imagine that the world almost collapsed a short time ago in Hyrule Castle; this village feels almost untouched by the kingdom’s troubles so far.
Now is the perfect time to explore a bit and gather anything that could help you on your quest. The villagers here won’t attack or chase you – this is a safe zone – so you can freely enter houses and talk to people for tips. As Zelda, you maintain a kind and modest demeanor, careful not to blow your cover. The townsfolk mention odd tremors and a pillar of light that appeared in the north earlier (likely the rift at the castle), but they’re not sure what to make of it yet.
Begin by checking the southwest house of the village. Inside this cozy cottage, a hearty fire crackles in the fireplace. On the hearth, you notice a slab of meat roasting on a spit, emanating a delicious aroma – and it’s shimmering with that telltale light. Tri jingles excitedly; time to learn another echo! Approach the fireplace and copy the meat to acquire the Meat Echo. This might seem odd, but it has its uses: throwing a chunk of summoned meat can lure hungry monsters away or distract carnivorous enemies. It’s essentially bait, perfect for sidetracking creatures that might otherwise chase you. You thank the puzzled homeowner for their hospitality (perhaps leaving a few rupees as payment for the “sample,” if you feel polite) and step back outside.
Next, visit the house just east of there. It appears to be a potter’s workshop – various clay pots and jars line the walls. If you happened to miss grabbing a Pot Echo in the castle, here’s another chance: a ceramic pot on the floor shimmers invitingly. Copy it to ensure you have the Pot Echo in your arsenal (though you likely got it earlier, it never hurts to reinforce it). Having multiple sources to learn an echo is helpful in case you overlooked one.
Behind that house, an enthusiastic villager appears to be bouncing on something… is that a trampoline? Indeed, someone has set up a small trampoline in their yard. Not only is it fun, but Tri shows interest in it as well. Approach the trampoline (mind your royal dignity as you do a light jump) and copy it to gain the Trampoline Echo. This is a fantastic tool: by summoning a trampoline echo, Zelda can create a springy platform to launch herself to higher ledges that a normal jump can’t reach. It will open up a lot of vertical exploration opportunities. Try it out now if you like – place a trampoline echo on the ground, step on, and bounce high with a satisfying boing. The kids nearby cheer, thinking you’re some wandering acrobat. You chuckle under the cloak and move on.
On the north side of the village square, near that trampoline yard, there’s an old stone well. You hear some gentle humming coming from it – could be just the wind. If curiosity strikes, hop onto the well’s edge and jump down into it (Zelda’s always up for a little adventure). Splash! You land ankle-deep in a secret little grotto at the bottom. Sure enough, there’s a treasure chest hidden here. Pop it open to find 5 jars of Floral Nectar, a sweet potion-like concoction the villagers brew. Floral Nectar works like a mild healing item (each jar can restore a bit of health or provide a small buff). This is a great bonus for your journey. Climb the ladder conveniently placed here to exit the well.
Now that you’ve scoured some houses for echoes and goodies, it’s time to check out the item shop in the northeast part of town. The shop is marked by a wooden sign with a rupee symbol. Inside, a friendly shopkeeper greets you. Browse the wares on display: they have Red Potion (30 rupees) to heal your wounds, Floral Nectar (30 rupees) if you need more after the well, and most impressively, a Piece of Heart for sale at 80 rupees. The Heart Piece sits on the counter, gleaming and tempting. The price is steep for a traveler, but thanks to the rupees you’ve collected on the beach and prairie (and any others from earlier), you might have enough by now. Check your wallet – if you have at least 80 rupees, consider buying that Piece of Heart. It’s an optional purchase, but completing another heart container early will make your adventure a lot easier in the long run.
Optional: If you can afford it, purchase the Piece of Heart (80 rupees) from the shop. The shopkeeper happily hands it over, and Zelda can feel the warmth as the heart fragment absorbs into her, contributing to her life energy. (This is your second Heart Piece if you got the one on Suthorn Beach; collecting four will grant you an extra heart in your life gauge.) If funds are low, don’t worry – you can always return later after gathering more rupees. The shopkeeper also mentions he’s willing to buy items from you, so if you find surplus ingredients or treasures, selling to him is a way to earn rupees in the future.
With shopping done, step outside and take a moment to appreciate that you are safe in this village. The people here treat you as just another traveler, which for now is a blessing. They chatter about a “fallen star” in the forest or a weird quake earlier, but no one suspects the cloaked stranger in their midst is Princess Zelda herself. You’ve got the supplies and knowledge you need for the next phase of your quest.
When you’re ready, it’s time to move on and investigate the mysterious location Impa marked on your map. Open your Adventure Log (press the minus button) and you’ll see a clear waypoint indicator on the map in the area east of here, beyond Suthorn Village. Tri flutters excitedly, reminding you that our goal lies through the Suthorn Prairie and into the woods beyond. The first major rift-related destination – likely the Suthorn Ruins, according to Impa’s mark – awaits.
Head to the east exit of Suthorn Village, where a dirt path continues out into the wilds. Just as you leave, you pass a weathered signpost by the side of the road. It’s shimmering, meaning you can copy it. This grants the Sign Echo, which might seem trivial, but who knows – maybe you can place signs later to confuse monsters or mark spots. More importantly, Tri takes this opportunity to teach you about waypoints: as you move a bit further east, Tri suddenly zips to a particular patch of ground and emits a pulsating glow. Investigate that glowing spot and Zelda discovers a strange rune etched in the ground. Upon checking it, Tri registers it on your map as a warp point. “If you need to return to Suthorn Village or this exact spot later,” Tri explains, “you can open your map and warp here instantly.” This fast-travel ability will be extremely handy as the world opens up, letting you backtrack or return to town for supplies in the blink of an eye. For now, you have one waypoint – more will be unlocked as you find similar markers or when Tri places them at key story junctures.
The path from here splits: north leads further into Hyrule Field, but a shimmering wall of distortion – a smaller rift barrier – crackles up that way, blocking travel for now. It seems the rifts’ influence is already messing with the terrain, likely connected to the phenomenon you’re investigating. So instead, follow the road southeast into Suthorn Forest. As you step under the ancient trees, Tri suddenly alerts you with a soft trill. A short cutscene plays: the forest ahead is calm, but there’s a feeling of anticipation in the air. Zelda grips the Tri-Rod a little tighter and steels herself for what’s to come. The Mysterious Rifts quest is truly beginning, and our heroine is ready to face it head-on.