Table of Contents
- Leaving the Plateau & Reaching Dueling Peaks
- Journey to Kakariko Village (Meeting Hestu)
- Meeting Impa & Exploring Kakariko Village
- Journey to Hateno Village (Fort Hateno & Tower)
- Hateno Village & Ancient Tech Lab (Camera Rune)
- Locked Mementos & Captured Memories
- Next Steps & Conclusion
Leaving the Plateau & Reaching Dueling Peaks
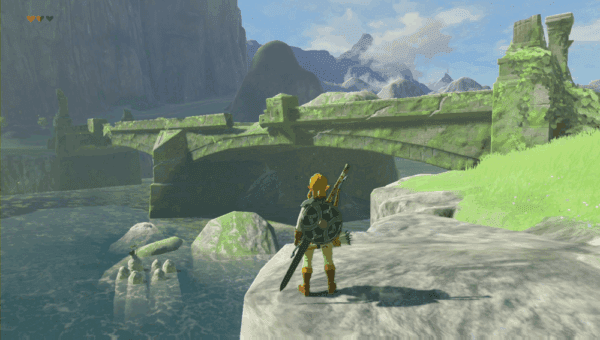
Leaving the Great Plateau with your new Paraglider, glide eastward towards the twin peaks visible in the distance. Make sure the “Seek Out Impa” main quest is active so a marker guides you. As you soar off the Plateau’s edge, look below for a road leading across Proxim Bridge into lush green fields. On a small island southwest of the bridge you’ll spot Bosh Kala Shrine, a wind puzzle trial. It’s likely the first shrine you’ll encounter after the Plateau. Activate (and optionally complete) this shrine The Wind Guides You to gain a Spirit Orb and a handy fast-travel point. Cross Proxim Bridge and continue along the path into West Necluda, keeping the Dueling Peaks mountains directly ahead.
As you approach the towering Dueling Peaks, consider climbing the Dueling Peaks Tower just north of the road to reveal the map of the region. Use your Sheikah Scope to place a pin on the glowing tower for easier navigation. The route runs beside a shallow river where Octoroks lurk; if they spit rocks at you, either deflect them with your shield or use Cryonis to create ice platforms and bypass the water. Upon reaching the base of the Tower, clear any enemies and scale it to unlock the regional map. The elevated view helps orient you towards Kakariko and highlights other landmarks. (You’ll see a narrow valley splitting the two peaks – that’s your path forward.) Before moving on, you can glide back down and continue along the valley road between the Dueling Peaks.
Inside the Dueling Peaks canyon, your Sheikah Sensor will likely start beeping for a nearby shrine. There are actually two shrines hidden in this area. Up on a ledge to the north is Ree Dahee Shrine (puzzle: Timing is Critical), which you can detour to if you’re eager for another Spirit Orb. Further along at the canyon’s exit, you’ll find Ha Dahamar Shrine right beside the road near a pond. It’s initially surrounded by thorny spikes, but you can use Cryonis on the water to leap over them and access the shrine. Activate these shrines for future fast travel – you can always complete their challenges now or return later. Just beyond Ha Dahamar Shrine lies your first hub of civilization: the Dueling Peaks Stable.
At the Dueling Peaks Stable, take a breather and chat with the travelers. Stables serve as rest stops where you can sleep, cook, and board or take horses. If you haven’t already, this is a great time to catch a wild horse from the nearby hills. Sneak up to a horse, press ?ᄌマ to mount, then soothe it with ?ᄌマ when it bucks. Ride it to the stable and register it by speaking to the stable hand (20 rupees fee), which lets you name the horse and summon it from any stable. Inside, you’ll find characters sharing useful tips and side quests. Remember, talking to NPCs with (!) over their head can trigger quests, but you can always tackle them later at your leisure.
- Optional – Wild Horses: Speak to Rensa at the front of the stable to begin the “Wild Horses” side quest. He’ll challenge you to tame a wild horse from the nearby plains and bring it back. This serves as a tutorial on horse taming and, upon success, rewards you with 50 rupees and a reliably tamed steed (you can keep the horse!)
- Optional – Misko’s Treasure: Inside the stable, listen for Domidak and Prissen chatting about treasure. Talking to them triggers the “Misko, the Great Bandit” side quest. They’ll sell you a clue leading to a hidden stash of rupees and gems. Solving this riddle (involving a suspicious rock formation near the Dueling Peaks area) can fatten your wallet early on – a big help for purchasing gear.
Journey to Kakariko Village (Meeting Hestu)
Continue your journey by following the main road west from the stable, then turning north across Kakariko Bridge toward the wooded hills. (Check the signposts for “Kakariko Village” at the crossroads.) As you cross the mossy stone Kakariko Bridge into a narrow mountain pass, keep an eye out for a particularly large Korok character named Hestu dancing near the road. Hestu is hard to miss – he’s a giant, maraca-shaking Korok – and he’s actually on a quest of his own. Speak to him and he’ll lament that monsters stole his beloved maracas. This begins the “The Priceless Maracas” side quest. Clear out the Bokoblin camp just up the hill (use bombs or arrows from a safe distance if you’re low on hearts) and retrieve Hestu’s Maracas from a treasure chest. When you return them, Hestu can finally perform his dance and will offer to expand your inventory in exchange for Korok Seeds. Each seed lets you add a slot to your weapon, bow, or shield inventory – a huge upgrade that lets you carry more gear. (Tip: If you’ve been finding Korok Seeds under random rocks or by solving little environmental puzzles, now you know their purpose!) Give Hestu as many seeds as you can spare; the first expansion costs 1 seed, the next 2, and so on. (You’ll encounter Hestu again later, but it’s very worthwhile to do a few upgrades now.)
Optional Koroks: On your way up the trail, be on the lookout for small Korok puzzles – often marked by out-of-place rocks, target balloons, or flower trails. For example, examine fairy lights, complete rock circle patterns, or race to catch glowing wisps. Solving these little puzzles will yield Korok Seeds. It’s worth grabbing a few along the road to use with Hestu. (There’s one at the top of Kakariko Bridge and several around the woods if you explore.)
With inventory expanded and your horse (if you have one) in tow, continue up the winding road. Lanterns line the path as you ascend into a picturesque valley. Soon you’ll reach the serene Kakariko Village, marked by a wooden archway and two big Guardian statue remnants at its entrance. There’s a goddess statue here as well – a perfect time to pray and trade in four Spirit Orbs for a Heart Container or Stamina Vessel if you’ve completed some shrines. Before anything else, activate the Ta’loh Naeg Shrine to the left of the village entrance. This shrine (“Ta’loh Naeg’s Teaching”) is a combat tutorial that pits you against a Guardian Scout to practice dodge flurries and parries – a great opportunity to sharpen your fighting skills. Completing it nets you a few combat items and another Spirit Orb. Now, onto your primary goal: meeting Impa.
Meeting Impa & Exploring Kakariko Village
Kakariko Village exudes a peaceful, traditional Sheikah atmosphere. Take in the sights: villagers tending pumpkin patches, colorful prayer flags fluttering, and fireflies beginning to twinkle at dusk. The main path leads straight to a large two-story house adorned with blue cloth and Sheikah eye symbols – Impa’s house. As you approach, a young Sheikah woman named Paya nervously greets you at the bottom of the steps. She recognizes the Sheikah Slate on your hip and realizes you must be the legendary hero her grandmother spoke of. Paya ushers you inside to finally meet Impa, the wise elder of Kakariko.
Speak to Impa to trigger an important cutscene and dialogue. She is overjoyed that you’ve returned, but also reveals the grave situation facing Hyrule. Impa recounts the prophecy and events of 100 years past: how Princess Zelda fought Calamity Ganon to a stalemate and had Link placed in the Shrine of Resurrection after he was gravely injured. She explains that Ganon is now sealed inside Hyrule Castle, growing in strength, and that Zelda has been containing him there ever since – but her power will soon run out. Impa tasks you with defeating Calamity Ganon and restoring peace. To do so, you’ll need to free the four Divine Beasts, the ancient Shiekah constructs piloted by the Champions a century ago. Impa marks the general locations of the Divine Beasts on your map (in the regions of the Zora, Goron, Rito, and Gerudo tribes) and officially gives you the main quest “Free the Divine Beasts.” These will be massive undertakings, but don’t worry – you don’t have to head for them immediately. Impa suggests another course first: recovering your lost memories.
Noticing Link’s blank expression, Impa realizes he has lost his memory entirely. She mentions that Princess Zelda left something for him: an old photo Album inside the Sheikah Slate, containing pictures of various locations in Hyrule. These pictures were taken by Zelda herself 100 years ago. Impa suspects that visiting those spots might jog Link’s memories of their past. However, the Slate’s Camera Rune (which took those photos) is not functioning yet. To restore it, Impa directs you to seek out Purah, an eccentric Sheikah researcher at the Hateno Ancient Tech Lab. This begins the next main quest, “Locked Mementos,” sending you to Hateno Village for a Slate upgrade. Impa emphasizes that regaining your memories will help guide you on the path to defeating Ganon.
Before you leave, Impa provides a Cherished Ballad cutscene (the iconic tapestry scene) detailing the fall of Hyrule: the Champions, the Divine Beasts, and Ganon’s betrayal. This gives rich context to your mission and underscores why freeing the Divine Beasts is vital. After the story, Impa hands you the Paraglider (already obtained) and the objective to visit Hateno Lab. She also notes that once the Camera is repaired, you should return to her – she has something for you if you can recall at least one of Zelda’s pictures. With that, Seek Out Impa is completed and Locked Mementos is now your active quest.
Now that you have some freedom in Kakariko, take time to stock up and explore. There’s a General Store (Enchanted) selling the Stealth Armor set (very useful for sneaking, albeit expensive) and other supplies. The Curious Quiver shop sells arrows – talk to the owner, Rola, for an easy side quest (“Arrows of Burning Heat”) if you feel like it. You can also cook up meals at the cooking pot by the campfire; Kakariko’s surrounding woods have plenty of Hearty Radishes and Endura Shrooms that make excellent restorative dishes. If you roam around the village, you’ll find several side quests: Cado needs help rounding up his scattered cuccos (Flown the Coop), and a little girl named Koko will eagerly share cooking recipes through a series of daily quests (Koko’s Kitchen). These are entirely optional and meant to deepen the village’s story – do them if you wish, or come back later.
Optional: There is a Great Fairy Fountain on a hill just north of Kakariko that you might stumble upon now (up the path behind the shrine). However, the Great Fairy Cotera demands a 100 rupee offering to unlock her power – a steep price if you’re low on funds. The payoff is the ability to upgrade your armor, significantly boosting your defense. If you’ve collected some valuable ores (like opals or ambers from chests and ore deposits), you could sell a few in town to afford this. It’s recommended to return later when you have more rupees, perhaps after visiting Hateno. In fact, a traveling painter in Kakariko named Pikango will guide you to this fairy fountain as part of a quest once you have the Camera. So, file this away for now: upgrading armor will be important, and Kakariko’s fairy is the first step.
Journey to Hateno Village (Fort Hateno & Tower)
When you’re ready to proceed with the main quest, set out from Kakariko Village toward Hateno Village. Ensure you’ve prepared food, weapons, and perhaps a trusty horse – there’s a long road ahead, filled with both danger and discovery.
From Kakariko, follow the road south out of the village. Your destination, Hateno Village, lies to the southeast, beyond a large stretch of hills and forest. The path leads through a place known as Fort Hateno, marked by ruined barricades and decayed Guardian remains – this was the site of a last stand against the Calamity 100 years ago. As you approach the Fort Hateno area, stay alert: a couple of Guardian Stalkers half-buried in the mud of Ash Swamp may still be active. If you see one come to life (its red eye glowing and targeting you), sprint in a zigzag or take cover behind terrain to avoid its laser blasts. You can also detour slightly off the main road to bypass the swamp on higher ground. Once past the fort’s broken wall, the threat diminishes and the road opens up into the peaceful East Necluda countryside.
Soon you’ll see the distinctive silhouette of Hateno Tower rising in the distance to the south. It’s worthwhile to climb this Sheikah Tower before reaching the village proper, as it will fill in the map for East Necluda. The tower stands on a ridge beyond some cliffs to your right as you travel. Make your way to its base, but note the thorny vines covering it – these will hurt if you climb into them. One trick is to burn the brambles with fire: if you have a fire weapon or fire arrows, ignite the thorns to clear a path (shooting a Fire Arrow at the base works wonders). Otherwise, find a higher ledge on the cliff behind the tower and glide down onto an exposed section of the tower above the thorns. Watch for a Bokoblin or two in the area while you climb. At the top, activate Hateno Tower to reveal the surrounding region’s map. From this vantage, Hateno Village is easily spotted to the east – a cozy cluster of buildings with smoke drifting from chimneys. You can also see the Ancient Tech Lab on a hill further north: a peculiar large telescope juts out from a white building there. Set a marker if you like, then descend (by gliding or climbing down) and continue your journey to the village.
Hateno Village & Ancient Tech Lab (Camera Rune)
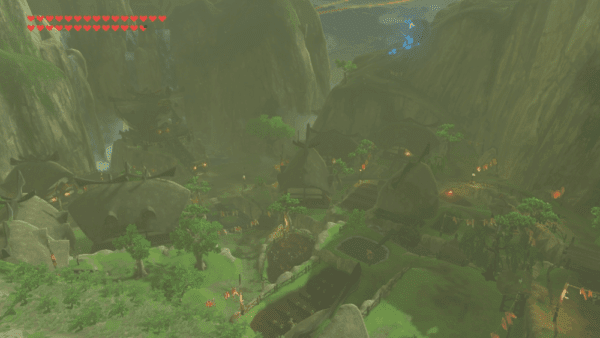
Follow the main road east into the Hateno region. The landscape here is idyllic – expect to see peaceful wildlife, farmers working fields, and perhaps a few wild horses on the plains. As night falls, you might also encounter Stal monsters (skeleton Bokoblins that appear after dark) – dispatch them with a few hits, or simply outrun them on horseback. Around a bend, the road leads you straight to the gates of Hateno Village
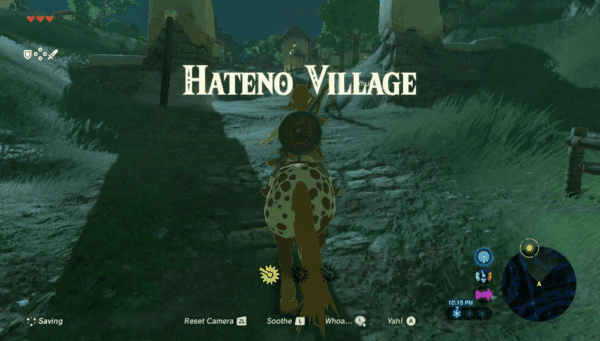
(you’ll know you’ve arrived when the title appears on-screen)
Before heading in, veer off to the right up a short slope to access Myahm Agana Shrine, which sits on a bluff overlooking the village. Activating this shrine provides a convenient warp point for Hateno Village. (The puzzle inside is a motion-control labyrinth – you can attempt it now or save it for later. Either way, be sure to at least activate the shrine.)
Hateno Village is a quaint farming town and one of the few places largely untouched by the Calamity. Stroll down the main street and take in the rustic charm: windmills turning lazily, villagers going about daily life, and a variety of shops. There’s a General Store (East Wind) selling fruits, arrows, and general goods, and next door, the Ventest Clothing Boutique where you can buy the Hylian Tunic, Trousers, and Hood if you missed them in Kakariko. They also stock the Soldier’s Armor set which boasts high defense (very pricey, but an investment for later). A bit further, you’ll find the Kochi Dye Shop – a unique establishment where you can dye your armor different colors. If you feel like customizing Link’s outfit, bring some ingredients and rupees and talk to Sayge the dye merchant to change your attire’s color scheme. Across the plaza is the Great Ton Pu Inn if you need to rest until morning or want to spend rupees on a comfy bed (sleeping until morning can also clear bad weather). While exploring, keep an eye out for a certain mischievous statue – behind the inn, down a slope, there’s a strange horned statue that can exchange Heart Containers and Stamina Vessels (for a price). This “devil statue” is an optional secret; it essentially lets you respec your upgrades (trading a bit of one for the other) if you ever regret your choices.
When you’re ready to proceed with the main quest, head north through the village and up the hill toward the Hateno Ancient Tech Lab. Follow the path past some fields and you’ll start ascending a steep hillside dotted with apple trees and wooden signs pointing the way to the lab. Partway up, the road diverges: the left fork goes to Hateno Bay, but you should stick to the right to continue uphill. As you climb, you’ll notice round blue lanterns along the path – these will be important in a moment. At the top of the hill stands the Hateno Ancient Tech Lab, which looks like a small lighthouse with a large telescope attached. Outside you’ll meet Symin, an assistant researcher. He directs you inside where you finally meet Purah, the director of the lab (to Link’s surprise, she appears as an eccentric young girl – a result of a botched experiment). Purah immediately notices your Slate is missing some rune functionalities. After some humorous banter, she agrees to help restore your Sheikah Slate, but she has a task for you first: bring the blue flame from the Ancient Furnace back to light the lab’s furnace. This will re-power the lab’s Guidance Stone. Time to do a little fetch quest with fire!
Exit the lab and look toward Hateno Village; you should see an eerie blue flame burning in a large furnace far below, near the entrance to town. That’s the Ancient Furnace. Grab a wooden object to use as a torch – there’s usually a Torch or two leaning against the lab’s walls or outside (you can also use any wooden weapon like a Tree Branch, but a proper Torch won’t burn up as quickly). If it’s currently raining, you might want to wait by a fire or sleep until clear weather, since rain will extinguish the flame. Head down to the furnace, which is marked by a blue flame icon on your map. Stand next to the blue flame and press A to ignite your torch. Now you must carefully carry this blue flame all the way back uphill to the tech lab. Along the road are those empty stone lanterns you saw earlier – make a point to light each one as you pass. These act as checkpoints; if your torch flame goes out at any time, you can relight it from the last blue lantern you ignited instead of trekking back to the bottom. Avoid sprinting or using your glider with the lit torch (those actions will put it away and snuff the flame). If enemies appear – for example, Keystone Keese or Chuchus at night – you can put the torch away to fight, but remember you’ll need to relight it after. Alternatively, outrun or ignore them since the torch occupies your hands. Work your way up, lantern by lantern. The distance between some lanterns is longer than others, so don’t worry if you go a while without seeing one; just keep following the path. Once you reach the top of the hill, use the blue flame to light the furnace outside the tech lab. The furnace roars to life, and Hateno Lab is officially operational again – in fact, the lab’s roof starts glowing and it becomes a new fast-travel point on your map.
Head back inside and talk to Purah. Impressed that you got the job done, she rewards you by finally upgrading your Sheikah Slate. Interact with the Guidance Stone as she instructs, and enjoy the cutscene as your Slate downloads its missing features. You receive the Camera Rune, along with the restored Album and the lengthy Hyrule Compendium database. Purah asks you to test the Camera by snapping a Picture of her. To do this, ready the Camera Rune (hold LZ and select it), frame Purah in the shot and snap the photo. Talk to Purah again and show her the picture; she’s satisfied and a bit flattered (you can see her pose was very deliberate!). More importantly, she mentions that your Album already contains 12 old photos – Princess Zelda’s pictures from 100 years ago. These are the locations Impa spoke of that may hold your lost memories. Purah suggests returning to Impa in Kakariko Village now that the Slate is fixed, so Impa can fill you in on the next steps. Before you leave the lab, you can also speak with Symin – he has a side quest for you. Symin introduces the Hyrule Compendium and offers the quest “Sunshroom Sensing” which, once completed, upgrades your Sheikah Sensor to Sheikah Sensor+. Essentially, after you show him a picture of a Sunshroom, he modifies the Sensor so that you can track any item or creature documented in your Compendium, not just shrines. This upgrade is optional but quite useful if you’re hunting specific materials. Feel free to do it now (there are Sunshrooms in Retsam Forest just west of the lab), or come back later when you need it.
Locked Mementos & Captured Memories
When you’re all set, warp (or travel) back to Kakariko Village to report to Impa.
Back in Kakariko, find Impa in her house. The old Sheikah leader is pleased that you’ve restored the Camera Rune. When you tell her about the pictures in the Album, Impa reveals an exciting new mission: recovering Link’s lost memories. She formally adds the main quest “Captured Memories” to your log. The task sounds simple but spans the entire kingdom – you must visit the locations shown in Zelda’s twelve photographs and Recall the memories associated with each. Impa understands that identifying these locations can be difficult. To help, she immediately identifies one of the photos for you: a picture of a beautiful meadow with statues and a gate. Impa recognizes it as the Lanayru Road – East Gate, just past the Great Fairy Fountain you haven’t visited yet. She marks this location on your map, giving you a solid starting point for finding your first memory. (This memory is relatively close by, in the hills north of Kakariko.) Impa advises that after recovering at least one memory, you should return to her. In fact, as a reward, Impa will gift you the prized Champion’s Tunic for recalling even one of Zelda’s photos – a very useful piece of armor that displays enemy health and boasts high defense when upgraded. This gives you a tangible goal as you begin the memory hunt.
Now, how to track down the memory locations? The images in the Album are your clues – each photograph corresponds to a place in Hyrule. You’ll need to use landmarks in the photos and match them to the real world. This is a true test of exploration and observation. Fortunately, you don’t have to do it alone. Remember the wandering painter Pikango? He can now help you on this quest. Speak to Pikango (he’s right outside Impa’s house by the campfire). Showing him a photo from your Album will prompt him to reminisce and give hints about where that picture was taken. In fact, Pikango is the one who suggested the spot Impa marked – he mentioned it’s up the hill past the fairy fountain. Pikango’s hints are incredibly useful for narrowing down locations, especially for memories in regions you haven’t been to yet. And don’t worry, Pikango travels to various stables around the world. At almost any stable you visit, you’ll find him eagerly painting landscapes; talk to him and he’ll give clues for a memory location near that area. Use his knowledge to your advantage as you wander Hyrule seeking those glowing recall points.
Speaking of which – what does a memory location look like? When you’re near one of the spots depicted in the photos, use your Camera Rune and look for a soft glowing golden light on the ground. These glow spots usually appear when you’re very close to the exact angle shown in the photograph. Approach the glowing area and press A to “Recall.” Link will experience a flashback, unlocking a poignant cutscene memory from 100 years ago featuring Princess Zelda (and often other characters). Each memory fills in more of the storyline and Link’s bond with Zelda before the Calamity. They’re well worth finding for the story alone. After the cutscene, the glow will vanish from that spot (you’ve permanently reclaimed that memory). The first memory you recover will prompt Link to… well, not remember everything, but it’s a start. And as mentioned, returning to Impa after any one memory triggers her reward – she presents you with Zelda’s Champion Tunic as promised. This blue tunic was worn by Link in the old photographs; aside from its sentimental value, it has a special property of showing enemy health bars and can be upgraded to one of the best armors in the game.
Optional – Find the Fairy Fountain: Now that you have the Camera, another quest opens up in Kakariko. Talk to Pikango by the fire and he’ll mention he’s painting the Great Fairy Fountain. He offers to take you there if you agree to snap a photo of it for him. Follow Pikango up the path behind the shrine to the top of the hill (he’ll stop partway, and you continue ahead). You’ll find the Great Fairy Fountain (Cotera’s Fountain) nestled in a forest clearing. Examine the large closed flower bud and pay the 100 rupees fee to awaken the Great Fairy (if you haven’t already). Cotera will emerge and grant you the power to enhance your armor (for a cost in materials). It’s strongly recommended to upgrade some armor now – even a single level boost on your Hylian gear or Champion’s Tunic will make a difference. After basking in the fairy’s blessings, switch on your Camera Rune and take a picture of the fairy fountain. Head back down to Pikango and show him the photo to complete the “Find the Fairy Fountain” quest. He’s amazed by the fountain’s beauty. More importantly, completing this quest inspires Pikango to travel further and continue helping you – from now on, whenever you meet him at stables, he’ll gladly provide specific hints for the nearest memory photo. This will greatly assist you in the Captured Memories quest as you explore new regions.
Next Steps & Conclusion
At this point, the world truly opens up for you. Locked Mementos is complete – you sought guidance from Impa and unlocked the Sheikah Slate’s potential with Purah’s help. You now have multiple main quests: Captured Memories (ongoing as you travel) and Free the Divine Beasts (four objective markers beckon from different corners of Hyrule). How you proceed is up to you. A common next step is to tackle one of the Divine Beast quests – perhaps starting with the Zora’s Domain to the northeast or another region of your choosing. Each Divine Beast quest will be a substantial adventure of its own. Feel free to also pursue shrine challenges, side quests, and further upgrades (remember to visit other Great Fairies as you find them to enhance your gear further). With your expanded inventory, upgraded runes, and a growing arsenal of weapons and knowledge, you are well-prepared to face the challenges beyond Kakariko and Hateno. Good luck, Hero – Hyrule’s fate is in your hands, but now you have the guidance and potential unlocked to succeed in your journey.