


Table of Contents
- Reaching Rito Village via the Tabantha Region
- Meeting the Rito Elder Kaneli
- Proving Yourself to Teba at the Flight Range
- The Assault on Divine Beast Vah Medoh
- Exploring Vah Medoh – Wind Puzzles and Terminals
- Boss Fight: Windblight Ganon
Reaching Rito Village via the Tabantha Region
You begin your journey to Rito Village by heading northwest into the Tabantha Frontier. Cross the Tabantha Great Bridge, a long wooden span over a windy canyon, and continue along the main road. Soon, the tall spire of Tabantha Tower comes into view just north of the bridge. The direct path is guarded by Bokoblins posted as sentries, so it’s wise to veer off the road and climb the hillside for a safer approach. As you scale the hill, you’ll notice pools of malice (the evil purple muck) coating the tower’s base. Climb the smaller rock pillar nearby and shoot the eye embedded in the malice to cleanse it, causing part of the pillar to collapse and form a makeshift ramp. Glide over and climb up to activate Tabantha Tower, unlocking the map for this region.
From the top of Tabantha Tower, leap off eastward and glide back down to the main path. Follow the road as it winds north through gentle hills and pine trees. Watch out for a Stone Talus that emerges from the rocky ground along the way – you can simply sprint past this lumbering mini-boss if you prefer not to fight. A few roaming Lizalfos may also ambush you in the valley, but they’re nothing you haven’t handled before. As dusk falls and you near your destination, you’ll spot the warm lights of the Rito Stable just off the roadside. [Optional] Take a break here to chat with travelers or do some cooking; the stable is a safe haven to recover before pressing on.
Beyond the stable, the road leads you up a gentle slope toward a large column of rock rising from the middle of Lake Totori – this is Rito Village, built vertically around the column’s base. Crossing the last wooden bridge into the village, you’re greeted by an awe-inspiring (and unsettling) sight: Divine Beast Vah Medoh, a gigantic ancient bird, circling ominously in the skies above. Its metallic wings slice through the clouds as it patrols overhead, a constant reminder of the challenge to come.
Meeting the Rito Elder Kaneli
Rito Village itself spirals around the tall rock spire, with wooden walkways and stairs winding upward. You ascend through the village, passing curious Rito villagers and the local shops built into perches along the way. [Optional] Roughly halfway up, make a short detour to the Akh Va’quot Shrine, which sits on a ledge off the main path. Activating this shrine creates a handy warp point for Rito Village (and you can complete the shrine’s trial now or return later). Continue upward, and at the very top you find the Rito chief’s dwelling.
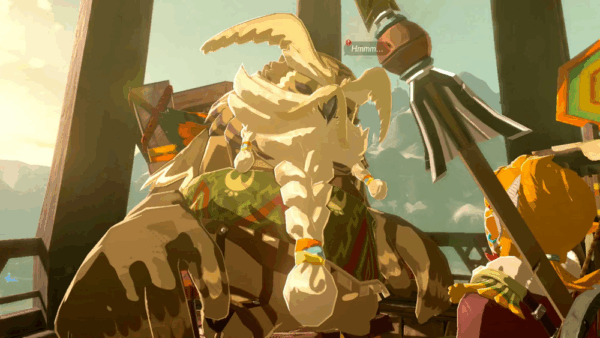
At the peak of Rito Village, you speak with Kaneli, the wise elder of the Rito tribe. Kaneli sits with a worried look, his impressive white plumage illuminated by the village’s torchlight. He thanks you for coming and describes the dire situation: the Divine Beast Vah Medoh has been terrorizing Rito Village, stirring up violent winds that endanger his people. He explains that two warriors, Teba and Harth, attempted to confront the beast. Harth was injured in the attempt, and Teba set out alone to continue the fight. With Teba still missing, Kaneli pleads for your help in calming Vah Medoh. He tasks you with finding Teba, the last brave soul who went to challenge the beast.
Your first lead is to check with Saki, Teba’s wife, who resides in a hut just below Kaneli’s perch. Saki, a pink-feathered Rito tending to her child, is anxious for her husband’s safety. She informs you that Teba headed to the Flight Range, a training area in the mountains at Dronoc’s Pass on the outskirts of the Hebra region. Saki points northwest, explaining that the Flight Range is not far from the village. She also warns that the area is frigid. As you gaze out from the village toward the distant cliffs, Link is suddenly struck by a flash of memory – a vision of Revali, the Rito Champion of old, practicing in that very Flight Range. [Optional] If you have unlocked the Captured Memories quest, this platform triggers a forgotten memory of Revali’s mastery of the skies, adding a poignant resolve to your mission.
Proving Yourself to Teba at the Flight Range
To reach the Flight Range, prepare for a cold journey. The air grows colder as you venture toward the Hebra Mountains, so equip warm clothing or eat a spicy meal for cold resistance. (In Rito Village’s shop you can purchase the Snowquill Armor set – tunic, trousers, and headdress – which completely negates cold weather effects. This investment is highly recommended before you proceed into the freezing heights.) When you’re ready, head to a high ledge on the northwestern side of Rito Village and leap off, paraglider open. The updrafts around the village carry you a long way. Glide northwest toward the Flight Range, following a line of tattered flags that mark the path through the canyon. Below, snow blankets the ground as you cross into the Hebra region, and jagged cliffs loom on all sides. [Optional] On the way, you can stop at the Sha Warvo Shrine nestled in a cliff – activating it provides a fast travel point right near the Flight Range for convenience.
Land at the Flight Range, a lone wooden platform built beside a frozen lake in a steep valley. A small cabin and a tall archery platform denote this as the training ground for Rito warriors. A blue ring of targets hangs in the air, swaying in the breeze. Climb the ladder up into the wooden lodge and finally you meet Teba, the Rito warrior. At first, Teba is cautious and stoic. He has resolved to take down Vah Medoh himself and is skeptical of your abilities. Tell him Kaneli sent you, and that you want to help. Teba ultimately agrees to let you join his fight only if you can prove yourself. To earn Teba’s respect, you must demonstrate your skill in aerial archery – the same technique needed to attack Vah Medoh.
Teba’s test is straightforward but thrilling: destroy five targets within three minutes while mid-air. Grab the arrows from the barrel by the hut if you’re low, then step to the edge of the platform. Leap off into the canyon and immediately catch the updraft rising from the chasm below. The updraft propels you upward; at the peak of your ascent, draw your bow. Time seems to slow as you aim at the nearest target. One by one, you glide through the chilly air, lining up shots on the scattered practice targets. Release arrows in quick succession while hovering with your paraglider – the trick is to let go of the paraglider briefly to drop and then reopen it to gain height or adjust your angle as needed. The targets are spread around the cliffs and beneath the arch, but there are more than enough to hit. After puncturing five targets with well-placed shots (likely long before the time limit expires), you sail back to the platform. The exercise leaves a satisfying trail of shattered targets in your wake.
Impressed by your sharpshooting and aerial finesse, Teba concedes that you are ready to face the Divine Beast together. He commends your skill and opens a nearby treasure chest as a reward. Inside you find the Falcon Bow, a Rito-made bow designed for aerial combat, with a high rate of fire that will serve you well in the skies. Teba also hands you a bundle of 20 Bomb Arrows, precious explosives necessary to damage Vah Medoh’s defenses. Now that both of you are equipped and determined, Teba outlines the plan: he will fly you up as close as possible to Vah Medoh, and together you will assault the beast in mid-air. When you’re ready, speak to Teba and the two of you take to the sky, launching into the freezing air to confront the Divine Beast.
The Assault on Divine Beast Vah Medoh

High above the Hebra Mountains, Vah Medoh soars in wide circles. Its immense form is like a massive stone-and-metal bird with outstretched wings, emanating a menacing red forcefield that shimmers around it. Teba carries you up with a powerful flap of his Rito wings. The wind rushes past as you draw closer to the machine’s altitude. Soon, you are gliding on your own alongside Teba in the thin, frigid air, at eye-level with the Divine Beast. Below, the world is a carpet of clouds; ahead, Vah Medoh’s emerald-green hull creaks as it turns to face you. A protective barrier of ancient energy surrounds the beast, so you cannot land on it just yet. Instead, you must destroy the four Guardian cannons mounted on its wings to disable the forcefield.
Teba cries out a warning as Vah Medoh’s defenses activate – the cannons begin to glow and track your movements. There are four cannons in total, two on each wing of the beast, and each must be taken out with your bomb arrows. You split up the targets: Teba will distract Medoh’s fire as much as he can, drawing some of the cannon blasts toward himself. Your job is to fly close to each cannon and bomb it. Steer yourself toward the first cannon, but be careful – once a cannon locks onto you, a thin red laser aims your way. A blinding energy beam sears out moments later. To avoid these deadly blasts, use the paraglider’s agility: if you see a cannon tracking you, suddenly drop by closing your glider, or sharply change altitude. The sudden shift causes the beam to miss by a wide margin. Immediately reopen your paraglider to regain lift and continue your attack run.
When you get within range of a cannon, draw your bow in mid-air. Time slows again as you line up a bomb arrow shot. Release, and boom! – a direct hit explodes against the ancient turret. Each cannon is tough and will take two Bomb Arrows to destroy. The air battle is fast-paced: you glide from one wing to the next, weaving around laser fire. The sky is lit with fiery explosions as one by one the cannons go down under your barrages. There is minimal cover in the open air, so rely on constant movement and the updrafts created by the beast’s wake to stay aloft. Teba provides covering fire and occasionally shouts encouragement when a cannon is destroyed. After a few intense minutes, the final cannon erupts in flame and plummets off Vah Medoh’s wing. With all four cannons disabled, the red forcefield enveloping Vah Medoh flickers and dissipates, clearing the way for you to approach safely.
His part in the mission complete, an injured Teba cannot continue (he may have taken a hit during the battle). He wishes you luck and retreats to safety, leaving the rest to you. You glide toward the now-unshielded Divine Beast and touch down on its back. At last, you have boarded Vah Medoh, high above the world. A brief calm follows as you stand on the enormous construct; eerie blue-lit interiors beckon through an opening in the hull. Steeling yourself, you step inside the Divine Beast to begin the next phase of the quest.
Exploring Vah Medoh – Wind Puzzles and Terminals
Inside the belly of the beast, the environment shifts to ancient technology – a mix of stone and Sheikah machinery humming with energy. Ghostly Guidance Stones and circuits line the walls. The moment you enter, a disembodied voice (Princess Zelda’s voice from 100 years past) echoes in your mind, guiding you to take control of the Divine Beast. Directly ahead, you find the glowing Guidance Stone map terminal. Activate it, and a detailed map of Vah Medoh appears on your Sheikah Slate, revealing the beast’s layout. The map shows the locations of five terminals that you must activate, each positioned along Vah Medoh’s wings. Crucially, the map also grants you the ability to tilt Vah Medoh at will. You can now rotate the Divine Beast’s wing alignment between three settings – level, tilted upward, or tilted downward – by selecting the controls on your map. This ability to tilt the dungeon is key to solving the puzzles ahead.
With the entire dungeon as a massive mechanism, you proceed to explore Vah Medoh’s chambers. Immediately, you feel strong gusts of wind flowing through certain hallways – parts of the beast are open to the sky, letting in the air. In fact, wind is the central theme of Medoh’s puzzles. Use your paraglider in vertical shafts where updrafts are present to reach higher platforms or cross wide gaps. Early on, you enter a chamber with a giant shuttered window and a locked gate. You spy a switch connected to the window mechanism. Activating the switch causes the huge metal shutters to slide open, and frigid gales from outside rush into the chamber. The wind powers a set of turbines, which in turn open the gate, granting you access to a new area. In another room, you discover a large metal orb resting precariously on a track. By tilting Vah Medoh, you send the orb rolling along the track like a marble. The goal is to get it into a socket that will trigger a mechanism. For example, one puzzle requires you to stop an air current with a switch, then tilt the Beast so the ball rolls to one side, use Magnesis to reposition the ball, and tilt the other way – causing the orb to roll into a receptacle that opens a sealed gate. Solving these contraptions often involves a combination of manipulating wind (opening or closing vents) and altering gravity through tilting.
As you explore, you’ll encounter corruption in the form of eyeball-shaped blight scattered around. Take out these eyes with arrows to clear the gooey malice that blocks passages and chests. Step by step, you work your way through each wing of the Divine Beast. Some terminals are perched in hard-to-reach places: one might be on a wingtips accessible only when that wing is tilted downward, allowing you to glide across a gap. Another terminal might sit behind a turbine that blasts constant wind – you’ll have to disable or redirect the airflow by solving a small puzzle so you can approach it safely. Keep an eye out for metal grates, gust-producing fans, and moveable blocks; all of these are part of Medoh’s mechanisms. Whenever you’re stuck, remember to use the Divine Beast controls: changing the tilt can turn a wall into a floor or send objects sliding to new positions. Each time you activate a terminal, the voice of Zelda chimes in with encouragement, and one of the five glowing indicators on your map goes dark.
The interior of Vah Medoh has multiple levels, but thanks to the open design and updrafts, you can often glide between platforms or drop down carefully to backtrack. Work systematically from one wing to the other, using the central body as a hub. After activating the fifth and final terminal, a triumphant chime rings out and your map updates. The voice instructs you to activate the Main Control Unit, which has now appeared. This main control is located on a platform on Vah Medoh’s back (essentially on top of the dungeon). To reach it, make your way back to the central room. Use a powerful upward draft (enabled by the wind now flowing freely through Medoh’s body) to launch yourself up and out through an opening. Land atop the Divine Beast, where a glowing pedestal – the main control unit – is waiting. Take a moment to heal up, eat any stat-boosting meals, and prepare for a fight. The moment you activate this final control, the dungeon will cease operation and the boss will appear.
Boss Fight: Windblight Ganon
Activating the main control triggers a cutscene as the skies darken overhead. From the ether emerges Windblight Ganon, the monstrous phantom that controls Vah Medoh. This incarnation of Ganon’s malice is a lanky, floating horror with a single eye, an arm cannon, and a shroud of Sheikah technology swirling around it. It howls in fury at your presence, determined to protect the Divine Beast. Windblight Ganon immediately attacks, and the battle is on atop Vah Medoh’s back – an arena consisting of the Beast’s wide, flat surface with a few low walls and continuously generated updrafts at the edges.
Phase 1: Windblight Ganon uses the power of wind to its advantage. It will hover at a distance and fire barrages of energy bullets from its arm cannon. These projectiles travel quickly but you can dodge them by sprinting sideways or taking cover behind the stone scaffolds on the beast’s back. The boss also conjures mini-tornadoes that roam around the arena – if you see swirling winds forming on the ground, keep your distance to avoid being sucked in and thrown. To damage Windblight Ganon, use the updrafts that are naturally present (or created by the boss’s wind attacks) to your advantage. Catch an updraft with your paraglider, rise high, then draw your bow. In mid-air, time slows, giving you a clear shot at the boss’s eye. Nail Windblight in its big blue eye with an arrow – regular arrows work, but Bomb Arrows deal extra damage and stagger the foe. After a few well-placed hits, Windblight will reel and drop to the ground, temporarily stunned. Take this opportunity to rush in and strike with your strongest melee weapon, or continue raining arrows before it recover.
Keep moving to avoid the boss’s attacks. If Windblight Ganon cloaks itself or a tornado obscures your view, don’t panic. Glide to another updraft or drop to the ground and reposition until you spot the boss again. The arena is spacious enough to maneuver; use the entire area to keep a favorable angle. Patience and accuracy are key – whittling down about half its health will trigger the next phase.
Phase 2: Enraged, Windblight Ganon changes its tactics. It summons four floating drones – small guardian-like orbs – that orbit around it. These drones will refract and bounce the boss’s laser shots, meaning Windblight can now angle beams at you from unexpected directions. It may also unleash multiple tornadoes at once, turning the battlefield into a chaotic storm. Focus remains the same: use updrafts to get height and enter bullet-time, then aim for Windblight’s eye whenever you have a clean shot. The drones can be destroyed with a few arrows each, which might be worthwhile if they’re making the laser fire too difficult to dodge, but note that the drones respawn after a short time. It might be better to ignore them and concentrate on the main enemy. Continue strafing and gliding to avoid the crisscrossing laser beams; the same trick of dropping suddenly or changing altitude works against these as it did against Medoh’s cannons.
Despite Windblight Ganon’s menacing arsenal, your mastery of the updrafts and archery will eventually bring it down. Each successful hit to its eye interrupts its attacks and hastens its defeat. After enough punishment, Windblight Ganon lets out a final screech and collapses, exploding into dark mist. You’ve defeated the Divine Beast’s foe. In the aftermath, a Heart Container materializes – claim this to increase your maximum health by one. Approach the main control unit once more and activate it to finally free Divine Beast Vah Medoh from Ganon’s control.
In a moving finale, the spirit of Revali, the Rito Champion, appears before you. Though proud and headstrong in life, Revali now offers his grudging respect and gratitude. He grants you Revali’s Gale, a sacred ability of the Rito Champion. This powerful skill allows you to create your own updraft at any time – simply charge jump (hold X) and you’ll launch skyward on a gust of wind. It’s an invaluable ability for traversing Hyrule’s terrain and reaching high places with ease.
With Vah Medoh now under control, the giant Divine Beast flies off to perch atop the Rito homeland, aiming its laser toward Hyrule Castle in preparation for the final battle with Calamity Ganon. Back in Rito Village, the threat in the skies has passed. If you return to Chief Kaneli, he will express the village’s heartfelt thanks and present you with the Great Eagle Bow, a treasured weapon once wielded by Revali himself. This marks the end of the Rito Village questline. Victorious and empowered with Revali’s Gale, you set off with greater confidence – one more Divine Beast has been freed, and Hyrule is one step closer to liberation.
Congratulations, brave hero, on conquering Vah Medoh and earning the aid of the Rito Champion! Every gale and gust is now at your command as you journey onward.