Skip to content
Zelda Central
  • About Us
  • Discord
  • Forums
  • Media
Facebook
Log In Register
‹
  • Majora’s MaskMajora’s Mask
  • The Legend of ZeldaThe Legend of Zelda
  • The Adventure of LinkThe Adventure of Link
  • A Link to the PastA Link to the Past
  • Link’s AwakeningLink’s Awakening
  • Ocarina of TimeOcarina of Time
  • Oracle of SeasonsOracle of Seasons
  • Oracle of AgesOracle of Ages
  • The Wind WakerThe Wind Waker
  • The Minish CapThe Minish Cap
  • Twilight PrincessTwilight Princess
  • Phantom HourglassPhantom Hourglass
  • Spirit TracksSpirit Tracks
  • Skyward SwordSkyward Sword
  • A Link Between WorldsA Link Between Worlds
  • Breath of the WildBreath of the Wild
  • Links Awakening SWITCHLinks Awakening SWITCH
  • Tears of the KingdomTears of the Kingdom
  • Echoes of WisdomEchoes of Wisdom
  • Hyrule Warriors: AoIHyrule Warriors: AoI
›
The Legend of Zelda
Main PageBlue Ring & Red RingBomb UpgradesBoss GuideCharactersDungeon MapsEnemiesGame Genie CodesHeart Container LocationsIntroductionItemsPotion AcquisitionStory and SettingSword UpgradesWalkthrough
The Adventure of Link
Main PageBoss StrategiesCharactersFairy LocationsGame Genie CodesHeart ContainersItemsLink Dolls (1UP)Magic JarsMapsP-BagsStory
A Link to the Past
Main PageBoss GuideBottlesCharactersCheat Device CodesComicEnemiesHeart Piece LocationsItems & EquipmentMagic Upgrades & MedallionsManualMapsPrologueWarp Tiles
Link’s Awakening
Main PageBoss StrategiesCharactersEnemiesGameShark CodesHeart PiecesItems & EquipmentMapsPhotographsSecret Seashells
Ocarina of Time
Main Page100% Completion ChecklistBig PoesBiggoron Sword Trading SequenceBoss GuideBottlesCharactersComicEnemiesGameShark CodesGold SkulltulasGossip StonesGreat Fairy FountainsHeart PiecesItemsMagic Bean BedsMask Trading SequenceMini-Games and SecretsOcarina SongsWalkthrough
Majora’s Mask
Main PageBomber's NotebookBoss GuideCharactersCheatsEnemiesGameshark CodesHeart Piece LocationsHidden Hole LocationsItemsKeaton QuizMapsMask Collection GuideOcarina SongsOfficial ArtworkSecrets and Easter EggsSide QuestsStoryStray FairiesWalkthrough
Oracle of Seasons
Main PageBoss GuideCharactersEnemiesGameShark CodesHeart Piece LocationsItems & EquipmentMapsTrading SequenceWalkthrough
Oracle of Ages
Main PageBoss StrategiesCharactersEnemiesGameShark CodesHeart Piece LocationsItems & EquipmentMapsTrading Sequence
The Wind Waker
Main PageAction Replay CodesBattleship GameBig OctoBoating Course ChallengeBoss StrategiesBottlesCharactersDeluxe Picto BoxEnemiesFigurine CollectionHeart Piece LocationsInstruction ManualItems & EquipmentPost-CompletionSubmarinesTingle StatuesTreasure ChartsWalkthroughWithered TreesWorld Map
The Minish Cap
Main PageBoss StrategiesBottle LocationsBox ArtworkCharactersCheat Device CodesEnemiesEquipment & Item UpgradesFairy Fountain LocationsGoron QuestHeart Piece LocationsMapsTiger ScrollsWind Crests
Twilight Princess
Main Page100% Completion ChecklistAction Replay CodesBoss GuideBottle LocationsCave Of OrdealsCharactersEnemiesGolden BugsGuardian PuzzleHeart Piece LocationsHowling StonesItems & EquipmentMalo Mart & Magic ArmorMini-Games & SecretsPoe SoulsWalkthrough
Phantom Hourglass
Main PageAction Replay CodesBoss GuideCharactersCourage GemsEnemiesGolden Frog LocationsHeart ContainersItems & Equipment
Spirit Tracks
Main PageAction Replay CodesCharactersEnemiesFlute SongsHeart ContainersItems & EquipmentMapsMini GamesRabbit LocationsStamp Station Locations
Skyward Sword
Main PageBoss StrategiesBottle LocationsCharactersEnemiesHeart Piece LocationsItem & Equipment UpgradesSide Quests
A Link Between Worlds
Main PageAction Replay PowerSavesBoss StrategiesBottle LocationsCharactersItems, Equipment & GearMaster Ore LocationsWalkthrough
Breath of the Wild
Main PageArmor Sets & UpgradesCharactersDownloadable ContentEnemies & MonstersHyrule CompendiumMini-Games & SecretsRecovered MemoriesWalkthroughWeapons, Bows & Shields
Links Awakening SWITCH
Main PageBoss StrategiesCharactersEnemiesHeart Piece LocationsItems & EquipmentSecret SeashellsTrading Sequence
Tears of the Kingdom
Main PageArmor Sets & UpgradesBoss StrategiesCharactersEnemiesShrine Locations and SolutionsSide QuestsWalkthroughWeapons and Shields
Echoes of Wisdom
Main PageAmiiboBoss StrategiesCharactersEchoesEquipment UpgradesGameplay MechanicsHeart Piece LocationsMain QuestsMinigames and ChallengesOutfitsSide QuestsSmoothie RecipesStamp RallyWalkthrough
Majora’s Mask Game Information, Guides, and Media
  • Main Page
  • Bomber's Notebook
  • Boss Guide
  • Characters
  • Cheats
  • Enemies
  • Gameshark Codes
  • Heart Piece Locations
  • Hidden Hole Locations
  • Items
  • Keaton Quiz
  • Maps
  • Mask Collection Guide
  • Ocarina Songs
  • Official Artwork
  • Secrets and Easter Eggs
  • Side Quests
  • Story
  • Stray Fairies
  • Walkthrough

Majora’s Mask: Items

In The Legend of Zelda: Majora’s Mask, Link’s journey through Termina is enriched by a diverse array of items and equipment, each serving a unique purpose in his quest to thwart the impending catastrophe. From formidable swords and protective shields to transformative masks and magical instruments, these tools are pivotal in overcoming obstacles, solving intricate puzzles, and engaging formidable foes.

This comprehensive guide delves into the myriad items available in Majora’s Mask, detailing their functionalities and the methods to acquire them. Whether you’re seeking to enhance your combat prowess with powerful weapons, expand your inventory capacities with upgraded quivers and bomb bags, or unlock new abilities through mystical masks, this resource aims to equip you with the knowledge to navigate Termina with confidence and skill.

Embark on this exploration to fully harness the potential of Link’s arsenal, ensuring a rich and fulfilling adventure in the enigmatic world of Majora’s Mask.

Swords

Kokiri Sword

What It Does: A basic sword with modest attack power, carried over from Ocarina of Time.​
How to Get It: After regaining your human form from Deku Link, the Kokiri Sword is automatically equipped.

Razor Sword

What It Does: An enhanced version of the Kokiri Sword, dealing double damage. However, it wears down after 100 strikes, reverting back to the Kokiri Sword.
How to Get It: Visit the Mountain Smithy in Mountain Village (Snowhead region). After thawing their furnace using Fire Arrows, Hot Spring Water, or by defeating Goht to bring spring, pay 100 Rupees to have your Kokiri Sword upgraded. The forging process takes until the next day.

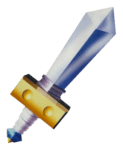
Gilded Sword

What It Does: A permanent upgrade that deals triple the damage of the Kokiri Sword and boasts an unbreakable blade.
How to Get It:

  1. Defeat Goht: Ensure it’s springtime in the Mountain Village by defeating the Snowhead Temple boss, Goht.
  2. Win the Goron Race: Access the Goron Racetrack and secure first place to receive a bottle of Gold Dust.
  3. Upgrade Process:
    • Day 1: Have the Mountain Smithy forge the Razor Sword for 100 Rupees.
    • Day 2: Present the Gold Dust to the smithy for a free upgrade to the Gilded Sword, completed by the next day.

Note: Ensure you have enough time in the current three-day cycle to complete both upgrades.

Great Fairy Sword

What It Does: A powerful two-handed sword adorned with black rose motifs, acting as the game’s equivalent to the Biggoron Sword. As it occupies a C-button slot, it cannot be used alongside a shield.
How to Get It: Collect all 15 Stray Fairies in the Stone Tower Temple and return them to the Great Fairy’s Fountain in Ikana Canyon. As a reward, the Great Fairy of Kindness grants you this sword.


Shields

Hero Shield

What It Does: A standard shield used for basic defense.
How to Get It: Automatically equipped when you revert to human form from Deku Link. If lost, it can be repurchased at the Trading Post in West Clock Town for 80 Rupees.

Mirror Shield

What It Does: Reflects light to solve puzzles and defeat specific enemies vulnerable to light.
How to Get It: Found beneath the Well in Ikana Canyon. Equip the Gibdo Mask to interact with Gibdos and trade required items to progress through the well. After navigating the subterranean area, you’ll acquire the Mirror Shield.


Bows

Hero Bow

What It Does: Enables Link to shoot arrows at enemies, switches, and distant targets.
How to Get It: Obtained in the Woodfall Temple after defeating the Dinolfos mini-boss. A chest will appear containing the Hero’s Bow.


Arrows

Fire Arrow

What It Does: Magically imbued arrows that can ignite enemies, light torches, and melt ice.
How to Get It: Found in the Snowhead Temple after defeating the Wizzrobe mini-boss. A chest will appear containing the Fire Arrows.

Ice Arrows

What It Does: Arrows that freeze enemies and create ice platforms on water surfaces.​
How to Get It: Acquired in the Great Bay Temple after defeating the mini-boss. A chest will appear containing the Ice Arrows.

Light Arrow

What It Does: Powerful arrows that can dispel darkness, invert the Stone Tower Temple, and deal significant damage to enemies.
How to Get It: Obtained in the Stone Tower Temple after defeating the Garo Master mini-boss. A chest will appear containing the Light Arrows.


Quivers

Quiver of Arrows (Default)

What It Does: Holds up to 30 arrows.
How to Get It: Comes standard with the Hero’s Bow.

Large Quiver

What It Does: Increases arrow capacity to 40.
How to Get It: Achieve a score of 40 or more at the Town Shooting Gallery in East Clock Town to earn this upgrade.

Largest Quiver

What It Does: Expands arrow capacity to 50.
How to Get It: After obtaining the Large Quiver, earn a perfect score at the Swamp Shooting Gallery to receive this final upgrade.


Other Items & Equipment

Hookshot

What It Does: Fires a chain with a hooked tip, letting you latch onto wooden targets, chests, and ledges. Essential for dungeon traversal and secret areas.
How to Get It: Beat the mini-boss Wizzrobe inside the Pirate’s Fortress. The Hookshot is your reward for clearing his room.

Lens of Truth

What It Does: Reveals hidden enemies, invisible platforms, fake walls, and more. Without it, many puzzles are impossible.
How to Get It: After getting the Goron Mask, head to the Goron Village in Snowhead and follow the invisible ghost of Darmani up the cliff. Use the lens to track him after it’s acquired from a chest in the cave.

Ocarina of Time

What It Does: Plays magical songs that manipulate time, summon rain, warp to Owl Statues, and more. Central to nearly every major mechanic in the game.
How to Get It: You start with it, but Skull Kid steals it in the intro. Recover it by reaching the top of the Clock Tower at midnight on the Final Day and confronting him.

Magic Beans

What They Do: Plant them in soft soil and water them to grow rideable plants that lift you to hard-to-reach places.
How to Get Them: Buy them from the scrunched-up Bean Salesman in the hole near the Deku Palace Gardens, or get some from the Swamp Tourist Center.

Deku Stick

What It Does: Works as a torch carrier or melee weapon that deals high damage early on. Mostly used to light torches.
How to Get It: Commonly found by cutting down plants or smashing pots. Shops in Clock Town and other regions also sell them.

Deku Nut

What It Does: Stuns most nearby enemies with a flash. Very useful in crowded fights.
How to Get It: Found under bushes, inside jars, from fallen enemies, or purchased in general stores around Termina.

Powder Keg

What It Does: Massive bomb that can destroy boulders and barriers. Only Goron Link can use it.
How to Get It: Speak to the Goron Powder Keg vendor in Goron Village. Pass his trial by carrying a keg to blow up the Boulder blocking Romani Ranch, then you’ll be certified to purchase them.

Bombchu

What It Does: Small bombs that scurry across floors and climb walls before exploding. Great for tight spaces or hard-to-reach switches.
How to Get It: Buy them from the Bomb Shop in West Clock Town or find them in select chests throughout Termina.

Bomb

What It Does: A classic explosive. Drop or throw to destroy boulders, enemies, and secret walls.
How to Get It: Buy at the Bomb Shop or find in bushes, pots, or treasure chests across the land.

Adults Wallet

What It Does: Increases your rupee capacity from 99 to 200.
How to Get It: Donate a total of 200 rupees to the Bank in West Clock Town. The banker will upgrade your wallet.

Giants Wallet

What It Does: Maximum wallet capacity, letting you carry up to 500 rupees.
How to Get It: Clear all 30 Gold Skulltulas in the Swamp Spider House on the First Day to get this wallet as a reward.

Pictograph Box

What It Does: Take pictures of characters, objects, and scenery. Only holds one photo at a time.
How to Get It: Talk to the Tourist Guide inside the Swamp Tourist Center (near Southern Swamp). He’ll lend it to you if you’re in Deku form.

Bottles

What They Do: Store fairies, potions, fish, bugs, and more. You can collect six total.
How to Get Them:

  • Help the Gorman Brothers in their horse race challenge.
  • Win the Deku Scrub race at the Goron Racetrack.
  • Help the sisters at the Milk Bar with their deliveries.
  • Defeat the Big Poe in the Ikana Graveyard.
  • Beat the beaver brothers in a swimming race.
  • Buy a potion for Koume after she collapses in the Woods of Mystery.

Moons Tear

What It Does: Sparkling gem that proves you’ve seen the falling moon. Used to trade with the Deku Scrub for Clock Tower access.
How to Get It: Use the telescope at the Astral Observatory to spy on Skull Kid on top of the Clock Tower. After the cutscene, a Moon’s Tear will fall from the sky. Grab it from outside the observatory.

Town Title Deed

What It Does: A land ownership deed used to trade with other Deku Scrubs for their flower pads.
How to Get It: Trade the Moon’s Tear to the Deku Scrub in South Clock Town to receive this in return. It’s the first step in the title deed trading quest.

Swamp Title Deed

What It Does: Transfers ownership of the Deku Flower near the Swamp Tourist Center in the Southern Swamp to Link, enabling access to the roof of the Tourist Center where a Piece of Heart is located.
How to Get It: Present the Town Title Deed to the Business Scrub beside the Swamp Tourist Center (approach him as Human Link). He desires to move to a busier area and will trade his Swamp Title Deed for the Town Title Deed.

Games

  • The Legend of Zelda
  • The Adventure of Link
  • Link’s Awakening
  • A Link to the Past
  • Ocarina of Time
  • Majora’s Mask
  • Oracle of Ages
  • Oracle of Seasons
  • The Wind Waker


  • The Minish Cap
  • Phantom Hourglass
  • A Link Between Worlds
  • Breath of the Wild
  • Links Awakening SWITCH
  • Tears of the Kingdom
  • Echoes of Wisdom
  • Hyrule Warriors: Age of Imprisonment
  • Other Games

Interactive

  • Forum
  • Discord

Media

  • Amiibo
  • Animated GIFs
  • Animated Series
  • Comics
  • Fonts
  • Licensed Merchandise
  • Live-Action Movie
  • MIDI Music
  • Wallpapers

Fans

  • Extreme Zelda Fans
  • Fan Comics
  • Fan Games

© 2025 Zelda Central - All rights reserved.