Prepare yourself, hero! This bestiary details every distinct enemy variant Link encounters on his quest across the Sky and the vast Surface below. Learn their tactics, weaknesses, origins, and what treasures they might leave behind. Master this knowledge to overcome the dangers spawned by the Demon King Demise!
Table of Contents
Archer Bokoblin
Appearance: Bokoblins (usually Red or Green) wearing distinct skull caps and bandanas, equipped with bows.
Behavior: They prefer staying at a distance, taking aim and firing arrows at Link. They will sound an alarm if they spot Link, potentially alerting nearby allies.
Countering the Threat: Shield Bashing can deflect their arrows right back at them for an easy takedown. Alternatively, close the distance quickly while dodging arrows, or snipe them first with the Slingshot or Bow. They are generally less durable than standard Bokoblins.
Drops: Ornamental Skull (Common), Golden Skull (Rare), Deku Seeds (from arrows).
Location: Faron Woods, Eldin Volcano, Lanayru Desert.
Armos
Appearance: Imposing, knight-like statues often found guarding significant locations or pathways. Based on classic Zelda designs.
Behavior: They remain dormant until Link approaches, then animate and attack, sometimes shielding themselves or opening a large mouth that can fire energy blasts.
Combat Strategy: Their stone bodies are immune to direct sword hits. Target the small red crystals on their exterior using the Whip or Bow. Bait them into opening their mouths and quickly toss a Bomb inside for significant damage.
Drops: Amber Relic (Common).
Location: Lanayru Mining Facility, Sky Keep, Lanayru Sand Sea.
Beamos
Appearance: Tall, totem-like statues with a single, rotating eye that scans the area. A recurring and iconic Zelda enemy.
Behavior: When its eye spots Link, it locks on and fires a powerful, continuous energy beam.
Deactivating Defense: The eye is the only vulnerable point. Once you acquire the Bow, a single arrow to the eye destroys it instantly. Before that, you must use precise sword slashes: horizontal strikes destroy the blue body segments from the bottom up, allowing access to the eye for a final vertical thrust. Time your approach carefully between beam firings.
Drops: Amber Relic (Common).
Location: Lanayru Mining Facility, Lanayru Caves, Lanayru Sand Sea, Sky Keep.
Blue Bokoblin
Appearance: The toughest standard variant of Bokoblin, distinguished by their blue skin tone. They often wield sturdy clubs or machetes.
Behavior: They fight similarly to Red Bokoblins but are more durable and hit harder. They block attacks based on Link’s sword position.
Hero’s Approach: Their increased toughness means Shield Bashes are even more valuable for creating openings. Precise directional slashes are needed to bypass their guard. Don’t underestimate their resilience.
Drops: Ornamental Skull (Common), Golden Skull (Rare).
Location: Later areas of Eldin Volcano, Lanayru Desert, Fire Sanctuary, Sky Keep.
Blue Chuchu
Appearance: A blue, jelly-like blob, larger than Red Chuchus.
Behavior: Hops towards Link. Can temporarily charge itself with electricity after being exposed to it (like from a Yellow Chuchu’s defeat or environmental sources), making it dangerous to touch. Splits into smaller blobs when hit.
Splattering Slimes: Standard sword attacks work, but be cautious of its potential electric charge. Defeat it quickly or from range if possible when it’s sparking.
Drops: Jelly Blob (Common).
Location: Lanayru Desert, Lanayru Caves, Sky Keep.
Bokoblin Leader
Appearance: Standard Bokoblins (usually Red) wearing a distinctive blue cap and carrying a horn.
Behavior: Functionally similar to regular Bokoblins in combat, but their primary threat is the horn they blow to summon reinforcements if they spot Link.
Silencing the Call: Prioritize defeating these Leaders immediately upon spotting them to prevent being swarmed by additional Bokoblins. A quick ranged shot or aggressive melee attack is advised.
Drops: Monster Horn (Uncommon), Ornamental Skull (Common).
Location: Faron Woods, Eldin Volcano, Lanayru Desert.
Cursed Bokoblin
Appearance: Undead, decaying Bokoblins found primarily in the corrupted lower levels of the Ancient Cistern.
Behavior: They rise slowly from cursed earth and shamble towards Link. They can spit projectiles that inflict the debilitating Curse status (prevents sword/item use).
Purging the Curse: They can be knocked down, but often reanimate. A Fatal Blow while they are downed is the most reliable way to destroy them permanently. Avoid their cursed projectiles at all costs.
Drops: Evil Crystal (Uncommon), Ornamental Skull (Common).
Location: Ancient Cistern.
Cursed Spume
Appearance: Spumes dwelling in the poisonous muck found in the depths of the Ancient Cistern.
Behavior: They emerge from the cursed liquid to spit projectiles that inflict the Curse status, disabling Link’s sword and items temporarily.
Cleansing Tactics: Like other Spumes, they must be defeated with ranged attacks (Bow, Bombs, Skyward Strike) as they stay within the hazardous liquid. Prioritize eliminating them quickly to avoid the dangerous Curse effect.
Drops: Rupees, Hearts.
Location: Ancient Cistern.
Dark Keese
Appearance: Keese imbued with dark energy, often found in later dungeons or shadow-touched areas.
Behavior: They fly and attack like regular Keese but carry a nasty payload: their touch inflicts the Curse status, rendering Link unable to use his sword or items for a few critical seconds.
Banishing Shadows: Treat these as high-priority targets! Their curse effect can be fatal in a room full of enemies. Use swift sword strikes or ranged attacks (Slingshot, Bow, Whip) to eliminate them before they make contact.
Drops: Evil Crystal (Rare), Monster Claw (Common).
Location: Fire Sanctuary, Sky Keep, Lanayru Caves (later visits).
Dark Lizalfos
Appearance: A more menacing, shadowy variant of the standard Lizalfos, encountered in the Fire Sanctuary.
Behavior: Fights like a regular Lizalfos but is significantly faster, more aggressive, and possesses a dangerous new attack: breathing clouds of dark smoke that inflict the Curse status.
Confronting Darkness: All the challenge of a Lizalfos, amplified. Speed and dodging are crucial. Avoid the curse smoke at all costs. Exploit openings quickly after baiting attacks or landing Shield Bashes. Fighting pairs of these is extremely dangerous.
Drops: Lizard Tail (Uncommon).
Location: Fire Sanctuary.
Deku Baba
Appearance: Aggressive, snapping carnivorous plants found in wooded areas and dungeons. A Zelda series mainstay.
Behavior: They lunge from the ground or dangle from ceilings, snapping their large mouths (oriented either horizontally or vertically).
Plant Pruning: The key is directional slashing. Wait for the lunge and slash parallel to the mouth opening (horizontal slash for horizontal mouth, vertical for vertical). A mistimed slash gets blocked. Cut the base stem to finish them. Use the Beetle or Whip to deal with ceiling variants safely.
Drops: Deku Seeds, Rupees, Hearts.
Location: Faron Woods, Skyview Temple, Deep Woods, The Sky (on some islands).
Dreadfuse (LD-003K)
Appearance: An advanced, menacing pirate robot, visually similar to Scervo but distinctively colored and more powerful. Encountered as a mini-boss in the Sky Keep.
Behavior: Functions as an upgraded Scervo, utilizing an electrified weapon and aggressive attacks on a narrow walkway. It’s faster and hits harder than its predecessor.
Final Duel: Requires mastery of the Scervo fight tactics. Apply constant offensive pressure with precise thrusts and directional slashes to push it back. Be hyper-aware of its electrified attacks. Quick reflexes and Shield Bashes are essential for survival and creating openings.
Drops: Rupees, Hearts (as a mini-boss)
Location: Sky Keep.
Earth Watcher
Appearance: Ground-based, ghostly sentinels carrying lanterns within the Silent Realms.
Behavior: They patrol set paths along the ground. If Link enters the light cone projected by their lantern, they will instantly alert all Guardians.
Stealth Approach: Invincible and cannot be interacted with offensively. Success lies entirely in avoidance. Learn their patrol routes and sneak past them or wait for them to pass. Touching them also triggers the alarm
Location: Silent Realms (Faron, Eldin, Lanayru, Skyloft).
Electro Spume
Appearance: Spumes inhabiting quicksand, primarily in the Lanayru region. Crackle with electrical energy.
Behavior: Pop up from the sand to spit balls of electricity at Link. These projectiles can potentially stun Link or overload metal shields.
Desert Dispatch: Use ranged attacks – Bow, Bombs, or Skyward Strikes. Avoid getting too close, as their projectiles and the quicksand itself pose dangers.
Drops: Rupees, Hearts
Location: Lanayru Desert, Lanayru Sand Sea.
Fire Keese
Appearance: Standard Keese perpetually engulfed in flames.
Behavior: Swoop down to attack like regular Keese, but their fiery touch will ignite Link’s Wooden or Sacred Shield on contact, potentially destroying it.
Fiery Foes: Do not block with a flammable shield! Use the Iron or Hylian Shield, or defeat them before they make contact using ranged attacks (Slingshot, Bow, Whip) or careful sword strikes.
Drops: Monster Claw (Common)
Location: Eldin Volcano, Earth Temple, Fire Sanctuary.
Furnix
Appearance: Large, aggressive phoenix-like birds wreathed in flame, found soaring through fiery environments or the Sky.
Behavior: They perform swooping dive attacks, attempting to scorch Link with their fiery bodies. Their speed makes them difficult targets.
Phoenix Takedown: The Whip is the intended countermeasure. Latch onto their prominent tail feathers to yank them down to the ground, stunning them temporarily for sword attacks. Precise shots with the Bow can also work, but require good aim.
Drops: Monster Claw (Common)
Location: Eldin Volcano (Volcano Summit), The Sky (near Eldin Volcano entrance).
Green Bokoblin
Appearance: A slightly tougher variant of Bokoblin than the Red type, often found within dungeons or slightly later game areas. Distinguished by green skin.
Behavior: Fights identically to Red Bokoblins, guarding based on Link’s sword angle, but possesses more health.
Dealing with Green Goblins: Requires a few more hits than Red Bokoblins. Shield Bashes and precise directional slashes remain effective.
Drops: Ornamental Skull (Common), Golden Skull (Rare)
Location: Skyview Temple, Earth Temple, Lanayru Mining Facility, Ancient Cistern.
Green Chuchu
Appearance: The most basic Chuchu variant encountered early in the game. Typically green, though coloration can sometimes seem slightly variable.
Behavior: Hops towards Link. Splits into smaller blobs when struck. No elemental properties.
Splattering Slimes: Simple sword attacks make quick work of them. Be ready to dispatch the smaller blobs they split into.
Drops: Jelly Blob (Common)
Location: Faron Woods, Skyview Temple, Deep Woods.
Ground Guardian
Appearance: Large, intimidating, ghostly figures wielding massive clubs within the Silent Realms. One of the two main Guardian types.
Behavior: When active, they pursue Link relentlessly on foot. They are fast and hit extremely hard (one hit equals failure). They cannot pass through certain magical barriers within the realm.
Evading Judgment: Cannot be defeated. If they awaken, run. Use the terrain, sprint, and weave around obstacles. Knowing the layout of the realm and the locations of Sacred Tears is crucial for survival.
Location: Silent Realms (Faron, Eldin, Lanayru, Skyloft).
Guay
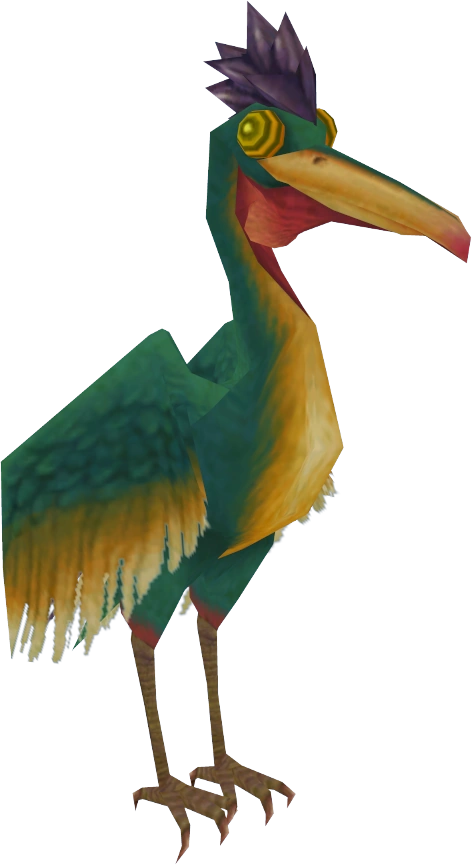
Appearance: Common, crow-like birds found flying in the Sky and some Surface areas.
Behavior: They circle overhead and then perform a swooping dive attack, or sometimes drop droppings on Link. Often appear in small flocks.
Fending off Fowl: Relatively weak and easily dispatched with a sword swipe, Slingshot pellet, arrow, or Whip crack. Just don’t let them pester you while you’re dealing with larger threats.
Drops: Monster Claw (Common).
Location: The Sky (common), Faron Woods, Lake Floria.
Hrok
Appearance: Large, brown, vulture-like birds native to the Lanayru Desert.
Behavior: They soar high above Link, circling before dropping large rocks down towards him.
Avian Annoyance: Their main threat is the surprise bombardment from above. Keep an eye on the sky and use the Slingshot or Bow to take them down quickly before they can line up their shot.
Drops: Monster Claw (Common).
Location: Lanayru Desert.
Keese
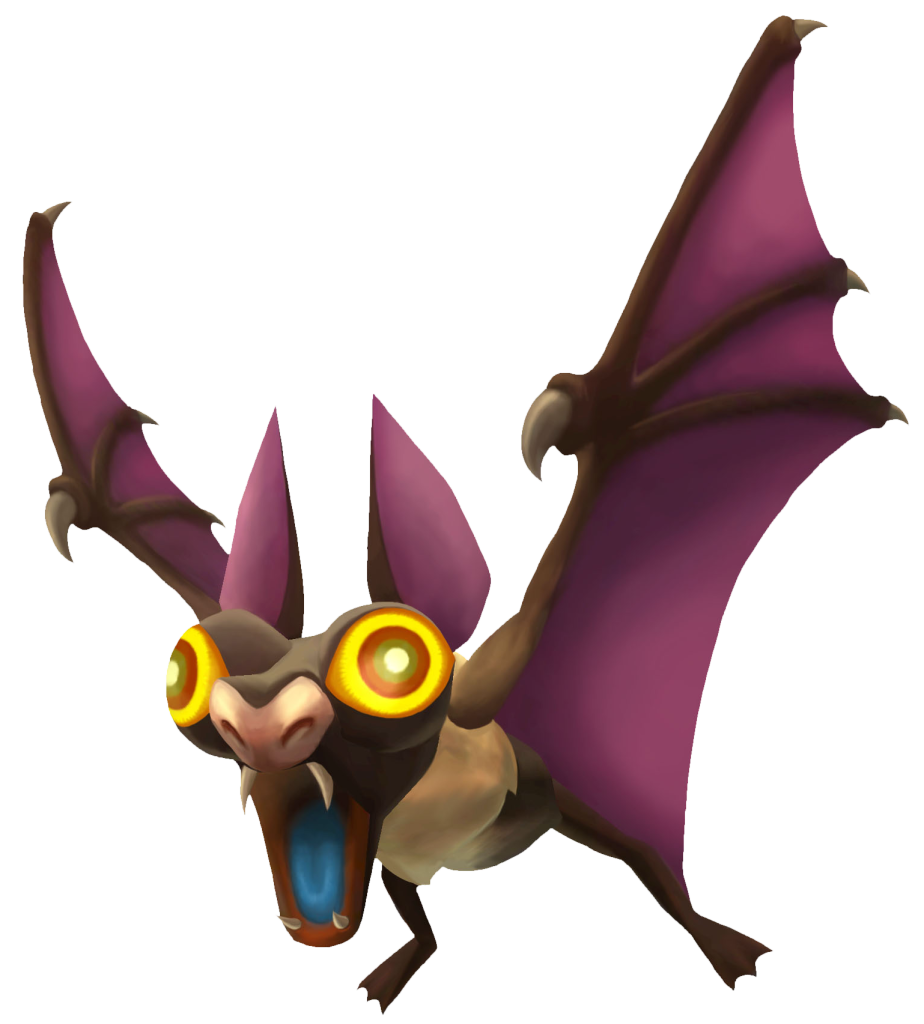
Appearance: Small, common bat enemies found throughout Hyrule’s caves, dungeons, and sometimes outdoors at night.
Behavior: Often hang dormant until Link approaches, then swarm and attack by flying directly into him.
Bat Busting: Individually weak, but dangerous in large numbers. Quick sword slashes, the Slingshot, Bow, or Whip are all effective. Try to deal with swarms before they overwhelm you.
Drops: Monster Claw (Common).
Location: Waterfall Cave (Skyloft), Skyview Temple, Earth Temple, Lanayru Caves, Ancient Cistern, Sandship, Fire Sanctuary, Sky Keep.
Lizalfos
Appearance: Agile, intelligent, bipedal lizard warriors wielding a distinctive stone gauntlet on one arm for defense. Found primarily in volcanic regions.
Behavior: Extremely defensive. They dodge sword swings expertly, block with their gauntlet, breathe fire, and perform swift tail whip counter-attacks if their guard is struck. A significant step up in combat complexity.
Tackling Lizalfos: This fight demands mastery of Skyward Sword’s directional combat. Bait attacks or wait for them to taunt (lowering their guard slightly), then strike their exposed side with a precise slash. Shield Bashes can interrupt their fire breath and create small openings. Be patient and deliberate.
Drops: Lizard Tail (Uncommon).
Location: Earth Temple, Eldin Volcano, Fire Sanctuary.
Magmanos
Appearance: Large, humanoid figures formed entirely of molten rock, rising from lava pools in the Fire Sanctuary.
Behavior: They lumber towards Link and attack with powerful ground slams using their massive fists. Impervious to most attacks while in their molten state.
Cooling Down the Threat: Lure them onto solid ground. The key is using a Water Fruit (carried by Scrapper) to douse them. This temporarily solidifies their bodies, making them vulnerable to repeated sword strikes. Attack quickly before they reheat and become invincible again!
Drops: Rupees, Hearts (as a mini-boss).
Location: Fire Sanctuary.
Magma Spume
Appearance: Spumes residing within pools of lava, typically in the Eldin region.
Behavior: Pop up from the lava to spit fireballs at Link. These fireballs can burn Wooden/Sacred shields.
Volcanic Vanquishing: Ranged attacks are necessary. Use the Bow, Bombs, or Skyward Strikes. Be mindful of their fiery projectiles when aiming. Rolling stone balls found nearby can also sometimes crush them.
Drops: Rupees, Hearts.
Location: Eldin Volcano, Earth Temple, Fire Sanctuary.
Moblin (Metal Shield)
Appearance: The toughest Moblin variant, carrying massive, seemingly indestructible metal shields and heavy spears. Often found guarding crucial passages later in the game.
Behavior: Uses its shield for near-impenetrable frontal defense while attacking with powerful spear thrusts. Slower but incredibly sturdy.
Breaking the Bulwark (Metal): Bombs won’t break the shield. Focus on evasion and exploiting their slow turning speed to attack their back. Precise directional sword strikes might sneak past the shield’s edge. Sometimes, Link can run up the large shield if the Moblin lowers it slightly, allowing for an attack from above. Requires patience and careful maneuvering.
Drops: Ornamental Skull (Common), Golden Skull (Rare).
Location: Fire Sanctuary, Sky Keep.
Moblin (Wood Shield)
Appearance: Large, brutish enemies wielding spears and carrying enormous wooden shields for defense.
Behavior: They march towards Link, blocking frontal attacks with their shield and using powerful spear thrusts.
Breaking the Bulwark (Wood): Their shield, while large, can be destroyed. Repeated sword strikes will eventually break it, as will a well-placed Bomb. Once the shield is gone, they are much more vulnerable, though their spear attacks still hit hard. Circling to their back is also effective.
Drops: Ornamental Skull (Common), Golden Skull (Rare).
Location: Eldin Volcano, Lanayru Desert, Earth Temple.
Moldorm
Appearance: Long, segmented worm-like creatures with multiple body sections and a flashing weak spot on their tail. A recurring Zelda mini-boss.
Behavior: Moves rapidly and erratically around its arena, trying to ram into Link. Only the tail segment is vulnerable.
Worm Whipping: The classic strategy applies: avoid contact with the body segments and focus solely on striking the flashing orb on the tail. Its unpredictable movement makes this challenging. A Shield Bash to the head can sometimes stun it briefly.
Drops: Rupees, Hearts (as a mini-boss).
Location: Skyview Temple (Mini-boss), Fire Sanctuary, Sky Keep.
Octorok (Ground)
Appearance: Classic octopus-like enemies that hide in grassy patches or under rocks on the Surface.
Behavior: Pop up briefly to spit a rock projectile at Link before hiding again.
Projectile Ricochet: Time a Shield Bash just as the rock is about to hit Link’s shield to deflect it back and defeat the Octorok instantly. The timing can be tricky but is very effective.
Drops: Deku Seeds.
Location: Faron Woods, Deep Woods, Sealed Grounds.
Pyrup
Appearance: Small, reddish, seal-like creatures with a single antenna, known for hiding inside skeletal remains or holes in walls.
Behavior: Extremely timid until hidden. Once inside cover, they continuously spew a stream of fire, blocking paths or damaging Link if he gets too close.
Putting out Pyrups: They cannot be harmed by direct attacks while hiding. The only way to defeat them is to toss or roll a Bomb directly into the opening of their hiding spot (skull mouth, wall crevice). Requires careful aim and trajectory calculation.
Drops: Rupees, Hearts.
Location: Eldin Volcano, Earth Temple.
Quadro Baba
Appearance: A tougher, blue-skinned variant of the Deku Baba, easily identified by its distinct mouth that opens in four directions (up, down, left, right).
Behavior: Lunges and snaps like a regular Deku Baba, but its four-way opening demands much more precise directional sword attacks.
Precise Pruning: You must match your sword slash perfectly to one of the four open quadrants when it lunges. A Shield Bash can stun it briefly, offering a small window, but mastering the directional slash is key.
Drops: Deku Seeds, Rupees, Hearts.
Location: Faron Woods (later areas), Skyview Temple (later visits), Lake Floria, Ancient Cistern.
Red Bokoblin
Appearance: The most common and weakest Bokoblin variant, identifiable by its red skin. Wields basic clubs or machetes.
Behavior: The standard grunt. Charges Link, blocks attacks based on sword angle, and sometimes performs basic combos.
Dealing with Red Goblins: Master the basics here: watch their guard, use directional slashes to bypass it, and utilize Shield Bashes to create openings. Relatively low health makes them good practice targets.
Drops: Ornamental Skull (Common), Golden Skull (Rare).
Location: Faron Woods, Skyview Temple, Eldin Volcano, Sealed Grounds (common early game enemy).
Red Chuchu
Appearance: The most basic form of Chuchu, typically red or pinkish.
Behavior: Hops slowly towards Link. Splits into smaller versions when struck. No elemental properties.
Splattering Slimes: Easily defeated with basic sword attacks. Aim for the center of groups if they split.
Drops: Jelly Blob (Common).
Location: Faron Woods, Skyview Temple, Deep Woods, Skyloft (Waterfall Cave initially).
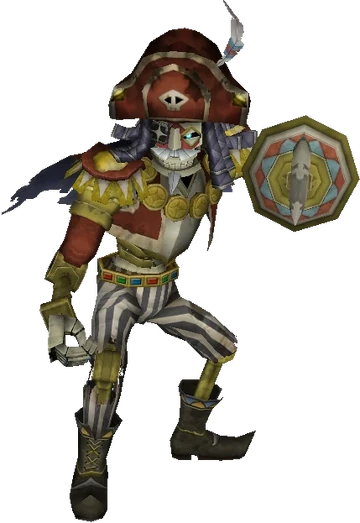
Scervo (LD-002G)
Appearance: An ancient pirate robot encountered as a mini-boss aboard the Sandship. Wields a hook-like sword.
Behavior: Engages Link in a duel on a narrow gangplank, attempting to push him off. Blocks most attacks unless they are specific thrusts or directional slashes targeting his opening. Will periodically electrify his weapon.
Pirate Duel: This fight tests offensive swordplay under pressure. Use thrusts and find the correct slash angle to bypass his guard and force him backward. A Shield Bash can halt his advance or counter his attacks. Stay aggressive but be ready to dodge his electrified strikes. Victory comes from pushing him off the plank.
Drops: Bow (Key Item), Rupees, Hearts.
Location: Sandship.
Sentrobe
Appearance: Floating, spherical Ancient Robots often found guarding rooms or corridors in Lanayru facilities.
Behavior: Attacks by firing seeking rockets or opening up to deploy small, rolling drone bombs.
Robot Response: The Shield Bash is crucial for deflecting their rocket projectiles back at them. When they open their central core to release drone bombs, quickly perform a sword thrust or slash inside the core to inflict damage.
Drops: Amber Relic (Common), Blue Bird Feather (Rare).
Location: Lanayru Mining Facility, Lanayru Caves, Sandship, Sky Keep.
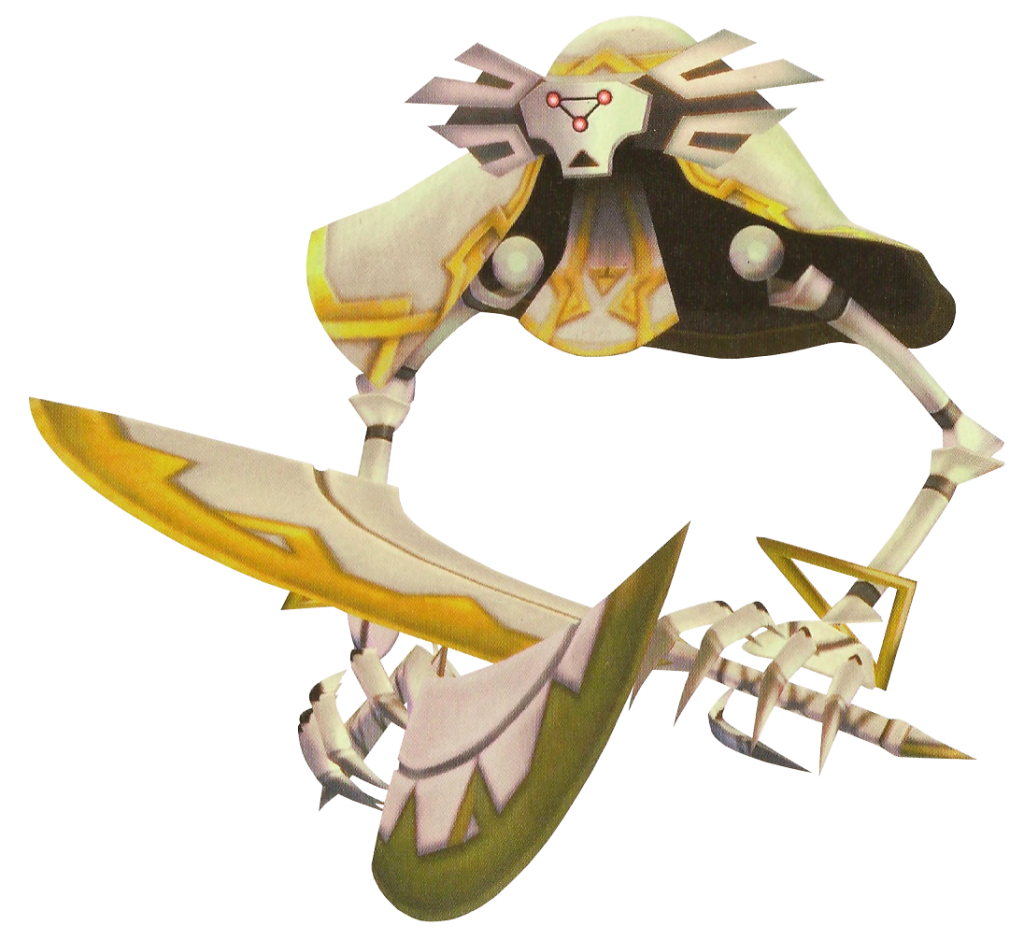
Sky Guardian
Appearance: Ghostly, floating figures wielding twin scythe-like blades within the Silent Realms. The aerial counterpart to the Ground Guardian.
Behavior: When active, they pursue Link relentlessly through the air, able to phase through obstacles and follow him up ladders or across gaps. Their blades mean instant failure if they connect.
Evading Judgment: Invincible. Focus purely on evasion. Their ability to ignore terrain makes them particularly dangerous. Use Link’s speed and knowledge of the Sacred Tear locations to stay ahead and deactivate them quickly.
Location: Silent Realms (Faron, Eldin, Lanayru, Skyloft).
Sky Octorok
Appearance: Octoroks adapted for aerial life, found flying in The Sky, particularly around Skyloft and Fun Fun Island.
Behavior: Fly in patterns and spit rocks at Link or his Loftwing.
Aerial Assault: Can be annoying while flying. Use the Loftwing’s Spiral Charge to dispatch them quickly, or try to snipe them with the Bow from solid ground if possible. Shield Bashing their rocks back is difficult but possible.
Drops: Deku Seeds.
Location: The Sky.
Sky Watcher
Appearance: Aerial versions of the Watchers, floating higher up and patrolling set paths within the Silent Realms, carrying lanterns.
Behavior: Scan the area below with their lantern beam. If Link enters the beam, all Guardians are instantly alerted.
Stealth Approach: Invincible. Avoidance is the only strategy. Keep track of their aerial positions and patrol routes, using cover or careful timing to pass beneath them without entering their light.
Location: Silent Realms (Faron, Eldin, Lanayru, Skyloft).
Skulltula
Appearance: Large spiders instantly recognizable by the hard, skull-patterned shell protecting their backsides. Found in dungeons and wooded areas.
Behavior: Either hang from ceilings on web strands or patrol the ground. They attack by lunging or swinging if hanging.
Spider Strategy: The purple abdomen is the weak spot. Hanging: Horizontal slash spins them, thrust kills. Hit the shell, and they swing dangerously! Beetle can cut the web or snipe the belly. Grounded: Upward vertical slash flips them onto their back, exposing the belly for a finishing Fatal Blow.
Drops: Evil Crystal (Rare).
Location: Skyview Temple, Deep Woods, Ancient Cistern, Fire Sanctuary, Lake Floria, Sky Keep.
Staldra
Appearance: Serpentine skeletal enemies composed of three connected skulls that move as one unit.
Behavior: Slither towards Link. All heads must be destroyed simultaneously to defeat it. If only one or two heads are hit, they regenerate quickly.
Multi-Headed Mayhem: Requires a precise, wide sword slash that connects with all three skulls in a single motion. Aim carefully and time your swing. The Whip can sometimes stun individual heads briefly.
Drops: Ornamental Skull (Common).
Location: Skyview Temple, Lanayru Mining Facility.
Stalfos
Appearance: Large skeletal warriors wielding two imposing swords. Fi suggests they may be the undead remnants of fallen knights. A classic, challenging Zelda enemy.
Behavior: Block incoming attacks with expert coordination using their two swords. Attack with powerful single or double slashes.
Skeletal Showdown: This is a duel of directional swordplay. Carefully observe how they hold their swords to find an opening and slash through it. Brute force won’t work. Shield Bashes are effective for creating openings if timed well. Bombs can also inflict damage. The first encounter is a key test of the combat system.
Drops: Ornamental Skull (Common), Golden Skull (Rare).
Location: Skyview Temple, Sandship, Sky Keep.
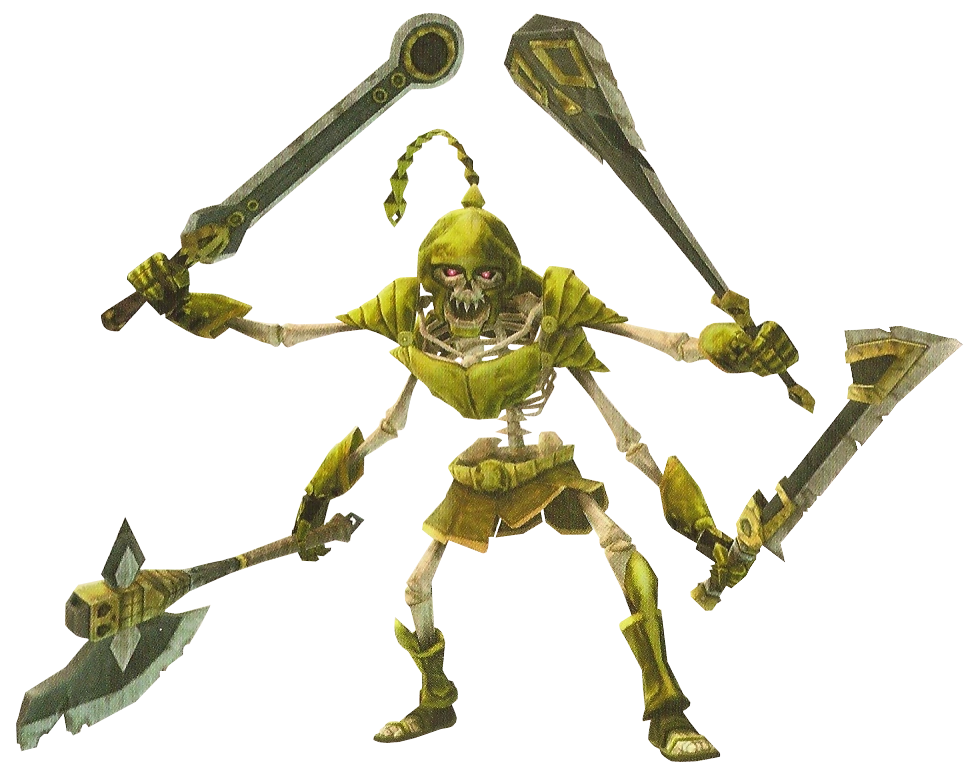
Stalmaster
Appearance: A terrifying, elite version of the Stalfos, distinguished by its four arms, often wielding a sword or heavy axe in each! Encountered as a mini-boss.
Behavior: Fights like a Stalfos but exponentially harder due to having four arms to block and attack with simultaneously. Relentless and intimidating.
Mastering the Stalmaster: One of the game’s toughest non-boss fights. Requires exceptional defense, frequent Shield Bashes to break its complex guard, and aggressive flurries when an opening appears. Finding a safe angle between four weapons is extremely difficult. Bombs can provide chip damage. This encounter is a major skill check.
Drops: Golden Skull (Uncommon), Evil Crystal (Rare).
Location: Ancient Cistern, Sky Keep.
Technoblin
Appearance: Bokoblins found in the Lanayru region who have scavenged and equipped Ancient Robot technology, notably electric stun batons.
Behavior: Fight similarly to standard Bokoblins but utilize their electric batons for attacks that can stun Link briefly on contact.
Tech Takedown: The stun effect is the main danger, especially near hazards like quicksand. Use standard Bokoblin tactics (directional slashes, Shield Bash) but be extra cautious to dodge or perfectly parry their electric strikes. Ranged attacks minimize risk.
Drops: Ornamental Skull (Common), Golden Skull (Rare), Amber Relic (Uncommon).
Location: Lanayru Desert, Lanayru Mining Facility, Lanayru Caves, Sandship.
Thunder Keese
Appearance: Keese imbued with electrical energy, crackling visually. Found primarily in the Lanayru region.
Behavior: Attack like normal Keese, but contact delivers an electric shock which can stun Link briefly. Blocking with a metal shield (Iron/Hylian) can also cause Link to be shocked.
Shocking Solution: Avoid blocking with metal shields. Use ranged attacks (Slingshot, Bow, Whip) for safety, or use careful, well-timed sword strikes.
Drops: Monster Claw (Common).
Location: Lanayru Desert, Lanayru Mining Facility, Lanayru Caves.
Walltula
Appearance: Small spiders found crawling on climbable surfaces like vines and cracked walls.
Behavior: Primarily act as obstacles, potentially knocking Link down if he bumps into them while climbing.
Clearing the Walls: Easily removed with the Slingshot, Bow, Beetle, Whip, or a careful sword poke. Deal with them before starting a long climb to avoid annoying interruptions.
Drops: None typically.
Water Spume
Appearance: Spumes found specifically in the Lanayru Sand Sea (which is technically water in the past).
Behavior: Pop up from the water’s surface to spit projectiles.
Nautical Neutralization: While navigating the Sand Sea on the boat using the Timeshift Stone, these can simply be run over or destroyed with a blast from the boat’s cannon (once acquired). Easily dealt with compared to other Spume types.
Drops: Rupees, Hearts.
Location: Lanayru Sand Sea.
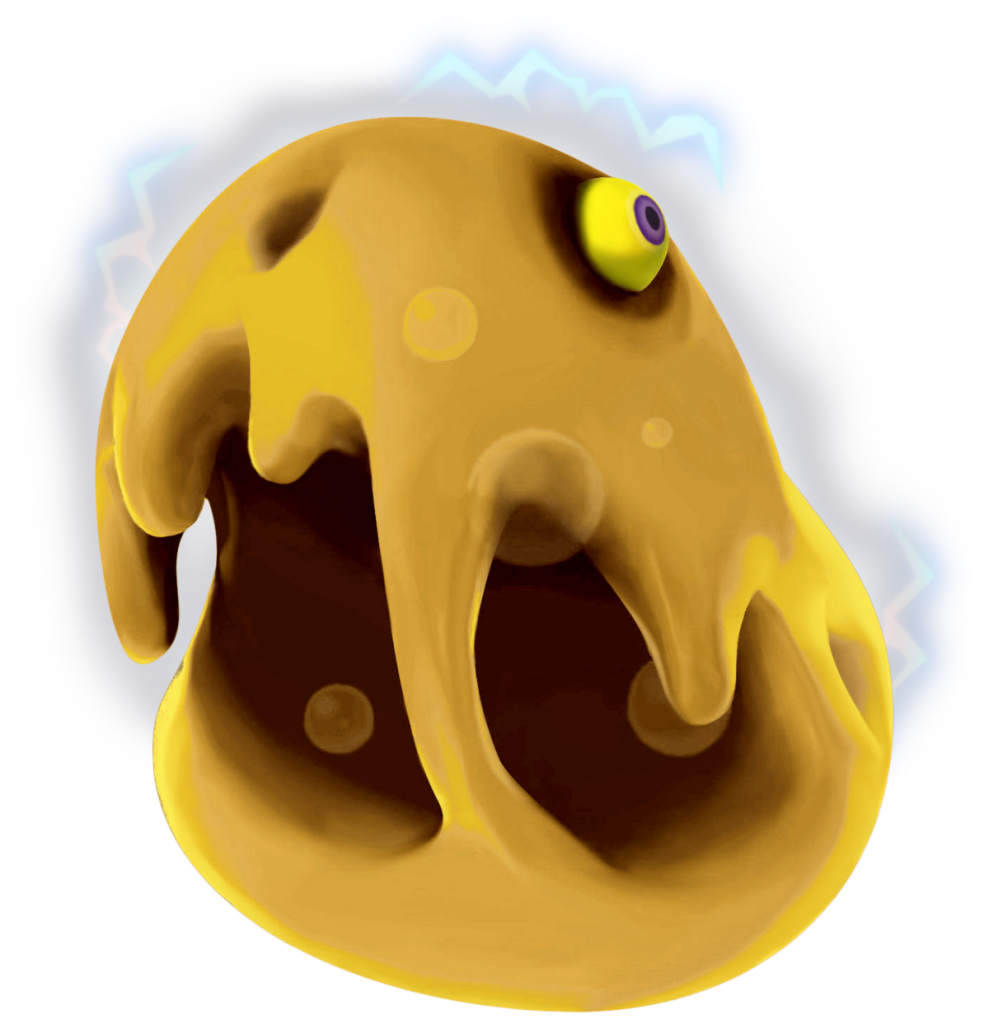
Yellow Chuchu
Appearance: Bright yellow gelatinous blobs.
Behavior: Hops towards Link. Possesses an innate electrical property; they discharge electricity in a small radius when struck or defeated.
Splattering Slimes (Electric): Be cautious when attacking! Strike them and immediately back away or use a ranged attack to avoid the electric discharge upon their defeat. Don’t let them gather near Blue Chuchus, as they can electrify them.
Drops: Jelly Blob (Common).
Location: Lanayru Desert, Lanayru Mining Facility, Lanayru Caves.


