


Table of Contents
- Prologue: Escape from Hyrule Castle: Step-by-step guide to escaping the castle, introducing basic mechanics.
- Chapter 1: Suthorn Forest & The Mysterious Rifts: Navigating Suthorn Village and completing the Suthorn Ruins dungeon.
- Chapter 2: Gerudo Desert: Guidance on completing quests and dungeons in the Gerudo Desert region.
- Chapter 3: Jabul Waters: Strategies for tackling quests and dungeons in the Jabul Waters region.
- Chapter 4: Return to Hyrule Castle: Progressing the main storyline upon returning to the castle.
- Chapter 5: Eldin Volcano: Strategies for navigating the Eldin Volcano region and its challenges.
- Chapter 6: Faron Wetlands: Guidance on completing quests and dungeons in the Faron Wetlands.
- Chapter 7: Hebra Mountains: Navigating the Hebra Mountains region and overcoming its challenges.
- Chapter 8: The Eternal Forest & Endgame: Preparation and strategies for the final challenges and boss encounters.
Overview
Main Quest Walkthrough
Reaching Hebra Mountain
From Hyrule Castle, head west then north following your map marker. You’ll encounter a Hyrulean guard near a cliff base, gazing up at Holy Mount Lanayru. He explains that the direct cliffs are too steep to climb and suggests taking the Hebra Mountain Passage ahead as a roundabout route. Continue north to a cave entrance blocked by rocks. Use a Bombfish Echo to blow up the boulders sealing the passage. Climb the ladder inside to begin the ascent through the mountain’s interior.
Hebra Mountain Passage Puzzle: Inside the passage cave, you’ll navigate upward through a vertical shaft. Use Water Block Echoes to form icy platforms and reach high ledges. Early on, spawn a Water Block and jump to grab a wall vine. Partway up, debris blocks a moving platform mechanism. Clear the cracked boulders with Bombfish Echoes to get the lift working. Ride the first moving platform upward. Then you’ll find a second moving platform with more obstacles: defeat an annoying Peahat (flying plant enemy) hovering about, then bomb the cracked blocks on the track’s right side to free the lift. There’s a chest behind those blocks containing Warm Peppers (×9)– grab them, as cooking these will produce Spicy meals that grant cold resistance. Continue climbing to the top of the room.
At the top, you see a massive boulder suspended precariously. Use Bind on the boulder to push it to the right, which frees some space. Drop down and clear the newly exposed blocks below it, then pull the large boulder back to the left to its original spot. This clever mechanism fixes a platform elevator. Now, return to the moving platform and ride it fully upward to the cave’s exit. Step outside to finally arrive at Hebra Mountain proper, greeted by a sweeping (and chilly) vista.
Navigating the Frozen Slopes
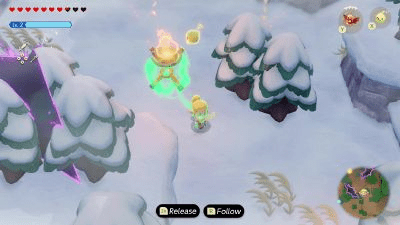
Upon exiting, Zelda gets an overview of the snowy mountain and the quest “Rift on Holy Mount Lanayru” begins. Almost immediately, you’ll notice the temperature plummeting. As you venture away from the cave, the extreme cold starts to sap Zelda’s health. Use a Chill-Proof or Ice-Proof potion now to grant temporary immunity to the cold. If you don’t have one, rely on your echoes: spawn a Brazier Echo, Bind it, and carry it like a lantern to keep Zelda warm. You can also summon a small fire enemy like an Ignizol and hold it above your head as a heat source. These methods will counteract the cold damage as you move.
Exploring for Supplies
The Hebra slopes are dotted with buried treasure. In the southwest snowfield, look for half-buried chests (marked by a corner peeking out of the snow). Here you can dig up 3 Twisted Pumpkins (which can be cooked into a dish that provides cold resistance). Further north, another chest yields 6 more pumpkins. Near that second chest, check the northern rock wall – a ladder is frozen behind thick ice. Use a fire source (Ignizol Echo or a Fire Arrow) to melt the ice and climb up, discovering an elaborate ice cave that holds a Golden Egg at its end. This Golden Egg is a valuable collectible (it’s part of a trade sequence later and also sells for many Rupees). Grab it if you can navigate the slippery platforms inside the cave.
Continue east along the main mountain path. Partway, Zelda finds a large figure half-submerged in a snowdrift – it looks like a slumbering Yeti. The creature snores loudly but doesn’t wake. For now, ignore the Yeti (don’t attack it; it’s not hostile unless provoked) and keep moving. It may be part of a side quest later. As you proceed, the path winds upward with occasional snow-boulder traps (listen for rumbling and step aside as giant snowballs roll past). Eventually, far to the east, you’ll reach another Waypoint statue in a relatively flat area. Activate it to have a fast travel point on Hebra.
Condé’s Cabin
Just northeast of that waypoint, you’ll spot a solitary cabin – a wooden lodge tucked against the mountainside. As Zelda approaches the cabin, a cutscene triggers: the “sleeping character” (the Yeti or someone else unseen) appears and rushes inside ahead of her. Enter the house to meet Condé, a friendly hermit. He welcomes Zelda to his home, offering a respite from the cold. Inside, examine the painting on the wall – it depicts two brothers atop the mountain (Condé will note it’s him and his brother). Read Condé’s journal on the table to learn he’s been trying to keep the mountain safe from the rift’s effects. Finally, examine the shovel by the door; this prompts a conversation where Condé remarks about the constant snow. Suddenly, he notices the snow outside has stopped (likely due to Zelda’s actions clearing some rift influence). Condé excitedly grabs his shovel and runs out, inviting Zelda to follow.
Outside, Condé uses his shovel to clear a snow pile blocking a cave entrance next to his house. He’s essentially revealing the path forward. This triggers a new objective to investigate the cave. Warm up by the fireplace in Condé’s house if needed (there’s a cooking pot here too – cook those Warm Peppers into a Spicy Stew for a 5-minute cold resistance boost). When ready, enter the now-unblocked Hebra Mountain Cave with Condé.
Hebra Mountain Cave & Stilled Rift
Inside the cave, Condé tries to press on but is halted by the sight of a large rift deeper within. He starts shoveling furiously at the strange purple void, trying to “dig it out”. Clearly, more mystical measures are needed. Walk up and have Tri create a portal, pulling Zelda and Condé into the Stilled Hebra Mountain Cave (the rift’s interior).
Stilled Cave Puzzle: This rift area is surreal – chunks of the cave floor float as semi-solid cloud platforms, and cold drafts blow everywhere. Nasty wind creatures called Tornandos (living mini-tornadoes) zoom around, trying to knock Zelda off the clouds. Move carefully and be ready to grab a ledge if you get blown. Your first task is to proceed north across the clouds. Along the way, Zelda can learn the Cloud Echo by interacting with small stationary clouds. This new echo creates a temporary cloud platform that she can jump on. Note: a Cloud Echo platform dissipates after about 2 seconds under Zelda’s weight, so use them in quick succession to traverse large gaps. Hop between solid ground and your spawned clouds to reach the far side. If a Tornando enemy rams you, defeat it with a projectile or wait for it to pause, then whack it with your sword – they aren’t very strong, just annoying.
On the far west side of this floating area, there’s a ledge with a chest containing a Monster Stone (a collectible used for a later quest). Grab it if you like. Then climb a ladder that leads down into an underground section of the rift (essentially beneath the cloud field). Here you’ll navigate more clouds in an enclosed space. Use Cloud Echoes or even Old Bed Echoes (if you have them, they work as solid platforms) to cross gaps. There are two chests here: one atop an upper ledge with Warm Peppers (×3) and another below with some rupees. More importantly, clear the enemies (a couple of Ice Keese and a frozen Bokoblin) to open the exit.
Climb out of the underground back into the open rift, now on the east side (which is considered Stilled Holy Mount Lanayru area). It’s still a frozen landscape but in eerie silence. Head eastward, using newly learned Cloud Echoes to navigate where the ground is broken. Near a frozen waterfall, you can enter a small ice cave that hides 50 rupees(optional). Continue to the northeast corner of the rift. Here you’ll find another cave entrance. Inside this cave, there’s a poignant painting on the wall showing Condé and his brother together, hinting at their story. This seems to be a memory or clue left by the brother.
Just to the right of that painting, you’ll finally see the massive rift source up close – blocking what looks like a temple entrance. Condé catches up (in spirit form within the rift) and furiously tries to shovel the rift away. Of course, shoveling purple void isn’t very effective. Now is Zelda’s chance to close this for good. Defeat the Rift’s guardian: a large icy creature emerges, the Tornadon – basically an oversized Tornando boss. It will blow strong gusts and launch icicle projectiles. Stand behind rocks to avoid gusts and use a fire echo (Ignizol or Fire Wizzrobe) to damage it. Once the Tornadon is defeated, have Tri absorb the energy of the rift. The rift is mended, and time resumes on Hebra Mountain.
Zelda and Condé find themselves back in the normal cave. Condé is shocked – he thinks his shoveling cleared the rift!He proudly thanks Zelda for her support, oblivious to the magical work. A ladder in the cave that was previously intangible is now solid. Climb up the ladder, melting a few remaining ice blocks on the way, and exit the cave to a higher ledge of Hebra Mountain.
Summiting Holy Mount Lanayru
Now at a high elevation, you’re close to the final destination. The air is thin and filled with glints of magic from the now-sealed rift. You’ll see the peak (Holy Mount Lanayru) looming ahead with ancient ruins visible at the top. The path from the cave exit leads around the mountain. Follow it and prepare to deal with some last challenges:
Blizzard Ascent: A short climb up the slope triggers a sudden blizzard – the last remnant of the rift’s curse. Visibility drops and fierce winds try to push Zelda back. Lean into the wind and use Bind on sturdy objects (like an old flagpole or rock outcrop) to anchor yourself if needed. Move between wind shelters (large rocks) when the gusts relent momentarily. Halfway up, a giant snowball will roll downhill; sidestep into a recess to avoid it. Once you pass this, the weather will clear as you near the summit.
At the very summit plateau, you find Condé’s brother, Agnis! It turns out the Yeti-like figure from earlier was Condé’s brother in a heavy coat. He was trying to contain the rift from this side. Reunited, the brothers thank Zelda for her help. Agnis steps aside to reveal the entrance to an ancient shrine – the Lanayru Temple is carved into the mountain’s peak. They encourage Zelda to proceed and put an end to the rift’s cause within. Approach the adorned door and use the Big Key (Lanayru) from your inventory – but wait, you don’t have a Lanayru Big Key yet. Not to worry: the brothers produce an old key together, given to their family by the Sheikah, which serves as the temple key. Unlock the Lanayru Temple and step inside.
Lanayru Temple (Dungeon)
The Lanayru Temple is the final major dungeon of this chapter, embodying the essence of water and ice – fitting for the region of the goddess of wisdom, Nayru. Its design mixes icy Zora-like architecture with sky elements (since parts of it were accessible only via floating clouds). Expect puzzles that involve melting and freezing water, shifting blocks of ice, and perhaps even a little time manipulation. Zelda’s echoes are crucial here, especially those with fire and ice properties.
Freezing and Melting Mechanics: Early in the temple, Zelda encounters rooms where parts are frozen solid. For example, the very first room has an icy floor and a frozen door. In the next chamber to the right, there’s a red orb generating cold air on a pedestal. The puzzle: use Bind to carry the red orb across water to a receptacle. To do so without dropping it, spawn Old Bed Echoes on the water as stepping stones so Zelda can walk right next to the orb. Bind the orb and carefully carry it over (don’t let it touch water or walls). Placing it on the left pedestal activates a large fan that blows warm air, melting the ice in the previous room. This opens new paths. Remember this theme: transporting magical orbs to control temperature is a recurring puzzle in Lanayru Temple.
Icy Foes and Fire Echoes: The temple contains enemies like Ice Octos (Octoroks that shoot freezing breath). They can be a nuisance, so take them out from a distance with a fire-based echo or arrow. In one side room, two Ice Octos guard a chest; burn them with a Fire Wizzrobe Echo to make the chest appear, yielding some Rock Salt for cooking. Throughout the dungeon, keep an Ignizol or Fire Wizzrobe Echo handy to melt icy walls or to freeze water you might also need an Ice Wizzrobe Echo or Ice Keese Echo for the opposite effect – occasionally you’ll want to freeze a water jet or create an ice block.
Strandtula Webs and Verticality: Lanayru Temple has tall chambers with multiple levels. Use your Strandtula Echoes to climb up whenever you see a patch of moss or cracks indicating a climbing spot. In an underground section, Zelda drops into a dark, water-filled basement. Light torches with Ignizol to see better, and use Strandtula webs to scale up to a hidden chest on a ledge (which contains Monster Fangs for upgrade material).
Temple Mini-Boss – Slime Eye: Midway through, Zelda faces the mini-boss Slime Eye in a sealed chamber. This giant cyclopean slime drops from the ceiling and tries to slam down on Zelda, causing rocks to fall with each thud. Keep moving to avoid being crushed by Slime Eye or the falling debris. The trick here is not obvious at first: the Slime Eye is practically invulnerable to direct attacks. However, it hates cold. Use an ice-based echo (e.g. an Ice Octo Echo) to freeze the Slime Eye in place. Once it’s frozen solid, quickly either strike it with Swordfighter Form or let any attacking echoes (like a Sword Soldier Echo if you have one out) whittle it down. After a few hits while frozen, Slime Eye will split into two smaller eyes and attempt to recombine. Keep up the strategy: freeze the pieces, hit them, and they will further split into even smaller blobs. Eventually, the blobs become so small that a couple of sword swings or a single fire blast will take them out. Defeat all the tiny eyes to win the fight. A door opens and Zelda can proceed, plus a fairy might appear as a reward. (Slime Eye’s defeat also often drops a Small Key needed for the next locked door.)
Underground Torch Puzzle: In the depths of the temple, there’s a notable puzzle with four torches on different ledges. You might see an inscription hinting “when all flames shine, the path shall align.” The catch is one torch is behind bars. Use a combination of echoes: place a Cloud Echo under a lit torch’s flame to carry the fire upwards, or use Reflect Echoes (like a mirror) if you have them, to redirect fire. Another approach is more brute force – if you obtained the Fire Rod Echo from an earlier quest, you can simply shoot a fireball through the bars to light the unreachable torch. Solving this opens a gate to a room with the Big Key chest.
Big Key: Solve the torch puzzle and some block-sliding puzzles involving ice blocks and pressure plates to reach the Big Key of Lanayru Temple. Now make your way to the boss door. (There’s a waypoint near the boss door – activate it for convenience.)
Boss: Skorchill – Twin-Element Guardian
The final boss of the Lanayru Temple is Skorchill, an armored giant knight that harnesses both ice and fire. This intimidating foe will test Zelda’s mastery of echoes and elements. The battle has multiple phases:
Phase 1 – Ice Armor
Skorchill begins by donning a helmet with a huge chunk of blue ice on it. This ice armor makes it impervious to direct attacks. Skorchill lumbers toward Zelda, occasionally stomping the ground to shake loose icicles from the ceiling. Avoid standing under the shadows of these icicles to not get hit. Skorchill will also spin in place, attempting to hit Zelda with its icy aura. The strategy: use a fire-based echo to melt the ice armor. For example, cast a Fire Wizzrobe Echo or toss a lit Ignizol at Skorchill’s head to gradually melt the ice. Three successful hits with fire will cause Skorchill’s ice helmet to shatter and stun the boss briefly. While it’s stunned and its icy protection is gone, rush in and deal damage – swing your sword or let loose with heavy echoes (like a Bombchu Echo or Swordfighter phantom). After taking enough hits, Skorchill roars and shifts tactics.
Phase 2 – Fire Armor
Now Skorchill switches element. It slams down a new helmet adorned with flaming horns. The arena gets warmer as Skorchill’s body is now wreathed in flames. In this phase, it will spit fireballs towards Zelda and occasionally generate a whirling fire tornado that moves across the room. Keep moving to avoid the fireballs (you can also try batting them away with your sword, but timing is tricky). Use an ice-based echo to counter the fire armor– for instance, summon an Ice Wizzrobe Echo or throw an Ice Keese at Skorchill’s helmet to cool it. A few solid ice hits will extinguish the flames, causing the fire helmet to crumble. This exposes Skorchill again; move in to damage it with your blade or echoes. Skorchill doesn’t stay defenseless for long, so get as many hits in as possible.
Phase 3 – Elemental Frenzy
In the final phase, Skorchill’s armor rapidly switches between ice and fire modes, regenerating bits of its helmet. It will alternate its attack patterns: you’ll see it sometimes coated in ice (doing the icicle stomp and spin) and moments later ignited with flame (doing fireballs and flame charge). Pay attention to the color of its helmet – blue means use fire attacks, red means use ice attacks. Quickly adapt by having both a fire and ice echo ready in your shortcut menu. For example, keep Ignizol and Ice Octo echoes at the ready. If Skorchill is in ice mode, immediately blast it with Ignizol to prevent it from fully regenerating the ice armor. If it’s in fire mode, hit it with an Ice Keese to douse the flames. Each successful elemental hit will briefly stagger the boss. When its armor breaks off, rush to strike with melee or a powerful echo. Repeat this dance of opposites – melt ice, freeze fire – and Skorchill will run out of energy. Finally, it collapses in defeat.
With Skorchill defeated, Zelda claims victory. The boss drops a trove of rewards: among them, five additional Might Crystals (collected automatically). Most importantly, the voice of Nayru, the goddess of wisdom, resonates in the chamber. Nayru bestows Nayru’s Sanction upon Zelda, completing the trio of divine blessings. This increases Zelda’s wisdom (max magic) and imparts knowledge needed to confront the looming threat of Null. Grab the Heart Container left by Skorchill and prepare to exit.
Tri will teleport Zelda out of the temple. Outside, Condé and Agnis are overjoyed that the eternal blizzard has ceased. The Hebra Mountains are peaceful again. The brothers thank Zelda profusely – Condé even gives her a family heirloom, the Lanayru Amulet, which subtly boosts the duration of all ice-based echoes (a fitting reward for overcoming Skorchill). The main quest “Rift on Holy Mount Lanayru” is now complete, and Chapter 4 concludes with Zelda having restored three regions of Hyrule.
Echoes & Collectibles
Brazier Echo: Unlocked via a side activity earlier (possibly in Hyrule Castle or by helping a Goron Blacksmith), but crucial in Hebra. This echo summons a portable brazier with a warm flame. Zelda used it to stay warm by carrying it with Bind. It’s also useful in puzzles where you need a fire source – you can drop a brazier next to an ice block to melt it gradually.
Cloud Echo: Gained within the Stilled Hebra Mountain rift by touching a small cloud. It creates a temporary cloud platform that Zelda can stand on for about 2 seconds. This echo essentially gives you a short-term stepping stone in mid-air, invaluable for crossing big gaps in the cloud realm or even in normal areas (you can use it to hop over broken bridges or reach high ledges if quick). Mastering the timing of jumping off Cloud Echoes is key to navigation in sky-high areas.
Old Bed Echo: If acquired (from a previous chapter’s quest in Hyrule Castle Town), the Old Bed Echo spawns an antique bed. Strangely, it’s not just for sleeping – it’s heavy and can be stood upon or used to weigh down switches. In Hebra’s rifts, old beds were used as makeshift platforms on clouds and to add weight to unstable seesaws. If you have this echo, remember it’s as good as an extra crate or block when you need one.
Ignizol Echo: Brought from earlier areas but heavily used here. It’s the little flame spirit you can carry. In Hebra, Ignizol served as a handheld heaterand of course to melt ice. In Lanayru Temple, it continued to serve by lighting torches and burning icy barriers.
Ice Wizzrobe Echo / Ice Keese Echo: These are echoes from ice-element enemies (perhaps acquired in earlier Zora regions or in Hebra itself from Ice Keese in the cave). They allow Zelda to cast freezing spells. They were extremely useful against the Slime Eye mini-boss (to freeze it) and against Skorchill’s fire phase. If you didn’t have one entering the temple, the game provided alternatives (like using the environment’s icicles or perhaps an Ice Rod item found in the temple to simulate this effect). Having at least one ice attack echo in your arsenal is strongly recommended.
Warm Peppers & Twisted Pumpkins: These cooking ingredients are found in the snow chests on Hebra. Warm Peppers can be cooked into dishes that grant cold-resistance (Spicy Pepper Steak, etc.), and Twisted Pumpkins similarly can create meals or potions that protect against chill. Make use of Condé’s cooking pot to brew some if you find yourself low on cold-proof potions. They don’t have direct echo uses but are invaluable collectibles to mitigate the environment.
Golden Egg: A rare collectible found in a hidden cave in Hebra. While not immediately useful in combat, it’s part of an ongoing trade sequence: later on, someone in Castle Town will trade something special for that Golden Egg. If you got it now, hang onto it. If not, you can return after the chapter – the cave remains open (just bring fire to traverse it). As a bonus, if you don’t trade it, you can sell the Golden Egg to a merchant for a large sum of Rupees.
Monster Stone: In the Stilled Hebra areas, Zelda found Monster Stones in chests. These stones are collected by a monster researcher NPC. If you gather enough (from various rifts), you’ll earn rewards like an expanded wallet or a new mask. They’re more of a collectible, but completionists will want to grab the one in Hebra’s rift.
Heart Pieces: The Hebra region has a few heart pieces tucked away. One is atop a tall pine tree southwest of Condé’s cabin – you can get it by climbing a nearby ledge and jumping onto the tree (use a Cloud Echo if needed to gain extra height). Another heart piece is your reward for an optional mini-game that unlocks after the temple: Condé’s brother Agnis will challenge you to a race down the mountain on a sled. Beat his record time and he’ll give you a Piece of Heart. In the Lanayru Temple, there’s also a heart piece in a hidden alcove accessible after melting an ice wall in the basement – pushing a block underneath and climbing up nets you that piece.
Lanayru Amulet: Given by Condé and Agnis after clearing the temple (story reward). This is a key item that passively extends the duration of ice-based echoes (they don’t fizzle out as quickly). For example, Cloud Echo platforms might last a bit longer, and Ice Chuchu echoes might freeze enemies for an extra second or two. It’s automatically equipped and will help in any future icy challenges.
Side Quests & Optional Areas
The Sleeping Yeti (Agnis’s Test): After clearing the Lanayru Temple, return to where the Yeti was napping (now revealed as Agnis). Agnis offers Zelda a challenge: he’ll intentionally re-freeze part of the mountain for a snowboard/sled race. You can borrow a Shield to sled on or use a special Snow Seal Echo (a ridable snow walrus from the desert if you have it, just for fun!). Racing from the mountaintop down to a goal flag near the Hebra base in a fast time will reward you with a Piece of Heart and a Snowshoe Echo (which eliminates slipping on ice when used). This race is optional but a fun diversion that also yields a useful echo for icy terrains.
Condé’s Painting: In Condé’s house, now that the adventure is over, check the painting on his wall again. It has changed to depict Zelda standing with the two brothers on the mountaintop – a touching detail. If you talk to Condé about it, he mentions wanting to show it in Castle Town’s gallery. Later, this becomes a minor side quest: delivering the painting (or rather an echo of it, which Tri can create) to the Castle Town art dealer for some rupees and a collectible figurine of Farore.
Hebra Mountain Caves: There are a couple of optional caves and spots in Hebra worth revisiting. One is the Snowball Cave (the optional right room in Hebra Mountain Cave) where giant snowballs fall from the ceiling in a pattern. If you navigate to the end of this tricky cave, you get a nice treasure (50 Rupees). Another is a secret hot spring hidden behind a bombable wall near the mountain’s base – soaking in the hot spring not only fully heals Zelda but also grants a temporary stamina boost (if you had a stamina mechanic from earlier echoes). The hot spring also has a hidden chest under the water containing a Purple Rupee.
Trading Quest – The Golden Egg: If you obtained the Golden Egg, you can start (or continue) a trading sequence. In Chapter 5 (not covered here), someone in Hyrule Castle Town will trade the Golden Egg for a Silk Ribbon. That Ribbon eventually can be traded for an item that upgrades Tri’s powers. So while optional, holding onto that egg from Hebra can set you on a path to a great reward.
Hidden Fairy Fountain: On a ledge north of Condé’s cabin (reachable by Cloud Echo hopping), there is a concealed Great Fairy Fountain behind some ice. If you melt the ice and play Zelda’s Lullaby Echo (assuming she learned a musical echo earlier), the Great Fairy will appear. At this point in the game, she can upgrade one of Zelda’s echoes – notably, she can enhance the Drippitune Echo to also create a temporary puddle when used (useful for solving puzzles requiring water in dry areas). It’s an easily missed secret, but very beneficial.
Combat & Exploration Tips
Surviving the Cold: Always monitor the cold meter (or visual cues like Zelda shivering). If you’re out of potions, use environmental heat sources. Torches and braziers are your lifeline – you can even light a regular wooden arrow on a brazier and carry that flaming arrow as you walk (improvising a torch). Also, fight near lit torches when possible; for instance, luring Ice Keese near a torch will cause them to thaw out and become easy targets. Binding a Brazier Echo to carry it is one of the best tactics to move freely without taking chill damage. If you find yourself taking damage and no heat source is around, quickly pause and eat a spicy meal to patch yourself up and gain resistance.
Snow Navigation: Hebra’s deep snow will slow Zelda’s movement. Consider using the Pegasus Boots Echo (if obtained) to dash through snowdrifts. Alternatively, spawn a Sled Echo (if you have one, some players get a sled from Rito Village in a later chapter) to glide over the snow. In the Stilled Hebra rift, the floaty cloud platforms have slightly different physics – momentum can carry Zelda off if she’s not careful. Jump straight to each cloud or use short hops; do not try sharp turns while on a tiny cloud platform.
Fighting Ice Enemies: Enemies like Ice Keese and Snowmauls (large snowball-throwing moblins) are weak to fire. One well-placed fire arrow or Fire Wizzrobe Echo can dispatch a group. If you lack fire, use melee but be cautious: Ice Keese can freeze you on contact, leaving Zelda immobile for a brief moment and open to other attacks. To avoid this, raise your shield when Ice Keese swoop – the shield will block them and even cause them to bounce off and fall, giving you a chance to hit them. For the Snowmaul Moblins (giant white Moblins that throw snowballs), try to stay close; if you’re up close, they drop the snowball idea and attempt clumsy melee swings, which are easier to dodge. After defeating them, you can learn the Spear Moblin Echo (if not already), which came in handy in the cloud area for ranged combat.
Use of Echo Elements: By now, Zelda has a repertoire of elemental echoes. Think in opposites: Fire melts ice, Ice extinguishes fire, Electricity shocks water creatures, etc. In Hebra, primarily fire vs. ice is the theme. However, note that water-based echoes (like Drippitune’s rain) can also turn snow into ice or slush which might be useful or hazardous. For instance, using Drippitune in a blizzard will cause falling snow to turn into sleet, oddly resulting in slippery ice patches on the ground. This isn’t necessarily helpful unless you want to slide something across the ice (there is a puzzle where you slide a giant snowball into a hole by making the ground icy). Be mindful of such interactions; the Echoes of Wisdom game often rewards creative use of your abilities.
Skorchill Boss Tips: In the Skorchill battle, aside from the main elemental strategy, a useful tip is to watch Skorchill’s helmet closely. It gives away its next attack. If you see frost accumulating on its helmet (turning bluer), it’s about to do an icicle stomp – get ready to move. If you see flames flickering (turning red), it’s about to unleash fire – prepare an ice echo. Also, the room has four torches in the corners. In the ice phase, lighting those torches (with Ignizol or Fire Arrows) slightly raises the ambient temperature, slowing the rate at which Skorchill’s ice armor regenerates. Conversely, in the fire phase, dousing those torches (with Ice Arrows) makes it a bit easier to cool Skorchill down. Use these environmental cues to your advantage if you’re struggling. Lastly, keep a fairy in a bottle just in case – Skorchill’s combo of being frozen by an icicle then hit by a fire tornado can catch even careful players off guard, and a fairy will revive you if you fall.
General Mountain Travel: The Hebra region is easier to traverse after clearing the rift because the perpetual snowstorm stops. You’ll then have clear visibility to spot things like cracked walls or distant ledges. Make notes of places you couldn’t reach before – with the Cloud Echo and other new abilities, you might be able to go back and explore them. And remember to use that new Lanayru Amulet: when active, you’ll notice your ice echoes lasting a bit longer or having stronger effects. For example, an Ice Octo Echo might freeze an enemy for a longer duration than it used to, giving you ample time to strike. This will be invaluable as you proceed to the next challenges beyond Chapter 4.
With Faron, Eldin, and Hebra’s challenges overcome, Princess Zelda has proven her resourcefulness and courage. You have collected powerful echoes, solved intricate puzzles, and earned the blessings of Farore, Din, and Nayru. Equipped with these new abilities and insights, you’re now well-prepared to face whatever lies ahead in Echoes of Wisdom’s unfolding adventure!