


The Wind Waker 100% Completion Walkthrough
- Prologue: Outset Island: Introduction to Link’s home, initial quests, and obtaining the Hero’s Sword and Shield.
- Forsaken Fortress (First Visit): Stealth mechanics and rescuing Aryll.
- Windfall Island: Acquiring the Sail, meeting key characters, and side quests.
- Dragon Roost Island & Cavern: Assisting the Rito tribe, dungeon exploration, and obtaining Din’s Pearl.
- Forest Haven & Forbidden Woods: Meeting the Great Deku Tree, aiding the Koroks, and securing Farore’s Pearl.
- Post-Forbidden Woods Exploration: Collect charts, heart pieces, and upgrades across the southern sea.
- Greatfish Isle & Nayru’s Pearl: Story progression and obtaining the final pearl.
- Great Sea Side Quest Adventure: Explore islands and complete Windfall quests for key upgrades and collectibles.
- Tower of the Gods: Dungeon challenges and gaining access to Hyrule.
- Hyrule Castle: Discovering the Master Sword and storyline developments.
- Post-Hyrule Castle Exploration: Complete trading quests for heart pieces, treasure charts, and the Magic Armor.
- The Forest Water Challenge: Locating and saving each withered tree for a heart piece.
- Forsaken Fortress (Second Visit): Confronting the Helmaroc King and rescuing Aryll.
- Reef Special Charts & Windfall Side Quests: Six-Eye Reefs, Treasure Charts, and Windfall Island side quests.
- Fire Mountain & Ice Ring Isle: Obtain the Power Bracelets and Iron Boots from these elemental islands to access the next temples.
- Earth Temple: Venture with Medli into the Earth Temple to cleanse evil and claim the Mirror Shield.
- Wind Temple: Enter Gale Isle, team up with Makar, and conquer the Wind Temple.
- Triforce Shard Quest: Locating Triforce Charts, deciphering them, and retrieving Triforce shards.
- Ganon’s Tower: Final challenges, boss rematches, and the ultimate confrontation with Ganondorf.
Table of Contents
Return to Hyrule Castle – Breaking Ganon’s Barrier
When you’re ready, warp to the Tower of the Gods. Sail inside the towering structure and descend to the lowest level, where a familiar golden seal on the floor awaits. This is the same spot where you once placed the Goddess Pearls to open the tower, and later descended to Hyrule. Hop into the glowing ring at the base of the Tower of the Gods to teleport back beneath the sea to Hyrule. A sense of urgency hangs in the air now that the Triforce of Courage is with you.


You emerge once again in the submerged kingdom, just outside Hyrule Castle. It’s eerily quiet this time. The last visit here had the castle frozen in time; now, the atmosphere is tense and foreboding. Make your way inside the castle’s front entrance. As you step into the main hall, a cutscene triggers: you discover that Princess Zelda (Tetra) – whom you left hidden here for safety – is now in danger. In a whirlwind of dark magic, Ganondorf himself appears and reveals the trap. He kidnaps Zelda right before your eyes, spiriting her away in a cyclone of evil energy. You watch helplessly as he ascends beyond the castle walls toward his towering fortress. Ganondorf leaves you with a parting gift: two mighty Darknuts crash down into the hall, armor clanking, ready to attack!


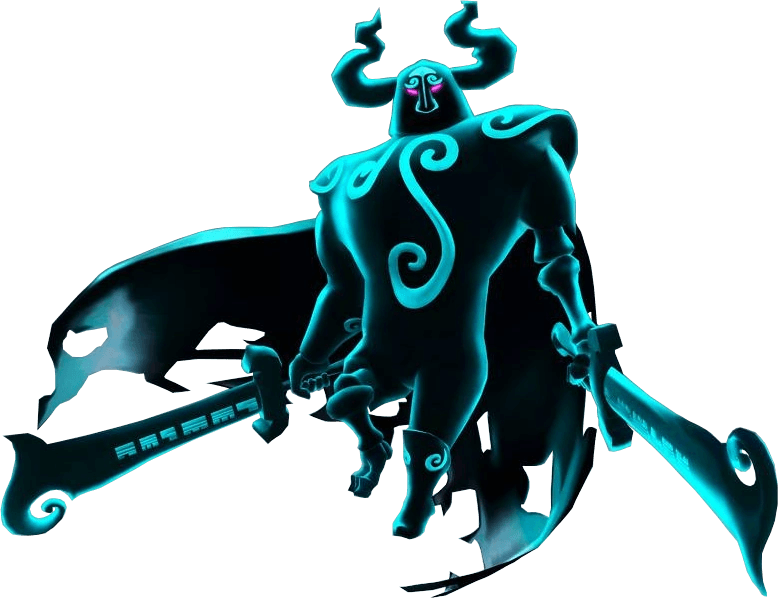
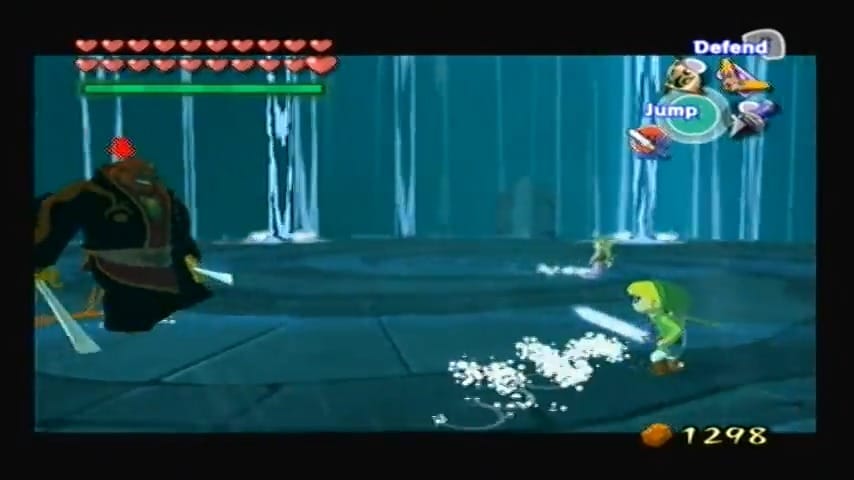
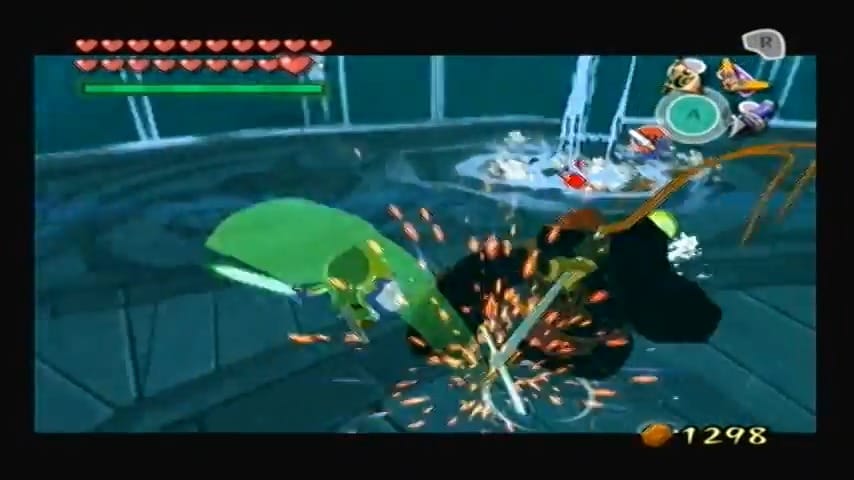
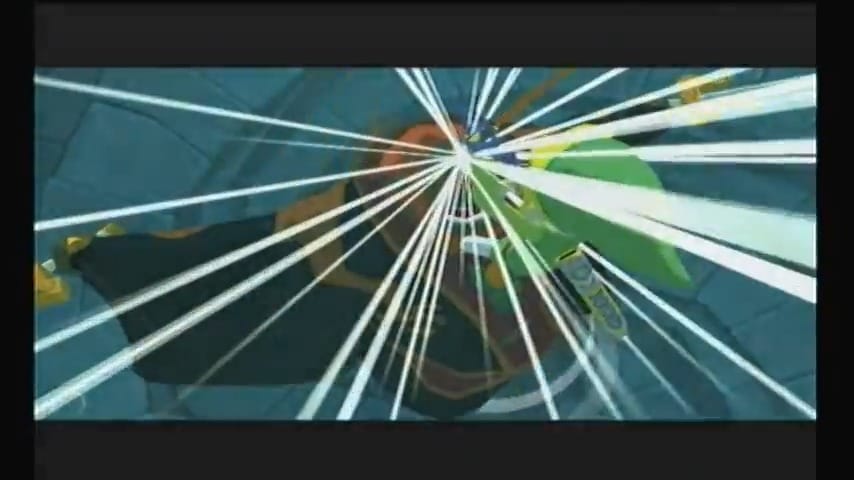
Prepare yourself for a fierce battle in Hyrule Castle’s hall. These Darknuts are heavily armored knights wielding large swords, and now you’re fighting two at once. Lock on to the closest one and try to maneuver so that one Darknut is between you and the other (you don’t want them flanking you). Use your parry attack (watch for the ?ᄌマ prompt when a Darknut swings) to leap over and strike from behind, which can knock off its helmet or armor. You can also stun a Darknut by shooting a Fire Arrow or Ice Arrow at its head from a distance, or even throw the Boomerang to briefly distract them – every opening helps.
Focus on disarming them: after a few hits or a successful parry, their massive breastplates will fall off, and you can cut the belts on their backs to make their armor drop away entirely. Once a Darknut is de-armored, your Master Sword can deal serious damage. Keep moving, avoid getting cornered by their wide swings, and take them down one by one. Exploit the fact that the two Darknuts can accidentally hit each other if you position yourself cleverly; sometimes one will stagger the other with a stray sword swipe. With your fully powered Master Sword (and possibly some Hurricane Spin technique you learned from Orca, if you have it), you’ll eventually defeat both Darknuts. They collapse with a clatter, leaving behind spoils like Knight’s Crests or hearts. The castle falls quiet again, but the danger has not passed.

With the Darknut ambush thwarted, it’s time to pursue Ganondorf and rescue Zelda. Exit the castle’s main hall through the back door – the opposite side from where you originally entered. This leads out to the castle courtyard and beyond. When you approach the threshold, you’ll confront the glowing red barrier that Ganondorf had erected around the castle’s perimeter. This sinister crimson force field has blocked your path until now, crackling with dark energy. But you hold the key to dispelling it: step forward with the Master Sword in hand and the Triforce of Courage resonating on your hand. In a dramatic moment, Link raises his blade, and the power of the fully restored Master Sword combined with the Triforce shatters the barrier in a brilliant flash. The oppressive red wall dissolves into shards of light, finally clearing the way. The path to Ganon’s Tower is now open!


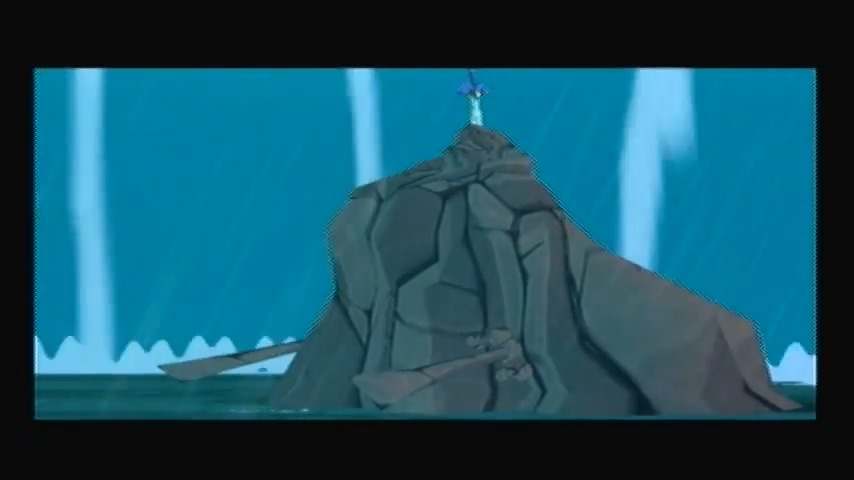
Step outside into the flooded kingdom of Hyrule’s landscape. For the first time, you can explore beyond the castle courtyard. A long stone causeway extends ahead, bridging over the submerged plains that glitter under the watery sky. In the distance, looming on the horizon, you can see the ominous silhouette of Ganon’s Tower, crackling with dark clouds at its peak. This is your destination – the final dungeon where Ganondorf awaits with Princess Zelda.
Cross the stone bridge spanning Hyrule Field. As you make your way across, you may encounter a few last enemies attempting to bar your path. It’s not uncommon to see a stray Moblin or Darknut patrolling the bridge or the flooded grounds below. If a Moblin with a spear spots you, be ready to counter its charge or simply run past – your goal lies ahead and these minions are the last obstacle before the tower. If a Darknut is present outside, you can choose to engage it one-on-one now (using similar tactics as before) or just dash for the tower entrance since you’ve already proven your might. There’s no need to waste too many resources on these guys; the true challenge is inside Ganon’s lair.

At the end, you’ll approach a broken bridge. Use the Hookshot to pull yourself across. You have arrived at Ganon’s Tower.


The Four Boss Rematches
You step into the dark halls of Ganon’s Tower, only to find your path immediately blocked by a crackling magical barrier. The air hums with evil energy as the barrier shimmers between you and the central door ahead. To dispel this barrier, you’ll need to conquer four trials that lie across the chamber. Four narrow bridges branch out from the central platform, each leading to a doorway marked by a familiar aura. Ganon forces you to relive the battles with his monstrous lieutenants – Gohma, Kalle Demos, Jalhalla, and Molgera – before he’ll let you reach him. Grit your teeth, ready your items, and venture forth. Each trial will restrict you to the tools you originally used to defeat these bosses, so plan accordingly.


Inside, you’ll find yourself facing a wide pit of lava. There are a few ways to handle this, but here’s the simplest approach. Look up and to the right—you’ll spot a skull resting on top of a hanging grapple bar. Use your Bow to shoot the skull out of the way, clearing the path. Now equip your Grappling Hook, target the bar, and swing across. Once you’re steady, climb up the rope. At the top, pull out your Deku Leaf and float across the room to the final platform above the lava. You’ll find another grapple bar here—hook on, climb the rope, and use your Deku Leaf again to reach the solid ground on the far side. Deal with the two floating skulls using your Bow or a gust from the Leaf, then head through the door.


Gohma (Dragon Roost Rematch)
You’re now thrown into battle with the first of four returning bosses from earlier in the game. Check your items screen and you’ll see—you’re locked into using only the gear you had during the original fight. In this case, you’ll rely on the Grappling Hook once again.

The furious scorpion screeches, spewing fire and clattering its claws, but stay mobile on the craggy platforms to avoid her strikes. Repeat the process of pulling down the ceiling two or three times until Gohma’s shell shatters. With her vulnerable eye exposed, leap in and strike with the Master Sword. Just a few of your empowered sword strikes will finish off this phantom Gohma. As the beast collapses in defeat, a flash of light whisks you back to the central hub.


Back in the main chamber, one quarter of the barrier’s power fades. Three bridges remain. Head across the room to the center platform and take the rope bridge on the far left first. Once you cross, take out the Moblin guard waiting for you, then head through the door ahead.


Inside, you’ll find yourself facing a wide pit of lava. There are a few ways to handle this, but here’s the simplest approach. Look up and to the right—you’ll spot a skull resting on top of a hanging grapple bar. Use your Bow to shoot the skull out of the way, clearing the path. Now equip your Grappling Hook, target the bar, and swing across. Once you’re steady, climb up the rope. At the top, pull out your Deku Leaf and float across the room to the final platform above the lava. You’ll find another grapple bar here—hook on, climb the rope, and use your Deku Leaf again to reach the solid ground on the far side. Deal with the two floating skulls using your Bow or a gust from the Leaf, then head through the door.


Kalle Demos (Forbidden Woods boss)
Droplets of water drip from giant flowers, and tangled roots writhe underfoot. In the center looms Kalle Demos, the monstrous plant you defeated long ago – only now it lunges to life again with a guttural groan. Immediately, draw your Boomerang.
Target the five quivering vines suspending the creature’s pulsing flower bulb from the ceiling. The vines whip about defensively, but a quick Boomerang toss cuts through several at once. Dodge the plant’s swinging tendrils as you systematically sever each vine . With a final snap, Kalle Demos’ bulb crashes to the ground, stunned. Seize the moment: rush in and slash the exposed core with your sword. The Master Sword’s might makes this battle shorter than before – the parasitic plant can only endure a few rounds of this punishment before it withers and collapses. In a flash of green light, you are transported out. Another piece of the central barrier flickers and dies, and the evil magic blocking the way grows weaker.


Back in the main hall, head across the next bridge. This section brings you back to the atmosphere of Headstone Island, with dark stone corridors and looming coffins. As you move forward, the caskets lining the walls will burst open one by one. There’s no need to fight the enemies inside unless you want to. Instead, keep your pace up and roll through the corridor to avoid taking damage—stopping here is a surefire way to get swarmed.


Once you make it through the hallway, you’ll reach a small platform with a switch and a single beam of light pouring down nearby. Up ahead are a few purple ChuChus, and you’ll need to get clever. The goal is to lure one of the ChuChus toward the light. Step forward just enough to get its attention, then quickly run back to the beam. As the ChuChu enters the light, it freezes into a stone statue. Pick it up and place it on the floor switch, which will trigger a temporary staircase leading forward. Move quickly, though—if you take too long, the ChuChu will thaw and you’ll have to do it again. Make it to the top and go through the door.


Jalhalla (Earth Temple boss)
An all-too-familiar laugh echoes as Jalhalla, the giant Poe, materializes with a swirl of spirits. The air is thick with the stench of the undead. He doesn’t give you much room to breathe: Jalhalla immediately starts to barrel toward you, attempting to flatten you.
Remember your strategy from before. Equip the Mirror Shield and catch the beams of light shining through cracks in the ceiling. Angle the shield to shine light onto Jalhalla’s transparent form, freezing him in place and making his corpulent body solid. With a grunt, lift the enormous ghost (you’ve gotten stronger since last time!) and throw him into one of the spiked pillars around the room. Jalhalla breaks apart into a swarm of smaller Poes that bounce chaotically around the crypt. Cut down as many of the lesser ghosts as you can; each one you destroy weakens Jalhalla’s form when he reassembles. It only takes a couple of cycles – shining light, smashing the stunned ghost, and slashing the mini-Poes – before the giant Poe cannot reform any longer. Jalhalla vanishes with a final wail.


Once again you appear in the central hall, and the magical barrier’s glow fades even further. Just one trial remains. Take the rope bridge on the left. A guard waits for you just across—take him down quickly, then proceed through the door.
Inside, you’re greeted by a wide pool of lava. There are a few ways to cross, but here’s the most straightforward. Look up to your right and you’ll spot a skull resting on top of a grappling post. Equip your Bow and shoot the skull to clear the way. With the path open, latch onto the grapple bar with your Grappling Hook and swing across. Once the rope is steady, climb up, then pull out your Deku Leaf and glide over the lava to reach the far platform.


Another grapple point waits ahead. Use the Grappling Hook again, climb up the rope, and float over to the next bit of solid ground. Two floating skull enemies hover nearby—use your Bow to pick them off from a distance or send them flying with a gust from the Deku Leaf. Once the coast is clear, step through the door and continue deeper into the trial.


Molgera (Wind Temple boss)
The ground is coated in shifting sands, and a hot wind howls around you. With a shrill screech, the enormous Molgera bursts out of the sand, jaws agape. Sand sprays across the room as the giant sand worm dives in and out. Wasting no time, equip your Hookshot – it’s the key to pulling this leviathan out of hiding.
When Molgera circles and surfaces, target the writhing tongue emerging from its mouth and fire the Hookshot. You latch onto the creature’s maw and yank it close, dragging Molgera’s body halfway out of the sand. Run up and strike the purple tongue with your sword repeatedly. The creature thrashes and retreats back under the sand, summoning its smaller offspring to harass you. Keep moving to avoid or dispatch these larvae (a quick spin attack can clear them out). Molgera will soon erupt from another spot – again, Hookshot its tender tongue and lay into it with your blade. After a few rounds of this, the giant sand worm gives a final screech and disintegrates into sand. The trial is complete.


As Molgera’s phantom vanishes, you are teleported back one last time. All four boss emblems carved on the central door now glow, and the magical barrier dissolves completely. The way forward is clear. Take a deep breath – with the trials behind you, the true confrontation draws near.
The Tower’s Secret Puzzles
With the barrier gone, the massive doors ahead creak open. Proceed forward.


Ascend the stairs of Ganon’s Tower. Torchlight casts long shadows on the stone walls as you climb. About halfway up, a horde of chittering Miniblins swarms out to attack, their pitchforks waving erratically. They may startle you, but they’re easily dispatched by a few quick sword strikes or a spin attack. Keep moving upward, cutting through the pesky Miniblins, until you reach the top of the stairs.


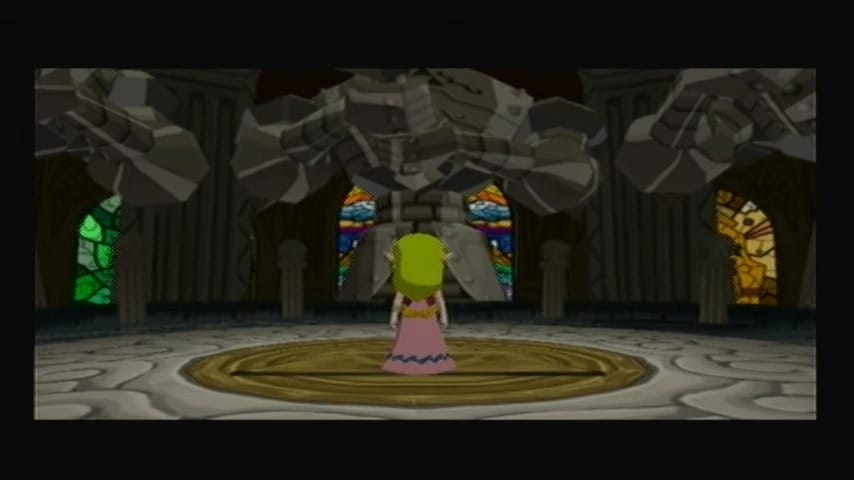
At the summit of the staircase, you step into an eerie circular chamber bathed in a pale blue light. This room has two heavy doors on opposite sides, and strange unlit torches adorning the walls. The door through which you entered seals shut behind you, leaving you alone in this quiet, blue-lit space. In the center of the floor is a pattern that almost looks like a swirling vortex, and the atmosphere feels heavy with magic – as if a puzzle test lies ahead.

First, head through the door on the right. The rusty hinges groan as you push it open. Inside, the room is small and dark, but along the far wall you see four torches. Three of them are burning, their flames casting dancing shadows, while one torch remains unlit. You step closer and examine them. The torches’ arrangement and the number of flames on each torch aren’t random – it looks like a code. As you watch, a brief magical spark travels from one torch to another, illuminating them in a specific sequence. Ganon is toying with you by providing a clue in plain sight. Pay close attention to the order in which the torches are lit, and count how many flames each torch bears. The pattern sears itself into your memory: this is clearly a hint for the opposite room. Satisfied that you’ve memorized the torch sequence, you exit back to the blue-lit chamber.

Now cross to the door on the left side of the circular room. This door opens into a larger chamber with a high ceiling. Along the far wall, you spot four unlit switches mounted at various heights. Each switch is carved to resemble a torch or candle. It immediately calls to mind the pattern you just witnessed. This is a classic puzzle: you must hit these switches in the same order indicated by the torch pattern from the right-side room. Equip your Boomerang, as its ability to target multiple objects will be handy here (in the HD version, the gyroscope aiming on the GamePad can help you target the switches more precisely). Stand at a good vantage point where you have line of sight to all four switches, then lock onto them with the Boomerang. Launch the Boomerang and watch it fly true, striking each switch in turn – first the one corresponding to the first lit torch in the clue, then the second, and so on. If you’ve hit them in the correct sequence, you’ll hear a satisfying chime and the switches will all remain depressed.


For a moment, nothing happens – and then the center of the room begins to glow. With a low rumble, a dark portal materializes on the floor, swirling with ominous energy. You’ve activated a warp point that crackles with dark magic, yet it doesn’t feel threatening. In fact, as you approach, you sense a familiar presence reaching out through it. This portal is a gateway back to the Great Sea. Peering into it, you can just make out the nighttime sky and the silhouette of none other than the King of Red Lions bobbing in water on the other side. It seems Ganon left a direct path to the surface world – perhaps even he expects you might need a moment to prepare for what’s coming.


(Optional: If you wish to re-enter the overworld to rest up or resupply, now is your chance. Step into the shimmering portal and you’ll be transported back to the Forsaken Fortress, right where your talking boat, the King of Red Lions, is waiting for you on the dark waters. The portal deposits you in the flooded chamber at the base of the fortress. Climb aboard your boat; from here, you’re free to sail to any island to gather potions, fairies, or missing collectibles under the starry sky. When you’re ready to return to the final battle, simply sail back to the glowing portal floating in the water at Forsaken Fortress. It will take you right back into Ganon’s Tower, to the same blue-lit chamber as before.)
If you’re prepared to press on (or once you return from stocking up), head back into the torch clue room (the right-side room). The floor in that small torch chamber actually conceals a hidden path. In the center of the room, where the torchlight was shining, there is now a black, gaping hole leading downward. Ganon’s magic has revealed the next trial: a leap of faith into darkness. Draw your sword, steel yourself, and head back through the door from which you entered the room.
The Phantom Ganon Gauntlet
Through the newly opened door, you’ll enter a dark hallway. Suddenly, Phantom Ganon – Ganondorf’s ghostly doppelgänger – appears for a surprise attack! You fought this specter back in the Forsaken Fortress, but this time he has a trick up his sleeve (or cape): he creates multiple copies of himself to confuse you.
Pay attention to the one Phantom Ganon that looks slightly more solid or darker than the others – that’s the real one. Face that one and knock his energy orb attacks back at him with your sword (tennis, anyone?), or simply shoot him with a Light Arrow if you’re quick enough (in case you already had Light Arrows; if not, you’ll get them shortly). After a few hits, the real Phantom Ganon falls and vanishes, leaving behind his dark sword on the ground.


Here’s the puzzle: the direction the sword’s hilt points is the correct door to go through. All other doors in the room are decoys that lead to looping dead-ends. So, note the direction the sword points, and go through that door.

You will repeat this process through a sequence of rooms – it’s like a maze. Each room, Phantom Ganon (or several copies) attacks, you defeat the real one, then use the dropped sword as a compass to proceed. The order is consistent but using the sword clue makes it straightforward.


After a number of these encounters, you’ll eventually enter a differently colored chamber (you might notice the last room looks a bit unique). Defeat Phantom Ganon here and a big treasure chest spawns. Open it to obtain the Light Arrow, the most powerful arrow upgrade in the game! Link can now shoot arrows of pure light, effective at destroying evil.


Item: Light Arrow
A powerful holy arrow that instantly destroys most enemies. Essential for defeating evil forces and stunning Ganondorf.
Phantom Ganon isn’t done trying to slow you down, though. In the next (final) room of the maze, he appears one more time. But now you have the upper hand – literally. A single hit from a Light Arrow will vanquish Phantom Ganon for good. When he falls this time, he leaves his sword behind again. You can actually pick up his dark sword by pressing A. It’s heavy, but Link can carry it. Notice the large sealed doorway with a grinning pig-like face blocking your way (that’s the emblem of Ganon). Go up to that door and throw Phantom Ganon’s sword at it. The sword glows and shatters the barrier, clearing the path. Thus, the phantom puzzle is solved and you can move on. Make sure you have enough Magic and some arrows – there’s often a pot or two with refills around here.


Head up the stairs and begin your climb toward the tower’s peak. Ganon’s minions swarm the steps, but you can blast through them with ease. Want to enjoy yourself? Try a Light Arrow or two—they vaporize even armored Darknuts in one hit. It’s incredibly satisfying. Clear the floors as you ascend higher and higher. Near the top, break the pot on the left side to reveal a fairy—a helpful safeguard if you’re low on health. Then walk through the imposing red-and-gold gate at the summit.


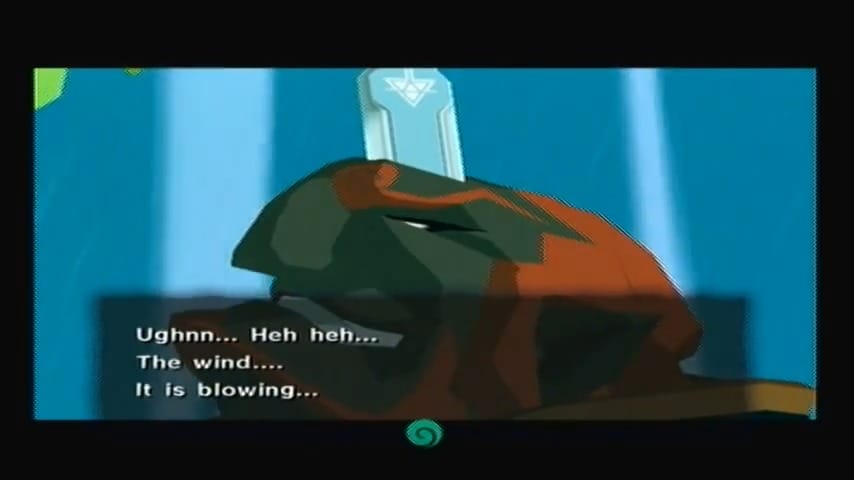
You step into a cavernous throne room at the very apex of Ganon’s Tower. The space is eerily silent and bathed in an unnatural blue glow. In the center, on a raised platform, Princess Zelda lies unconscious on a stone altar-like bed. Standing over her, with his back turned toward you, is the dark silhouette of Ganondorf. You’ve made it to the final confrontation. As you approach cautiously, Ganondorf begins to speak, his deep voice echoing. He tells of the winds that blew across his homeland, a parched desert wind that brought death, and the gentle breezes of Hyrule that carried life – confessions of a bitter king who coveted the lush world above the waves.


Missable Pictograph Warning: Puppet Ganon
If you are intending to complete the Nintendo Gallery Figurine side quest, be sure to snap a picture of Puppet Ganon before you defeat him. Once this encounter is complete, he will be inaccessible in the future.

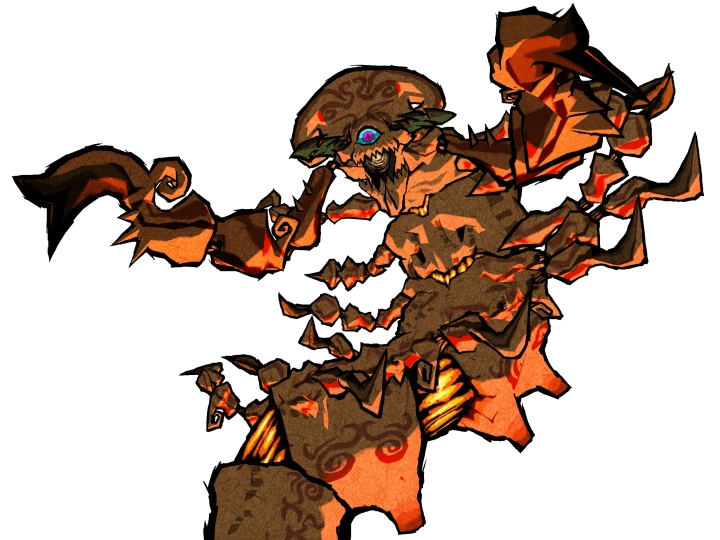
Puppet Ganon – The Penultimate Boss
Puppet Ganon is essentially Ganondorf’s twisted magic creating a massive marionette in his own beastly image. The fight has three phases, and it can be one of the trickiest battles in the game if you don’t know what to do. But fear not – here’s a breakdown:

Phase 1 – Puppet Ganon (Humanoid Boar form)
A giant puppet version of Ganon’s pig form hangs from the ceiling by glowing blue cords. It lumbers around the room, swiping with its arms and spinning a long tail that has a blue orb at the end. The objective is to hit that orb with Light Arrows. It’s only vulnerable from behind, so you’ll often need to maneuver to get a clear shot. You can use the Boomerang to target and cut Puppet Ganon’s blue cords to tangle it up and slow its movements. (Cutting all the cords will drop it to the floor temporarily, making the tail easier to hit.) Avoid the swinging arms and the Keese (bats) that occasionally spawn when it spins. Whenever you have an opening, shoot a Light Arrow at the blue orb on the tail. Three successful hits will destroy the first form.


Phase 2 – Puppet Ganon (Spider form)
The puppet transforms into a giant, grotesque spider-like creature (basically a big bulbous puppet with eight limbs). It scuttles to the ceiling, out of view. The only warning you have is its shadow on the floor and a trick: the shallow pool of water on the ground will reflect the spider’s shape above, letting you see where it’s positioning. It will then drop down hard, trying to crush you. Watch the reflection and move aside to avoid being flattened. When the spider puppet lands upside-down, its vulnerable blue orb is exposed on its underside for a moment. Shoot it with a Light Arrow before it flips back up. You won’t have time to get more than one shot per drop, typically. After each hit, the spider will go back up and come crashing down faster, perhaps multiple times in a row. Keep dodging and shooting the blue orb when you can. Three Light Arrows will crack this form as well, transitioning Puppet Ganon to its final phase.


Phase 3 – Puppet Ganon (Worm form)
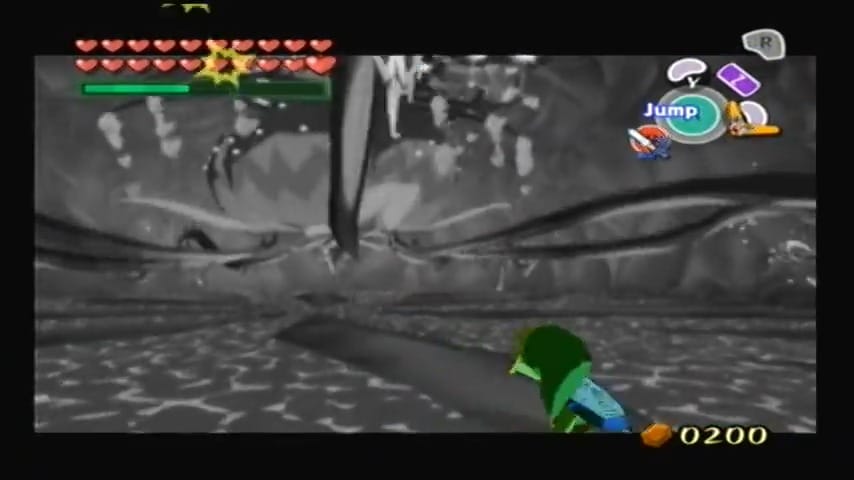
Now things get wild – Puppet Ganon turns into a long, flying snake-like worm (resembling a Moldorm from classic Zelda). It zips around the room erratically, slithering through the air at high speed. The glowing blue orb is now on its tail end, which it swings around quickly. This phase can be frustrating because the target moves so fast. One strategy is to position yourself in a corner and use the Boomerang or Hookshot to stun the head momentarily, or even toss bait on the ground – funny enough, Puppet Ganon’s worm form will be attracted to All-Purpose Bait for a short moment, giving you a chance at a shot. However, the usual approach is to anticipate its movement: as the worm zooms by, try to fire a Light Arrow at the tail orb when it comes into view. It often circles the room in a pattern; with a bit of practice you can time your shots. If you have plenty of magic, you might spam the arrows a bit to increase your odds of a hit. Hitting the tail stuns the worm briefly. Again, it takes three hits to defeat this final form. After the third hit, Puppet Ganon will collapse and dissolve into dark mist.


Take a moment to breathe – you’ve defeated Puppet Ganon! However, Ganondorf himself is not done. You’ll see a cutscene of Ganondorf mocking Link, then leaping up to the roof of the chamber along with the captive Zelda. A rope (actually Puppet Ganon’s remaining central red cord) will drop from the ceiling, inviting Link to climb up and face him.

The Final Battle – Ganondorf
This is it – the final showdown with Ganondorf awaits at the top of the tower. Use your Grappling Hook to grab onto the dangling rope (the one Puppet Ganon was hanging from) and climb up. You can swing from it to reach some side ledges if you need to break jars for health or magic. Take a moment to breathe – you’ve defeated Puppet Ganon! However, Ganondorf himself is not done. You’ll see a cutscene of Ganondorf mocking Link, then leaping up to the roof of the chamber along with the captive Zelda. A rope (actually Puppet Ganon’s remaining central red cord) will drop from the ceiling, inviting Link to climb up and face him.


When you’re ready, climb all the way up to the hole in the ceiling. Equip your Mirror Shield and Master Sword, and ensure you have some health recovery items just in case. Step into the lit doorway to emerge on the rooftop of Ganon’s Tower, a circular arena atop Hyrule’s drowned realm. A beautiful night sky and a curtain of water surrounding Hyrule form the backdrop for this epic fight.


Ganondorf
Ganondorf is waiting, wielding dual swords. He has Zelda unconscious at his side. A final cutscene plays: Ganondorf shares a bit of monologue about the wind and Hyrule’s fate, then tosses Zelda aside and attacks. The battle is a swordfight that progresses through a few stages.
His monologue is heavy with despair and rage. Before you can move, Ganondorf suddenly whirls around and in a flash attacks. He lunges forward with startling speed and strikes Link hard, easily overpowering you in the cutscene. You’re knocked to the ground, the Master Sword flying from your grip. Ganondorf seizes you by the throat, lifting you like a ragdoll, and with his other hand he summons the complete Triforce above. The golden relic pieces float toward him – the Triforce of Power (his), Courage (yours), and Wisdom (Zelda’s) – and assemble into a shining triangle. Ganondorf’s eyes gleam with triumph as he reaches out to wish for the return of Hyrule. But at that crucial moment, the chamber is bathed in blinding light.


The King of Hyrule (in his human form, Daphnes) appears behind Ganondorf, one hand on the Triforce. With a calm, sad smile, the King speaks his wish first: he wishes for hope and a future for Link and Zelda, and for the ancient land of Hyrule to be washed away. The Triforce flashes in acknowledgment and vanishes, its wish fulfilled. Water begins to pour down around the tower – the gods are answering the King’s prayer by flooding this last remnant of old Hyrule. Enraged and driven to madness by his lost chance, Ganondorf laughs maniacally. He tosses you aside and draws two gleaming swords. “Your gods destroy you,” he snarls, “but I’ll destroy you first!” At that moment, Zelda, awakened by the King’s wish, calls out to you. She slides your precious Master Sword back into your hands – the final battle is on.


One-on-One Duel
At first, it’s just Ganondorf versus Link, blade to blade. Ganondorf is an agile and relentless fighter. He will block most of your frontal attacks and respond with swift strikes of his own. A good strategy is to use your parry (watch for the A-button prompt when Ganondorf is about to strike, or after your attack is blocked – Link can roll around and slice his back). You can also try to land jump attacks or shoot a Light Arrow at him, but Ganondorf dodges arrows quickly (unlike in Ocarina of Time, there’s no easy stun with Light Arrows on him directly). Another tactic: keep Ganondorf’s back turned to where Zelda lies – at this stage, Zelda will occasionally shoot Light Arrows at Ganondorf from the floor if she has a clear shot. If you position Ganondorf between you and Zelda, she might nail him with an arrow, stunning him briefly for you to get hits in. After you land a few blows, Ganondorf changes tactics.

Ganondorf Knocks Out Zelda
Eventually, Ganondorf gets annoyed by Zelda’s interference and quickly strikes her down, knocking her unconscious. Now it’s truly a one-on-one fight without support. Ganondorf’s attacks intensify – he’ll do a jumping slice and other heavy attacks. Continue using your parry (dodge and counter) moves and try not to get cornered. If you get low on health, break the jars around the edges of the arena (if any left) by luring Ganondorf away briefly. This part is about being patient and looking for openings, like after Ganondorf does a jump attack and lands, you can get a quick hit in. The Master Sword is fully powered, but Ganondorf is tough – it takes a good number of strikes to weaken him. Eventually, after enough hits, a brief sequence will trigger where Zelda wakes up again.


Teamwork Finale
Zelda regains consciousness and realizes a new strategy. She calls out to you to use your Mirror Shield. Now, resume the fight but stay locked onto Ganondorf and keep some distance. Zelda will ready a Light Arrow and begin aiming at Ganondorf. Ganondorf is too agile to be hit directly now – he will always dodge her shots if he sees them coming. The key is to distract Ganondorf and reflect the Light Arrow off your shield. You can do this by engaging Ganondorf so that you are facing Zelda with Ganondorf in between. Zelda will shout a signal (or the game prompts you in HD version) once she’s about to fire.

At that moment, hold up your Mirror Shield. The Light Arrow will ricochet off your shield and strike Ganondorf from an unexpected angle, stunning him completely. (If it misses, keep maneuvering and try again – you might need to intentionally stand still to bait Ganondorf into an attack, giving Zelda a clear shot at your shield.) Once Ganondorf is paralyzed by the reflected Light Arrow, seize the chance: run up to him and the A-button Finishing Blow prompt will appear. Link leaps into the air and, in a dramatic and rather gruesome finishing move, drives the Master Sword straight into Ganondorf’s forehead, turning him to stone. Congratulations – you’ve defeated the Dark Lord!


What follows is the beautiful and bittersweet ending cinematic. With Ganondorf turned to stone and literally stuck with the Master Sword, the threat is sealed. However, King Daphnes (the King of Hyrule in disguise as the boat) uses the power of the Triforce to make a selfless wish: he wishes for Hyrule to finally be washed away and for Link and Tetra to have a future above the waves, free of the old land’s burden. The ancient kingdom begins to flood as the protective bubble fails.


The King, having passed on the legacy, stays behind in the drowning Hyrule, bidding the heroes farewell. Link and Zelda are lifted in a bubble to the surface of the ocean as water engulfs Ganondorf’s petrified form. They emerge safely back in the Great Sea, where Link’s pirate crew (led by Tetra’s second-in-command, Gonzo) finds them drifting. In a touching reunion, Aryll and Grandma (if you completed the side quest to cure her) are okay, and Tetra, now acknowledged as Princess Zelda, plans a new journey. The final scenes show Link and Tetra aboard their ship with the pirates, setting sail to find new land. The King’s parting words echo in their minds as they look toward a hopeful horizon. Roll credits on this wonderful adventure!


After the ending, your game file will be marked with a Triforce symbol, indicating you cleared the quest. Wind Waker offers a fun New Game Plus (Second Quest) if you start a new file using that clear data. In the Second Quest, Link wears his casual Outset Island outfit (those snazzy blue pajamas) for the whole adventure, and you start with the Deluxe Picto Box, allowing you to take color photos from the beginning (handy for the Nintendo Gallery quest). You’ll also be able to understand the ancient Hylian text on signs and dialog that was unintelligible in the first playthrough, adding some extra flavor. It’s a nice way to enjoy the game again with a few bonuses.
But for now, sit back and bask in your victory. You’ve conquered The Legend of Zelda: The Wind Waker’s final challenges. From salvaging Triforce treasures across the sea to toppling the mighty Ganondorf, you’ve truly earned the title of Hero of Winds. Well done, adventurer! Now go take that well-deserved break – perhaps by cruising the Great Sea at your leisure, knowing that peace has been restored, and the next adventure awaits just beyond the horizon.