
Welcome, Zelda Central explorers, to the most comprehensive guide to completing the Nintendo Gallery in The Legend of Zelda: The Wind Waker! This isn’t just a hobby; it’s an epic undertaking testing your pictography skills across the entire Great Sea. We’ll cover getting the essential Deluxe Picto Box and then dive into tracking down every single figurine needed to fill Carlov’s gallery. Prepare for the ultimate photo safari!
Table of Contents
Getting Started: Your Photographic Arsenal
First, the basics. You need the color-capturing Deluxe Picto Box.
1. Get the Standard Picto Box

Free Tingle from his cell in the Windfall Island jail early in the game. Solve the simple switch puzzle inside, and he’ll give you the standard black-and-white Picto Box.


2. The Upgrade Quest: Deluxe Picto Box!

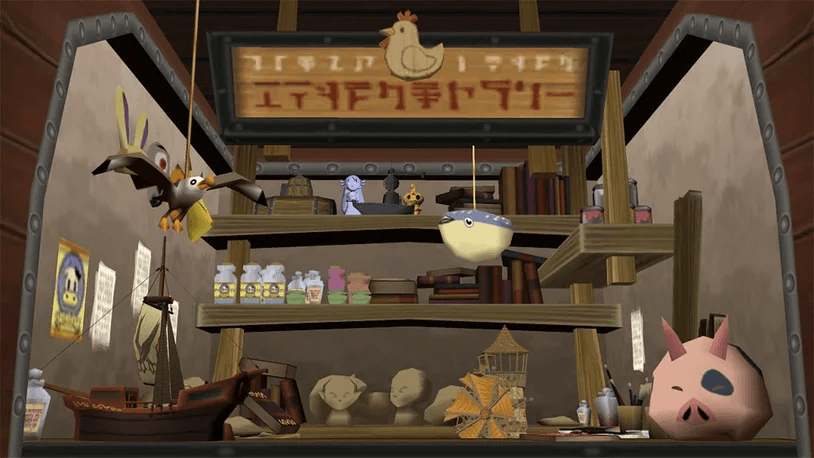
Visit Lenzo’s Picto Shop on Windfall Island. Show him the standard box. Complete his three photo assignments:
Photograph Anton mailing a letter.


Photograph Gossack (in the Cafe Bar) getting startled.


Photograph Linda and Anton looking at each other.


After impressing Lenzo, he’ll ask for a Forest Firefly. Catch one in an empty Bottle inside Forest Haven (look up near the high paths). Return to Lenzo, give him the firefly, and receive the essential Deluxe Picto Box!
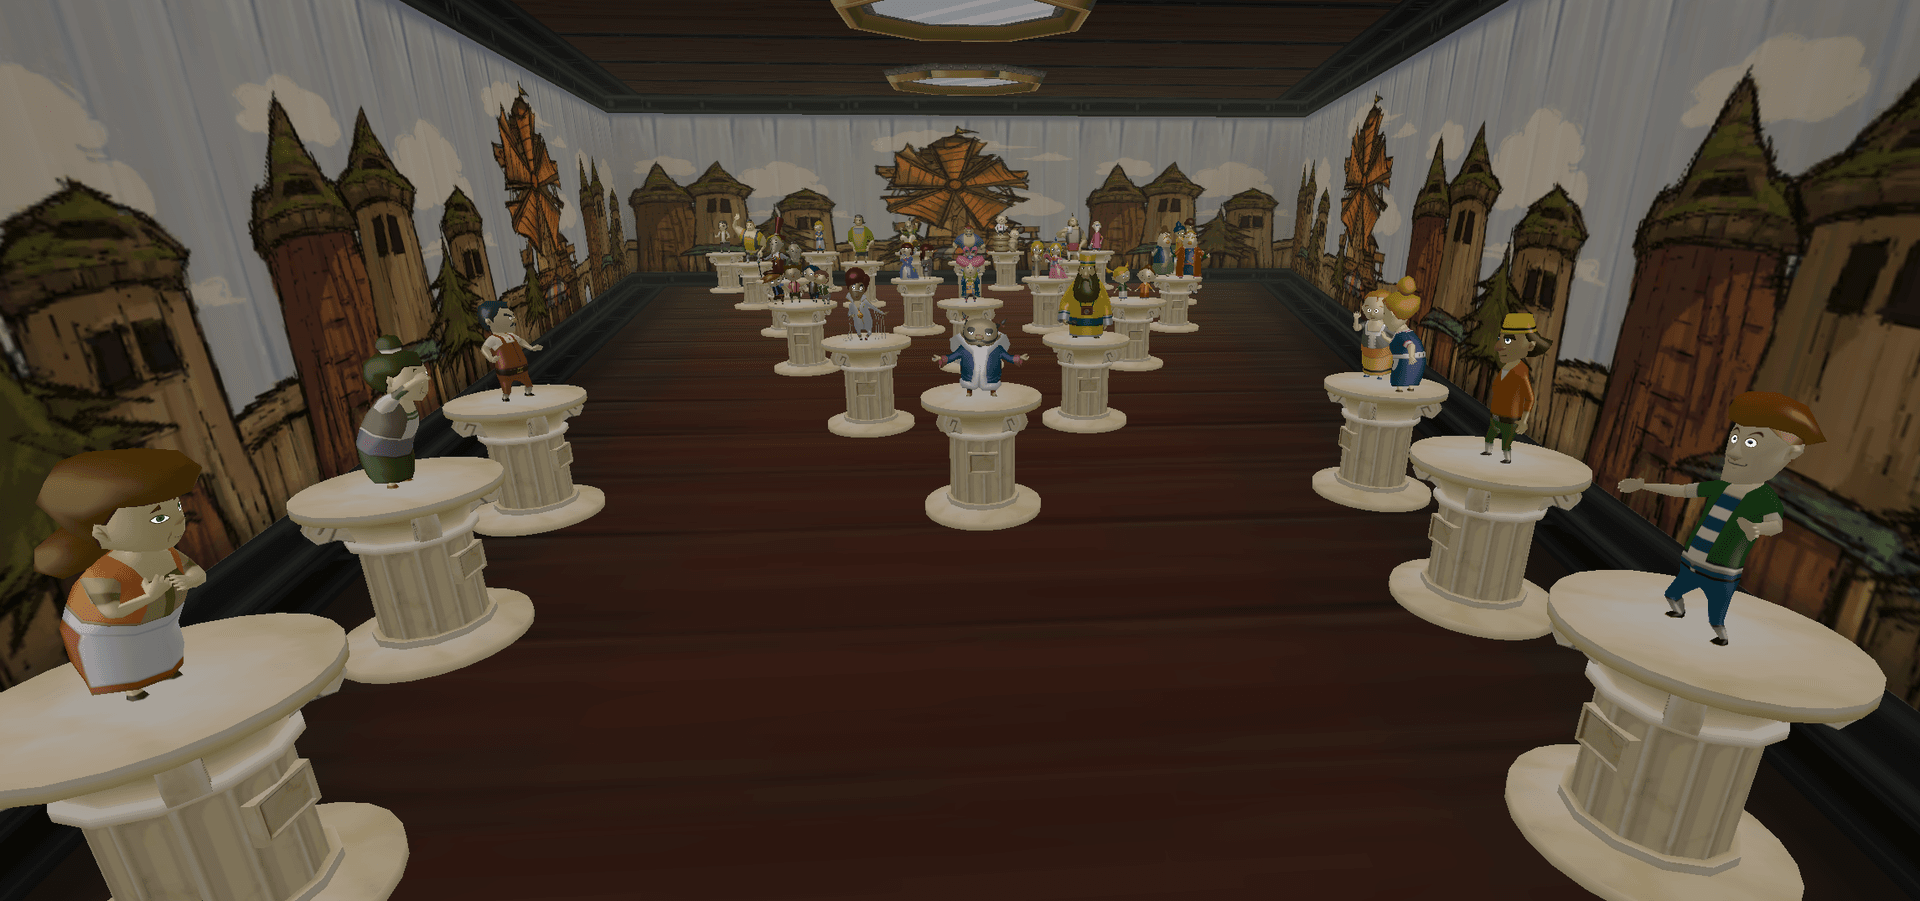
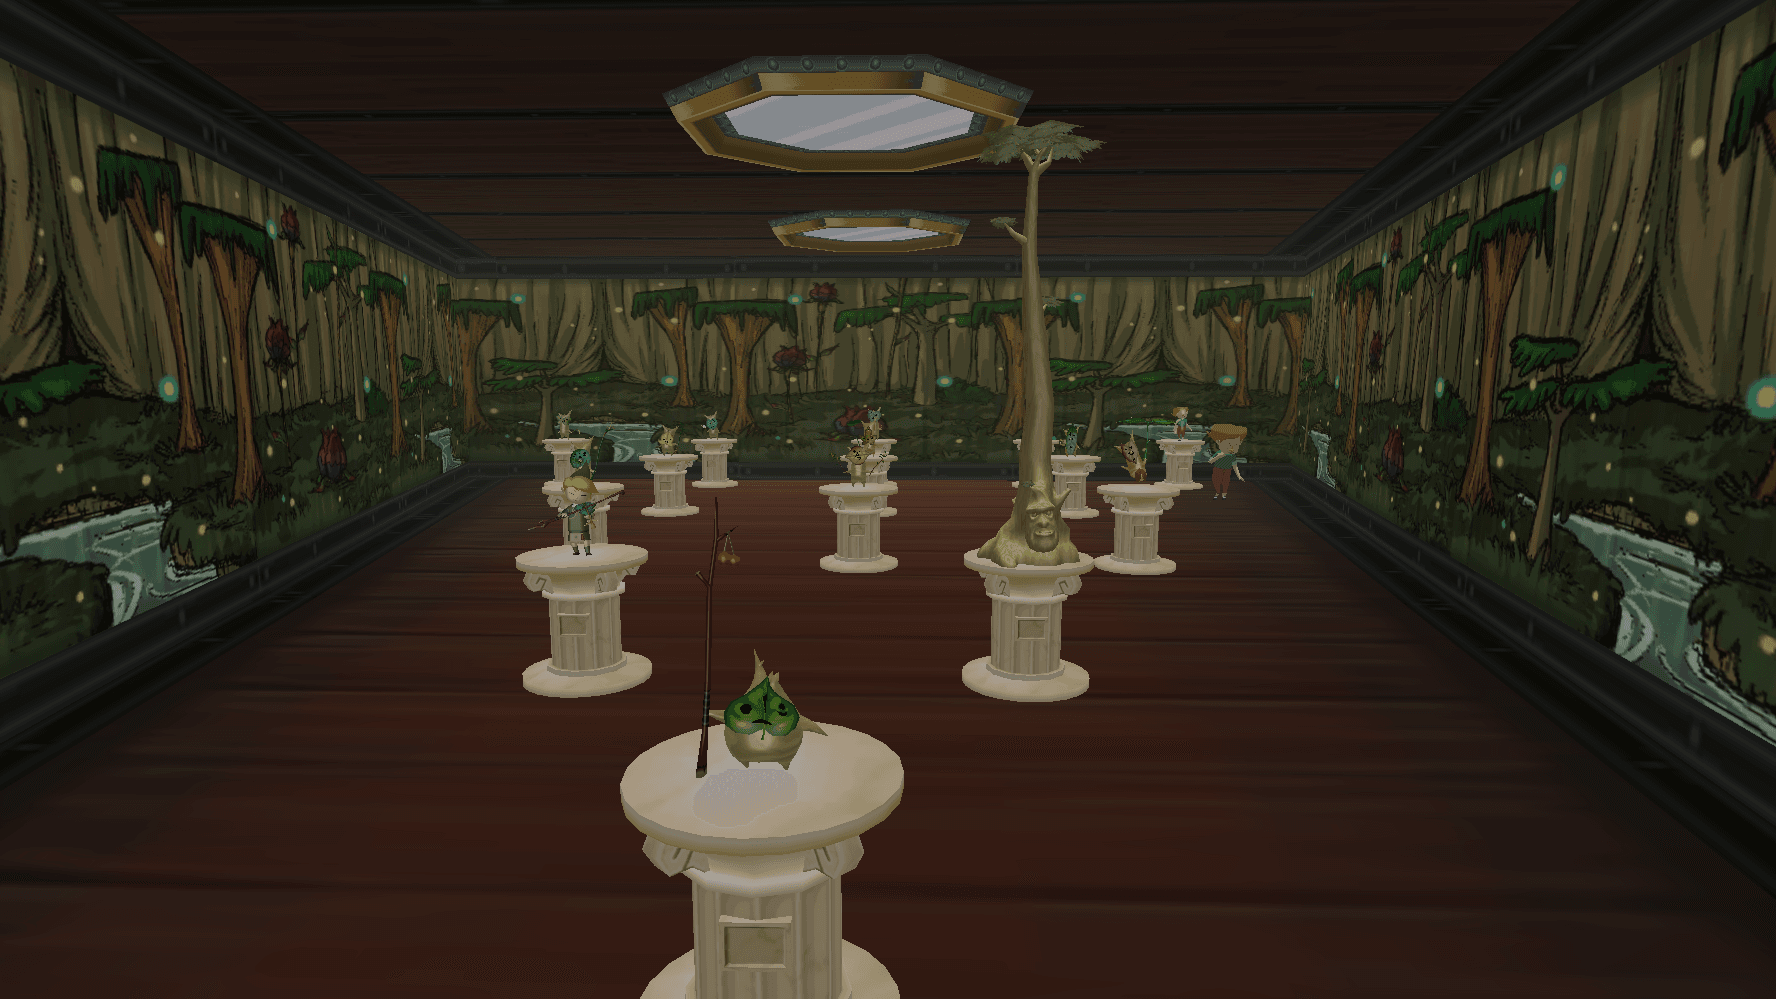
Welcome to the Nintendo Gallery!
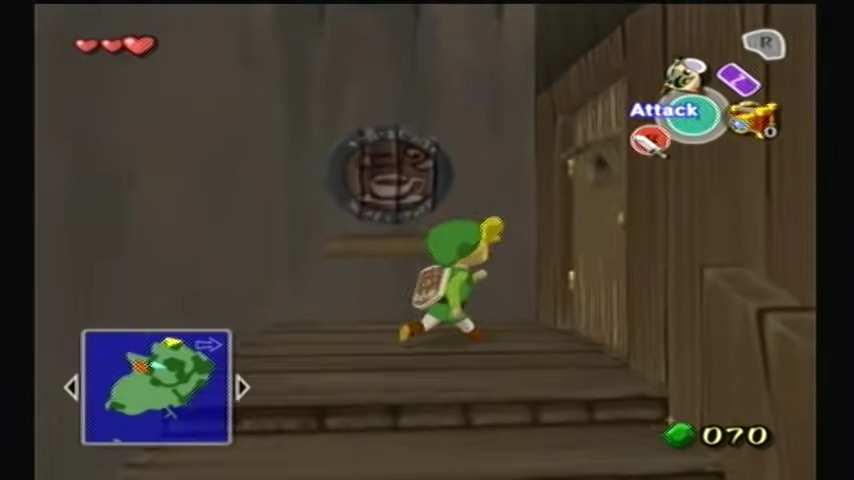
Location: A small island near Forest Haven with a tall wooden platform. Glide over from Forest Haven’s highest exit using the Deku Leaf (adjust wind). Enter the hatch on top.
The Sculptor: Talk to Carlov inside.
The Process: Show Carlov a good quality, full-body, color pictograph taken with the Deluxe Picto Box.
One Per Day: Carlov sculpts only one figurine per in-game day. Leave and wait (Song of Passing x2 or explore) for it to be completed.
Mastering the Lens: Pictograph Pro-Tips
- Center Subject & Full Body: Essential! Zoom if needed.
- Clear View: No obstructions.
- Face Forward: Best chance of acceptance.
- Look for “Good!” Text: Appears when aiming if the shot is likely valid.
- Color Only: Deluxe Picto Box shots required.
- Manage Storage: Delete bad shots; show good ones to Carlov quickly (holds 12 in HD, 3 in GC).
CRITICAL: Missable Figurines List!
Get these photos the moment you have the chance! Missing them requires starting over in New Game+!
- Big Octo: Found in specific sea sectors (look for circling gulls). Photograph BEFORE defeating each one, as they don’t respawn. (Counts as one figurine type, but get the photo before they’re all gone).
- Cyclos: The large frog-like Wind God inside giant cyclones. Photograph BEFORE shooting him down with arrows to learn the Ballad of Gales.
- Helmaroc King: Boss of the Forsaken Fortress (second visit). Photograph DURING the boss fight BEFORE defeating him with the Skull Hammer.
- Kogoli: Rito guard on Dragon Roost Island. Photograph him BEFORE completing his side quest. He vanishes afterwards. Found near the Chieftain’s chamber entrance.
- Phantom Ganon: Ghostly mini-boss. While encountered multiple times, it’s crucial to photograph him, especially the sword-wielding version fought just before the Helmaroc King in the Forsaken Fortress. Also photograph him in Ganon’s Tower encounters.
- Puppet Ganon (All Forms): Final Boss. You MUST photograph EACH of his three forms (Puppet, Spider, Snake) DURING the final battle before defeating that specific form.
- Tetra: Pirate captain. Photograph her BEFORE late-game events in Hyrule change her appearance permanently. Get her during the Forsaken Fortress escape or when encountering her crew.
Complete Figurine Checklist & Locations
Here is the exhaustive list of every figurine needed.
Outset Hall (Outset Island Figurines)


Abe
A pig-farmer living on Outset Island – husband of Rose and father of Joel and Zill.
How to acquire: Find Abe during the day near the pig pen at the top of Outset’s hill. He’s usually in the pen caring for his pigs.
Tips: Before taking the pictograph, shoo the pig out of the pen for a clear shot of Abe facing you.

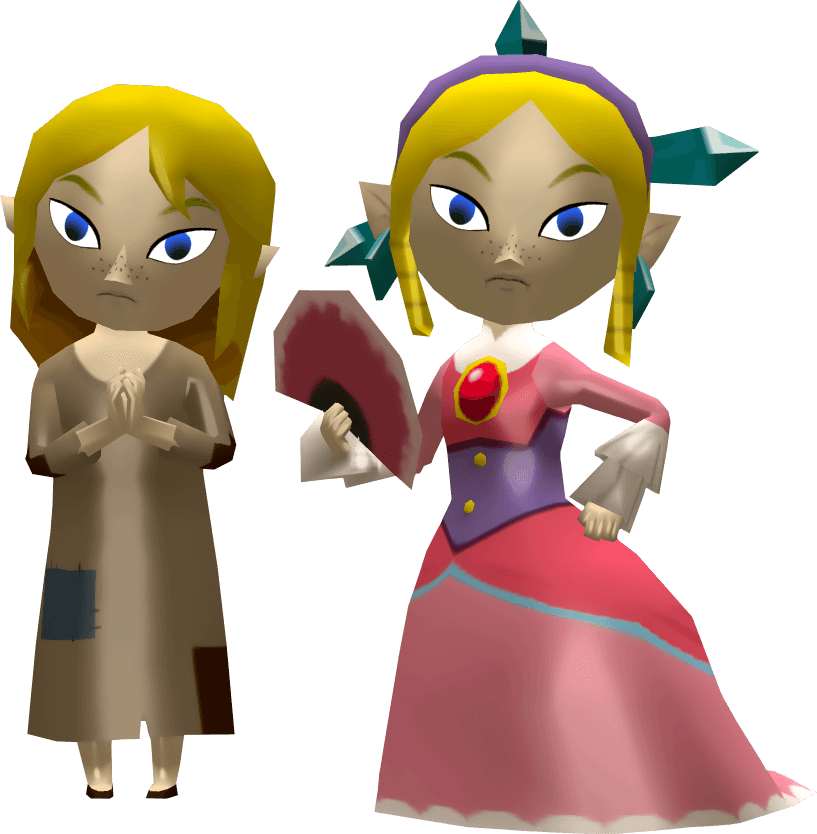
Aryll
Link’s little sister who lives on Outset and loves seagulls.
How to acquire: You cannot photograph Aryll directly (she’s absent once the quest begins). Instead, taking Grandma’s pictograph will automatically add Aryll’s figurine alongside Grandma’s.
Tips: Make sure to get Grandma’s photo (see below), as it’s the only way to obtain Aryll’s figurine. (On a Second Quest playthrough, you could snap Aryll at the very start with the Deluxe Picto Box, but otherwise use Grandma’s method.)

Crab
A small sand crab found on beaches throughout the Great Sea.
How to acquire: You can photograph a Crab on any island’s shoreline (Outset’s beach, Windfall’s shore, etc.).
Tips: Approach slowly – if you get too close, the Crab will scurry into the sand. Wait until the Crab faces you (you’ll see its eyes) and zoom in for a clear shot. If it burrows, step back and wait for it to re-emerge.

Grandma
Link’s kind grandmother who lives in the family home on Outset.
How to acquire: Find Grandma inside Link’s house on Outset Island (downstairs). Simply take her pictograph while she’s sitting in her rocking chair.
Tips: When you deliver Grandma’s photo to Carlov, you will receive Aryll’s figurine automatically as a bonus. (Grandma’s figurine comes with Aryll’s, so this is essential for completing Aryll without a direct photo.)

Jabun
The great water spirit who once dwelt behind Outset Island (he guarded Nayru’s Pearl).
How to acquire: Jabun can only be obtained via a Legendary Pictograph from Lenzo – you cannot photograph him yourself. Lenzo sells Jabun’s pictograph on nights when the right half of the moon is missing (a waning half-moon), or during the day following such a night.
Tips: Check Lenzo’s shop on Windfall at the correct moon phase. This pictograph is missable if you never purchase it during the proper moon – make sure to get it when available.

Joel
A young boy on Outset Island (he’s one of the two brothers in the pig farmers’ household).
How to acquire: Find Joel near his house on Outset during daytime. He’s the boy without the runny nose (as opposed to his little brother Zill). He often wanders around the pig pen area.
Tips: Get close enough so that Joel looks at you, and frame him alone in the center. There’s no special timing required (he’s always around when the sun is up).

Mesa
An Outset Island resident who was often seen cutting grass outside.
How to acquire: Early in the game Mesa stands near the path on Outset (daytime), swinging his sword at grass. Later in the adventure, he stops going outside – you’ll then find him inside his house at night instead.
Tips: It’s easiest to photograph Mesa during the day while he’s outdoors. If he’s no longer outside, go into his house at night and snap a picture while he’s indoors (he’ll be standing in place, making for an easy shot).

Orca
The elderly swordsman of Outset who trained Link in swordplay.
How to acquire: Visit Orca on the bottom floor of his house (same house as Sturgeon) at any time. He’s usually practicing with his spear.
Tips: Stand a few steps back so you can capture his whole body facing you. (Orca is friendly and will turn to talk to you, which helps in getting a head-on pictograph.)

Pig
The common pig found on Outset and other islands.
How to acquire: Photograph any pig on Outset or Windfall. The three little pigs in Outset Village work fine, or the small pigs that wander outside on Windfall. (Even the huge black pig on Outset counts once it grows up!)
Tips: Pigs tend to run if you chase them. Try picking one up and placing it where you have a good angle, or drop some All-Purpose Bait to make a pig stop and eat, which often makes it face the camera. Ensure the pig’s whole body is in frame.

Rose
A woman living on Outset Island – she is Abe’s wife and the mother of Joel and Zill. Rose loves raising the family’s pigs.
How to acquire: Find Rose near the pig pen on Outset (during daytime). She is usually just outside the house tending to the pigs.
Tips: Wait until she looks up from fussing with the pigs so that her face is toward you. She often stands still, making it easy to compose the pictograph.

Seagull
The common seagulls that fly around many islands (Aryll’s favorites).
How to acquire: You can photograph a Seagull anywhere they flock (Outset shores, outside the Gallery island, etc.). A reliable method is on the Nintendo Gallery’s own island: cut some grass to attract seagulls, then drop All-Purpose Bait to keep them nearby.
Tips: Stand back and zoom in on a seagull that’s relatively low to the ground. Make sure the seagull is facing you (watch for its eyes/front) and take the picture before it flies off. Don’t get too close or they’ll scatter.

Sturgeon
Orca’s brother, a scholarly man who lives on the second floor of their house.
How to acquire: Enter Orca and Sturgeon’s house on Outset and climb the ladder. You’ll find Sturgeon upstairs (day or night), usually pacing or writing.
Tips: He will turn to face you if you get his attention. Center him in the frame and include enough of his upper body. This one is straightforward as Sturgeon stays put in a small room.

Sue-Bell
A young girl on Outset who carries a jar on her head. (She’s often seen delivering water to the wilted plant on the hill.)
How to acquire: During the day, Sue-Belle walks around Outset Island’s lower area with a pot on her head. At night, she can be found inside Sturgeon’s house helping her grandfather.
Tips: Easiest is in daylight: position yourself so you see her face (not just her back) as she walks with the jar and snap the photo. If you try at night inside, make sure there’s enough light from your angle to see her face clearly.

Zill
The little boy on Outset with the constantly runny nose (Joel’s younger brother).
How to acquire: Find Zill playing outside the pig pen house on Outset during the day. He’s unmistakable with his dripping nose.
Tips: Crouch or angle the camera lower to get Zill’s face head-on (since he’s very short). He often runs around, so either snap while he’s standing still or use a bit of bait to make him stop. Ensure his face is toward you (he might be distracted by his sniffles!).
Windfall Hall (Windfall Island Figurines)
All of the following characters are found on Windfall Island.

Anton
A young man on Windfall who has a crush on Linda. He’s slender and wears a blue shirt.
How to acquire: If you haven’t helped Anton unite with Linda yet, he will be wandering around town along the main paths. If you have completed that side quest, Anton will be standing under the big tree in the central plaza (often near Linda).
Tips: In the post-quest scenario, frame your shot with Anton on one side so that Linda isn’t visible in the picture (if another named character appears, Carlov might reject it). Basically, photograph Anton alone.

Candy
A sailor on Windfall Island who spends his day on the town’s wooden pier (docks). He wears a blue-and-white striped shirt.
How to acquire: During daytime, find Candy at the pier by the sea on Windfall. He faces out toward the ocean.
Tips: An easy method is to hop into your boat in the water and align yourself so that Candy is looking toward you from the pier. Then zoom in and take the picture. (If you approach from the town side, you’ll see mostly his back; being on the King of Red Lions in the water causes him to face you for a clear shot.)

Cannon
The owner of Windfall’s Bomb Shop (initially a greedy merchant who gets a comeuppance from Tetra’s pirates). How to acquire: Enter the Bomb Shop on the outskirts of Windfall (the shack on the slope near the docks). Cannon stands behind the counter inside, both day and night. Tips: Get close enough to the counter so that Cannon looks toward you, and capture his upper body and face. (No special timing needed – just avoid photographing him only from the side.)

Dampa
A Windfall local identifiable by his red cap and blue vest. He loafs around the bomb shop by day and frequents the café at night.
How to acquire: During daytime, find Dampa standing outside near the Bomb Shop door. At night, he’ll be inside the Café Bar (the establishment with the jukebox) if you miss him in daylight.
Tips: Photographing him in daylight is easiest, as he stands still. If at night in the dim café, stand near him to get enough light on his face (or use the Firefly-enabled Deluxe Picto Box, which automatically adjusts brightness).

Doc Bandam
The friendly potion brewer on Windfall (he runs the Chu Jelly Juice Shop).
How to acquire: Enter the Potion Shop on Windfall (it’s near the beachfront stairs). You’ll see Doc Bandam behind the counter mixing potions.
Tips: Simply target him from the front of the counter. The shop is small, so you can get a good close shot. Make sure no large objects (like the counter jars) block your view of his face.

Garrickson
A man in a red outfit who often checks the postbox. (He’s known for mailing love letters – possibly part of Lenzo’s photo side quest).
How to acquire: Look for Garrickson near the red postbox either in the morning or afternoo). He typically approaches the mailbox by the town entrance gate to drop in a letter.
Tips: If he’s actively mailing a letter, wait until after he finishes and turns around so his face is visible. Otherwise, you might catch him walking in the area wearing all red – call out to him to have him face you. Include his full figure in the shot for recognitio).

Gillian
The barista who operates the Café Bar on Windfall (she’s behind the counter in the café).
How to acquire: Enter the Café (the building near the town gate with the cafe sign) during daytime. Gillian stands behind the counter serving drinks.
Tips: Stand just across the counter and snap her upper body and face. She’s stationary, so it’s straightforward – just avoid having any customers block the view.

Gossack
A nervous patron of the café. He wears a cap and sits in the coffee shop’s seating area. (He’s the fellow who jumps in fright if Link breaks a jar in the cafe.)
How to acquire: Visit the Café during the day. Gossack is the man in red sitting at a table in the corner, usually on the step up from the counter.
Tips: To get a good angle, stand near the counter on the raised step so you can see Gossack’s face head-on. You might recall him looking shocked if you made a loud ruckus – try not to startle him now, and just take a calm pictograph of him at his table.

Gummy
A well-dressed man on Windfall, wearing a yellow shirt and black vest.
How to acquire: Gummy is a bit tricky. During the day, he stands on an upper ledge overlooking the town (you reach him by climbing a ladder near the arch in the plaza). At night, he attends Zunari’s auctions in the rich mansion. The easiest method is to participate in an auction at the mansion and, after it ends, photograph Gummy while everyone is still gathered (he’ll be standing among the crowd).
Tips: If you try in daylight on the ledge, climb up next to him and then step slightly away – you may need to stand on the railing to the side of Gummy to fit him in frame. Make sure you get most of his body. At night post-auction, he’ll be facing forward as he leaves, which can make the shot easier.

Kamo
A gloomy-looking man who sits on the steps on Windfall. (He’s the one who loves gazing at the full moon – Link gave him a Moon pictograph for a joy pendant reward.)
How to acquire: Find Kamo on the outdoor staircase that leads up by the windmill. He’s there both day and night, but he’s easier to photograph in the daylight. He wears a purple and black outfit and often slumps with a frown.
Tips: Approach during the day when lighting is good. Kamo might not look directly at you (he’s usually staring off in thought), so get in front of him and use L-targeting to make him notice you. Snap him when his face is toward the camera. (Fun fact: if it’s nighttime and a full moon is out, you might catch him smiling up at it.)

Kane
A well-dressed gentleman in a yellow suit who stands near the postbox on Windfall during the day.
How to acquire: Look for Kane by the main town gate and postbox in the daytime. He generally stands still, observing the area.
Tips: This is a simple one – just walk up so that he turns to face you and take the pictograph. Make sure to include his distinctive yellow outfit so he’s identifiable.

Killer Bees
The four trouble-making children of Windfall (Jan, Jin, Jun-Roberto, and Jiro, collectively the “Killer Bees”). They roam the town in a pack.
How to acquire: You need all four kids in one pictograph. Find the Killer Bees during the day in Windfall’s central town area – they often run around the school courtyard or the streets.
Tips: Do not attempt the photo while they’re actively circling you during their game, as you’ll just get a blur of kids running. Instead, wait until the four of them pause together (sometimes they stop near the school or tree). Stand a short distance away so you can frame all of them, and call out to get their attention. When all four turn to face you, take the shot. Carlov will create one figurine that includes the entire Killer Bees gang.

Kreeb
A man in an orange shirt and yellow cap who loiters on the walkway up to the Windfall windmill (Ferris wheel).
How to acquire: Head up toward the windmill on the wooden ramp that circles around the town. Kreeb stands partway along that path, leaning on the railing.
Tips: To get Kreeb’s face, climb up on a higher ledge or railing at an angle to him. From slightly above or to the side, he’ll turn toward you and you can capture his face and torso clearly. If you shoot from the walkway itself, you might only see his profile, so a diagonal vantage is better.

Lenzo
The famous pictographer of Windfall, recognizable by his yellow coat and big camera lens hung around his neck. (He upgraded your Picto Box.)
How to acquire: Visit Lenzo’s Photo Shop (above the potion shop). During the day, you’ll find Lenzo either behind the counter on the upper floor or occasionally walking around inside. He’s often at the counter, which is the best time to photograph him.
Tips: Photograph Lenzo when he’s behind his counter and alone. Do not take a pictograph while he’s standing next to Minenco (the lady in orange who sometimes chats with him about photography), because having that second person in frame will cause Carlov to reject it. Catch him solo – he’ll face you as you approach, so get a clear shot then.

Linda
A young woman in an orange dress who spends time in Windfall’s plaza. (She and Anton like each other.)
How to acquire: Find Linda standing in the central courtyard of Windfall during the day. She usually stays near the bench or walking path in the plaza.
Tips: Simply snap a picture of her when she’s facing the camera. She tends to turn and smile at Link if you talk to her, which can help. There’s no special trick – just avoid having other townsfolk too close in the frame.

Maggie
One of the two girls who were kidnapped by the Helmaroc King. Maggie was originally poor, but after being rescued she returns to Windfall in a fancy purple dress (her father struck it rich by receiving a ransom reward).
How to acquire: Go to the second floor of the wealthy mansion (the door at the top of the stairs in the town’s back alley). During the day, Maggie is in her room upstairs, dressed in purple.
Tips: Stand a bit to the side and take Maggie’s pictograph at an angle – this helps avoid any awkward framing inside the small room. Make sure to include her whole upper body and her face. (If she’s reading a Moblin’s letter, wait until she looks up.)

Maggie’s Father
The man who went from pauper to wealthy gentleman overnight. He wears a tall top hat and fancy clothes now.
How to acquire: He is found in the same mansion as Maggie, often pacing or dancing in the upstairs hall near Maggie during the day.
Tips: He’s exuberant and will face you readily. Just position yourself so you capture him from head to toe (including that tall hat!). Since Maggie and her father share the room, try to have only one of them in the picture at a time. He’s tall but the room is small, so step back as needed.
Mila
The second girl kidnapped by Helmaroc – originally the rich daughter, now impoverished. After being rescued, Mila wears ragged clothes and tries to make a living on Windfall.
How to acquire: During the day, Mila stands in front of Zunari’s shop stall, dressed in tattered rags. She moves around restlessly, advertising wares.
Tips: Mila tends to pace, so it can be tricky to get her facing you. A good tactic is to stand to the side of Zunari’s stall (facing the harbor) and wait with your Picto Box ready. As Mila walks and turns, snap the photo the moment she faces your direction, before she moves again. Speed is key here. (If you have trouble, you can also encounter Mila at night in a certain scenario – but by day in rags is the intended snapshot.)

Mila’s Father
Once a wealthy man, he’s now destitute after spending his fortune trying to save Mila. He wears a green outfit that has become worn-out, and sports orange facial hair.
How to acquire: Find him during the day near the docks of Windfall – specifically, he stands by the lone tree near the pier, gazing out sadly.
Tips: Photograph him from the front so his face (with the big orange mustache and goatee) is visible. He might be looking down, but if you target him he’ll acknowledge you. Center him in the frame; his green tattered suit should be fully visible.

Minenco
A middle-aged woman in an orange vest who is passionate about pictography.
How to acquire: Minenco can be found outside, near the Potion Shop on Windfall, during the day. She often stands just to the side of the shop, enjoying the view of the harbor.
Tips: This is a straightforward shot – approach Minenco from the front so that she turns to face you and take the pictograph. Ensure you get her from the waist up. (Minenco sometimes visits Lenzo; but it’s best to snap her when she’s by herself outside the shop.)

Missy
A young woman who spends her time on the eastern pier of Windfall. She has short brown hair and a casual outfit.
How to acquire: Go around to the back side of Windfall Island during the day (the eastern wooden pier near where the wealthy man’s house is). Missy is standing on that pier looking out to sea.
Tips: Use your boat for this one as well: sail a short distance off that pier so Missy turns to look at you over the water, then take the photo from your boat to get her face and front side. If you’d rather do it on foot, walk onto the pier and call to her so she spins around, then quickly snap the picture.

Mrs. Marie
The beloved schoolteacher of Windfall Island. She wears a purple dress and has her hair in a bun.
How to acquire: Mrs. Marie is inside the School (the building with a chalkboard sign in the courtyard) during the day. Enter the classroom to find her near her desk.
Tips: Simply stand a few feet away and take her picture when she’s facing you. She may move her arms in excitement if you’ve given her Joy Pendants, but as long as her face is toward the camera you’re good. The classroom is well-lit, so it’s an easy shot.

Pompie & Vera
The two gossipy women of Windfall. Pompie and Vera stand together near the town gate, chatting endlessly.
How to acquire: During daytime, approach the pair of women by the entrance of Windfall (they’re the ones dressed in bright dresses, one with a teal dress and one with pink). You only need to photograph one of them – Carlov will create a figurine that includes both gossip queens.
Tips: To ensure the sculptor accepts it, try to focus on one woman so that she is clearly the subject. For example, position yourself so that one lady is in the center of frame and the other is slightly off to the side or behind. This way the pictograph registers as one subject. Either Pompie or Vera will do; once you turn in the photo, you’ll get the combined figurine of the duo.

Potoya & Joanna
Two little girls often seen playing around the flowerbeds on Windfall’s beach.
How to acquire: Look for the girls during the day near the sandy area with flowers (below the Bomb Shop, on the way to the seaside jail). Sometimes they also go to class in Mrs. Marie’s school. Just like the gossip ladies, you only need a pictograph of one of the girls – the figurine will depict both Potova and Joanna together.
Tips: Get down to their level so the camera isn’t looking down too steeply. Wait until one of the girls pauses and looks toward you (they might giggle and face you if you call them). Take the photo with one girl centered. Ensure you’re close enough that her face is visible and she’s smiling if possible.

Sam
A laid-back man with big sideburns and a brown vest, who sits on a bench on Windfall.
How to acquire: Sam is usually found sitting on the bench near Zunari’s stall (the bench at the northwest part of town, overlooking the sea). He’s present in the daytime.
Tips: To get Sam to face you while he’s on the bench, it actually helps to hop in your boat and float a short distance out from the coast in front of him (similar to Candy and Missy). From the boat, use your zoom to frame Sam as he looks out toward you over the water. This way, his relaxed pose and face will be clearly captured.

Tott
The ever-dancing Elvis-like fellow on Windfall. Tott wears a black vest and does an energetic dance near the tombstone by the waterfront.
How to acquire: Tott can be found day and night at the little alcove with a tombstone (near the path to the lighthouse). He literally dances there 24/7.
Tips: Because Tott is constantly moving, wait until he strikes a stable pose in his dance (or play the Wind’s Requiem to make him do a special dance pose) before taking the picture. Make sure his whole body is in frame (including his flailing arms). Tott will face different directions as he dances – grab a shot when he’s facing forward (toward the sea).

Zunari
The traveling merchant-turned-shopkeeper on Windfall, recognizable by his thick parka and hood. (He’s the one who sold Link the sail.)
How to acquire: By day, Zunari stands behind his stall in Windfall’s plaza. By night, he runs the auctions in the mansion. It’s easiest to photograph Zunari at night inside the Auction House – he stands at the front without his counter in the way. Alternatively, during the day you can photograph him at his stall, but you must approach cleverly.
Tips: If doing it during the day, walk around to the side of Zunari’s stall (so that you’re almost beside him rather than in front). Get in close – this will make Zunari turn his head toward you, and you can snap a picture of his face and body from a slight angle. Do not take the pictograph of Zunari while he’s fully behind the counter from the front, as the counter will block part of him and Carlov won’t accept it. At night during an auction, simply approach the front where Zunari is standing (he hosts the event) and photograph his upper body – Carlov will accept that just fine since he’s clearly visible.
Dragon Roost Hall (Dragon Roost Island Figurines)

Most of these characters are Rito or encountered on Dragon Roost Island and nearby islands.

Baito
A new mail sorter from off-island (a human with a big beard and a tribal tattoo on his face).
How to acquire: First you must trigger Baito’s appearance by sorting at least 25 letters in the Dragon Roost mail mini-game. Once you break the 25-letter record, Baito is hired at the Rito Post Office. After that, he appears behind the counter in the mail center on Dragon Roost Island.
Tips: Snap Baito while he’s standing at the counter where you sorted letters (he’ll be in uniform and facing you). If he hasn’t appeared yet, improve your letter-sorting score to bring him to the island. Baito will smile when you talk to him, which makes for a nice centered shot.
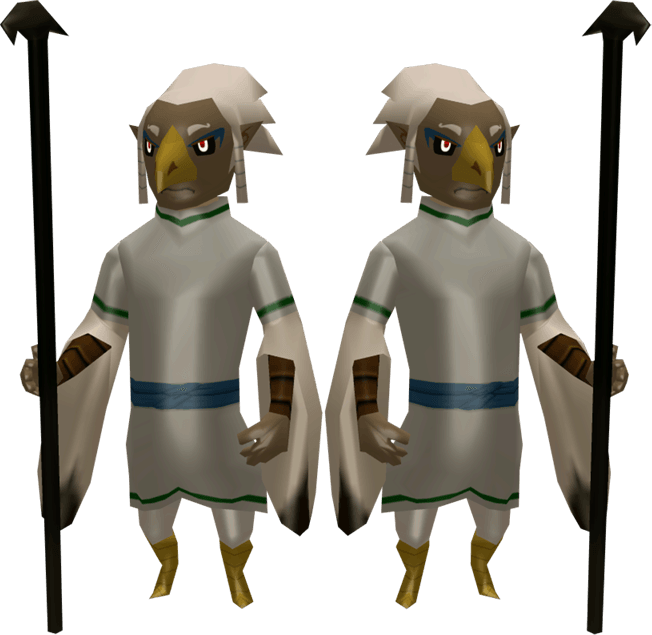
Basht & Bisht
The pair of Rito guards who enforce order on Dragon Roost.
How to acquire: You only need to photograph one of the two guards – the figurine will show both Basht and Bisht together. One guard stands at the cave exit on the ground level (guarding the path toward Dragon Roost Cavern) and the other is by Chieftain Komali’s throne room door upstairs.
Tips: Take a pictograph of either guard when he’s facing you. A good approach is the guard at the main floor exit: he stands at attention, so just photograph him from the front. Once you turn that in, you’ll get a figurine depicting both Rito sentries side by side.

Chieftain
The leader of the Rito tribe (Komali’s father). He’s a large Rito man wearing a crown and a red ceremonial robe.
How to acquire: Find the Chieftain in the Rito’s main hall (the same room where you first met Medli and Komali). He usually stands in the back of that room near his throne.
Tips: Get a full view of the Chieftain from the front. He will acknowledge you when approached, making it easy to capture his face. Importantly, when you obtain the Chieftain’s figurine, you automatically receive the figurine of Quill (the postman) as well. No separate pictograph is needed for Quill, so don’t worry if you haven’t seen Quill in a while – just be sure to turn in a clear photo of the Chieftain.

Hoskit
A Rito guard who stands watch on the upper level of Dragon Roost. Hoskit carries a spear and notably asked Link to collect Golden Feathers for his girlfriend.
How to acquire: Find Hoskit on the second floor interior of Dragon Roost Island, right next to the doorway leading to the Chieftain’s room. He’s the guard on duty with a spear in hand.
Tips: Photograph Hoskit from the front so that his spear and face are visible. If you completed the Golden Feather exchange, he’ll express gratitude but remain on duty. Either way, he generally faces outward – just snap him when he glances toward you. (His quest context isn’t required, but fans will remember he’s the feather guy.)

Ilari
An impatient Rito postman known for trying to deliver a Moblin’s love letter to Maggie.
How to acquire: Ilari is found on a high ledge outside the main Dragon Roost postal center. To reach a good vantage: go through the door next to the mailbox counter (opposite the path you took to meet Medli) – outside, you’ll see Ilari on a ledge across a gap. Jump down to the lower ground or ledge near the water and face Ilari from there. He’s the Rito with a satchel, looking out to sea.
Tips: From the lower ledge or ground, use your zoom to get Ilari in frame. He tends to face outwards, so move until you’re roughly in front of him and wait; he will turn his head side-to-side. Take the pictograph when his face is visible. (Ilari disappears once his letter delivery is over and Medli leaves for the Earth Temple, so photograph him before clearing the Earth Temple to be safe.)

Koboli
The Rito mail clerk who runs the mail sorting center.
How to acquire: Koboli is always behind the counter in the Dragon Roost post office (where you play the letter sorting mini-game). Visit him at any time.
Tips: Simply stand in front of the counter and take Koboli’s picture while he’s facing you. He’s the only Rito with a clipboard behind that counter (before Baito arrives). It’s an easy one since he doesn’t leave that spot.
Kogoli
A Rito stationed just outside the post office who disappears later in the game.
How to acquire: Kogoli stands on the right-side ledge just outside the Dragon Roost mail center entrance. He’s the first Rito you see on the right when you exit toward the Rock Spire where Medli was found. Important: You must photograph Kogoli before you conduct the Earth God’s Lyric with Medli (before entering Earth Temple). As soon as you play that song for Medli, Kogoli will vanish from Dragon Roost (he “completes his duties” and isn’t seen again).
Tips: Stand on the opposite side of the gap, where the left ledge is, and zoom across to get Kogoli. He’s leaning on the railing. Wait for him to turn his head toward you and then take the shot. This is a one-time opportunity in a first playthrough – do not forget him. (If you missed Kogoli, he is essentially missable unless you obtain a pictograph via other means, as Lenzo does not sell this one.)

Laruto
The ancient Zora sage of the Earth Temple.
How to acquire: Laruto only appears in a cutscene when teaching the Earth God’s Lyric to Link; you cannot capture her directly. Instead, purchase Laruto’s Legendary Pictograph from Lenzo’s shop on Windfall. She is usually sold on nights when the left half of the moon is missing (a waning crescent).
Tips: Check Lenzo’s shop on the appropriate moon night or the following day (if the previous night had the left crescent). Once you have the pictograph, bring it to Carlov to get Laruto’s figurine. (Laruto’s figurine will depict her as the graceful Zora spirit with a harp.)

Medli
A young Rito girl who is Valoo’s attendant and the eventual Earth Sage.
How to acquire: You have two chances to get Medli’s pictograph. Option 1: Before conducting the Earth God’s Lyric for her, find Medli on Dragon Roost Island. After you rescue her from Dragon Roost Cavern, you’ll later find Medli on a ledge in Dragon Roost (near where you initially found Komali) playing her harp. Talk to her there, then snap a photo of Medli while she’s practicing. Option 2: If you missed that, you can photograph Medli after completing the Earth Temple – she will remain in the Earth Temple boss room (praying) once her sage duty is done.
Tips: The easiest shot is on Dragon Roost when she’s playing the harp on the cliff – stand a short distance away so you can see her fully (harp and all), then take the picture after speaking to her (so she’s looking at you). In the Earth Temple boss chamber, ensure you have a clear angle (no fog or obstacles) and capture Medli’s upper body as she faces you.

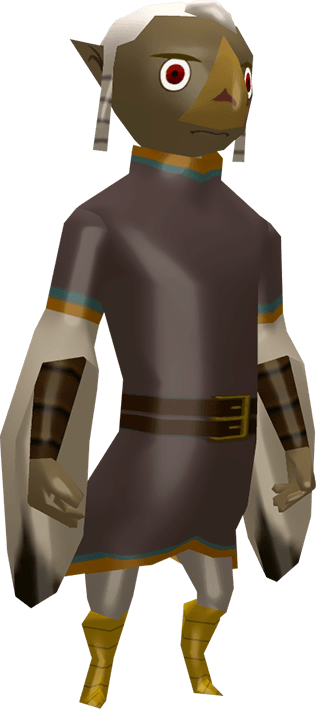
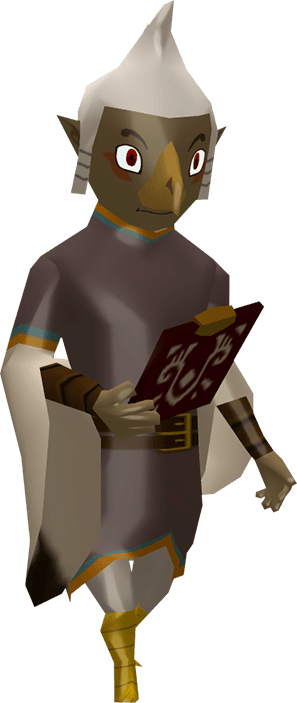
Namali
A Rito functionary inside Dragon Roost’s postal hall. Namali holds a clipboard and has smooth (non-spiky) head feathers.
How to acquire: Inside Dragon Roost Island’s main hall (first floor), look for the Rito man carrying a clipboard and wearing a simple attendant outfit. This is Namali. He typically stands to one side, overseeing postal operations.
Tips: Photograph Namali like you would any NPC – face him and get his torso and face in frame. To avoid confusion with Pashli (who also has a clipboard), note that Namali’s hair/crest is not spiky. If you speak to him, he may look up from the clipboard, giving you a perfect moment to shoot.
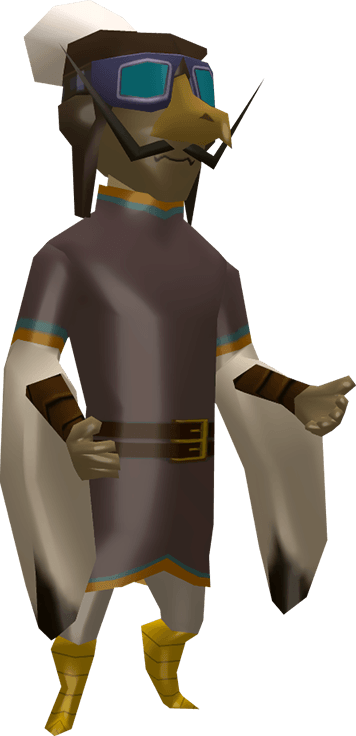
Obli
The host of the Flight Control Platform mini-game (Bird-Man Contest). Obli is actually a human dressed up in a Rito costume (complete with a fake beak and wings). He has a mustache.
How to acquire: Sail to the Flight Control Platform (one square east of Dragon Roost Island). Pay 10 rupees to participate, which lets you climb up to the top where Obli is. Obli stands at the peak of the platform to start the contest.
Tips: Once you’re up there, don’t jump off immediately. Walk over to Obli and take a pictograph of him straight on. He’s wearing a Rito-like outfit but clearly has a mustache – make sure that detail is visible. (If you don’t want to pay, you might be able to angle a shot from your boat, but it’s much easier to just pay and climb up close.)
Pashli
Another Rito clerk inside Dragon Roost’s post hall. Pashli also carries a clipboard, but he has spiky hair/feathers on his head, distinguishing him from Namali.
How to acquire: Find Pashli on the first floor of Dragon Roost’s interior, likely on the opposite side from Namali or walking about with his notes.
Tips: As with Namali, just get a clear shot of Pashli facing the camera. To ensure you have the right person: Pashli’s head feathers stick up in spikes. If needed, talk to him and he’ll look up from his clipboard.

Prince Komali
The young Rito prince, son of the Chieftain. (He overcame his fear and eventually gave Link Din’s Pearl.)
How to acquire: Later in the game (after Valoo is calmed), Prince Komali can be found outside, standing on the ramp that leads from Dragon Roost’s postal area up toward the summit. He’s out on the wooden walkway just above the pond.
Tips: Stand across the gap from Komali – for example, on the edge of a railing across from him – so you can see him from the front at eye level. Zoom in if needed and take the pictograph when Komali is looking toward you. Try to include his full body (he’s small) and the blue orb (Din’s Pearl) he carries might be visible, though not required. He’ll often face you if you call him.

Quill
The Rito postman who delivers mail to Outset (and helped Link early on).
How to acquire: You do not need to photograph Quill at all. When you obtain the Chieftain’s figurine, the gallery automatically gives you Quill’s figurine as well.
Tips: Simply make sure you got the Chieftain’s pictograph accepted. Quill’s figurine will then appear (depicting the Rito mailman in his postal uniform). If you’re curious, Quill is the one who delivered your letter from Tetra – but since he only appears in cutscenes after that, the automatic unlock is the only way to get him.
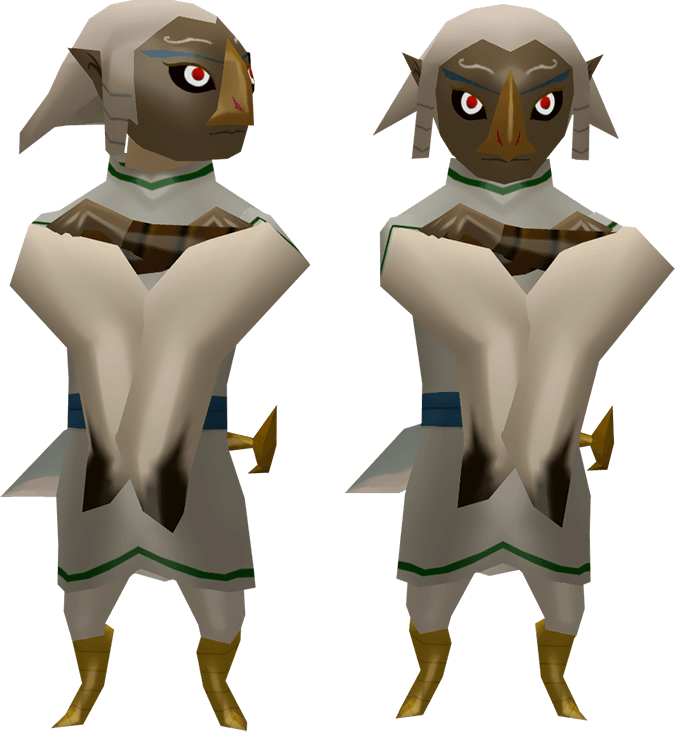
Skett & Akoot
The two guards who stand directly behind the Rito Chieftain at his throne.
How to acquire: Like other paired figurines, you just need a pictograph of one of the guards (either Skett or Akoot). Enter the Chieftain’s room and you’ll see these two Rito soldiers flanking him at attention.
Tips: Stand off to one side and photograph one guard straight-on. Because the two are very close, try to focus the frame on either the left guard or the right guard specifically (to avoid confusion). Carlov will carve one figurine that features both Skett and Akoot together once he accepts the photo.

Valoo
The great Sky Spirit, a massive red dragon who perches atop Dragon Roost Island.
How to acquire: Sail to Dragon Roost Island’s northern side (the ocean side where you can get a view of Valoo above). Get a bit of distance so that Valoo’s full head and some of his body are visible (not just the silhouette). While on your boat, use the zoom and wait for Valoo to face your direction or roar, then take the pictograph.
Tips: Valoo is far away and mostly stationary. Ensure you take the photo during daylight for better clarity. You might see just his head and neck poking from the mountaintop – that’s sufficient as long as it’s centered and facing you. (You don’t need to climb up; it’s actually impossible to get close, so the boat-angle is the way to go.)

Willi
The brother of Obli and the one who sells tickets at the Flight Control Platform. Like Obli, Willi is also a human disguised in Rito attire (he lacks a mustache, unlike Obli).
How to acquire: Sail to the Flight Control Platform (east of Dragon Roost). Willi is found at the base of the platform on a small raft or entry booth – he’s the character you pay to attempt the Bird-Man Contest. He wears a similar bird costume and a helmet, but no mustache.
Tips: Photograph Willi from the front before or after paying the fee. Since he’s at sea level, you can sail right up to his platform and snap a picture of him there. Make sure his whole body is in frame (he tends to crouch a little). If you go up top for Obli, you can always come back down and catch Willi afterward.

Zephos & Cyclos
The twin frog-like Wind Gods. Zephos is the gentler frog who resides at the Wind Shrine, and Cyclos is the froggy god of winds who creates cyclones.
How to acquire: You specifically need a pictograph of Cyclos (the one in the cyclone). Find Cyclos by sailing the Great Sea – he’s often found stirring a giant whirlwind in various quadrants (commonly near Mother & Child Isles or Shark Island). Do not shoot him down with arrows before getting his photo! Instead, allow the cyclone to pull you close and look up to spot Cyclos, a frog-like figure on a cloud at the cyclone’s center. Take a pictograph of him (try to get his face or any part of his upper body visible on the cloud) before you hit him with the arrows to learn Ballad of Gales.
Tips: This can be tricky due to the wind and movement. As you’re caught in the cyclone, quickly enter camera mode and zoom. You’ll see a swirling cloud with an angry frog deity – snap it when you have any piece of Cyclos in view. If you miss the first encounter, don’t defeat him yet; sail around to find another of his cyclones and try again. Once you get his pictograph and turn it in, the figurine will depict both Zephos & Cyclos together (Zephos is included automatically as the two are a pair). (If Cyclos is defeated before you photograph him, you’ve missed this figurine for the playthrough.)
Forest Haven Hall (Forest Haven & Korok Figurines)
These figurines include the Koroks and other characters related to Forest Haven.

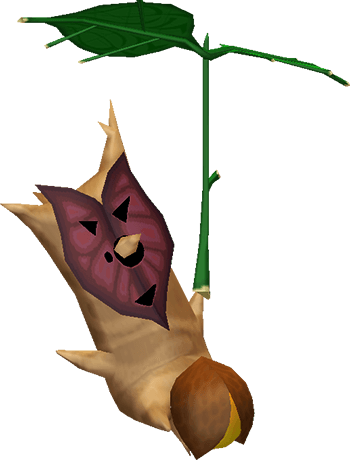
Aldo
One of the Korok forest spirits. Aldo has a bluish-green, heart-shaped leaf face and a somewhat frowning expression.
How to acquire: Before clearing the Forbidden Woods (Forest Haven’s dungeon), you can find Aldo alongside the Great Deku Tree in Forest Haven. After completing the Forbidden Woods, Aldo takes flight to Cliff Plateau Isles (the island one square east of Forest Haven) to plant trees. You can find him on Cliff Plateau Isles thereafter.
Tips: The easiest method is to photograph Aldo after he’s at Cliff Plateau Isles – sail there, progress through the small isles puzzle (use a Deku Leaf to reach the higher plateau where Aldo is), and snap a pictograph of him facing you. Alternatively, catch him in Forest Haven during the Korok ceremony (he’s one of the Koroks gathered around the Deku Tree) – just make sure he’s singled out in your frame.

Carlov
The master sculptor who runs the Nintendo Gallery. He’s a short, eccentric man with a big mustache (and the one you give pictographs to).
How to acquire: Carlov is found inside the Nintendo Gallery itself (on a small island near Forest Haven). Once you’ve unlocked the Gallery’s hatch, go inside and you’ll see Carlov standing behind the counter. Simply take his pictograph while he’s at his desk.
Tips: Center Carlov so you get his whole upper body and face – he’ll usually be looking at you eagerly. (Interestingly, it’s said that Carlov never lets anyone watch him work because he carves figurines in his underwear, but thankfully he’s fully dressed for the photo!) Since he’s always there, this one isn’t missable. Just be sure to use the Song of Passing to make it daytime if lighting is an issue inside the gallery.

Deku Tree
The Great Deku Tree is the giant guardian tree of Forest Haven with a kindly face.
How to acquire: Inside Forest Haven, approach the Great Deku Tree (you likely interacted with him during the story). Stand on the big lily pad right in front of him, and target his face. After you speak to him (to have him open his eyes and look at you), take a pictograph of the Deku Tree’s face.
Tips: You can’t really miss his massive form, but for Carlov to accept it, try to get as much of the Deku Tree’s face as possible in the frame (from the top of his head/branches down to his mustache-like roots). You may have to back up onto the lily pad to fit him in. Ensure it’s well-lit (daytime in Forest Haven is best).

Drona
A Korok with a bright yellow leaf covering his face.
How to acquire: Before Forbidden Woods is cleared, Drona is present at Forest Haven with the other Koroks. After the Korok ceremony, Drona flies off to Private Oasis (also known as Link’s Oasis, one square south of Tower of the Gods). You can find him on that island’s grassy area once he’s left.
Tips: If you wait until after Forbidden Woods, sail to Private Oasis (need the cabana deed to enter the hut, but Drona stays outside). He’s usually near a tree on that island planting a new forest tree. Photograph him facing you (he has a yellow mask-like face). If you photograph him early at Forest Haven, isolate him in the shot. Either way, he’s a stationary Korok making it an easy capture.

Elma
A Korok with a green, lilypad-shaped face.
How to acquire: Elma is at Forest Haven initially (before Forbidden Woods completion). After the ceremony, Elma travels to Needle Rock Isle (one square southwest of Greatfish Isle) to plant trees. Head to Needle Rock Isle after Forbidden Woods; Elma stands on that island’s grassy area.
Tips: On Needle Rock, defeat any hostile enemies first (there can be ChuChus or Bird enemies) so they don’t interfere. Then snap a picture of Elma up close as he looks at you. His face leaf is round and green. As always, you can also catch him by the Deku Tree earlier – just ensure a clear shot focusing on him.

Fado
An ancient Kokiri sage and violinist – the Sage of Wind.
How to acquire: Fado only appears as a spirit and cannot be photographed directly (in the Wind Temple cutscene). You must buy Fado’s Legendary Pictograph from Lenzo in Windfall’s shop. It’s usually offered on a certain moon phase night (commonly the same nights as Laruto or alternating).
Tips: Check Lenzo’s shop periodically (nights when a particular moon is visible – in some versions, Fado’s pictograph is sold when the moon is full or another specific phase). Once purchased, bring the pictograph to Carlov. The figurine will show Fado, the sage with the green Kokiri attire and violin. (Note: Fado’s pictograph becomes available after you have encountered him in the story at Gale Isle. Also, obtaining Fado’s figurine will not unlock Makar – you still need Makar’s photo separately.)

Hollo
A Korok who never left Forest Haven – he runs the potion shop inside a hollow tree.
How to acquire: Hollo is always in Forest Haven in his little alcove (the hollow tree cave accessible by bouncing on a Baba Bud near the Deku Tree). You might remember giving Hollo Boko Baba Seeds for Blue Potion. Go into Hollo’s hideout (climb the Deku Tree and drop into the hollow, or swing in) and photograph him while he’s brewing potions.
Tips: It’s a bit dark inside Hollo’s hollow, so do it in daytime and get close. Hollo has a green Korok face and is stirring a cauldron. He will face Link when spoken to. Make sure your flash (Firefly) is active if needed to brighten the shot. Carlov will accept as long as Hollo’s form is clear.

Irch
A Korok who leaves to plant a tree on Shark Island after the ceremony.
How to acquire: After beating Forbidden Woods, find Irch on Shark Island (one square west of Southern Fairy Island, or two squares south of Greatfish) – it’s the island with a distinctive shark shape on the map. Irch has a unique face (possibly a pointed leaf).
Tips: Shark Island has a few challenges, but Irch will be just standing near one of the small trees he’s planting. Clear any enemies (Bokoblins often appear at night) and photograph Irch from the front. Since Koroks are short, crouch a little or come at his level to capture his face well. (Alternatively, snap him around the Deku Tree before he departs – but he might be easier to identify when alone on his island.)

Linder
A Korok who goes to Greatfish Isle to plant a new forest tree.
How to acquire: After the Forbidden Woods dungeon, Linder can be found on the broken Greatfish Isle. He’ll be on one of the remaining landmasses (Greatfish is fragmented – check near a small sprout somewhere on the island’s outskirts).
Tips: Photograph Linder at Greatfish by approaching carefully (that island can have Peahats flying around – eliminate them first). Get Linder’s face (a Korok with a certain shaped leaf) in frame, and take the picture in good daylight. If uncertain which Korok he is at Forest Haven: Linder might have a particular mask shape (the figurine description mentions him explicitly, but any Korok picture in Forest Haven can be tricky with multiples, so isolating him on Greatfish is best).

Makar
A special Korok who plays the violin. He is the Wind Sage in waiting.
How to acquire: You have two main opportunities to photograph Makar. Option 1: During the Korok Ceremony cutscene at Forest Haven (right after Dragon Roost Cavern), you briefly see Makar playing his fiddle. If you are on a Second Quest with the Deluxe Picto Box early, you could snap him then. However, the reliable way is Option 2: After completing the Wind Temple, Makar will remain in the Wind Temple’s boss room (the room where you defeated Molgera). Go back inside the Wind Temple after beating it, return to the boss arena, and you’ll find Makar there with his violin. Photograph him in that room.
Tips: In the Wind Temple boss chamber, Makar will usually be standing or wandering near the center. Make sure to include his whole body and instrument. He’s small, so get close enough. If enemies (like Mini-Moldorms) respawn in the temple, clear them on the way. Makar’s figurine is a must for completing the set, and it shows him with his beloved violin. (If on Second Quest, you could also catch Makar right after the Forbidden Woods when he’s playing music for the ceremony, but since that’s a cutscene moment, it’s tricky – the post-Wind Temple method is safer.)

Manny
A red-haired young man who stands inside the Nintendo Gallery. (He’s the Gallery fan who wanted to join the club – you see him carrying a bag with an 8-bit Octorok design on it.)
How to acquire: Once you’ve opened the Nintendo Gallery, Manny appears on the first floor of the gallery, wandering around with his bag. Simply take a pictograph of Manny there.
Tips: Manny is usually moving around excitedly. Call out to him to get him to pause and face you, then take the shot. Make sure to get his whole figure including the bag (though Carlov will accept even a torso shot). Manny isn’t missable as long as the Gallery is unlocked – he’ll remain there day and night.

Oakin
A Korok who journeys to Star Island after the ceremony.
How to acquire: After Forbidden Woods, find Oakin on Star Island (the island at the far north of the map, one square north of Windfall, often labeled Star Isle). He’ll be standing near a newly planted small tree.
Tips: Star Island sometimes has enemies (Miniblins at night, perhaps), so clear them out before the pictograph. Then photograph Oakin from the front. He has his own distinct leaf mask (perhaps a shape resembling an oak leaf, fitting his name). Just ensure the lighting is good and he’s centered. (Oakin is another Korok you can identify at Forest Haven by elimination – but much easier on his island.)
Olivio
A Korok who goes to Eastern Fairy Island to plant a tree.
How to acquire: After the ceremony, Olivio can be found on Eastern Fairy Island (one square east of Fire Mountain, or two squares west of Forest Haven). Look for him on that small fairy isle’s grassy perimeter.
Tips: As with the others, get a clear shot of Olivio facing you. Eastern Fairy Island is small and usually safe once you remove any ChuChus. Olivio’s face leaf is a particular design (the figurine description might mention it; either way just get him clearly in frame). If possible, take the picture during daylight for best results, as the Fairy Island might be dim in the evening.

Rown
A Korok who flies to Mother & Child Isles to plant his tree.
How to acquire: After Forbidden Woods, Rown will be at Mother & Child Isles (the twin island set in the center of the map’s northern half). Note that Mother & Child Isles has an inner fairy fountain you warp to (where the Fairy Queen is) and an outer area – Rown is on the outer island area, accessible normally by boat. Specifically, Rown is on Child Isle (the smaller of the two) tending a tree. Sail there (one square northwest of Tingle Island).
Tips: Approach Rown and photograph him when he’s facing you, just like the other Koroks. The Mother & Child outer island area might have some peahats or enemies, so deal with those first. Rown’s leaf face might have a design (possibly a round or unique shape). Just ensure it’s well-lit and centered. He’s the last of the Korok planters – once you have him, you should have all eight Korok figurines (including Makar and Hollo).
Monster Hall (Common Enemies Figurines)

These figurines are the regular enemies found throughout the Great Sea and dungeons – they populate the “Monster” gallery room. Each enemy must be photographed while it’s alive and facing toward you. Generally, try to get as much of their body as possible in the frame. Here are all the common enemies and tips on where to snap them:
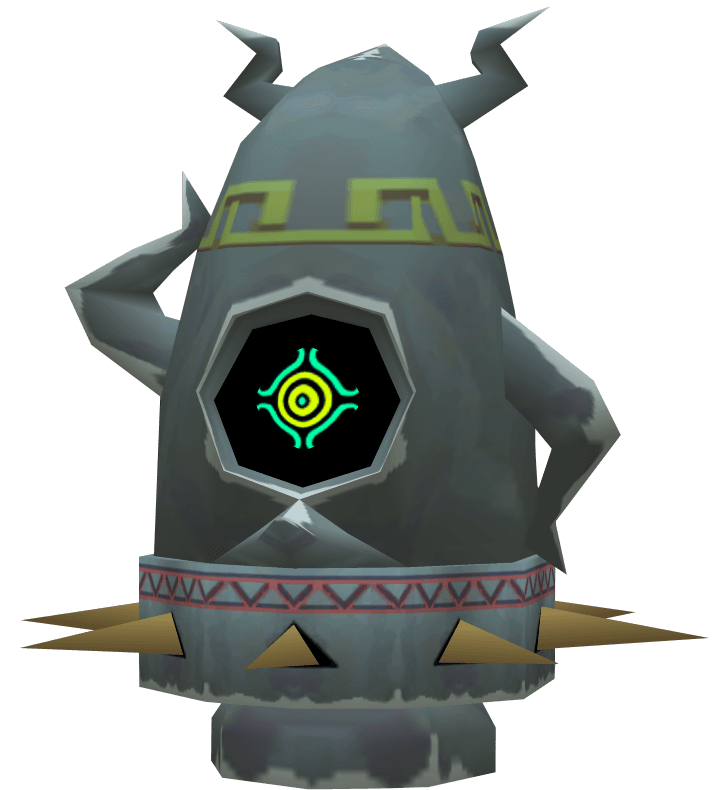
Armos
A small, statue-like enemy that springs to life and hops around, usually found in dungeons like the Tower of the Gods.
How to acquire: Encounter Armos in the Tower of the Gods or Wind Temple. An easy spot is Tower of the Gods – there are inactive Armos statues in some puzzle rooms.
Tips: Photograph an Armos while it’s inactive or just waking up. If you can find one that hasn’t noticed you yet (they look like statue faces), take the pictograph then – Carlov will accept it even if its eyes aren’t glowing. If it’s active, wait until it faces you between hops and quickly snap it. Keep your distance; Armos explode after you defeat them, so get the pic beforehand.
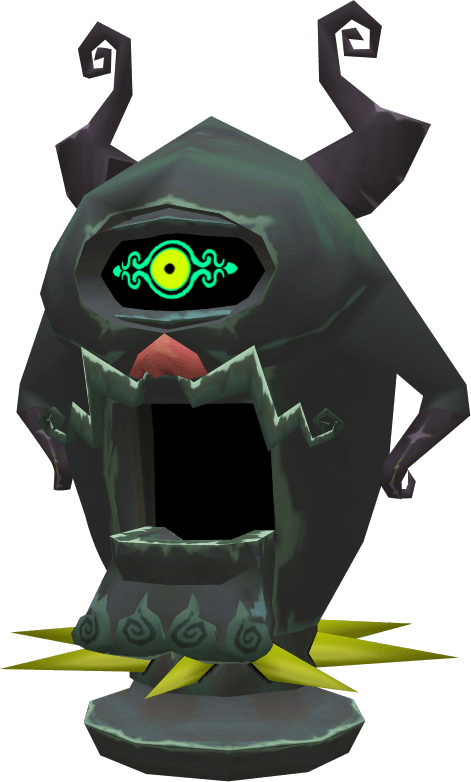
Armos Knight
A larger, more dangerous version of Armos – a big statuesque knight that charges at intruders.
How to acquire: Find Armos Knights in the Tower of the Gods (later rooms) or the Wind Temple (there’s a hidden room with a pair of them). For example, in Wind Temple, use the warp jar from the first room and glide to a recessed ledge where two Armos Knights sit idle.
Tips: Just like with small Armos, try to photograph an Armos Knight before it fully activates. Glide into a room quietly and snap a picture of the inert giant statue. If it’s already active, get far enough that you can see its whole body and take the shot head-on when it pauses or turns toward you. They have a big red eye – centering that can help ensure it’s facing you. Don’t defeat all Armos Knights without a photo; they don’t respawn easily.

Boko Baba
A carnivorous plant enemy with a snapping mouth, found in forested areas.
How to acquire: Boko Babas are common in Forest Haven (interior) and the Forbidden Woods dungeon. You’ll run into plenty on the path inside Forest Haven (those are great for photos).
Tips: Approach a Boko Baba until it stretches out of its bud, and then step back so you can see its face/mouth open towards you. Take the pictograph when it lunges or is fully extended (its “face” – the pink flower-like mouth – should be toward the camera). It might be easier to get the photo before you kill any in Forbidden Woods; otherwise, Forest Haven has infinite ones in the first room, which is safe to revisit. Carlov doesn’t require the whole vine, but do include the head clearly.

Bokoblin
A goblin-like creature – these are the basic foot soldiers (often with machetes or sticks).
How to acquire: Bokoblins appear frequently in Dragon Roost Cavern (the first dungeon) and in places like the Forsaken Fortress and many submarine hideouts. A reliable spot is Dragon Roost Cavern: in the very first lava room, a Bokoblin lurks behind a breakable wall. Or in Forsaken Fortress, once you have a sword, Bokoblins patrol the rooms.
Tips: It’s best to catch a Bokoblin before it notices you. For instance, in Dragon Roost Cavern, crawl through the small hole to see a Bokoblin from afar. Zoom in and photograph it while it’s idle or dancing around. If a Bokoblin is attacking, you can parry to stun it or get some distance and then quickly snap it facing you. Just ensure it’s not mid-swing (blurry) and that its full body is in frame. Bokoblins are common, so you have many chances.

Bubble (Red/Blue Bubble)
Floating flaming skulls found in dark areas (Red Bubbles are on fire, Blue Bubbles have a cursed blue flame).
How to acquire: Bubbles are encountered in the Earth Temple (for example, a coffin room spawns a Blue Bubble, and later rooms have Red Bubbles flying). Also, some appear in Ganon’s Tower or certain caves.
Tips: Zoom in on a Bubble because they appear small if far. In the Earth Temple, after a Blue Bubble pops out of a coffin, stand a bit away and photograph it as it comes toward you – it has a distinct skull face with flames around it. Red Bubbles (flaming skulls) can be found in the main hall of the Earth Temple or some submarine caves; you might shoot them with an Ice Arrow to extinguish flames, but Carlov will accept them even with fire as long as the form is clear. Important tip: Carlov might reject a Bubble photo if the skull is too small in the frame – so get close. Bubbles bob around erratically, so try to catch one when it’s not too far or high. Using the Hookshot on a Blue Bubble (once its flame is out via Deku Leaf or boomerang) pulls it to you and stuns it, giving you a perfect close-up moment. Only one figurine covers both Red and Blue Bubbles, so one photo of either type suffices.

ChuChu
A jiggly blob-like enemy that comes in different colors (green, red, blue, etc.).
How to acquire: ChuChus are everywhere – Forest Haven, Forbidden Woods, Tower of the Gods (yellow Elec ChuChus), Earth Temple (blue ChuChus), etc. Even the islets across the Great Sea have ChuChus popping up. One easy place is the first room of the Earth Temple or the forest outside the Forbidden Woods.
Tips: Since ChuChus tend to boing around, try to take a picture when it’s relatively still. If it’s a green ChuChu, it may try to blend into a puddle – catch it while it’s upright. Zoom in close because ChuChus aren’t tall (Carlov might not accept if it looks too small in the picture). You don’t need a separate figurine for each color; one pictograph of any ChuChu counts for all, as they share a figurine entry.

Floor Master
A large, purple, disembodied hand that emerges from the floor to grab unsuspecting victims.
How to acquire: Floor Masters appear in the Earth Temple (notably in the dark crypt-like rooms) and occasionally in other underground areas. The Earth Temple has a room with a giant face on the floor and multiple Floor Master pits – that’s a good spot.
Tips: A Floor Master won’t count if you only photograph the empty hole – it needs to be emerged. Lure the Floor Master out by stepping near its circle, then quickly move back so you can see the whole hand. You can stun it with the Boomerang or a Light Arrow, which causes it to freeze in place for a moment – an excellent time to take the pictograph of the hand extended out of the hole. Aim to include the hand and the edge of its pit so it’s clear what it is. Don’t get too close or it will grab you! If you accidentally defeat one, leave the room and return to respawn it.
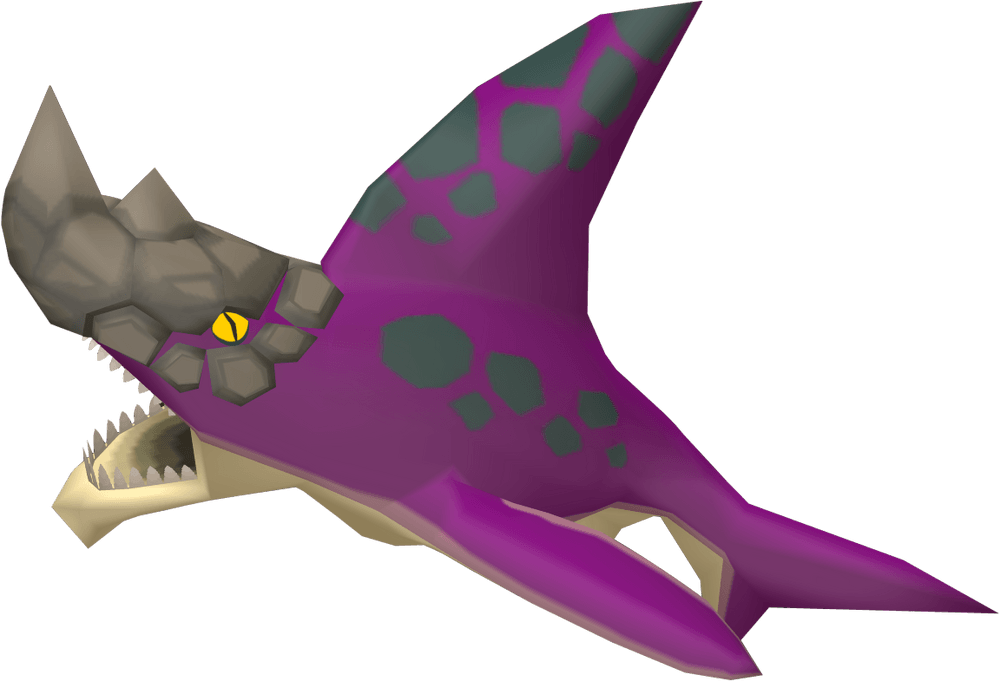
Gyorg
A giant shark-like fish that prowls the ocean and tries to ram your boat.
How to acquire: While sailing the Great Sea, you’ll often encounter Gyorgs in various sectors (they look like large sharks with frills). A known hotspot is outside of Seven-Star Isles or around Two-Eye Reef – anywhere you suddenly hear battle music at sea and see fins, that’s a Gyorg approaching.
Tips: This can be challenging since you’re on a moving boat. One strategy: sail slowly and wait for a Gyorg to fin near the surface, then quickly enter camera mode and zoom in on it as it faces you during an approach. You can also shoot a Gyorg with the boomerang or hook it with the Grappling Hook to stun it momentarily, then photograph it. Make sure to get the whole shark in frame if possible, or at least a clear side profile while it’s coming head-on. If you struggle, use the Flight Control Platform area or any stationary platform where Gyorgs circle – you can stand on your boat near a platform and line up a shot as one circles around.

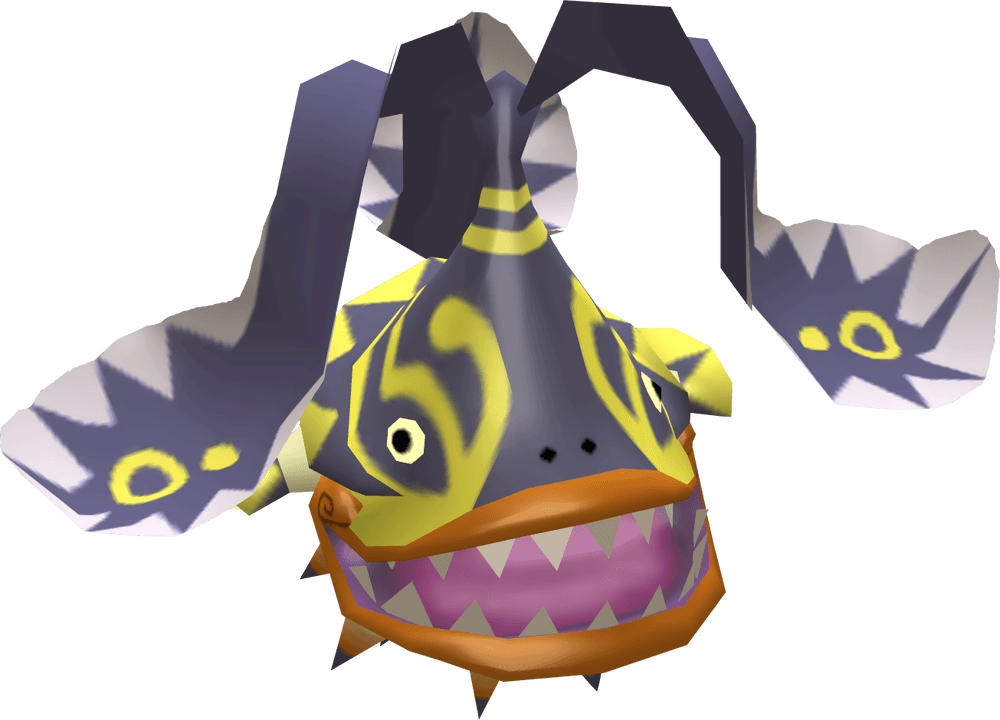
Kargaroc
A large, green-tailed bird monster that often attacks from the skies.
How to acquire: Kargarocs roost on various islands (Dragon Roost Island’s foothills, the Flight Control Platform, Needle Rock, etc.) and will swoop at you when you get close. A guaranteed encounter is on Dragon Roost Island outside – look for nests or when you climb around the mountain, a Kargaroc will attack. They also frequently appear on lookout platforms at sea.
Tips: Try to photograph a Kargaroc in mid-air as it faces you. You might provoke one into charging – as it flies toward you, use the Picto Box zoomed in and snap it before it veers off. Alternatively, use the Grappling Hook on a Kargaroc to steal an item; while it recoils, quickly take a picture. Another method is to shoot it with an Ice Arrow to freeze it, then take a pictograph before it shatters (just be quick). Be sure to get its whole body (the distinct yellow-and-green tail feathers are their signature look). Since they circle, you may have multiple attempts if you miss the first shot.

Keese (Fire Keese)
Small bat-like creatures that flutter in caves and temples. Fire Keese are a variant engulfed in flames.
How to acquire: Keese appear in many dark areas – Dragon Roost Cavern has regular Keese in lava rooms, and Fire Keese in some parts; Earth Temple has a bunch as well. Essentially any place that’s cave-like might spawn Keese (even sea platforms at night).
Tips: Keese are quick, so a good approach is to find a room with a resting Keese (they sometimes hang from ceilings). Line up your camera and wait for a Keese to fly toward you – they often swoop in a straight line. Take the pictograph when it’s relatively close and facing you (its eyes toward the camera). If dealing with Fire Keese, you might let one approach and then quickly toggle to camera. It’s okay if the Keese’s fire is out of the frame edges a bit, but try to capture the body and wings clearly. One pictograph covers both normal and Fire Keese (they share a figurine). If needed, clear out all but one Keese to reduce chaos, then focus on that one. Also, using the Hookshot on a Keese stuns and pulls it to you – sometimes it will flap in place briefly afterward, giving you a still target for a second.

Magtail
A fiery centipede-like creature found in volcanic areas (notably Dragon Roost Cavern). Magtails have a glowing red body and can curl into a ball of fire.
How to acquire: Go to Dragon Roost Cavern; Magtails crawl in the lava pits there. A common spot is the cavern rooms where Magtails come onto platforms to attack (like near the pots used to weigh switches).
Tips: Lure a Magtail onto solid ground. Often, if you toss water on lava to form a platform, a Magtail will crawl up. Wait until the Magtail is uncurled and walking (when it’s stretched out, showing its centipede form with pincers). Take a pictograph head-on when it’s extended toward you. Avoid shooting when it’s rolled into a ball (just looks like a glowing orb). You might stun it with ice or hookshot to freeze it in extended form. Make sure the whole length is in frame if possible, or at least its front half and glowing eyes/pincers facing you.

Miniblin
Tiny, imp-like monsters that often attack in swarms. They carry little pitchforks and make chattering noises.
How to acquire: Miniblins commonly appear at night on certain islands (Diamond Steppe, Angular Isles, etc.) and whenever an alarm is sounded (like in Forsaken Fortress after you’re detected). Also, they spawn infinitely in some areas like the bottom of the Wind Temple pit or when summoned by certain Wizzrobes.
How to photograph: The challenge is their numbers – they rarely attack alone. Try to find a spot where only one or two Miniblins approach (for example, if you hear the horn and Miniblins spawn, run a bit so they string out). Pick one Miniblin and focus on it. Crouch or angle down so you’re at its level, and take a pictograph when it’s running straight at you (their arms flail, but as long as the face is toward the camera it’s fine). If you kill many Miniblins and leave one, that last one will still attack but you can manage framing more easily. Tips: Because Miniblins are small, get close – Carlov will accept it even if it’s a bit zoomed in on one of them. Just ensure no other Miniblin is squarely in the frame. These guys respawn endlessly in some fights (like the Phantom Ganon maze in Ganon’s Tower spawns Miniblins sometimes), so you have plenty of opportunity.

Morth
A small black spherical creature covered in spikes (bright orange spikes) – they cling onto Link and slow him down.
How to acquire: Morths appear in the Forbidden Woods (they often swarm you in certain rooms or when a Mothula shakes them off) and on some sea platforms. The most iconic place is the room in Forbidden Woods with the big flower bud elevator – lots of Morths drop from the ceiling.
How to photograph: It can be tricky since Morths are tiny and usually en masse. One strategy: in Forbidden Woods, toss the Deku Leaf to blow a bunch of Morths off the platform, leaving maybe one on the ground. Then get close and take a pictograph of that single Morth as it wiggles toward you. Alternatively, allow one Morth to latch onto Link’s Deku Leaf shield (they often stick to you) and then go into camera mode – if it’s on your front, you might actually photograph it clinging to Link. But safer is catching one on the ground. Tips: Use zoom for these little guys. Even though they’re small, Carlov’s figurine will represent them proportionally, so just make sure the Morth is clearly visible and facing camera (they have a tiny eye or opening, but just having the spiky ball centered should suffice). Include its spikes clearly against the background. Morths are not rare, so you can retry if needed.

Octorok
An octopus-like enemy that spits rocks or bombs. In Wind Waker, small Octoroks appear in Forest Haven’s inner pond and in some shallow water areas (and in the Forbidden Woods).
How to acquire: The easiest place is inside Forest Haven – in the waters at the base of the Deku Tree, Octoroks pop up and spit rocks at you as you hop between lilypads. Also, in the entrance of Forbidden Woods, some Octoroks shoot from the water.
Tips: Stand on a lilypad in Forest Haven and wait for an Octorok to surface and face you. When it spits a rock, bounce it back with your shield (or just sidestep it) – during that moment, the Octorok will pause facing you. Take the pictograph of it with its head above water. Make sure to get close enough so the Octorok isn’t tiny in frame (zoom in on its round purple body with eyes). If you struggle with timing, you can also freeze one with the Boomerang (one hit knocks it out for a second) or Deku Leaf (blow wind to stun it) and snap quickly. Just ensure it’s above water and facing roughly toward you.

Peahat
A small flying plant-like enemy with spinning blades (leaves).
How to acquire: Peahats are common in the Forbidden Woods (first rooms, and some rooms where they hover around until you boomerang them). They also populate certain sea platforms and Mother & Child Isles exterior.
Tips: Use the Deku Leaf on a Peahat to disrupt it – one puff of wind will cause a Peahat to stop spinning and float slowly for a couple of seconds. In that window, take a pictograph of it facing you. They have a single eye-like center; try to get that side toward the camera. Another method: in Forbidden Woods, often one or two Peahats approach at a time – get your camera ready, target one as it comes near. These aren’t too large, so zoom moderately. Including the entire Peahat (leaf rotor and body) is ideal. They usually hover at eye level when close. (Later in the game, the Hookshot can yank off their leaves, leaving them stunned on the ground – an easy photo op if you have that.)

Poe
A ghostly enemy with a lantern, found in dark areas like the Earth Temple. Poes float and can turn invisible.
How to acquire: Go into the Earth Temple. In the first few rooms with coffins, Poes will appear (often out of coffins when you approach). There’s a particular room where a Poe (or several) roam after you shine light to remove some curse fog.
Tips: Poes can turn invisible, so catch them while visible. One trick: use the Mirror Shield or a Light to make a Poe solid (exposed), then don’t kill it – while it’s recoiling visible, snap the pictograph. Another tip from the Earth Temple: in the stalfos room (with coffins), eliminate other enemies like ReDeads or Moblins first so they don’t photobomb. Then, when a Poe is alone, stand a good distance and photograph it head-on. Poes carry a lantern – often their face is visible within the hood. Get that facing you and it counts. They bob around, but are slow, so take your time to frame it. If multiple Poes, try luring one away. Only one Poe figurine is needed (no separate colors in WW).

Rat
Plain old rats that scurry around, often stealing rupees or bait.
How to acquire: Rats appear in many caves and dungeons. For instance, in the basement of the Forsaken Fortress and in the Windfall Island escape tunnel (Tingle’s Cell), rats pop out. Also, you’ll find them in the Tower of the Gods (they’ll drop bombs on you) and in some fairy island interiors.
Tips: Use bait to lure a rat out into the open. Sprinkle some All-Purpose Bait near a rat hole (small holes in walls) – a rat will usually run out and eat the bait, standing relatively still. While it’s busy munching (and facing you, since they turn around when eating bait), take a pictograph. If you have no bait, you can also chase a rat until it pauses and turns to hiss at you – that’s a moment to capture its face, but it’s tougher. The bait method is very reliable. Ensure the rat is not too tiny in the frame; you may have to crouch a bit or zoom in. (The Rat figurine counts for all rats, including the Bombchu-type ones.)

ReDead
Ghoulish, zombie-like creatures that lurk in tombs (they paralyze Link with a scream).
How to acquire: ReDeads appear in the Earth Temple (coffin chamber, dark rooms after the Mirror puzzles) and also in some secret caves (like beneath the Oasis cabana). In Earth Temple, there’s a room full of coffins and ReDeads that emerge from sarcophagi.
Tips: ReDeads are slow-moving. Do not get too close, or they’ll scream and freeze you (which ironically could give you a steady shot, but it’s risky). Instead, use the Hookshot on a ReDead from a distance; in Wind Waker, hookshotting a ReDead pulls you to it but also stuns it for a brief moment. When it’s stunned and looking at you, quickly take a pictograph. Alternatively, shine light on it with the Mirror Shield to stun it. Make sure you capture its whole horrific form — the desiccated body and face with gaping mouth. Often they do a sway or slump animation; catch it when upright if possible. The key is good lighting (use light sources in the Earth Temple) and keeping your distance so it doesn’t scream right when you snap (though even if it does, as long as your camera was already out, the photo can still register). Only one figurine for ReDead, as they are all the same type.
Seahat
A giant flying fish-like monster that patrols the ocean skies. They are like oversized Peahats of the sea.
How to acquire: Seahats are commonly found near the Flight Control Platform (they swarm as you approach that mini-game island) and around other certain quadrants (Angular Isles, etc.). They are big, green, propeller-tailed fish that glide above water and will ram your boat.
Tips: Seahats can be dangerous because they come in groups and knock you off the boat. A good approach: sail to Needle Rock Isle or Seven-Star Isles – regions known for Seahats – then slow down. When you see a Seahat circling, use your Boomerang to hit it once (that will stun it briefly and cause it to hover lower). While it’s stunned and facing somewhat your direction, take a pictograph from your boat. Alternatively, if you’re at Flight Control, climb the ladder to the contest platform and look down at the Seahats – one might face upward toward you, allowing a photo from above. Just ensure the Seahat’s features (its big eyes and rotors) are visible. Another tip is to use bait in the water – sometimes Seahats will approach a floating bait (though usually that’s for Big Octo triggers). The simplest: one boomerang hit causes a Seahat to pause without killing it; that’s your moment to photograph. Include as much of its body as possible; you might see it from the side, which is fine if its face is somewhat visible. Since they tend to travel in packs, try to isolate one so others aren’t in frame.
Hyrulean Hall (Bosses & Mini-Bosses Figurines)

This hall contains all the bosses and major enemies of the game – many of these have limited chances to photograph, so plan accordingly. It’s called “Hyrulean” here because most are tied to Hyrule’s legends or key story battles. For bosses, you often have only the boss fight (or a second chance in Ganon’s Tower) to get the pictograph. Use the Deluxe Picto Box’s color framing assistant (in Wind Waker HD a gold border appears when the photo will be accepted) if available, or be ready to save/reset after a final battle if needed.

Big Octo
A massive squid with many eyes that lurks in the ocean.
How to acquire: There are six Big Octo locations across the Great Sea (you find them by spotting seagulls circling on the water). When you sail into the seagull swarm, the Big Octo will surface and attack. Important: You must take a pictograph of a Big Octo before you defeat all of them on the map. Once a specific Big Octo is killed, it’s gone for good, and if you kill all six without a photo, you’ll miss the figurine. So, when you engage a Big Octo, do not fully kill it until you get a picture.
Tips: As soon as the Big Octo appears (the camera will rotate to show the giant squid with its glowing eyes), equip the Picto Box. The Big Octo has a large body that rotates around your boat. Try to get as much of the Octo in frame as possible – including some of its tentacles or multiple eyes – with it facing you if you can. One strategy is to stop your boat and wait until the Big Octo’s face (the side with most eyes) is above the water and facing the camera, then snap it. You can also allow it to suck you in closer (it creates a whirlpool) which kind of centers it; just don’t wait too long or you’ll Game Over by being swallowed. After taking the pictograph, you can finish it off normally. If you already defeated all Big Octos, the only hope is Lenzo’s shop in a Second Quest (but Lenzo typically sells only character pictographs, not Big Octos). So make sure to get this during one of the encounters.

Darknut (Standard)
A knight-like armored warrior, tall and clad in heavy armor with a large sword (this variant has no shield).
How to acquire: Darknuts first appear in the Tower of the Gods (the black-armored ones without shields) and later in Ganon’s Tower. The one in Tower of the Gods miniboss room is a good opportunity. Also, in the final maze in Ganon’s Tower, you face multiple Darknuts.
Tips: Don’t knock off its helmet or armor before photographing it. It’s best to capture a Darknut when it is fully armored, as that clearly identifies it. In Tower of the Gods’ mini-boss fight, for example, lure the Darknut into starting an attack (it will run at you). As soon as it starts running or just after a missed swing, run a bit away, pivot, and snap a pictograph of it coming toward you. Make sure the Darknut is facing you and its whole body fits in the frame. They often pause for a moment after swinging their sword – a great moment to take the shot head-on. Also, ensure no other enemies (like Keese or other Darknuts if in a group fight) are in the frame. The standard Darknut has no shield on its arm and typically appears earlier in the game (black/gray armor). Carlov considers it a distinct figurine from the shielded and caped ones, so get this one whenever you encounter the lone Darknut without a shield.
Darknut (Shielded)
A variant of Darknut that carries a large shield (often with lighter silver armor).
How to acquire: Shield-carrying Darknuts start appearing in the Earth Temple (the ones that accompany Wizrobes or are in the final stretch) and in Hyrule Castle and Ganon’s Tower. There’s one in the Earth Temple’s final big room (with the two Darknuts that spawn after light puzzles) that has a shield.
Tips: Use a similar strategy as for the standard Darknut: while it’s intact with armor and shield, get a good angle. In the Earth Temple, for instance, stun or avoid the other enemies (Bubbles) so they don’t interfere. Do not knock off its shield or helmet. Position yourself so the Darknut with the shield charges at you (you can drop Medli to avoid her attacking it, which could knock off armor). As it gets close with its shield up, take the pictograph capturing its front. You might need to aim a bit so that the shield isn’t covering its entire body – ideally, get a moment when it pulls the sword back or is between swings, so its profile is visible next to the shield. This will clearly show it’s the shielded variant. If multiple Darknuts (shielded and unshielded) attack together, separate them by running around a pillar, and photograph one at a time. The shielded Darknut figurine is separate, so ensure you specifically submitted a photo of a Darknut with a shield on its arm.
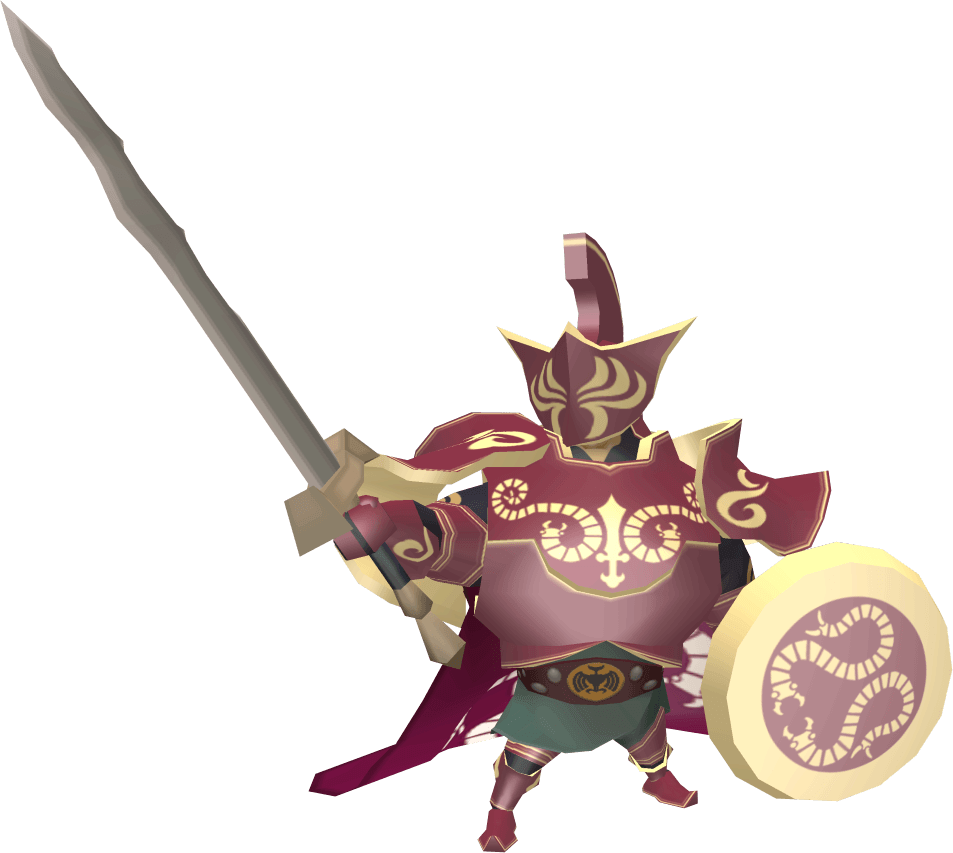
Darknut (Mighty, caped)
The strongest Darknut type, distinguished by a red cape and often a crested helmet. Sometimes called the “Mighty Darknut,” these appear late-game (e.g., in Hyrule Castle’s frozen fight or in Ganon’s Tower maze).
How to acquire: One place to find caped Darknuts is in the basement maze of Ganon’s Tower – by taking a specific wrong turn path in the Phantom Ganon maze, you can enter an optional room with two caped Darknuts. This is essential because in normal playthrough, you only fight caped Darknuts during the final Hyrule Castle assault (when time is frozen – which is a one-time cutscene battle) and in the final boss rush. So use the Ganon’s Tower secret room: From the maze start, go through doors in this sequence – back, left, forward, left, forward – and you’ll enter a chamber with two Mighty Darknuts.
Tips: In that secret room, you have two caped Darknuts. Ideally, defeat or lure away one and focus on photographing the other (you can also get both in one picture, but it’s risky to have them together). These Darknuts have large shields as well, and capes that make them visually distinct. Use the Hookshot on one’s cape – pulling the cape off will actually remove its armor instantly, which you do NOT want before the photo. So perhaps don’t hookshot – instead, bait one into charging while the other is far. When one is coming at you frontally, quickly take its pictograph with the cape visible behind and the full armor on. The red cape and often a horned helmet indicate it’s the mighty variant. If you accidentally knock off the armor or helmet, that’s not ideal for the photo, but Carlov might still accept it if the cape is still on (the cape usually stays until you fully defeat them). However, for safety, try to get it while armor is intact. If you miss in Ganon’s Tower, note that no new caped Darknuts respawn after you clear that room. But you can save and reset (without saving post-credits) after the final battle to retry. It’s best to get it in that optional room or, if on Second Quest, in Hyrule Castle before pulling the Master Sword (in Second Quest, you have the camera during the “frozen” Hyrule fight and could snap them then). This figurine is one many people miss, so prioritize it.

Ganondorf (Ganon)
The final boss – the King of Evil himself, in his human form.
How to acquire: You have two ways: either buy a Legendary Pictograph of Ganon from Lenzo on Windfall after beating the game (Lenzo sells “Ganon” on a certain moon night), or take a pictograph during the final battle against Ganondorf in Hyrule. It’s safer to do Lenzo’s if available on Second Quest, but it is possible to photograph Ganondorf in the moment. Lenzo will sell Ganondorf’s pictograph on nights when a specific moon phase occurs (commonly a full moon or something – check each night).
Tips: If you opt to photograph Ganondorf yourself, note that this is during the final fight on top of Ganon’s Tower. He’s very aggressive and the fight ends with a cutscene once he’s defeated. One approach is to get Ganondorf’s health low, then stop and pull out the Picto Box. Ganondorf often does a brief laugh or taunt if both you and Zelda hang back. Try to capture him during a moment he faces you with his guard down (perhaps right after he attacks and misses, or during a laugh). You want a full-body shot ideally, but at least from the waist up including his face. Immediately after taking it, you must save your game (pause and hit save) and reset (because once you deliver the final blow, the game ends and you can’t save afterward). Actually, in the GameCube version, you cannot save during the final battle, so the trick was to take the photo, then let Ganondorf defeat you (or reset the console) so that you return to before the fight with your photo in hand. Then you could go back up and finish him later. A simpler method: in Second Quest, Lenzo sells Ganondorf’s pictograph, eliminating the risk. Either way, Ganondorf’s figurine also covers his alter-ego “Ganon,” so you don’t need a separate Puppet Ganon photo for that name (Puppet Ganon is separate). If using Lenzo’s pic, just buy on the night when the moon is right (players report Lenzo sells Ganon on a full moon or on a night with a unique pattern after getting all other legendary pics). Carlov will accept it straightforwardly. If doing it manually, remember to ensure the photo meets all criteria (color, facing camera) and then get out of the fight safely. This is arguably the hardest snapshot because of timing, so many opt for Lenzo’s.

Gohdan
The boss of the Tower of the Gods – a giant stone head with detached hands, like a guardian deity.
How to acquire: After you defeat Gohdan in Tower of the Gods, his head remains mounted on the wall (with eyes dark). You can photograph Gohdan’s face on the wall after the battle – this counts for the figurine. If you forgot, you can also fight him again in Ganon’s Tower boss rush (Phantom Ganon refights). But the post-fight method is easiest.
Tips: Once Gohdan is beaten, don’t step into the warp immediately. Instead, stand in the boss room and face the wall where Gohdan’s face is now dormant. Take a pictograph of the big head from a reasonable distance so that you get the whole face in frame. Even though it’s inert, Carlov will accept it (the game recognizes that as Gohdan’s form). If you try during the fight itself, it’s hectic with moving hands – not needed. Just do it calmly afterward. The eyes don’t need to be glowing; as long as the sculpted head is there it qualifies. This is a known trick to get Gohdan easily. If you missed that and are now past Tower of the Gods, in Ganon’s Tower there’s a room where you re-fight Gohdan’s head (shooting targets again). You could snap a photo then, but the post-fight approach the first time is stress-free.

Gohma
The boss of Dragon Roost Cavern, a giant magma-covered lava scorpion that attacks with its claw and eye.
How to acquire: In the initial Dragon Roost Cavern fight, you likely didn’t have the Deluxe Picto Box yet (unless on Second Quest). Thankfully, you can fight Gohma again in Ganon’s Tower boss rush. In Ganon’s Tower, when you enter the door representing Dragon Roost, you’ll battle Gohma once more. Use that chance to photograph it.
Tips: At the start of the rematch, Gohma will roar and not attack for a brief moment – that’s your opening to get a picture. Stand a medium distance away (so you can fit as much of Gohma as possible) and line up the camera with Gohma’s central eye and head facing you. Take the pictograph quickly before it starts moving too much. You do not need to get the entire tail; focus on the body, claws, and eye. One claw might be raised – that’s fine as long as the eye is visible. If you attempt during the initial playthrough (Second Quest scenario), do it at the very beginning of the fight. After one or two of Valoo’s tail pulls, Gohma might break armor and move faster, making it harder to photograph. So ideally, the Ganon’s Tower refight or a quick snap right at fight start works. The Gohma figurine will show the whole lava bug, but Carlov just needs a clear pic of it facing you.

Helmaroc King
The enormous masked bird that serves as the boss of the Forsaken Fortress.
How to acquire: This is a one-chance photo. You must photograph Helmaroc King during the battle atop the Forsaken Fortress (after climbing the tower). If you miss it, Helmaroc King cannot be re-fought (it doesn’t appear in Ganon’s boss rush). Lenzo does not sell Helmaroc pictures, so your only fallback would be tingle tuner or hoping someone sends it via Tingle Bottle in WWHD – very unreliable. So ensure you get it when you fight it.
Tips: This fight has two phases: first, Helmaroc chases you up the spiral ramp (but you likely can’t snap a good shot there as you’re running), and second, you fight it on the rooftop arena after breaking its mask. Plan to take the photo in the rooftop phase. Before finishing it off, pull out the Picto Box. Helmaroc will periodically do swooping peck attacks or get stunned when you hit its head. A safe moment: use the Skull Hammer to knock off its mask completely (the fight isn’t over yet, it will squawk with its exposed face). When Helmaroc reels from losing its mask, step a ways back and take a pictograph of its now-exposed giant bird face as it faces you, wings outstretched. Alternatively, wait until it’s about to peck – you can lure it to one end of the arena, then run to the opposite end so it turns toward you and pause to take the shot as it starts a charge. It’s huge, but try to get as much as possible in frame, especially the head. This is your only chance. After you’re sure you got a good picture, feel free to deliver the final blows. (If you’re on GameCube, one method was to save during the fight using Tingle Tuner cheats or simply risk not saving and doing Second Quest if missed – but in general, prioritize getting this shot right then and there.)

Jalhalla
The boss of the Earth Temple – a giant ghost composed of many Poes (looks like a big balloon-like phantom with a mask).
How to acquire: You can photograph Jalhalla during the Earth Temple boss fight. If you miss it, you do get another chance in Ganon’s Tower boss rush (there’s a door to refight Jalhalla).
Tips: At the very start of the fight, Jalhalla will be fully visible and not yet attacking – he often just laughs or floats slowly at first. Immediately take out the Picto Box and snap a photo of Jalhalla as soon as the battle begins. Aim to get his whole body (the big round ghost with tiki mask) in the frame facing you. This initial moment is best because once you start shining light on him, he breaks into Poes and bounces around, which complicates things. If you didn’t do it initially, in the Ganon’s Tower rematch, again, do it right when the battle starts, or after you’ve stunned him with light before you throw him on spikes – when he’s stunned and stationary, quickly get a picture from the front with his mask facing you. Ensure no pillars block the view. Jalhalla’s pretty large, so back up enough. The figurine will show his full form, so include that if you can.

Kalle Demos
The boss of the Forbidden Woods – a monstrous plant with a giant central flower bulb and many tentacles.
How to acquire: Like Gohma, Kalle Demos can be refought in Ganon’s Tower. If you didn’t snap it during the Forbidden Woods (most likely you couldn’t, due to no camera yet), do so in the boss rush in Ganon’s Tower.
Tips: In Ganon’s Tower’s Forbidden Woods door, you’ll fight Kalle Demos again. At the start of the fight (before you cut any vines), the giant flower bulb hangs from the ceiling. Position yourself to see the bulb head-on (it has a blue eye-like center) and take a pictograph immediately or after cutting just a few vines if you need it lower. You actually don’t need the entire array of tentacles in the picture – focusing on the central bulb with some vines around it is sufficient, as that’s clearly Kalle Demos. It might be easier to cut a few of the supporting vines so that the bulb drops closer to ground level but do not defeat it entirely. When it’s low enough and possibly stationary (it might thrash slowly), snap the photo of the bulb (with its big pink petals) facing you. Another approach: before cutting anything, stand under it and angle up – you might capture the underside, but Carlov likely wants the “face” of the plant (the top with the eye). So better to weaken it until it drops and exposes the top. In the original fight, if you had the camera in Second Quest, after it drops to ground and opens its petals is also a fine time. One photo of Kalle Demos suffices for the figurine.

Moblin
The big pig-like guard enemies armed with spears. (They appear in Forsaken Fortress and various caves.)
How to acquire: Moblins are quite common, but do note that a Moblin figurine is separate from the smaller Bokoblins and Miniblins. Moblins patrol the Forsaken Fortress both times you go, and later appear in Ganon’s Tower maze, Hyrule “escape” scene, Savage Labyrinth, etc.
Tips: A good and safe place is in the first room of the Earth Temple. There are two Moblins patrolling a dark room with coffins early in that dungeon. From the entrance, you can glide down with the Deku Leaf, and they might not notice you right away. Pick one Moblin and zoom in for a shot while it snorts around unaware. If it notices you, you can also stun a Moblin by throwing Deku Nuts (if available) or use the Hookshot on it (hookshotting a Moblin’s back will yank you to it but also stun it a moment). Take the pictograph when it’s facing you – Moblins have large pig snouts and lanterns. They’re tall, so get a bit of distance or angle up to include head to toe. Another easy opportunity: in Forsaken Fortress (second visit), once you have your sword, there’s a scripted Moblin fight in a hallway – after defeating it, more Moblins won’t spawn, so maybe catch one before killing it. However, the Earth Temple setup is ideal since you can leave and re-enter to respawn them if needed. Make sure not to confuse Moblins with Mighty Darknuts in the figurine list; Moblins are just the big pig guys.

Molgera
The boss of the Wind Temple – a giant sand worm with a fearsome maw.
How to acquire: You fight Molgera at the end of the Wind Temple, and again one form of it appears in Puppet Ganon’s sequences (but that likely doesn’t count for a figurine). Fortunately, Molgera can also be refought in Ganon’s Tower boss rush (last door).
Tips: In the Ganon’s Tower refight, as soon as Molgera dives and the battle starts, do the following: run to a spot away from the spawning sand swirl, and wait for Molgera’s head to surface for the first time. The moment Molgera pops its head and opens its jaws with that long pink tongue out, take a pictograph from a distance that shows its face and as much of its body as possible. Ideally, you want to be far enough to capture the head and part of the wriggling body, but close enough for details. One method is: don’t move at start, Molgera will come up beneath you – but that might send you flying and spoil the shot. Instead, stand just at the edge of the arena, Molgera will surface somewhere and pause to roar. That’s when you click. If you miss it at beginning, you can also deliberately bait it: run around until Molgera’s fin surfaces chasing you, then quickly turn and photograph as it lunges out with mouth open. Use the Hookshot on Molgera’s tongue only after you’ve taken the picture, because once you start damaging it the battle gets chaotic with mini Molgeras. A well-timed photo at the start (Molgera roaring with its full head out of sand and maybe some body loops visible) is the best. Carlov just needs to identify it; the giant toothed maw is a giveaway.

Mothula
A large moth-like mini-boss creature with one eye, found in Forbidden Woods and occasionally summoned by Wizzrobes.
How to acquire: The Forbidden Woods mid-boss is a winged Mothula. There are also wingless Mothulas (just crawling ones) in later rooms of Forbidden Woods. And Wizzrobe mini-bosses can summon Mothulas in Wind Temple. For the figurine, both winged and wingless count as “Mothula.” The easiest is to get the Forbidden Woods mini-boss (the one with wings in the circular arena).
Tips: In the Forbidden Woods, as soon as the winged Mothula is engaged, ignore the smaller moths it spawns for a moment. Focus on the big Mothula: it will often pause to fire projectiles or to swoop. While it’s fluttering facing you, take a pictograph of it. You may need to dodge an attack first, then quickly camera-mode. If you missed that, later in the dungeon you find non-winged Mothulas crawling – those are slower but also constantly moving. You can stun a crawling Mothula with the Boomerang, which will flip it over briefly. As it gets up (facing you), snap a photo. Or let a Wizzrobe summon one (e.g. the Wind Temple mini-boss Wizzrobe often summons a winged Mothula). There, kill other enemies, leave the Mothula alive, and photograph it. Mothula isn’t limited; they appear in Savage Labyrinth as well. Just ensure you get a clear shot of the creature’s body with its eye facing forward. Include the wings if it has them. Carlov’s figurine will depict both forms, but one photo suffices.

Phantom Ganon
The dark ghostly incarnation of Ganon that you encounter as a mini-boss (and repeatedly in Ganon’s Tower maze).
How to acquire: You face Phantom Ganon first in Forsaken Fortress (second visit) – that’s a prime chance. He also appears multiple times in Ganon’s Tower (the labyrinth where you chase him through doors). If you miss at Forsaken Fortress, you have ample chance in Ganon’s Tower (he appears in every room of the maze until you solve it).
Tips: In Forsaken Fortress, after stunning him with a light ball rally, you could take a picture instead of attacking – but that’s risky mid-fight. A better tactic: in Ganon’s Tower maze, after defeating each Phantom Ganon, another door opens and the phantom dissolves – but Phantom Ganon spawns over and over until you finish the maze. Use one of those encounters: for example, from the start of the maze, go through one door incorrectly so you end up fighting him in a loop. When Phantom Ganon spawns, he usually floats for a second before attacking. At that moment, take a pictograph of him. Make sure his whole form is visible – the black armor, cape, and sword. You might catch the tail end of his spawn animation where he’s hovering with his sword raised – that works as long as he’s facing you somewhat. Another safe strategy: purposely let him throw an energy ball, reflect it with an empty bottle or sword, stun him, and when he falls down visible, run up and take a close picture of Phantom Ganon lying on the ground. He remains corporeal for a short time while stunned. Just ensure the angle shows his body (it might be face-down, but Carlov will still recognize it as Phantom Ganon – however facing up might be better). Given how many times you fight Phantom Ganon in the Tower, it’s easy to get a good shot. The figurine description likely mentions his ghostly form, but visually he looks like a black armored phantom of Ganondorf. No other enemy looks similar, so just make sure it’s centered.
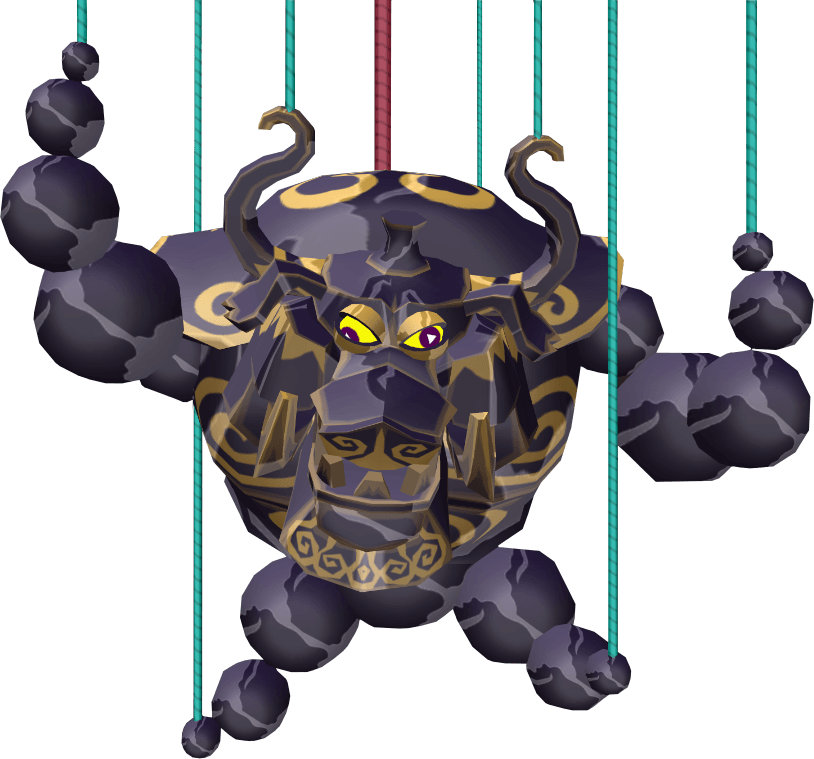
Puppet Ganon
The multi-form puppet boss in Ganon’s Tower – it has a marionette form (blue pig-like creature), a spider form, and a snake form. The figurine covers “Puppet Ganon” which essentially is the marionette (with hints to its other forms).
How to acquire: This one is tough: you only fight Puppet Ganon at the very end, right before final Ganondorf. You must photograph it during that fight. Since you can’t save after that fight (game goes to final battle and ending), the intended way is to do it on a second playthrough with the Deluxe Picto Box available, or get it via a Tingle Bottle from another player in WWHD. Many completionists get it on Second Quest
Tips: Focus on the first form of Puppet Ganon – the big blue pig marionette hanging by string). At the start of that battle, Puppet Ganon swings slowly. Position yourself some distance away, wait until he lowers near the ground and turns toward you, and take a pictograph of the whole puppet’s body including that grinning face and dangling arm). Because he’s huge, you might not fit everything, but get as much as possible. You can also try right after cutting two or three of his strings – he’ll collapse partly and stop moving for a moment, giving you a clearer shot of his upper half. Make sure the lighting isn’t too dark (there’s spotlights in the room, try to catch him under one). If you miss it and defeat him, you cannot get back to that fight in the same file – you’d have to start a second quest. In WWHD, one could hope someone sends the photo via Miiverse (back when it was active). So plan to photograph him before finishing the game. The figurine appears when you start Second Quest and turn it in. Carlov’s figurine will depict Puppet Ganon’s marionette form (and might reference the spider/snake in description). So ensure the marionette is clear – the glowing red core on its tail might not need to be visible, but the more detail the better. This is often the final figurine players get to complete the Nintendo Gallery! Mark the occasion by being prepared in that battle.

Stalfos
Ancient skeletal knights that wield swords (and sometimes shields). They block your strikes and then counterattack with quick slashes. Perfectly timed spin attacks or bombs will break their guard.
How to acquire: Photograph a live Stalfos before defeating it, in any dungeon where they appear. A reliable spot is the Earth Temple second half: after you light the torches in the main hall, a pair of Stalfos armor suits animate and attack.
Tips: Wait for a Stalfos to raise its sword in a block—just as it’s about to strike, back up and snap the photo head‑on. Bombs work great: place one at mid‑distance, lure it over, detonate, then quickly photograph the stunned bones as they reassemble.

Wizzrobe
Robe‑clad sorcerers who vanish in a swirl of smoke, then reappear to unleash fiery or electric blasts. They’re masters of hit‑and‑run magic.
How to acquire: Wizzrobes first show up in the Royal Grove (overworld) and then in the Tower of the Gods and Earth Temple. Photograph one immediately after it teleports back into view.
Tips: Keep your camera locked (L‑target) on the smoke swirl; as soon as the Wizzrobe materializes facing you, fire off a shot. You can predict its reappearances—memorize the pattern (usually three steps clockwise from your position) and be ready with your Picto Box out.
Great Sea Hall (Great Sea Figurines)
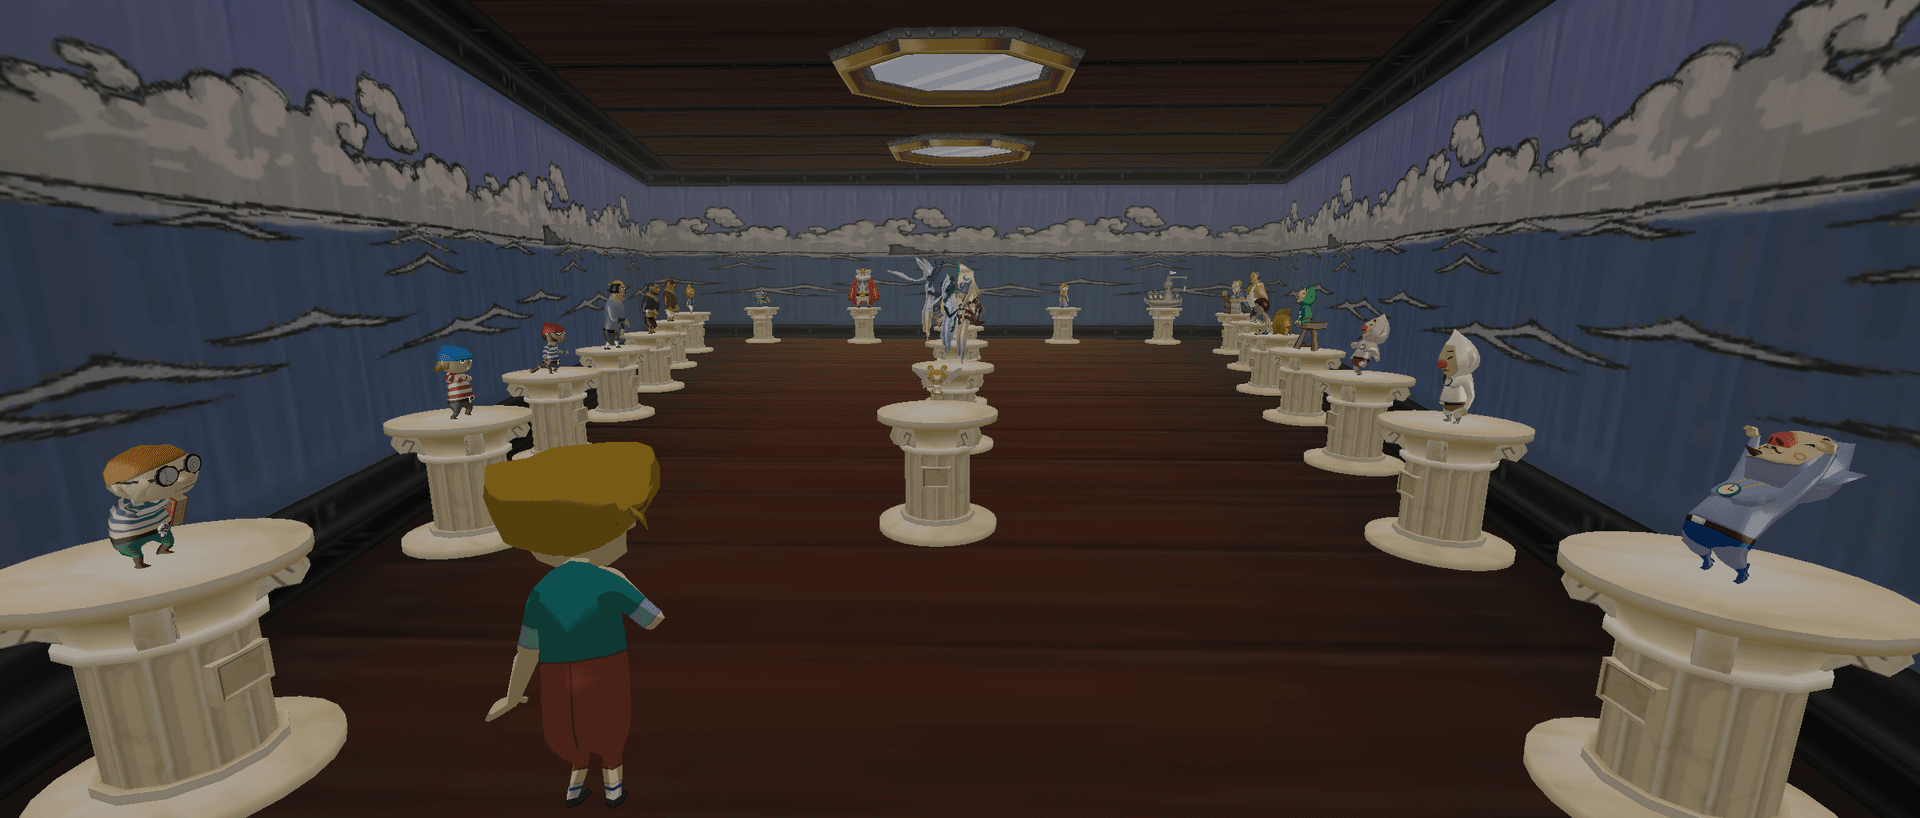
These figurines depict characters and beings from across the Great Sea—pirates, fairies, shopkeepers, and mysterious travelers. Most become available late in the game and require careful timing to photograph during sidequests or optional encounters.

Ankle
Ankle quietly tends the flower beds around Tingle Tower, humming an old proverb—“One may as well hang for a stolen sheep as for a stolen lamb.”
How to acquire: Photograph him kneeling over the blossoms on Tingle Island, any time after you’ve rescued Tingle and revisited the island.
Tips: Wait until he’s bent over a pot of flowers; call his name and he’ll glance up, giving a clean head-on shot without any background clutter.

Beedle
Energetic and ever-optimistic, Beedle dreams of a trading-post empire. He proudly showcases beetles and buzzing bugs at his floating shop.
How to acquire: Snap him while his shop is anchored off Windfall Island (or the next island where he parks).
Tips: Sail in close so he turns to greet you—being on your boat often triggers his full-arm gesture. Zoom tight to frame just Beedle and his wares.

David Jr.
A seasick young adventurer from Windfall, David Jr. washed ashore on Tingle Island with stars in his eyes and a queasy belly.
How to acquire: After the Ghost Ship quest, return to Tingle Tower and photograph him pacing or leaning against the wall inside.
Tips: He pauses mid-pace rubbing his forehead—snap at that moment for a portrait that captures his trepidation and determination.

Fairy
These glowing sprites flutter from fountain to bottle, springing to Link’s aid when hearts run low.
How to acquire: Either photograph a fairy in a bottle at your workshop, or wait beside any Fairy Fountain and shoot a free-flying one right after it heals you.
Tips: For a bottled fairy, place the bottle on a flat surface, stand back, and zoom so the glowing shape fills the frame. For a free fairy, wait until it hovers still for a split second before snapping.
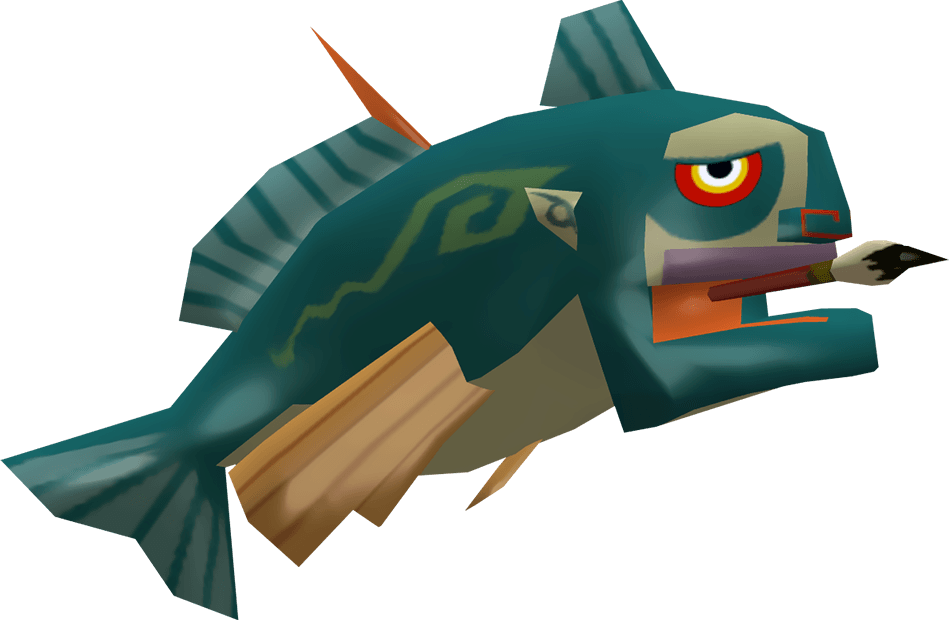
Fishman
Stoic yet loquacious, Fishmen nibble bait from Link’s boat and then gleefully relay (often dubious) ocean lore.
How to acquire: Toss All-Purpose Bait into open water—when a Fishman surfaces and begins to speak, photograph him amid his chat bubble.
Tips: Keep your boat steady; as soon as you hear his greeting tone, switch to camera and snap before he dives again. Zoom enough to include his fins and the speech icon.

Gonzo
Tetra’s hot-headed lieutenant who surprisingly sheds tears at the drop of a hat—his loyalty melts any rough edges.
How to acquire: Photograph him aboard the pirate ship during the rope-jump practice, or while he stands on the quarterdeck after the Forsaken Fortress approach.
Tips: During the mini-game he cheers from the side—call out to make him turn, then frame him against the ship’s rail for dramatic effect.

Great Fairy
Each of the seven Great Fairies hides on a distant isle, offering Link a power-boost that changes the course of your journey.
How to acquire: As soon as one finishes granting you an upgrade (bombs, wallet, quiver), photograph her in the grotto before you leave.
Tips: Wait until her blessing sparkles fade and she lowers her arms—that pause is perfect. Center her beneath the grotto arch and zoom so her flowing robes fill the view.

King of Hyrule (Daphnes Nohansen Hyrule)
Once Hyrule’s sovereign, he now guides Link as the King of Red Lions—his true form revealed in the moonlit throne room.
How to acquire: During the Hyrule Castle cutscene after you’ve played both God’s songs, photograph him in human form before the scene fades.
Tips: The moment the camera lingers on his regal stance, hit the shutter—his robes and crown against the torchlight make for a majestic shot.

Knuckle (Wind Waker HD only)
Tingle’s twin, the child prodigy carver whose studio is the tower’s very head. He’s perpetually unsatisfied—always seeking perfection.
How to acquire: In Wind Waker HD, finish all five Tingle Statues quests, then revisit Tingle Island at dawn and photograph Knuckle carving.
Tips: He appears at sunrise on the tower balcony—go early for soft light. Zoom tight on his chisel and the half-sculpted Tingle emblem behind him.

Loot the Sailor
Weathered from manning the Boating Course, Loot retreats to Windfall’s Café Bar for a stiff drink—and lives in mild fear of Mermen.
How to acquire: Photograph him leaning by the doorway of the Boating Course island hut during daylight.
Tips: Hang back on your boat so he turns to watch you arrive—snap then, and zoom in to capture his sailor’s cap and wary expression.

Mako
Quiet and clever, Mako’s glasses give him superhuman vision—he’s the brains of Tetra’s crew, with a hidden knife stashed in a book.
How to acquire: On Tetra’s ship, find him in the captain’s quarters and photograph him whenever he adjusts his glasses.
Tips: Engage him in conversation; when he pushes his glasses up, that millisecond where his eyes shine through—you’ll get the perfect intellectual portrait.

Niko
The junior pirate, ever-cheerful and a bit reckless, responsible for odd jobs and eager to prove himself.
How to acquire: During the rope-jump tutorial on deck, photograph him as he picks up the rope after a mishap.
Tips: Watch for his little giggle animation when he stumbles—call to make him look up, and frame him against the ocean horizon for a playful shot.

Nudge
Soft-spoken but surprisingly strong, Nudge often counsels Tetra and quietly holds the crew together with his sewing skills.
How to acquire: Photograph him in the pirate cabin or on deck while he’s leaning in to whisper advice to Tetra.
Tips: Pause a cutscene or quietly approach during free-roam—when he turns from Tetra with a nod, that fleeting thoughtful look is ideal.

Old Man Ho Ho
Ever-curious, he scans distant shores through his telescope—always chasing the next grand discovery.
How to acquire: Find him on lookout platforms outside islands like Dragon Roost or Windfall. Photograph him as he peers through his lens.
Tips: Approach slowly so he doesn’t lower it—when he shifts stance or wipes his eye, snap; zoom in enough to include the telescope barrel.

Princess Zelda (Tetra)
Cocky pirate captain by day, rightful heir to Hyrule by revelation—her dual identity defines the adventure.
How to acquire: On deck of her ship, photograph Tetra just before her transformation cutscene in Hyrule Castle, or immediately after she reveals her crown.
Tips: Call her name during free-roam to get her to turn and smile; for the cutscene shot, pause right as the glow builds and her stance is still.

Queen of Fairies
A childlike yet powerful monarch of the fairy realm, she imbues Link’s arrows with fire or ice.
How to acquire: After the Mother & Child Isles fountain grants you elemental arrows, photograph the Queen mid-animation as she raises her wand.
Tips: Wait until the elemental swirl gathers at her fingertips—she pauses for a heartbeat there, perfect for that magical portrait.

Salvage Corp
A band of diving-suit-clad treasure seekers, united by dreams of a colossal haul beneath the waves.
How to acquire: Locate their boat at a sunken-treasure marker (for example, near the Forsaken Fortress). Photograph the crew hauling loot on deck.
Tips: When they grunt and lift a chest as a group, call out; they’ll turn in unison—frame the treasure chest and their suits for a dynamic team shot.

Salvatore
Once a would-be painter, now the architect of Windfall’s squid-hunting mini-game, he juggles maps and paint…and hidden artistic ambition.
How to acquire: Photograph him at the Spectacle Island mini-game hut or inside his shop on Windfall.
Tips: During the squid game, he stands beside the counter—address him and he turns away from his map, offering a crisp three-quarter view.

Senza
The mild-mannered quartermaster who keeps Tetra’s ship running—his quiet words carry more weight than his silent presence suggests.
How to acquire: On deck of Tetra’s ship, photograph him during any cutscene when he’s giving orders or scanning the horizon.
Tips: He often folds his arms after speaking—catch that moment and zoom to isolate his thoughtful pose against the ship’s rail.

Tetra
Bold pirate queen and hidden princess, Tetra embodies both fierce independence and royal destiny.
How to acquire: Photograph her leaning over the rail looking to sea during free-roam or just before the Forsaken Fortress approach.
Tips: Call out so she turns to face you with a confident grin—zoom tight on her bandanna and determined eyes.

Tingle
Map-obsessed dreamer convinced he’s a forest spirit—his green suit and floaty balloon make him unforgettable.
How to acquire: After breaking him out of jail on Windfall, photograph him pacing or consulting his map either inside or on the balcony of Tingle Tower.
Tips: He spins around excitedly when you speak of fairies—snap at the apex of his twirl for a lively, characterful portrait.

Wandering Merchant
Nomadic traders who tuck curios into crates and ply the sea lanes in search of something… profitable.
How to acquire: Photograph one at a merchant boat docked briefly near islands like Greatfish or Mother & Child.
Tips: Engage in trade; as he steps back to show you his wares, snap that relaxed pose with his crates stacked behind him.

Zuko
Tetra’s taciturn lookout whose sharp eyes catch distant signs—no one’s quite sure what he’s thinking, but he always spots trouble early.
How to acquire: On Tetra’s ship, photograph him after a storm or during deck-standing cutscenes when he lowers his spyglass.
Tips: Wait for him to lower the glass and glance your way—zoom in on his hood and intense gaze, cropping out the rolling waves.
Final Reward
Conquering the Nintendo Gallery is a true badge of honor for any Wind Waker fan. Besides the immense satisfaction of seeing every pedestal filled, your final reward is the unique Link and the King of Red Lions figurine, personally awarded by a very impressed Carlov. You’ll officially be a Master Pictographer!

Link & King of Red Lions
This is the final figurine, representing the Hero of Winds and his companion. Carlov gives it to you automatically once you have collected all other figurines and placed them in the Nintendo Gallery. You do not need to photograph Link yourself.