


Boosting Link’s health is crucial for surviving the challenges of Hyrule and the Dark World. You start with 3 Heart Containers. You can find one full Heart Container early on and collect 24 Pieces of Heart scattered across the land. Every 4 pieces you collect automatically form a new Heart Container (giving you 6 extra). Combined with the 10 Heart Containers dropped by major bosses (including Agahnim twice), you can reach a maximum of 20 hearts!
This guide covers the locations of the 1 bonus Heart Container and all 24 Pieces of Heart.
(Note: Prerequisites list key items needed. Access to certain areas or defeating Agahnim may also be implied prerequisites.)
Table of Contents
- Bonus Heart Container
- Piece of Heart #1: Lost Woods – Hidden Hole
- Piece of Heart #2: Kakariko Village – Well
- Piece of Heart #3: Kakariko Village – Blind’s Hideout Basement
- Piece of Heart #4: Kakariko Village – Race Minigame
- Piece of Heart #5: South of Link’s House – Floodgate Control
- Piece of Heart #6: Sanctuary – Western Ledge
- Piece of Heart #7: Desert of Mystery – Eastern Cave
- Piece of Heart #8: Desert Palace – Western Exterior Ledge
- Piece of Heart #9: Zora’s Waterfall
- Piece of Heart #10: Death Mountain – Cave Below Path
- Piece of Heart #11: Death Mountain – Spectacle Rock via Mirror
- Piece of Heart #12: Pyramid of Power – Eastern Ledge
- Piece of Heart #13: Lumberjack’s Tree
- Piece of Heart #14: South Hyrule Field – Ledge via Mirror
- Piece of Heart #15: Graveyard – Ledge via Mirror
- Piece of Heart #16: Village of Outcasts – Chest Game
- Piece of Heart #17: Dark World – Digging Game
- Piece of Heart #18: Dark World Smithy Area – Hammer Stump
- Piece of Heart #19: Death Mountain – Lower Cave Ledge via Mirror
- Piece of Heart #20: Lake Hylia – Island via Mirror
- Piece of Heart #21: Misery Mire – West Building Chest
- Piece of Heart #22: Desert of Mystery – Ledge via Mirror
- Piece of Heart #23: Death Mountain – Floating Island via Mirror
- Piece of Heart #24: Turtle Rock – Exterior Ledge via Mirror

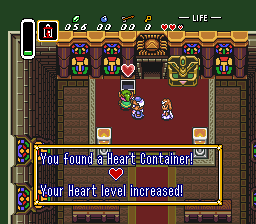
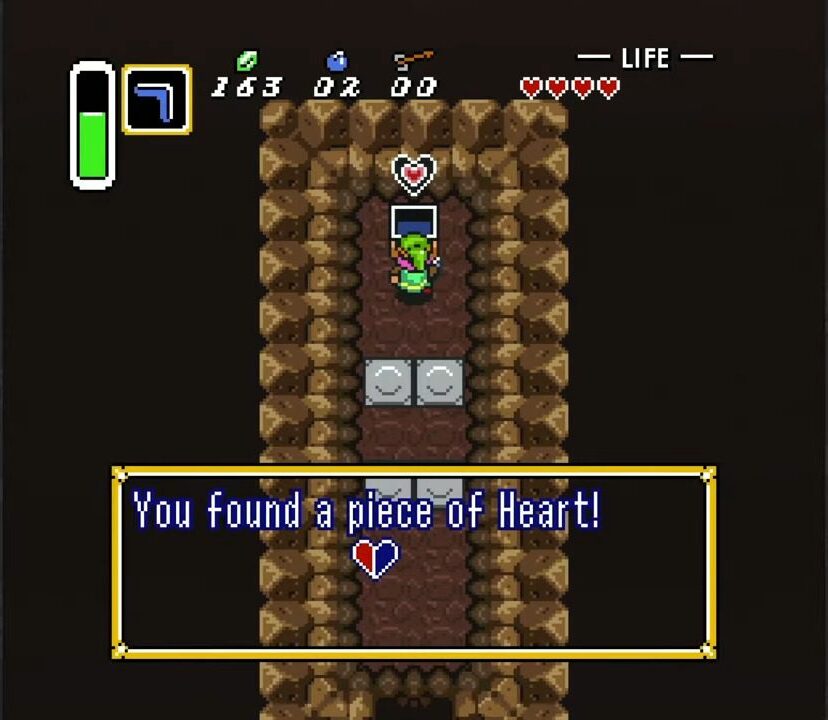
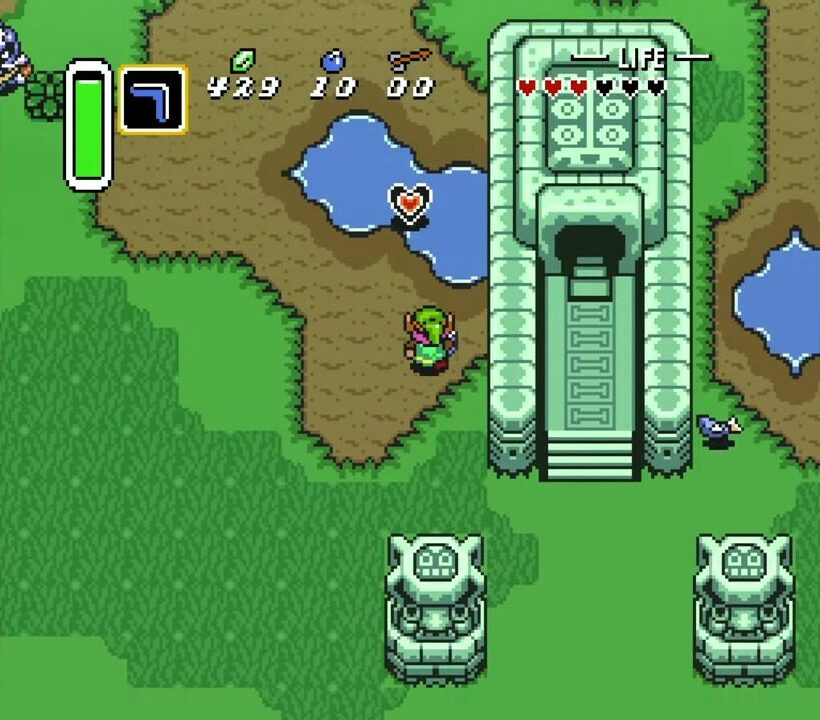
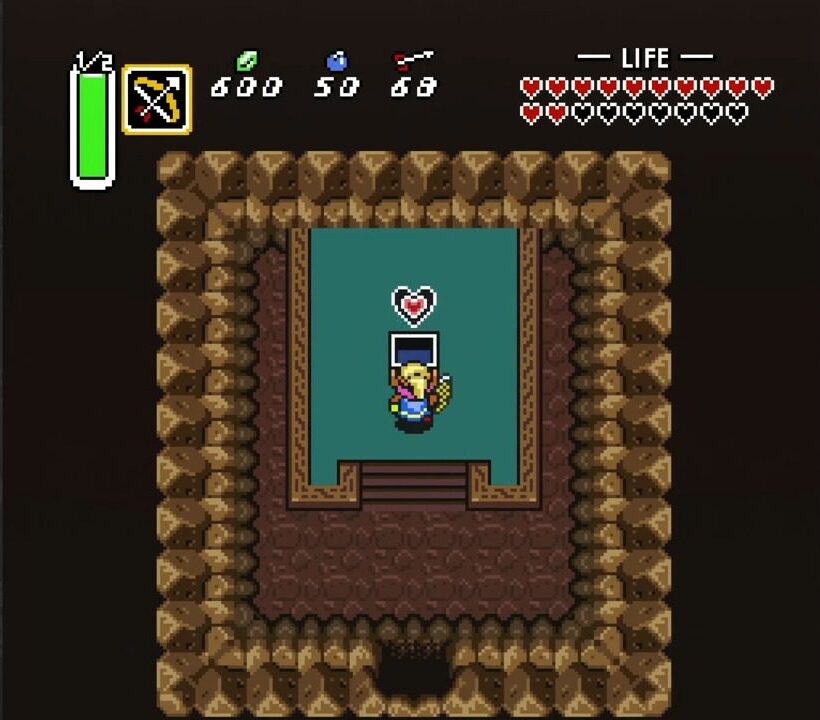
Bonus Heart Container (1 Total)
Location: Sanctuary
How to Get: After rescuing Princess Zelda from Hyrule Castle sewers and escorting her to the Sanctuary, check the chests inside. The one on the left holds a full Heart Container.
Requires: Escort Zelda to the Sanctuary.
Pieces of Heart (24 Total)

Piece of Heart #1: Lost Woods – Hidden Hole
Location: Lost Woods (Northwest Section)
How to Get: From the southern entrance of the Lost Woods, head north past the area with multiple Master Sword decoys. Find a hollow log structure with bushes behind it. Cut the bushes and drop into the revealed hole.
Requires: Access to Lost Woods.
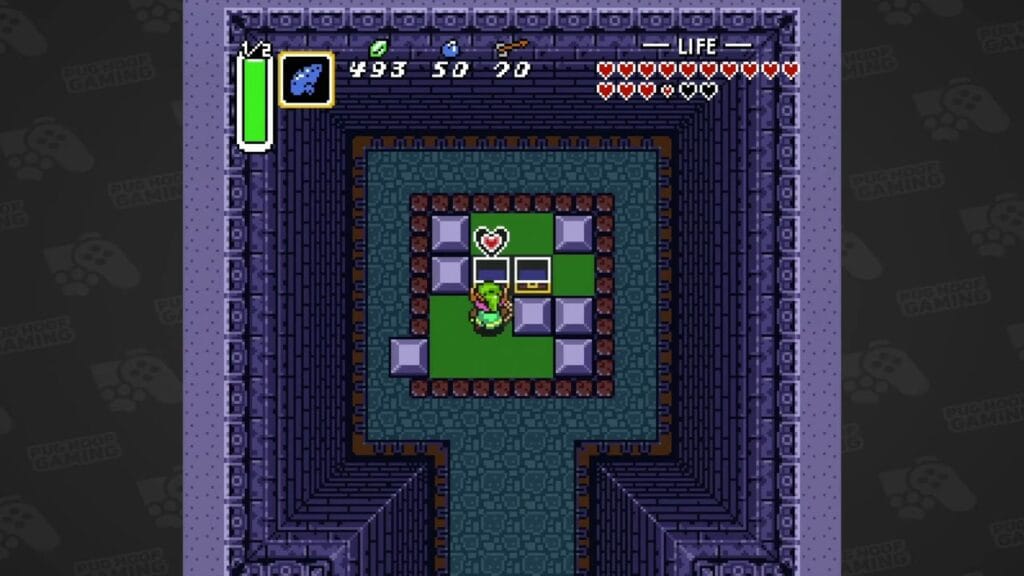
Piece of Heart #2: Kakariko Village – Well
Location: Kakariko Village (Near northwest exit/Fortune Teller)
How to Get: Find the well with a stone ledge above it. Jump off the ledge into the well. Inside, use a Bomb on the cracked northern wall. The piece is behind pots in the revealed room.
Requires: Bombs.
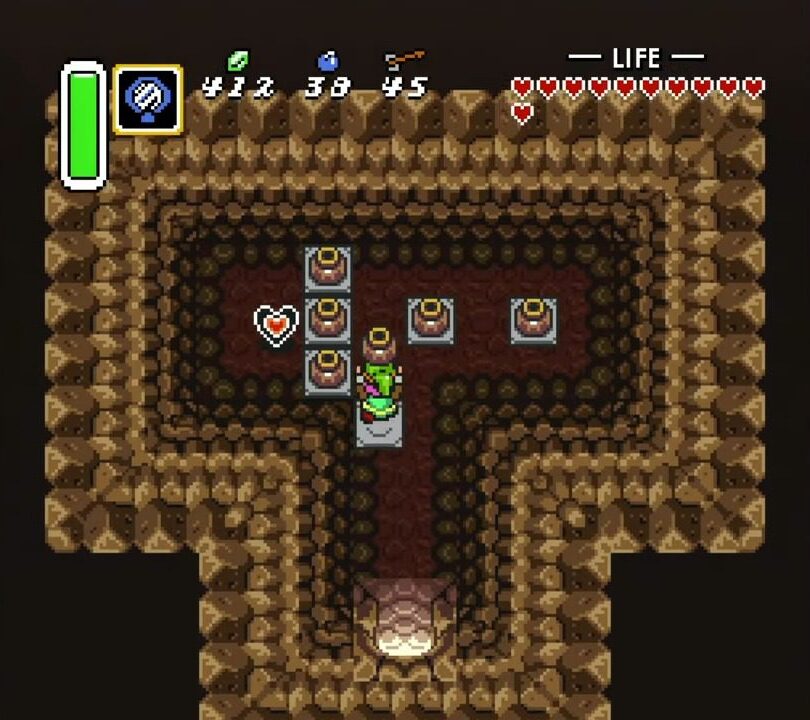
Piece of Heart #3: Kakariko Village – Blind’s Hideout Basement
Location: Kakariko Village (House south of the well, noticeable cracked wall near entrance).
How to Get: Enter the house and go downstairs to the basement. Use a Bomb on the cracked northern wall. The piece is behind pots in the revealed room.
Requires: Bombs.
Piece of Heart #4: Kakariko Village – Race Minigame
Location: South edge of Kakariko Village (long building south of the Library/Street Merchant).
How to Get: Enter the long house. Use a Bomb on the cracked western wall. Go through the hole to the outside area. Talk to the running woman to start a race. Dash east through the obstacles using the Pegasus Boots. Reach the finish sign within 15 seconds to win the Heart Piece.
Requires: Bombs, Pegasus Boots.

Piece of Heart #5: South of Link’s House – Floodgate Control
Location: Small stone building south of Link’s House and west of the Great Swamp.
How to Get: Enter the building. Push the center block up, then push either the left or right block aside. Go north and pull the right-hand lever. Exit the building. The water outside will have drained, revealing the Heart Piece.
Requires: Access to the area.
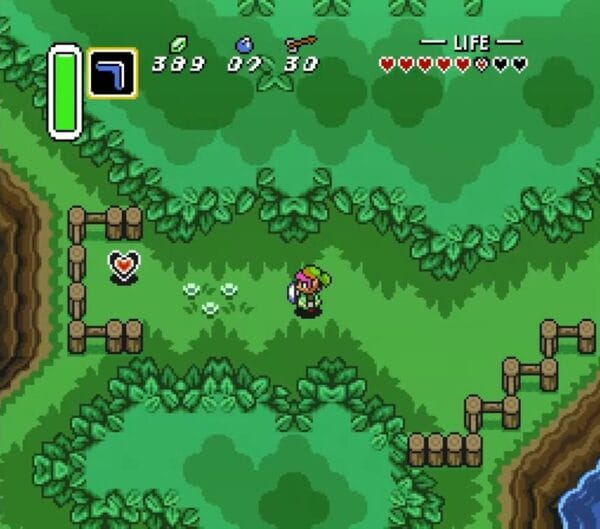
Piece of Heart #6: Sanctuary – Western Ledge
Location: Ledge overlooking the Sanctuary from the west.
How to Get: Go north from the Magic Potion Shop (east of Sanctuary) onto the elevated path. Follow this path west, above the Sanctuary entrance. You’ll see a pile of rocks. Dash into them with the Pegasus Boots to reveal the Heart Piece.
Requires: Pegasus Boots.
Piece of Heart #7: Desert of Mystery – Eastern Cave
Location: Cave entrance along the northern cliff face in the main Desert of Mystery area (east side).
How to Get: Enter the cave. Progress until you find Sahasrahla (the old man). In his room, use a Bomb on the cracked southern wall and enter the hidden room.
Requires: Bombs, Book of Mudora (to enter Desert).
Piece of Heart #8: Desert Palace – Western Exterior Ledge
Location: Ledge on the western side of the Desert Palace exterior.
How to Get: Enter the Desert Palace dungeon. From the entrance hall, go north one room, then west one room. In this room with Beamos, go south through the door to exit onto the exterior ledge. Walk south on the ledge to find the Heart Piece.
Requires: Book of Mudora (to enter Desert).

Piece of Heart #9: Zora’s Waterfall
Location: Path west of the large waterfall below Zora’s Domain.
How to Get: Reach Zora’s Domain (requires Power Glove to lift rock near Witch’s hut, or Flippers + Hammer access via Dark World). Purchase Zora’s Flippers from King Zora for 500 Rupees. Swim south from King Zora, going over the first small waterfall. Before the next *large* waterfall, stay to the left to find a small patch of land. Follow this path south.
Requires: Power Glove (or alternative access), 500 Rupees, Zora’s Flippers.
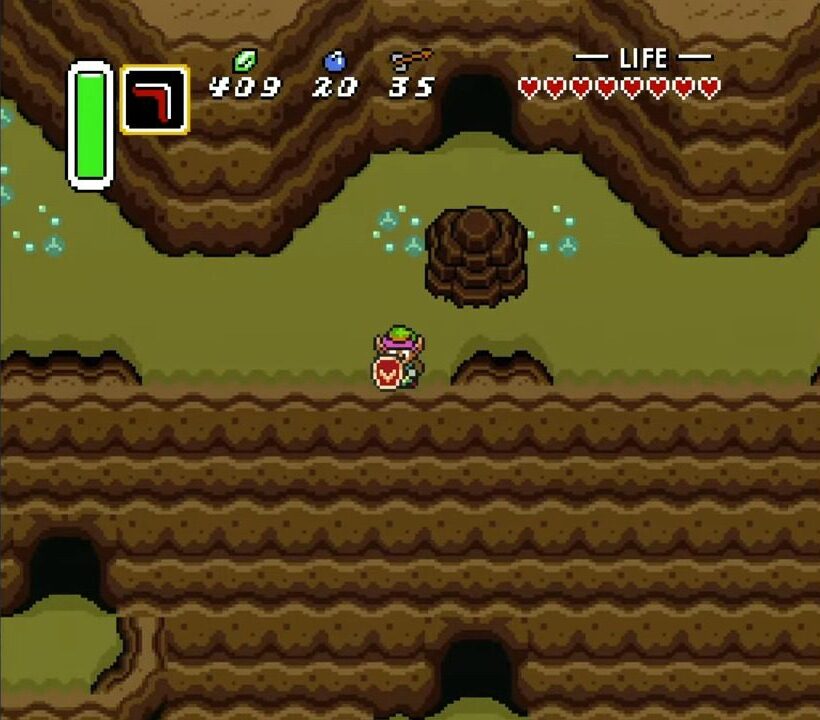
Piece of Heart #10: Death Mountain – Cave Below Path
Location: Cave entrance on a ledge below the main path on West Death Mountain (near Spectacle Rock).
How to Get: Ascend the first long ladder on Death Mountain. Head right along the main path. Look for a spot where you can carefully drop down south onto a lower ledge (just west of Spectacle Rock’s location). Enter the cave on this ledge.
Requires: Access to Death Mountain.
Piece of Heart #11: Death Mountain – Spectacle Rock via Mirror
Location: Top of Spectacle Rock (Light World).
How to Get: Reach the permanent warp tile on Death Mountain (Light World, near where Tower of Hera is). Step on it to warp to the Dark World (Link becomes a bunny). Walk slightly southwest onto the patch of ground with a distinct circular pattern. Use the Magic Mirror. You will reappear on top of Spectacle Rock in the Light World, next to the Heart Piece.
Requires: Access to Death Mountain warp tile, Magic Mirror, Defeat Agahnim 1.


Piece of Heart #12: Pyramid of Power – Eastern Ledge
Location: Ledge on the east side of the Pyramid of Power (Dark World).
How to Get: Immediately after Agahnim sends you to the Dark World atop the Pyramid, walk down the first set of stairs. Head east (right) and drop down the ledges. Continue east and follow the path north along the side of the Pyramid.
Requires: Defeat Agahnim 1.

Piece of Heart #13: Lumberjack’s Tree
Location: The unique-looking tree near the Lumberjacks’ house (north of Kakariko Village).
How to Get: After defeating Agahnim 1, the Lumberjacks will be gone. Dash into this specific tree with the Pegasus Boots. The leaves will vanish, revealing a hole in the trunk. Drop down into the hidden cave below.
Requires: Pegasus Boots, Defeat Agahnim 1.

Piece of Heart #14: South Hyrule Field – Ledge via Mirror
Location: Ledge in southern Hyrule Field (Light World), north of the Desert of Mystery entrance area.
How to Get: In the Dark World, go to the equivalent area (south of where the Flute Boy’s stump is located). Find a circle made of bushes. Stand in the center of the circle and use the Magic Mirror. You’ll appear on a ledge in the Light World. Enter the cave on this ledge.
Requires: Magic Mirror, Defeat Agahnim 1.
Piece of Heart #15: Graveyard – Ledge via Mirror
Location: Ledge overlooking the Graveyard from the north (Light World).
How to Get: In the Dark World, go to the northern part of the Graveyard equivalent area. You’ll need the Titan’s Mitt to lift the dark boulders blocking the path to the upper ledge. Once on the ledge, stand there and use the Magic Mirror. You’ll appear on the Light World ledge. Enter the cave.
Requires: Magic Mirror, Titan’s Mitt, Defeat Agahnim 1.

Piece of Heart #16: Village of Outcasts – Chest Game
Location: Building housing the chest-opening minigame in the Village of Outcasts (Dark World’s Kakariko).
How to Get: Pay the owner 30 Rupees to open two chests. The Heart Piece is one of the possible prizes. If you don’t get it, exit and re-enter the building to reset the chests and try again.
Requires: Rupees, Defeat Agahnim 1.

Piece of Heart #17: Dark World – Digging Game
Location: Area southwest of the Village of Outcasts (where the race minigame was in the Light World).
How to Get: Ensure you have the Shovel. Pay the creature here 80 Rupees to play the Digging Game. You have 30 seconds to dig within the fenced area. The Heart Piece is one of the items randomly dug up. Exit the screen and return to retry if needed.
Requires: Shovel, Rupees, Defeat Agahnim 1.

Piece of Heart #18: Dark World Smithy Area – Hammer Stump
Location: Near the Dark World equivalent of the Blacksmith’s shop.
How to Get: Use the Titan’s Mitt to lift the dark, heavy rocks blocking the path. Use the Magic Hammer to pound down all the stakes/pegs in the area. The strange frog-like stump will transform into a cave entrance. Enter to find the Heart Piece.
Requires: Titan’s Mitt, Magic Hammer, Defeat Agahnim 1.

Piece of Heart #19: Death Mountain – Lower Cave Ledge via Mirror
Location: Ledge near the very first cave entrance on Death Mountain (Light World).
How to Get: Go to the Dark World equivalent of the first cave Link enters on Death Mountain (where the lost old man is found). Use the Power Glove to lift the rock blocking its entrance. Enter the cave and proceed through the short passage to exit onto a ledge. Stand on this ledge and use the Magic Mirror. You’ll appear on the Light World ledge next to the Heart Piece.
Requires: Magic Mirror, Power Glove, Defeat Agahnim 1.

Piece of Heart #20: Lake Hylia – Island via Mirror
Location: Small isolated island in Lake Hylia (Light World).
How to Get: In the Dark World, swim in the lake (which resembles a swamp) towards the west side of where the Ice Palace is. Find a large circular area of shallow water marked by small stones. Stand in the center of this shallow circle and use the Magic Mirror. You’ll appear on the small Light World island containing the Heart Piece.
Requires: Zora’s Flippers, Magic Mirror, Defeat Agahnim 1.

Piece of Heart #21: Misery Mire – West Building Chest
Location: The small, separate building immediately west of the Misery Mire dungeon entrance (Dark World).
How to Get: Enter the building. Navigate the block puzzle inside to reach the two chests. The Heart Piece is inside one of them (usually the left one).
Requires: Access to Misery Mire area (Flute warp #6, Titan’s Mitt).

Piece of Heart #22: Desert of Mystery – Ledge via Mirror
Location: Ledge overlooking the Desert of Mystery from the north (Light World).
How to Get: In the Dark World’s Swamp of Evil (Misery Mire area), go to the far northeast corner, up against the northern cliffs. Stand here and use the Magic Mirror. You’ll appear on the Light World desert ledge. Lift the rock here to reveal a cave entrance. Enter the cave and push the blocks inside to reach the Heart Piece.
Requires: Magic Mirror, Access to Misery Mire area (Flute warp #6, Titan’s Mitt).

Piece of Heart #23: Death Mountain – Floating Island via Mirror
Location: Isolated platform west of the Turtle Rock area on Death Mountain (Light World).
How to Get: Go to the Dark World side of Death Mountain, near Turtle Rock. West of the dungeon entrance is a cave blocked by a dark rock. Lift it (Titan’s Mitt) and enter. Use the Ether Medallion to reveal an invisible pathway north. Cross it. Bomb the north wall, enter. Bomb the west wall, enter. Exit this room south onto an exterior ledge. Stand on the ledge and use the Magic Mirror. You’ll appear on the isolated Light World platform next to the Heart Piece.
Requires: Titan’s Mitt, Ether Medallion, Bombs, Magic Mirror, Access to Dark World Turtle Rock area (usually via Hammer-activated warp #9).

Piece of Heart #24: Turtle Rock – Exterior Ledge via Mirror
Location: Ledge on Death Mountain (Light World) corresponding to an exterior section of the Turtle Rock dungeon.
How to Get: Progress through the Turtle Rock dungeon until you reach a section that takes you outside onto a high ledge on the mountainside. Walk across this ledge towards the cave entrance leading back into the dungeon. *Before* entering the cave, stand on the ledge and use the Magic Mirror. You’ll warp to a similarledge in the Light World with a cave entrance. Enter this Light World cave. Defeat the enemies, use the Magic Hammer to pound down the mole-like obstacles, and proceed to the next small room containing the final Heart Piece.
Requires: Magic Mirror, Magic Hammer, Access and progress within Turtle Rock dungeon.
Collecting all these Heart Containers and Pieces of Heart will make Link significantly more resilient, greatly aiding your quest to save Hyrule! Good luck!