


Welcome, Heroes! In the vast, wild expanse of Hyrule in Breath of the Wild, your wits and courage are paramount. But let’s be real – facing down a Lynel or scaling the frigid Hebra peaks in just your starting threads isn’t going to cut it! Armor is essential. It’s not just about defense; it’s about enabling exploration, granting powerful abilities, surviving harsh climates, and sometimes, just looking incredibly cool while doing it.
Collecting every piece of armor is a journey in itself, a rewarding pursuit for any dedicated fan. But the real power? That comes from upgrading. By awakening the Great Fairies scattered across the land, you can transform humble gear into legendary protection, unlocking potent Set Bonuses that can define your playstyle.
Ready to become the best-equipped hero Hyrule has ever seen? Let’s dive in!
Table of Contents
Unlocking Potential: The Great Fairies & Upgrades
Finding armor is step one. Unleashing its true power requires the magic of the Great Fairies. These powerful beings slumber in hidden fountains, waiting for a hero (with enough Rupees!) to awaken them.
Great Fairy Locations & Costs
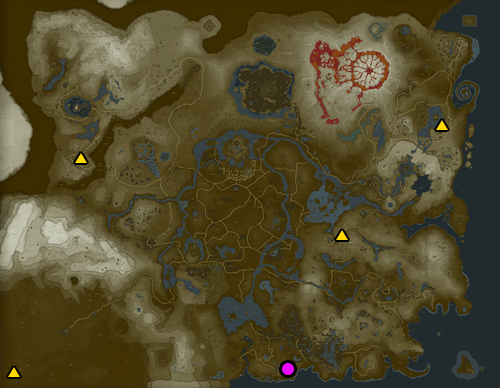
Track down these fountains to start enhancing your gear. Remember, the order you find them in determines the cost, but once awakened, any Great Fairy can perform upgrades up to the highest level you’ve unlocked.

Cotera
Found in the woods directly uphill from Kakariko Village, near Tal’oh Naeg Shrine. (Cost: 100 Rupees if she’s the first Fairy you awaken).

Kaysa
Located south of Tabantha Tower. You’ll need to glide across a canyon from the tower to reach her fountain near the Piper Ridge. (Cost: 500 Rupees if she’s the second Fairy you awaken).

Mija
Situated near Lake Akkala in the Akkala region, southeast of Akkala Tower and close to Dah Hesho Shrine. (Cost: 1,000 Rupees if she’s the third Fairy you awaken).

Tera
Resides in the far southwest corner of the Gerudo Desert, beneath the massive skeleton of the Gerudo Great Skeleton. The Hawa Koth Shrine is inside the skeleton structure for easy travel once discovered. Reaching this area often involves navigating sandstorms or renting Sand Seals. (Cost: 10,000 Rupees if she’s the fourth Fairy you awaken).
The Upgrade Process & Tiers
Unlocking Tiers: Each Great Fairy you awaken increases the maximum upgrade level available for all your upgradeable armor, across all awakened Great Fairies.
1st Fairy: Unlocks ★☆☆☆ upgrades.
2nd Fairy: Unlocks ★★☆☆ upgrades.
3rd Fairy: Unlocks ★★★☆ upgrades.
4th Fairy: Unlocks ★★★★ upgrades (the maximum).
How it Works: Approach an awakened Great Fairy’s fountain and interact with her. You can then select an eligible piece of armor. The Fairy will show you the required materials and the defense boost for the next star level. If you have the materials, you can confirm the upgrade. Each piece must be upgraded sequentially (you can’t skip levels).
Material Requirements: Every upgrade level for each armor piece demands specific materials – monster parts (horns, guts, eyeballs), gemstones (Amber, Opal, Topaz, etc.), insects, plants, or even rare Dragon parts and Star Fragments. The rarity, quantity, and variety of materials generally increase significantly with each upgrade tier, especially for ★★★☆ and ★★★★ levels. Don’t forget to use your Sheikah Sensor+ to track needed materials!
Core Armor Sets: Strategy & Upgrades
(Base Def = Defense per piece before upgrades. Total Def = Defense per piece at each star level. Set Bonuses activate at ★★☆☆ unless noted.)
Farming Tip: Use your Sheikah Slate’s Camera to take pictures of materials (monster parts, insects, plants), then set your Sheikah Sensor+ to track them! This makes finding specific upgrade ingredients much easier. Don’t forget Beedle often sells useful insects at stables!
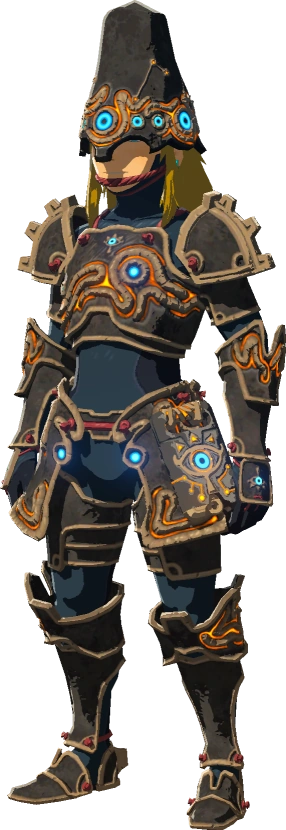
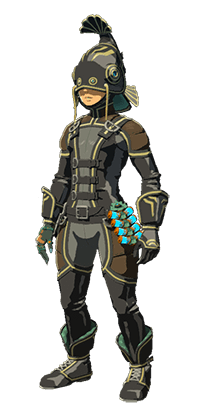
Ancient Set (Guardian Resist)
Get It: High-tech Sheikah gear! Purchase Helm, Cuirass, Greaves from Cherry at Akkala Ancient Tech Lab (after lighting the furnace). Very expensive in Rupees and Ancient Materials.
Use Case: The ultimate anti-Guardian defense. Dramatically reduces damage from their beams. Ancient Proficiency makes Ancient/Guardian weapons devastating, especially against Guardians and bosses.
Set Bonus: Ancient Proficiency
Upgrades: (Max Def: 28 per piece)
★☆☆☆ (7 Def): x5 Ancient Screw, x5 Ancient Spring
★★☆☆ (12 Def): x15 Ancient Spring, x10 Ancient Gear
★★★☆ (18 Def): x15 Ancient Shaft, x5 Ancient Core
★★★★ (28 Def): x1 Star Fragment, x2 Giant Ancient Core
Materials: Requires farming Guardians (walking, flying, decayed) for all types of Ancient parts. Star Fragments and Giant Ancient Cores are among the rarest materials.
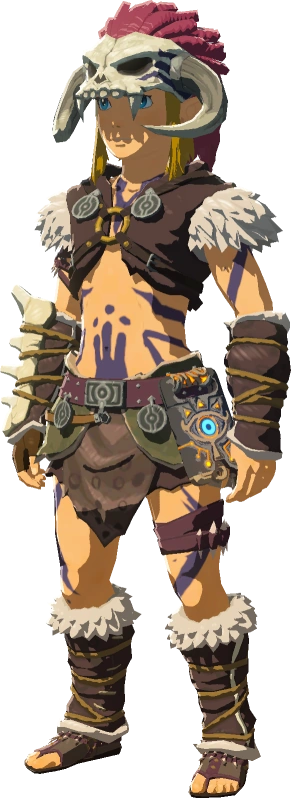
Barbarian Set (Attack Up)
Get It: For the offensively minded! Reward for conquering the three Labyrinths: Helm (Tu Ka’loh Shrine – Lomei Labyrinth Island, Akkala), Armor (Dila Maag Shrine – South Lomei Labyrinth, Gerudo Desert), Leg Wraps (Qaza Tokki Shrine – North Lomei Labyrinth, Hebra).
Use Case: Straight damage boost! Stacks with attack-boosting food/elixirs for massive damage output. Great for taking down tough enemies quickly.
Set Bonus: Charge Attack Stamina Up
Upgrades: (Max Def: 20 per piece)
★☆☆☆ (5 Def): x1 Lynel Horn
★★☆☆ (8 Def): x2 Lynel Horn, x2 Lynel Hoof
★★★☆ (12 Def): x3 Lynel Hoof, x1 Lynel Guts
★★★★ (20 Def): x2 Lynel Guts, x1 Shard of Dinraal’s/Naydra’s/Farosh’s Horn (Any one per piece)
Materials: Prepare for battle! Requires numerous parts from Lynels (increasingly difficult tiers) and a shard from each Dragon’s horn.
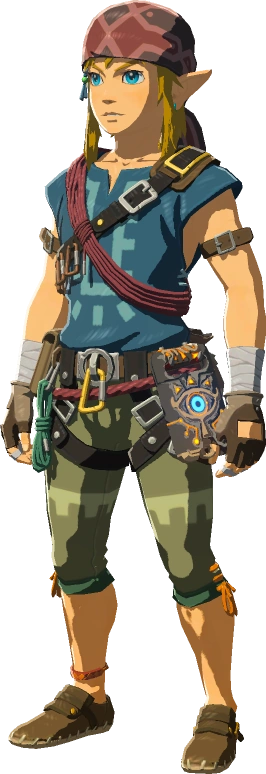
Climbing Gear Set (Climb Speed Up)
Get It: Arguably one of the most useful sets! Found in shrines: Bandana (Ree Dahee Shrine – Dueling Peaks), Gear (Chaas Qeta Shrine – Tenoko Island, requires a Major Test of Strength!), Boots (Tahno O’ah Shrine – Lanayru Range, “Secret of the Cedars” shrine quest).
Use Case: Makes scaling Hyrule’s massive cliffs significantly faster and less stamina-intensive. The set bonus makes jump-climbing much more efficient. A must-have for explorers!
Set Bonus: Climbing Jump Stamina Up
Upgrades: (Max Def: 20 per piece)
★☆☆☆ (5 Def): x3 Keese Wing, x3 Rushroom
★★☆☆ (8 Def): x5 Electric Keese Wing, x5 Hightail Lizard
★★★☆ (12 Def): x5 Ice Keese Wing, x10 Hot-Footed Frog
★★★★ (20 Def): x5 Fire Keese Wing, x15 Swift Violet
Materials: Hunt various Keese types, gather Rushrooms/Swift Violets on cliffs, catch lizards/frogs (stealth helps!).e game and serves a specific purpose.
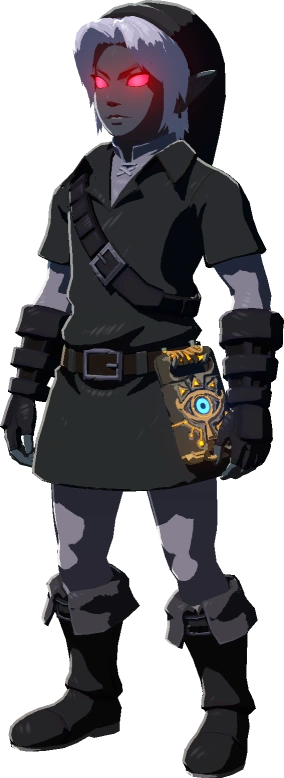
Dark Set (Night Speed Up)
Get It: Purchase from Kilton at the Fang and Bone shop (appears near various locations at night after initial encounter at Skull Lake). Requires trading monster parts for Kilton’s unique currency, Mon. The full set becomes available for purchase only after freeing all four Divine Beasts.
- Dark Hood: 199 Mon
- Dark Tunic: 199 Mon
- Dark Trousers: 199 Mon
Use Case: Allows Link to cosplay as Dark Link! Provides a speed boost when traveling at night. Primarily a cosmetic set for fans.
Set Bonus: Night Speed Up (Activates when all three pieces are worn)
Upgrades: Cannot be upgraded.
Defense: Base 3 per piece (Total 9 Fixed Defense)
Materials: Purchased using Mon, which is obtained by trading monster parts (horns, fangs, guts, etc.) to Kilton.
Desert Voe Set (Heat Resistance)
Get It: For male Links exploring the desert. Buy from Gerudo Secret Club (Password: GSC♦) or Rhondson in Tarrey Town (after her quest line).
Use Case: Necessary for daytime Gerudo Desert survival. The Shock Resistance bonus is surprisingly useful against Gerudo foes and Electric Lizalfos.
Set Bonus: Shock Damage Resist
Upgrades: (Max Def: 20 per piece)
★☆☆☆ (5 Def): x3 White Chuchu Jelly
★★☆☆ (8 Def): x5 White Chuchu Jelly, x3 Ice Keese Wing
★★★☆ (12 Def): x8 Icy Lizalfos Tail, x5 Cold Darner
★★★★ (20 Def): x10 Blue Lizalfos Tail, x5 Sapphire
Materials: Hunt ice-based enemies, gather Cold Darners near water in cooler regions. Sapphires from ore deposits.
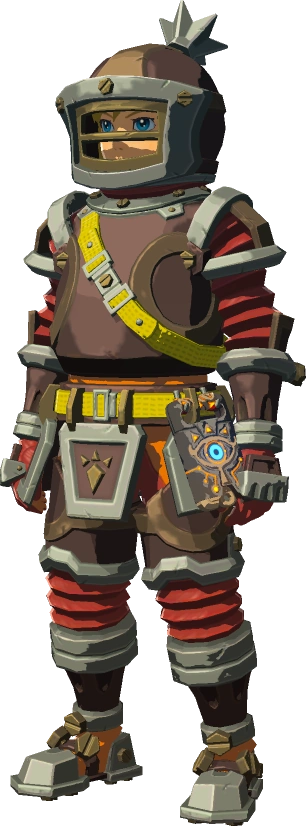
Flamebreaker Set (Flame Guard)
Get It: Absolutely required for Death Mountain! Buy Helm/Boots in Goron City armor shop. Get the Armor piece first from Kima at the Southern Mine (“Fireproof Lizard Roundup” side quest).
Use Case: Allows exploration of Eldin region’s extreme heat zones. Fireproof bonus prevents annoying burning damage from fire attacks anywhere.
Set Bonus: Fireproof
Upgrades: (Max Def: 20 per piece)
★☆☆☆ (5 Def): x1 Fireproof Lizard, x2 Moblin Horn
★★☆☆ (8 Def): x3 Fireproof Lizard, x4 Moblin Fang
★★★☆ (12 Def): x3 Smotherwing Butterfly, x3 Moblin Guts
★★★★ (20 Def): x5 Smotherwing Butterfly, x2 Hinox Guts
Materials: Catch lizards/butterflies on Death Mountain (stealth helps!), hunt Moblins/Hinoxes. Beedle sometimes sells Smotherwing Butterflies at Wetland or East Akkala Stables.

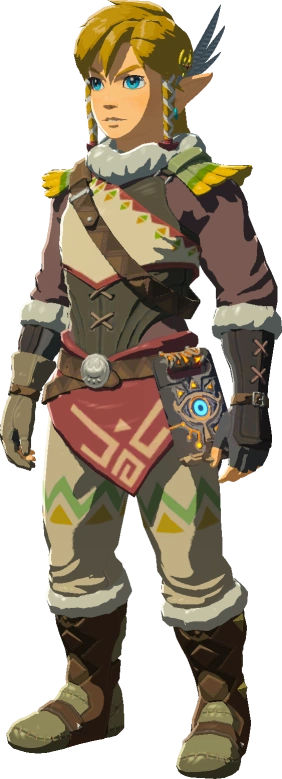
Hero of the Wild Set (Master Sword Beam Up)
Get It: The legendary green tunic! Your ultimate reward for completing all 120 base game Shrines. Claim it from the Forgotten Temple after completing the “A Gift from the Monks” side quest.
Use Case: The ultimate bragging rights armor! Looks amazing, has fantastic defense when fully upgraded. The set bonus enhances the Master Sword’s ranged beam attack when Link is at full health.
Set Bonus: Master Sword Beam Up
Upgrades: (Max Def: 28 per piece)
★☆☆☆ (7 Def): x10 Acorn, x2 Shard of Farosh’s Scale
★★☆☆ (12 Def): x5 Courser Bee Honey, x2 Shard of Naydra’s Scale
★★★☆ (18 Def): x5 Energetic Rhino Beetle, x2 Shard of Dinraal’s Scale
★★★★ (28 Def): x1 Star Fragment, x2 Shard of Farosh’s/Naydra’s/Dinraal’s Horn (one of each Dragon Horn needed across the set)
Materials: Requires common forest items (Acorns, Honey, Beetles – use stealth/Sensor+) and parts from all three dragons (scales, claws, fangs, horns – shoot specific body parts!). Also needs rare Star Fragments.

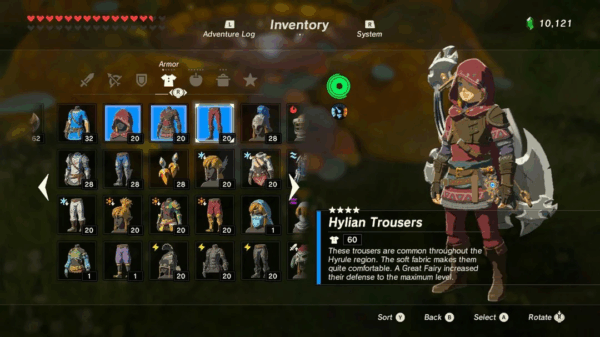
Hylian Set
Get It: Cheap and cheerful! Buy from Kakariko Village or Hateno Village shops early on.
Use Case: Reliable early-game defense. A classic look that upgrades nicely for general use if you gather the materials.
Set Bonus: None
Upgrades: (Max Def: 20 per piece)
★☆☆☆ (5 Def): x5 Bokoblin Horn
★★☆☆ (8 Def): x5 Bokoblin Horn, x3 Bokoblin Fang
★★★☆ (12 Def): x5 Bokoblin Fang, x3 Bokoblin Guts
★★★★ (20 Def): x5 Bokoblin Guts, x15 Amber
Materials: Common Bokoblin drops, Amber from ore deposits.
Rubber Set (Shock Resistance)
Get It: Earned piece by piece. Helm (Lakeside Stable quest “Thunder Magnet”), Tights (Qukah Nata Shrine puzzle), Armor (Toh Yahsa Shrine puzzle – Trial of Thunder on Thundra Plateau).
Use Case: Makes thunderstorms trivial and neuters electric enemies like Wizzrobes and Lynels with shock arrows. Unshockable is amazing.
Set Bonus: Unshockable
Upgrades: (Max Def: 20 per piece)
★☆☆☆ (5 Def): x3 Yellow Chuchu Jelly
★★☆☆ (8 Def): x5 Yellow Chuchu Jelly, x5 Voltfruit
★★★☆ (12 Def): x5 Zapshroom, x8 Yellow Lizalfos Tail
★★★★ (20 Def): x10 Yellow Lizalfos Tail, x10 Topaz
Materials: Hunt electric enemies, gather Voltfruit in Gerudo, Zapshrooms during storms. Topaz from ore deposits.
Snowquill Set (Cold Resistance)
Get It: Essential for cold regions! Buy at the Rito Village armor shop.
Use Case: Your go-to for Hebra Mountains, Gerudo Highlands, and Mount Lanayru. The Unfreezable bonus is fantastic against Ice Lizalfos and Ice Keese.
Set Bonus: Unfreezable
Upgrades: (Max Def: 20 per piece)
★☆☆☆ (5 Def): x3 Red Chuchu Jelly
★★☆☆ (8 Def): x5 Red Chuchu Jelly, x3 Warm Safflina
★★★☆ (12 Def): x8 Fire Keese Wing, x5 Sunshroom
★★★★ (20 Def): x10 Red Lizalfos Tail, x5 Ruby
Materials: Hunt fire-based enemies, gather plants in warm areas (Gerudo/Eldin). Rubies from ore deposits.
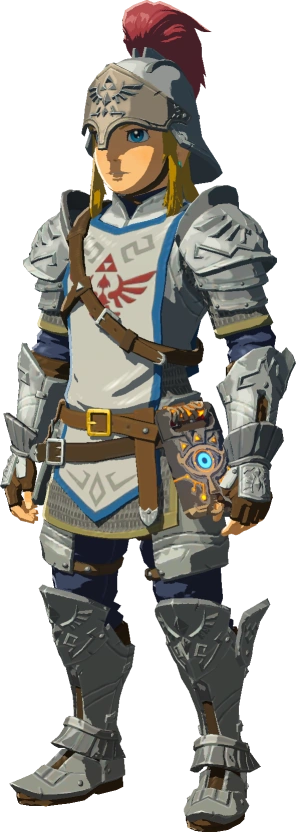
Soldier’s Set
Get It: Purchase from Hateno Village armor shop. Pricey early, but worth it for defense.
Use Case: Highest base defense of purchasable sets. Excellent pure protection if you don’t need environmental or stealth buffs. Great for tough fights before finding specialized gear.
Set Bonus: None
Upgrades: (Max Def: 28 per piece)
★☆☆☆ (7 Def): x5 Chuchu Jelly, x3 Bokoblin Guts
★★☆☆ (12 Def): x5 Keese Eyeball, x3 Moblin Guts
★★★☆ (18 Def): x3 Lizalfos Tail (Any type), x3 Hinox Guts
★★★★ (28 Def): x2 Lynel Hoof, x2 Lynel Guts
Materials: Requires a variety of common to tough monster parts. Lynel parts are the endgame challenge here!
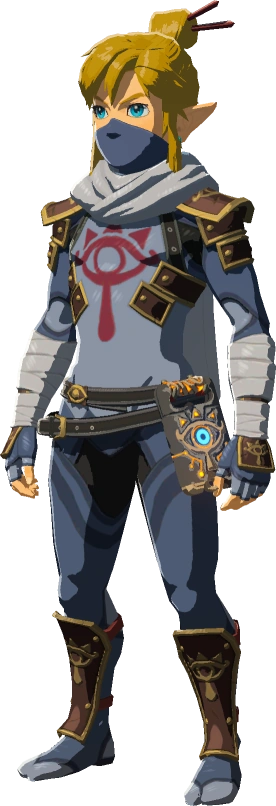
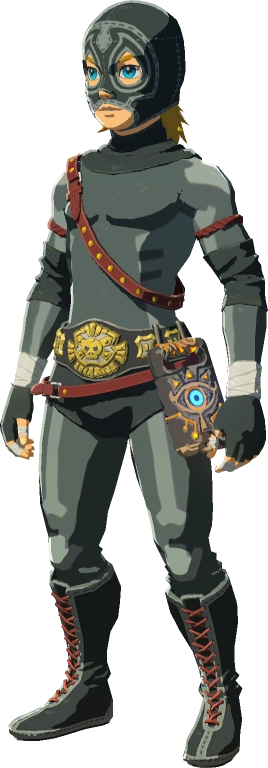
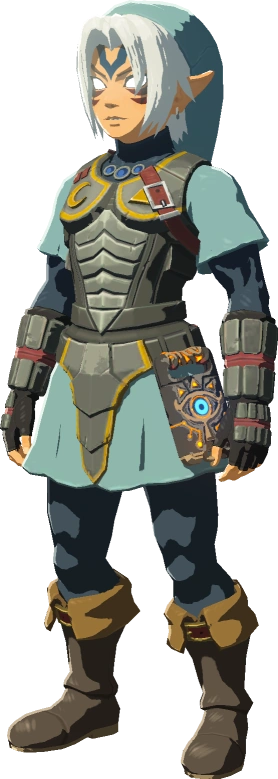
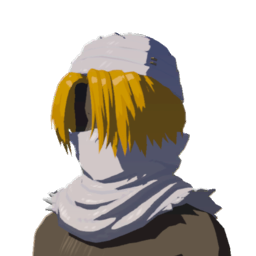
Stealth Set (Stealth Up)
Get It: A fan favorite for sneaky players! Buy Mask, Chest Guard, Tights from the “Enchanted” armor shop in Kakariko Village.
Use Case: Essential for catching critters (bugs, lizards, fairies), sneaking past enemy camps, and getting sneakstrikes. Night Speed Up bonus is great for traversing Hyrule after dark.
Set Bonus: Night Speed Up
Upgrades: (Max Def: 16 per piece)
★☆☆☆ (4 Def): x3 Blue Nightshade
★★☆☆ (6 Def): x5 Blue Nightshade, x5 Sunset Firefly
★★★☆ (9 Def): x8 Silent Shroom, x5 Sneaky River Snail
★★★★ (16 Def): x10 Stealthfin Trout, x5 Silent Princess
Materials: Gather nocturnal plants/insects/fish, often near forests and water. Silent Princesses are rare, look near Great Fairy Fountains and Master Sword pedestal.
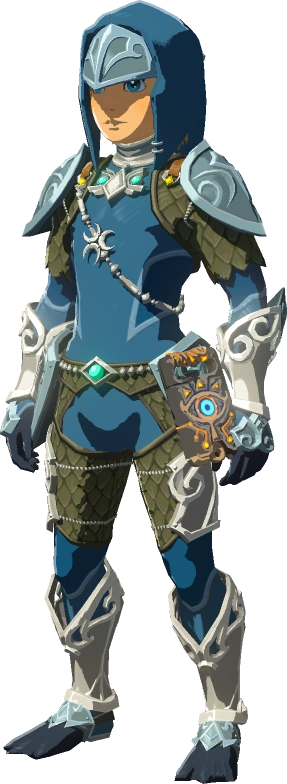
Radiant Set (Stealth/Bone Atk. Up)
Get It: Unique look and effect! Buy Mask, Shirt, Tights from Gerudo Secret Club (Password: GSC♦). Costs Rupees and Luminous Stones.
Use Case: Lures Stal enemies (skeletons), making them easy to farm or avoid. Bone weapon proficiency is niche but powerful with the right weapon (like Dragonbone Moblin Clubs). Plus, it glows in the dark!
Set Bonus: Disguise (Stals non-hostile); Bone Weap. Prof.
Upgrades: (Max Def: 20 per piece)
★☆☆☆ (5 Def): x5 Luminous Stone, x3 Bokoblin Guts
★★☆☆ (8 Def): x8 Luminous Stone, x3 Moblin Guts
★★★☆ (12 Def): x10 Luminous Stone, x2 Molduga Fin, x1 Molduga Guts
★★★★ (20 Def): x20 Luminous Stone, x2 Lynel Guts, x1 Molduga Guts
Materials: Needs tons of Luminous Stones (mine deposits at night!), plus tough Guts from Moblins, Moldugas (Gerudo desert bosses), and Lynels.
Zora Set (Swim Speed Up)
Get It: Deeply tied to the Zora’s Domain main quest. Armor (Gift from King Dorephan), Helm (Chest in Toto Lake above the Domain), Greaves (Complete “Lynel Safari” side quest from Laflat).
Use Case: Transforms swimming from a chore to a breeze. Climbing waterfalls is iconic and useful. Great for exploring Hyrule’s vast waterways.
Set Bonus: Swim Dash Stamina Up
Upgrades: (Max Def: 20 per piece)
★☆☆☆ (5 Def): x3 Lizalfos Horn
★★☆☆ (8 Def): x5 Lizalfos Talon, x5 Hyrule Bass
★★★☆ (12 Def): x5 Lizalfos Tail (Any type), x3 Hearty Bass
★★★★ (20 Def): x10 Lizalfos Tail (Blue), x15 Opal
Materials: Hunt Lizalfos (especially near water), fish for bass. Opals from ore deposits.
Notable Single Pieces & Accessories
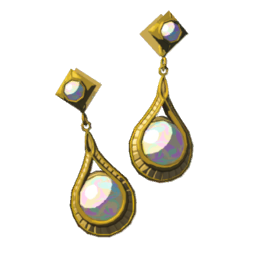
Amber/Opal/Topaz/Ruby/Sapphire Earrings
Buy in Gerudo Town jewelry shop after giving 10 Flint). Offer elemental resistance (Heat/Swim Speed/Shock/Cold/Heat) respectively. Upgradeable (Max 28 Def) with gems and Flint. Good substitutes if you only need one resistance type and want to wear different body/leg armor.

Champion’s Tunic
Gift from Impa after recovering a memory. Fantastic defense (Max 32!), shows enemy exact HP numbers – invaluable! Upgrades with Silent Princesses and Dragon parts. Doesn’t belong to a set.
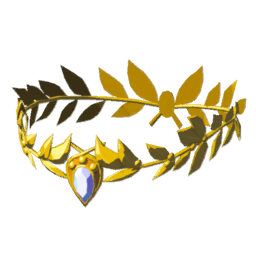
Diamond Circlet
Buy in Gerudo Town jewelry shop. Offers Guardian Resist Up. Upgradeable (Max 28 Def) with Diamonds and Star Fragments. Good alternative to Ancient Helm if you have spare Diamonds.
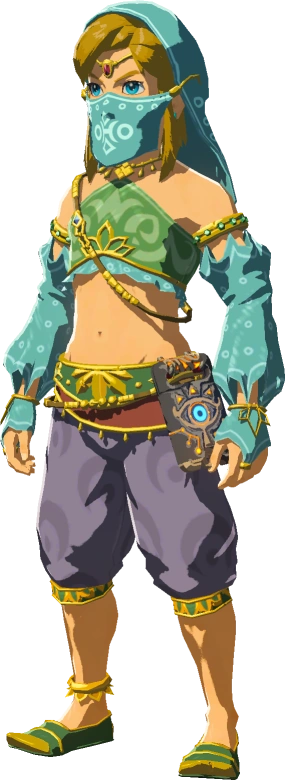
Gerudo Veil/Top/Sirwal (Vai Set)
Required for initial Gerudo Town entry, obtained near Kara Kara Bazaar. Provides basic Heat Resistance. Cannot be upgraded. Replaced by Desert Voe set for males wanting upgrades/bonuses.
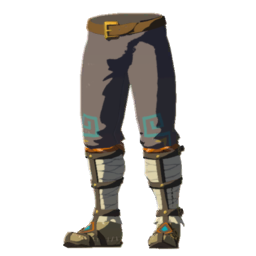
Sand Boots
Reward for “The Eighth Heroine” side quest from Bozai near Gerudo Town). Increases movement speed on sand. Cannot be upgraded. Essential for desert traversal.
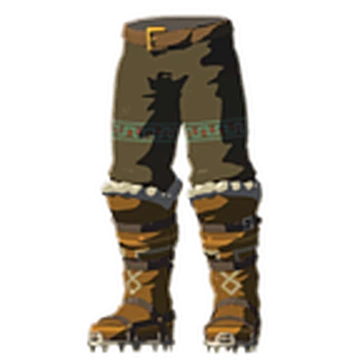
Snow Boots
Reward for “The Forgotten Sword” side quest, find Bozai again running around Gerudo Tower. Increases movement speed in deep snow. Cannot be upgraded. Vital for Hebra/Gerudo Highlands.

Thunder Helm
Reward for completing all Gerudo Town side quests and appeasing Chief Riju. Grants complete immunity to lightning strikes. A unique and powerful effect. Cannot be upgraded. Makes the Rubber Set’s bonus redundant if you have this.
DLC & Amiibo Armor: Special Gear
Beyond the base game, the DLC Expansion Pass and various Zelda Amiibo figures unlock even more armor!
DLC Expansion Pass Armor (Found via EX Quests)
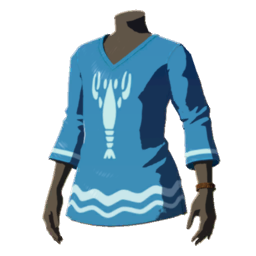
Island Lobster Shirt
How to Obtain: Found via the “EX Treasure: Garb of Winds” quest. The chest is located near Cora Lake, south of Lake Hylia bridge (look for it near the base of a waterfall).
Effect: Provides Heat Resistance (one level).
Defense: 1
Notes: A nostalgic nod to The Wind Waker. Offers basic heat protection, equivalent to one piece of the Desert Voe set, but without upgrade potential.

Korok Mask
How to Obtain: Found via the “EX Strange Mask Rumors” quest. The chest is located inside a hollow tree in the Lost Woods (follow the path torches, then listen for the shaking sound/look for visual cues).
Effect: Shakes and makes a distinct “jingle” sound when Link is close to an undiscovered Korok location. The closer you are, the more it shakes.
Defense: 1
Notes: Absolutely essential for players aiming to find all 900 Korok seeds. Equip it whenever you’re exploring new areas!

Majora’s Mask
How to Obtain: Found via the “EX Treasure: Ancient Mask” quest. The chest is located in the Kolomo Garrison Ruins, south of the Great Plateau’s Oman Au Shrine.
Effect: Causes most common enemies (Bokoblins, Moblins, Lizalfos, Stal-types) to become non-hostile towards Link until he attacks them. Does not work on stronger foes like Guardians, Lynels, Wizzrobes, Yiga, or bosses.
Defense: 1
Notes: Extremely useful for walking through enemy camps unbothered or setting up sneakstrikes. A must-have for avoiding minor skirmishes.

Phantom Armor
How to Obtain: Found via the “EX Treasure: Phantasma” quest. Chests are located in the Sacred Ground Ruins (Helmet), Coliseum Ruins (Armor – ground floor, check corners), and Hyrule Garrison Ruins (Greaves – near a decayed Guardian).
Effect: Each piece grants Attack Up. Wearing all three provides a significant Attack Up boost (equivalent to a level 3 food buff).
Defense: 8 per piece (Total 24)
Notes: Incredible defense and attack power very early in the game if you brave the locations. Makes early-to-mid game combat much easier, but offers no environmental protection or stealth.
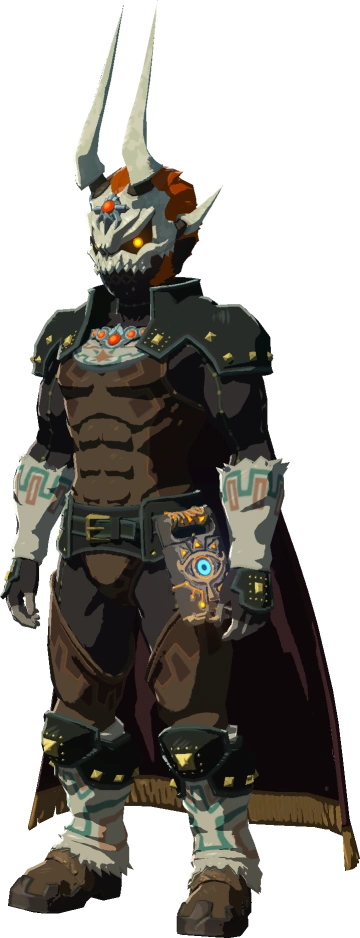
Phantom Ganon Set
How to Obtain: Found via the “EX Treasure: Dark Armor” quest. Chests are located under the waterfall north of Lake Floria (Skull), near the second waterfall south of Corta Lake in Faron Woods (Armor), and under the Sarjon Bridge west of Faron Tower (Greaves).
Effect: Each piece provides Stealth Up.
Set Bonus: Wearing all three pieces grants Disguise (Stal-enemies won’t attack) and Bone Weapon Atk. Up (increases damage with bone weapons, like the Radiant Set).
Defense: 4 per piece (Total 12)
Notes: A great alternative to the Sheikah Set if you want the stealth and bone weapon benefits, plus it has a menacing look!
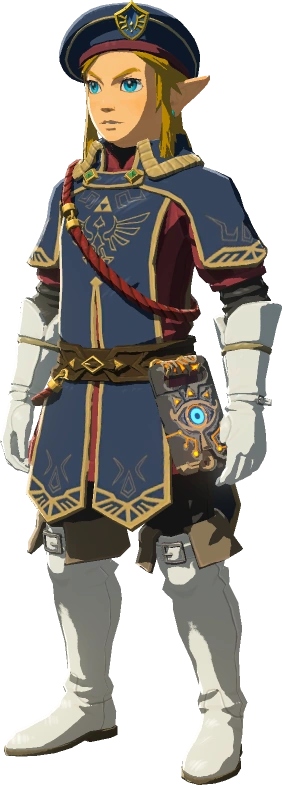
Royal Guard Set
How to Obtain: Found via the “EX Royal Guard Rumors” quest. All pieces are hidden within Hyrule Castle. Check the Guard’s Chamber (Cap), Dining Hall (Uniform – above fireplace), and Sanctum (Boots – near Zelda’s study area).
Effect: Each piece individually reduces stamina cost for Charge Attacks. Wearing all three stacks this effect significantly. There’s no separate named Set Bonus beyond this stacking effect.
Defense: 4 per piece (Total 12)
Notes: Excellent for heavy weapon users or anyone who loves spin-to-win tactics! Looks very regal too.

Midna’s Helmet
How to Obtain: Found via the “EX Treasure: Twilight Relic” quest. The chest is located at the Sage Temple Ruins, west of Giant’s Forest in Central Hyrule.
Effect: Provides Guardian Resist Up (one level).
Defense: 7
Notes: Offers good defense and the same level of Guardian resistance as one piece of the Ancient Set, but without needing Ancient materials. Great substitute headgear for fighting Guardians if you haven’t crafted the Ancient Helm.

Ravio’s Hood
How to Obtain: Found via the “EX Treasure: Merchant Hood” quest. The chest is located near the Spring of Courage (Dracozu Lake area), look for the right hand of the stone dragon.
Effect: Increases sideways climbing speed.
Defense: 2
Notes: A reference to Ravio from A Link Between Worlds. Its effect is niche but can be useful for long horizontal climbs where stamina conservation is key.

Tingle’s Set
How to Obtain: Found via the “EX Treasure: Fairy Clothes” quest. Chests are located at the Outpost Ruins (Hood – under a Guardian), Castle Town Prison (Shirt – island west of the castle), and Mabe Village Ruins (Tights – south of Hyrule Field).
Effect: No individual piece effect.
Set Bonus: Wearing all three pieces grants Night Speed Up, just like the Sheikah Set.
Defense: 2 per piece (Total 6)
Notes: Provides the same movement bonus as the Sheikah set but without the stealth. Mostly worn for its… unique… and slightly terrifying aesthetic. Kooloo-Limpah!
Amiibo Sets
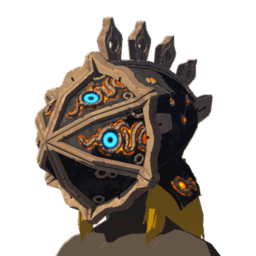
Divine Beast Helm: Vah Medoh (Revali Amiibo)
Get It: Random drop from scanning the Revali Amiibo.
Use Case: Rito Champion’s prowess! Provides Cold Resistance (Level 1), Guardian Resist Up, and Enemy HP visibility. Synergizes with the Ancient Set for Ancient Proficiency. Useful for exploring cold regions or aerial combat against Guardians.
Effect: Cold Resistance (Lv1) + Guardian Resist Up + Enemy HP Visible + Ancient Proficiency (w/ Ancient Set)
Upgrades: (Base Def: 4 | Max Def: 20)
★☆☆☆ (7 Def): x5 Ancient Screw, x1 Star Fragment
★★☆☆ (10 Def): x5 Ancient Spring, x1 Star Fragment
★★★☆ (14 Def): x5 Ancient Gear, x1 Star Fragment
★★★★ (20 Def): x5 Ancient Shaft, x1 Star Fragment
Materials: Requires Ancient Parts (Screws, Springs, Gears, Shafts) and 4 Star Fragments.
Divine Beast Helm: Vah Naboris (Urbosa Amiibo)
Get It: Random drop from scanning the Urbosa Amiibo.
Use Case: Gerudo Champion’s fury! Provides Shock Resistance (Level 1), Guardian Resist Up, and Enemy HP visibility. Synergizes with the Ancient Set for Ancient Proficiency. Excellent protection against electric enemies and Guardians, particularly in stormy weather or the Gerudo region.
Effect: Shock Resistance (Lv1) + Guardian Resist Up + Enemy HP Visible + Ancient Proficiency (w/ Ancient Set)
Upgrades: (Base Def: 4 | Max Def: 20)
★☆☆☆ (7 Def): x5 Ancient Screw, x1 Star Fragment
★★☆☆ (10 Def): x5 Ancient Spring, x1 Star Fragment
★★★☆ (14 Def): x5 Ancient Gear, x1 Star Fragment
★★★★ (20 Def): x5 Ancient Shaft, x1 Star Fragment
Materials: Needs Ancient Parts (Screws, Springs, Gears, Shafts) and 4 Star Fragments.
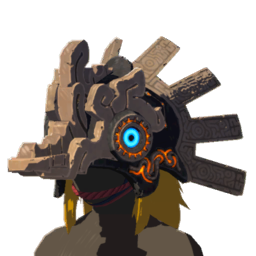
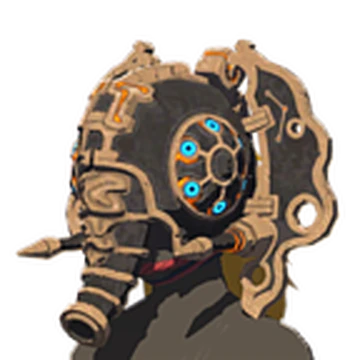
Divine Beast Helm: Vah Rudania (Daruk Amiibo)
Get It: Random drop from scanning the Daruk Amiibo.
Use Case: Goron Champion’s protection! Provides Flame Guard (Level 1), Guardian Resist Up, and Enemy HP visibility. Synergizes with the Ancient Set for Ancient Proficiency. Excellent for exploring Eldin or fighting fire-based enemies/Guardians.
Effect: Flame Guard (Lv1) + Guardian Resist Up + Enemy HP Visible + Ancient Proficiency (w/ Ancient Set)
Upgrades: (Base Def: 4 | Max Def: 20)
★☆☆☆ (7 Def): x5 Ancient Screw, x1 Star Fragment
★★☆☆ (10 Def): x5 Ancient Spring, x1 Star Fragment
★★★☆ (14 Def): x5 Ancient Gear, x1 Star Fragment
★★★★ (20 Def): x5 Ancient Shaft, x1 Star Fragment
Materials: Requires various common-to-rare Ancient Parts (Screws, Springs, Gears, Shafts) farmed from Guardians, and 4 Star Fragments.
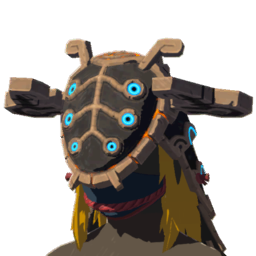
Divine Beast Helm: Vah Ruta (Mipha Amiibo)
Get It: Random drop from scanning the Mipha Amiibo.
Use Case: Zora Champion’s grace! Provides Swim Speed Up, Guardian Resist Up, and Enemy HP visibility. Synergizes with the Ancient Set for Ancient Proficiency. Ideal for aquatic exploration and fighting Guardians near water.
Effect: Swim Speed Up + Guardian Resist Up + Enemy HP Visible + Ancient Proficiency (w/ Ancient Set)
Upgrades: (Base Def: 4 | Max Def: 20)
★☆☆☆ (7 Def): x5 Ancient Screw, x1 Star Fragment
★★☆☆ (10 Def): x5 Ancient Spring, x1 Star Fragment
★★★☆ (14 Def): x5 Ancient Gear, x1 Star Fragment
★★★★ (20 Def): x5 Ancient Shaft, x1 Star Fragment
Materials: Needs various Ancient Parts (Screws, Springs, Gears, Shafts) and 4 Star Fragments.
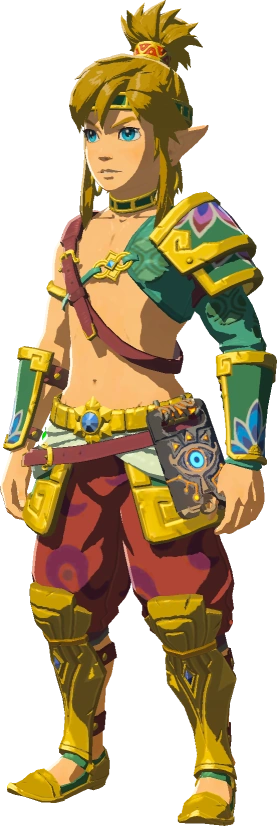
Fierce Deity Set (Majora’s Mask Link Amiibo)
Get It: Random drop from scanning the Majora’s Mask Link Amiibo. Contains Fierce Deity Mask, Fierce Deity Armor, Fierce Deity Boots.
Use Case: Unleash Link’s most powerful transformation! Provides Attack Up per piece and the Charge Attack Stamina Up bonus, making it functionally identical to the Barbarian Set but visually distinct and god-like. A top-tier offensive choice.
Set Bonus (★★☆☆+): Charge Attack Stamina Up
Upgrades: (Base Def: 3 per piece | Max Def: 20 per piece)
★☆☆☆ (5 Def): x5 Hinox Toenail, x1 Shard of Dinraal’s Scale
★★☆☆ (8 Def): x5 Hinox Tooth, x1 Shard of Dinraal’s Claw
★★★☆ (12 Def): x2 Hinox Guts, x1 Shard of Dinraal’s Fang
★★★★ (20 Def): x2 Lynel Guts, x1 Shard of Dinraal’s Horn
(Note: Each piece requires parts from a DIFFERENT dragon – Naydra for the Armor, Farosh for the Boots, Dinraal for the Mask).
Materials: Extremely demanding! Requires parts from all three dragons (Scale, Claw, Fang, Horn – one type per piece per star level, cycling through dragons for each piece), various Hinox parts, and Lynel Guts. Prepare for extensive boss and dragon farming.

Hero of the Sky Set (Skyward Sword Link Amiibo)
Get It: Random drop from scanning the Skyward Sword Link Amiibo. Contains Cap of the Sky, Tunic of the Sky, Trousers of the Sky.
Use Case: Embrace the style of the earliest hero in the timeline! Features the Master Sword Beam Up bonus and respectable defense.
Set Bonus (★★☆☆+): Master Sword Beam Up
Upgrades: (Base Def: 3 per piece | Max Def: 20 per piece)
★☆☆☆ (5 Def): x1 Sapphire, x1 Star Fragment
★★☆☆ (8 Def): x3 Sapphire, x1 Star Fragment
★★★☆ (12 Def): x5 Sapphire, x1 Star Fragment
★★★★ (20 Def): x10 Sapphire, x1 Star Fragment
Materials: Requires Sapphires (found in ore deposits, rarer than Amber/Opal, more common in snowy regions) and 12 Star Fragments total for the set.

Hero of Time Set (Ocarina of Time Link Amiibo)
Get It: Random drop from scanning the Ocarina of Time Link Amiibo. Contains Cap of Time, Tunic of Time, Trousers of Time.
Use Case: Pure Ocarina of Time nostalgia! Offers solid defense when upgraded and the useful Master Sword Beam Up bonus for fans of the classic ranged attack.
Set Bonus (★★☆☆+): Master Sword Beam Up
Upgrades: (Base Def: 3 per piece | Max Def: 20 per piece)
★☆☆☆ (5 Def): x3 Amber, x1 Star Fragment
★★☆☆ (8 Def): x5 Amber, x1 Star Fragment
★★★☆ (12 Def): x15 Amber, x1 Star Fragment
★★★★ (20 Def): x30 Amber, x1 Star Fragment
Materials: Primarily requires a large amount of Amber (found commonly in ore deposits) and a total of 12 Star Fragments (4 per piece) across the full set upgrade path.

Hero of Twilight Set (Twilight Princess / Smash Bros. Link Amiibo)
Get It: Random drop from scanning the Twilight Princess Link or Smash Bros. Link Amiibo. Contains Cap of Twilight, Tunic of Twilight, Trousers of Twilight.
Use Case: A fan-favorite, more rugged hero look. Great defense and the Master Sword Beam Up bonus. Note: This set shares the exact same upgrade path as the Armor of the Wild set, just with lower defense caps.
Set Bonus (★★☆☆+): Master Sword Beam Up
Upgrades: (Base Def: 3 per piece | Max Def: 20 per piece)
★☆☆☆ (5 Def): x1 Topaz, x1 Star Fragment
★★☆☆ (8 Def): x3 Topaz, x1 Star Fragment
★★★☆ (12 Def): x5 Topaz, x1 Star Fragment
★★★★ (20 Def): x10 Topaz, x1 Star Fragment
Materials: Needs Topaz gems (found in ore deposits, more common in Gerudo/Eldin regions) and 12 Star Fragments total for the set.

Hero of the Wind Set (Wind Waker / Toon Link Amiibo)
Get It: Random drop from scanning the Wind Waker / Toon Link Amiibo. Contains Cap of the Wind, Tunic of the Wind, Trousers of the Wind.
Use Case: Sail the winds of Hyrule in style! Brings the cel-shaded hero’s look to BotW. Offers good defense and the Master Sword Beam Up bonus.
Set Bonus (★★☆☆+): Master Sword Beam Up
Upgrades: (Base Def: 3 per piece | Max Def: 20 per piece)
★☆☆☆ (5 Def): x3 Opal, x1 Star Fragment
★★☆☆ (8 Def): x5 Opal, x1 Star Fragment
★★★☆ (12 Def): x10 Opal, x1 Star Fragment
★★★★ (20 Def): x20 Opal, x1 Star Fragment
Materials: Needs plenty of Opal (common from ore deposits, especially near water) and 12 Star Fragments total for the set.

Hero Set (8-Bit Link Amiibo)
Get It: Random drop from scanning the 8-Bit Link Amiibo. Contains Cap of the Hero, Tunic of the Hero, Trousers of the Hero.
Use Case: The original classic! Pixel perfect nostalgia. Features the Master Sword Beam Up bonus.
Set Bonus (★★☆☆+): Master Sword Beam Up
Upgrades: (Base Def: 3 per piece | Max Def: 20 per piece)
★☆☆☆ (5 Def): x1 Ruby, x1 Star Fragment
★★☆☆ (8 Def): x3 Ruby, x1 Star Fragment
★★★☆ (12 Def): x5 Ruby, x1 Star Fragment
★★★★ (20 Def): x10 Ruby, x1 Star Fragment
Materials: Requires Rubies (found in ore deposits, rarer, more common in Eldin region) and 12 Star Fragments total for the set.
Sheik’s Mask (Sheik Amiibo)
Get It: Random drop from scanning the Sheik Amiibo.
Use Case: Perfect for aspiring Sheikah! Provides a Stealth Up bonus, allowing for sneaky maneuvers or combining stealth with other armor effects.
Effect: Stealth Up (Single piece)
Upgrades: (Base Def: 2 | Max Def: 20)
★☆☆☆ (4 Def): x1 Silent Princess, x1 Star Fragment
★★☆☆ (6 Def): x2 Silent Princess, x2 Star Fragment
★★★☆ (10 Def): x3 Silent Princess, x3 Star Fragment
★★★★ (20 Def): x4 Silent Princess, x4 Star Fragment
Materials: Requires the rare Silent Princess flower (found near Great Fairy Fountains, Master Sword pedestal, specific mountain spots) and a total of 10 Star Fragments.
Important Notes on Special Gear
- Most base DLC armor pieces (Phantom, Tingle, Royal Guard, etc.) cannot be upgraded at Great Fairy Fountains. Their stats are fixed.
- Major masks (Majora’s, Korok, Midna’s, Ravio’s Hood) are not upgradeable.
- Amiibo “Hero” sets and Fierce Deity set are upgradeable, but often cap at lower defense (20) than top-tier base game sets (28). Their upgrade materials often include Star Fragments (usually 1 per piece per level).
Strategy & Tips for the Discerning Hero
Mix and Match
Don’t be afraid to combine pieces! Champion’s Tunic + Climbing Boots + Snowquill Headdress can be great for exploring cold mountains while seeing enemy HP. Prioritize the effect you need most.
Prioritize Upgrades
Early on, getting the Hylian or Soldier’s set to ★★☆☆ offers a solid defense boost. The Stealth and Climbing sets are game-changers for exploration – upgrading them early makes traversal much smoother. Focus on sets that suit your playstyle or current objective.
Material Hoarding
Don’t sell all your gems and monster parts! Check the upgrade requirements before selling valuable materials like Diamonds, Star Fragments, Ancient Cores, and Lynel Guts. They are much harder to reacquire than Rupees.
Know Your Vendors

Grante (Tarrey Town)
Found on a balcony in Tarrey Town after completing the “From the Ground Up” side quest. He sells rare armor pieces (like Barbarian or Climbing gear) only if you’ve already found at least one piece of that set. He also sells replacements for unique weapons/shields like the Hylian Shield if they break.
Kilton (Fang and Bone)
Appears near villages/stables at night (first encounter is at Skull Lake in Akkala). Trade monster parts for his unique currency, Mon, to buy monster masks and the Dark Link Set (Night Speed Up, not upgradeable).
Phew! That covers just about everything you need to know about armor in Breath of the Wild. Whether you’re collecting for style, defense, or utility, understanding how to find, use, and upgrade your gear is key to mastering the wilds of Hyrule. Gather those materials, seek out the Great Fairies, and adventure on, brave hero!