


Side Quest Guides
- Romani Ranch Events: Protecting the ranch and related activities.
- Anju and Kafei’s Quest: Detailed steps to reunite the couple.
- Goron Races: Participation requirements and rewards.
- Frog Choir: Locations and coordination of the frog choir.
- Oceanside Spider House: Strategies to clear the spider-infested house near the ocean.
- Swamp Spider House: Strategies to clear the spider-infested house in the swamp.
Welcome, fellow adventurers, to the definitive guide for conquering the incredible side quests of The Legend of Zelda: Majora’s Mask! If you’re looking to snag every mask, bottle, and Piece of Heart that Termina has to offer, you’ve come to the right place. Forget about existential dread for a moment; let’s dive into these rewarding challenges and make the most of our time before that pesky moon crashes down!
Romani Ranch Under Siege: Protecting the Cows and the Milk

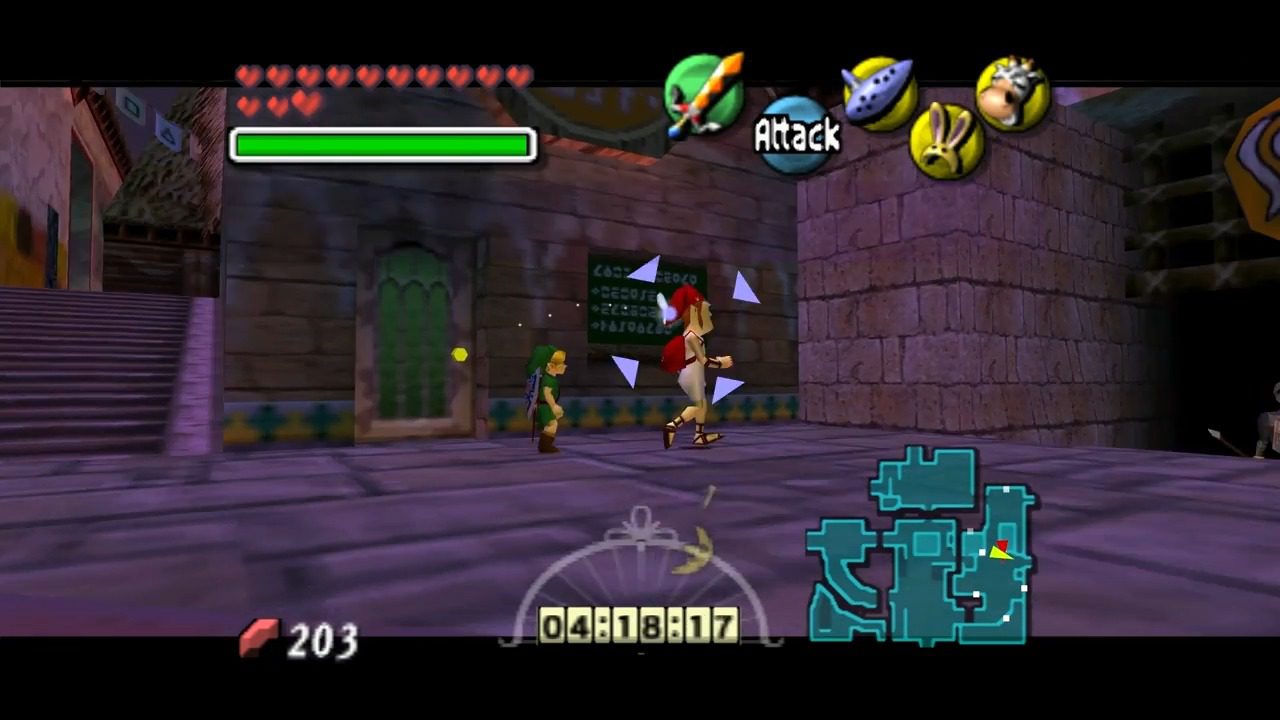
Night 1: Defend the Ranch!
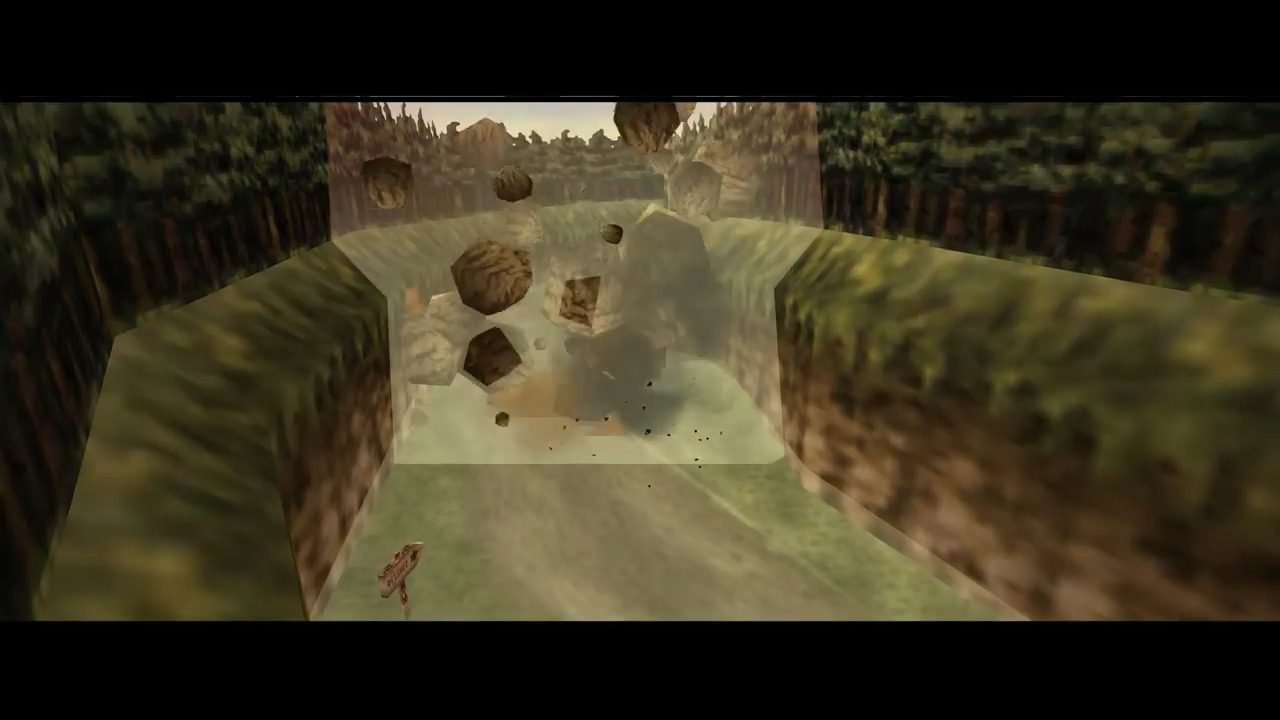
Before you can protect the ranch, you’ll need to ensure you can even reach it on the first day. This requires clearing the large boulder that blocks the road to Romani Ranch. This can be done using a Powder Keg, which becomes available after you have cleared the Snowhead Temple. Additionally, you’ll need to have learned Epona’s Song from Romani by successfully completing her horse archery balloon-shooting mini-game earlier on the first day.

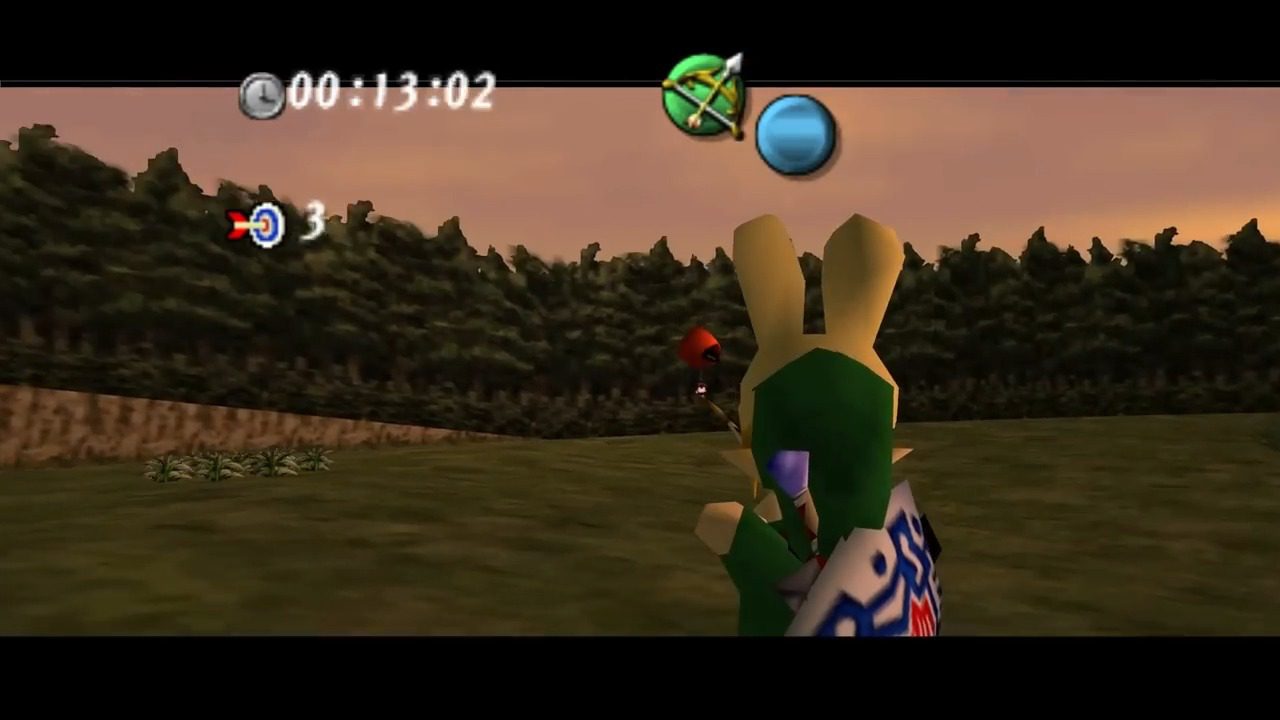

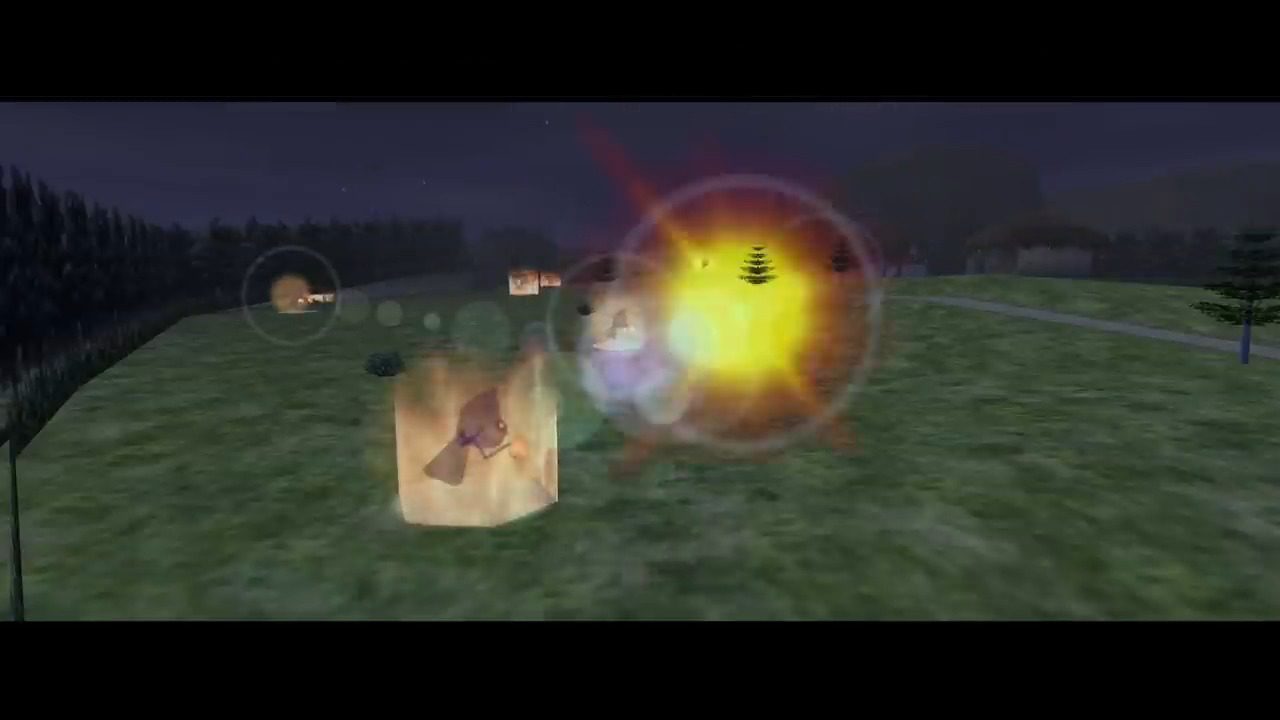
Once you’ve met these prerequisites, return to Romani Ranch at 2:00 AM on the first night. Romani will be waiting for your help in defending the ranch’s precious cows from “enigmatic invaders”. These mysterious beings, often described as “ghost-like aliens” or simply “Them,” will attempt to steal the cows from the barn. Your task is to fend them off until the sun rises around 5:15 AM.
To successfully defend the ranch, consider employing these strategies:
- Mount your trusty steed, Epona, and ride around the ranch, using your bow to shoot down the approaching invaders.
- Equip the Bunny Hood to significantly increase your movement speed on foot, allowing you to quickly intercept the ghostly figures.
- Find a strategic vantage point to snipe the invaders from a distance. Good options include the small hill located in front of Epona’s stall or the roof of the ranch house, which can be accessed via a ladder at the back.
- If you find the invaders too fast, you can play the Song of Inverted Time to slow them down, giving you more time to react and shoot. However, be aware that this will also extend the duration of the defense. Some adventurers find this helpful, while others prefer the challenge at normal speed.
- Purchase the Romani Ranch map from Tingle. This map will display the locations of the invaders, making it much easier to track and intercept them before they reach the barn.
- Pay close attention to Romani’s dog. It has a keen sense for the supernatural and will bark in the direction of the closest invader to the barn, providing you with an early warning.
- Focus your efforts on the invaders that are getting close to the barn. Be particularly vigilant for one invader that often attempts to sneak around the back of the barn.
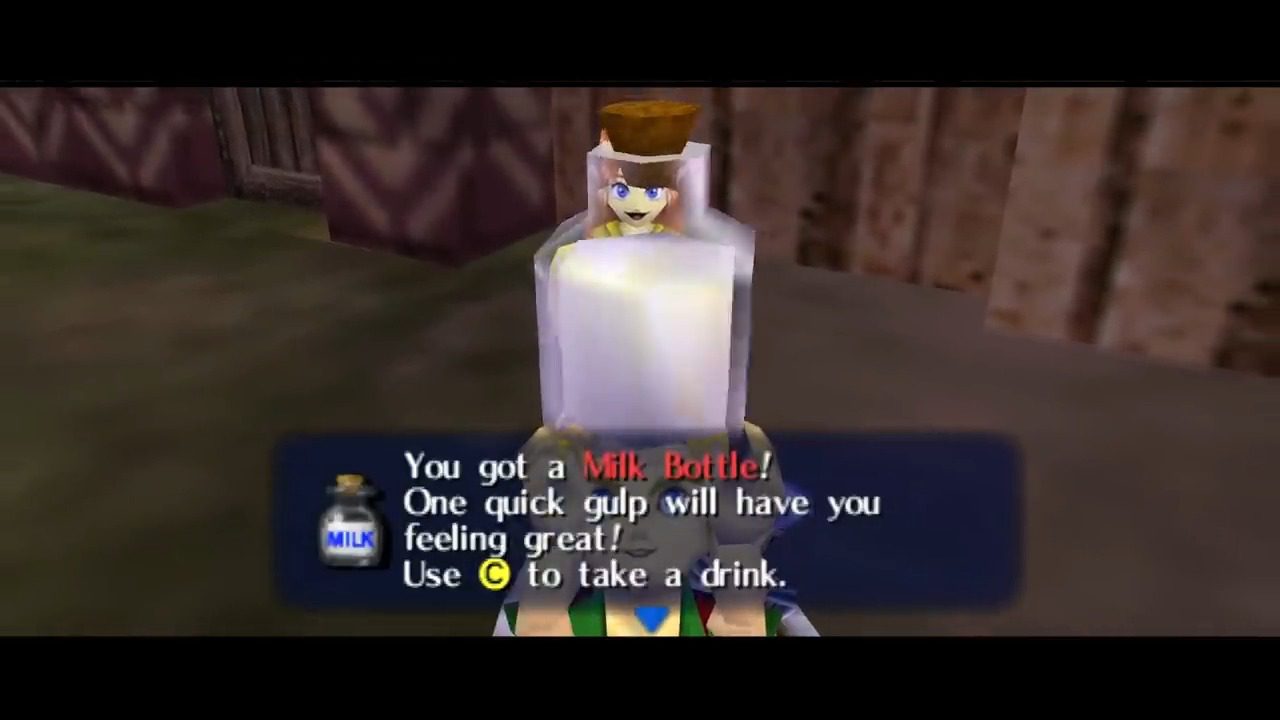
If you successfully protect the barn until the sun rises, Romani will express her gratitude by rewarding you with a Bottle of Milk.
Day 2: Milk Delivery Escort!
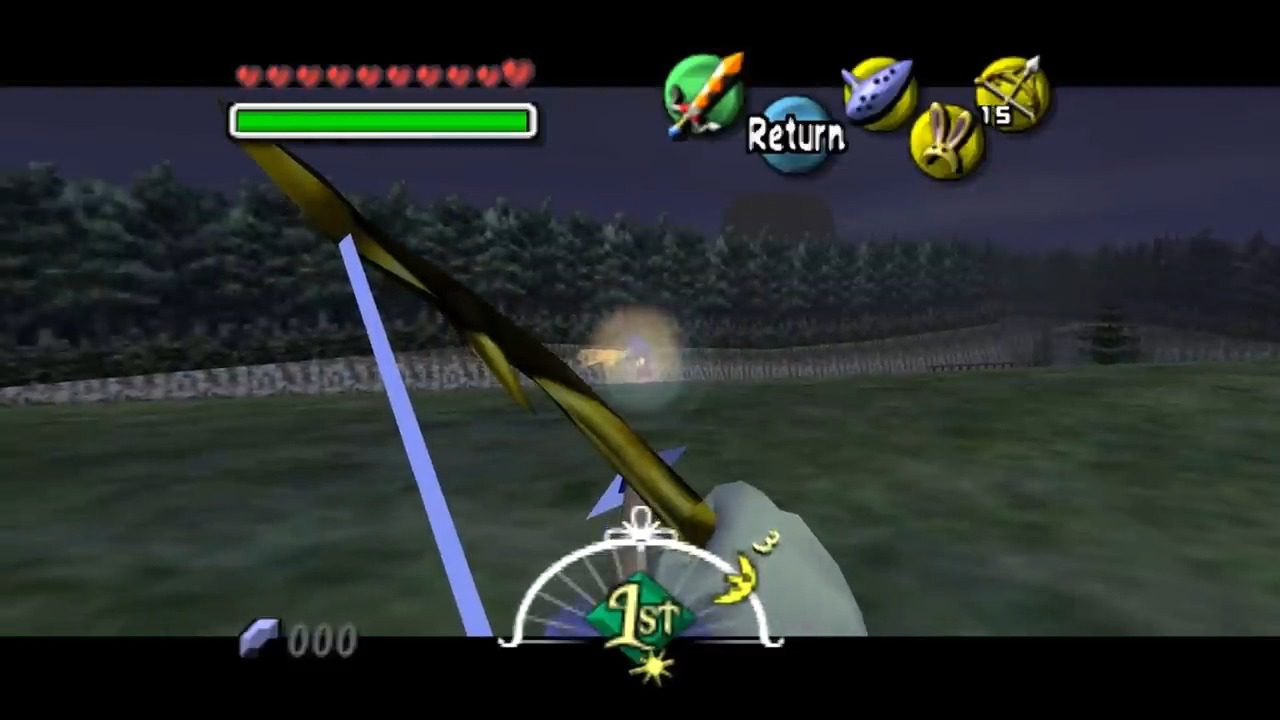
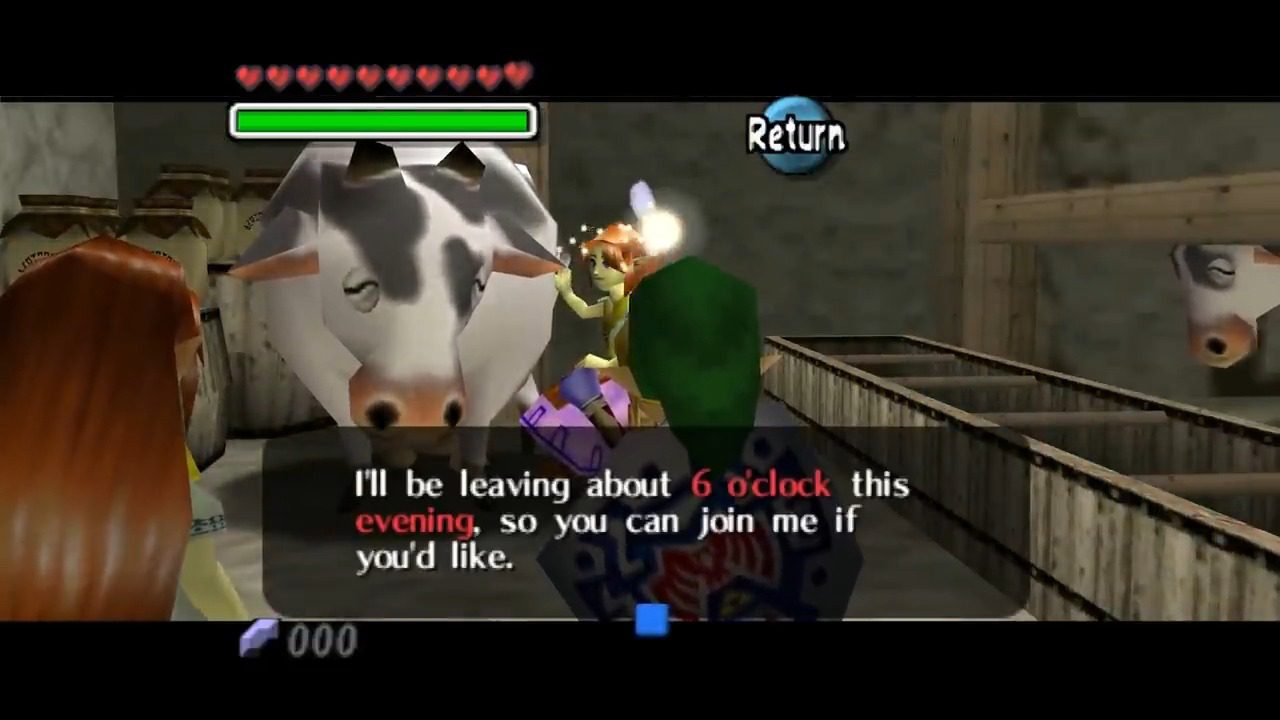
Having successfully defended Romani Ranch on the first night, you’ll have the opportunity to assist Cremia, Romani’s older sister, with her milk delivery to Clock Town on the second night.
Return to Romani Ranch at 6:00 PM on the second day to meet with Cremia. She will explain that she needs to deliver milk to the Milk Bar in East Clock Town. However, the usual route along Milk Road is blocked by a fence. As a result, she will be taking a detour through the Gorman Racetrack. During this detour, you will encounter the “potential threats” – the Gorman Brothers, two mischievous individuals who will attempt to steal or break the precious milk jars.
Your role in this endeavor is to ride in the back of Cremia’s wagon and defend it and the milk from the Gorman Brothers. You will have an unlimited supply of arrows, so don’t hesitate to keep firing rapidly at the bandits to knock them back and prevent them from reaching the wagon.
For those who have already completed this side quest in a previous cycle and possess the Romani Mask, there’s a much easier way to ensure a safe delivery. If you wear the Troupe Leader’s Mask (which can be obtained in the Milk Bar after getting the Romani Mask), the Gorman Brothers will not attack the wagon at all. They will simply follow along without posing any threat.
Successfully defending the milk cart from the Gorman Brothers for the first time will earn you the Romani Mask as a reward. This mask grants you membership to the exclusive Milk Bar in Clock Town. If you complete this task again in subsequent cycles after already obtaining the Romani Mask, Cremia might reward you with a hug or a valuable Gold Rupee in the 3DS version of the game.


Bonus Intel: Who are “Them” and the Gorman Brothers?
The mysterious “Them” that Romani speaks of are said to appear at Romani Ranch every year during the Carnival of Time, with the sole purpose of stealing the cows. Their true nature remains a subject of speculation among the residents of Termina and even players. Some theories suggest they are alien beings, perhaps inspired by folklore like the Flatwoods Monster, while others believe they could be some form of ghostly entities.
The Gorman Brothers, on the other hand, are more grounded in reality. These two are the owners and operators of the Gorman Track located on Milk Road. They are known for their less-than-honest business practices and view Romani Ranch as their primary competitor in the milk industry. In their attempts to gain a monopoly, they resort to various underhanded tactics, including banditry, to sabotage Cremia’s milk deliveries. Interestingly, these two brothers are related to Gorman, the leader of the Gorman Traveling Troupe, adding another layer to their character.
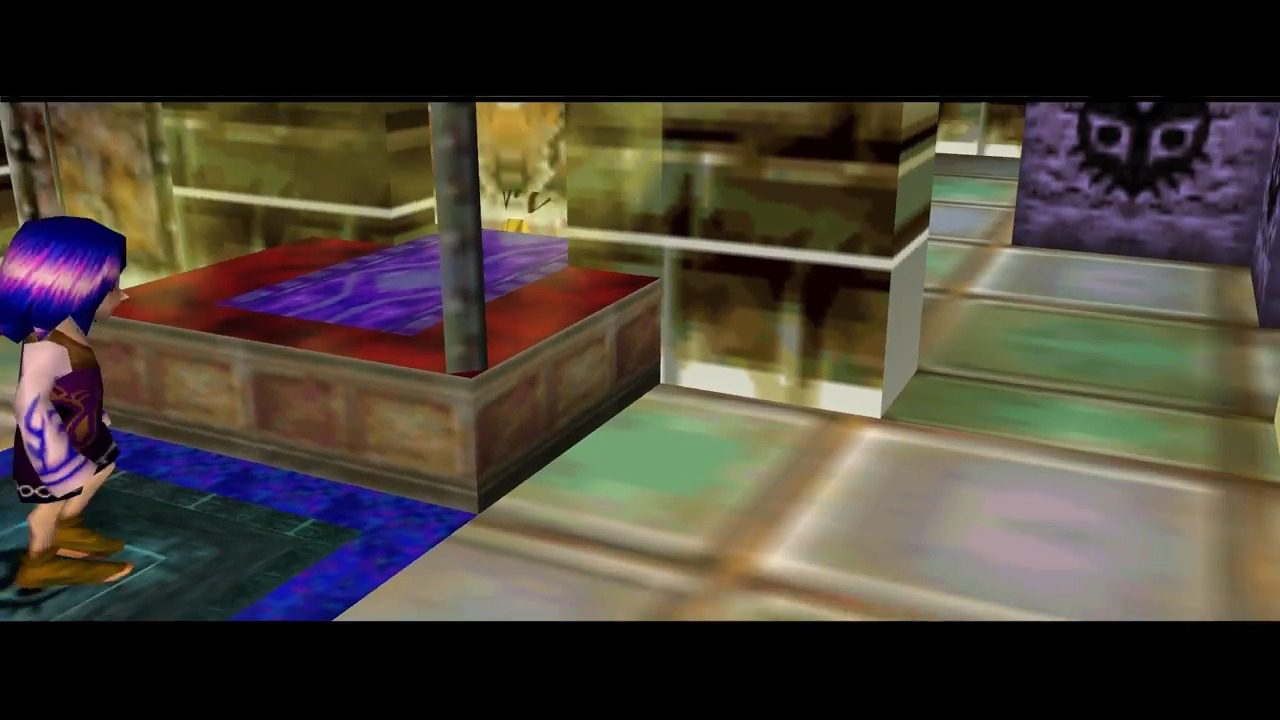
Anju and Kafei’s Heartbreak: A Three-Day Love Story
This is a quest for the ages, a poignant tale of lost love that unfolds across all three days. It demands precise timing and careful actions, but the rewards – the coveted Couple’s Mask and an extra bottle – make every step worthwhile. Let’s get started on this emotional rollercoaster.
Day 1: Setting the Stage
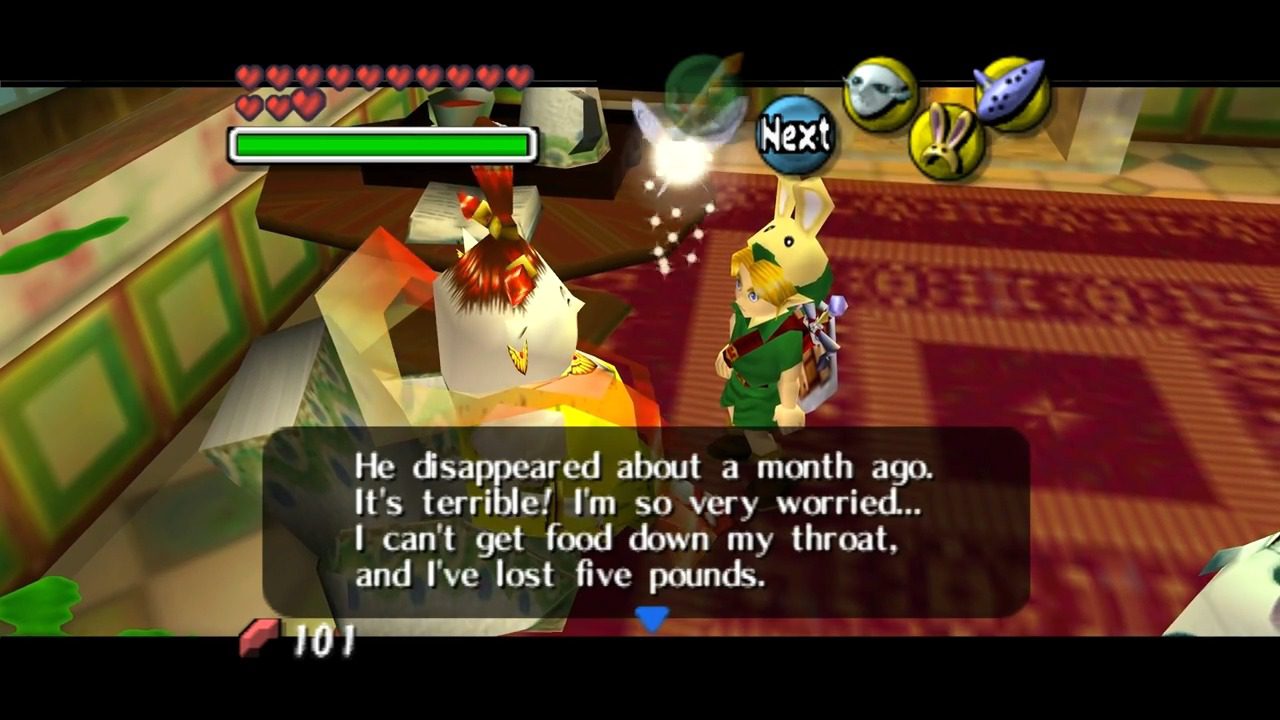
Our journey begins on the dawn of the first day. Make your way to the Mayor’s Office in East Clock Town. Inside, head to the door on the right and speak with the large woman in the yellow dress, Madame Aroma. Offer your assistance in finding her missing son, Kafei. Touched by your willingness to help, she will entrust you with Kafei’s Mask. This mask is your key to unlocking the initial stages of this intricate quest.

Later in the day, around 2:10 PM, you can optionally witness a brief scene at the Stock Pot Inn where the Postman delivers a letter from Kafei to Anju. While not strictly necessary to advance the quest, observing this exchange provides valuable context to the unfolding narrative.
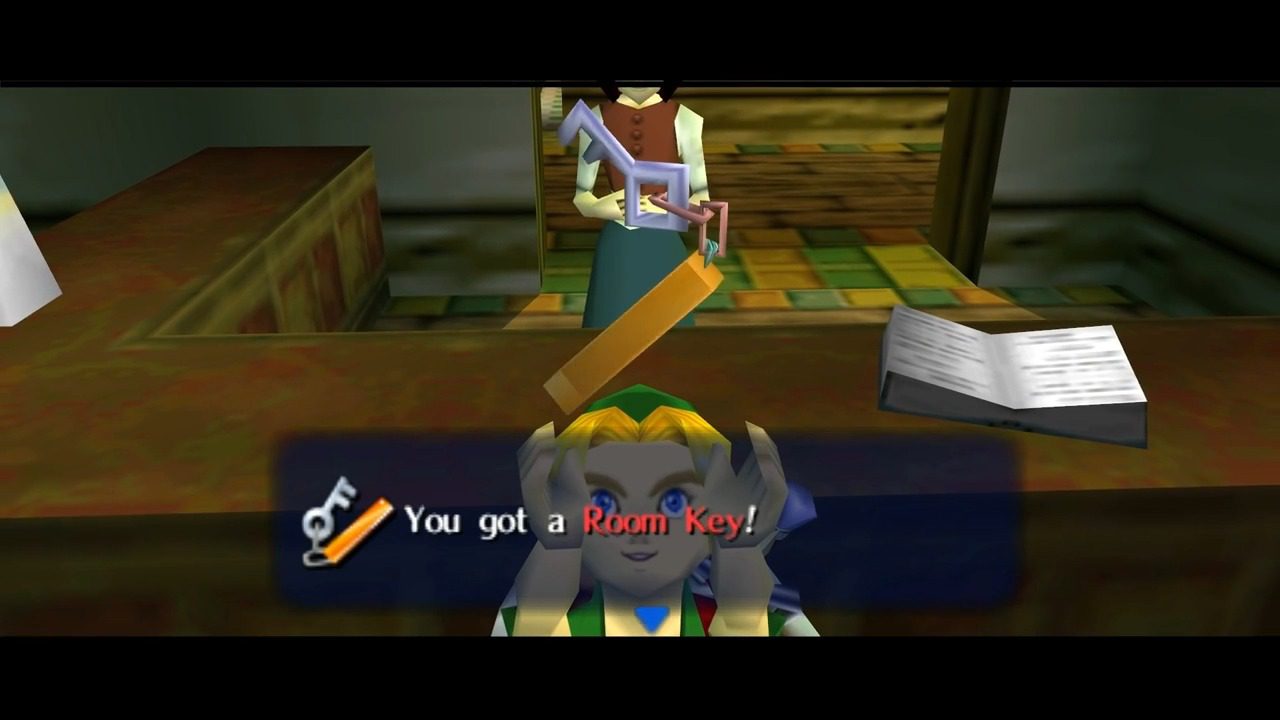
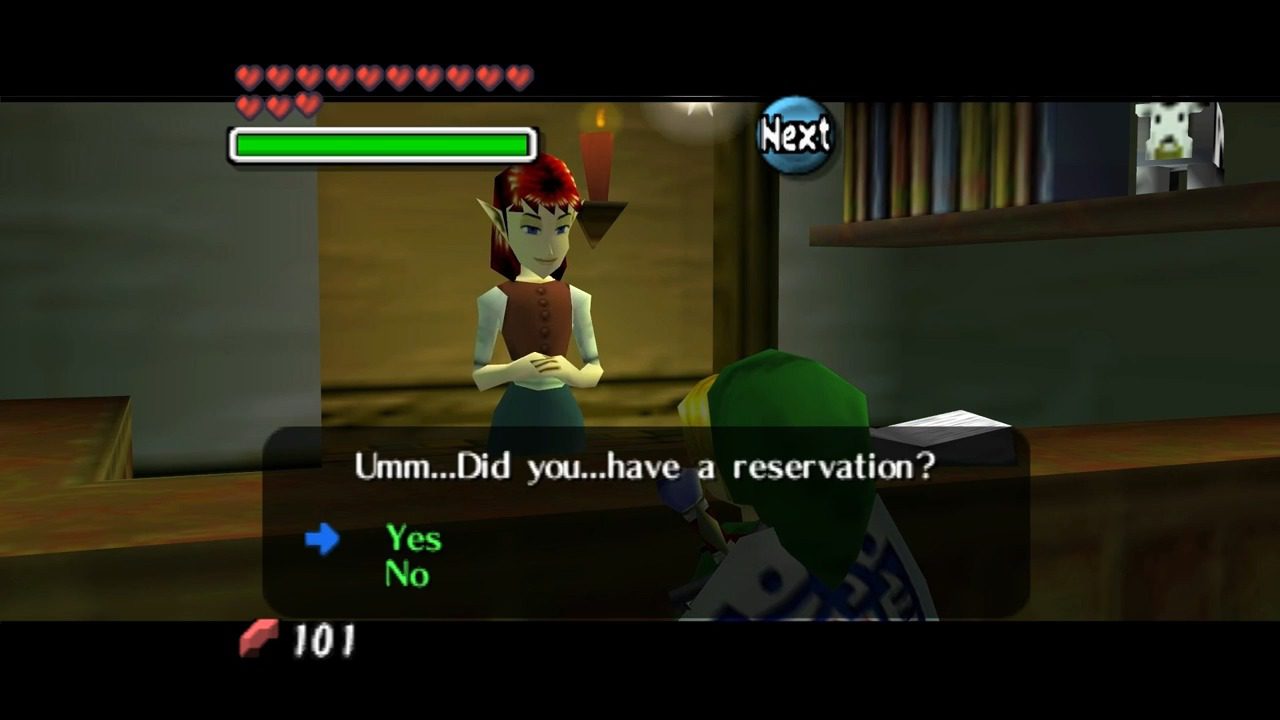
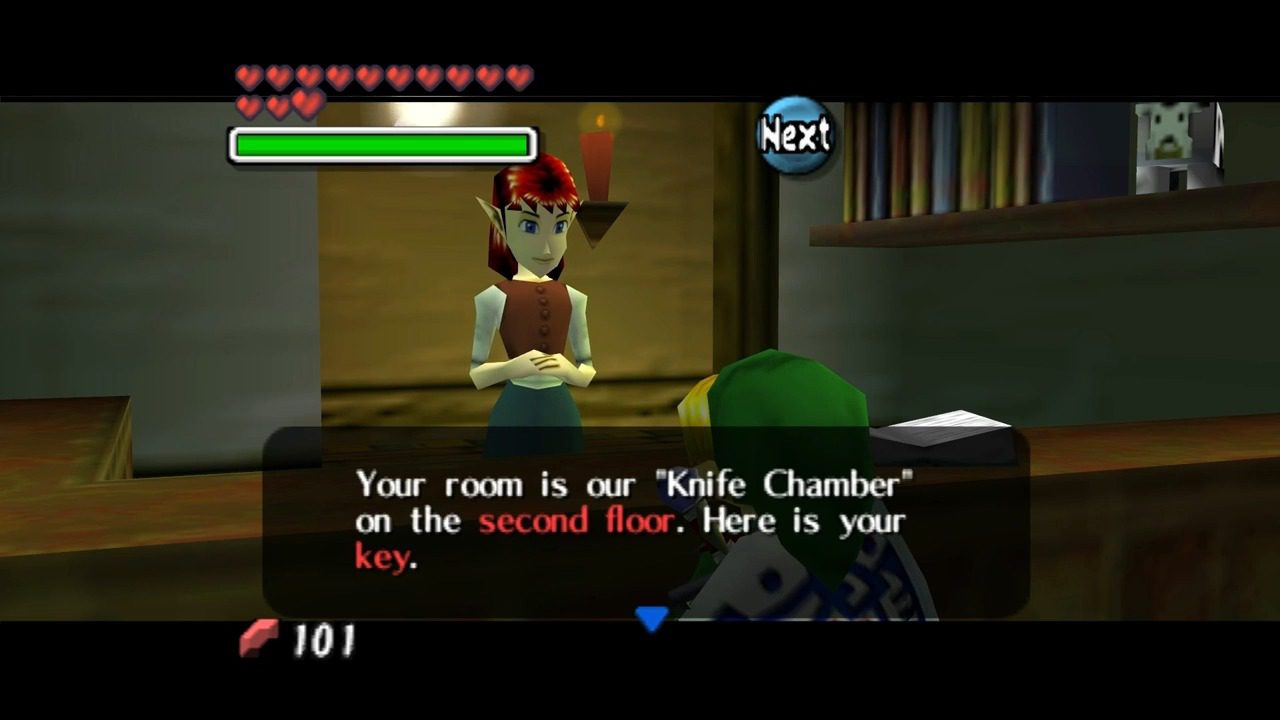
Shortly after the Postman departs, around 2:15 PM, enter the Stock Pot Inn and speak with Anju. If you are playing the 3DS version of the game, it is crucial to be wearing the Goron Mask during this conversation. Otherwise, Anju might mistake you for a different Goron who has a reservation at the inn. If you meet this condition, she will provide you with a Room Key. This key will prove essential for accessing the inn later when it is closed for the night.
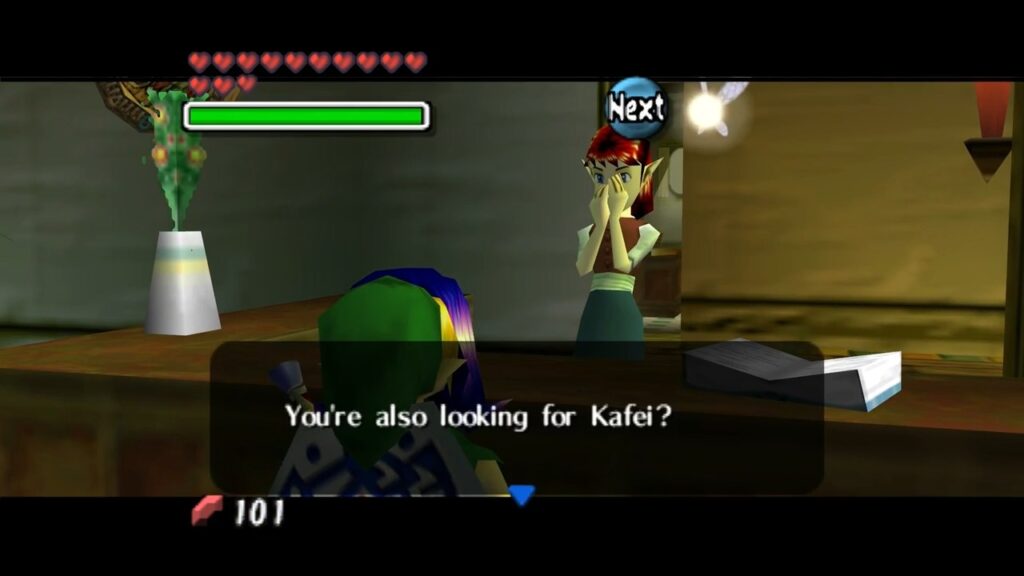
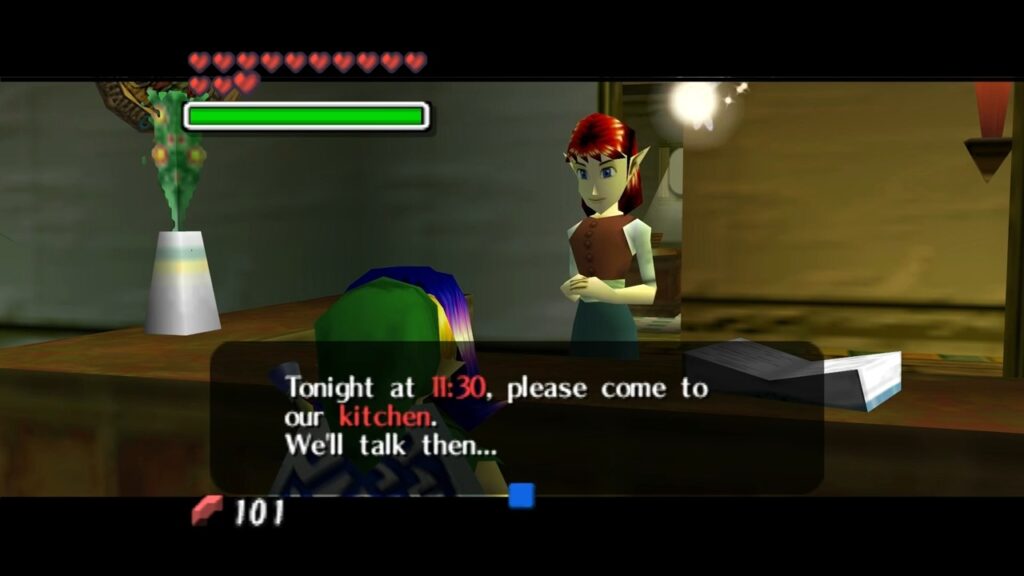
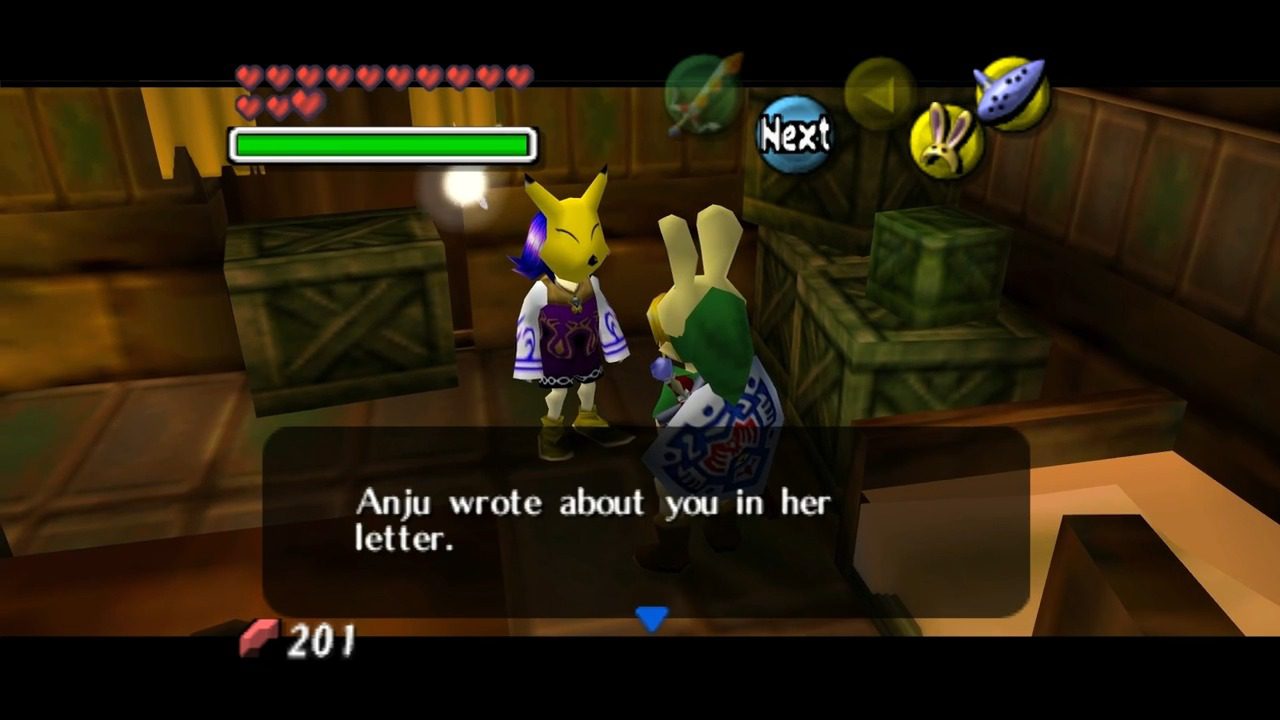
Now, sometime between 2:00 PM and 7:00 PM, equip Kafei’s Mask and speak with Anju again at the Stock Pot Inn. Recognizing you as someone connected to Kafei, she will ask you to meet her in the kitchen on the ground floor at 11:30 PM that night.
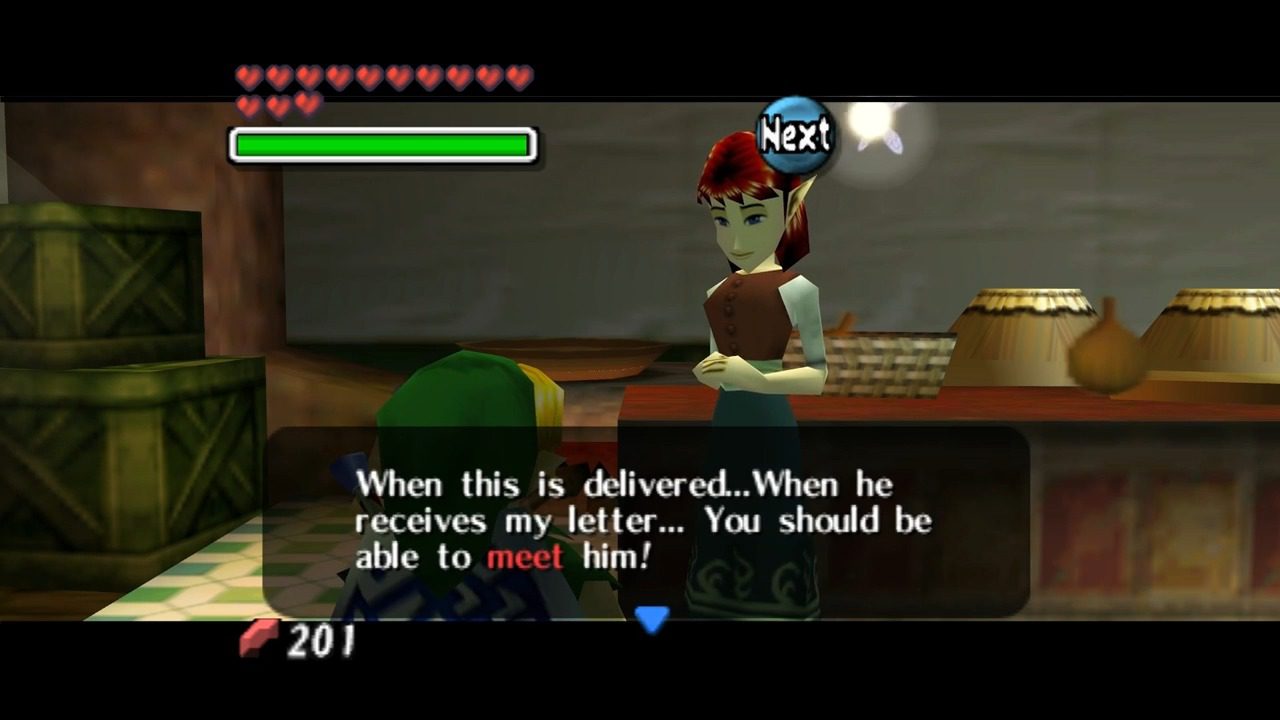
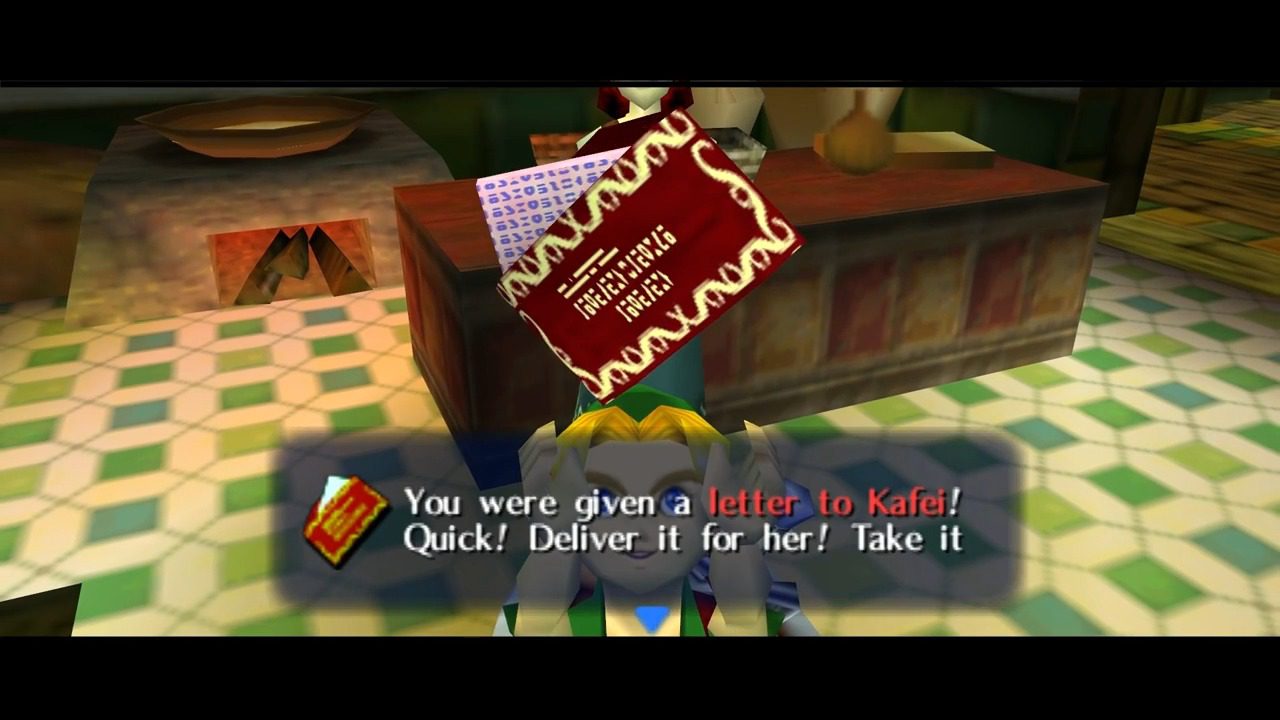
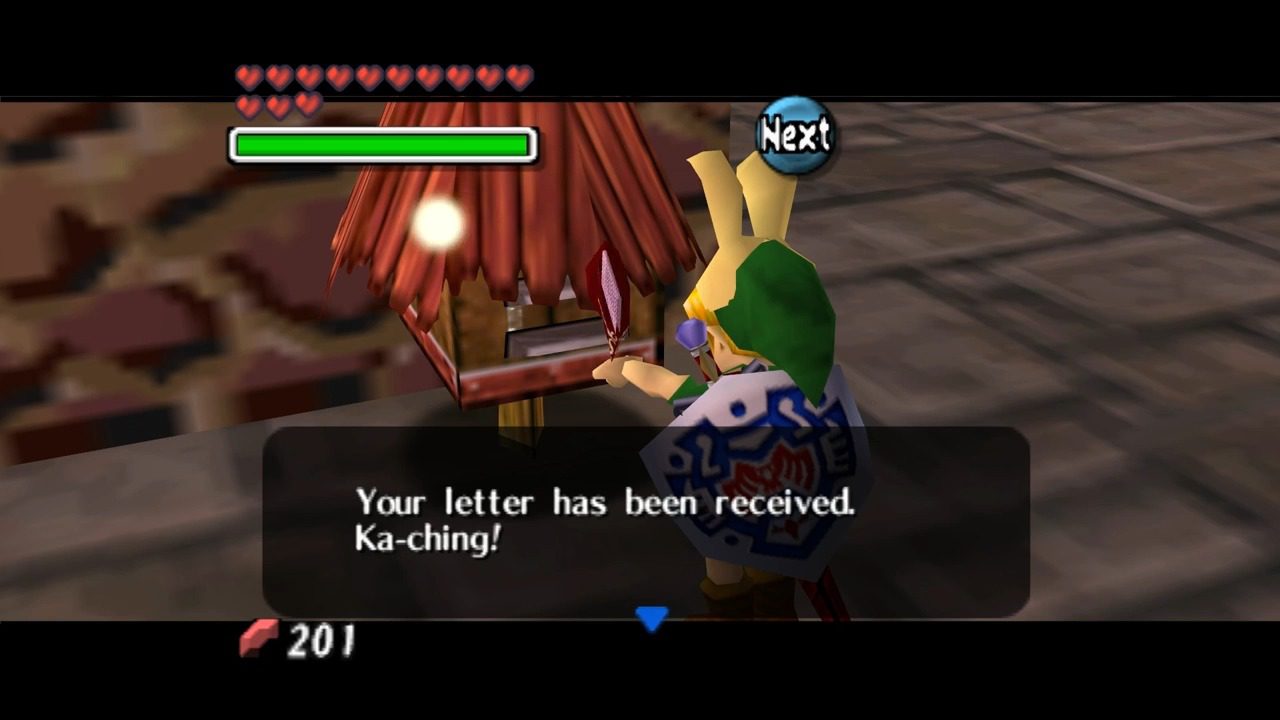
As the clock approaches 11:30 PM, ensure you are in the Stock Pot Inn. If you arrive after the inn has closed its doors, don’t fret! There’s a Deku Flower located just outside the inn. Use it to launch yourself onto the roof and enter through the second-floor door. Once inside, head to the kitchen on the first floor and wait for Anju. At 11:30 PM, speak with her. Trusting you, she will reveal her plight and give you a letter addressed to Kafei. Your final task for the first day is to mail this important letter. Locate any mailbox in Clock Town – there are several scattered throughout the different sections. Deposit the letter before the dawn of the second day to keep the questline on track.
Day 2: Following the Trail
As the second day begins, your first priority should be to ensure that Kafei’s letter has been successfully mailed if you haven’t done so already. This seemingly simple action is a critical link in the chain of events that will lead to Anju and Kafei’s reunion. Around 3:00 PM, make your way to the Laundry Pool area in Clock Town. Keep an eye on the back door of the Curiosity Shop, which is located within the Laundry Pool area. At approximately 3:10 PM, the Postman will arrive and ring the bell at this back door to deliver mail to Kafei. While the Postman is engaged, seize this opportunity to quickly enter Kafei’s house through the back door of the Curiosity Shop and wait for him inside.
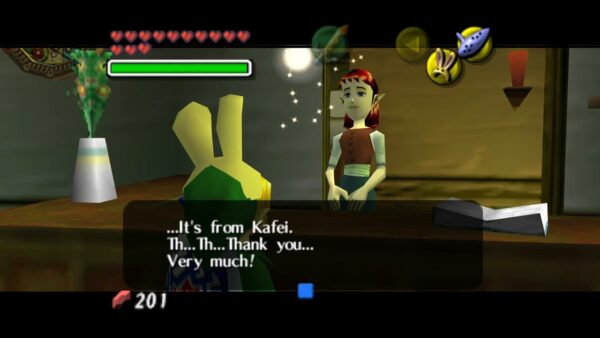
Around 4:00 PM, Kafei will return to his house. Speak with him, and he will confide in you the unfortunate circumstances that have befallen him. He will reveal that he was transformed into a child by the mischievous Skull Kid and that his precious Sun Mask was stolen by the notorious thief, Sakon. As a token of his trust and a request for your continued help, he will give you the Pendant of Memories to deliver to Anju. After this heartfelt conversation, Kafei might offer you a glimpse through a spyglass into the Curiosity Shop. He is desperately hoping to catch sight of Sakon, the thief who stole his wedding mask. While this is an interesting moment in the narrative, it is not essential for the completion of the quest.
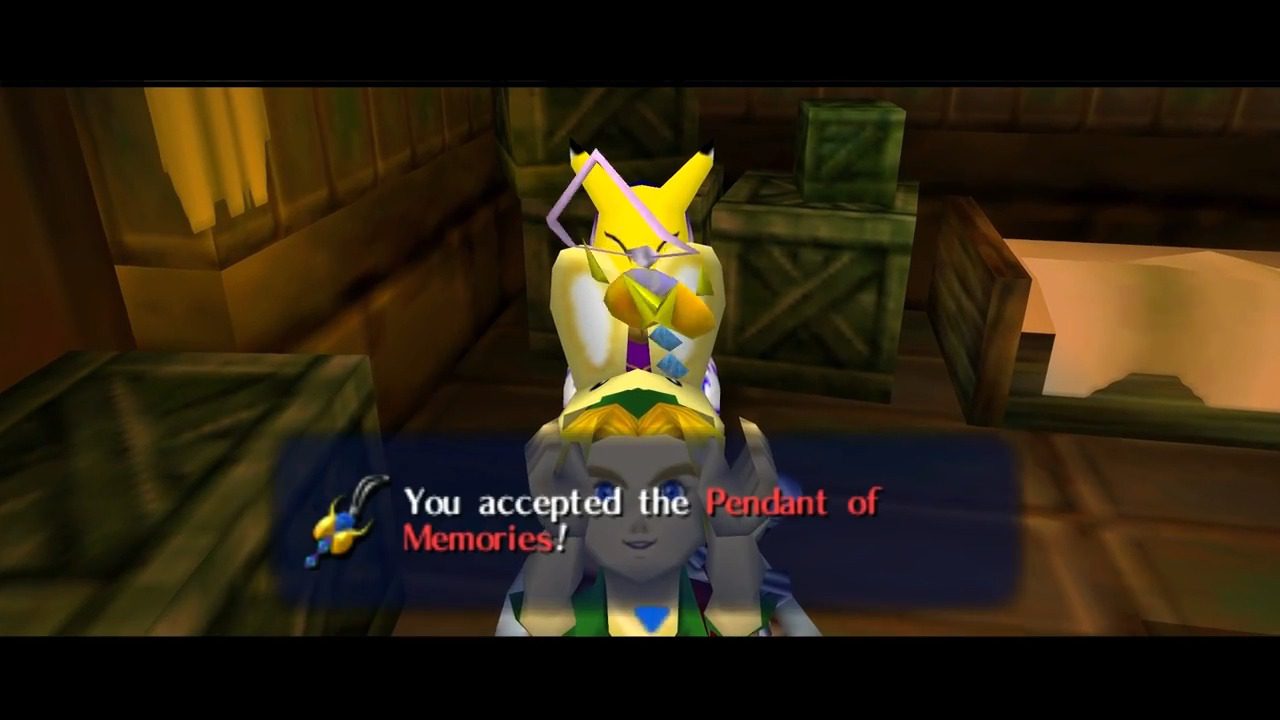
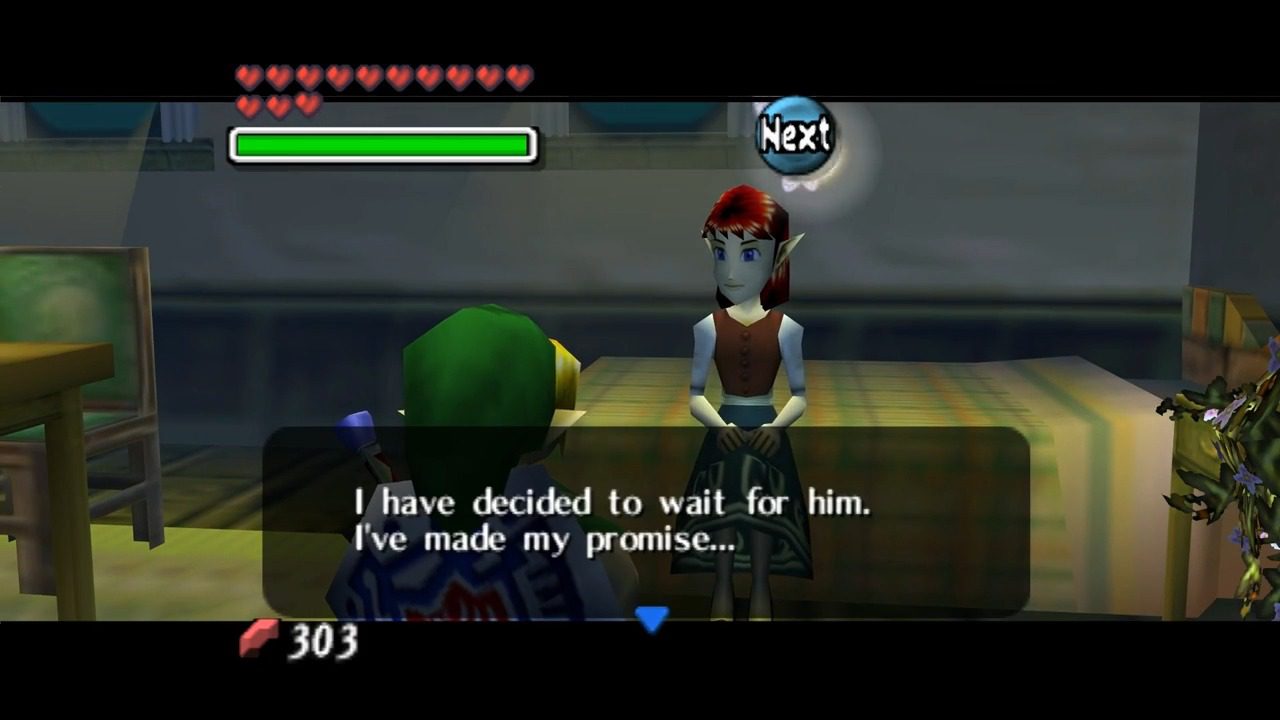
Your next crucial step is to deliver the Pendant of Memories to Anju at the Stock Pot Inn. You can do this any time before 7:00 PM on the second day. Presenting her with the pendant will reassure her of Kafei’s intentions and ensure that she remains at the inn, waiting for his return on the final night.
Day 3: The Reunion
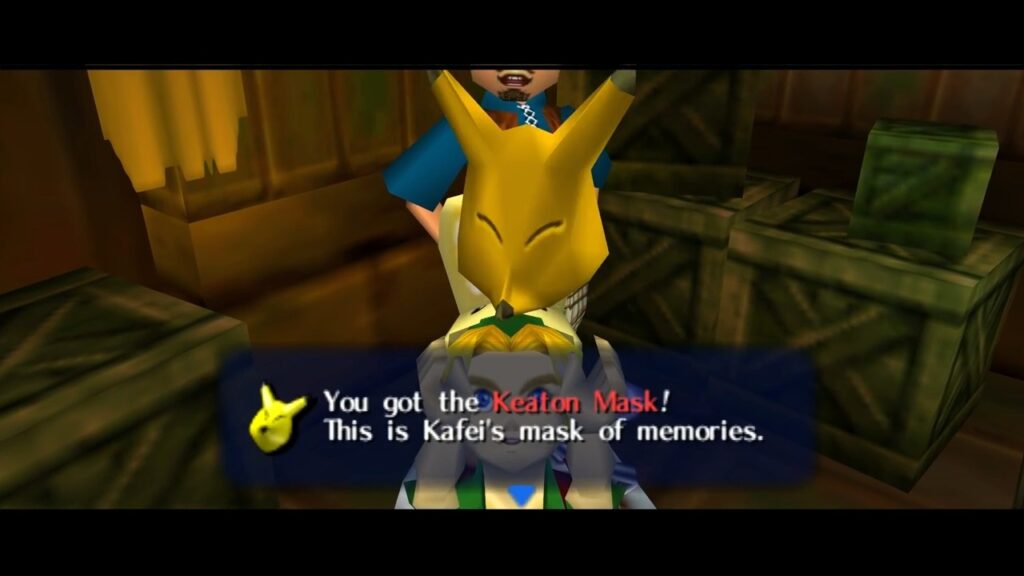
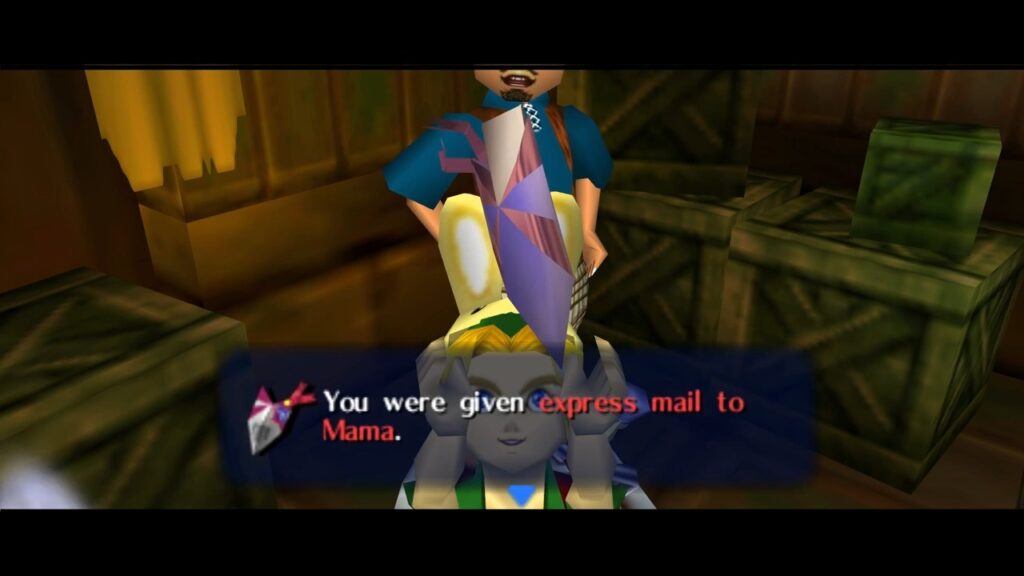
As the final day dawns, your focus shifts to the eventual reunion of Anju and Kafei. At 1:00 PM, return to Kafei’s hideout, which is still located at the back of the Curiosity Shop in the Laundry Pool area. Inside, you will find the owner of the Curiosity Shop instead of Kafei. Speak with him, and he will give you the Keaton Mask and a letter titled Special Delivery to Mama. (Note that in the 3DS version, the Curiosity Shop door might be unlocked as early as dawn on the third day.)

Around 6:00 PM, make your way to Ikana Canyon and head to the lower area before the river, where Sakon’s hideout is situated. You will find Kafei hiding behind a rock, anxiously awaiting Sakon’s arrival. Join him behind the rock (or equip the Stone Mask if you possess it to remain unseen) and wait for the thief. To give yourself more time for the upcoming challenges, it is advisable to play the Song of Inverted Time before 6:00 PM.
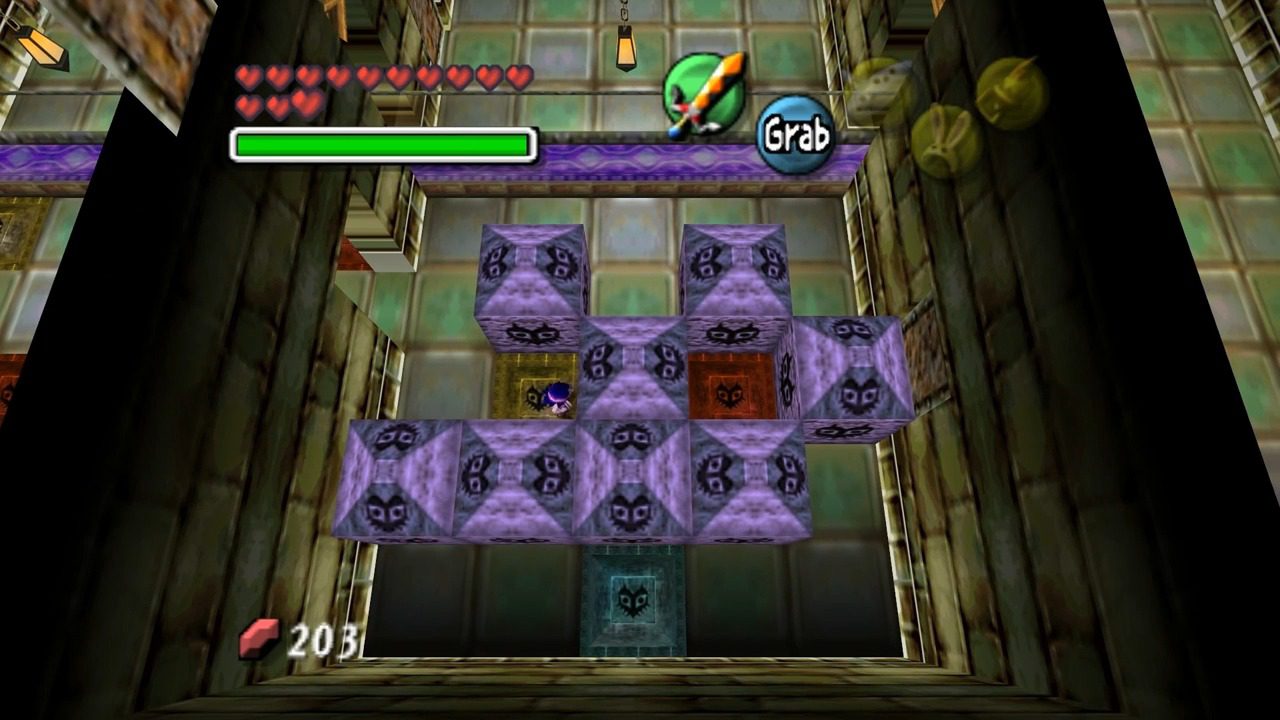
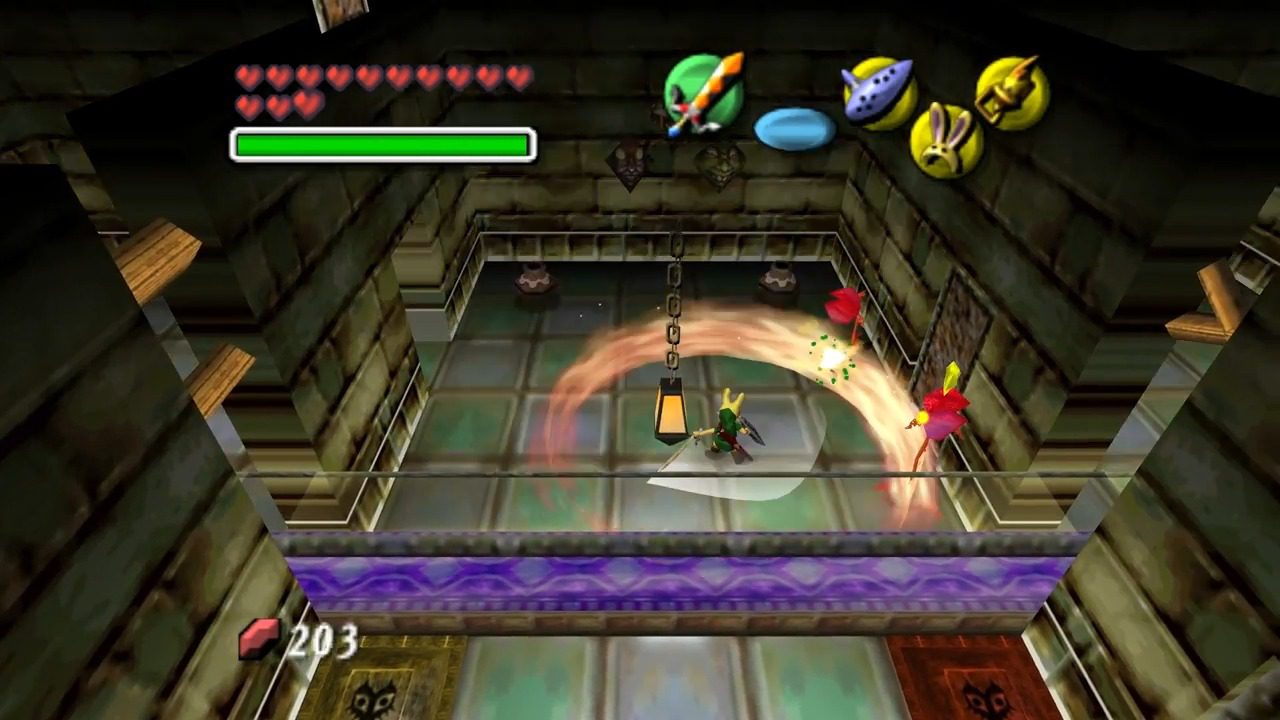
Once night falls, Sakon will eventually appear and enter his hideout. As soon as the door opens, Kafei will follow him inside. You must quickly follow Kafei into the hideout as well, as the door will not remain open for long. Inside Sakon’s Hideout, you will find yourself alternating between controlling Link and Kafei. Together, you must solve a series of puzzles to retrieve the stolen Sun’s Mask. This sequence demands quick thinking and fast reflexes. Coordinate your actions carefully to navigate the traps and enemies.
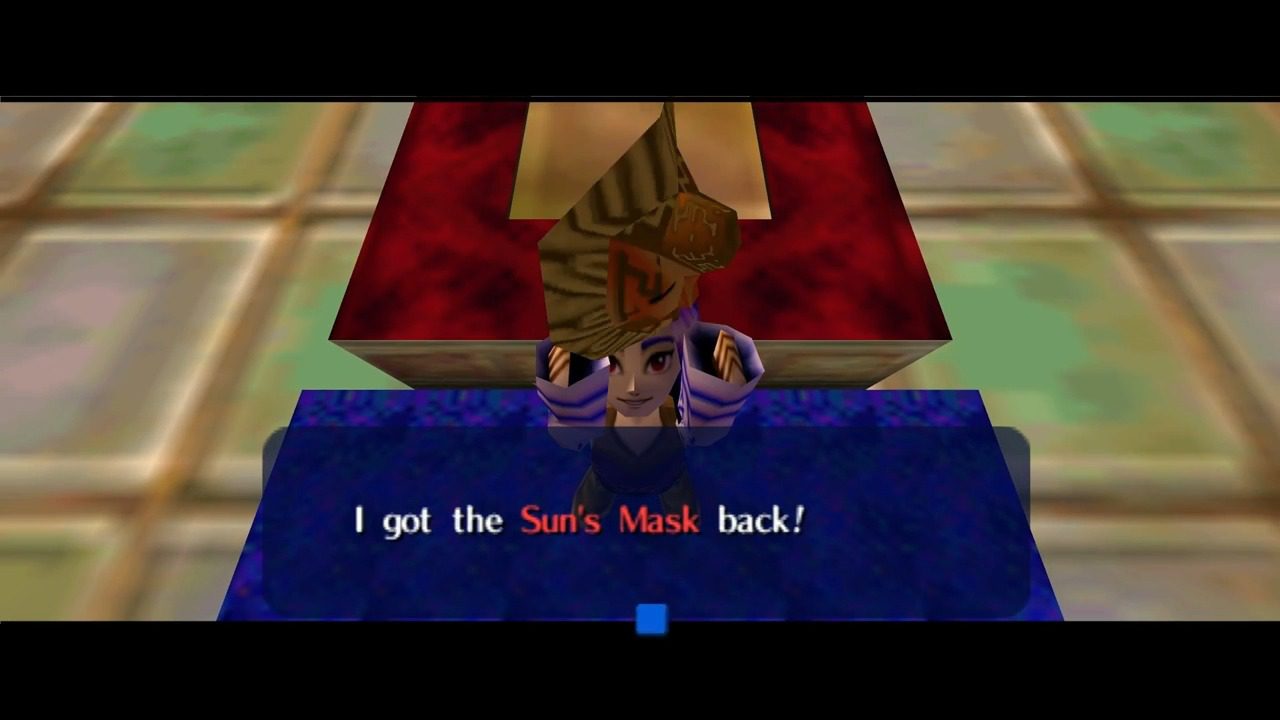
After successfully navigating the hideout and retrieving the Sun’s Mask, Kafei will thank you and immediately rush back to Clock Town. Now, you have a choice regarding the Special Delivery to Mama. You can choose to deliver it yourself for one reward or have the Postman deliver it for another.
Option 1 (Additional Bottle to Inventory): If you wish to obtain a bottle, head to the Latte Milk Bar in East Clock Town (remember, you will need the Romani Mask to enter). Speak to Madame Aroma while wearing Kafei’s Mask and give her the Special Delivery to Mama. In return for your effort, she will give you an Empty Bottle.

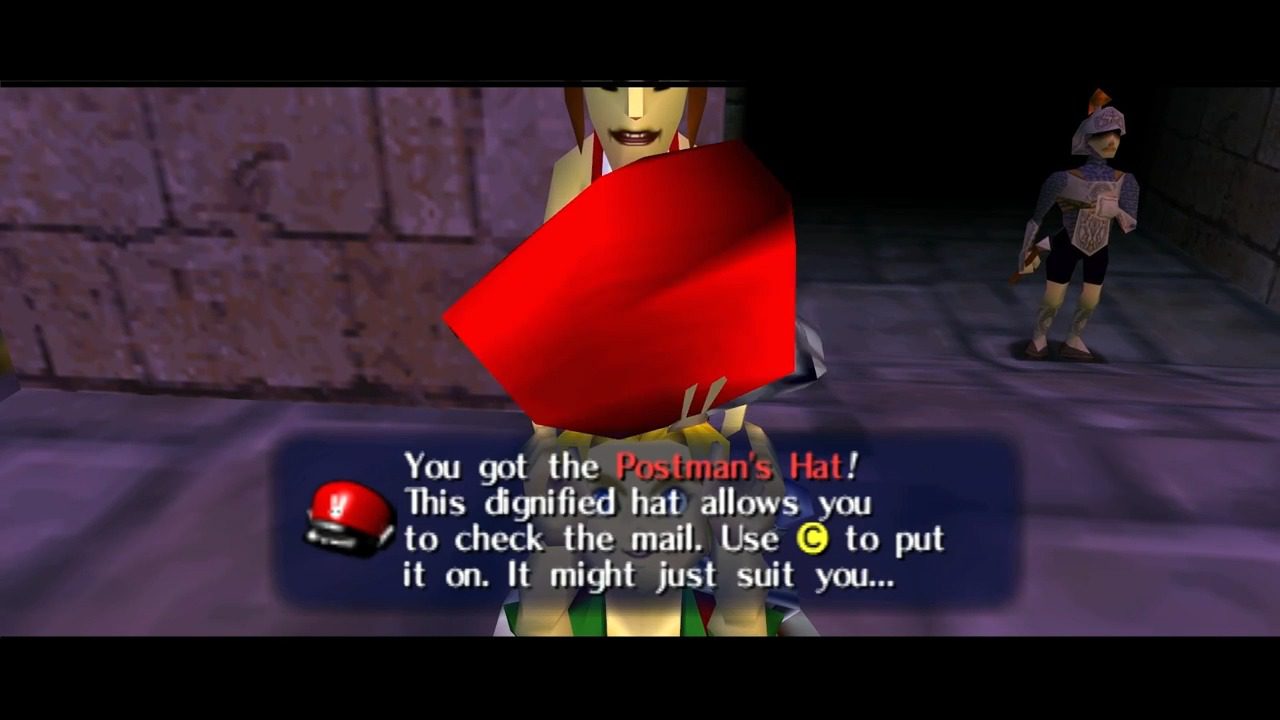
Option 2 (Postman’s Hat): Alternatively, if you desire the Postman’s Hat, take the Special Delivery to Mama to the Post Office in West Clock Town and give it to the Postman. Follow him to the Milk Bar. After he delivers the letter to Madame Aroma, he will briefly step outside. Speak to him at this moment, and he will reward you with the Postman’s Hat. It’s important to note that you can only receive one of these rewards per three-day cycle, so you will need to complete the entire Anju and Kafei quest twice if you wish to obtain both the Empty Bottle and the Postman’s Hat.
With the Sun’s Mask recovered, make your way to the Stock Pot Inn during the last six hours of the Final Night. Head upstairs and enter the room directly facing the stairs, the one that usually says “Employees Only”. If you successfully gave Anju the Pendant of Memories on the second day, you will find her waiting in this room. With very little time remaining before the moon’s descent, Kafei will finally appear.

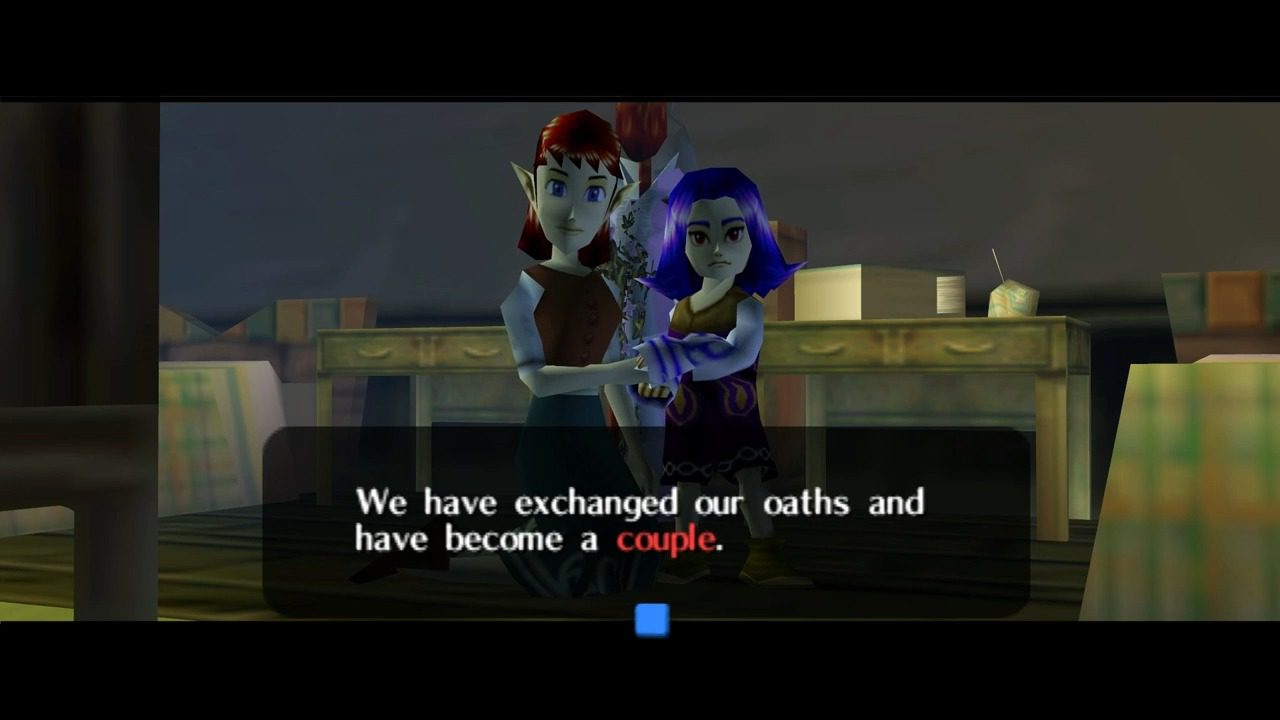

In a touching scene, Anju and Kafei will unite their Sun and Moon masks, creating the Couple’s Mask, a symbol of their enduring love. They will then wait together to face the dawn. At this point, it is highly recommended to play the Song of Time to begin a new cycle, allowing you to keep the precious Couple’s Mask and other rewards you have earned. If you have time, you can visit the bank and deposit all your rupees first, so those aren’t lost as well.
Goron Race: Unleash Your Inner Boulder!

Ready to experience the thrill of high-speed rolling as a Goron? The Goron Race is an exhilarating test of your abilities, and emerging victorious will net you some precious Gold Dust!
Participating in the Goron Race
Before you can even think about hitting the racetrack, you’ll need to ensure a couple of things are in order. First, you must have cleared the Snowhead Temple. This will bring spring back to the Mountain Village and thaw the ice that blocks access to certain areas. Second, you’ll need to obtain a Powder Keg. These become available for purchase from the Biggoron in Goron Village after you’ve cleared the Snowhead Temple. Use the Powder Keg to blow up the large boulder that obstructs the entrance to the Goron Racetrack.
The Goron Racetrack is conveniently located on the Road to Goron Village, just to the left as you enter. Once you’ve cleared the boulder, speak with the Goron Elder’s Son, who can be found near the racetrack entrance, to initiate the race.
The grand prize for crossing the finish line in first place is a Bottle of Gold Dust. This valuable item is a crucial component for Zubora and Gabora at the Mountain Smithy to forge the powerful Gilded Sword, a significant upgrade to your current blade.
Race Day Strategies:
The Goron Race requires you to utilize Goron Link’s powerful rolling ability, which consumes magic. Therefore, managing your magic meter effectively is paramount. Throughout the racetrack, you’ll find green Magic Jars. Be sure to roll into these to replenish your magic supply and keep your momentum going. For an extra edge, consider obtaining the Magic Meter upgrade from the Great Fairy located in Snowhead. This upgrade will significantly increase your magic capacity, making it easier to sustain your rolling throughout the race.
Navigating the corners of the track smoothly is essential for maintaining your speed. Avoid making sharp, abrupt turns or colliding with the walls, as this will drastically slow you down. Try to anticipate the turns and begin steering slightly earlier than you think you need to. Staying close to the inside edges of the track can also help you take tighter turns and maintain a higher velocity.
You won’t be the only Goron on the track! The other racers can be quite competitive and will attempt to ram you, potentially knocking you out of your rolling charge. Don’t be afraid to return the favor! You can also bump into the other Gorons to slow them down, especially in the crucial final stretch of the race. However, exercise caution and avoid colliding with any Gorons that are already blinking red, as they are more likely to knock you over.
The Goron Racetrack features several ramps. There are differing opinions on the best way to approach these. Some racers find it beneficial to use the ramps to perform jumps and gain a burst of speed. Others, however, recommend avoiding the ramps altogether, as getting hit by another Goron while airborne can easily lead to you being knocked off course. Experiment with both approaches to see which strategy suits your racing style best.
When the race begins, consider an unconventional starting tactic. Some players have found success by hanging back for a few seconds at the start. This is because the Gorons in the race have what’s known as “rubberband AI,” meaning they will adjust their speed to stay relatively close to you. By letting them take an early lead, they might slow down, allowing you to catch up more easily around the halfway point. Another even more counterintuitive strategy is to wait for a full 10 to 11 seconds after the race starts before you begin moving. This allows the other Gorons to get ahead and spread out, potentially giving you a clearer path to catch up without being constantly bumped.
Throughout the race, keep a watchful eye out for obstacles on the track, such as Bomb Flowers and small trees. Colliding with these will significantly impede your progress.
Finally, remember that the Goron Race is free to enter, and you can retry as many times as you need. Don’t get discouraged by early failures. Each attempt will help you learn the track layout, identify the best racing lines, and refine your strategies. Practice makes perfect when it comes to mastering the Goron Race!
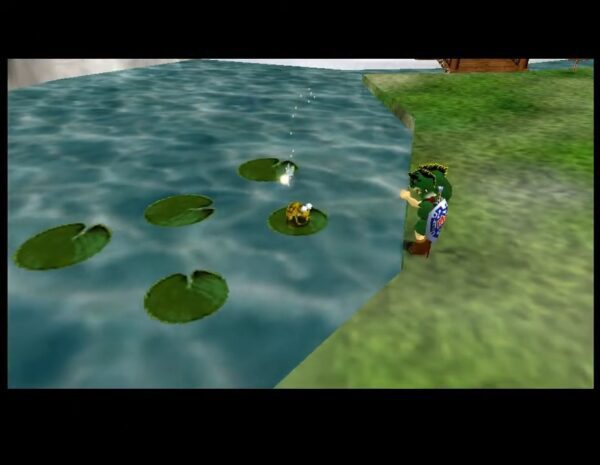
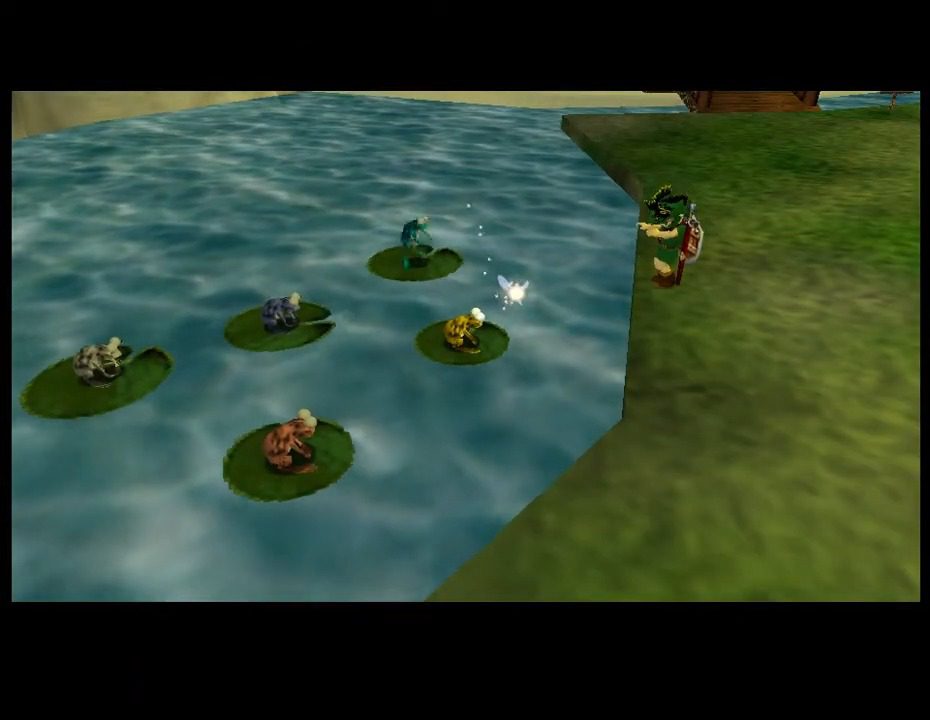
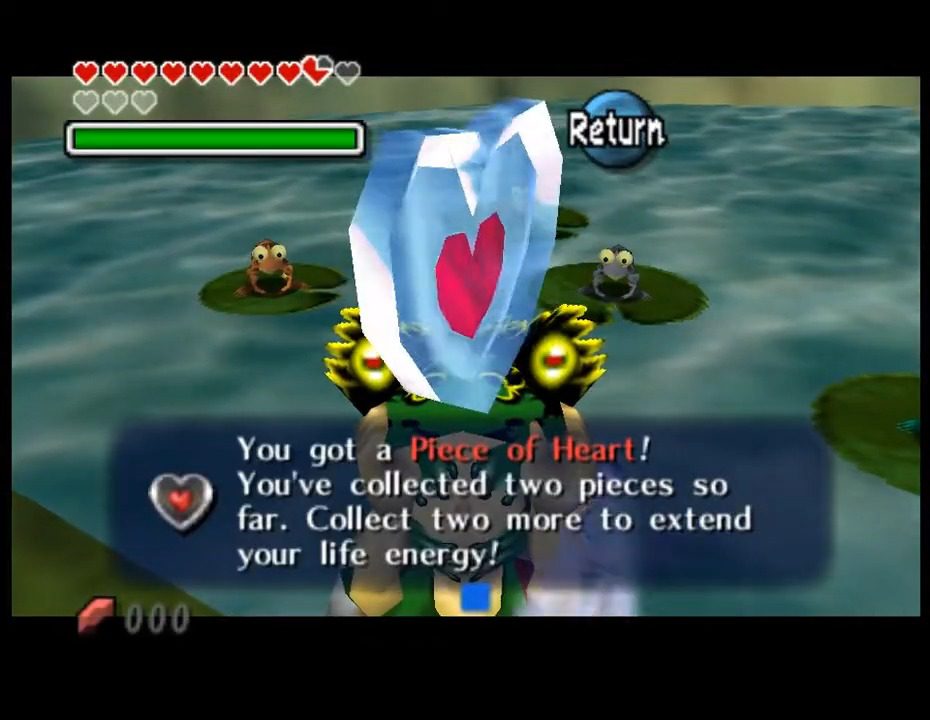
Frog Choir
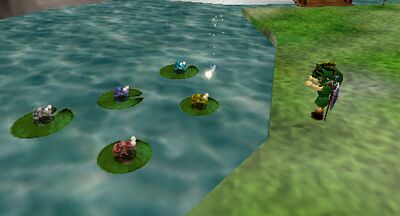
Prepare to embark on a musical quest to reunite a scattered choir of frogs! By locating all five members and leading them in a harmonious performance, you’ll be rewarded with a valuable Piece of Heart.
Interacting with the Frog Choir
Before you can begin your amphibian adventure, you’ll need to acquire a few key items and meet certain conditions. First and foremost is the Don Gero’s Mask. This mask can be obtained in Mountain Village after you have melted the ice within the Goron Shrine using Hot Spring Water and then given the Rock Sirloin to the hungry Goron who is shivering from the cold. You will also need the Zora Mask , which you receive after defeating Gyorg in the Great Bay Temple, as it allows you to speak to one of the missing frogs. Lastly, it is necessary to have cleared the Snowhead Temple. This will bring spring back to the Mountain Village, making the final frog accessible.
Once you have these prerequisites in place, the search for the scattered members of Don Gero’s Frog Choir can begin. Here are the exact locations where you can find each of the five frogs:
Mountain Village: Once spring has returned to the region (after you have defeated Goht in the Snowhead Temple), make your way to the small river where the Mountain Smithy is located. You will find the last frog sitting on a lily pad. This is also the location where you initially encounter a frog wearing Don Gero’s Mask, who will inform you about the missing choir members and initiate this side quest.
Laundry Pool in Clock Town: Navigate to the the Laundry Pool located in the southwestern part of Clock Town. Here, you will find a frog waiting patiently near the tree.

Southern Swamp: Head to the Southern Swamp. On the path leading towards the Deku Palace, specifically on a fallen log in the area with non-poisonous water (after passing through the first tunnel), you will spot another frog. You might even see this frog during the Swamp Tourist Center boat tour, but you won’t be able to reach it until after you have completed the Woodfall Temple.

Woodfall Temple: Venture into the depths of the Woodfall Temple. After successfully defeating the Gekko mini-boss in this temple, it will transform into the third member of the Frog Choir.

Great Bay Temple: Your next destination is the Great Bay Temple. Just like in Woodfall Temple, you will need to face and defeat the Gekko mini-boss. Upon its defeat, it will reveal itself to be the fourth frog waiting to join the choir.

Once you have successfully located all five scattered frogs, your next step is to bring them together for their performance. Return to the Mountain Village in its springtime state. Equip the Don Gero’s Mask and approach the frogs gathered on the lily pads in the small river. Speak to them while wearing the mask, and they will begin a harmonious song, their voices blending together in a delightful chorus. As a reward for your efforts in reuniting Don Gero’s Frog Choir and leading their performance, you will be granted a valuable Piece of Heart. This will bring you one step closer to increasing your maximum health.
It is important to remember that for this side quest to be considered complete and for you to receive the Piece of Heart, you must locate and gather all five frogs within the same three-day cycle. If you attempt to collect them across multiple cycles, the choir will not reunite, and you will miss out on your reward.
Spider House Purge: Wallet and Wisdom Upgrades!
For those brave enough to face their eight-legged fears, Majora’s Mask offers two distinct Spider Houses filled with creepy crawlies and valuable rewards. Prepare to delve into these eerie dwellings and exterminate every last Gold Skulltula!
Oceanside Spider House: Exterminating the Coastal Creepies
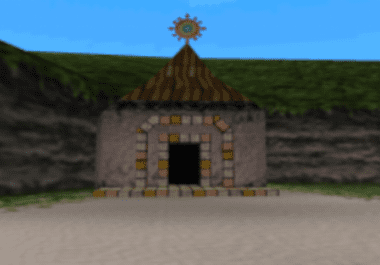
The Oceanside Spider House is located near the Great Bay Coast, conveniently situated next to the Fisherman’s Hut. To gain entry, you’ll need to use a Bomb to blast open the cracked wall at the entrance.
Your objective within this coastal dwelling is clear: defeat all 30 Gold Skulltulas that lurk within its shadowy corners.
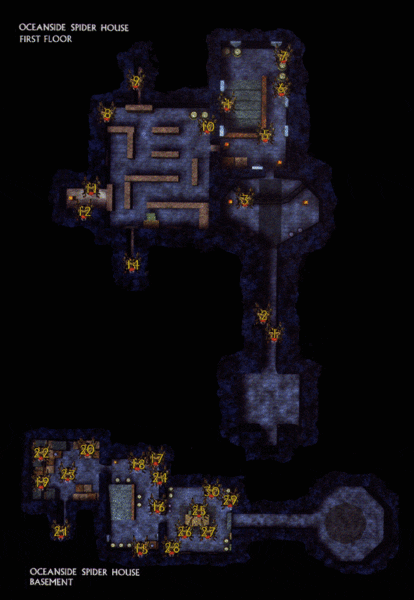
If you manage to successfully clear the entire house of Skulltulas on the first day, you will be rewarded with the incredibly useful Giant Wallet. This upgrade will significantly increase the amount of Rupees you can carry, a boon for any adventurer. However, if you complete this challenge on any subsequent day, you will unfortunately miss out on the Giant Wallet.
To ensure you can reach every single Skulltula in the Oceanside Spider House, you will need to have obtained the Hookshot, the Goron Mask, and a supply of Bombs. Additionally, having Fire Arrows can be helpful for burning away some of the pesky cobwebs that might be obscuring your targets.
Swamp Spider House: Braving the Bog’s Beasts!
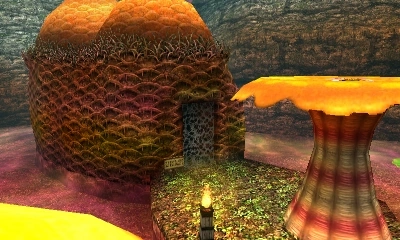
The Swamp Spider House, also known as the Fearful Spider House, is located in the Southern Swamp. To reach it, you will first need to gain access to the boat tours at the Swamp Tourist Center, as this will allow you to clear the Big Octo that blocks the way. Once you can access the eastern side of the swamp, you’ll find the entrance to the Spider House blocked by a large web. This web can be easily burnt away using a nearby torch or with Fire Arrows.
Your goal within this eerie swamp dwelling is to defeat all 30 Gold Skulltulas to break a curse that has befallen a man inside.
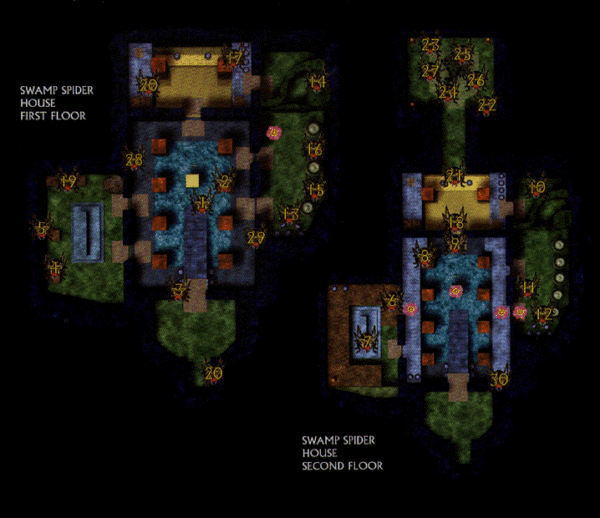
Upon successfully exterminating all the Skulltulas, the grateful, uncursed inhabitant will reward you with the invaluable Mask of Truth. This mask will grant you the ability to understand the thoughts of animals and decipher the secrets held by Gossip Stones, opening up new avenues for exploration and discovery.
To navigate the Swamp Spider House effectively and collect all the Gold Skulltulas, several items will prove helpful. These include the Deku Mask, which allows you to reach certain high areas, bottles for capturing essential bugs, Magic Beans and Spring Water for growing bean platforms, and Bombs for clearing obstacles. While not strictly required for every Skulltula, having the Hookshot and Bow will also make certain tokens easier to obtain.
These side quests not only enrich your adventure in Termina but also provide valuable items and memorable experiences.