Skip to content
Zelda Central
  • About Us
  • Forums
Facebook Facebook Instagram Instagram Discord Discord Twitch Twitch
Log In Register
‹
  • Ocarina of TimeOcarina of Time
  • The Legend of ZeldaThe Legend of Zelda
  • The Adventure of LinkThe Adventure of Link
  • A Link to the PastA Link to the Past
  • Link’s AwakeningLink’s Awakening
  • Majora’s MaskMajora’s Mask
  • Oracle of SeasonsOracle of Seasons
  • Oracle of AgesOracle of Ages
  • The Wind WakerThe Wind Waker
  • The Minish CapThe Minish Cap
  • Twilight PrincessTwilight Princess
  • Phantom HourglassPhantom Hourglass
  • Spirit TracksSpirit Tracks
  • Skyward SwordSkyward Sword
  • A Link Between WorldsA Link Between Worlds
  • Breath of the WildBreath of the Wild
  • Links Awakening SWITCHLinks Awakening SWITCH
  • Tears of the KingdomTears of the Kingdom
  • Echoes of WisdomEchoes of Wisdom
  • Hyrule Warriors: AoIHyrule Warriors: AoI
›
The Legend of Zelda
Main PageBlue Ring & Red RingBomb UpgradesBoss GuideCharactersDungeon MapsEnemiesGame Genie CodesHeart Container LocationsIntroductionItemsPotion AcquisitionStory and SettingSword UpgradesWalkthrough
The Adventure of Link
Main PageBoss StrategiesCharactersFairy LocationsGame Genie CodesHeart ContainersItemsLink Dolls (1UP)Magic JarsMapsP-BagsStory
A Link to the Past
Main PageBoss GuideBottlesCharactersCheat Device CodesComicEnemiesHeart Piece LocationsItems & EquipmentMagic Upgrades & MedallionsManualMapsPrologueWarp Tiles
Link’s Awakening
Main PageBoss StrategiesCharactersEnemiesGameShark CodesHeart PiecesItems & EquipmentMapsPhotographsSecret Seashells
Ocarina of Time
Main Page100% Completion ChecklistBig PoesBiggoron Sword Trading SequenceBoss GuideBottlesCharactersComicEnemiesGameShark CodesGold SkulltulasGossip StonesGreat Fairy FountainsHeart Piece LocationsItems & EquipmentMagic Bean BedsMask Trading SequenceMini-Games and SecretsOcarina SongsWalkthrough
Majora’s Mask
Main Page100% Completion ChecklistBomber's NotebookBoss GuideCharactersCheatsEnemiesGameshark CodesHeart Piece LocationsHidden Hole LocationsItemsKeaton QuizMapsMask Collection GuideOcarina SongsOfficial ArtworkSecrets and Easter EggsSide QuestsStoryStray FairiesVersion DifferencesWalkthrough
Oracle of Seasons
Main PageBoss GuideCharactersEnemiesGameShark CodesHeart Piece LocationsItems & EquipmentMapsTrading SequenceWalkthrough
Oracle of Ages
Main PageBoss StrategiesCharactersEnemiesGameShark CodesHeart Piece LocationsItems & EquipmentMapsTrading Sequence
The Wind Waker
Main Page100% Completion ChecklistAction Replay CodesBattleship GameBig OctosBlue ChuChusBoating Course ChallengeBoss StrategiesBottlesCharactersDeluxe Picto BoxEnemiesHeart Piece LocationsInstruction ManualItems & EquipmentNintendo Gallery FigurinesSongsSubmarinesTingle StatuesTreasure ChartsWalkthroughWorld Map
The Minish Cap
Main PageBoss StrategiesBottle LocationsBox ArtworkCharactersCheat Device CodesEnemiesEquipment & Item UpgradesFairy Fountain LocationsGoron QuestHeart Piece LocationsMapsTiger ScrollsWind Crests
Twilight Princess
Main Page100% Completion ChecklistAction Replay CodesBoss GuideBottle LocationsCave Of OrdealsCharactersEnemiesFishing GuideGolden BugsGuardian Statue PuzzleHeart Piece LocationsHowling StonesItems & EquipmentMalo Mart & Magic ArmorMini-Games & SecretsPoe SoulsWalkthrough
Phantom Hourglass
Main PageAction Replay CodesBoss GuideCharactersCourage GemsEnemiesGolden Frog LocationsHeart ContainersItems & Equipment
Spirit Tracks
Main PageAction Replay CodesCharactersEnemiesFlute SongsHeart ContainersItems & EquipmentMapsMini GamesRabbit LocationsStamp Station Locations
Skyward Sword
Main PageBoss StrategiesBottle LocationsCharactersEnemiesHeart Piece LocationsItem & Equipment UpgradesSide Quests
A Link Between Worlds
Main PageAction Replay PowerSavesBoss StrategiesBottle LocationsCharactersItems, Equipment & GearMaster Ore LocationsWalkthrough
Breath of the Wild
Main PageArmor Sets & UpgradesCharactersDownloadable ContentEnemies & MonstersHyrule CompendiumMini-Games & SecretsRecovered MemoriesWalkthroughWeapons, Bows & Shields
Links Awakening SWITCH
Main PageBoss StrategiesCharactersEnemiesHeart Piece LocationsItems & EquipmentSecret SeashellsTrading Sequence
Tears of the Kingdom
Main PageArmor Sets & UpgradesBoss StrategiesCharactersEnemiesShrine Locations and SolutionsSide QuestsWalkthroughWeapons and Shields
Echoes of Wisdom
Main PageAmiiboBoss StrategiesCharactersEchoesEquipment UpgradesGameplay MechanicsHeart Piece LocationsMain QuestsMinigames and ChallengesOutfitsSide QuestsSmoothie RecipesStamp RallyWalkthrough
Ocarina of Time Game Information, Guides, and Media
  • Main Page
  • 100% Completion Checklist
  • Big Poes
  • Biggoron Sword Trading Sequence
  • Boss Guide
  • Bottles
  • Characters
  • Comic
  • Enemies
  • GameShark Codes
  • Gold Skulltulas
  • Gossip Stones
  • Great Fairy Fountains
  • Heart Piece Locations
  • Items & Equipment
  • Magic Bean Beds
  • Mask Trading Sequence
  • Mini-Games and Secrets
  • Ocarina Songs
  • Walkthrough
Home » The Legend of Zelda Games » Ocarina of Time » Walkthrough » Gerudo Fortress (Ocarina of Time Walkthrough)

Gerudo Fortress (Ocarina of Time Walkthrough)

Alright, you’ve emerged from the Shadow Temple a true hero! Now, it’s time to head to the Gerudo Fortress, a heavily guarded area where some poor carpenters are being held captive. We’ll break them out and then tackle the Gerudo Training Ground to snag those awesome Ice Arrows. Let’s roll!

Step 1: Infiltrating the Gerudo Fortress

After receiving the Shadow Medallion, your next destination is the Gerudo Valley. If you haven’t been there yet, it’s located in the western part of Hyrule Field. Just head west from Hyrule Castle. You’ll recognize it by the large canyon and the wooden bridge leading across.

As you approach the bridge, it will collapse, leaving you stranded. Don’t panic! Look to your left, and you’ll see a ladder leading down. Climb down and follow the path along the riverbank. You’ll eventually reach a point where you can use your Longshot to grapple to the other side of the canyon. Epona can make the jump as well.
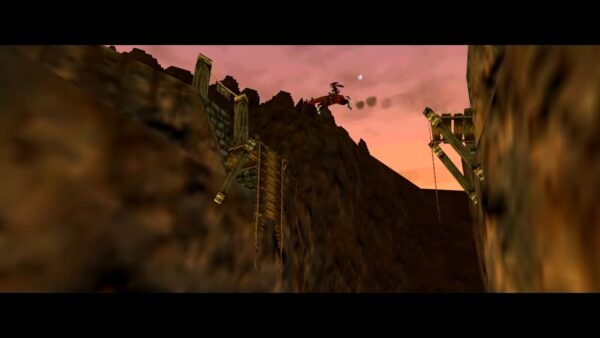
Now you’re in Gerudo Valley. Near the entrance to Gerudo Fortress, there are two Gold Skulltulas to claim: one on the area wall behind the Carpenters’ tent and another on the backside of the stone pillar across from the Carpenters’ tent. Defeat them both and claim them.
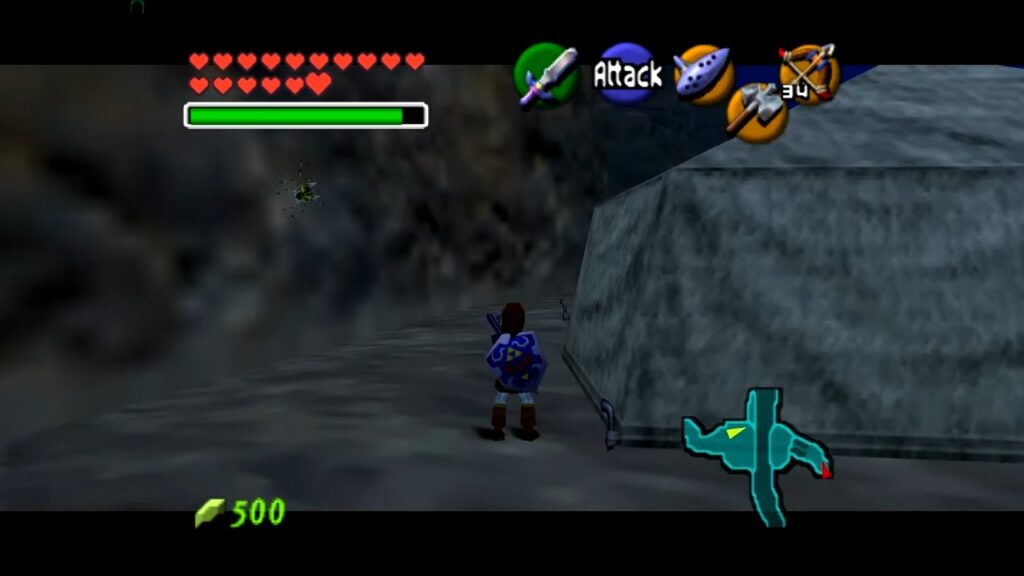
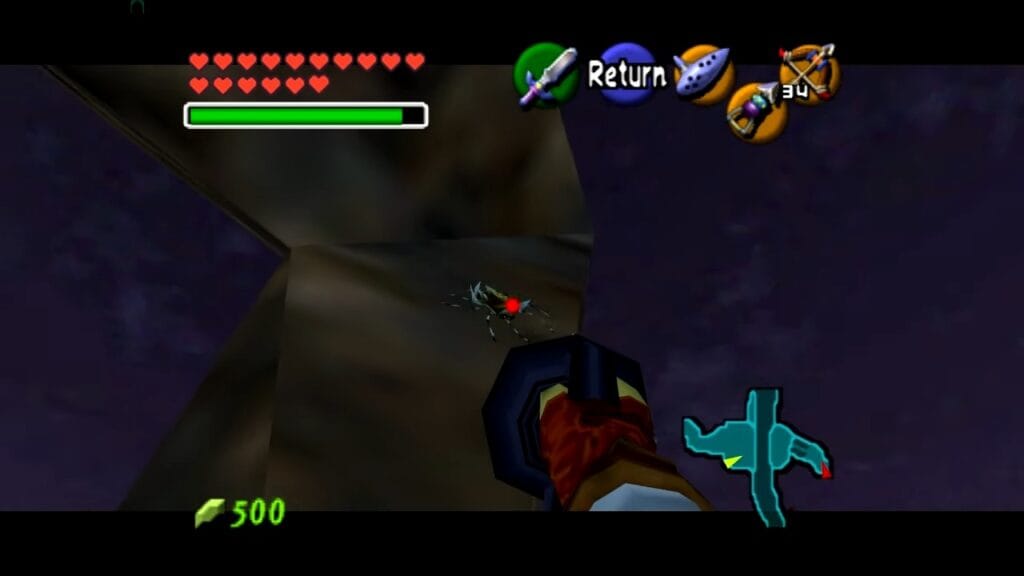
Head forward, and you’ll soon reach the imposing Gerudo Fortress. These ladies don’t take kindly to intruders, so stealth is key here.

Step 2: Rescuing the First Carpenter

Your immediate goal is to rescue the four carpenters who are being held in separate cells within the fortress. If a Gerudo guard spots you, she’ll toss you into a cell. If this happens, just use your Longshot on the window to escape.

The first carpenter is in the first building on the right as you enter the fortress area. Sneak past the guards (use your ears to listen for their footsteps) and enter the building. You’ll find the first carpenter locked in a cell. Approach the cell, and he’ll tell you he needs your help.

Step 3: Rescuing the Second Carpenter

Head out of the first building and continue along the path. The second carpenter is in the next building on the right. Again, be careful to avoid the guards’ line of sight. Once inside, you’ll find the second carpenter in another cell.

Step 4: Rescuing the Third Carpenter

Exit the second building and continue further into the fortress. You’ll see a large set of stairs leading up to a higher level. Head up these stairs. The third carpenter is in a cell in the building on this upper level. Watch out for the guards patrolling this area.

Rescuing the Fourth Carpenter and Getting the Gerudo Membership Card

After rescuing the third carpenter, continue exploring this upper level. You’ll find another building. Inside, you’ll find the fourth and final carpenter.

Once you’ve freed all four carpenters, a cutscene will trigger. The foreman will thank you, and the Gerudo leader will appear, impressed by your skills. She’ll grant you the Gerudo Membership Card, which will allow you to freely roam the fortress without being attacked. This card is your ticket to the next challenge: the Gerudo Training Ground.

After rescuing all the carpenters and obtaining the Gerudo Token, navigate to the upper levels of the fortress. Find a vantage point where you can summon Pierre by playing the Scarecrow’s Song. Use the Hookshot or Longshot to grapple to Pierre, then to the chest containing the Piece of Heart. Alternatively, With the Longshot, you can directly target the chest from certain positions without summoning Pierre.

At nighttime, at the far end of the Horseback Archery Range, on the target pole.

With Epona, head to the back of the Gerudo Fortress to find the Horseback Archery Range. Play the archery mini game. Each attempt costs 20 Rupees. While Epona gallops along a set path, use your bow to shoot targets and pots to accumulate points.​ Earn 1,000 points for a Heart Piece. Earn 1,500 points for a quiver upgrade.

Accessing the Gerudo Training Ground

Now that you have the Gerudo Membership Card, you can explore the fortress without fear of being thrown in jail. The entrance to the Gerudo Training Ground is located on the first floor of the main fortress building, near where you initially entered the area. Look for a door with a Gerudo symbol above it. Show your membership card to the guard, and she’ll let you pass. You’ll have to pay a small fee of 10 Rupees to enter.

Conquering the Gerudo Training Ground

The Gerudo Training Ground is a challenging series of rooms filled with puzzles that require you to use all the items you’ve collected so far. Your ultimate reward for completing it is the Ice Arrows. Here’s a room-by-room guide:

As soon as you enter, turn around and shoot the golden eye switch above the door. Two small chests will appear. One contains Arrows, and the other has a Blue Rupee. There are three doors in this room. We’ll start with the left one.

Avoid the spike trap and move onto the sand. Defeat the two Stalfos that appear within the time limit to make a chest appear with Small Key #1.

Take the second left and wait for the boulder to pass. Grab the rupee and quickly run down the ramp to get the second rupee. Run down the nearby corridor back to the start and use your Longshot to snag the third rupee. Take the second right and run to the bottom of the ramp, dodging the boulder, to grab the fourth rupee. Finally, run up the ramp and jump off the ledge to get the fifth rupee in the center. Alternatively, you can Longshot it from near the entrance. Go through the door directly ahead.

Defeat the two Wolfos and one White Wolfos. Above the fake door, use your Lens of Truth to see a hexagonal section of the wall. Use your Longshot to hit the target. Press the switch and go through the door.

Before jumping down, go to the right where Navi turns green and play the Scarecrow’s Song to make Pierre appear. Jump down onto the outer ring and shoot the four eyes on the statue (one on each side) without missing. A chest will appear with Small Key #2. Use your Longshot to grab the key. You can now Longshot to Pierre or fall into the lava. Go through the previously locked door and open the chest for Small Key #3. Go back down to the lower floor and through the door.

Kill the two Fire Keese and two Fire Slugs to open the door and make a small chest appear. Use your Megaton Hammer on the statues. One will reveal a switch. Step on it to remove the fire around the chest in the middle of the room and get Small Key #4. Go through the now open door.

Turn around and use your Longshot to grab the first Silver Rupee above you. Jump to the first platform and grab the second rupee. Go to the middle platform, and when Navi turns green, play the Song of Time to make two Time Blocks appear. Carefully collect the third and fourth Silver Rupees on the other side. Return to the Time Blocks, climb up, and get Small Key #5. Press the nearby switch and grab the fifth Silver Rupee before the fire returns. Enter the east door.

Play the Song of Time to remove the Time Blocks. Equip your Iron Boots and Zora Tunic and sink down. Avoid the Blade Trap and kill the four Shell Blades with your Longshot. The first Silver Rupee is in the middle. The next two are along the west wall – Longshot the target to go through them. The fourth is on a platform to the north. The final one is near the east wall. Once all five are collected, the door will open.

Immediately throw a Bomb at the Beamos. Defeat the two Dinalfos. The door will open.

You should have eight Small Keys at this point. If you came from the Lava Room, you’ll need a total of nine keys. Enter the door on the left. Use your Lens of Truth to see a hole in the ceiling directly to your left. Climb up the grating to find a secret room with the final Small Key. Climb back down and go through all the remaining doors on the left side. You’ll eventually wind up in the center room. Open the final door, and claim your reward: the Ice Arrows!

Conclusion: Master of the Fortress

You’ve done it! You’ve successfully infiltrated the Gerudo Fortress, rescued all the carpenters, and conquered the challenging Gerudo Training Ground, earning the powerful Ice Arrows. You’re now a master of stealth and puzzle-solving. With the Shadow Medallion and the Ice Arrows in your possession, you’re well-prepared for the trials that lie ahead. Keep pushing forward, hero!

Games

  • The Legend of Zelda
  • The Adventure of Link
  • Link’s Awakening
  • A Link to the Past
  • Ocarina of Time
  • Majora’s Mask
  • Oracle of Ages
  • Oracle of Seasons
  • The Wind Waker


  • The Minish Cap
  • Phantom Hourglass
  • A Link Between Worlds
  • Breath of the Wild
  • Links Awakening SWITCH
  • Tears of the Kingdom
  • Echoes of Wisdom
  • Hyrule Warriors: Age of Imprisonment
  • Other Games

Interactive

  • Forum
  • Discord

Media

  • Amiibo
  • Animated GIFs
  • Animated Series
  • Comics
  • Fonts
  • Licensed Merchandise
  • Live-Action Movie
  • MIDI Music
  • Wallpapers

Fans

  • Extreme Zelda Fans
  • Fan Comics
  • Fan Games

© 2025 Zelda Central - All rights reserved.

Enable Notifications OK No thanks
Log In Register
  • About Us
  • Forums

Choose Your Adventure

The Legend of ZeldaThe Legend of Zelda
Page Main PagePage Blue Ring & Red RingPage Bomb UpgradesPage Boss GuidePage CharactersPage Dungeon MapsPage EnemiesPage Game Genie CodesPage Heart Container LocationsPage IntroductionPage ItemsPage Potion AcquisitionPage Story and SettingPage Sword UpgradesPage Walkthrough
The Adventure of LinkThe Adventure of Link
Page Main PagePage Boss StrategiesPage CharactersPage Fairy LocationsPage Game Genie CodesPage Heart ContainersPage ItemsPage Link Dolls (1UP)Page Magic JarsPage MapsPage P-BagsPage Story
A Link to the PastA Link to the Past
Page Main PagePage Boss GuidePage BottlesPage CharactersPage Cheat Device CodesPage ComicPage EnemiesPage Heart Piece LocationsPage Items & EquipmentPage Magic Upgrades & MedallionsPage ManualPage MapsPage ProloguePage Warp Tiles
Link’s AwakeningLink’s Awakening
Page Main PagePage Boss StrategiesPage CharactersPage EnemiesPage GameShark CodesPage Heart PiecesPage Items & EquipmentPage MapsPage PhotographsPage Secret Seashells
Ocarina of TimeOcarina of Time
Page Main PagePage 100% Completion ChecklistPage Big PoesPage Biggoron Sword Trading SequencePage Boss GuidePage BottlesPage CharactersPage ComicPage EnemiesPage GameShark CodesPage Gold SkulltulasPage Gossip StonesPage Great Fairy FountainsPage Heart Piece LocationsPage Items & EquipmentPage Magic Bean BedsPage Mask Trading SequencePage Mini-Games and SecretsPage Ocarina SongsPage Walkthrough
Majora’s MaskMajora’s Mask
Page Main PagePage 100% Completion ChecklistPage Bomber's NotebookPage Boss GuidePage CharactersPage CheatsPage EnemiesPage Gameshark CodesPage Heart Piece LocationsPage Hidden Hole LocationsPage ItemsPage Keaton QuizPage MapsPage Mask Collection GuidePage Ocarina SongsPage Official ArtworkPage Secrets and Easter EggsPage Side QuestsPage StoryPage Stray FairiesPage Version DifferencesPage Walkthrough
Oracle of SeasonsOracle of Seasons
Page Main PagePage Boss GuidePage CharactersPage EnemiesPage GameShark CodesPage Heart Piece LocationsPage Items & EquipmentPage MapsPage Trading SequencePage Walkthrough
Oracle of AgesOracle of Ages
Page Main PagePage Boss StrategiesPage CharactersPage EnemiesPage GameShark CodesPage Heart Piece LocationsPage Items & EquipmentPage MapsPage Trading Sequence
The Wind WakerThe Wind Waker
Page Main PagePage 100% Completion ChecklistPage Action Replay CodesPage Battleship GamePage Big OctosPage Blue ChuChusPage Boating Course ChallengePage Boss StrategiesPage BottlesPage CharactersPage Deluxe Picto BoxPage EnemiesPage Heart Piece LocationsPage Instruction ManualPage Items & EquipmentPage Nintendo Gallery FigurinesPage SongsPage SubmarinesPage Tingle StatuesPage Treasure ChartsPage WalkthroughPage World Map
The Minish CapThe Minish Cap
Page Main PagePage Boss StrategiesPage Bottle LocationsPage Box ArtworkPage CharactersPage Cheat Device CodesPage EnemiesPage Equipment & Item UpgradesPage Fairy Fountain LocationsPage Goron QuestPage Heart Piece LocationsPage MapsPage Tiger ScrollsPage Wind Crests
Twilight PrincessTwilight Princess
Page Main PagePage 100% Completion ChecklistPage Action Replay CodesPage Boss GuidePage Bottle LocationsPage Cave Of OrdealsPage CharactersPage EnemiesPage Fishing GuidePage Golden BugsPage Guardian Statue PuzzlePage Heart Piece LocationsPage Howling StonesPage Items & EquipmentPage Malo Mart & Magic ArmorPage Mini-Games & SecretsPage Poe SoulsPage Walkthrough
Phantom HourglassPhantom Hourglass
Page Main PagePage Action Replay CodesPage Boss GuidePage CharactersPage Courage GemsPage EnemiesPage Golden Frog LocationsPage Heart ContainersPage Items & Equipment
Spirit TracksSpirit Tracks
Page Main PagePage Action Replay CodesPage CharactersPage EnemiesPage Flute SongsPage Heart ContainersPage Items & EquipmentPage MapsPage Mini GamesPage Rabbit LocationsPage Stamp Station Locations
Skyward SwordSkyward Sword
Page Main PagePage Boss StrategiesPage Bottle LocationsPage CharactersPage EnemiesPage Heart Piece LocationsPage Item & Equipment UpgradesPage Side Quests
A Link Between WorldsA Link Between Worlds
Page Main PagePage Action Replay PowerSavesPage Boss StrategiesPage Bottle LocationsPage CharactersPage Items, Equipment & GearPage Master Ore LocationsPage Walkthrough
Breath of the WildBreath of the Wild
Page Main PagePage Armor Sets & UpgradesPage CharactersPage Downloadable ContentPage Enemies & MonstersPage Hyrule CompendiumPage Mini-Games & SecretsPage Recovered MemoriesPage WalkthroughPage Weapons, Bows & Shields
Links Awakening SWITCHLinks Awakening SWITCH
Page Main PagePage Boss StrategiesPage CharactersPage EnemiesPage Heart Piece LocationsPage Items & EquipmentPage Secret SeashellsPage Trading Sequence
Tears of the KingdomTears of the Kingdom
Page Main PagePage Armor Sets & UpgradesPage Boss StrategiesPage CharactersPage EnemiesPage Shrine Locations and SolutionsPage Side QuestsPage WalkthroughPage Weapons and Shields
Echoes of WisdomEchoes of Wisdom
Page Main PagePage AmiiboPage Boss StrategiesPage CharactersPage EchoesPage Equipment UpgradesPage Gameplay MechanicsPage Heart Piece LocationsPage Main QuestsPage Minigames and ChallengesPage OutfitsPage Side QuestsPage Smoothie RecipesPage Stamp RallyPage Walkthrough
Hyrule Warriors: AoIHyrule Warriors: AoI
Facebook Instagram Discord Twitch