Table of Contents
What Are Blue ChuChus?

The Legend of Zelda: The Wind Waker Blue ChuChus are electrified versions of the standard ChuChu. They discharge electricity continuously, so striking them directly won’t work. Instead, stun them first—a well-timed boomerang or arrow will do—then defeat them safely. Each drops Blue Chu Jelly, a rare ingredient used to brew Blue Potions (restorative to both health and magic) on Windfall Island. Note that once you loot a Blue Chu Jelly, a respawn of that Blue ChuChu will not drop another.
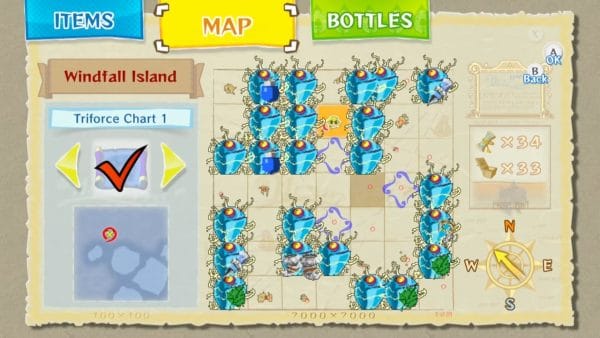
There are 23 Blue ChuChus hidden across the Great Sea. Hunt them all, collect enough jelly, and you’ll be equipped to weather any storm—or dungeon.

Blue Potion: Why We Collect Blue Chu Jelly
Doc Bandam on Windfall Island requires 15 Blue Chu Jelly to brew your first Blue Potion. This potent elixir fully restores both health and magic, then becomes available for purchase at 60 rupees per use—or traded for one free potion after every additional 5 jellies.
Once unlocked, you’ll never need to hunt again—Blue Potions are sold reliably throughout your journey, making your investment in jelly pay dividends in the long run.
Island-by-Island Blue ChuChu Locations
Here are the 23 locations where you’ll find Blue ChuChus:
| # | Island | Quadrant | Spot Description |
|---|---|---|---|
| 1 | Star Island | B1 | Under a large boulder (bomb or Power Bracelets to lift). |
| 2 | Northern Fairy Island | C1 | Near the eastern palm tree. |
| 3–4 | Crescent Moon Island | E1 | Two appear near the treasure chest. |
| 5 | Overlook Island | G1 | Use Hookshot to the palms and cross to the far edge. |
| 6 | Mother & Child Isles | B2 | On the smaller “Child” isle, near the shore. |
| 7 | Spectacle Island | C2 | Under the short wooden bridge. |
| 8 | Pawprint Isle | E2 | Jump on the northeast ChuChu statue to trigger it. |
| 9 | Western Fairy Island | A3 | Near the southern palm—Skull Hammer required. |
| 10 | Rock Spire Isle | B3 | Climb and remove boulders to reach the top spire. |
| 11 | Tingle Island | C3 | By the small wooden sign near the tower base. |
| 12 | Eastern Fairy Island | E3 | Next to the northern palm tree. |
| 13 | Thorned Fairy Island | G4 | Eastern palm; skull hammer vines away. |
| 14 | Needle Rock Isle | A5 | On the ring-shaped island—scan around. |
| 15 | Stone Watcher Island | C5 | Hidden behind the giant stone face. |
| 16 | Bird’s Peak Rock | G5 | Hookshot the peg above the steel door; it’s on the ledge. |
| 17 | Diamond Steppe Island | A6 | Hookshot between trees up to the third level. |
| 18 | Shark Island | C6 | Activate four switches, use Wind’s Requiem + Deku Leaf to glide to the tail’s highest point. |
| 19 | Southern Fairy Island | D6 | Near the eastern palm tree. |
| 20 | Cliff Plateau Isles | G6 | Drop into the smaller isle’s hole and exit top of the large isle. |
| 21 | Horseshoe Island | A7 | Only appears at night to the right of the second nut-hole. |
| 22 | Angular Isles | E7 | On top of the largest isle, next to a treasure chest. |
| 23 | Boating Course | F7 | Jump from the course’s high point and glide with Deku Leaf to the nearby isle |


