In The Legend of Zelda: The Wind Waker, players encounter a series of formidable bosses, each presenting unique challenges that test Link’s arsenal and your strategic prowess. This guide offers concise strategies to help you navigate and conquer each boss encounter effectively.
Table of Contents
Gohma
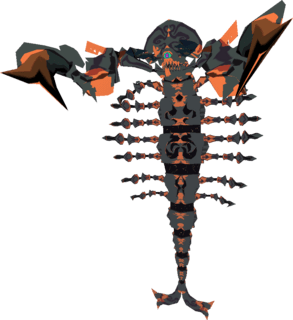
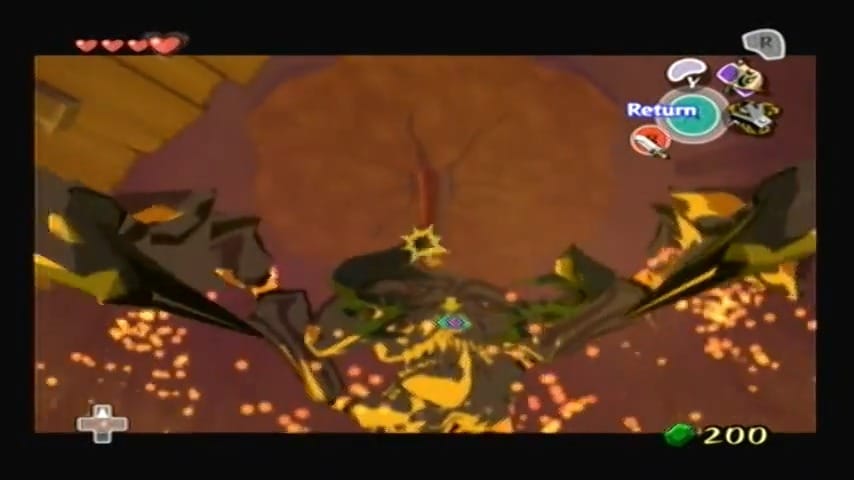
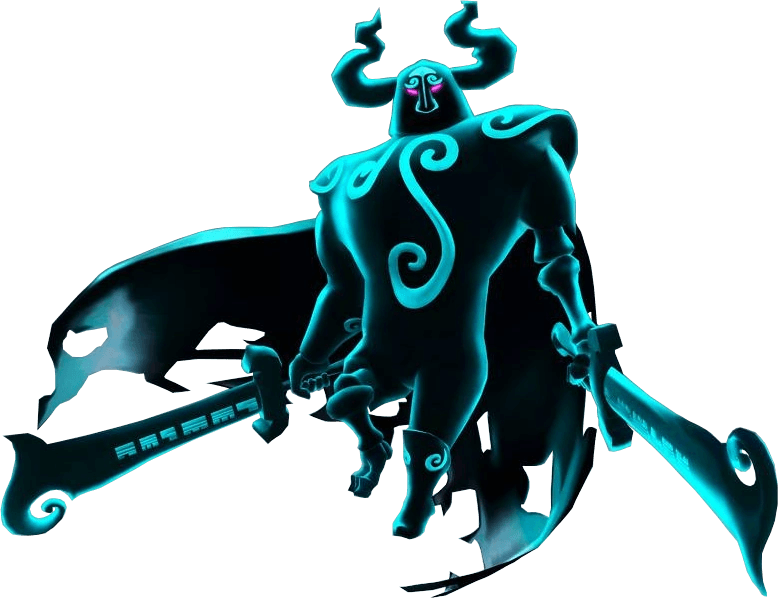
Gohma, a fiery lava scorpion, is ready to rumble under Valoo’s lair. The boss of Dragon Roost Cavern is Gohma, a giant molten-rock arachnid with one huge eye. Don’t panic – we have a strategy! Gohma might look intimidating, but this battle is all about using the environment to your advantage.

Phase 1 – Break the Armor
Notice Valoo’s massive tail dangling through the ceiling of the arena. That’s the key. Lock onto Gohma (L-target the eye) to keep it in view. You can’t hurt its outer shell with your sword, so don’t attack Gohma directly just yet. Instead, face toward where Valoo’s tail hangs and use your Grappling Hook in first-person mode to latch onto the dragon’s tail. Swing from it and let go to launch yourself across the room. This causes the ceiling to crumble and a chunk of rock to crash down on Gohma’s exoskeleton from above! Gohma will screech as its armor cracks. The trick is to do this three times: as soon as you land, target the tail again (it swings back into position shortly after each hit). Each time you swing and drop the ceiling on Gohma, more of its rocky armor shatters. Meanwhile, Gohma will be swiping at you with its claws or spewing fire, but keep moving and grappling quickly, and you should avoid most attacks. After the third ceiling crash, Gohma’s armor is completely destroyed, revealing a softer, slimier creature underneath. Now the real battle begins.


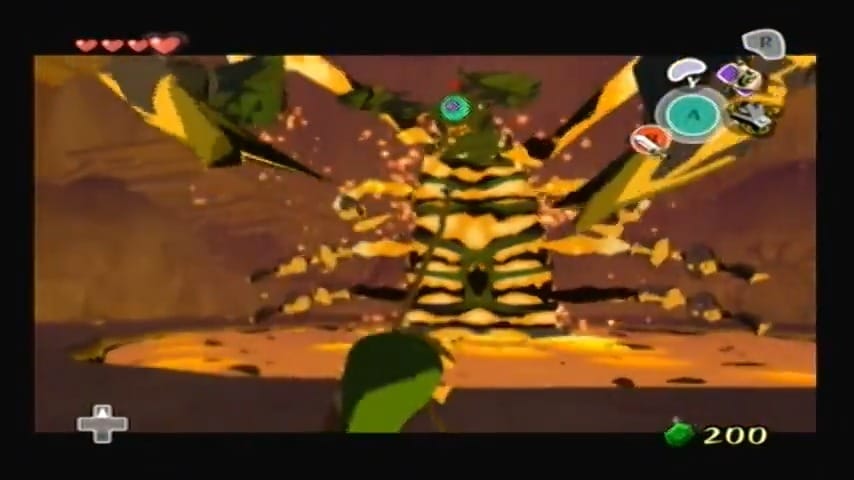
Phase 2 – The Eye of the Scorpion
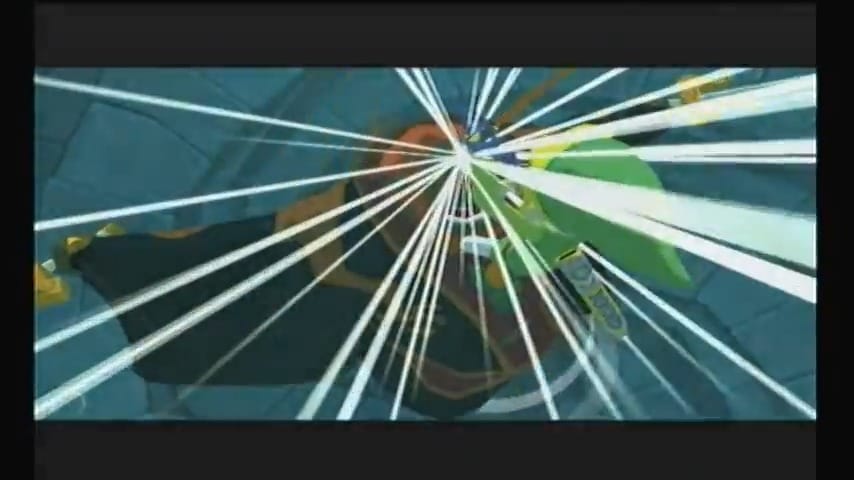
With its shell gone, Gohma’s giant glowing eye is exposed – that’s its weak point. The arena is now clear of ceiling debris so you can focus on offense. Gohma becomes more aggressive, scuttling after you and lunging. Target its eye and use the Grappling Hook one more time, but this time pull on Gohma’s eye. This will stun the beast momentarily (in the HD version you can also use the hook to snatch a spoil item if Gohma had one, but it doesn’t). When Gohma is stunned (its eye turns bluish and it stops moving), rush in with your sword and slash away at the eye as much as possible. It will recover and thrash about, so back off when it starts moving again, avoiding its pincer strikes and the occasional flame it might spit. Repeat this process: target the eye, grapple to stun, then slice it up. A few rounds of well-aimed strikes to the eye will finish off the fiery fiend. Watch out for its tantrum in this phase – Gohma might swing its claws widely or charge, but if you keep strafing and using your hook from a distance, it can’t hit you.


Kalle Demos
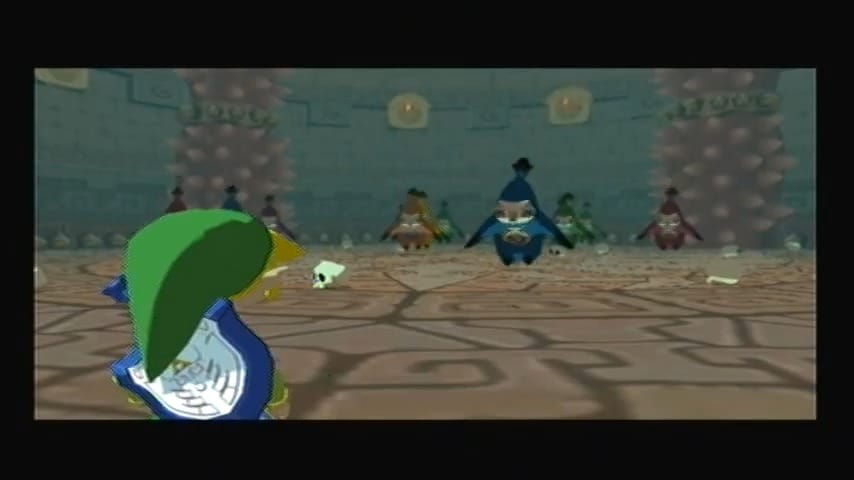
Kalle Demos, a gargantuan plant creature, is the boss of the Forbidden Woods. In the center of a lush circular arena, you’ll see Makar trapped, suspended from above by the tendrils of a monstrous flower. As you approach, the giant flower drops down and reveals a purple-eyed core inside – then it quickly hoists itself back up, hanging by many vine tentacles from the ceiling. This carnivorous plant has multiple whipping vines and a slew of tactics to harm intruders.
Phase 1 – Cut it Down: Immediately equip your Boomerang. Kalle Demos is dangling from vines connected to the ceiling, and those are your primary targets. Circle around the room to maintain distance from the boss’s swinging vine-arms that try to slap or stab at you. Target five of the vine appendages at a time with your Boomerang (you can lock onto several in one go) and release to slice them. The goal is to cut all of the supporting vines. If you stay moving, the vine tentacles on the floor will have a harder time hitting you. Occasionally, Kalle Demos might release a few Peahat-like spores or drop Morths to distract you – you can quickly Boomerang those as well, or just ignore them and keep moving.
After enough vines are cut, the giant flower will plummet to the ground with a crash, stunned. This is your chance! Run into the middle of the fallen flower and you’ll see the exposed core – the bulb with Makar inside. Slash the core repeatedly with your sword. You should get several good hits in (use jump attacks or spin attacks for extra damage if you can).


Before long, Kalle Demos will fling you back and regenerate its vines, reattaching to the ceiling. Phase 2 is just a repeat of cutting vines and striking the core. Keep an eye on your health in case stray attacks hit you, and use that bottled fairy if needed. Each cycle, try to cut the vines even faster – using the Boomerang’s lock-on efficiently can sometimes drop the boss in one round if you target every remaining vine in one throw. If not, dodge the angry swipes and razor leaves it may fling, and go for another round of vine-cutting. Two to three full cycles of vine cutting and core slashing should do it.
After enough punishment, Kalle Demos wilts and collapses in defeat. The room’s flora recedes and little Makar is freed from the bulb (don’t worry, he’s unharmed and very thankful!). A Heart Container will appear – be sure to pick it up, as it permanently increases your maximum health by one. Step into the glowing blue light at the center of the arena to exit the dungeon with Makar.


Gohdan
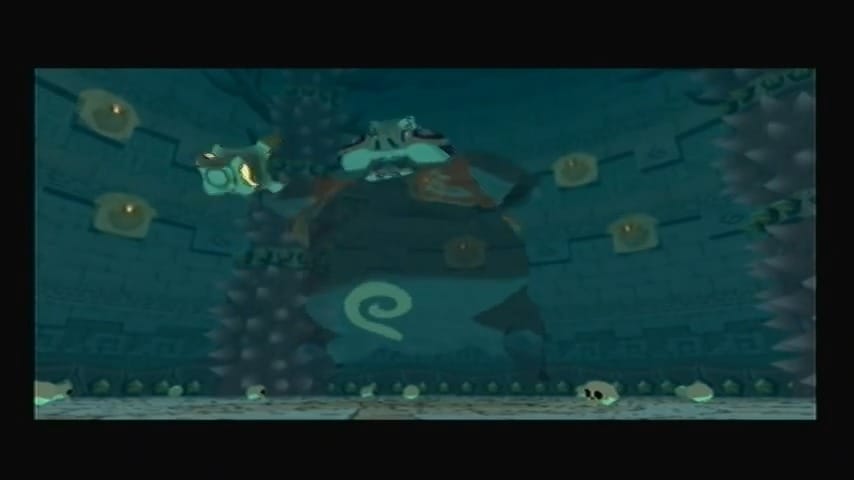
Step into the wide arena and approach the center. A booming voice commends your progress and issues one final challenge. The colossal stone face on the wall comes alive, and two massive hands detach from the walls – this is Gohdan, the Great Arbiter who guards the Tower of the Gods. Gohdan’s head and hands will attack you in tandem. To defeat this boss, you’ll need your newly acquired Hero’s Bow and also your Bombs.
Gohdan’s Weak Points: The boss has two hands with glowing eyes on their palms, and two eyes on its central head. You must disable the hands first, then the head, and finally feed it bombs. Here’s the strategy:
- Shoot the Hands’ Eyes: Immediately target one of Gohdan’s floating hands. Avoid getting too close as they hover. Each hand has an eye in its palm – shoot the eye with an arrow. It typically takes two arrows to make a hand fall limp. You’ll know it’s deactivated when it collapses and stops moving. Quickly do the same to the other hand: lock on (L-target) or manually aim and fire two arrows at its palm eye. With both hands temporarily disabled, they won’t harass you while you target the head.
- Shoot Gohdan’s Eyes: Once the hands are down, Gohdan’s two large eyes on its face open up, glowing red. Equip your bow again and shoot each eye on the head. Just like the hands, each eye needs two arrows to be blinded. If you’re quick, you can get two shots per eye before the eyes close or before the hands revive. Once both eyes have been hit twice, Gohdan will be stunned and its giant mouth will open as the head slumps down to floor level.
- Throw a Bomb into the Mouth: With the mouth open and within reach, quickly toss a Bomb into Gohdan’s mouth like you’re feeding it. The bomb will explode inside, damaging the boss. Gohdan’s head then reactivates and rises, and its hands will revive.
- Repeat the Cycle: Gohdan requires three bomb “meals” to be defeated. This means you’ll need to repeat the process up to three times: disable both hands with arrows, shoot both eyes on the face with arrows (two per eye), and then bomb the mouth. The boss gets slightly faster each round, but the strategy remains the same.
Gohdan’s Attacks and Tips:
- Hand Strikes: Gohdan’s hands swipe and try to smack or push you off the platform. Keep moving to avoid their slaps. If you see a fist clenching, be ready to side-jump out of the way to avoid a crushing blow. The hands can also suddenly surge forward to shove you – running perpendicular to their charge helps avoid being pushed off.
- Fireballs: Gohdan’s head periodically spits out fireballs that home in on your last position. These can be dodged by constantly moving (don’t stand still) or by running to one side as they launch. You can also shoot the fireballs with an arrow to destroy them mid-air, but that can waste time and arrows; usually just dodging is fine.
- Falling Off / Electric Floor: The arena is a raised platform floating above a pit. If a hand knocks you off, don’t panic – there is a way back up. The surrounding floor is lined with an electric current that will shock you every few seconds while you’re down there. Quickly roll towards one of the four corners of the room where you’ll find ladders. Climb back up as fast as you can to rejoin the fight before you take too much damage from the electricity.
- Arrow Refills: If you run low on arrows during the fight, Gohdan will actually help you out. After a while of not being attacked, Gohdan will “sneeze” out a bundle of arrows (10) onto the platform, ensuring you’re not left helpless. Collect them and continue the assault. (Likewise, hearts may drop if you’re low on health in the standard mode, but in Hero Mode they will not – so bring a fairy or potion if playing HD Hero Mode.)
Stay patient and keep to the pattern. After you’ve tossed three bombs into Gohdan’s mouth, the giant head will start to sputter. Gohdan will acknowledge your skill and the challenge will end. The boss’s hands withdraw and the face returns to its place on the wall, now lifeless.


Phantom Ganon
Lock onto the hovering Phantom Ganon as he launches glowing orbs of dark magic at you. It’s time for some dead man’s volley! Reflect the energy balls back at him with well-timed sword swings. Each time you bat an orb back, the phantom swats it to-and-fro faster, so be ready – this deadly tennis match speeds up with each volley.
Keep your rhythm and eventually an orb will strike Phantom Ganon, knocking him out of the air and stunning him on the ground. Rush in and land a flurry of sword strikes before he can recover. Phantom Ganon may also teleport behind you occasionally; if you suddenly lose sight of him, quickly spin around and strike to interrupt his sneak attack. It may take a few rounds of volleys and follow-up hits, but stay patient and Phantom Ganon will fall.


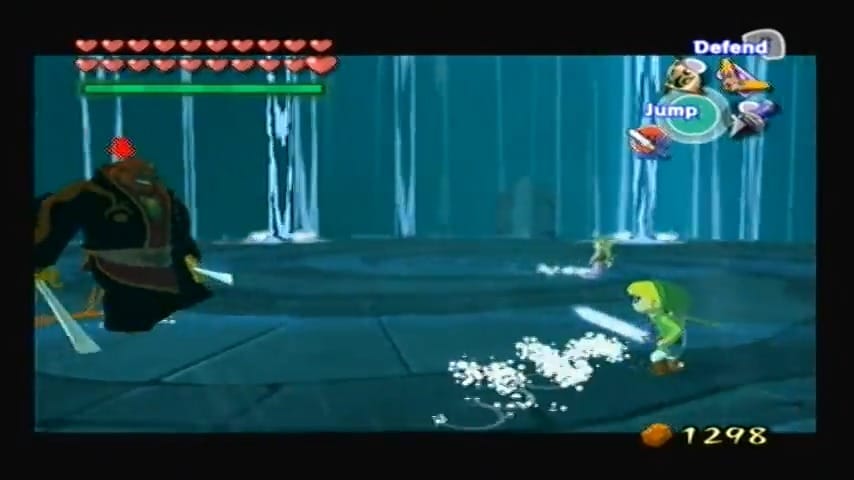
The Helmaroc King
Just as the last pirate hustles Aryll out, an ear-splitting screech echoes from below. The Helmaroc King – the gigantic armored bird that once kidnapped your sister – suddenly bursts up into the tower. The room shakes as water begins flooding the lower levels of the tower staircase! It’s boss fight time, and this battle comes in two distinct phases. First, you’ll need to outrun the rising water and the Helmaroc King’s onslaught as you race up the spiral ramp inside the tower. Then, you’ll face the Helmaroc in a final one-on-one duel on the fortress rooftop.

Escape the Flood (Phase 1)
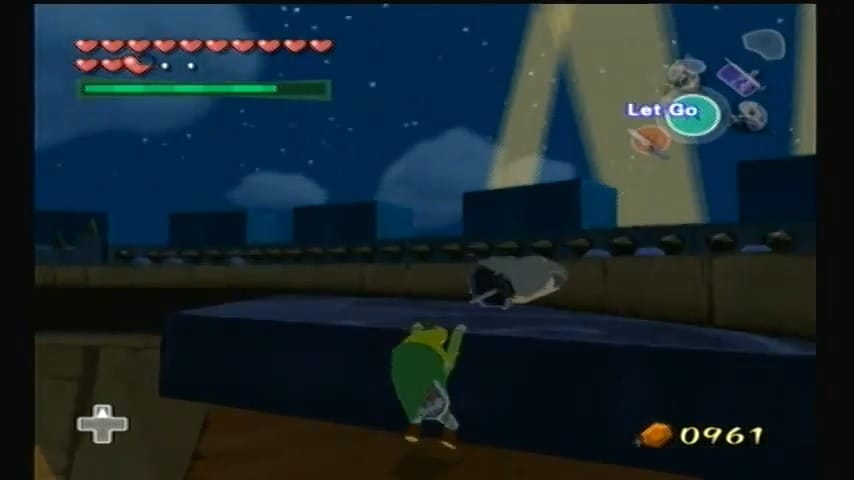
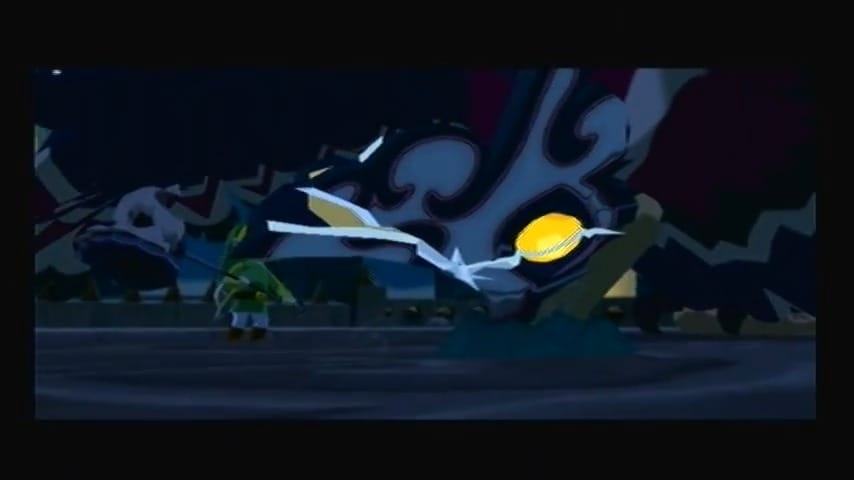
As soon as you regain control, dash up the spiral staircase that winds around the interior tower wall. Don’t hesitate – the water level is climbing rapidly from below, and the Helmaroc King is in hot pursuit! If you’re confident, roll forward to move at top speed. The Helmaroc will smash through walls and platforms in its rage, knocking out sections of the stairs as it chases you. If you’re too slow, the giant bird can even crash into the platform you’re on and send you tumbling down. Should you fall, don’t panic – the rising water will lift you, and you can use your Grappling Hook on the wooden poles above gapped stairways to swing back up. As you sprint upward, Bokoblins may leap out of pots on the stairs to attack, but it’s best to ignore them in this frantic climb (many will simply get swept away by the flood or knocked aside by Helmaroc’s attacks). Keep your focus on moving up. Whenever a staircase segment is destroyed, use the Grappling Hook or a well-timed jump once the water rises enough to reach the next ledge. It’s a thrilling race against the flood and the furious bird behind you – but if you keep moving, you’ll reach the summit in time. At the very top, just as you approach the exit to the roof, the Helmaroc King will lunge one last time and shove its massive head through the doorway, trying to block your escape. Don’t hold back – whack the Helmaroc’s masked face with your Skull Hammer as hard as you can! One solid hit to that metal mask will stun the beast and send it plummeting back down the shaft with an angry squawk. With the way briefly clear, climb the ladder and exit through the door to emerge onto the fortress rooftop under the open night sky.


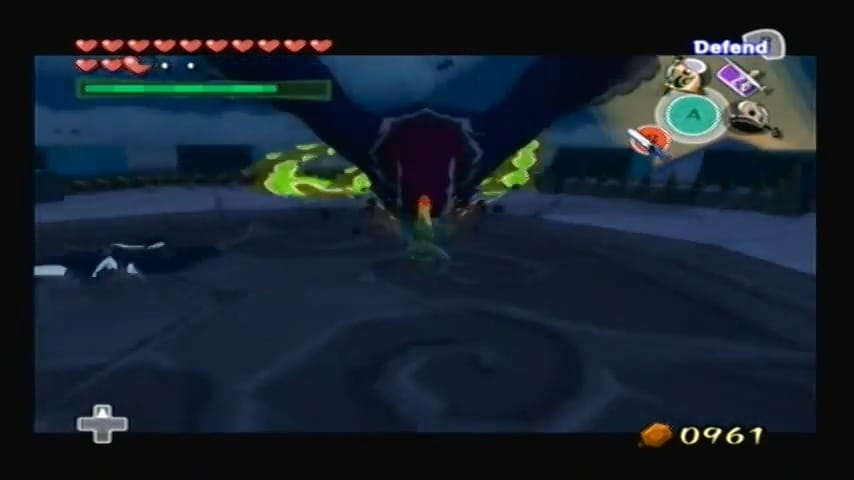
Rooftop Arena (Phase 2)
Now the real duel begins. You stand on the broad roof of the Forsaken Fortress, a circular arena bordered by a low wall lined with sharp wooden spikes. The Helmaroc King swoops overhead in the darkness, poised to attack. Stay on your toes and be mindful of those spiky walls – falling or getting knocked into them will hurt. The Helmaroc King has a few signature attacks in this phase, and recognizing them is key to surviving and creating openings for your counterattack:
- Talon Sweep (Dive Attack): The Helmaroc King might suddenly dive straight at you, skimming low over the arena with its talons outstretched. It’s a fast charge, but you can see it coming as the bird circles and lines up its approach. When you notice it swooping toward you, sidestep or roll aside at the last moment to avoid getting clawed. The boss will usually need to pull up and circle around after a missed dive, giving you a moment to reposition away from the walls.
- Wing Gust: If the Helmaroc King hovers in place and beats its gigantic wings, it’s generating a powerful gust of wind. These gusts push you across the roof, threatening to slam you into the ring of spikes. To avoid a painful poke, run toward the Helmaroc King or perpendicular to the wind rather than trying to run away with it. By moving counter to the gale, you can resist being blown back. Alternatively, quickly crouch with your shield up – the wind won’t budge you while guarding. Stay out of the direct path of the gale if possible, and be ready to regain footing if you get knocked off balance.
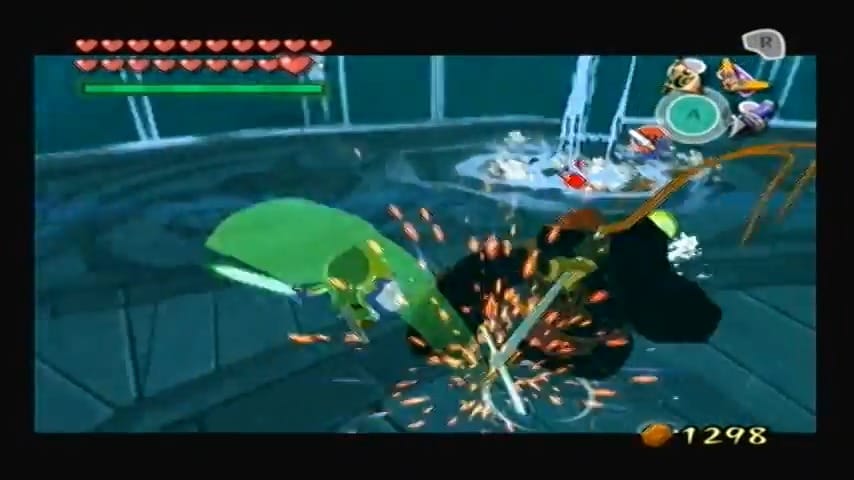
- Beak Peck: This is the opening you’ve been waiting for. The Helmaroc King will land on the platform and march towards you, then thrust its gigantic beak forward in an attempt to peck you into the ground. Bait this attack by keeping a medium distance and strafing to one side. The moment the bird lunges, sprint or roll to the side to dodge it – the Helmaroc’s beak will slam down and get stuck in the rooftop for a brief moment! This is your chance: run up to that embedded beak and smash the Helmaroc King’s faceplate with your Skull Hammer as hard as you can. You’ll see the bird’s thick metal mask crack a little with each successful hammer blow.
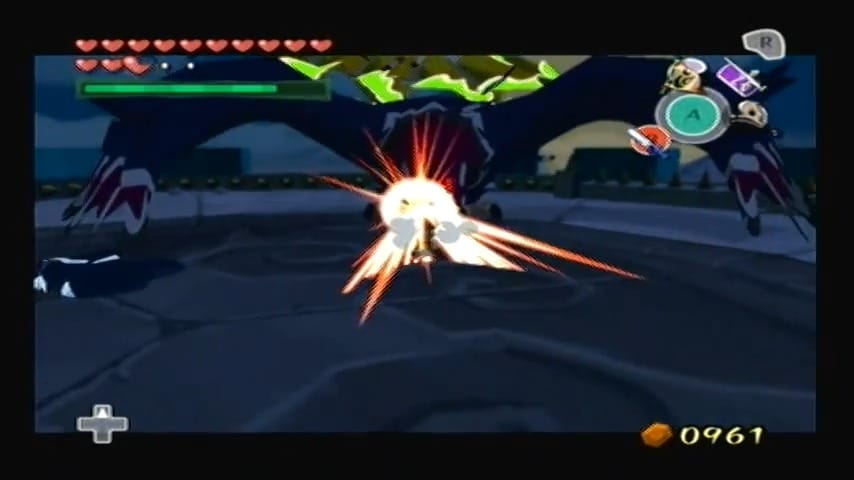

After each successful hammer hit, the Helmaroc King will screech and yank its head free, taking to the sky again. It will resume attacking with more furious dives and wind gusts, so repeat the process: avoid its swooping strikes and cyclones, and watch for the next peck opportunity. It takes about five direct hammer strikes to significantly damage the Helmaroc’s mask. After a handful of hits, the iron mask shatters off the Helmaroc King’s face, falling away in pieces. Now you can finally wound the beast directly. Switch to your sword (the Master Sword, or any sword will do) and get ready to finish the fight. The Helmaroc King, now maskless, will become even more enraged but also vulnerable – it may try the same attacks as before. Counter its moves as you did earlier: dodge the dives and wind, and when the bird stomps down and pecks (it can still do this even without the mask), evade and retaliate. Without armor protecting it, the Helmaroc’s exposed head can be injured by your blade. Jump attacks or slashes to the face will rapidly deplete its remaining health. Only a few well-placed sword hits are required now. After enough punishment, the giant bird will let out one last defeated shriek, rise up into the air, and explode in a burst of dark smoke, signaling the end of the battle.

Jalhalla
Inside the dark boss chamber, a short cutscene plays: dozens of Poes (the same ghostly figures you’ve been fighting, but many more of them) swirl together at the center of the room, merging into one enormous phantom with a grin on its mask. This is Jalhalla, the Giant Poe and the boss of the Earth Temple. He’s a rotund ghost in a mask and cape, carrying a lantern. He may look a bit comical, but don’t underestimate him – he’s quite dangerous if you’re not careful. The fight is all about using light to expose Jalhalla’s true form, and then using your strength (and Power Bracelets) to smash him apart.
The arena: You’re in a circular room with tall walls. Around the edges stand several large spiked pillars (kind of like spiked columns). These are important for your offense. There are also plenty of little skulls lying on the floor, which you can pick up and throw if needed (though they don’t do much to Jalhalla directly). Most crucially, look at the ceiling: there are holes in the ceiling that let in beams of light, similar to spotlights. However, only one beam of light is active at any given time, shining down in a particular location on the floor. Every so often, that active beam will turn off and another will turn on somewhere else in the room. So the available light moves around periodically. Keep track of where the lit patch is – you’ll need to use it to harm Jalhalla.
Phase 1 – Expose Jalhalla
Jalhalla starts off invisible and invulnerable, floating around the room. To damage him, you first need to make him tangible by hitting him with light. There are two ways to do this:
- Lure him into the light. If a light beam is on the floor, you can stand in it and get Jalhalla to come toward you. Jalhalla will try to either inhale air to suck you closer or stomp towards you to attack. As he nears the beam of light, lock onto him and raise your Mirror Shield to catch the light. Angle it so the light shines onto Jalhalla’s body.
- Position yourself in the light such that when Jalhalla charges, he passes through the beam. This can be trickier, but an alternative if he’s aggressive.
The easier method is usually the first: stand in the beam and reflect it onto him. When the light hits Jalhalla, he reacts as all Poes do – his spectral form becomes solid. He’ll turn a solid white/pinkish color and drop to the ground with a thud, now dazed and vulnerable.


Phase 2 – Knock him down and break him apart
As soon as Jalhalla is solid and stunned, run up to him and press the A button to grab him. Thanks to your Power Bracelets, Link can lift this giant ghost without problem (time to put that strength to use!). Once you have Jalhalla hoisted over your head, throw him as hard as you can into one of the spiked pillars along the walls. Aim for a pillar that’s relatively close so you don’t miss – Link will toss Jalhalla like a huge bowling ball. When Jalhalla’s body strikes the spikes, he bursts apart into a crowd of about ten smaller Poes, the ones that form his essence.


Now it’s your chance to do damage. The little Poes will be momentarily scattered and running around in a panic. Quickly pull out your sword and start slashing the mini-Poes. Each one only takes a single hit to defeat (two at most). The more of these you destroy now, the fewer will recombine to form Jalhalla again – essentially, each Poe you kill is a bit of Jalhalla’s health gone. Swing fast and try to take out as many as possible before they start to flicker and disappear. You likely won’t get them all in one go, because after a few seconds, any remaining Poes will magically pull back together, re-merging into Jalhalla’s giant form for the next round. Jalhalla will have fewer Poes composing him now, meaning he’s taken significant damage.


Repeat the cycle: With Jalhalla reformed (now a bit smaller in mass, but still the same look), repeat the process: find the active light beam, lure him or position yourself, and shine the Mirror Shield to stun him solid. Then grab him and slam him into the spikes again, scattering more Poes, and slice them up. Each cycle will eliminate a chunk of his ghostly count.
It typically takes three to four cycles to fully defeat Jalhalla, depending on how many Poes you manage to destroy each time. If you’re efficient and take out say 4-5 Poes each round, you might only need three throws. If you get fewer each time, it might be four throws. You’ll know you’re getting close when Jalhalla reforms with noticeably fewer Poes making up his body (his size might slightly reduce and there will be fewer Poes to kill each time).
Jalhalla’s attacks: Of course, Jalhalla isn’t just going to sit there. He has a few attacks to watch for:
- Body Slam (flattening attack): Jalhalla might suddenly float up a bit and then drop his big body down in an attempt to squash you like a pancake. If you see him hovering over you or wiggling, run away from that spot or roll to the side quickly. If you fail to dodge, Link will get flattened underneath Jalhalla’s girth. Being squished doesn’t do a ton of direct damage, but it causes a comedic effect where Link becomes paper-thin and “possessed” or confused for a short while. The controls will reverse (left becomes right, forward becomes back, etc.) because Link is dazed. It can be very disorienting! If this happens, don’t panic. One way to cure the curse quickly is to run into one of the light beams – the purifying light will pop Link back to normal size and orientation. Otherwise, just wait a few moments and the effect will wear off on its own, and controls will return to normal. Try not to get squished in the first place by keeping an eye on Jalhalla’s movements and staying out from directly underneath him.
- Flame breath / fireballs: Jalhalla can also take a deep breath and spew out streams of fire or fireball projectiles from his lantern. If you see him inhale or his lantern start to glow with flame, be prepared to sidestep or keep moving to avoid where he’s aiming. The fire attack can travel in a line, so just moving out of its path will keep you safe. The good news is these flames are relatively slow-moving and easy to run away from. Just don’t stand still when he’s trying to toast you.
- Possession (Poe swarm): On occasion, instead of merging fully, Jalhalla might send a few of his Poe underlings to attack you even while he’s together, or when he breaks apart they might deliberately rush Link. If a small Poe latches onto you, it’s similar to being cursed – Link may move sluggishly or the controls get mirrored briefly. Wiggle away and slash it. This is not so much a separate attack as a result of either getting swarmed by the little guys if you stand idle. Keep moving and they shouldn’t pile on you.
- Invisibility and charging: Jalhalla can vanish and reappear; sometimes he might go invisible and then suddenly charge at you, trying to collide. Listen for audio cues (a telltale laugh) and be ready to side-jump if needed. When he’s invisible, you can’t hurt him until he materializes or until you catch him in light.
Throughout the battle, maintain a steady pattern: avoid his attacks by staying mobile, quickly move to wherever the current light beam is shining, and use your Mirror Shield to stun him whenever you have a clear shot. If the active light is across the room and Jalhalla is between you and it, you can try to coax him over, or wait for the beam to shift to a more convenient spot. Keep your camera pointed at him so you can react to his moves.
After a few rounds, all the tiny Poes will have been sliced apart, and Jalhalla will have

Molgera
As you step into Molgera’s lair, you find yourself on a wide circular bed of shifting sand. The ground itself behaves like quicksand, constantly pulling you toward the center. The atmosphere is tense and the music kicks in with a fast drumbeat – Molgera is about to attack. Suddenly, a giant sand dweller erupts from beneath the surface. This colossal flying sand worm is Molgera, and it’s ready to make a meal of you.
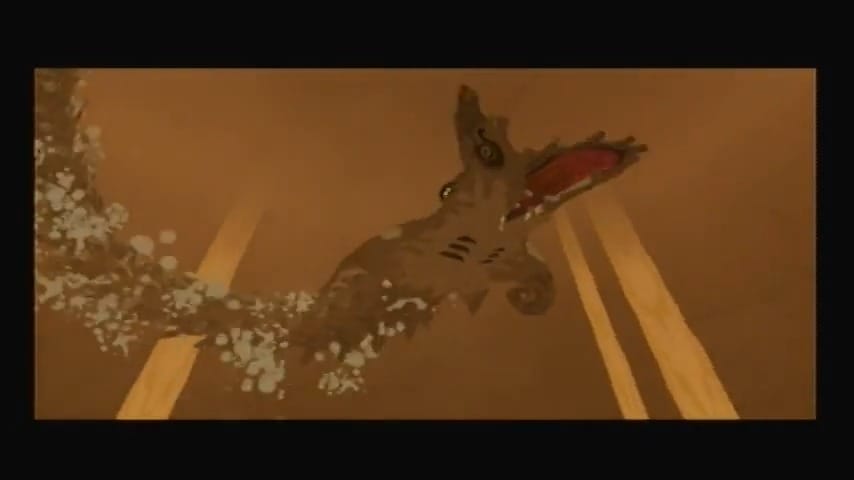
Molgera’s arena is essentially a giant pit of sand. The footing is unstable (you’ll be slowly dragged toward the center by the sand), and there’s nowhere solid to hide, so keep moving. Molgera itself is a huge, beige-yellow worm with a gaping maw full of teeth and a long purple tongue. Its attacks are deceptively swift: it may lunge out of the sand with its mouth open wide, trying to bite you, or suddenly fly up from one spot and crash down in another attempt to slam you. After you injure Molgera a couple of times, it will also spit out several mini-Molgeras – smaller versions of itself – to harass you. These little larvae will hop and bite at you, making the battle more chaotic.
Strategy: Target Molgera’s tongue. Watch the sand’s surface for a telltale sign: when you see a large patch of dark, shifting sand gathering in one spot, Molgera is about to emerge there. Keep a medium distance and be ready. The moment Molgera pops its mouth above the sand and exposes that red-purple tongue, Hookshot the tongue to pull the beast toward you. As soon as Molgera’s head is dragged close, slash the tongue repeatedly with your sword. You’ll usually manage a few hits before it shakes loose and retreats. Be careful not to stand too close to Molgera’s mouth when it emerges – if you linger right in front of it, Molgera can lunge forward and swallow you whole, chewing you up before spitting you out for heavy damage. After taking a few hits, Molgera will dive back under and reappear elsewhere.


When Molgera summons its larvae (up to three at a time), you have a choice: you can ignore them and focus on the boss, or eliminate them to make the fight easier. The safer approach is to quickly target and Hookshot each mini-Molgera out of the sand, then cut them down. They often drop hearts and magic, which can be a lifesaver mid-battle. Clearing the small fry ensures they won’t interfere when you try to Hookshot the big boss’s tongue (otherwise they might knock you around as you aim). Keep an eye on Molgera while dealing with the little ones; don’t get caught off guard by the main boss emerging under you.


If Molgera doesn’t immediately resurface from below, it might take to the air. The massive worm will circle around above and then attempt a devastating aerial slam attack. When you see Molgera flying, run in one direction (or roll) to avoid the spot where it tries to crash down on you. You can also try to Hookshot Molgera while it’s airborne – if you aim at its open mouth, you can tug it down mid-flight, but this is risky and requires good timing. Generally, it’s safest to keep moving and wait for Molgera to dive back into the sand, where you can predict its next emergence by watching for the dark sand circle.
Remain patient and stick to the pattern: wait for Molgera to surface with an open mouth, Hookshot the tongue, and then deliver as many sword strikes as possible. After about three full cycles of this (with increasingly aggressive attacks and more larvae each time), Molgera will not be able to take any more punishment. A final series of blows will cause the giant creature to thrash and then explode in a shower of sand.


The Phantom Ganon Gauntlet
Lock onto the hovering Phantom Ganon as he launches glowing orbs of dark magic at you. It’s time for some dead man’s volley! Reflect the energy balls back at him with well-timed sword swings. Each time you bat an orb back, the phantom swats it to-and-fro faster, so be ready – this deadly tennis match speeds up with each volley.
Pay attention to the one Phantom Ganon that looks slightly more solid or darker than the others – that’s the real one. Face that one and knock his energy orb attacks back at him with your sword (tennis, anyone?), or simply shoot him with a Light Arrow if you’re quick enough (in case you already had Light Arrows; if not, you’ll get them shortly). After a few hits, the real Phantom Ganon falls and vanishes, leaving behind his dark sword on the ground.


Here’s the puzzle: the direction the sword’s hilt points is the correct door to go through. All other doors in the room are decoys that lead to looping dead-ends. So, note the direction the sword points, and go through that door.

You will repeat this process through a sequence of rooms – it’s like a maze. Each room, Phantom Ganon (or several copies) attacks, you defeat the real one, then use the dropped sword as a compass to proceed. The order is consistent but using the sword clue makes it straightforward.


After a number of these encounters, you’ll eventually enter a differently colored chamber (you might notice the last room looks a bit unique). Defeat Phantom Ganon here and a big treasure chest spawns. Open it to obtain the Light Arrow, the most powerful arrow upgrade in the game! Link can now shoot arrows of pure light, effective at destroying evil.


Puppet Ganon
Puppet Ganon is essentially Ganondorf’s twisted magic creating a massive marionette in his own beastly image. The fight has three phases, and it can be one of the trickiest battles in the game if you don’t know what to do. But fear not – here’s a breakdown:


Phase 1 – Puppet Ganon (Humanoid Boar form)
A giant puppet version of Ganon’s pig form hangs from the ceiling by glowing blue cords. It lumbers around the room, swiping with its arms and spinning a long tail that has a blue orb at the end. The objective is to hit that orb with Light Arrows. It’s only vulnerable from behind, so you’ll often need to maneuver to get a clear shot. You can use the Boomerang to target and cut Puppet Ganon’s blue cords to tangle it up and slow its movements. (Cutting all the cords will drop it to the floor temporarily, making the tail easier to hit.) Avoid the swinging arms and the Keese (bats) that occasionally spawn when it spins. Whenever you have an opening, shoot a Light Arrow at the blue orb on the tail. Three successful hits will destroy the first form.


Phase 2 – Puppet Ganon (Spider form)
The puppet transforms into a giant, grotesque spider-like creature (basically a big bulbous puppet with eight limbs). It scuttles to the ceiling, out of view. The only warning you have is its shadow on the floor and a trick: the shallow pool of water on the ground will reflect the spider’s shape above, letting you see where it’s positioning. It will then drop down hard, trying to crush you. Watch the reflection and move aside to avoid being flattened. When the spider puppet lands upside-down, its vulnerable blue orb is exposed on its underside for a moment. Shoot it with a Light Arrow before it flips back up. You won’t have time to get more than one shot per drop, typically. After each hit, the spider will go back up and come crashing down faster, perhaps multiple times in a row. Keep dodging and shooting the blue orb when you can. Three Light Arrows will crack this form as well, transitioning Puppet Ganon to its final phase.


Phase 3 – Puppet Ganon (Worm form)
Now things get wild – Puppet Ganon turns into a long, flying snake-like worm (resembling a Moldorm from classic Zelda). It zips around the room erratically, slithering through the air at high speed. The glowing blue orb is now on its tail end, which it swings around quickly. This phase can be frustrating because the target moves so fast. One strategy is to position yourself in a corner and use the Boomerang or Hookshot to stun the head momentarily, or even toss bait on the ground – funny enough, Puppet Ganon’s worm form will be attracted to All-Purpose Bait for a short moment, giving you a chance at a shot. However, the usual approach is to anticipate its movement: as the worm zooms by, try to fire a Light Arrow at the tail orb when it comes into view. It often circles the room in a pattern; with a bit of practice you can time your shots. If you have plenty of magic, you might spam the arrows a bit to increase your odds of a hit. Hitting the tail stuns the worm briefly. Again, it takes three hits to defeat this final form. After the third hit, Puppet Ganon will collapse and dissolve into dark mist.


Ganondorf
Ganondorf is waiting, wielding dual swords. He has Zelda unconscious at his side. A final cutscene plays: Ganondorf shares a bit of monologue about the wind and Hyrule’s fate, then tosses Zelda aside and attacks. The battle is a swordfight that progresses through a few stages.
His monologue is heavy with despair and rage. Before you can move, Ganondorf suddenly whirls around and in a flash attacks. He lunges forward with startling speed and strikes Link hard, easily overpowering you in the cutscene. You’re knocked to the ground, the Master Sword flying from your grip. Ganondorf seizes you by the throat, lifting you like a ragdoll, and with his other hand he summons the complete Triforce above. The golden relic pieces float toward him – the Triforce of Power (his), Courage (yours), and Wisdom (Zelda’s) – and assemble into a shining triangle. Ganondorf’s eyes gleam with triumph as he reaches out to wish for the return of Hyrule. But at that crucial moment, the chamber is bathed in blinding light.


The King of Hyrule (in his human form, Daphnes) appears behind Ganondorf, one hand on the Triforce. With a calm, sad smile, the King speaks his wish first: he wishes for hope and a future for Link and Zelda, and for the ancient land of Hyrule to be washed away. The Triforce flashes in acknowledgment and vanishes, its wish fulfilled. Water begins to pour down around the tower – the gods are answering the King’s prayer by flooding this last remnant of old Hyrule. Enraged and driven to madness by his lost chance, Ganondorf laughs maniacally. He tosses you aside and draws two gleaming swords. “Your gods destroy you,” he snarls, “but I’ll destroy you first!” At that moment, Zelda, awakened by the King’s wish, calls out to you. She slides your precious Master Sword back into your hands – the final battle is on.


One-on-One Duel
At first, it’s just Ganondorf versus Link, blade to blade. Ganondorf is an agile and relentless fighter. He will block most of your frontal attacks and respond with swift strikes of his own. A good strategy is to use your parry (watch for the A-button prompt when Ganondorf is about to strike, or after your attack is blocked – Link can roll around and slice his back). You can also try to land jump attacks or shoot a Light Arrow at him, but Ganondorf dodges arrows quickly (unlike in Ocarina of Time, there’s no easy stun with Light Arrows on him directly). Another tactic: keep Ganondorf’s back turned to where Zelda lies – at this stage, Zelda will occasionally shoot Light Arrows at Ganondorf from the floor if she has a clear shot. If you position Ganondorf between you and Zelda, she might nail him with an arrow, stunning him briefly for you to get hits in. After you land a few blows, Ganondorf changes tactics.

Ganondorf Knocks Out Zelda
Eventually, Ganondorf gets annoyed by Zelda’s interference and quickly strikes her down, knocking her unconscious. Now it’s truly a one-on-one fight without support. Ganondorf’s attacks intensify – he’ll do a jumping slice and other heavy attacks. Continue using your parry (dodge and counter) moves and try not to get cornered. If you get low on health, break the jars around the edges of the arena (if any left) by luring Ganondorf away briefly. This part is about being patient and looking for openings, like after Ganondorf does a jump attack and lands, you can get a quick hit in. The Master Sword is fully powered, but Ganondorf is tough – it takes a good number of strikes to weaken him. Eventually, after enough hits, a brief sequence will trigger where Zelda wakes up again.


Teamwork Finale
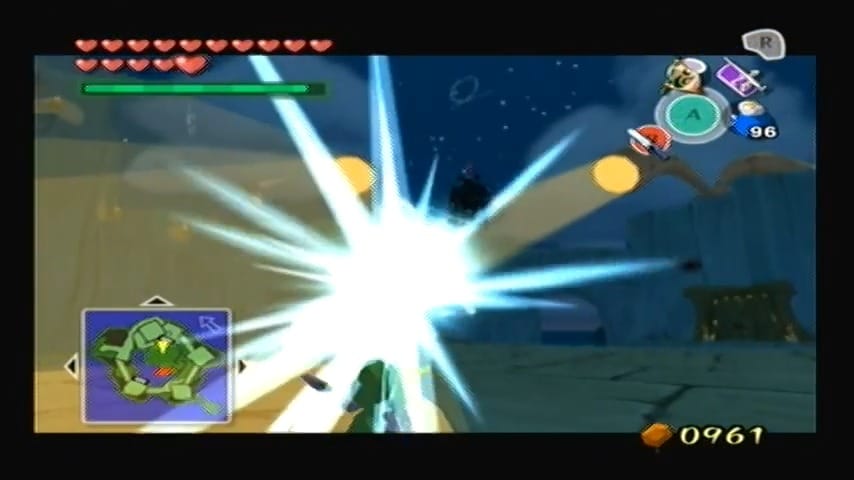
Zelda regains consciousness and realizes a new strategy. She calls out to you to use your Mirror Shield. Now, resume the fight but stay locked onto Ganondorf and keep some distance. Zelda will ready a Light Arrow and begin aiming at Ganondorf. Ganondorf is too agile to be hit directly now – he will always dodge her shots if he sees them coming. The key is to distract Ganondorf and reflect the Light Arrow off your shield. You can do this by engaging Ganondorf so that you are facing Zelda with Ganondorf in between. Zelda will shout a signal (or the game prompts you in HD version) once she’s about to fire.

At that moment, hold up your Mirror Shield. The Light Arrow will ricochet off your shield and strike Ganondorf from an unexpected angle, stunning him completely. (If it misses, keep maneuvering and try again – you might need to intentionally stand still to bait Ganondorf into an attack, giving Zelda a clear shot at your shield.) Once Ganondorf is paralyzed by the reflected Light Arrow, seize the chance: run up to him and the A-button Finishing Blow prompt will appear. Link leaps into the air and, in a dramatic and rather gruesome finishing move, drives the Master Sword straight into Ganondorf’s forehead, turning him to stone. Congratulations – you’ve defeated the Dark Lord!