


Welcome, hero, to the most comprehensive and visually guided journey through one of gaming’s greatest masterpieces: The Legend of Zelda: A Link to the Past! Whether you’re a seasoned Hyrule veteran or a newcomer stepping into this timeless adventure for the first time, our 100% completion walkthrough is your indispensable companion.
Get ready to uncover every secret, collect every heart piece, find every item, and conquer every dungeon. From the mysterious depths of the Light World to the perilous challenges of the Dark World, our fully illustrated guide will lead you step-by-step through every puzzle, boss battle, and crucial discovery. We’ll show you exactly how to defeat notorious foes like the Helmasaur King, Mothula, and the dreaded Trinexx, all leading up to the final epic showdown with Ganon himself at the Pyramid of Power.
No more missed treasures or frustrating dead ends! Our A Link to the Past Walkthrough is meticulously crafted to ensure you experience everything this iconic SNES adventure has to offer. So grab your Master Sword, prepare your inventory, and let’s embark on the ultimate quest to save Hyrule!
I. The Light World Adventure
- Princess Zelda Rescue : Infiltrate Hyrule Castle to rescue Zelda and kickstart Link’s epic quest.
- Eastern Palace : Solve Armos Knights’ traps in your first dungeon to claim the Pendant of Courage.
- Desert Palace: Navigate shifting sands and defeat Lanmolas to earn the Pendant of Power.
- Tower of Hera: Climb Death Mountain’s Tower to obtain the Moon Pearl and final pendant.
- The Master Sword & Hyrule Castle: Claim the Master Sword, confront Agahnim, and set your destiny in motion.
II. The Dark World & Seven Maidens
- Dark Palace: Explore the Dark World’s Palace and free the first Maiden from darkness.
- Light World Exploration: Back in Hyrule, unlock warps, collect hearts, and prepare for deeper Dark World dungeons.
- Swamp Palace: Use Cane of Somaria blocks to navigate the toxic swamp and rescue another Maiden.
- Skull Woods: Uncover hidden tunnels and puzzles among the skull trees to free a trapped Maiden.
- Gargoyle’s Domain: Enter via pitchfork statue, secure the Titan’s Mitt, and beat Blind the Thief.
- Ice Palace: Traverse icy floors, gain Blue Mail, and defeat a freezing foe.
- Misery Mire: Master Cane of Byrna and Ether Medallion to rescue another Maiden in the mire.
- Turtle Rock: Face volcano hazards and rescue the last Maiden within this volcanic fortress.
III. Ganon’s End Game
- Ganon’s Tower : Climb the tower’s gauntlet of traps and minibosses to battle Agahnim.
- Pyramid of Power: The Ultimate Showdown with Ganon.
Princess Zelda Rescue
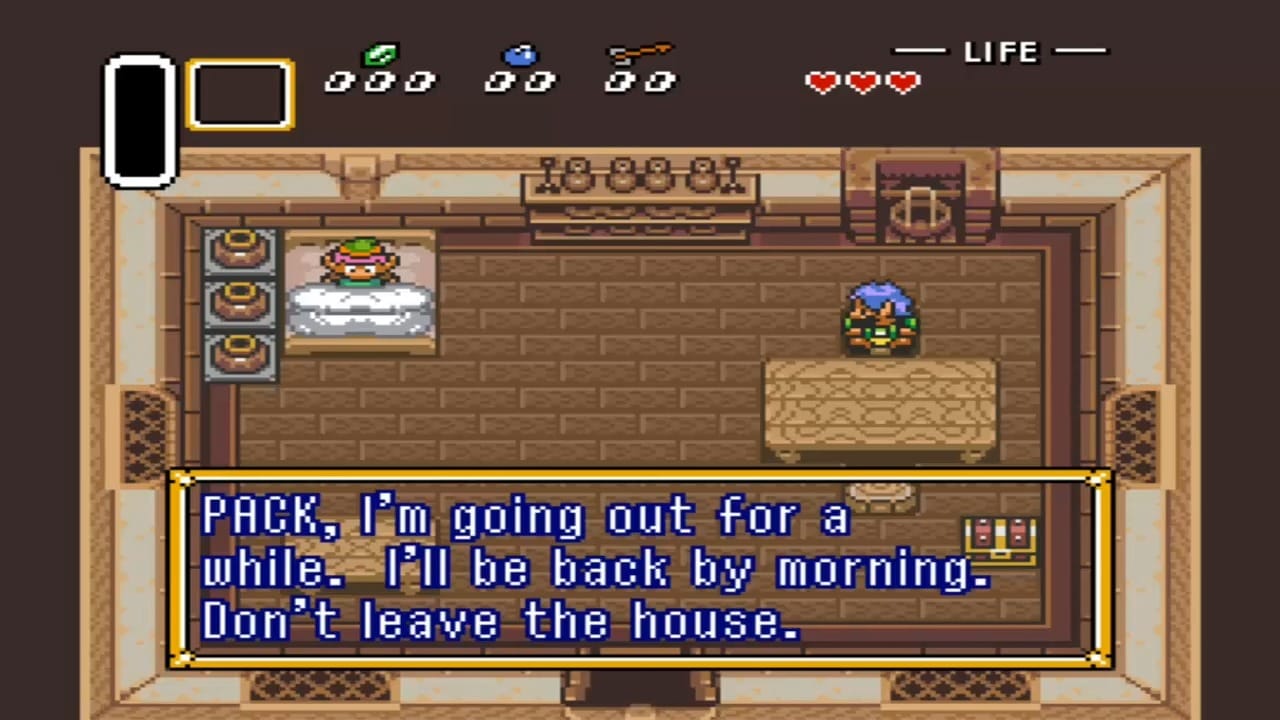
In this opening section, Link awakens on a stormy night to Princess Zelda’s telepathic plea and sets out for Hyrule Castle. He finds a secret passage by lifting a bush near the gate and drops into the castle basement. There, Link discovers his injured Uncle, who entrusts him with the Fighter’s Sword and Fighter’s Shield before collapsing. Armed for the first time, Link sneaks through the castle, defeating guards and navigating to the dungeon. He obtains a Small Key and the first dungeon Map, and even finds the Boomerang in a treasure chest. After battling a Ball and Chain Trooper, Link uses the key to free Princess Zelda from her cell. Together they escape via a secret chapel passage, fighting off Keese (bats) and rats in the dark tunnels. Emerging in the Sanctuary, Link delivers Zelda to the Loyal Sage, completing the rescue mission.
Before leaving the Sanctuary, Link opens a chest and gains his first full Heart Container, increasing his health. The Sage thanks Link and Zelda remains in Sanctuary for safety. At this point Link’s inventory includes the Lamp, Fighter’s Sword & Shield, and Boomerang, with four hearts of health. These early tools and extra heart will be crucial for the trials ahead. The Sage directs Link to seek the elder Sahasrahla in Kakariko Village, setting the next quest in motion.
- Lamp – Found in Link’s house chest at the very start (used to light torches in dark areas).
- Fighter’s Sword & Fighter’s Shield – Inherited from Link’s uncle in the secret passage (basic sword and shield to attack and block).
- Boomerang – Obtained from a castle chest after defeating a guard (stuns enemies and grabs distant items).
- Heart Container – Sanctuary chest reward after rescuing Zelda (permanently increases Link’s heart count).


Eastern Palace
With Zelda safe, Link heads east to find Sahasrahla and the first pendant. The elder sends Link to the Eastern Palace, the game’s first true dungeon. Inside this temple, Link navigates past Popo blobs and rolling boulders in trap hallways. He finds a chest with 100 Rupees and uses floor switches to open sealed doors. Exploring branching rooms, Link picks up the dungeon Map and Compass, then encounters Eyegore statues that only awaken when approached. After obtaining the Big Key, Link reaches the big treasure room where he claims the palace’s prized item: the Bow. Immediately after, he’s ambushed by Stalfos knights dropping from above, testing his newly acquired bow. Armed with arrows, Link can now defeat the Eyegores blocking his path.
Venturing to the boss chamber, Link faces the Armos Knights, six giant animated statues. Using the Bow, he can defeat each knight with a few well-placed arrows, avoiding their charging formation. When the last knight falls, it leaves behind a Heart Container. Link then claims the green Pendant of Courage, the first of three pendants needed for the Master Sword. Upon exiting, Sahasrahla congratulates Link and rewards him with the Pegasus Boots, which allow Link to dash at high speed. With the Pendant of Courage in hand and new boots that let him smash into objects and move faster, Link is prepared to journey to the next pendant location.
- Bow – Dungeon item from Eastern Palace big chest (allows ranged attacks with arrows).
- Pendant of Courage – Green pendant dropped by the Armos Knights, first of three spiritual pendants.
- Heart Container – Dropped by the Armos Knights boss (increases Link’s max health to 6 hearts total).
- Pegasus Boots – Reward from Sahasrahla after clearing Eastern Palace, enabling Link to run/dash and smash certain objects.


Desert Palace
Link’s quest next leads to the Desert of Mystery in southwest Hyrule. Using the Book of Mudora (recovered from Kakariko’s library using the Pegasus Boots), Link reads an ancient Hylian inscription and opens the Desert Palace. Inside the sandy ruins, he must avoid Beamos statues firing laser beams and contend with Leevers and creatures hiding in quicksand. Early in the dungeon, Link finds the Map and Compass, then uses boots to knock a key off a high ledge. Progressing through blade traps and Popo enemies, Link secures the Big Key needed for the palace’s main treasure. In a guarded chamber, Link opens the big chest to claim the Power Glove, a magical glove that greatly increases his strength. “You feel strength in both hands!” — with this upgrade, Link can now lift and throw the heavy light-gray stones that were previously immovable. The glove’s power is essential both to access the rest of the dungeon and to reach new areas beyond.
Using the Power Glove, Link reaches the second half of the dungeon through an outdoor passage. He lights torches to reveal hidden walls and navigates a maze of shifting sand floors. At the pinnacle, Link confronts the Lanmolas, three giant burrowing sand worms. He evades their erupting attacks and strikes each repeatedly (the Ice Rod picked up earlier can help deal extra damage). Upon defeating the Lanmolas, Link is rewarded with a Heart Container and the blue Pendant of Power, the second of the pendants of virtue. He is automatically transported outside as the desert palace crumbles. With two pendants collected, Sahasrahla marks the final pendant’s location (Death Mountain) on Link’s map. The newfound Power Glove also enables Link to lift large rocks around Hyrule, granting access to Zora’s Domain and other hidden spots.
- Power Glove – Special item from Desert Palace that grants the strength to lift heavy rocks (upgrade from the basic Power Glove level; essential for reaching Death Mountain and other areas).
- Pendant of Power – Blue pendant obtained after defeating Lanmolas (second of the three pendants).
- Heart Container – Dropped by the Lanmolas boss (increases Link’s health; he should have 7 heart containers after this).
- (Book of Mudora – Collected just before this section; used to read the Hylian inscription to enter the dungeon.)


Tower of Hera
After braving the desert, Link journeys to Death Mountain in search of the last pendant. He lifts a large stone near the mountain’s base (thanks to the Power Glove) and enters the dark cave passage. Inside, Link meets a lost Old Man and kindly guides him through the maze of caves while fending off bats and pitfalls. As thanks, the Old Man gives Link the Magic Mirror – a mystical mirror that allows travel from the Dark World to the Light World and marks return points. Emerging atop Death Mountain, Link avoids falling boulders and petrifying Deadrocks. Using the Mirror’s reflection power, he accesses Spectacle Rock and even nabs a hidden Piece of Heart. At the mountain summit, Link uses a convenient warp tile and the Magic Mirror to reach the entrance of the Tower of Hera, high above Hyrule.
Within the Tower of Hera (the third Light World dungeon), Link faces tricky floor puzzles and relies on switches to change colored barriers. Early on, he finds a Small Key by snagging it with the Boomerang from behind barriers. He also discovers the dungeon Map on 2F and uses the key to delve deeper. A notable challenge is the flying tile trap: Link endures or dodges a swarm of enchanted floor tiles that launch at him one by one. Solving a torch-lighting puzzle with the Lamp reveals the Big Key, which he uses to unlock the tower’s top floors. In a guarded chamber, Link opens the big chest and obtains the Moon Pearl, a crucial artifact that protects him from transforming in the Dark World. (Without the Moon Pearl, Link would turn into a helpless bunny in the Dark World.) Equipped with the Moon Pearl, Link ascends to the roof for the boss battle.
At the summit, Link confronts Moldorm, a giant armored worm that knocks him back with each hit and can send him tumbling off the tower ledges. With patience and well-timed sword strikes to Moldorm’s tail, Link defeats the wriggling boss. He earns a Heart Container and finally claims the red Pendant of Wisdom, the third and final pendant. Having collected all Pendants of Virtue, Link is now worthy to wield the Master Sword. He uses the mirror or a quick descent to make his way back down the mountain and prepare for the journey to the Lost Woods.
- Magic Mirror – Gift from the Old Man on Death Mountain (warps Link from Dark World to Light World at will).
- Moon Pearl – Treasure from the Tower of Hera big chest; prevents Link from transforming in the Dark World.
- Pendant of Wisdom – Red pendant obtained after defeating Moldorm (third of the three pendants).
- Heart Container – Dropped by Moldorm (Link’s heart total increases again).


The Master Sword & Hyrule Castle
With all three pendants in hand, Link returns to the Lost Woods in search of the legendary blade. Deep in a sacred grove, he finds the Master Sword resting in its stone pedestal. Link lifts the Master Sword high as woodland creatures scatter – the ancient blade recognizes him as its true hero. This magic sword is a significant upgrade, doubling Link’s attack power and enabling him to break certain spells. Immediately upon claiming the sword, however, Zelda’s telepathic voice urgently cries out: soldiers have attacked the Sanctuary and captured her. The old Sage’s last words reveal that Agahnim’s forces have taken Princess Zelda to the castle.
Link rushes to Hyrule Castle, where the Master Sword’s power breaks the wizard’s seal on the tower door. Fighting through re-energized guards, including tougher blue knights and archers, Link ascends the tower’s six floors. At the summit, he confronts Agahnim, the evil wizard who has been abducting the descendants of the Seven Sages. In a magical duel, Link uses the Master Sword to deflect Agahnim’s shadowy energy blasts back at him. After a series of reflected hits, Agahnim is defeated – only to reveal a darker truth. The wizard’s body dissolves to a bat-like form of Ganon, who flies off toward the Dark World. Before Link can react, he is drawn through an ominous portal into the Dark World himself, landing atop the Pyramid of Power. The Light World’s fate now hinges on Link rescuing the seven captive maidens (including Zelda) from dungeons across the Dark World and ultimately defeating Ganon.
(Optional: On his way to the Master Sword, Link can hold up the blade to a nearby monolith on Death Mountain and use the Ether Medallion, obtaining a powerful magic spell. This Ether Medallion isn’t immediately required, but proves useful for a later dungeon.)
- Master Sword – Legendary blade pulled from its pedestal in the Lost Woods (replaces Link’s old sword; doubles attack power and enables breaking Agahnim’s barrier spell).
- Ether Medallion – Magical coin acquired from a Death Mountain tablet using the Master Sword and Book of Mudora (optionally obtained; invokes a spell to freeze enemies).
- Agahnim Defeated – A key story event: Agahnim is vanquished at Hyrule Castle Tower, but this victory is short-lived as Ganon’s spirit escapes, pulling Link into the Dark World.


Dark Palace
Link’s arrival in the Dark World marks a new phase of the adventure. He appears on the Pyramid of Power in a twisted version of Hyrule. Thanks to the Moon Pearl, Link retains his human form. His goal now is to free the seven maidens sealed in crystal prisons. The first target is the Dark Palace (Palace of Darkness) in what mirrors eastern Hyrule. To enter the dungeon, Link pays a tricky monkey guide, Kiki, who opens the palace gate for 110 Rupees. Inside, the Dark Palace is a sprawling labyrinth filled with new enemies like Goriyas and jumping Kodongos. Link carefully explores its many rooms, collecting small keys and the dungeon Map and Compass. In one chamber, he faces a group of blue armored Stalfos knights and, after defeating them, obtains the palace’s treasured item – the Magic Hammer. This heavy mallet lets Link smash pegs and flip shelled enemies, a crucial ability both here and in the wider overworld. With the Hammer in hand, many previously inaccessible areas (like peg-blocked paths) can now be traversed.
The Dark Palace culminates in a showdown with the Helmasaur King, a giant dinosaur-like creature with a thick masked carapace. Link uses the Magic Hammer to crack the Helmasaur’s mask (or alternatively bombs), then strikes the exposed jewel on its forehead with his sword and arrows. After an intense battle on a platform surrounded by damaging spikes and fireballs, the Helmasaur King is defeated. Link claims the Heart Container it leaves behind and frees the first Sage descendant: the maiden’s essence emerges in Crystal #1. She thanks Link and explains that only by rescuing all seven maidens can the power to break Ganon’s barrier be obtained. One crystal down, six to go – but before tackling the next Dark World dungeon, Link takes the opportunity to return to the Light World for some much-needed upgrades.
- Magic Hammer – Dungeon item in the Dark Palace (capable of pounding stakes and smashing certain enemies).
- Heart Container – Dropped by the Helmasaur King upon defeat (Link’s max health increases again).
- Crystal #1 (First Maiden) – Earned by defeating the Helmasaur King; contains the maiden who tells Link about the remaining prisoners and the fate of the Dark World.


Light World Exploration
After clearing the first Dark World dungeon, Link takes a detour from the main quest to greatly strengthen his inventory. Armed with the Hammer and other new tools, he returns to the Light World to uncover hidden treasures and optional upgrades. First, Link heads to the Haunted Grove south of Kakariko. In the Dark World version of this area, he meets the ghost of the Flute Boy, who entrusts Link with his Shovel to find his lost instrument. Back in the Light World grove, Link uses the shovel to dig up the Flute (Ocarina). He plays the newly found flute for the dying Flute Boy in the Dark World, then travels to Kakariko Village. There, Link plays the flute in front of the weather vane, awakening a magical flying duck. This grants him fast-travel across the Light World map – an invaluable time-saver. He also delivers the flute to the old man (the Flute Boy’s father) in the village, bringing closure to that side story.
Link’s exploratory spree continues with a visit to the Witch’s Hut to finally trade in the Mushroom he found earlier in the Lost Woods. The witch brews it into Magic Powder, which Link then uses at a hidden altar (accessible by hammering a peg near the blacksmith’s house) to invoke the Mad Batter. This comical bat creature “curses” Link by halving his magic consumption – effectively a Magic Meter Upgrade that doubles his magical efficiency. Next, Link uses the Hammer to reach otherwise blocked areas. Near the eastern river, he finds the catfish fountain in the Dark World and is given the Quake Medallion as a gift for disturbing the catfish (the Quake spell can shake the earth and will later open Turtle Rock). In the northwest Lost Woods, Link uses the Power Glove to lift a stone and discovers the Magic Cape hidden under the Brother’s Grave. The Magic Cape grants temporary invisibility and intangibility at the cost of magic – useful for bypassing strong enemies and obstacles. On Death Mountain, Link braves a spike-filled cave using the Cape and recovers the Cane of Byrna, a blue staff that creates a protective magical barrier around him.
During this extensive exploration, Link also collects numerous Pieces of Heart scattered across Hyrule. Notable finds include Heart Pieces #13 and #14, obtained by cleverly warping between the Dark and Light Worlds (one on an island in Lake Hylia, and another on a ledge near the Haunted Grove). By now Link has likely completed a few additional Heart Containers from four-piece sets, significantly boosting his life meter. He also upgrades his Bomb and Arrow carrying capacity at the Pond of Happiness (Lake Hylia’s fairy fountain), spending rupees to eventually hold up to 50 bombs and 70 arrows. Finally, with the Titan’s Mitt he will soon obtain, Link plans to rescue the trapped Dwarven Swordsmith in the Dark World and have his Master Sword tempered to the stronger Tempered Sword – but that will come just a bit later. By the end of these excursions, Link’s arsenal is vastly improved: he now wields the Flute for quick travel, an upgraded Magic Meter, and new magic items like the Cape and Cane, making him well-prepared for the tougher Dark World dungeons ahead.
- Flute (Ocarina) – Dug up in the Haunted Grove and activated at Kakariko’s weather vane, enabling fast travel via the duck.
- Magic Powder & Magic Meter Upgrade – Magic Powder (from the Mushroom) used at the bat altar grants Link half magic consumption (double magic duration).
- Magic Cape – Found under an enchanted grave (via Mirror warp); renders Link invisible/intangible at the cost of magic.
- Cane of Byrna – Obtained in a spike-filled cave on Death Mountain; creates a protective barrier around Link when used.
- Quake Medallion – Received from the Catfish in Dark World Zora’s domain (casts a quake spell; also required to open Turtle Rock).
- Pieces of Heart – Multiple heart pieces collected (e.g. Lake Hylia island, Haunted Grove ledge) forming new Heart Containers to increase health.
- Bomb/Arrow Capacity Upgrades – Great Fairy pond upgrades (optional) allowing Link to carry many more bombs and arrows.


Swamp Palace
Link’s next destination is the Swamp Palace in the Dark World’s swamp (analogous to the Light World’s Floodgate area). To gain entry, he first returns to the Light World swamp ruins and pulls a lever to drain the water from the dam. This action causes water to flow into the Swamp Palace in the Dark World, allowing Link to progress inside. The Swamp Palace is a water-themed dungeon filled with flooded rooms, water flow puzzles, and aquatic enemies. Link swims through shallow water while fighting Water Tektites and avoids Skulls and Blade Traps gliding along tracks. Early on, he must manipulate water levels by toggling valves between rooms in order to reach new areas. Using keys he finds under pots and behind cracked walls (which he blows open with bombs), Link gradually works his way to the heart of the palace. Along the way he grabs the Map and Compass, and uses a newly acquired Small Key to unlock a back room.
The Swamp Palace’s central treasure is the invaluable Hookshot. After solving a puzzle of merging waterways and using a key to reach a big chest in a flooded chamber, Link obtains the Hookshot – its chain allows him to grapple across gaps and stun or kill many foes instantly. With the Hookshot, Link can pull himself over wide pits and retrieve distant objects, a game-changing tool for exploration. He immediately uses it to traverse a gap and access the boss lair. There he faces Arrghus, a giant eye surrounded by orbiting puffballs. Link employs the Hookshot to pull the protective puffballs away from Arrghus one by one, then slashes them with his sword. Once Arrghus is exposed, it leaps about the room; Link dodges and strikes until the floating eye is defeated. Arrghus drops a Heart Container, and the second captive maiden is freed in Crystal #2. The grateful maiden (Sage descendant) tells Link more about Ganon’s plot and the legend of the Triforce, guiding him toward the next dungeon in the Skull Woods.
- Hookshot – Dungeon item of the Swamp Palace; a long-chain grappling hook that lets Link latch onto pots, chests, and wooden stakes to pull himself across distances. Also stuns enemies and grabs items from afar (first appearance of the Hookshot in the series).
- Heart Container – Dropped by Arrghus upon defeat (increases Link’s total health).
- Crystal #2 (Second Maiden) – Earned by defeating Arrghus; contains the maiden who is rescued from the Swamp Palace.


Skull Woods
The third Dark World dungeon takes Link to the creepy Skull Woods in the northwest, above the Village of Outcasts. This dungeon is uniquely intertwined with the overworld – its rooms are scattered throughout a forest maze, with multiple entry/exit points beneath giant skulls. Link wanders through the monster-infested woods, avoiding Wallmasters (giant hands that grab him from above) and Gibdos (mummies), while locating the dungeon entrances hidden under skull stones. Inside the Skull Woods, Link must solve navigation puzzles that involve dropping through holes in the floor and looping between interior and exterior sections. Early in the dungeon, he obtains a Big Key after burning a tarp with his Lamp, but finds the big treasure chest inaccessible behind a locked door. He searches other sections of the dungeon, finds small keys (sometimes by defeating Gibdos or Skeletons), and eventually unlocks the chamber containing the prized Fire Rod. The Fire Rod is a powerful magical weapon that shoots flames; it can instantly burn Gibdos to ashes and light torches from a distance. It’s the Skull Woods’ key item and is required to clear obstacles later in the dungeon (notably a giant skull block).
With the Fire Rod in hand, Link can fully explore the dungeon’s depths. He returns to a sealed outdoor area where an enormous stone skull blocks the final section. Using the Fire Rod, Link sets the skull’s eyes aflame, causing the massive skull gate to crumble and reveal the boss lair. Inside, Link confronts Mothula, an evil moth creature hovering over a conveyor-belt floor lined with damaging spikes. To complicate matters, the walls shoot beams and the floor shifts, moving Link (and the spikes) erratically. Link relies on the Fire Rod as the most effective weapon – a few direct blasts set Mothula ablaze. After roughly eight hits from the Fire Rod (or a combination of sword strikes if he’s conserving magic), Mothula is defeated. Link obtains the Heart Container left behind and frees the third maiden from Crystal #3. The maiden’s spirit thanks him and adds her knowledge to the others’, further detailing the heroes of legend. With half of the Dark World dungeons now cleared, Link’s next challenge lies back in the Village of Outcasts at a place called Gargoyle’s Domain.
- Fire Rod – Dungeon item found in Skull Woods (a magical rod that launches fire blasts). Essential for burning certain obstacles and very effective against mummies and the boss.
- Heart Container – Dropped by Mothula (increases Link’s health; he should have around 11 heart containers by now, depending on pieces found).
- Crystal #3 (Third Maiden) – Earned by defeating Mothula; contains the third Sage descendant, rescued from Skull Woods.


Gargoyle’s Domain (Thieves’ Town)
Returning to the ruined Dark World village (the Village of Outcasts), Link seeks out the Thieves’ Town dungeon, known here as Gargoyle’s Domain. The entrance is hidden beneath a gargoyle statue in the center of town – Link pulls on the pitchfork of the stone gargoyle to reveal a staircase leading down. This dungeon is the former thieves’ hideout and is filled with undead and tricky floor traps. Link navigates conveyor belts, Blade Traps, and enemies like green Geldarm blobs and floating trolls. Early on, he collects the dungeon Map and Compass and uses switches to manipulate floor spikes. In a flooded basement room, Link finds the Big Key. Uniquely, Gargoyle’s Domain initially presents no obvious big chest; instead, the Big Key is mainly used to rescue a maiden locked in a cell. Link finds a young blonde maiden (who looks like Zelda) imprisoned deep in the hideout – he uses the Big Key to free her. The maiden begins following Link through the dungeon, requesting escort to safety. However, experienced players might suspect a trick… and indeed, this maiden plays a role in the boss encounter.
While exploring the dungeon with the maiden in tow, Link uncovers the true treasure of Thieves’ Town: the Titan’s Mitt. Found in a big chest hidden behind cracked walls, the Titan’s Mitt is a powerful upgrade to the Power Glove that allows Link to lift the heaviest dark boulders in the Dark World. This greatly expands Link’s mobility – with it he can access places like the Dark World’s Graveyard ledge, the Bomb Shop’s big bomb, and more. Upon claiming the Titan’s Mitt, the floor collapses as a trap, but Link escapes back to the entrance with the maiden. In the bright foyer, sunlight beams down from a cracked ceiling. The maiden suddenly refuses to go further, reacting to the sunlight – which reveals her true form. She is actually Blind the Thief, the boss of this dungeon, disguised! The battle begins as Blind (a cloaked, floating demon with a skull face) attacks Link with fireballs, all while moving around an array of conveyor belts. Using the Master Sword (or Tempered Sword if already upgraded) and carefully timing his strikes between Blind’s fiery volleys, Link manages to damage Blind. Each time Blind takes enough hits, his head separates and flies around breathing fire, while a new head grows on his body. By the third head, Link lands the final blow and defeats Blind. He obtains a Heart Container and frees Princess Zelda herself, who was sealed in Crystal #4 this whole time – the “maiden” Link thought he was escorting earlier was a decoy. Zelda is relieved to be saved and uses her telepathy to tell the other maidens of Blind’s defeat, urging Link to continue his quest.
With the Titan’s Mitt now in hand, a wealth of new opportunities opens. Link immediately leaves the dungeon and finds a trapped Frog Smith in the Dark World blacksmith area; using the Mitt, he escorts the frog through a portal back to the Light World, where the grateful blacksmiths reforge Link’s Master Sword into the Tempered Sword (a stronger Level 3 sword) after a short work period. Link also discovers a locked Treasure Chest left in the Dark World smithy (since the chest’s key is lost, it follows him). He takes this chest to a man by the desert in the Light World, who opens it to reveal Link’s fourth Magic Bottle, giving Link another slot to store potions or fairies. Additionally, Link can now lift the black rocks blocking the entrance to the Graveyard ledge and obtain the optional Magic Cape (if not acquired earlier), and he can access the Dark World’s Bomb Shop to eventually purchase the Super Bomb. These activities further bolster Link’s arsenal as he moves on to the Ice Palace. Zelda, safe at the Sanctuary again, encourages Link to rescue the remaining maidens.
- Titan’s Mitt – Dungeon item of Gargoyle’s Domain; upgrades the Power Glove to lift even the largest rocks. This opens many previously inaccessible paths in both worlds.
- Heart Container – Dropped by Blind upon defeat (another increase to Link’s health).
- Crystal #4 (Fourth Maiden – Princess Zelda) – Earned by defeating Blind; Princess Zelda is freed from this crystal and reunited with the Sanctuary.
- Tempered Sword – Level 3 Sword obtained by rescuing the Frog Smith and reforging the Master Sword (doubles attack power compared to Master Sword).
- Magic Bottle (4th) – Final empty bottle, found by bringing the locked chest (from Dark World smithy) to the desert nomad who opens it for Link.


Ice Palace
For the fifth Dark World dungeon, Link travels to the icy lake region (Dark World’s Lake Hylia). Using the Flute, he warps to the Light World lake and then enters the Dark World via a portal on a small island. There stands the entrance to the Ice Palace, sealed in thick ice. (If needed, Link can use the Bombos Medallion to melt the entrance, though the Fire Rod also works once inside.) The Ice Palace is a treacherous labyrinth of slippery floors and frigid enemies. Link immediately encounters new foes like Penguin-like Pengators sliding toward him and Freezors (ice creatures that block paths). Navigation is challenging due to conveyor belts and the need to fall through holes to lower levels. Early in the dungeon, Link picks up the Compass and uses a key to progress downward. Notably, part of the Ice Palace’s difficulty is a large block he must push from an upper floor to trigger a switch on the floor below – solving this puzzle opens the way to the boss. After exploring multiple floors and finding the Big Key, Link locates the big treasure chest. Inside is the Blue Mail, a welcome defensive upgrade. The Blue Mail is a new tunic that reduces damage taken by half compared to the Green tunic. Donning the Blue Mail, Link’s tunic turns blue and he gains significant resilience against enemy attacks.
With the Blue Mail and all keys collected, Link descends to the lowest level where the boss lurks encased in ice. Using a combination of the Fire Rod and Bombos magic to melt barriers, Link reaches the lair of Kholdstare, a giant multi-eyed frozen slime. At first, Kholdstare is encased in a huge ice block – Link uses the Fire Rod (or Bombos) to thaw it out. Once free, Kholdstare splits into three bouncing eyeball-clouds that rain ice chunks from above. Thanks to the Blue Mail’s protection, Link weathers the falling ice and focuses on attacking the eyeballs, one by one. He maneuvers carefully on the slick floor, using Fire Rod blasts and sword strikes to chip away at each part of Kholdstare. Eventually, all three eyes are destroyed. Kholdstare drops a Heart Container, and the maiden in Crystal #5 is liberated. This fifth Sage descendant tells Link the story of Ganon’s evil wish on the Triforce and implores him to rescue the two remaining maidens. She hints that an enchanted object in the next dungeon will be needed to navigate its depths. Link exits the thawing Ice Palace with increased defenses and resolve, ready to brave Misery Mire.
- Blue Mail – Dungeon item from the Ice Palace big chest; a blue tunic that reduces damage taken by 50% (compared to the original green outfit). This armor upgrade makes Link much more durable against enemies.
- Heart Container – Dropped by Kholdstare (further increasing Link’s health).
- Crystal #5 (Fifth Maiden) – Earned by defeating Kholdstare; contains the fifth maiden, who is freed and adds her wisdom to the others’.


Misery Mire
The next dungeon lies in the dreaded Swamp of Evil – the Dark World counterpart of the Desert. To enter Misery Mire, Link travels to the Light World desert and uses the Titan’s Mitt to lift a black rock, revealing a portal to the Dark World’s mire. The swamp is engulfed in a perpetual thunderstorm, and the dungeon entrance is initially inaccessible due to raging winds. Standing on an emblazoned lightning symbol, Link uses the Ether Medallion to calm the storm. The magical ether spell clears the dark clouds, causing the mire’s entrance to rise from the swamp. Link then opens the dungeon and steps inside Misery Mire. This labyrinth is filled with teleporting Wizzrobes (which fire spells at Link), dangerous Floating Eyes, and an array of switches and doors that make navigation complex. The design is more convoluted than previous dungeons, with multiple branching paths and hidden small keys. Link relies on his experience to defeat Wizzrobes (which only take damage when fully materialized) and avoids jellies and spikes in narrow halls.
Misery Mire’s item is the Cane of Somaria, an invaluable red cane that can create solid blocks out of thin air. Deep in the dungeon, after solving a puzzle involving multiple torches, Link acquires the Big Key and reaches the big chest to obtain the Cane of Somaria. This cane’s magic lets Link spawn or remove a glowing platform block at will – a power crucial for later puzzles and particularly needed in Turtle Rock. With the Cane of Somaria, Link can also drop blocks on switches remotely, adding a new layer of strategy. After clearing out the remaining rooms and collecting the Compass, Link heads to the boss lair. The boss of Misery Mire is Vitreous, a giant eyeball surrounded by smaller eyeballs, all contained in a pool of electrified slime. As lightning periodically strikes the arena, the smaller eyes attack in waves. Link uses arrows (or the Ether spell) to dispatch the tiny eyes, then dodges blobs and lightning to face the big eye. He uses arrows or sword slashes to damage Vitreous when it emerges from the slime. Once Vitreous is defeated, Link receives a Heart Container and frees the sixth maiden in Crystal #6. The maiden thanks Link and emphasizes that only one prisoner (Zelda) remains – atop Turtle Rock.
Before leaving the mire, Link takes a crucial side trip. Having rescued six maidens, the Bomb Shop now stocks the big Super Bomb. Link purchases this huge bomb and carefully escorts it to the cracked wall on the Pyramid of Power. The explosion opens a secret chamber where a Great Fairy resides. To her, Link throws in his Tempered Sword and Bow; the fairy enchants them, returning the sword as the mighty Golden Sword (Level 4 sword) and the bow now armed with Silver Arrows. The Golden Sword doubles Link’s attack power again, and the Silver Arrows are the only weapon capable of defeating Ganon. Fully powered up with the strongest sword and arrows, Link is as prepared as possible for the final challenges ahead. With six crystals obtained and every major item collected, Link heads toward Turtle Rock on Death Mountain for the last maiden.
- Cane of Somaria – Dungeon item in Misery Mire; a magical red cane that creates or dispels movable blocks. This is essential for puzzle-solving in later areas (especially Turtle Rock’s moving platform puzzles).
- Heart Container – Dropped by Vitreous (increases Link’s health once more).
- Crystal #6 (Sixth Maiden) – Earned by defeating Vitreous; contains the penultimate maiden, who is freed and adds her power to break Ganon’s seal.
- Golden Sword – Upgrade of the Tempered Sword obtained from the Pyramid’s fairy fountain (Level 4 sword, strongest attack).
- Silver Arrows – Enchanted arrows bestowed by the same Great Fairy (required to defeat Ganon).


Turtle Rock
The final Dark World dungeon is Turtle Rock, perched atop Death Mountain. Link uses the Tower of Hera portal to reach Dark World Death Mountain and makes his way to the giant turtle-shaped rock formation. The entrance is sealed by an insignia – using the Quake Medallion on the marked altar, Link causes the turtle’s jaws to open, revealing the dungeon entrance. Turtle Rock is a fiery, cavernous dungeon with a complex network of corridors. A unique feature here is the use of the Cane of Somaria: Link must create blocks on special tracks to ride moving platforms across wide gaps of lava. Throughout Turtle Rock, Link encounters fire-breathing Chain Chomps (borrowed from the Mario universe), rolling boulder traps, and lasers emitted by Cyclops statues. He finds multiple small keys and the dungeon Map and Compass while carefully conserving magic for Somaria platform paths. Partway through, Link exits to a ledge to get some fresh air – from there, he uses the Mirror to briefly return to Light World Death Mountain and collect a hidden Piece of Heart (one of the last heart pieces in the game). Re-entering Turtle Rock, Link uses his keys to delve deeper and eventually secures the Big Key after navigating an “eye bridge” of lasers.
The big treasure of Turtle Rock is the Mirror Shield, found in a large chest after a tricky roller switch puzzle. The Mirror Shield is the most powerful shield, capable of blocking beams that the Red Shield could not, such as the laser eyes in Turtle Rock. With this massive shield (adorned with a reflecting surface), Link can traverse the infamous Laser Bridge safely by blocking or reflecting the laser blasts. Using his fully upgraded arsenal – Mirror Shield to block hazards, Somaria platforms to cross lava, and the Ice Rod to freeze enemies – Link reaches the dungeon boss: Trinexx. Trinexx is a three-headed dragon (one fire head, one ice head, and a central stone head) living in a pool of lava. The fight is demanding: Link must use the Fire Rod on Trinexx’s ice head and the Ice Rod on its fire head to weaken them. After shattering both elemental heads, Trinexx reveals its true form – a fast-moving serpent that slithers around the room, causing the floor to break apart. Link strikes the glowing core on Trinexx’s body with the Golden Sword while using the Mirror Shield to block flying rocks. In a barrage of fireballs and quake, Link lands the final hits, and Trinexx is defeated.
As the last boss falls, Link picks up the final Heart Container and releases Princess Zelda from Crystal #7. Zelda and the other freed maidens use their combined power to break the barrier around Ganon’s Tower. Zelda thanks Link profoundly and says that they must stop Ganon before he uses the Triforce to wreak irreparable damage. Link now has all heart containers (after gathering a few remaining heart pieces) and every item in the game. With the Mirror Shield protecting him, the Golden Sword in hand, and Silver Arrows at the ready, he ascends the reopened Death Mountain tower to face the final gauntlet.
- Mirror Shield – Dungeon item from Turtle Rock; the largest shield that can reflect or block even the strongest projectiles (e.g. Laser Eye beams). It automatically faces forward to protect Link from frontal attacks.
- Heart Container – Dropped by Trinexx, completing Link’s life meter (if all pieces were collected, Link now has the maximum 20 hearts).
- Crystal #7 (Princess Zelda) – Earned by defeating Trinexx; Princess Zelda is freed from Turtle Rock and all seven maidens are now rescued. Their combined power breaks the seal on Ganon’s Tower.


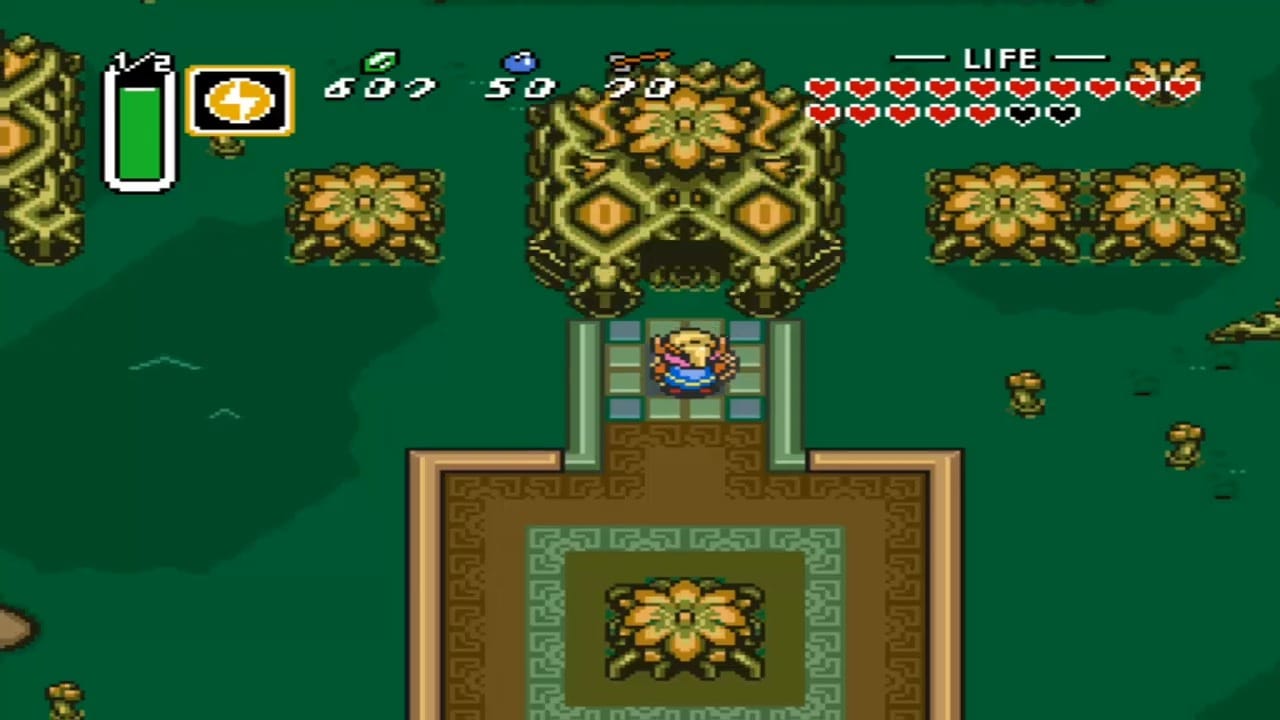
Ganon’s Tower
The barrier on top of Death Mountain fades, granting Link access to Ganon’s Tower, the final dungeon. This massive tower is a gauntlet that tests all of Link’s skills and gear. Inside, Link must conquer trials on multiple floors that echo earlier dungeons: he faces rematches with Armos Knights, Lanmolas, and Moldorm as mini-bosses guarding the tower’s Big Key. Each section of the tower is filled with tough enemies (Wizzrobes, Lynels, and more), complex puzzles, and many bombable walls hiding secret passages. On one side, Link solves a puzzle to drop a crystal switch and races through to open chests, finding the Map and Compass. On another, he navigates invisible floors using the Ether Medallion to briefly see the path. Midway through, Link opens a treasure chest containing the Red Mail, the final tunic upgrade. The Red Mail changes Link’s outfit to a red color and cuts incoming damage by half again compared to the Blue Mail – meaning Link now only takes a quarter of the damage he would have in his original green tunic. With the Red Mail, Link achieves maximum defense, which is crucial for the battles ahead.
Climbing higher, Link uses all of his items in various puzzles (lighting torches with the Fire Rod, grappling with the Hookshot, pushing heavy blocks with the Titan’s Mitt, etc.). He endures another flying tile trap, uses Bombos or Silver Arrows to quickly clear rooms of enemies, and carefully conserves magic for required moments. At last, Link reaches the top floor where he confronts Agahnim one more time – the wizard’s spirit returns in Ganon’s Tower for a final showdown. This time Agahnim creates two spectral clones of himself. Link employs the same tactic as before, using the Master Sword (now Golden Sword) to bat the energy orbs back at each Agahnim. With skill, he positions himself so that reflected shots hit multiple copies at once. After enough hits, the three Agahnims merge and are defeated, and Ganon’s dark form erupts from the corpse of Agahnim as a bat. Ganon crashes through the pyramid’s roof, forcing Link to give chase for the final battle. Link steps into a warp tile that leads out of the collapsing tower and finds himself back on the Pyramid of Power, where Ganon awaits. Having conquered Ganon’s Tower’s trials and obtained the Red Mail, Link is fully equipped to face the Dark Lord in the final confrontation.
- Red Mail – Ultimate body armor found in Ganon’s Tower; reduces damage to one-quarter of the original (doubling defense from Blue Mail). Visually, it turns Link’s tunic red.
- Big Key (Ganon’s Tower) – Allows access to the upper floors and the final door (obtained after defeating the Armos Knight redux).
- Final Boss Access – Defeating Agahnim again at the top of the tower triggers Ganon’s escape to the Pyramid, setting the stage for the final battle. (No collectible item, but this is the point of no return before fighting Ganon.)


Pyramid of Power
On the Pyramid of Power’s roof, the final battle against Ganon begins. Ganon reveals his true form: a massive blue pig-like demon wielding a trident. He acknowledges Link’s efforts, vowing to destroy him and keep the Triforce for darkness. The fight is intense and multi-phased. In the first phase, Ganon teleports around the arena hurling his trident, which spins and returns like a boomerang. Link uses the Golden Sword to strike Ganon when he reappears, while dodging the whirling trident and fire keese bats that Ganon summons. After enough hits, Ganon switches tactics, summoning blazing fire bats that spiral outwards. Link avoids the firebats and continues to slash at Ganon. Chunks of the floor begin to crumble away, expanding the danger with pits at the edges. Ganon then declares, “You are doing well, lad, but can you survive this?!” and extinguishes the torches lighting the arena. In the darkness of the final phase, Ganon becomes invisible and only vulnerable under certain conditions. Using the Silver Arrows is now crucial – Princess Zelda had hinted that Ganon “hates bright light” and the silver in these arrows is his only weakness. Link equips the Fire Rod or Lamp to quickly relight the two torches in the room, briefly illuminating Ganon. While Ganon is visible and stunned (after a sword strike during his jump), Link shoots him with a Silver Arrow. It takes four Silver Arrow hits to fatally wound the King of Evil. With each successful arrow strike, Ganon roars in pain. Finally, the fourth Silver Arrow pierces Ganon’s body, and the demon collapses and disintegrates.
With Ganon defeated, a doorway opens on the Pyramid’s base, leading Link into the Triforce Chamber. Inside this golden room, the sacred Triforce awaits – the essence of the Golden Power that Ganon stole. Link touches the Triforce, and the spirit of the Triforce speaks, recognizing Link’s virtues and granting his wish. Link’s victorious wish restores Hyrule and all those who were affected by Ganon’s darkness: The King of Hyrule is resurrected, Princess Zelda and the maidens are safely returned home, the priests and people of the Light World are revived, and even Link’s uncle and the loyal Sanctuary Sage make a recovery. Peace returns to both the Light and Dark Worlds as evil is sealed away. Link places the Master Sword back in its pedestal, where it will rest again “forever… until it is needed again.” The Legend of Zelda: A Link to the Past concludes with balance restored, thanks to Link’s courage and the power of the Triforce of Wisdom, Power, and Courage united once more.
- Golden Sword & Silver Arrows – (If not obtained earlier, the Super Bomb must be used to get these from the Great Fairy before battling Ganon.) These ultimate upgrades are required: the Golden Sword inflicts maximum damage on Ganon, and the Silver Arrows are the only weapon that can destroy him.
- Triforce – The divine relic obtained after defeating Ganon. The Triforce grants the wish of the one who touches it. Link’s wish restores Hyrule and all those harmed by Ganon’s evil, bringing the game’s story to its peaceful conclusion.
- Peace Restored – (Story item/event) With Ganon defeated and the Triforce reunited with a true hero, Princess Zelda and the six other sages use its power to rebuild the world. The Master Sword sleeps again, and the legends of this adventure pass into history.


