


A Link to the Past 100% Completion Walkthrough
- Princess Zelda Rescue : Infiltrate Hyrule Castle to rescue Zelda and kickstart Link’s epic quest.
- Eastern Palace : Solve Armos Knights’ traps in your first dungeon to claim the Pendant of Courage.
- Desert Palace: Navigate shifting sands and defeat Lanmolas to earn the Pendant of Power.
- Tower of Hera: Climb Death Mountain’s Tower to obtain the Moon Pearl and final pendant.
- The Master Sword & Hyrule Castle: Claim the Master Sword, confront Agahnim, and set your destiny in motion.
- Dark Palace: Explore the Dark World’s Palace and free the first Maiden from darkness.
- Light World Exploration: Unlock warps, collect hearts, and prepare for deeper Dark World dungeons.
- Swamp Palace: Use Cane of Somaria blocks to navigate the toxic swamp and rescue another Maiden.
- Skull Woods: Uncover hidden tunnels and puzzles among the skull trees to free a trapped Maiden.
- Gargoyle’s Domain: Enter via pitchfork statue, secure the Titan’s Mitt, and beat Blind the Thief.
- Ice Palace: Traverse icy floors, gain Blue Mail, and defeat a freezing foe.
- Misery Mire: Master Cane of Byrna and Ether Medallion to rescue another Maiden in the mire.
- Turtle Rock: Face volcano hazards and rescue the last Maiden within this volcanic fortress.
- Ganon’s Tower : Climb the tower’s gauntlet of traps and minibosses to battle Agahnim.
- Pyramid of Power: The Ultimate Showdown with Ganon.
Table of Contents
Unlocking Secrets – Castle Small Keys & Dungeon Map Explained
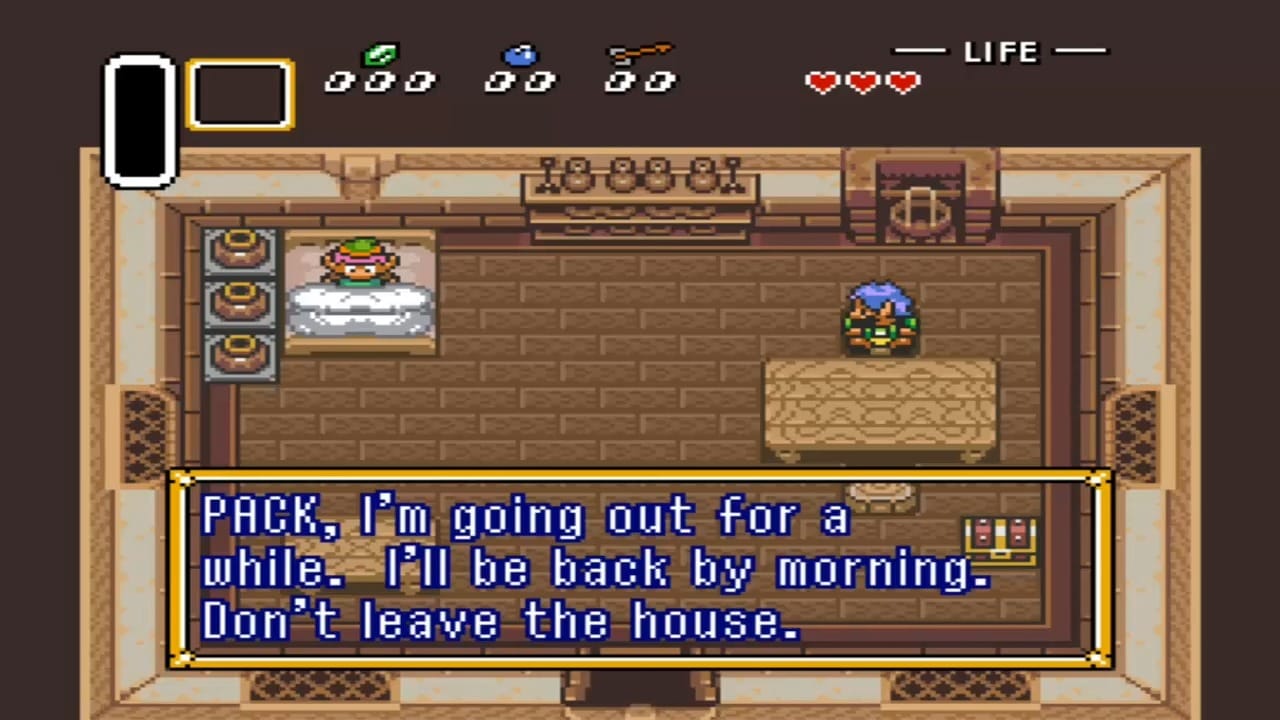
You awaken in Link’s House on a stormy night, Zelda’s telepathic plea for help echoing in your mind. The room is dimly lit by flashes of lightning outside. As soon as you gain control of Link, step out of bed and open the chest at the foot of the bed. Inside, you find the Lamp, your very first item.


Item: Lamp
This humble lantern allows you to light torches in dark areas, which will be crucial in the trials ahead. Make sure to equip it (on SNES press Start to open the inventory, select the Lamp with the cursor, and press Y to use; on GBA, the Lamp is used with the A button, and the map is viewed with L instead of X).
After grabbing the Lamp, exit Link’s House into the raging thunderstorm. Rain pelts the ground and distant thunder booms, setting an ominous mood. It’s the middle of the night, and Hyrule Castle looms to the north. Zelda’s voice guides you to find her, so you head northward along the path. If you talk to the castle guards outside, they won’t let you in (they’ve been brainwashed to obey the evil wizard Agahnim). Instead, follow the path to the right of the main gate. Despite the rain slicking the ground, you can run (hold B on SNES/GBA) along the side path until you reach a dead-end with a lone bush. Lift the bush using the action button (A on SNES, R on GBA) to reveal a secret hole in the ground. Without hesitation, jump into the hole – Link will drop into an underground passage with a splash.


Inside the secret passage, you find Link’s uncle collapsed on the floor, injured. He, too, came to rescue Princess Zelda but could not proceed further. He imparts his sword and shield to you before collapsing, saying his famous last words: “Save the Princess… Zelda is your…*” (In the GBA version, this dialog is slightly reworded for clarity, but the scene plays out the same). Now you obtain the Fighter’s Sword and Fighter’s Shield. Equip the sword (SNES: it’s automatically equipped to the B button; GBA: B or X swings the sword) and feel free to swing a few practice slashes. With a sword in hand, you can cut small bushes and, more importantly, defend yourself.


Item: Fighter’s Sword
A sturdy sword, perfect for taking on tougher foes. A reliable weapon in your quest.

Item: Fighter’s Shield
A solid shield that provides decent protection. Essential for blocking enemy attacks.
Proceed through the door into the next chamber. This hallway serves as a tutorial in basic combat. Green Soldiers patrol here – these are the castle guards. Engage the first guard with your sword; a couple of quick slashes will defeat him. If you need to, use your shield to block any sword strikes by facing the enemy. Continue south through the door, which leads outside to the front of the castle. Defeat or run past enemies to the castle doors.


The first floor of the castle circles the chamber. Make your way to the north hallway going either direction (left or right). You’ll encounter numerous Green Soldiers along the way. Take the stairs down to the basement.


To the next room, where you’ll find another green guard. Defeat him and head through the door into a room with a treasure chest guarded by a Blue Sword Soldier (a tougher guard with a darker uniform). Defeat the blue guard, using careful timing to avoid his strikes – remember, you can hold B to charge a spin attack for extra damage or strafing. Upon defeat, the blue guard drops Small Key #1, the first small key on your journey. Pick it up. Now open the chest he was guarding to obtain the Dungeon Map of Hyrule Castle’s first floor. This map isn’t essential, but it helps you see the layout of the castle if you check your map screen (SNES: press X; GBA: press L to toggle the map). With the small key, unlock the door at the bottom of the room and proceed.

In A Link to the Past, small keys are used within the dungeon you find them. They open locked doors but are not carried to other areas. Keep track of how many you have found in a dungeon (the pause screen shows key count for the current dungeon). In this castle section, you’ll need each key to progress, so grab them whenever you defeat key-holding enemies or find them in chests.
Continue through the castle’s ground floor. Fight your way through a few more green soldiers as you navigate the corridors. You’re aiming to reach the far west side of this floor. Slice through any soldiers that get in your way – try using quick hit-and-run tactics. When you reach the west side of the area, enter the door to the north.


Conquering Hyrule Castle Dungeon – Key #3, Key #4 & Big Key Tips
Immediately, you encounter another guard – this one might be a bit more aggressive. Defeat the guard, and he will drop Small Key #2. Use it to unlock the door on the east side of the room. In the same room, open the chest you see – inside is the Boomerang! This is a very useful early item; equip it (select it in your inventory) and you can throw it with the item button (SNES Y / GBA A). The Boomerang stuns most enemies when it hits them, giving you a safe opportunity to follow up with sword strikes. It can also retrieve distant items like rupees and hearts. Tip: Use the Boomerang to safely stun guards from a distance, especially helpful in the next areas.


Head through the door you unlocked. Navigate the basement passage, dispatching any guards in your path – a mix of green and blue soldiers patrol these halls. You’ll descend another level (down two flights of stairs) toward the prison cells. The air gets cooler and damp as you go deeper, and the sound of your footsteps echoes. Eventually, you reach a chamber with a heavily armed Ball and Chain Trooper guarding a locked door. This imposing guard swings a spiked ball on a chain and can deal serious damage if you get too close.


Boss Fight: Ball and Chain Guard
This mini-boss requires either skillful swordplay or clever use of the environment. One strategy is to use your Boomerang from a distance to stun the guard (a direct hit will freeze him momentarily). While he’s stunned, rush in and land a few sword slashes, then back off before he recovers.


Alternatively, notice the two pots in the corners of the room – these can be your best weapons. Quickly lift a pot (stand over it and press A) and throw it at the trooper. Pots deal heavy damage; two pot throws will defeat this guard outright on the SNES version.
When the guard is defeated, he drops a large gold-encrusted key – the Big Key (also called the Master Key). This special key opens locked doors with big locks, like the one to the prison cell nearby. Pick up the Big Key and use it on the door above to open Princess Zelda’s cell. You’ve found Princess Zelda at last! A brief dialog ensues as Zelda thanks you for coming to her rescue. She will now follow you for the next segment as you attempt to escape the castle together. Be sure to open the treasure chest in Zelda’s cell before leaving – in the SNES version, if you somehow missed getting the Lamp earlier, this chest contains a spare Lamp. If you already have the Lamp, the chest will typically give you a handful of rupees or other minor loot as a bonus.


With Zelda in tow, it’s time to escape the castle. Retrace your steps back upstairs – you need to return to the first floor main hall. Be careful; Zelda is unarmed and will just follow your lead, so make sure any guards on the way are dealt with. Thankfully, Zelda doesn’t take damage or get captured again during this follow sequence, so you don’t need to protect her beyond simply clearing enemies that block the path. Backtrack up the two flights of stairs and through the basement rooms you came from (you can ignore side rooms, since you already collected the items). Use your small keys on any locked doors that you had opened previously if they’ve closed again. Soon, you’ll emerge back on the first floor of Hyrule Castle, near the main entrance where you came in.


Sanctuary Escape & Heart Container #1 – How to Escape with Zelda
Rather than try to fight through all the guards in the lit halls, Zelda suggests a secret way out. From the castle entrance hall (with the ornamental throne and two decorative torch sconces), head north to the Throne Room. This large chamber is conspicuously empty now. Zelda knows the way: she instructs you to check behind the ornamental throne. Approach the decorative shelf at the back (it looks like a large mantle or altar). Push it from the left side; with Zelda’s help, it slides to the right, revealing a hidden staircase leading down. Descend into the secret passage under the castle.

The Secret Passage is a dark, musty tunnel that connects Hyrule Castle to the Sanctuary. The moment you enter, the screen dims – it’s pitch black ahead except for a narrow cone of vision in front of Link (illuminated by the Lamp). You can light torches on the walls using the Lamp (face a torch bowl and press the item button) to illuminate larger areas of each room.
Be aware that each flame lit will consume a bit of your magic meter (the green bar) – you likely have a very small magic meter at this point. If you run out of magic power, you won’t be able to use the Lamp until you find magic refills (small green jars dropped by enemies or found under pots). In the SNES version, lighting one or two torches will fully light the room, whereas in the GBA version the room stays dim with only your cone of light even after lighting torches – either way, light helps you see enemies.

Make your way through the dark tunnels. Rats begin to scurry around these halls, and you’ll also encounter Keese (bats) fluttering in the darkness, and occasionally ropes (snakes) slithering on the damp floors. Use quick sword swipes to take them out – one or two hits will do. Tip: Rats and bats often drop small rupees or hearts when defeated, so it can be worth clearing them out. In fact, the rats in the sewers are a great source of rupees early on. Keep Zelda close as you traverse the corridors; she’ll follow automatically, so just ensure you don’t leave her behind by scrolling too quickly.

In one dark room, you’ll find a chest against the right-hand wall. Open it to find Small Key #3. This key opens the locked door leading deeper into the sewers. Continue onward with Zelda, navigating through the maze-like passage (there’s basically one path forward, though you may have to loop around some walls). As you progress, you might notice some enemies like Ropes (snake-like creatures) in your path – these take a couple of hits to defeat. Keep heading north and west through the darkness.


Eventually, after climbing down another staircase, you’ll reach a water-filled section of the sewers. The floor is shallow water here, and movement slows a bit. There’s one last locked door barring your way to the Sanctuary. Defeat all the rats in this room. (It’s a good idea to quickly slash every rat you see; one will drop the key when defeated.) Grab the key and use it on the door above. This leads to a much brighter room – you’ve reached the Sanctuary passage. Push the middle block in the trio upward to clear a path, then ascend the staircase.


You emerge into a small chamber with two levers. Zelda exclaims that “We’re almost there!” To open the final door, you need to pull the correct lever. There are two switches: pull the right-hand lever (stand below it and hold A/Action to grab, then pull down). If you accidentally pull the left lever, a barrage of snakes (Ropes) will drop from the ceiling – not dangerous if you move away, but an unwelcome surprise! With the right lever, the door to Sanctuary slides open.


Enter Sanctuary, and you’ll meet the Loyal Sage (Priest) who has been sheltering Princess Zelda. A brief dialog or cutscene plays – Zelda is safe here for now. Congratulations on completing the rescue mission!

Before you leave, open the big treasure chest next to the Sage. Inside is Heart Container #1, a full Heart Container that permanently increases your health by one heart. This is essentially your reward for the successful escape. Link’s maximum hearts should now go from 3 to 4. (If you hadn’t collected any optional heart pieces yet, this is your first increase. If you somehow missed opening the chest, be sure to grab it – you earned it!). Now you can either proceed to the next main objective (Eastern Palace) or take a breather and explore for upgrades.

Checkpoint: At this stage, you have the Lamp, Fighter’s Sword & Shield, Boomerang, one Heart Container added (4 hearts total), and Princess Zelda is safe. The Eastern Palace (first pendant dungeon) is your next story destination. However, this is a great time to explore the overworld for optional goodies that will make the upcoming challenges easier. In the sections below, we’ll cover some highly recommended detours to collect Pieces of Heart, Bottles, and the Magic Powder before heading to Eastern Palace. These side quests are optional, but they provide extra health and useful items that can be very helpful early on. We will mark them as Optional so you can decide to do them now or skip and return later.
Lost Woods Secrets – Piece of Heart #1 & Mushroom Location

As you step into the Lost Woods, the atmosphere becomes foggy. The music changes to a mischievous, whimsical tune. Crows perch in the tree limbs here and might swoop down at you unexpectedly. Keep your sword ready to swat them away (one hit will take them out, but watch out for their diving attack).


Heart Piece #1
From the woods entrance (north of the Fortune Teller’s hut), go northward a little and you will see an odd arrangement: a small hideout built into a tree stump, often referred to as the Thieves’ Hideout (or Den of Thieves). Just above this hideout, you’ll notice a curious 3×3 grid of small green bushes on the ground.

This is a classic secret: cut down the bushes with your sword, revealing a conspicuous hidden hole in the center of the 3×3 patch. Jump into that hole. You’ll land in a hidden grotto inside the tree stump. Hidden deep in the Lost Woods, a secret thief hideout holds the first Piece of Heart.
Inside this cavern, you’ll find a prize on a ledge: Heart Piece #1 (your first Piece of Heart) waiting for you on the floor. Pick it up – Link holds it aloft triumphantly. (Pieces of Heart are collectibles; every four pieces you find will form a full Heart Container, giving you another permanent heart on your life meter. There are 24 pieces scattered across Hyrule, so grabbing one now is a great start.) After claiming the heart piece, hop down from the ledge and exit the hideout through the door.


Back in the Lost Woods, there’s one more valuable item to snag here: the Mushroom. From the Thieves’ Hideout, travel northwest through the misty forest. The Lost Woods can be confusing, but generally keep to the northwest path. You might pass a fake Master Sword on a pedestal (ignore it, it’s a decoy). Near the north-west section of the woods, in a grove, you’ll find a bright red Mushroom lying on the forest floor. There’s no puzzle to it: just walk up and pick the Mushroom. The game describes it as a sweet-smelling Mushroom. This item doesn’t have an immediate use, but a bit of foreshadowing: you can trade this Mushroom for Magic Powder later. We’ll do that soon, but not quite yet – we need to take it to the Magic Shop, which we’ll visit after exploring Kakariko Village.


Item: Mushroom
A rare mushroom with a mysterious aroma. It might have more uses than you think!
With the Mushroom in your inventory (it sits in the one of the slots as an item you can assign/use, though “using” it in the field just makes Link sniff it), that’s all we need from the Lost Woods for now. Exit the woods the way you came (back out the south entrance near where you started). Watch out for a rogue Thief character that roams the woods (a sprite in a hooded cloak) – he won’t hurt you directly, but if he bumps into you, he can steal some of your rupees or even items! Avoid or outrun him. Also be mindful of more crows or small woodland critters as you leave.

Kakariko Village Exploration – Bombs, Heart Pieces & Bottles
Coming out of the Lost Woods, head south to enter Kakariko Village, the largest settlement in the Light World. Kakariko is a friendly town filled with villagers and shops, and it offers several goodies for an adventurous soul to collect. The music turns cheerful and relaxing. This will be a busy visit: our goals here include obtaining some Bombs, two more Pieces of Heart, and two Magic Bottles, as well as a useful tool for catching fairies.

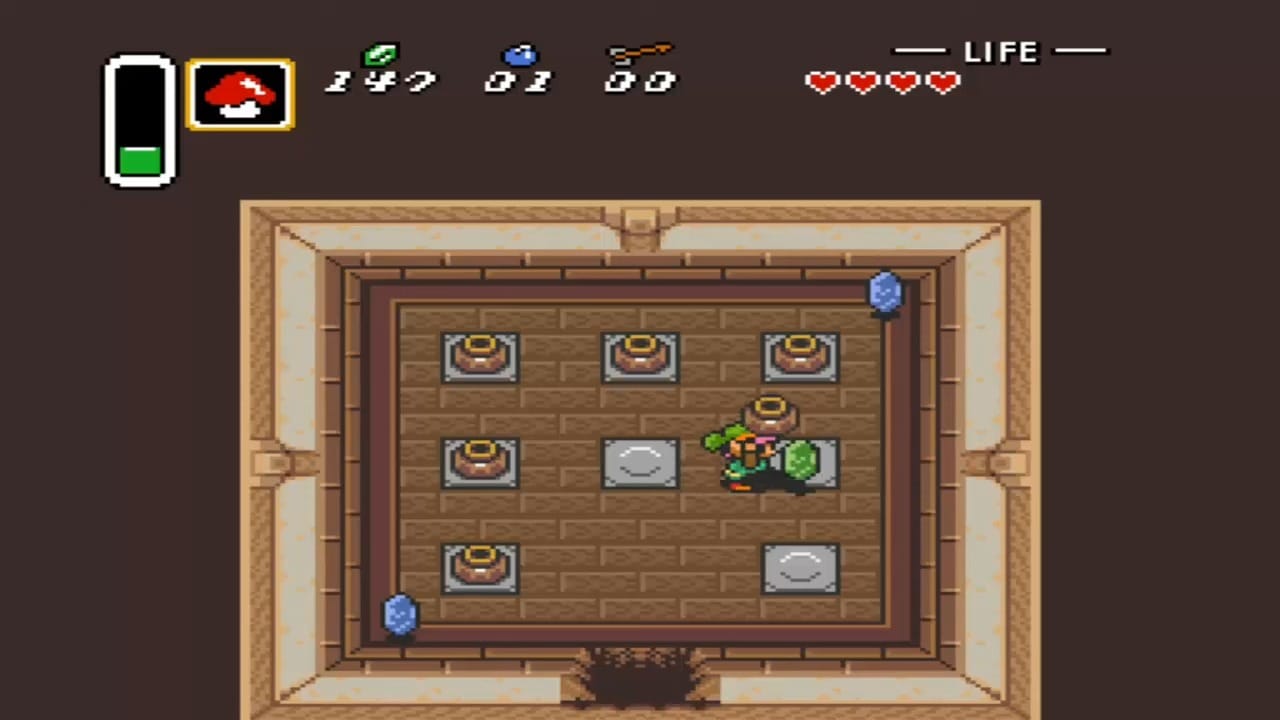
In the northwest corner of the village, you’ll see a well and a small cave entrance on a ledge above it. This area has two secrets: the village well and a hidden treasure cave. First, stand on the higher ledge just above the well (there’s a grassy area you can access by walking around to the left). Leap off the ledge into the well – Link will drop into a secret cave via the well shaft. You’ll land in a dimly lit underground room.
Open the four treasure chests here and smash/lift the pots: between them, you’ll gather some Bombs and a total of 70 Rupees! This cache ensures you now have Bombs in your inventory – typically you’ll find 3 or 10 bombs in one of the chests (and your Bomb count will appear in your HUD). This is likely the earliest point you can acquire Bombs, which is why we took this detour.


Item: Bomb
Enter item description here. This item can be found in various locations throughout the game and serves a specific purpose.
Heart Piece #2: Kakariko Well
Now that you have Bombs, look at the north wall of this cave room. You should notice a cracked section of wall (a subtle circular crack marking). That indicates a bombable wall. Set a Bomb (equip bombs and press the item button, then quickly move away a bit) in front of the crack. The Bomb will flash and explode, opening a passage in the wall.

Go through the new opening into a small hidden chamber. Inside, you’ll find a large chest – open it to claim Heart Piece #2. Great job, that’s your second one (two more pieces and you’ll earn another Heart Container). Collect any remaining rupees in here, then head back out the way you came and climb the ladder to exit the well.


Heart Piece #3: Blind’s Hideout
Outside again, still in Kakariko’s northwest, you’ll see the small cave entrance right next to the well (the cave built into the hillside). Enter this cave next. This is often referred to as Blind’s Hideout (Blind was a thief who once lived here, according to lore).

Inside, go down the stairs to the basement. You’ll find a puzzle room with blocks and four treasure chests. Push the blocks out of your way (if you make a mistake, you can exit and re-enter to reset the blocks). Open all four chests to score a whopping 80 Rupees (each chest contains 20 rupees).

This haul, combined with what you’ve collected so far, should give you plenty of spending money. Once you’ve grabbed the rupees, use another Bomb on the cracked north wall of this basement. Blast it open and go through to find Piece of Heart #3 waiting in a small room. Open the chest to take the third heart piece. Excellent – you’re now one piece away from another full Heart Container! Exit Blind’s Hideout once you’re done.


Magic Bottle #1: Street Merchant
Back in the overworld of Kakariko, let’s put those rupees to use. Just a bit south of Blind’s Hideout, near the center of town, you’ll find an outdoor Street Merchant sitting on a carpet in an open area. Approach him and he’ll offer to sell you a Magic Bottle for 100 Rupees.

This is absolutely worth it – Magic Bottles are extremely useful, as they let you carry potions or fairies. By now, you should “easily have” 100 Rupees (as the merchant says) from all the treasure you looted. Buy the Magic Bottle #1 from the merchant. Link holds it above his head proudly. Bottles appear in your inventory screen; they start empty, but you can fill them with recovery items later (we’ll soon get something to put in it!).


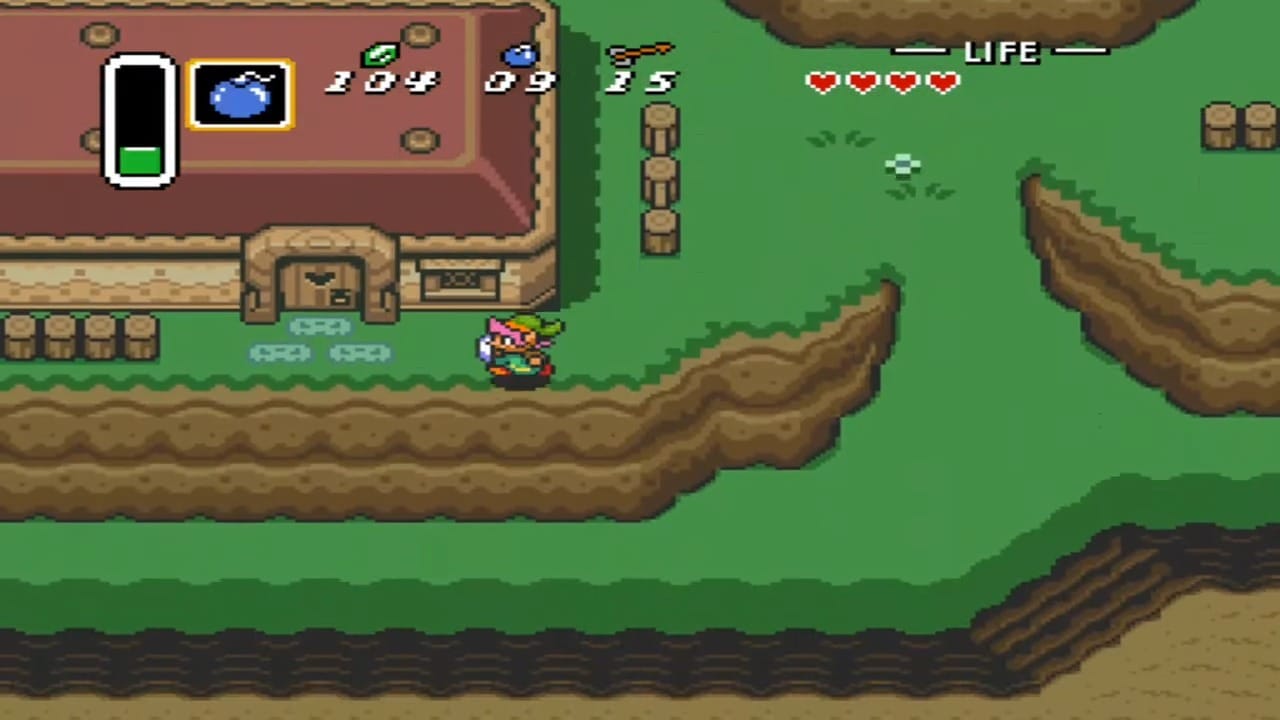
Now, with Bombs still in supply, there are a couple more hidden spots in Kakariko to check out for supplies and items. If you explore the southwest corner of Kakariko, you’ll notice a small sealed shack with no door (sometimes called the “Mysterious Hut”). It looks like just a windowed hut with no entry. This is actually a secret supply shed. Place a Bomb against its south wall (the side facing you) to blow open an entrance.


Step inside, and you’ll find a room with pots and items. Here you can replenish Bombs and Arrows, and collect some extra rupees. What’s great is that these items respawn whenever you leave and re-enter the hut, so you can effectively stock up on bombs (and arrows for your bow, which you’ll get later) for free at this spot. Keep this location in mind if you ever run low on supplies. For now, make sure you leave with max or near-max bombs (you can carry up to 10 bombs initially).
Magic Bottle #2: Kakariko Inn
Next, head to the Kakariko Inn (also known as the tavern or bar) on the south side of town. It’s the building with a spacious front yard and a bulletin board nearby (there’s also a drawing of a cup on the sign). The front door of the tavern is open (inside, a man tells you about the sick kid, which we’ll get to soon).

However, the secret we want is accessed from behind the building. Walk around to the back of the bar – you’ll find a hidden entrance on the rear wall. Enter this secret door, and you’ll find yourself in a back room with a lone treasure chest. Open it to obtain Magic Bottle #2! This one is free, and now you have two bottles in total. Two empty bottles will be incredibly handy for holding multiple potions or fairies early in the game. Now you’re really gearing up.


Just north of the tavern is a small home where a sick boy lies in bed (the “Bug-Catching Kid”). Go into that house (it has a green roof and a boy visible in bed). Talk to the sick kid. He mentions he can’t go out to catch bugs because he’s ill. Seeing that you have at least one bottle, he says, “Hey, I have this Bug Catching Net, you can borrow it”. He then gives you the Bug-Catching Net. (If you didn’t have a bottle yet, he would cough and mention wanting one – he only gives you the net if you have an empty bottle to use it with.)


Item: Bug Catching Net
The Bug-Catching Net is used to catch small fairies (to store in bottles for later healing) or even bees. Equip it and press the item button to swing; it only works on certain flying critters, but it’s very useful once you find a Fairy Fountain or encounter fairies from defeated enemies. Now Link’s inventory grows further, and you can capture a fairy next time you see one (handy for auto-reviving if you die).
At this point, you’ve thoroughly plundered Kakariko’s secrets. Let’s recap your spoils from the village: Bombs (acquired from the well cave), Piece of Heart #2 and #3, Magic Bottle #1 and #2, and the Bug-Catching Net. You should also have a healthy sum of rupees left even after the bottle purchase, thanks to all the treasure.
You might notice a few other things in Kakariko – like a house with a woman who screams for soldiers if you barge in (don’t worry, you can dash out to avoid the soldier), a cucco (chicken) coop you can bomb open for rupees, and a library (House of Books) with a mysterious green book on top of a shelf (we can’t get that Book of Mudora until we have the Pegasus Boots). Keep these in mind for later. For now, we’ve got one more heart piece to collect nearby.
Heart Piece #4: 15-Second Racing Guide
When you’re ready, exit Kakariko Village to the south. You’ll find yourself in a new area just below the village, where there’s the House of the Quarreling Brothers (a long red-roofed house split into two rooms) and, further south, the 15-Second Game track. To reach the next heart piece, you need to get into that fenced-off race track field.

Here’s how: Enter the Quarreling Brothers’ house (the door on the right side of the long house). Inside, you’ll find one of the brothers who blocked off the door to the left side out of spite. He won’t budge, but you don’t need him to – you have Bombs! Place a Bomb against the crumbled-looking portion of the left wall inside the house. Boom! The wall blows open, creating a doorway to the other half of the house. Go through the new opening and exit out the door on the left side of the house. This puts you outside, on the west side of the house, which is exactly where the racing game begins.


Speak to the lady by the gate (the game operator). She explains the rules of the 15-Second Game: you need to reach the goal (the man at the end of the maze) in 15 seconds or less to win a prize. If you agree, she’ll let you attempt the race (for a small fee, usually 10 rupees). This is essentially a short obstacle course full of bushes and fences. You don’t have the Pegasus Boots yet (which would normally let you dash), but it is still possible to win within 15 seconds on foot if you take the optimal route and use a shortcut.

Racing Strategy: The timer starts as soon as you jump down into the maze. From the start, quickly slash through the line of five bushes directly north of you to clear a path. Immediately take the first left turn, then when you see a fork, go left again. Slash through three more bushes in your way. You’ll see a sign pointing right—ignore the long way around.


Instead, from just above the sign, face south and jump off the ledge (there’s a wooden plank that serves as a ramp). This drop is a shortcut that skips a chunk of the maze. Upon landing, immediately go west and then up to talk to the man at the finish line. If done correctly and quickly (hug the corners and don’t waste time), you should reach him in under 15 seconds. He’ll congratulate you, saying “You qualified!” and award you Piece of Heart #4.


This is a significant milestone: since you now have Pieces #1, #2, #3, and #4, that’s four pieces total – which automatically forms a new Heart Container. Your life meter increases by one, bringing you up to 5 hearts in total (remember, you already got one from Sanctuary, and collecting four pieces gives another). The game will fully heal you as well when the new heart is added.

(If you don’t make it in time on the first try, don’t worry! You can leave the area and re-enter (or pay to try again) as many times as needed. Keep practicing the route – cutting bushes cleanly and taking the shortcut jump are key. Without Pegasus Boots, it’s tight but doable. Also note, if you had the Boots from later, it becomes trivial, but doing it now gives you that heart container earlier.)
With that, Kakariko and its surroundings have yielded a bounty of upgrades. You’ve now significantly boosted Link’s survivability (5 hearts and a stocked inventory) compared to when you left Sanctuary.
Magic Shop Magic Powder – Trade Mushroom & Power Up Early
Now it’s time to put that Mushroom to use and get the Magic Powder, a fun and useful magical item. From Kakariko or Sanctuary, make your way to the Magic Shop, which is located on the eastern side of Hyrule, just north of the Eastern Palace area. The quickest route from Kakariko: go back up to Sanctuary, then head east from Sanctuary into the Hyrule Castle courtyard area and immediately north into the Hyrulian Cemetery (just east of Sanctuary).

From the graveyard, exit to the right (east) and follow the path that leads east across a bridge. You’ll see the landscape change to a weird green-tinted area with mushrooms – that’s how you know you’re close. Cross the bridge and head up one screen to find a small colorful hut with a witch stirring a cauldron outside. This is the Magic Shop, run by the witch Syrup and her assistant.


When you approach, equip the Mushroom as your active item. Walk up to the witch (Syrup) who is brewing something in her pot just outside the shop. “Hmm! The smell of rotten fruit! If you give me that Mushroom, I can finish my brew,” she cackles (or a similar line). Give her the Mushroom by pressing the item button while facing her. She gratefully accepts it and says “Heh heh, thank you young man. Come back to the shop later for something good.” Essentially, she is now going to mix up Magic Powder for you.

To get your reward, you need to transition the screen (the powder takes a moment to be ready). You can simply walk one screen away (e.g., left across the bridge) and then come right back, or enter the shop and exit. After a brief moment, re-enter the Magic Shop building. Inside, you’ll see a bag of red powder sitting on the counter next to the Hooded Shopkeeper. This is the Magic Powder you’ve been promised. Walk up to it and press the action button to pick up the Magic Powder. A jingle will play as you obtain it.


Item: Magic Powder
Magic Powder is a curious item that you can sprinkle on things – it can transform enemies or objects with funny or helpful effects. For example, sprinkling it on Buzzblobs (the electric cactus-like creatures) will turn them into harmless blobs that give hints, and using it on anti-fairy spirits will turn them into fairies that you can capture or use for healing. It’s a very handy item to have early on for these tricks.
The Magic Powder sits in your inventory as an item (assign it to use). It consumes a bit of magic power per use, so use it sparingly or stock up on green Magic Jars. Now that you have the powder, talk to the shopkeeper if you’d like – he sells potions (if you have rupees, you might consider buying a Blue Potion now to fill one of your bottles: it costs 160 rupees and will fully restore your health and magic when used. Red Potion (health only) and Green Potion (magic only) are cheaper alternatives. You can also capture a fairy later to keep in a bottle as another means of healing). Stock up as needed.
You’ve now accomplished the goal of this walkthrough segment – from the humble beginning in Link’s house all the way through rescuing Zelda and collecting a trove of items, concluding with the Magic Powder.
Next Steps
At this point, Link is well-prepared to take on the challenges ahead. With five hearts, a better arsenal (Boomerang, Lamp, a full Bomb bag, Magic Powder, and the Bug-Catching Net), plus two Bottles for safety, you have a significant advantage going into the first real dungeon. The Princess is safe at Sanctuary, and your next story destination is the Eastern Palace to seek the Elder Sahasrahla and obtain the first Pendant of Courage.
When you’re ready, head toward the Eastern Palace in the east of Hyrule (from the Magic Shop, just go south and east). But if you’re feeling extra adventurous, note that there are a couple more optional items you could get now (like the Ice Rod in the southeast or two more heart pieces near Lake Hylia and the Eastern Palace area). These are further out of the way and truly optional at this stage, so you might save them for later. The adventure is nonlinear, so explore as you wish!


For now, congratulations on making it this far! Tip: Save your game (pause and choose Save & Quit) now that you’ve gathered all these items, especially if you’re on original hardware or the SNES version. (On Nintendo Switch Online, you can also create a suspend point.)