


A Link to the Past 100% Completion Walkthrough
- Princess Zelda Rescue : Infiltrate Hyrule Castle to rescue Zelda and kickstart Link’s epic quest.
- Eastern Palace : Solve Armos Knights’ traps in your first dungeon to claim the Pendant of Courage.
- Desert Palace: Navigate shifting sands and defeat Lanmolas to earn the Pendant of Power.
- Tower of Hera: Climb Death Mountain’s Tower to obtain the Moon Pearl and final pendant.
- The Master Sword & Hyrule Castle: Claim the Master Sword, confront Agahnim, and set your destiny in motion.
- Dark Palace: Explore the Dark World’s Palace and free the first Maiden from darkness.
- Light World Exploration: Unlock warps, collect hearts, and prepare for deeper Dark World dungeons.
- Swamp Palace: Use Cane of Somaria blocks to navigate the toxic swamp and rescue another Maiden.
- Skull Woods: Uncover hidden tunnels and puzzles among the skull trees to free a trapped Maiden.
- Gargoyle’s Domain: Enter via pitchfork statue, secure the Titan’s Mitt, and beat Blind the Thief.
- Ice Palace: Traverse icy floors, gain Blue Mail, and defeat a freezing foe.
- Misery Mire: Master Cane of Byrna and Ether Medallion to rescue another Maiden in the mire.
- Turtle Rock: Face volcano hazards and rescue the last Maiden within this volcanic fortress.
- Ganon’s Tower : Climb the tower’s gauntlet of traps and minibosses to battle Agahnim.
- Pyramid of Power: The Ultimate Showdown with Ganon.
Table of Contents

Heart Piece #13 – Dark World Lake Hylia → Light World
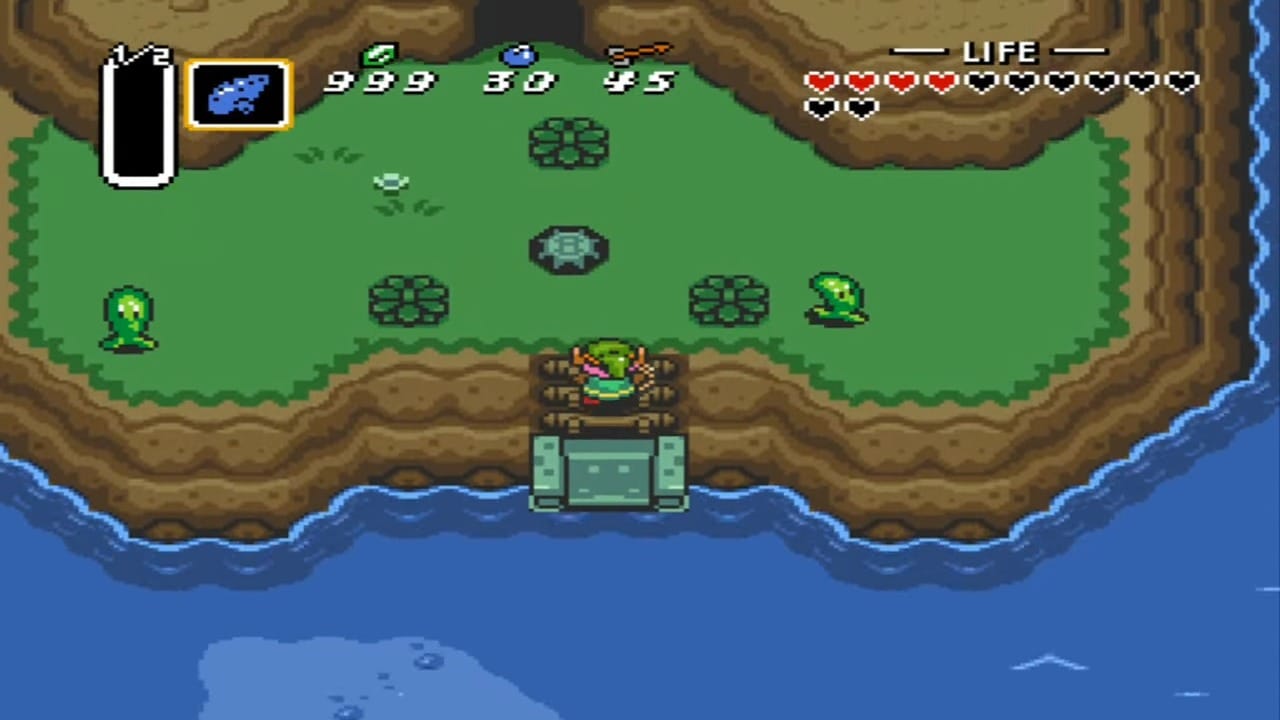
You’ve obtained the Magic Mirror and Zora’s Flippers—perfect. Now head to the Dark World version of Lake Hylia. Swim northwest across the icy edge until you reach a circular arrangement of stones ringing a shallow pool. Step into the centre of that ring—yes, you practically stand in ankle-deep water—and activate the Magic Mirror.
You’ll be instantly transported to the Light World, materializing on a secluded island in Lake Hylia surrounded by rippling blue waters. Grab Heart Piece #13 on the island!


Bomb and Arrow Capacity Upgrades (Optional)


In the center of the lake is an island with a cave entrance – this is the Pond of Happiness. Inside the cave, approach the pond at the back. A message asks if you want to throw Rupees in to make a wish. Toss in Rupees – you can start with 5 or 20 at a time. After you’ve thrown in a total of 100 Rupees, a Great Fairy (Queen Venus) will appear and ask if you’d like to carry more Bombs or Arrows. Choose whichever you prefer; each wish will increase your capacity by 5 for that item. After your first upgrade, the pond will let you throw 25 or 50 Rupees at a time, which speeds things up. Every cumulative 100 Rupees = another upgrade of +5 bombs or +5 arrows.

Continue tossing Rupees and upgrading in whichever order you like. You can upgrade bombs up to a max of 50 (from a starting 10) and arrows up to 70 (from a starting 30). Each increase will be +5 until you approach the max; the final upgrade for bombs will give +10 (from 40 to 50). In total, you’ll spend around 1400 Rupees to fully upgrade both Bombs and Arrows, but the game provides more than enough Rupees across Hyrule to cover this. The Fairy will return any extra Rupees if you overshoot the exact amount needed for the final upgrade, so don’t worry about losing money.
If you can’t afford all upgrades right now, no problem – we will come back later. Even one or two upgrades can help (extra arrows are very useful in upcoming dungeons). This fairy pond is a convenient Rupee sink throughout your adventure. (There’s nothing else this many Rupees are needed for aside from potions, so feel free to dump your savings here in exchange for a bigger ammo stockpile.)
Tip: You don’t have to exit the cave after each upgrade. In the SNES version, simply wait about 10 seconds after the fairy disappears and the pond will let you throw more Rupees (on some versions like Nintendo Switch, it even resets more quickly). There’s also a side room with four Fairies (reachable by bombing the right wall inside the pond cave) if you need to heal or capture fairies.
(We’ll return to finish any remaining upgrades later once you’ve collected more Rupees. Feel free to fully max out now or do it in increments.)
Now to return to the dark world. Go south past the Bomb Shop (Dark Link’s House) and west through the marshes. Use the Magic Hammer to pound the stakes blocking the path and navigate into the area south of the Dark World’s Village of Outcasts. This region corresponds to the Haunted Grove in the Light World – you’ll know you’re close when you see a circle of bushes on the ground and a lone creature standing on a stump playing music.


Heart Piece #14
The next Heart Piece is found near the area known as the Haunted Grove. Travel to the southern portion of Hyrule Field, just north of the Desert of Mystery entrance (Light World). This is the grassy grove with a lone tree stump that has a creature’s silhouette playing a flute (you might have seen the ghostly Flute Boy here earlier). Our goal is to appear on a small ledge here in the Light World by warping from the Dark World.
In the Dark World grove, find the conspicuous circle made of 8 bushes, located just south of the tree stump where the creature is. Stand in the center of this circle and activate the Magic Mirror. This will instantly teleport you back to the Light World, materializing you onto a high ledge in the Light World that was previously unreachable.
On this isolated ledge in the Light World, enter the cave you see. Inside, you’ll be rewarded with Heart Piece #14! Grab the Piece of Heart and exit. (This ledge is north of the desert and west of where the Haunted Grove animals gather in the Light World.)


Flute Acquired (Haunted Grove quest)
While you’re in the Haunted Grove area, there’s an important item to collect: the Flute (also called the Ocarina) – a magical instrument that will grant you fast travel. This item is technically optional at this moment, but it becomes required later to access Dungeon #6, and it’s very useful as soon as you get it. Let’s obtain it now.
Return to the Dark World if you aren’t already there (use the portal left behind by the Magic Mirror or a nearby warp tile). In the Dark World’s version of the Haunted Grove, you’ll find a strange creature sitting on a stump, with woodland creatures gathered around. This is the missing Flute Boy, transformed by the Dark World’s curse. Speak to him, and he will tell you he buried his Flute in the Light World near his old stump and asks for your help finding it. He then hands you his Shovel to do the job. Agree to help him.


Item: Shovel
Use it to dig up treasures and occasionally even enemies hidden just below the dirt. Most famously, you’ll need it to unearth the Flute in the Haunted Grove—after that, it disappears from your inventory in the SNES version.
Use the Magic Mirror once more to return to the Light World Haunted Grove. The grove is peaceful here, with a lone wooden stump in a flower patch – this is where the ghostly image of the boy was playing earlier. Walk to the northwest corner of the flower patch near the stump and start digging with the Shovel. It shouldn’t take long before you dig up a shiny flute! This is the lost Flute. (If you’re having trouble, basically dig one row at a time around the stump area – the exact spot is just a few tiles south or southwest of the stump itself. A distinctive sound will play when you uncover it.)


After obtaining the Flute, go back to the Dark World portal (it should be conveniently nearby since you mirrored here). Back in the Dark World, approach the Flute Boy on the stump again. By now he’s fading away. Play the Flute for him (equip it and press Y) so he can hear it one last time. In a bittersweet scene, the young man will be grateful but then turn into a small tree on the stump, forever petrified. He can no longer use the flute, so Link gets to keep it. The Flute Boy asks that if you go to his village, please give the flute to his father – in fact, his father is the old man in the Kakariko tavern who mentioned his missing son. We’ll fulfill that wish shortly.


Item: Flute
A magical instrument dug up in the Haunted Grove. Playing it at the Weathercock in Kakariko Village releases a duck that lets you fast-travel to eight key Light World locations. Works outside dungeons—your shortcut to strategic map hopping.
At this point, you now have the Flute in your inventory (it replaces the Shovel on the SNES version). In the GBA version, the Flute is a separate item and your Shovel remains in your inventory; on SNES, the Shovel is gone once the Flute is found. (Don’t worry – if you ever need to dig again, such as in the digging game, the game will provide a shovel for you.) The Flute Boy’s parting words also gave a clue: go to the village and use the flute for his father.
Fast Travel (Flute activation)
With the Flute in hand, you can unlock one of the most useful features in the game: fast travel around the Light World map. Make sure you are in the Light World (use the Mirror if needed) and head to Kakariko Village.
In the center of Kakariko Village, there’s a weather vane (a statue of a rooster, also called the Weathercock) right in the town square. Stand in front of the Weathercock and pull out the Flute. Play the Flute by pressing Y. You’ll see the statue begin to shake and then suddenly explode into pieces, and out pops a small duck! This is the Flute Boy’s beloved pet bird. The freed duck will take to the skies.


Now, whenever you play the Flute in the Light World overworld, the duck will appear and circle above Link’s head, awaiting a destination. You’ll be shown numbers 1 through 8 on the world map – these correspond to various key locations around Hyrule where the duck can drop you off. Simply move the cursor to the number and press A, and off you go! This fast travel ability is a huge time-saver. The available warp points are:
- Death Mountain (East) – The entrance to Death Mountain, near the old man’s cave (and a shortcut to the Tower of Hera area).
- Witch’s Magic Shop – Just outside the Magic Shop (potion shop) east of Hyrule Castle, near where the Eastern Palace area is.
- Kakariko Village – Right in the center of the village (where the weather vane was).
- Link’s House – Just south of Link’s House (and the Bomb Shop in the Dark World).
- Eastern Palace – Outside the Eastern Palace entrance.
- Desert of Mystery – The southwest corner of the desert. (This spot is crucial for accessing Dungeon #6 later; you’ll use the warp here to reach Misery Mire in the Dark World.)
- South of Lake Hylia (Swamp Ruins) – Near the drained pond where you found a Heart Piece in the Great Swamp (Light World). Convenient for reaching the Swamp Palace entrance.
- South East Hyrule (Lake Hylia) – The southeast corner of Lake Hylia, near the Ice Rod Cave area.
Whenever you play the Flute in the Light World outdoors, the duck will whisk you to the chosen location in seconds. (It will not come in the Dark World – the flute only works in the Light World except for one story moment later.) This makes traveling across Hyrule much faster, so take advantage of it to revisit areas or tackle sidequests!
Finally, if you stop by the Kakariko tavern, you can speak to the Flute Boy’s father (the villager sitting at the table) and tell him about his son. He will understand what happened and ask you to keep the Flute as a token, and reiterates the hint to use it at the weather vane (which you’ve already done). This isn’t required, but it adds a bit of touching story closure and context.
Magic Upgrade – 1/2 Magic Meter (Optional)
Next, let’s obtain a fantastic magic upgrade that doubles your magic meter’s efficiency (so your spells and items consume half the magic power they normally would). This secret is often missed by new players but extremely useful. It involves a hidden cavern near Kakariko and the mysterious Mad Batter.
Make sure you have some Magic Powder (the item you get by giving the witch the Mushroom from the Lost Woods – sprinkle powder is needed for this). Also, you’ll need the Magic Hammer, which you should have from the Dark Palace dungeon.
Head to the eastern outskirts of Kakariko Village (Light World), just east of the Haunted Grove/woods area. Here you’ll find the deserted Smithy’s shop (blacksmith’s house) and a small fenced-in area with a lone wooden peg sticking out of the ground next to a suspicious-looking well. Climb the ledge above this area (there are stairs just north, by a single building on the east side of Kakariko) and you’ll be on a higher ledge overlooking the well. Use the Magic Hammer to pound the wooden peg down into the ground. Jump into the hole to enter a secret fairy grotto under the well.


Inside, walk north to find a strange altar – a green statue with a tiny bowl in front of it. This place looks empty, but it’s imbued with magic. Equip the Magic Powder and sprinkle some onto the altar bowl. With a flash, a crazy bat-like creature (the Mad Batter) bursts forth! He cackles about punishing you for waking him and “curses” you by reducing your magic power by half. Don’t be alarmed – this is a rare case of a curse that’s actually a blessing! In truth, the Mad Batter has made it so all your magic items now use only half the normal Magic Meter. In other words, your Magic Meter’s effective capacity has doubled. You’ll see the words “1/2” on your meter now to indicate the change.

Despite his mischievous dialogue (“I’m going to make it so you have half your magic power!”), he’s helping you, as indicated by Link’s puzzled reaction. From now on, every spell, rod, cane, or magic item consumes 50% of the energy it used to. This upgrade will make things like the Lantern, Fire/Ice Rods, Ether/Bombos medallions, and especially the Magic Cape and Cane of Byrna far more economical to use. (The Mad Batter flies off after his prank, and you can leave the cave – you’ve got the upgrade permanently.)
The nearest warp tile from Kakariko Village can be found if you take the northwest entrance to the Lost Woods. When you enter the woods, go east then south to come to an area blocked by a wooden peg. Hit the wooden peg with your magical hammer and lift the stone to reveal a warp pad.


Heart Piece #15: Village of Outcasts Chest Game
While in the Dark World Kakariko (Village of Outcasts), there are two mini-games that yield Heart Pieces. The first is the Treasure Chest Game for Heart Piece #15.
In the Village of Outcasts (Dark World’s Kakariko), enter the shack at the northwest corner of the village – the one with a door and a sign out front (just left of where the statue puzzle would be in Light World). This is a gambling game where the npc lets you open two chests for 30 Rupees. Pay him 30 Rupees to play. Inside, you’ll see 16 treasure chests. You can pick any two per game. One of those chests contains a Piece of Heart!
Unfortunately, the prize is random each time and you only get two tries per round. There’s no known trick – it’s pure luck. Open two chests and hope for the best. If you don’t get the heart piece, leave the building and re-enter to reset the game (and be prepared to pay 30 Rupees again). Keep playing until you find the Piece of Heart. Usually it doesn’t take too many attempts – but it’s a 1 in 16 chance each play if you only open two chests. If you’re feeling lucky, you might snag it on your first few tries. Heart Piece #15 will be added to your collection as soon as you pick the correct chest.


Heart Piece #16: Graveyard Ledge Cave
Go north to the area that corresponds to the Light World Graveyard (directly east of the Sanctuary). The Dark World graveyard (sometimes called the “Ghostly Garden”) is filled with dark rocks and bushes.
At the very north end of this area, up against the cliff, use the Pegasus Boots to smash into the group of boulders blocking a narrow pathway. This allows you to climb up onto the higher ledge at the north edge of the graveyard (just above where a cave entrance is visible in Light World).


Once you’re standing on that upper ledge in the Dark World, use the Magic Mirror. You will warp back to the Light World and appear on a high ledge overlooking the Light World graveyard – a ledge you ordinarily can’t reach. Right next to you is the entrance to a cave on this ledge. Go inside and bomb the cracked north wall. Go through the newly revealed doorway and open the waiting Piece of Heart. Heart Piece #16 is yours!


Exit the cave and step on the warp tile you left behind to return to the Dark World.
Magic Cape Acquired (Optional)
Exit the From where we just acquired Heart Piece #16, move to the area pictured below and use your Magic Mirror to return to the Light World beside the Headstone. Stand south of it and dash into the tombstone with the Pegasus Boots. Crash! The headstone will shove back and a secret stairway is revealed leading into the crypt.

Go down the steps into the underground passage. Open the treasure chest inside to obtain the Magic Cape! Head back and step on the warp tile you left behind to be able to exit the area.
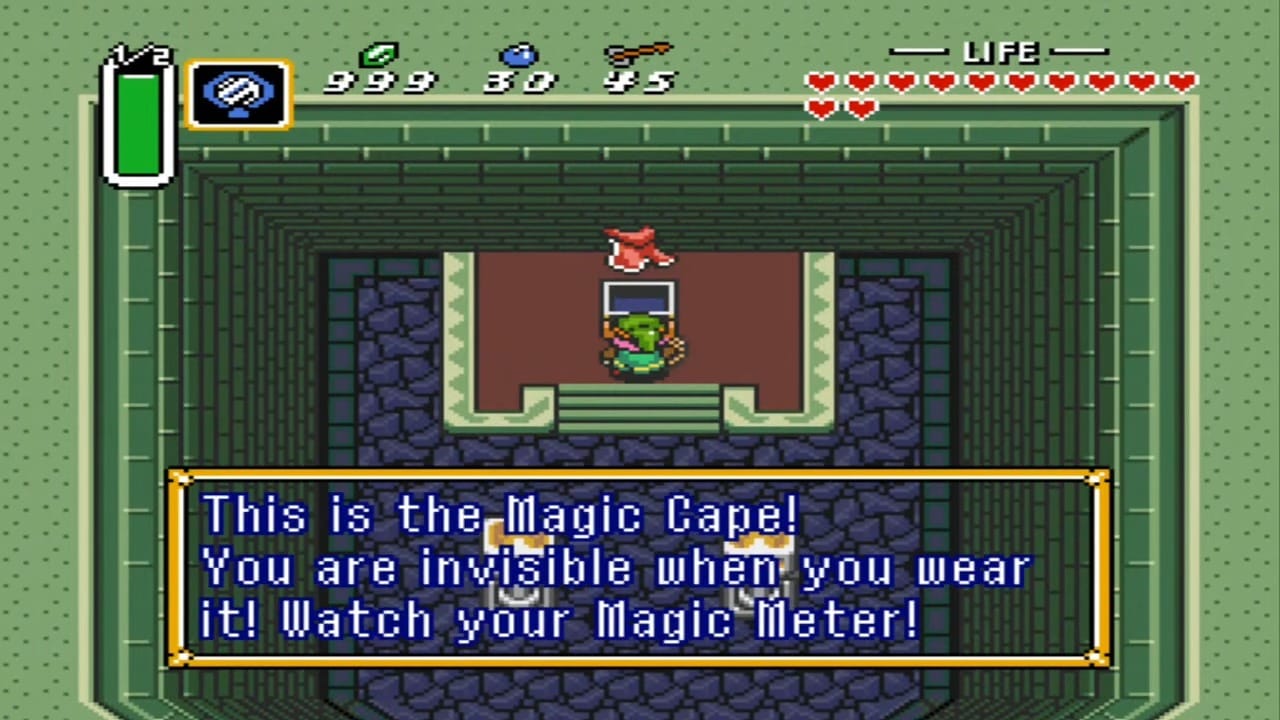

Item: Magic Cape
This item is a green cape that, when worn (press Y to activate), turns Link invisible. While invisible, enemies won’t see or harm you, and you can even pass through certain barriers (like the bumper obstacles in some dungeons). The Magic Cape drains your Magic Meter continuously while active, so use it sparingly. It’s extremely helpful for bypassing tough enemies.
Heart Piece #17
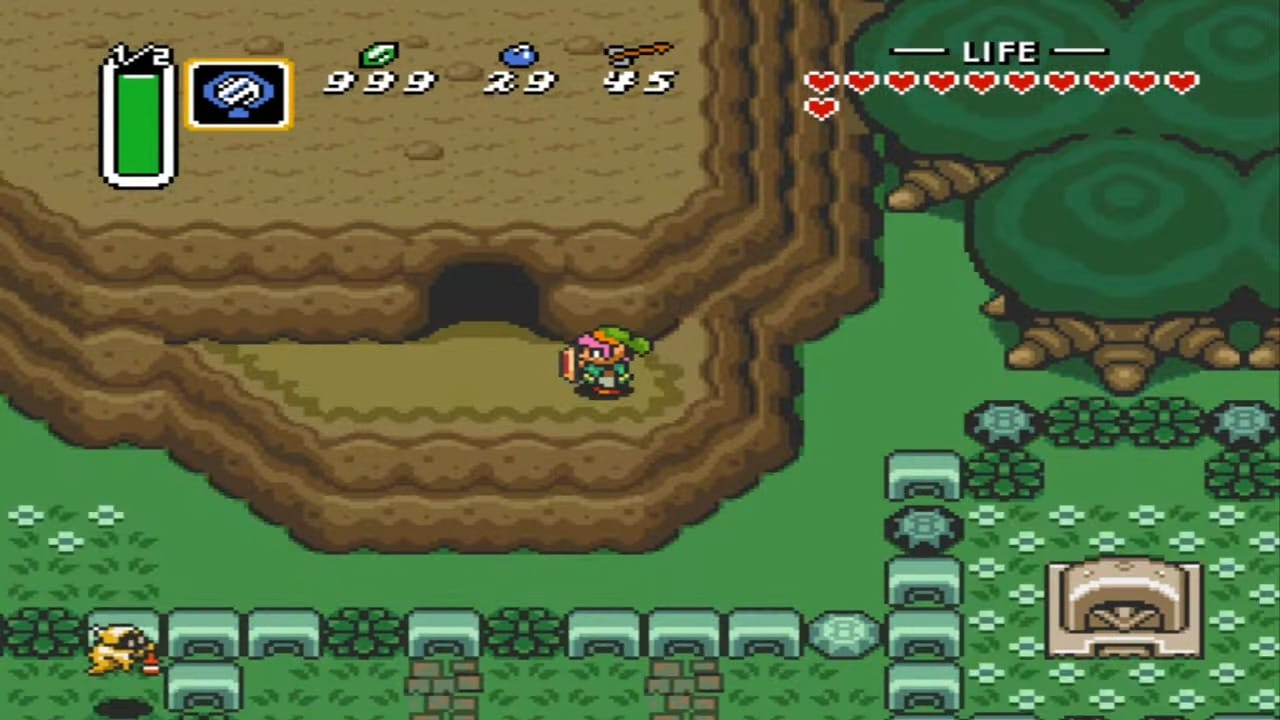
Exit the graveyard and use your Magic Mirror to return to the Light World, go west and walk up the path until you reach the Lumberjacks’ home just beyond the Lost Woods entrance. The brothers have disappeared, and their attention leaves behind a strange sight: among the surrounding trees, one stump stands out—its foliage a lighter green than the rest.

Ready your Pegasus Boots, and with a burst of speed, dash straight into that odd-looking stump. The trunk shivers and suddenly collapses, revealing a hidden stairway. Jump inside and climb the simple stairwell. At the top, turn right through the doorway carved into the heart of the stump. There’s a lone chest resting in the dim light—open it, and inside you’ll find Heart Piece #12. Let the glow wash over you; another step closer to a full heart container.


Return to the Dark World on the warp tile you left behind.
Bombos Medallion Acquired (Optional)
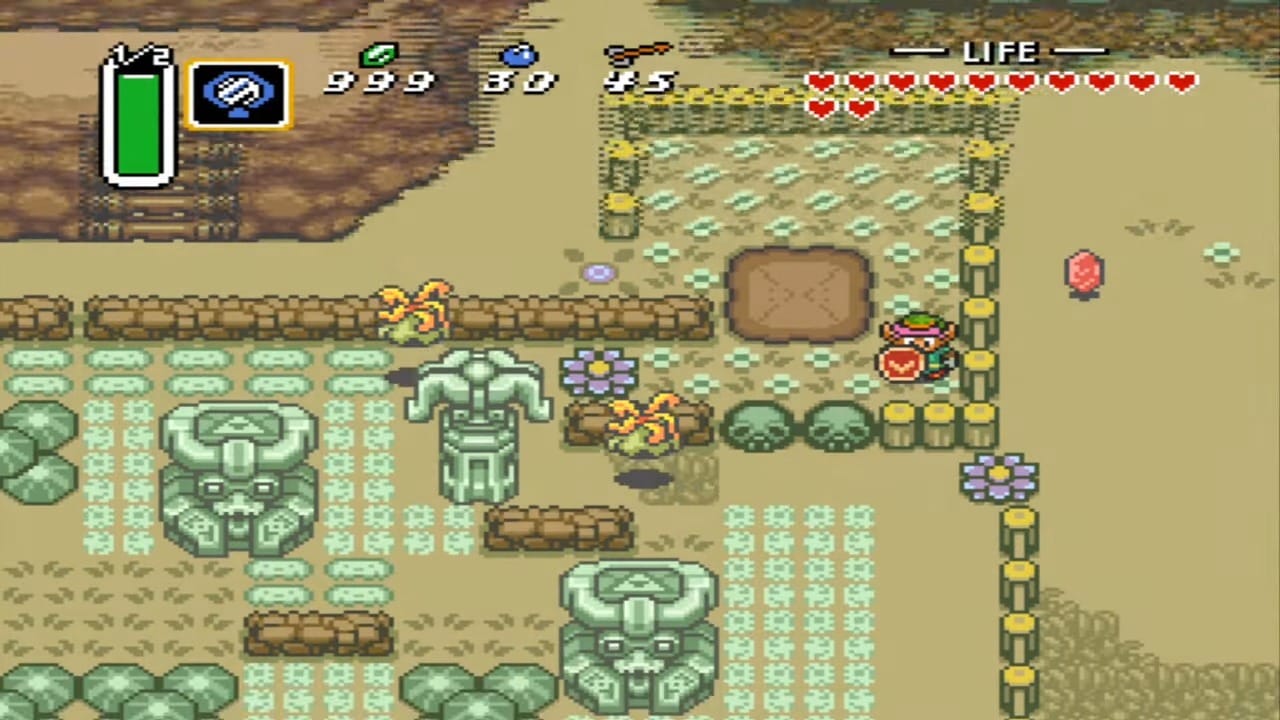
In the Dark World, work your way towards the area containing the Desert Palace in the Light World. You’ll come to a dead end containing small patch of ground circled by wooden stakes in the Dark World. This peculiar circle of pegs doesn’t do anything in the Dark World by itself, but it marks our target spot.


Stand in the middle of the ring of stakes and use the Magic Mirror. Poof! You will appear back in the Light World on top of the plateau that was inaccessible – exactly where we want to be.

Just to your left (west) on this plateau, you’ll see an etched stone monolith with the Bombos symbol. Walk up to it and read the tablet using the Book of Mudora (stand in front of it and press A with the Book). Link will hold up the Book and chant the ancient Hylian inscription. The sky will darken for a moment… then lightning strikes the monolith, and it will gift you the Bombos Medallion! A fiery emblem appears and circles around you as the medallion is added to your inventory.
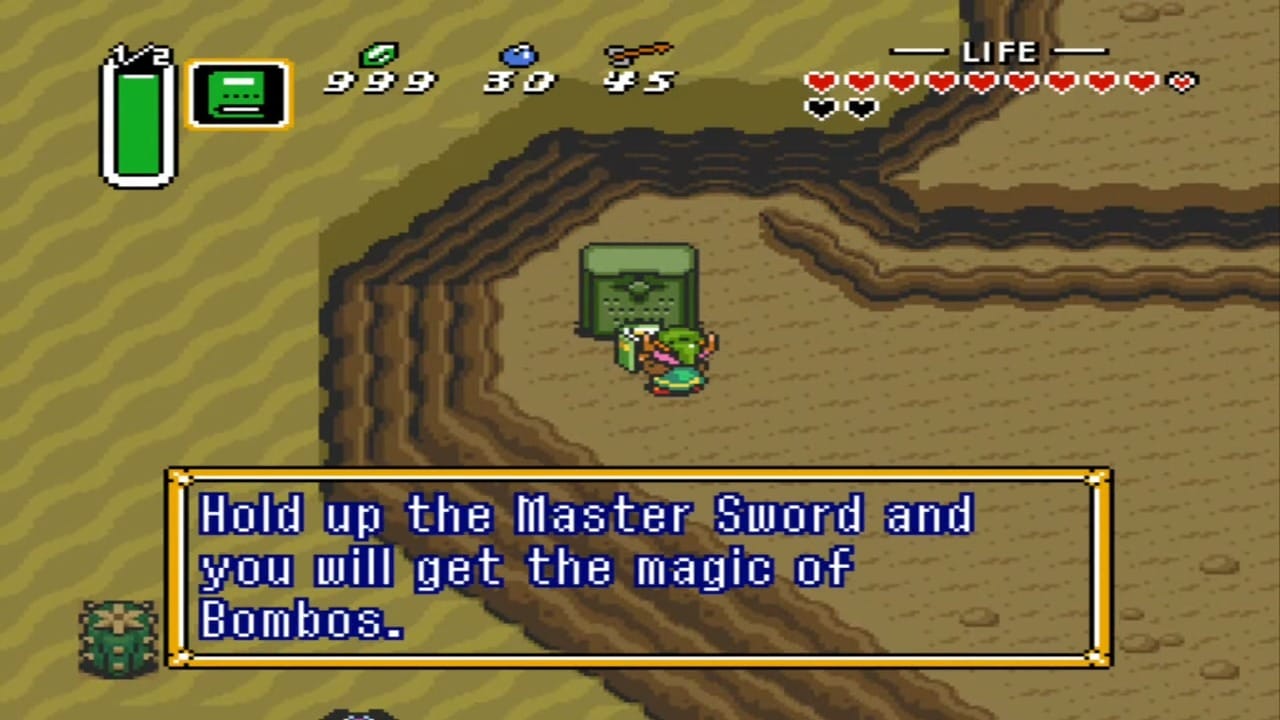


Item:Bombos Medaalion
The Bombos Medallion’s magic effect, when used, causes massive flames to erupt and explode on every enemy on screen. It essentially “bombs” all enemies with fire. It can even turn ice-based enemies into puddles. It costs a hefty chunk of magic per use, however, so use it wisely (the 1/2 magic upgrade helps here).
Return to the Dark World using the warp tile you left behind.
Heart Piece #18: Digging Game (Treasure Field)
South of the Village of Outcasts in the Dark World (in the area that corresponds to the Light World “15-Second Game” race south of Kakariko), you’ll find the Treasure Field – commonly just called the Digging Game. This mini-game awards Heart Piece #17.
From the Village of Outcasts, go southwest (toward where the Haunted Grove was in Light World). You should see an area enclosed by a fence, full of soft soil, with a sign and a mole-like fellow standing by a gate. This is the digging game location (just west of the Dark World Smithy area). Talk to the Treasure Field manager, the creature by the entrance. He’ll say: “Welcome to the Treasure Field. The object is to dig as many holes as you can in 30 seconds. Any treasure you dig up will be yours to keep. It’s only 80 Rupees to play.”

Make sure you have at least 80 Rupees, then pay him 80 Rupees to start the game. Link will be placed inside the fenced area with a shovel (if you no longer have a Shovel because it turned into the Flute, don’t worry – the game loans you a shovel for the duration). Now, rapidly press Y to dig as fast as possible! You have 30 seconds to dig anywhere within the fenced dirt field. You’ll unearth random items – mostly Rupees of various colors, some small magic jars, etc.
Among these random prizes is one Piece of Heart. However, the game is set so that the Heart Piece will only potentially appear after you’ve dug at least 25 holes in a single session (20 holes in the European version). That means you’ll want to dig quickly and make a lot of holes. Even after 25+ digs, it’s still a matter of luck – the heart piece spawn is random and might not show up on your first try.
The strategy here is to maximize the number of holes you dig in the time limit. Move in a methodical pattern (e.g. zig-zag across the field) and mash Y to dig nonstop. Usually, you can dig around 30 holes in 30 seconds if you’re efficient. Once time is up, you can no longer collect new items (any treasure that pops up as the clock hits 0 won’t be obtainable).

If you didn’t get the Heart Piece, you’ll have to try again. Exit the screen to the south or east to reset the game, then come back in and pay another 80 Rupees. It may take a few attempts – the heart piece might pop out on your second try, or it could take a half-dozen games. Just keep at it. Statistically, there’s only a small chance (~3% each dig after 25 digs) of the piece appearing on a given dig, so persistence is key. The good news is you often dig up more Rupees than you spent, offsetting the cost (you might even profit a bit).
Eventually, you’ll uncover a shining heart buried in the dirt – that’s Heart Piece #17. Quickly grab it before the timer ends (it counts as yours the moment you pick it up). Congratulations!

Cane of Byrna Acquired (Optional)
The Cane of Byrna is an optional magic item that creates a protective barrier around Link. It’s found in a cave on Death Mountain (Dark World). This will be a bit of a trek, but with your new Flute, it’s not too bad. Ensure you have the Magic Cape and a healthy supply of Hearts or a potion, because getting the Cane involves walking through a gauntlet of spikes!
Use the Flute to fly to point #1 (Death Mountain), which drops you off at the base of Death Mountain (Light World). Climb up the mountain as you did before (through the cave with the old man, etc.) until you emerge at the top by Spectacle Rock. Now, from the top of Death Mountain (Light World), head to the east side (toward where Tower of Hera was). Just south of Spectacle Rock’s peak, on the path leading to Hera, there is a warp tile on the ground (this warp was likely used when you first got the Moon Pearl). Step on that warp tile to go to the Dark World. You’ll find yourself on top of Dark World Death Mountain, near the Tower of Hera equivalent (which is a large cliff structure in Dark World).

From the Dark World warp tile on Death Mountain, head north to the warp tile we’ve used multiple times. Step on it to enter the dark world. Directly south, you’ll see a narrow ledge with a gap in the railing – jump off the ledge at that gap. Link will drop down a level and land in front of a cave entrance on the side of the mountain. This cave is located roughly under where Spectacle Rock was. This is the entrance to the Cane of Byrna cave (often dubbed the “Spike Cave”).


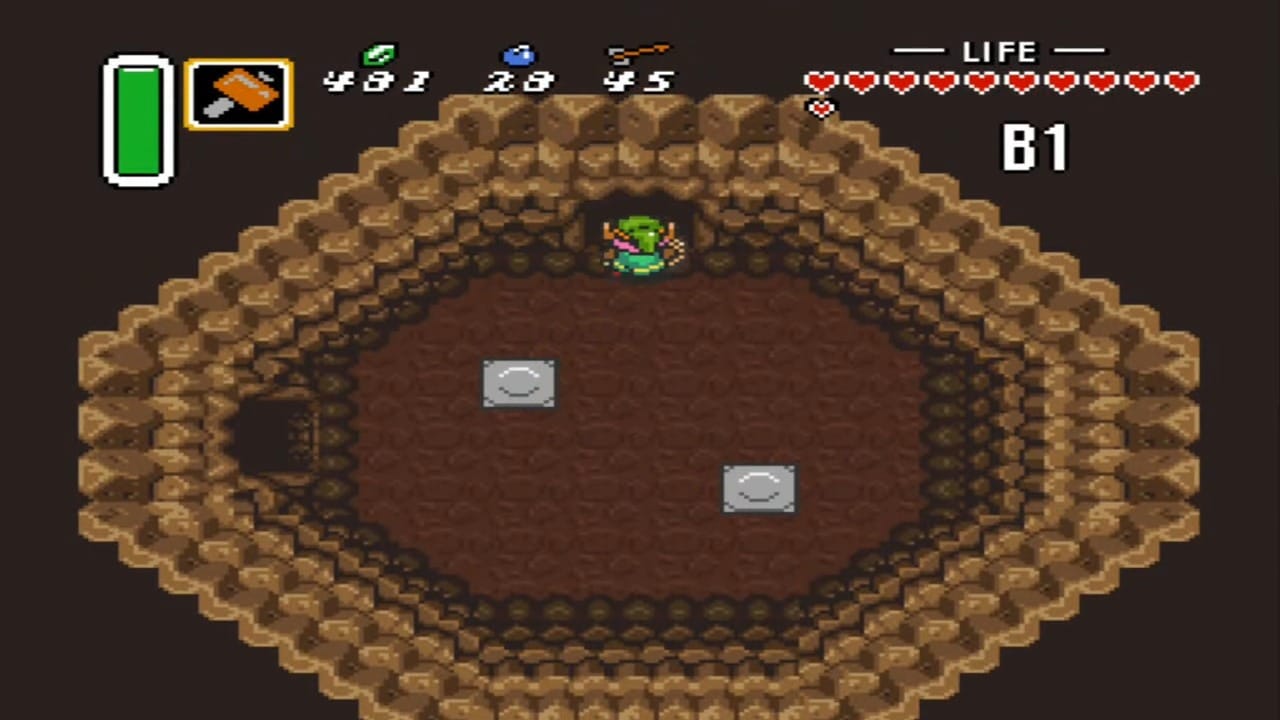
Inside, you’ll immediately notice the floor is covered in rows of sharp spikes – this cave is a gauntlet that tests your ability to mitigate damage. At the very start, there are some orange Moles blocking the path. Use the Magic Hammer to pound down all the Moles so you can walk forward. There is a raised platform with a big gray stone at the far end – the Cane of Byrna is hidden under that stone. But between you and the prize is a winding path of spikes that will constantly hurt you.

Make sure you have plenty of magic (ideally a full Magic Meter and the 1/2 Magic upgrade), activate the Magic Cape and run through the entire spike section. While the Cape is on, you won’t take any damage from the spikes (you’re invisible/intangible). However, the Cape rapidly drains magic – even with double magic, one full Magic Meter won’t last the entire round trip in the SNES version. If you attempt this, you will likely reach the Cane but have no magic left to use it on the way back.

There is a big gray stone blocking a chest on the north wall. Lift the heavy stone with the Titan’s Mitt to access the treasure chest. Open it to obtain the Cane of Byrna! Unlike the Cape, you remain visible, but the Cane’s barrier will protect you from enemies and spikes alike. It also damages enemies that touch the spinning barrier. Importantly, the Cane of Byrna uses far less magic energy than the Magic Cape for the same duration of invincibility. It’s a very useful tool for tough combat situations or hazardous terrain.


Item: Cane of Byrna
This magical cane creates a bright blue ring of light that orbits around Link, rendering him invincible to most forms of damage while active.
Now you need to get back out of this spiked cave. Fortunately, you have a new toy to help. Use the Cane of Byrna to surround yourself with its protective aura and start heading back through the spikes. The Cane’s protection does not knock you out of it when you take “hits” – it simply nullifies the spike damage entirely as long as your magic lasts. With a full (or even half-full) magic meter and the 1/2 Magic upgrade, you should be able to walk back to the entrance without taking health damage. If you run low on magic, quickly toggle the Cane off to conserve it during safe moments, or be ready to guzzle a Green Potion. The few hearts under the skulls at the end should have topped you up if you were low.
Exit the cave once you reach the entrance – you’ve conquered the Spike Cave! Enjoy your Cane of Byrna, which is essentially an improved alternative to the Magic Cape in many scenarios (it doesn’t make you invisible, but it protects you and hurts foes at a more efficient magic cost).
Bombs and Arrows Capacity – Fully Upgraded
By now, with all the treasure collected and perhaps after clearing a few more dungeons, you should have more than enough Rupees to fully upgrade your Bomb and Arrow capacity if you haven’t done so already. Make a final trip to the Pond of Happiness (Lake Hylia island fairy pond) in the Light World and continue tossing in Rupees in 100 increments. Each 100 will grant another upgrade of +5 to Bombs or Arrows. If you’ve been following along, you might have done this gradually. Keep going until the Great Fairy tells you that you can’t carry any more. You will reach the maximum of 50 Bombs and 70 Arrows. Once maxed, the fairy will kindly stop taking your money (and if you happened to overshoot the exact amount, she’ll refund the surplus Rupees).
It takes 14 total upgrades (7 for bombs, 7 for arrows) to go from base to max, which is 1400 Rupees in total. If you find yourself short on Rupees, consider clearing out some easy high-value chests (like the ones in the Cave of 50 Rupees in the Light World, or playing the Chest Game for profit). But by the late game, you should have plenty of excess Rupees from dungeon loot and enemy drops to cover this.

With a full arsenal of Bombs and Arrows, you’ll rarely worry about running out. This is especially helpful in later dungeons where you might spam arrows (e.g. against Ganon’s Tower foes or certain bosses). Bombs, while not used as often in combat, are now plentiful for opening all those cracked walls without fear of running out.
With the Flute in hand and all these side quests complete, Link is now far better equipped for the trials ahead. You’ve collected several extra Heart Containers from Pieces (in fact, you should have formed a couple of new Heart Containers from pieces #13–#18), your Magic Meter lasts twice as long, you have the fast-travel ability to zip around Hyrule, and you’ve acquired powerful items like the Magic Cape and Cane of Byrna. Not to mention your bomb bag and quiver are filled to the brim. Take a moment to appreciate how much stronger you’ve become!