


The Wind Waker 100% Completion Walkthrough
- Prologue: Outset Island: Introduction to Link’s home, initial quests, and obtaining the Hero’s Sword and Shield.
- Forsaken Fortress (First Visit): Stealth mechanics and rescuing Aryll.
- Windfall Island: Acquiring the Sail, meeting key characters, and side quests.
- Dragon Roost Island & Cavern: Assisting the Rito tribe, dungeon exploration, and obtaining Din’s Pearl.
- Forest Haven & Forbidden Woods: Meeting the Great Deku Tree, aiding the Koroks, and securing Farore’s Pearl.
- Post-Forbidden Woods Exploration: Collect charts, heart pieces, and upgrades across the southern sea.
- Greatfish Isle & Nayru’s Pearl: Story progression and obtaining the final pearl.
- Great Sea Side Quest Adventure: Explore islands and complete Windfall quests for key upgrades and collectibles.
- Tower of the Gods: Dungeon challenges and gaining access to Hyrule.
- Hyrule Castle: Discovering the Master Sword and storyline developments.
- Post-Hyrule Castle Exploration: Complete trading quests for heart pieces, treasure charts, and the Magic Armor.
- The Forest Water Challenge: Locating and saving each withered tree for a heart piece.
- Forsaken Fortress (Second Visit): Confronting the Helmaroc King and rescuing Aryll.
- Reef Special Charts & Windfall Side Quests: Six-Eye Reefs, Treasure Charts, and Windfall Island side quests.
- Fire Mountain & Ice Ring Isle: Obtain the Power Bracelets and Iron Boots from these elemental islands to access the next temples.
- Earth Temple: Venture with Medli into the Earth Temple to cleanse evil and claim the Mirror Shield.
- Wind Temple: Enter Gale Isle, team up with Makar, and conquer the Wind Temple.
- Triforce Shard Quest: Locating Triforce Charts, deciphering them, and retrieving Triforce shards.
- Ganon’s Tower: Final challenges, boss rematches, and the ultimate confrontation with Ganondorf.
Table of Contents
Pawprint Isle Pit Stop (Optional)
From Windfall Island, sail one square east (E2 on your Sea Chart) to reach Pawprint Isle, a small cluster of islets shaped like an animal’s pawprint. The main isle (“the palm” of the paw) has a conspicuous blue-and-white dome rock in the center. Beach your boat and head to that dome. Slash away the tall grass surrounding it to reveal a crawlspace entrance at its base. Crouch and crawl inside the hollow dome to drop into a hidden underground cave.


Inside, your first challenge is a swarm of red, jiggling blobs known as Red ChuChus. As you move through the cave’s tunnels, these gooey enemies pop up from the ground. Use your sword (or a quick spin attack) to defeat them, and be sure to collect the Red Chu Jelly they leave behind.


Item: Red Chu Jelly
A gelatinous spoil dropped by Red ChuChus. Deliver 5 to Doc Bandam on Windfall Island to receive a free Red Potion, which restores Link’s health. Red Chu Jelly can also be sold to Beedle for 1 Rupee each.

Heart Piece #4 of 44
Clear out all the Red ChuChus in the cave and explore the dead-end passages to find a treasure chest. Open it to claim Piece of Heart #4! This will complete a new Heart Container if you’ve gathered the previous three pieces.


With the Heart Piece in hand, look around for other treasures: you’ll notice two large boulders sealing off small alcoves. These rocks can’t be broken yet (you’ll need Bombs later in the adventure), so note their location and plan to return. Exit the cave the way you came.
Salvage Corps Encounter (Optional)
Set sail toward your next destination (from Pawprint Isle, Dragon Roost Island is to the east), but stay alert on the open sea. There’s a chance you will run across a floating salvage platform crewed by four enthusiastic divers in old-fashioned diving suits. This is the Salvage Corp, a roving band of treasure hunters. They tend to appear around Pawprint Isle’s quadrant and a couple of other regions (Eastern Triangle Island and Western Fairy Island) as you sail. If you spy a boat with a crane and four cheery sailors, steer towards it and hop out onto their vessel to chat.
Treasure Chart #34 (Collectible #3 of 41)
Talk to the Salvage Corp’s leader on deck. Mistaking you for a fellow treasure-seeker, he’ll excitedly insist on sharing some booty with you: Treasure Chart #34! This chart doesn’t point to loot at Pawprint Isle itself, but it’s still a great find for completion. (Chart #34 will lead you to a sunken Silver Rupee near Eastern Triangle Island – worth a hefty 200 Rupees.)


The Corp members also offer a useful tip: they explain how to use a Grappling Hook like a salvage crane to haul up undersea treasure. Unfortunately, you don’t have a Grappling Hook yet, so you can’t dig up the chart’s treasure right now. But file that knowledge away; you’ll be getting a Grappling Hook very soon at Dragon Roost Island. After thanking the Salvage Corp crew, return to King of Red Lions and continue sailing toward Dragon Roost Island (which lies at square F2 on your Sea Chart).
(If the Salvage Corp doesn’t spawn on your route immediately, don’t worry – they appear randomly. You can always find them later. However, obtaining Chart #34 now is convenient for 100% completion.)
Dragon Roost Island: The Rito and the Wind Waker
As you approach the towering volcanic peak of Dragon Roost Island, your boat (the King of Red Lions) will announce your arrival and draw your attention to a great dragon perched at the summit – the mighty sky spirit, Valoo. Before you disembark at the dock, the King of Red Lions entrusts you with a legendary artifact: the Wind Waker baton. This sacred conductor’s baton was once used by the royal family of Hyrule to control the winds. Now it’s yours to master.


Item: The Wind Waker
The King gives you a quick tutorial on how to use the Wind Waker. To use it, assign it to a button (or press the D-pad Up in the HD version) and tilt the left stick to conduct in time with the rhythm. First you practice a 3/4 time signature by holding the stick left or right to keep the beat, then a 4/4 time. After a few tries, you get the hang of conducting melodies with the Wind Waker. This magical item will allow you to learn songs that can affect the world around you (like changing the wind’s direction, time of day, etc.) – a crucial ability for your seafaring quest.
Step off the boat onto Dragon Roost’s shore. From the boat dock, face the island’s rocky wall. You’ll notice some Bomb Flowers growing in the grassy area to the left and a large cracked boulder blocking a path upward. Pick up a Bomb Flower (stand next to it and press A) and toss it at that boulder. Back away as it explodes and destroys the rock, revealing a climbable ledge.


Now you can scramble up the rocks to a higher ledge. Continue along the winding path. Soon you come to a gap where the wooden bridge is out. Shimmy across the narrow ledge on the wall (“sidle” as you did at Forsaken Fortress) to get past the gap. On the other side, drop down into the lower area. There’s another big boulder blocking a tunnel ahead. Luckily, more Bomb Flowers grow nearby on this lower ledge. Grab one and blow up the boulder to clear the tunnel entrance. Drop Go through the short tunnel.


On the far end, you meet your old postal friend Quill, the Rito postman. He’s impressed you made it here on your own and flies off to inform his chieftain of your arrival. Climb the slope to the left to enter the large cavern door at the top – this is the Rito Tribe’s settlement, often called the Rito Aerie or Dragon Roost Cavern (not to be confused with the dungeon of the same name).


A cutscene plays where the Rito Chieftain greets you. He already knows of you, thanks to Quill. The chieftain is polite but concerned; he explains that the great dragon Valoo, who normally sits peacefully atop the island, has been inexplicably enraged lately. Valoo’s fury has made it impossible for the young Rito to approach him and receive their scale – a ritual each Rito must undergo to grow their wings. In short, the Rito have a serious problem that only a brave outsider might help solve. The chieftain says they will help you find your goal (you seek Din’s Pearl from Valoo) after they deal with calming Valoo. He asks you to speak with his son, Prince Komali, who has been isolating himself due to the crisis. The chieftain hopes you can cheer Komali or give him courage. With that, the chieftain departs deeper into the aerie.


Item: Delivery Bag
After the chieftain leaves, Quill approaches and hands you the Delivery Bag. This is a postal carrier’s satchel (identical to Quill’s own) and it will let you hold letters and delivery items. It has eight slots to keep various mail and quest items organized. This gift is immediately useful: to win over Prince Komali, you’ll need to deliver something to him.

Quill directs you to a young Rito girl named Medli for more information, then he returns to his duties. Take a moment to equip the Delivery Bag in your inventory screen. Now find Medli: go up the ramp along the outer wall of this main hall and enter the first room on the left. Inside, you see a young Rito with orange-brown clothing and a harp slung on her back – this is Medli. Speak to her. Medli is kind and earnest; she recognizes you as the outsider Quill mentioned. She hands you a letter from the chieftain addressed to his son, Komali. Father’s Letter is now in your Delivery Bag. Medli asks if you could deliver it to Prince Komali to perhaps ease his troubled heart. She also mentions she’ll be waiting by the entrance to Dragon Roost Cavern (the path to Valoo) afterward, hoping to go in and calm Valoo herself, but she might need your help to get there. Agree to meet her later. For now, you have a letter to deliver.


Komali’s room is one level down. Exit Medli’s room and go down the ramp to the bottom floor of the aerie. The guarded door leads back outside (we’ll head there soon), but first, deliver the letter. Across the central chamber at ground level is another doorway leading to Prince Komali’s quarters.


Enter Komali’s room to find the young Rito prince clutching a glowing red orb (Din’s Pearl itself!). He’s suspicious of you, a stranger. Open your Delivery Bag, equip Father’s Letter, and use it while facing Komali to hand it over. Komali reads his father’s words urging him to be brave. Unfortunately, the prince remains dejected and cynical. He feels helpless because Valoo’s rage means he cannot get his scale to grow his wings. He doesn’t yet trust you, a stranger, to help. After some curt remarks, Komali turns away. Though the letter didn’t cheer him up immediately, you’ve at least initiated contact. (Don’t worry, Komali will come around in due time – especially after you deal with Valoo’s problem.) With your current mission from the chieftain as complete as it can be for now, it’s time to assist Medli at the cavern entrance.


Before leaving the Rito Aerie, now is a good time to take advantage of an Optional Mini-Game here for a future Heart Piece and some cash: the Mail Sorting game. The Rito run the island’s mail center on the upper level of this hall. Climb back up the ramp to the second floor and find Koboli, the Rito postal worker at the desk sorting letters.

Your goal is to sort at least 10 letters correctly to “impress” Koboli. On your first try, reach 10 and he’ll reward you with 1 Rupee per letter as payment (and offer you a job). Keep sorting again and aim higher – 20 letters, then 25. If you manage 25 letters sorted in time, Koboli is amazed and says he needs to hire an assistant postman! With one round done, we’ll move on and pick up this side quest later on.


Medli’s Request and the First Empty Bottle
Step outside from the bottom floor of the Rito hall, and you’ll find yourself in a dusty, cavernous exterior area at the foot of Dragon Roost’s peak. This is the path toward the Dragon Roost Cavern (the dungeon where Valoo resides), but currently the way is partly flooded and impassable. As you move left, you’ll see Medli waiting down in a shallow pit where a bridge used to span across. Jump down to meet her.


Empty Bottle #1 of 4: Getting Medli to High Ground
Time for some teamwork: offer to help Medli. She asks you to throw her up to the ledge across the broken bridge. Pick up Medli and stand on the rock platform. Face the ledge where you see a cave entrance and wait for the wind to blow toward it (watch the little embers/ashes drifting in the breeze). When the timing is right, run forward and toss Medli. If done correctly, she’ll catch the ledge and climb up. Success! Medli is grateful for the boost and rewards you with an Empty Bottle – your very first bottle. Bottles are incredibly useful for holding potions, fairies, water, etc., so this is a big win.


Medli heads off through the door on the high ledge to continue her mission. You’ll see her again later. For now, pocket that bottle and get ready to use it. Your next task is opening the way to Dragon Roost Cavern (the dungeon). The problem: the pool of water here is dried up and the entrance is blocked. In the center of this area is a rock wall with the carved stone face of the Rito deity. That stone wall is actually the sealed dungeon entrance, currently unreachable due to a pit of lava and missing bridge. There’s also a large, cracked boulder sitting in the middle of the dry pond bed, acting as a plug.
We need to get water flowing here again. Fill your new Empty Bottle with water from the small spring puddles near the broken bridge (there’s water trickling around the base of the pit Medli was in).


Now climb back up to where you came out of the Rito hall, using the short broken ladder. You’ll see two withered-looking Bomb Flowers on this higher ledge. These plants need water to bloom. Stand by one and use the filled bottle to pour water on the Bomb Flower. With a splash, the plant revives into a healthy Bomb Flower! Pluck the Bomb and carefully toss it down toward that big cracked boulder below. The goal is to break that rock without the bomb falling into the dry pit and fizzing out. One trick is to wait a second or two after picking the bomb (until it flashes faster), then throw it so it explodes in midair right on the boulder. Another method is to try to drop the bomb directly on top of the boulder from the ledge. Either way, after a couple of attempts, BOOM! The boulder shatters. This unplugs the spring – water gushes out, quickly filling the pit and creating a small lake. The once-dry area is now a pond you can swim in.


On the other side of the new pond, climb up and you’ll see the grand entrance to Dragon Roost Cavern, guarded by two stone statues holding pots. These statues will spit fire if you get too close, and the door is sealed. To open it, you need to destroy both statues. Luckily, bomb flowers are growing on a ledge to the right. Pick a bomb, hop onto the now-floating wooden platform, and toss the bomb into the first statue’s pot/bowl. Aim carefully and boom – the statue shatters, turning into a makeshift stepping stone in the lava below. Jump to that platform, grab another bomb, and throw it into the second statue. With both guardian statues blown to bits, the huge stone door slides open. Take a deep breath, because you’re about to enter your very first dungeon!


Inside Dragon Roost Cavern – Dungeon Walkthrough
Welcome to Dragon Roost Cavern, the fiery first dungeon. The atmosphere here is literally hot – molten lava pools, wooden bridges, and plenty of enemies stand between you and Valoo’s summit. But don’t worry, we’ll navigate it step by step in a fun way. As with any Zelda dungeon, keep your eyes peeled for treasure chests (maps, keys, etc.) and be ready to use your brain and your courage to solve puzzles. Ahead, you’ll find two statue blocks, pull the block to the left out and then push the block to the right behind it. Proceed through the revealed passage.


Small Key #1 – Lighting the Torches in the First Room
The first chamber is a small cave with a few wooden barrels and two unlit torches. A lone Bokoblin drops down to ambush you from a high ledge. Take it out with your sword (these guys are pretty weak). Once it’s defeated, the barred door ahead unlocks. Before leaving, smash the barrels for supplies and look around for a chest. You’ll find one tucked beside the wall where the Bokoblin jumped down. Open it to obtain a Small Key (1). This will open the locked door in the room. Use the small key on the door and head deeper into the cavern.


The next area is a long wooden walkway wrapping around a large lava-filled cavern. Immediately to your left is a flimsy wooden barricade – slash it to break through. Proceed along the wooden catwalk. You’ll pass a locked door on your left, but ignore it for now; we’ll come back once we find another key. Continue forward on the winding bridge. Soon, part of the bridge is missing – it’s a gap with a lower rock platform visible beneath. Jump down onto that rock. There’s a block set into the wall here. Grab and pull the block out so you can climb up on it. From the top of the block, jump across to the far side of the broken bridge and keep moving.


Around the next bend, you’ll encounter another gap in the bridge, this one periodically belching a plume of flame from below. Time your jump for when the fire subsides, then leap across. Be careful of the Red Keese (fire bats) fluttering about – defeat them with your sword or simply avoid their dive-bombs to prevent getting knocked off. Once you’re across that gap, you’ll see a high ledge with a huge boulder blocking a door ahead. Conveniently, several Bomb Flowers grow on the cliff wall to the left of that boulder. But they’re out of reach if you try to pick them. Instead, grab one of the small rocks or pots lying on the ground and throw it at the Bomb Flowers on the wall. This will detonate one of the bomb plants, which in turn blows up the big boulder across the gap. The explosion reveals a doorway behind where the boulder was. Proceed ahead through it.


Dungeon Map – Crossing the Lava Pit
Beyond the locked door, a tunnel leads you into a small chamber split by a pool of lava. The air here ripples with heat. A large bubbling lava pit separates you from a high ledge on the far side, where you can see a tempting treasure chest. There’s no way to jump the gap safely… but the solution is right by the entrance. You’ll see a couple of large water-filled jars near the doorway. Pick up a water jar and toss it into the center of the lava pool. The water cools the lava for a moment, solidifying it into a temporary rock platform. Move quickly—jump onto the newly formed rock and then leap across to the far ledge before the platform sinks back into magma.


Open the chest on this ledge to obtain the Dungeon Map. Now you can view the dungeon’s layout, which will help in navigation. With map in hand, grab another water jar from next to the chest and throw it into the lava to create another short-lived platform. Jump onto it and quickly hop to the opposite side of the room (the side opposite where you first entered, not back to the door). Here you find a ladder leading upward. Climb the ladder, but be ready – a Red ChuChu flops down from the ceiling to attack as you near the top! Lure the gooey red ChuChu down and defeat it with a few sword strikes (two hits will do). If you like, pick up the Red Chu Jelly it drops as a spoil; collecting enough of these can be used to brew red potions later. Once the ChuChu is dealt with, continue through the door at the top of the ladder.


Small Key #2 – Boarded Doors and a Hidden Chest
In the next hallway, you’ll see a wooden barricade blocking a doorway directly ahead. As you approach, a Bokoblin smashes through the boarded door from the other side and attacks! Lock onto the Bokoblin and defeat it with your sword. After the fight, pick up the Bokoblin’s machete-like sword that it dropped. You can use this hefty weapon to break through barriers. Face the other boarded-up wall (to the left of where you entered) and swing the Bokoblin’s sword to splinter the wooden boards.


Proceed through the revealed passage. The next area contains a couple of Red ChuChus. Take them out. With the enemies gone, use the borrowed Bokoblin sword one more time to break the second set of boards blocking a nook in this alcove. Behind those planks is a treasure chest. Open it to obtain Small Key #2.


With the second small key in hand, drop back down to the main floor. Head toward the northern wall. Watch out for an ambush of two additional RedChus. Defeat them and proceed through the door.


The Main Cavern: Bombs and Blocked Paths
Alright, stepping through that door brings you into a large, multi-level hub room crackling with heat. Take a moment to get your bearings – you’ll be seeing this area again. Immediately, you’ll notice lava bubbling below and flowing in streams. To your left, across a gap, is a wooden bridge, but it’s currently out of reach.
Look up along the wall near that unreachable bridge. See those two Bomb Flowers growing there? Directly below them sits a hefty-looking boulder blocking a lower opening. We need to deal with that boulder for later, but we can trigger the bombs now. Grab one of the vases nearby and toss it up at the Bomb Flowers (Target them first!). Alternatively, stand close enough and perform a Spin Attack near the wall – the range should be just enough to detonate the bombs. KABOOM! The explosion clears the boulder, revealing a new path below. Proceed forward through the locked door directly across from where you entered this hub.


Fiery Foes and a Path Outside
Through the locked door, you enter a chamber where the temperature spikes again. The ceiling drips with glowing red blobs – Red ChuChus are literally hanging above, ready to drop down on you as you move in. Advance carefully, watching for jiggling blobs, and dispatch each Red ChuChu as it plops to the ground. Use quick slashes or even your shield to stun them if they pile up. Once you’ve cleared the ChuChus, you’ll see another wooden barricade ahead on the left wall. As you approach that boarded-up section, a Bokoblin hidden in a pot busts through the boards and lunges out! Block or dodge its surprise attack, then counter with your sword to defeat this Bokoblin. It will drop another Boko Stick for you.


Pick up the Boko Stick and light it on the nearby torch stand (there should be a lit torch in one corner). Now locate the second boarded-up doorway on the opposite side of the room (to the right if your back was to the entry). Toss or swing your lit stick to burn down those wooden boards, revealing a pressure switch on the floor. Step onto the switch and you’ll hear a satisfying clunk as the barred door in the room unlocks.


Go through the newly opened door and inhale a gulp of fresh air – you’re outside on the mountainside of Dragon Roost. You’ve emerged partway up the volcano’s slope. It’s a brief but welcome respite from the sweltering interior.

Mountainside Ascent (Outside)
Turn right and cross the wooden bridge spanning a chasm. Halfway across, a Bokoblin leaps in your way, brandishing its weapon. Engage it on solid ground (try not to fight while on the bridge; the Bokoblin’s swings could cut the bridge’s ropes!). Defeat the Bokoblin on the far side. Now climb the tall ladder that leads further up the cliffside. Caution: The ladder has a charred, weakened section near the top. As you climb, you’ll see and hear flames intermittently shooting from the wall through that burnt section. Time your ascent to avoid the flames – climb quickly past the charred rung area right after a burst of fire subsides. If you linger too long on the burnt part, a sudden flame jet can knock you off.


At the top of the ladder, a Kargaroc (a large, red bird with a razor beak) attacks from its perch. It swoops down screeching. Raise your shield or roll to avoid its dive, then strike with your sword when it hovers low. Two or three hits will defeat the Kargaroc. With the hostile bird dealt with, look ahead: the path forward is a narrow ledge along the cliff wall. Flames shoot out from a crack in this wall as well, blocking a portion of the path. You’ll need to sidle across the narrow section carefully. Approach the ledge and press against the wall to sidle (shimmy sideways). Move only when the flame jet stops spouting. Quickly scoot past before the fire resumes.


On the other side of the flame vent, you can drop down to a safer foothold. A large boulder blocks a doorway here. Conveniently, there’s a Bomb Flower growing on the ledge above it. Climb up to the Bomb Flower (there are a couple of ledges you can mantle onto). Pick the Bomb Flower and toss it down to the boulder you just passed. The bomb explodes and blows up the boulder, revealing a doorway. Drop down and enter this door.


Compass – The Block Puzzle Room (2F)
Inside, you find yourself in a room stacked with giant stone blocks. This is a simple block puzzle that creates a staircase. First, grab the bottom-center block and pull it out toward you. Then pick either the left or right bottom block and pull it out as well. With one block pulled out from the middle and one from a side, you’ve effectively made a set of steps. Climb up the blocks like stairs to reach the upper opening. Go through to the next area – you’ve now reached the second floor (2F) of the cavern.


Immediately upon entering, your boat guide, the King of Red Lions, telepathically warns you about scampering rats in this chamber. The rats hide in holes and might steal your Rupees if you’re not careful. (If you have All-Purpose Bait, you can drop some near a rat hole to lure them out; sometimes they’ll sell you items as a secret shop, but this isn’t required.) For now, proceed with caution and cut down any rats that dash at you.


This room also contains a high ledge that you can’t quite reach by jumping. Notice a block embedded in the wall on the left side. Pull out the block from the wall; it slides out and stays put. Use it as a step to climb up to the upper ledge. On this ledge, you’ll find a fancy treasure chest tucked in a corner. Open it to obtain the Dungeon Compass. With the Compass, your dungeon map will now also show the locations of chests and the boss, as well as your own location, which is extremely handy for thorough exploration.


After celebrating your compass acquisition, there’s more to do in this room. From the compass chest, look toward the barred doorway on ground level: you’ll spot a pile of wooden boards blocking a niche high on the wall across from the entrance. In the corner near that barred door, there’s a large earthenware jar full of Boko Sticks. Smash the jar to grab a Boko Stick, then light it on the lit torch nearby. Face the boarded-up niche and throw the lit stick at it (or climb and run closer, then swing) to burn the boards away. A small chest was hiding behind the planks. Open it to claim Small Key #3.


Use this newly acquired key to unlock the barred door in this room (the locked door right next to the broken jar). Now head through that door to step back outside again.

Small Key #4 – The Kargaroc’s Nest
Back outside on the mountainside, you’re at a higher elevation than before. It’s a small exterior ledge with a staircase leading further up. Ascend the stone stairway and hop across a couple of gaps where sections of the stairs have crumbled away. At the top, you’ll see a locked door on your right – and on your left, a large nest occupied by another Kargaroc. That door is your goal, but you need a key first… and that bird seems to be guarding something shiny.

Immediately turn left and engage the Kargaroc before it can surprise you. Use the same strategy as before: block its swooping attack with your shield or dodge, then slash it when it hovers. After a few hits, the Kargaroc will be defeated. Look into its nest on the ground – sure enough, amidst the twigs lies Small Key #4, likely stolen by the bird. Grab the key from the nest.

Now use Small Key #4 to unlock the nearby door on this ledge. Head inside to return to the fiery interior of the dungeon once more.

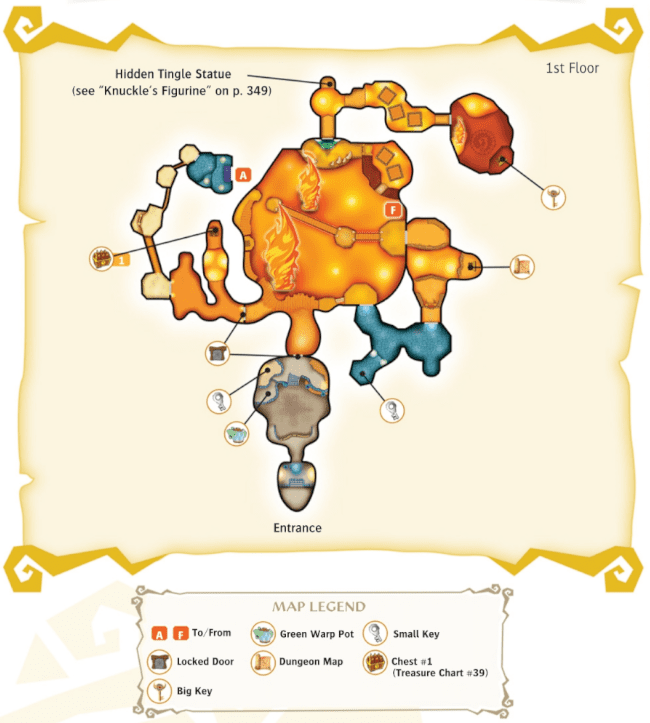
(Optional) Treasure Chart #39 – The Bokoblin Guarded Chest
The door brings you into a dark, cavernous room. It’s dimly lit, but you can make out pots and unlit torches scattered about. As you move forward, a few fire Keese (flaming bats) will flutter down from the ceiling beams. Before you get swarmed, quickly locate the torch stand in the center of the room. There’s a convenient jar of Boko Sticks by the entrance; grab one, light it on the small flame at the doorway, and run to light the central torch stand. The sudden light source helps immensely. Now target the Keese flapping around. Use your sword or even a quick slingshot/boomerang if you have one, and swat down all the Keese. With the room clear, a chest appears at the back. Open it to find a Joy Pendant (these are collectible spoils — keep it, as they’ll be useful later in your quest).


Before leaving this room, there’s one more task: burn through another wooden barrier blocking the exit corridor. Light a Boko Stick again and burn down the planks sealing the path forward. Go down that corridor and light the two torches at the very end of the hall. This action unlocks the heavy door ahead, leading you back into the central magma cavern on a higher ledge. You’ve essentially looped around and climbed upward.


Step into this new area carefully. Right as you enter, there’s a Bomb Flower and a warped, sealed cauldron on the floor. Use the Bomb Flower to blow the rock off the cauldron, activating the second Warp Pot in the dungeon. Now you can use these green-smoke cauldrons to warp between the dungeon’s entry area and this mid-point (just climb in one pot to pop out the other). It’s a useful shortcut if you need to leave and re-enter or if you fall and want to get back up here quickly.

A wooden bridge spans the lava in front of you. Cross this bridge to the other side. On the far side, go through the door you find there.

Inside the next chamber, the door slams shut behind you and locks — it’s an ambush! Several Bokoblins lurk here. Two attack immediately, and more are actually hiding in tall pots on shelves. Focus on the visible Bokoblins first. Block or dodge their initial strikes, then counterattack and finish them. Now, to flush out the others: perform a roll into the walls or the base of the shelves to knock down the pots, forcing any hiding Bokoblins to tumble out. Soon, all three (or more) Bokoblins in the room will engage you. Use spin attacks or targeted slashes to defeat each one in turn.


Treasure Chart #39 (Collectible #4 of 41)
When the last Bokoblin falls, the door unlocks – but don’t leave yet. One of the defeated Bokoblins likely dropped a Boko Stick. Pick it up and light it on the lone torch in the room (or any still burning embers). You’ll notice there are two torch stands here: one might already be lit, and another stands unlit. Locate the unlit torch stand (often on a ledge or opposite the lit one) and set it ablaze with your lit stick. Upon lighting the second torch, a treasure chest spawns between the torches. Open the chest to claim Treasure Chart #39.


With the room cleared and the chart in hand, exit through the now-unlocked door. Climb the ladder in the ambush room (if you haven’t already to get the chest) and head out to the next area.
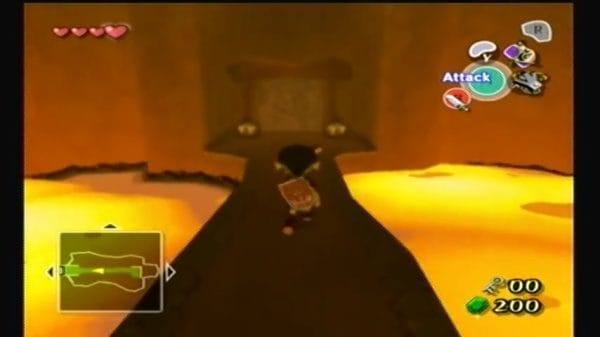
Riding the Lava – Reaching the Upper Levels
The next cavern is a small lava-filled chamber with a lone rock platform in the center and a Magtail – a giant, centipede-like lava creature – crawling around on it. This fiery enemy can be intimidating, but there’s a trick. Grab a water jar from near the door (there are usually water jars provided in this room) and hurl it at the Magtail. The cooling splash will cause the Magtail to instantly curl up into a rigid ball. Quickly jump to the central rock island and strike the Magtail a couple of times to finish it off while it’s defenseless. With the Magtail gone, jump back to the edge to fetch another water jar.

Now, observe the lava around you: one spot is bubbling intensely, a sure sign that a lava geyser is about to erupt there periodically. Stand on the central rock island and watch for the timing. When the bubbling spot calms briefly, throw a water jar onto that bubbling lava. It will create a temporary solid platform right over the heat vent. Quickly hop onto that new rock platform. In a second, the lava geyser will blast upward, carrying the rock (and you on it) straight up like an elevator! Ride it up and, at the peak of its ascent, jump forward to the high ledge ahead.


Follow the path above to the door and go through it. In this small antechamber, there are two large boulders: one directly in front of the boss door and another to the left. There’s also a Bomb Flower below your ledge. Drop down, grab the bomb and blow up the boulder in front of the boss door first. Destroying it reveals the final Warp Pot of the dungeon. Now all the Warp Pots are active; you can jump in this blue-green cauldron to warp between the dungeon’s entrance, the mid-point (the area where you lit two torches after the dark room), and here. This provides a quick shortcut back up if needed. Next, use another Bomb Flower to blow up the boulder on the left side of the room. With a bang, it reveals a doorway. Head through this new door.


The Crumbling Stairs (Outside Again)
Fresh air hits you as you find yourself outdoors on the mountainside once more, now very high up near Dragon Roost’s peak. Above you looms the dragon Valoo, roaring and thrashing his tail — clearly still upset. You’re nearly at the summit where he perches.

From the door, immediately start running up the stone staircase carved into the cliff. These stairs are old and begin to crumble away under your feet as soon as you step on them! Don’t stop; sprint upward as fast as Link can go. If you hesitate, the collapsing steps can drop you back down. Zigzag if needed to avoid any sections falling ahead, but keep moving. At the top of the crumbling staircase, dash through the doorway.

Inside, you finally reach the aerie near the summit — only to be confronted by a worrying sight: Medli, the Rito girl you helped earlier, is being held captive! She’s tied up just ahead, guarded by a pair of Bokoblins. It’s time for the Mini-Boss fight of this dungeon.

Mini-Boss Fight – Rescue Medli
As you step forward, two green Bokoblins charge at you to protect their prisoner. Engage them quickly. Use jump attacks or a spin attack to hit both at once, or take them down one at a time with combos. With your improved skills, they should fall without too much trouble. Once the Bokoblins are defeated, a shadow passes overhead – a Kargaroc swoops in and drops a much larger foe onto the platform. A hulking Moblin lands with a thud, brandishing a long spear.


This Moblin is the mini-boss proper. He’s bulky and hits hard with that spear, but he’s also slow and has an obvious weakness. Lock onto the Moblin and circle strafe to avoid his lunging jabs. After a thrust, he’ll frequently expose his back or get momentarily off-balance. Dodge and get behind him, then strike the Moblin’s back side repeatedly. He’ll howl and scramble away comically when you land rear attacks, giving you a chance to reposition. Another tactic is to wait for him to swing, then use a parry attack (if you have the Hero’s Sword, watch for the A-button prompt) to roll around or leap over and land hits from behind. It takes a good number of slashes, but eventually the big brute collapses with a groan.


When the Moblin is defeated, he coughs up a glowing orb of loot. Break the orb to spill its goodies. Among the spoils, you should see a Skull Necklace – a collectible trinket that Moblins often carry. Skull Necklace (Optional): Be sure to grab this item before moving on. It’s optional, but these necklaces can be traded later in the game for rewards. You may also find some hearts or Rupees in the orb to refill your health after the fight. With the enemies vanquished, Medli is safe. Approach her to untie her.


Medli thanks you profusely for rescuing her. She reveals what she learned: a creature has been tormenting Valoo by attacking the dragon’s tail from below, which is the cause of all the rage and tremors. Knowing you’ll need help to reach Valoo’s tail, Medli gives you a special treasure of the Rito: the Grappling Hook!


Item: Grappling Hook
This Grappling Hook is essentially a sturdy rope with a claw at the end – an invaluable tool for any adventurer. It functions like a hookshot or whip: you can latch onto wooden Grappling Posts (look for pegs or poles sticking out overhead) and swing across gaps like a vine. The Grappling Hook also has other uses: in combat, you can use it to steal spoils from enemies (snatch Joy Pendants from Bokoblins, Skull Necklaces from Moblins, etc.), and when sailing later, it doubles as a crane to haul up treasure from the sea. For now, its swinging ability will help you traverse the upper parts of this dungeon.
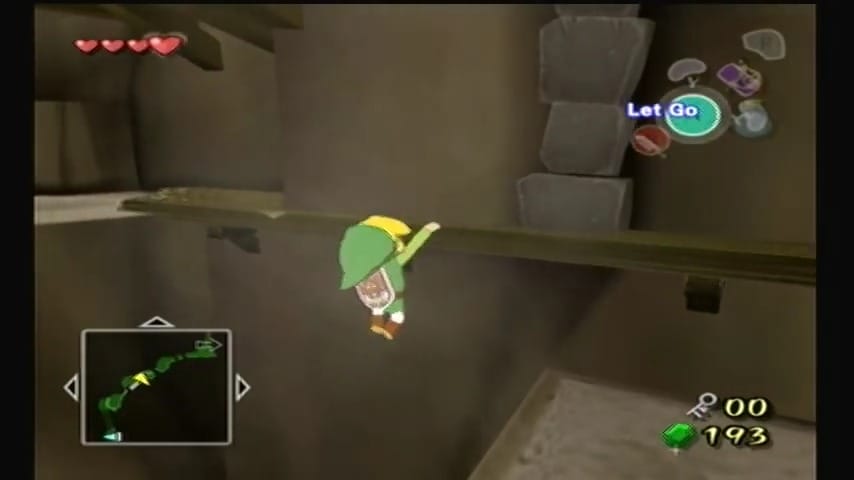
Medli gives you a quick tutorial. Climb the short stairs next to her and you’ll see an overhead wooden pole on the ceiling ahead. This is a Grappling point. Equip the Grappling Hook and aim at the wooden pole. The targeting reticle will change when pointed at a valid grapple spot. Press the button to latch on – Link will swing from the rope. Swing across to the opposite ledge, then press the release button to drop when you’re over solid ground. Medli claps and encourages you onward. There’s another gap immediately after, with a second Grappling post. Use the Grappling Hook again to swing over the next gap in the rocky corridor.


You land in front of a brittle-looking wooden barrier. Smash the wooden panels with your sword (or roll through them) and drop down to the area below. Continue using your Grappling Hook to descend the exterior of the mountain until you reach the door. Step through and you’ll find yourself back inside the upper level of the big lava cavern.

Toward the Big Key – Swinging and Switching
Through the door, you step onto a wooden bridge high above a lava lake. A Bokoblin immediately confronts you on this bridge. Use your new Grappling Hook on him if you want a Joy Pendant (target and use the hook to snatch it away), then finish him with your sword. As you cross to the middle of the bridge, another Bokoblin hops out of a pot on the far side and attacks. Defeat this one as well (steal another pendant if you like). When both Bokoblins are down, a chest appears on the lowest level of this room, far below the bridge.


Now, to reach that chest and continue, you actually have to collapse the bridge you’re standing on. Position yourself at the center of the rope bridge and ready your sword. Perform a spin attack (or any sweeping attack) to cut the rope supports of the bridge. All at once, the ropes snap and the whole bridge gives way! Link falls along with the debris, landing on a rocky platform below. (If you have full health, you won’t take damage from this planned fall.) Down here, open the newly appeared chest to collect another Joy Pendant – another optional goodie that will be useful later.


There’s a door on this lower level, so go through it to proceed. You’re now at the base of a tall vertical shaft within the mountain, where an interesting puzzle awaits.
In this tall lava room, a large weighted platform hangs suspended by ropes over a pool of lava. On the far side is a closed gate with no obvious switch, and above you on a high ledge you can see another doorway. First, climb the stairs up the side to reach the top of the suspended platform. This platform is attached to the ceiling by three ropes at its edges. The goal here is to cut those ropes so the platform will drop like an elevator. Stand in the middle of the platform for the best reach, and do a charged spin attack to sever all three ropes in one go (or quickly slash them one by one, but be careful not to fall off). The platform, now free, plunges down into the lava, then stops just above it, creating a stable floor at lava level.

From this lowered platform, a new route opens: there’s an archway in the wall that was previously too high to reach but is now accessible. Step through the arch to a series of rocky stepping stones and make your way forward. Jump across a few small platforms in the lava (they’re stable rock chunks) until you reach a ladder. Climb up the ladder to a small ledge with yet another locked door. This door has no keyhole – instead, there’s a curious hook mechanism high above it. Turn around to face back toward the center of the cavern, and you’ll spot a wooden Grappling Hook peg on a column above.


This is a hook switch that opens the door when pulled. Use your Grappling Hook to target the distant peg and latch on. Don’t swing over; instead, while hanging on the rope, pull back. The tension will momentarily jerk the switch, triggering the locked door to pop open. Once you see the door unlocked, swing back to the ledge you came from and hop off the rope. Now go through the now-unlocked door.


The next room is another lava-filled chamber with a high roof. There’s a prominent Grappling Post hanging from the ceiling in the middle of the room. This section will test your new item further. Stand at the edge and aim for the overhead post. Grapple it and swing, but don’t immediately jump off in the same direction – instead, stop your swing mid-air (hold R on GameCube, or the equivalent button, to halt) and rotate to face a new direction. You should see another ledge off to the right side with more platforms. Start swinging toward that side and jump to the ledge. From there, hop across a couple more small platforms over the lava to reach another Grappling point. Use the Grappling Hook on that second overhead peg and swing across the last gap. Land safely on the far side and go through the door.


Big Key – Puzzle of the Magtail and Flames
You’ve reached a crucial chamber – inside is the chest containing the Big Key, which opens the boss’s door. However, it’s guarded by a trap. The chest sits behind a circle of tall flames on your left. On the right, a lava pit burbles, and from it emerges a Magtail (another of those lava centipedes). In the center of the room is a pressure switch plate on the floor, which clearly will extinguish the flames if weighted down. The problem: the switch is too large and heavy for you alone to keep depressed, and it’s across the flames from the chest.

Here’s how to solve it. First, deal with the Magtail: lure it toward you and either fight it normally or use the Grappling Hook trick. The Magtail will open its pincers and expose a glowing eye when it’s about to attack. One strategy is to target that eye with the Grappling Hook – hitting it stuns the Magtail and makes it curl into a ball. (Two hits with the hook usually force it to curl up.) Alternatively, strike its eye with your sword after it lunges to also make it curl up. Once the Magtail is curled into a tight ball, pick up the creature – yes, you can lift it while it’s rolled up! Carry the curled Magtail and place it onto the floor switch in the middle of the room. Its weight will hold the pressure plate down, and you’ll hear the flames around the Big Key chest sizzle out.


Now hurry over to the now-accessible chest and open it to claim the Big Key. This key is large and ornate, used to unlock the Boss Door you saw earlier. With the Big Key in hand, you’re almost ready to confront the boss of Dragon Roost Cavern.

Exit the Big Key room the way you came in (through the door opposite the chest). We’re going to head back to the boss door antechamber. But before you rush off to battle, there’s one last optional goodie you can collect now that you have the Grappling Hook…
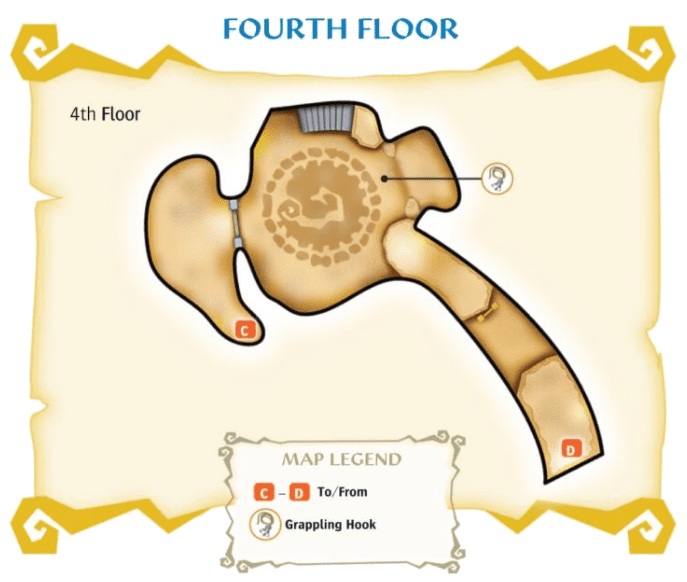
Treasure Chart #11 – Hidden Chest Back on 2F (Collectible #5 of 41)
If you’re aiming for 100% completion, Treasure Chart #11 is hidden in this dungeon and now obtainable with your Grappling Hook. To save time, we’ll use the dungeon’s warp pots for this. From the Big Key room exit, you should be back in the tall lava cavern where you dropped the hanging platform. Use your Grappling Hook to get back across the lava the way you came (swing across the peg again). Climb down the ladder you came up, and hop back to where the blue Warp Pot is at the base of the boss door ledge (the pot you revealed by bombing the boulder). Jump into the blue Warp Pot, and it will teleport you to another pot. If you pop out in the wrong pot, jump in again until you appear in the first room’s Warp Pot (the one from the beginning of the dungeon).


From that first room warp, head through the door into the lava jar room where you got the Dungeon Map on 1F (use your map to locate the room on 2F marked as unexplored or with a chest). Work your way back to the room on 2F that you haven’t fully explored This is the lava-filled room you encountered early on, now revisited with the Grappling Hook in hand.

Once there, follow these steps: go down the hallway and take the first left, then through a doorway to a familiar lava pit chamber. This area had an unreachable platform before. Look up – there are Grappling Hook pegs overhead now visible. Target the wooden bar above the wide lava gap and grapple across to the far side. On that ledge, you’ll see some brittle wooden panels on the wall. Smash or roll through these breakable panels to reveal a hidden alcove with a chest. Open it to obtain Treasure Chart #11.


With Treasure Chart #11 in your possession, backtrack: exit the secret room, and use the warp pot network again to return to the boss door area. Jump into the warp pot on this side (it’ll take you back to the blue pot near the boss door on 3F).


Back to the Boss Door
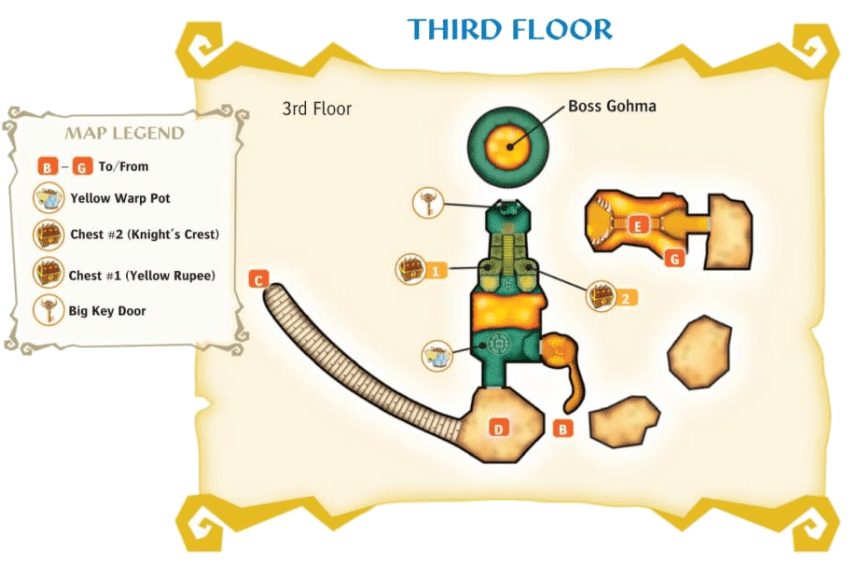
Use your Grapple Hook to navigate over the lava. Halfway up the stairs lies a chest with a Knight’s Crest. At the top of the stairs you’ll spot the Boss Door. Take a deep breath and make sure you’re prepared (break any nearby pots for hearts or magic). When ready, step through it with your Boss Key to confront the boss of Dragon Roost Cavern.


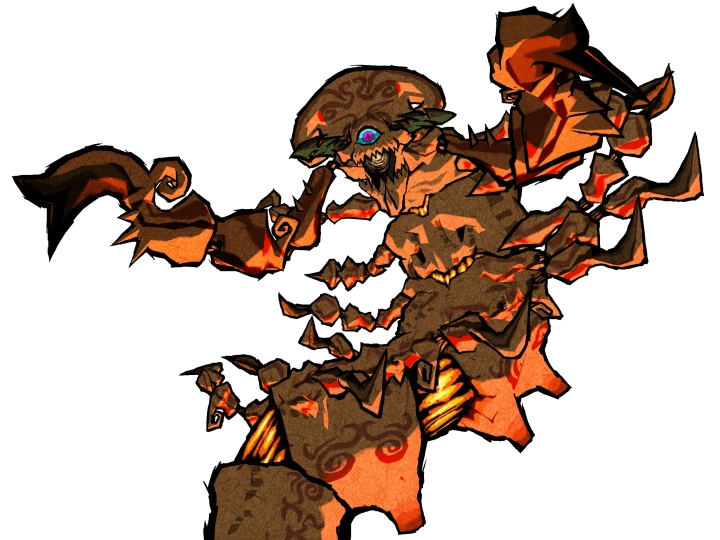
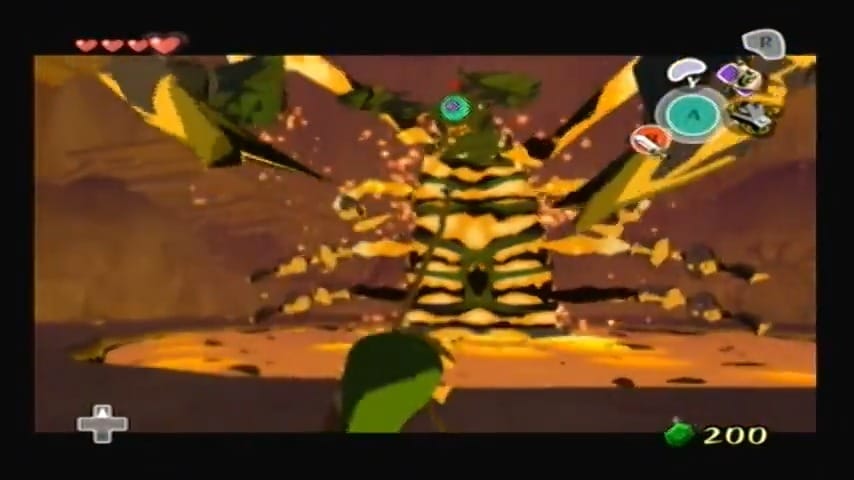
Boss Battle: Gohma – Scourge of Dragon Roost
Gohma, a fiery lava scorpion, is ready to rumble under Valoo’s lair. The boss of Dragon Roost Cavern is Gohma, a giant molten-rock arachnid with one huge eye. Don’t panic – we have a strategy! Gohma might look intimidating, but this battle is all about using the environment to your advantage.

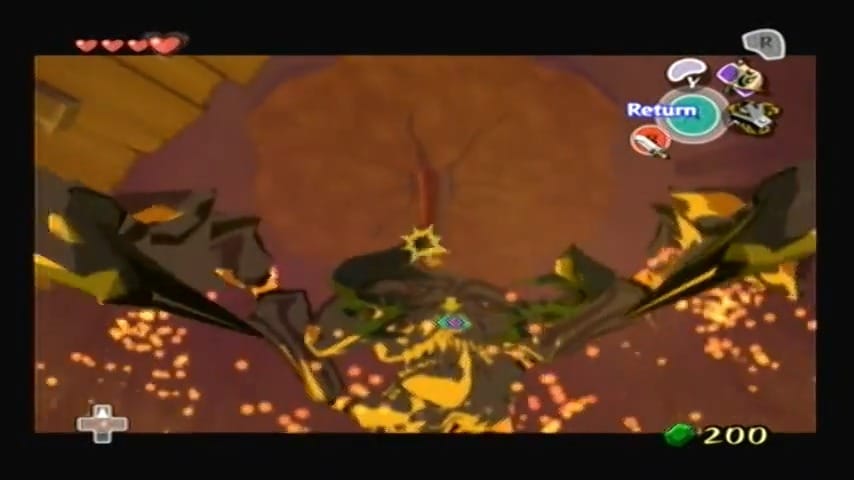
Phase 1 – Break the Armor
Notice Valoo’s massive tail dangling through the ceiling of the arena. That’s the key. Lock onto Gohma (L-target the eye) to keep it in view. You can’t hurt its outer shell with your sword, so don’t attack Gohma directly just yet. Instead, face toward where Valoo’s tail hangs and use your Grappling Hook in first-person mode to latch onto the dragon’s tail. Swing from it and let go to launch yourself across the room. This causes the ceiling to crumble and a chunk of rock to crash down on Gohma’s exoskeleton from above! Gohma will screech as its armor cracks. The trick is to do this three times: as soon as you land, target the tail again (it swings back into position shortly after each hit). Each time you swing and drop the ceiling on Gohma, more of its rocky armor shatters. Meanwhile, Gohma will be swiping at you with its claws or spewing fire, but keep moving and grappling quickly, and you should avoid most attacks. After the third ceiling crash, Gohma’s armor is completely destroyed, revealing a softer, slimier creature underneath. Now the real battle begins.


Phase 2 – The Eye of the Scorpion
With its shell gone, Gohma’s giant glowing eye is exposed – that’s its weak point. The arena is now clear of ceiling debris so you can focus on offense. Gohma becomes more aggressive, scuttling after you and lunging. Target its eye and use the Grappling Hook one more time, but this time pull on Gohma’s eye. This will stun the beast momentarily (in the HD version you can also use the hook to snatch a spoil item if Gohma had one, but it doesn’t). When Gohma is stunned (its eye turns bluish and it stops moving), rush in with your sword and slash away at the eye as much as possible. It will recover and thrash about, so back off when it starts moving again, avoiding its pincer strikes and the occasional flame it might spit. Repeat this process: target the eye, grapple to stun, then slice it up. A few rounds of well-aimed strikes to the eye will finish off the fiery fiend. Watch out for its tantrum in this phase – Gohma might swing its claws widely or charge, but if you keep strafing and using your hook from a distance, it can’t hit you.
After enough hits, Gohma lets out a final roar and disintegrates into a heart container and shiny loot. Victory! You’ve defeated the boss and calmed the turmoil in Dragon Roost Cavern. Grab the full Heart Container that appears (permanently increasing your life by one heart). Then step into the glowing blue whirlwind portal that appears to exit the dungeon.


Aftermath – Din’s Pearl Secured
Link is warped outside to Dragon Roost Island’s peak, where the once-enraged Valoo is now calm and content. Medli and Prince Komali are here too. Enjoy the heartwarming cutscene: Valoo speaks (in Hylian, only the Rito understand) and names you a true hero. Komali, inspired by your deeds and with renewed confidence, approaches and gratefully hands you Din’s Pearl, the sacred gem his grandmother entrusted to him. Hooray! That’s one of the three Pearls down. Komali also seems to have found his courage – he’ll start working to earn his wings from Valoo. Medli thanks you as well, and you’ve clearly made some lifelong friends among the Rito.

After you finish Dragon Roost Cavern and claim Din’s Pearl, don’t head straight back to Windfall—instead turn around at the shore and slip through the tunnel carved into the mountain. Swim across to the tiny outcropping where you’ll see two broken stone tablets standing side by side. Pull out your Wind Waker and play the melody etched into the left tablet—Up, Left, Right—and in that moment you’ll learn the Wind’s Requiem.


Wind Waker Song: Wind’s Requiem
A little frog‐like god named Zephos will drift down to congratulate you and explain that this tune lets you bend the breeze to your will. From then on, whenever you need to change direction at sea, simply conduct Up‑Left‑Right on any wind‐symbol pedestal—most notably that same shrine stone—to call the wind in the exact direction you choose. Your mastery of the winds is now complete; set sail and explore with confidence!
Now that things are peaceful, a few new opportunities open up on Dragon Roost: the Rito can resume their mail duties and you can play the mail sorting game for a prize (if you sort 25 letters or more in 30 seconds, you’ll eventually get a Piece of Heart via mail). Also, one Rito named Kogoli (outside near the postboxes) will later ask for Golden Feathers (which Kargarocs drop) – another future side quest for a reward. Feel free to explore around the island for any missing treasures.
When you’re all set, sail back down to your boat at the docks. Set the wind to south (play the Wind’s Requiem and choose South, because our next journey is to Forest Haven in the southern sea, where the second pearl (Farore’s Pearl) awaits. Climb aboard the King of Red Lions, and off we go to continue the adventure!


But for now, pat yourself on the back – you’ve successfully navigated Windfall’s challenges and conquered Dragon Roost Cavern, all in great style. Enjoy the sense of accomplishment (and that extra heart container’s worth of health). Onward to new horizons, hero of winds!
Spoils: Din’s Pearl obtained. Next stop: The Forest Haven & Forbidden Woods.