


The Wind Waker 100% Completion Walkthrough
- Prologue: Outset Island: Introduction to Link’s home, initial quests, and obtaining the Hero’s Sword and Shield.
- Forsaken Fortress (First Visit): Stealth mechanics and rescuing Aryll.
- Windfall Island: Acquiring the Sail, meeting key characters, and side quests.
- Dragon Roost Island & Cavern: Assisting the Rito tribe, dungeon exploration, and obtaining Din’s Pearl.
- Forest Haven & Forbidden Woods: Meeting the Great Deku Tree, aiding the Koroks, and securing Farore’s Pearl.
- Post-Forbidden Woods Exploration: Collect charts, heart pieces, and upgrades across the southern sea.
- Greatfish Isle & Nayru’s Pearl: Story progression and obtaining the final pearl.
- Great Sea Side Quest Adventure: Explore islands and complete Windfall quests for key upgrades and collectibles.
- Tower of the Gods: Dungeon challenges and gaining access to Hyrule.
- Hyrule Castle: Discovering the Master Sword and storyline developments.
- Post-Hyrule Castle Exploration: Complete trading quests for heart pieces, treasure charts, and the Magic Armor.
- The Forest Water Challenge: Locating and saving each withered tree for a heart piece.
- Forsaken Fortress (Second Visit): Confronting the Helmaroc King and rescuing Aryll.
- Reef Special Charts & Windfall Side Quests: Six-Eye Reefs, Treasure Charts, and Windfall Island side quests.
- Fire Mountain & Ice Ring Isle: Obtain the Power Bracelets and Iron Boots from these elemental islands to access the next temples.
- Earth Temple: Venture with Medli into the Earth Temple to cleanse evil and claim the Mirror Shield.
- Wind Temple: Enter Gale Isle, team up with Makar, and conquer the Wind Temple.
- Gale Isle & the Wind Temple: Enter Gale Isle, team up with Makar, and conquer the Wind Temple.
- Triforce Shard Quest: Locating Triforce Charts, deciphering them, and retrieving Triforce shards.
- Ganon’s Tower: Final challenges, boss rematches, and the ultimate confrontation with Ganondorf.
Table of Contents
Headstone Island – Learning the Earth God’s Lyric
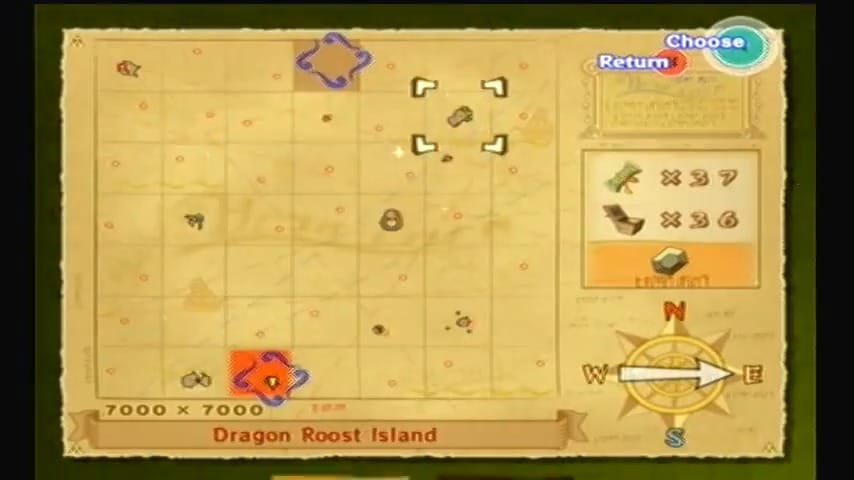
Headstone Island is your gateway to the Earth Temple. It’s located east of Outset Island, so warp to Outset again and sail one square east.


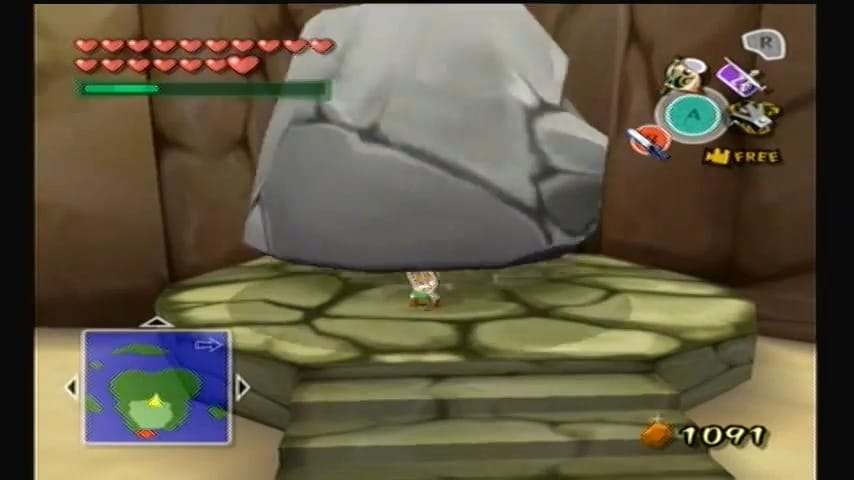
As you arrive, you’ll see that Headstone Island has a large, dome-like slab of rock – the “headstone” – blocking the entrance to a cave. Now that you have the Power Bracelets, you can do something about that. Hop onto the island and walk up to the enormous stone blocking the cave entrance. Press A to grab the headstone, and lift it with all your might. Link hefts the giant slab and tosses it aside, clearing the entrance. Head inside the now-open cave.


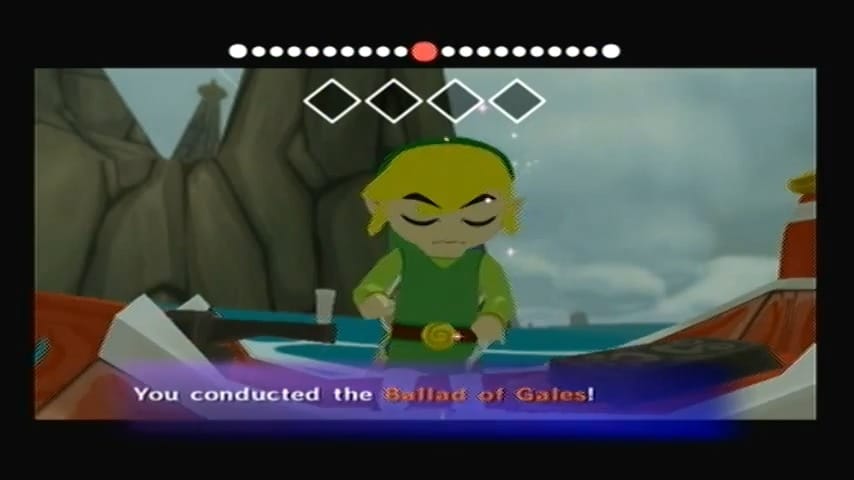
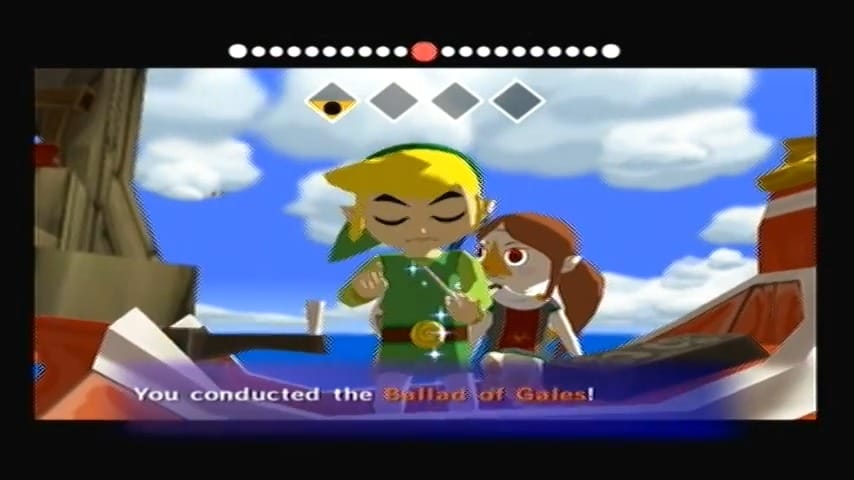
In the cave chamber, the camera will pan to an ancient stone tablet etched with Hylian musical notes. As you approach this mysterious tablet, a ghostly figure materializes behind you. A cutscene plays as Laruto, the Zora sage of ages past, appears in spirit form. She addresses you, explaining that she once served as the Earth Sage, praying to the gods so the Master Sword held the power to repel evil. But she was slain by the Evil King (Ganondorf), and thus the Master Sword has lost that divine power. Laruto teaches you the Earth God’s Lyric, a song that was used in her prayers. Take out your Wind Waker and follow along as the notes appear; the melody is six notes long and alternates between three-four time signatures. Once you successfully conduct the song, you learn the Earth God’s Lyric. Laruto implores you to find the new sage, someone from her bloodline who can carry on her role and restore power to the Master Sword. With a final plea, her spirit fades away, leaving you alone in the silent chamber.


Wind Waker Song: Earth God’s Lyric
A sacred song that awakens the ancient sage Laruto and allows you to command Medli to assist in the Earth Temple.
Now you have a new goal: find the descendant of Laruto’s race (the Zora) who can become the next Earth Sage. The Zora race doesn’t exactly exist in this era of the Great Sea – but perhaps someone in the Rito tribe (who are evolved from the Zoras) might be the sage you seek. If you recall, the Rito Medli carries a harp similar to the one Laruto held, and she’s a dedicated attendant to Valoo. Medli is a strong candidate to be Laruto’s descendant. It’s time to pay a visit to Dragon Roost Island and see if Medli is still there.
Awakening Medli as the Earth Sage (Dragon Roost Island)
Warp to Dragon Roost Island, and head into the Rito tribe’s aerie. Medli wasn’t around the last time you visited, but the Rito chief mentioned she went to pray near Valoo. You’ll need to search a bit to find her. Climb up through Dragon Roost Cavern’s trail as if you were going to visit Valoo again. From the Rito main hall, go up the stairs and out the doorway that leads to the exterior cliffs.
The sun is setting (or rising) as you step outside onto a high ledge of the mountain. To your right, you’ll see a gap with a wooden post on the far side – that’s a target for your Grappling Hook. Latch the hook onto the post and swing across the gap to the next ledge. Continue up the winding path, defeating or avoiding any Red ChuChus that pop up along the way. At the top of the path, you’ll reach a small plateau overlooking the Dragon Roost pond. Here you find Medli, sitting peacefully and playing her harp.
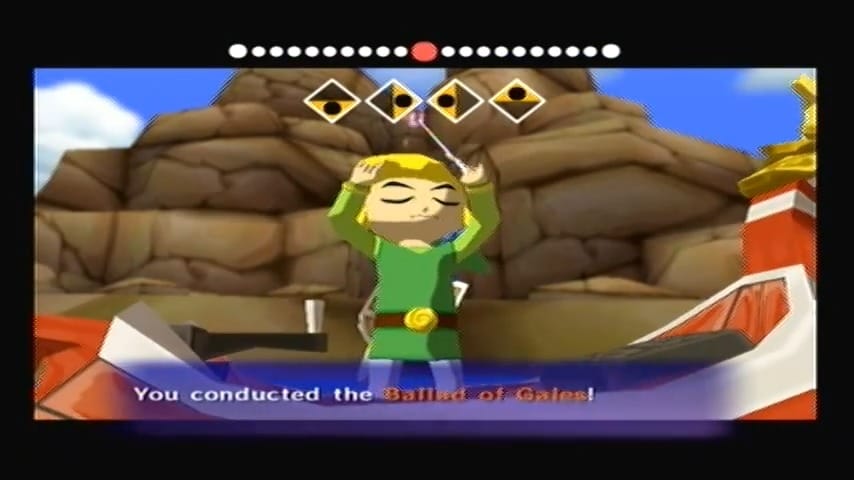

Walk up to Medli and speak with her. She’s happy to see you but mentions she’s been sensing something calling to her through the harp. Stand facing Medli and pull out the Wind Waker. As you begin to conduct the Earth God’s Lyric, Medli is drawn into a trance. A magical scene unfolds: the spirit of Laruto appears in a vision behind Medli and passes on the sage’s legacy. When Medli comes to, she realizes that she is the chosen Earth Sage. The song awakened her true purpose – she now knows she must accompany you to the Earth Temple and pray there to restore the Master Sword’s power. Medli is nervous but determined, saying her duty is important to both her people and yours. With newfound resolve, Medli agrees to travel with you.


After the cutscene, you’ll find yourself back down at the boat with Medli at your side. (The game conveniently brings Medli with you to save time.) Speak to the King of Red Lions, and he’ll let Medli climb in as a passenger. Now set your destination for Headstone Island once more. Warp or sail there with Medli. When you arrive at Headstone, Medli will hop out and gaze at the cave entrance. It’s time to open the path to the Earth Temple.


Inside the cave, stand in front of the large stone seal (the tablet that Laruto’s song was carved on) with Medli nearby. Bring out the Wind Waker and play the Earth God’s Lyric once again. Medli will take out her harp and play along with you, harmonizing the melody. The duet causes an ancient magic to resonate – the massive stone seal crumbles away, revealing a hidden passage leading deep into the earth. With the entrance now open, pick up Medli (if she hasn’t already followed) and venture forth into the Earth Temple.


Earth Temple – Descent into Darkness

Welcome to the Earth Temple, the sixth dungeon of the game. This oppressive subterranean temple is shrouded in darkness and eerie fog. Its chambers are filled with the undead and puzzles that revolve around light and reflection. Both Link and Medli will be crucial here: you must work together, using Medli’s abilities and your new Mirror Shield (to be obtained inside) to solve the light puzzles and defeat shadowy enemies. Keep Medli safe from harm – if monsters grab her, you may need to rescue her before moving on. Remember that you can pick Medli up and carry her, or use the Command Melody (conducted with the Wind Waker) to take control of her directly. Medli’s harp can reflect light just like a mirror, and she can fly for short distances when you control her. With courage and cooperation, you’ll conquer this temple and awaken its ancient power.

You start in a small antechamber. There’s a pit separating you from the door on the opposite side. Pick up Medli and carry her to the edge of the gap. Take a running leap off the ledge – while in mid-air, Medli spreads her wings and glides, carrying both of you across safely. As your momentum wanes over the far ledge, let go of Medli so you both land on solid ground. Regain your grip on her and head through the door into the next room.

In this larger chamber, drop Medli safely in a corner for now. Three bulky Moblins patrol the area (two at the base of the stairs and one more up the steps to the right). Engage the Moblins carefully – they charge with spears, but you can stun them with arrows or simply counter their attacks with your sword. Clear out all three. Once it’s safe, find Medli and carry her up the long staircase along the wall. Partway up, there’s a ledge with a floor switch.
Step on this switch while holding Medli; it doesn’t stay down, so nothing happens yet. Set Medli down on this ledge. Now it’s time to use the Command Melody for the first time here. Take out the Wind Waker and play the Command Melody (♩♩♪♩♮♪) to take control of Medli. As Medli, fly from the ledge and flutter across to a similar ledge on the other side of the room. There you’ll see another floor switch. Step on it with Medli’s small feet. With both switches now pressed (Medli on one, Link on the other), the heavy door down below unlocks. Switch back to Link (press R) and go pick up Medli. Carry her through the newly opened doorway.


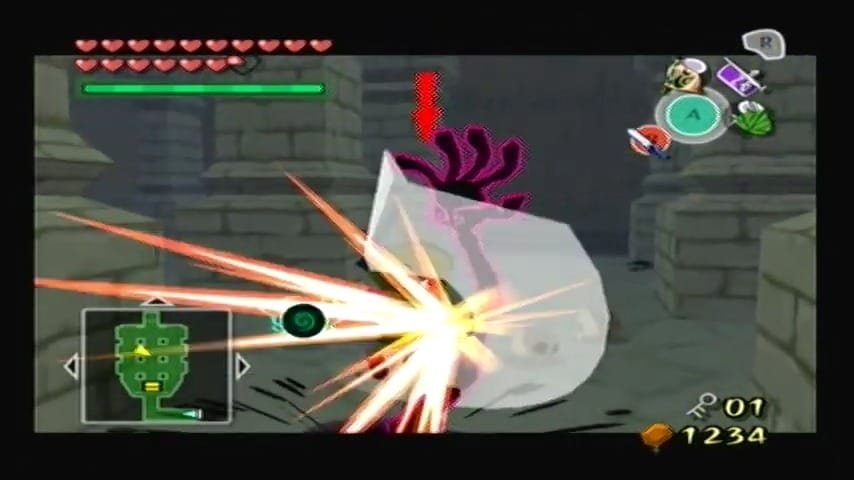
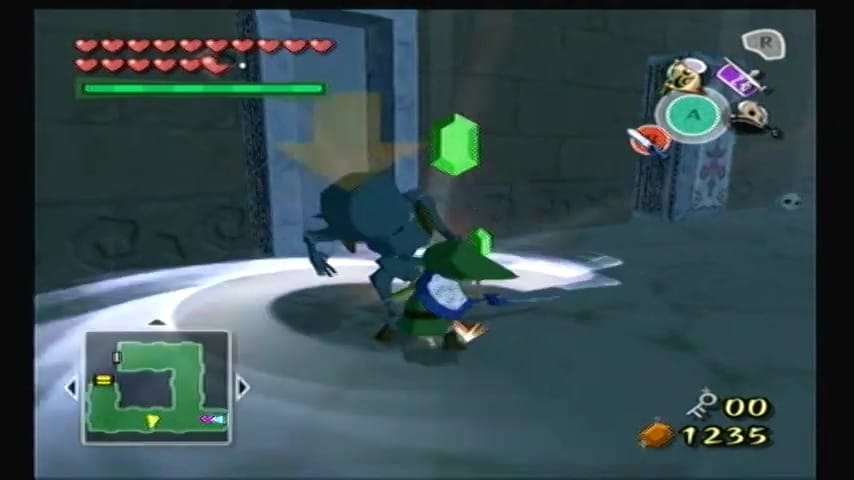
The next chamber is crawling with ChuChus. You’ll immediately be beset by Red ChuChus (standard ones) and Green ChuChus (electric ones). Defeat the red ones with your sword, but be cautious with the green ones: wait for their electricity to stop coursing before striking, or stun them with a projectile first. Once those are dealt with, you’ll notice several strange purple/black ChuChus oozing around – these are Dark ChuChus (also called Black ChuChus). Your sword simply bounces off their shadowy bodies; in this pitch-dark state they are invulnerable.

However, there are beams of light shining into this room from a high window, casting bright spots on the floor. This is your chance to put Medli’s unique skill to use. Position Medli in one of the light patches (or take control of her and stand her in it) and press A to have her raise her harp like a mirror. The harp will reflect a ray of light wherever Medli faces. Aim Medli so that the light shines onto a Dark ChuChu. The radiance will petrify the ChuChu, turning it into a stone statue for a short time. Return to controlling Link, run up to the now-stone Chu, and pick it up.


You can throw the statue or simply let it drop; the impact will shatter the Dark ChuChu into oblivion. Use Medli’s reflected light to stone each of the Dark ChuChus one by one, and destroy them with Link. If Medli isn’t in the right spot, you can also push or carry these Chu statue forms into an abyss to get rid of them. Once all ChuChus are defeated, play the Command Melody again to switch to Medli and reflect light from the ceiling towards the raised platform. There is a hidden chest that lies on it that will be revealed. Open it to obtain the Dungeon Map, which will help you navigate the Earth Temple’s many rooms.


Before leaving, you might notice a large sealed cauldron (a warp pot) in the corner. Burn the wooden boards off it with a Fire Arrow or Bomb to activate it – this will serve as a shortcut later if you need to exit and re-enter the dungeon. When ready, grab Medli and proceed through the door to the next area.


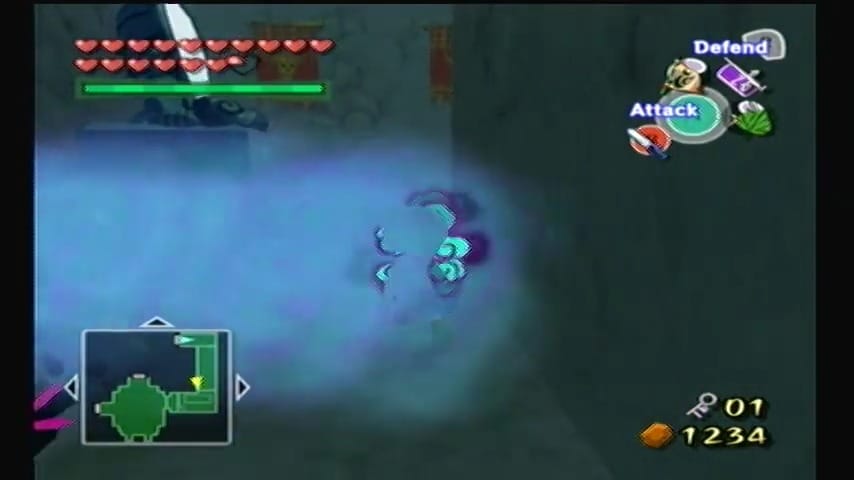
The Big Mirror Chamber (Central Fog Room)
This room is dominated by a large stone idol surrounded by a swirling blue fog known as Paralyzing Fog. Contact with this fog temporarily disables Link’s ability to use items and weapons. To navigate safely, use the Deku Leaf to clear a path through the fog towards the switch on the right side of the idol. Alternatively, take control of Medli and position her in a beam of light to shine her harp, momentarily dissipating the fog. Once the path is clear, quickly move Link to the switch and use the Skull Hammer to activate it, opening the south door. Proceed through this door with Medli.


In the following crypt-like room, you’ll encounter Red Bubbles emerging from open caskets. Defeat them, then climb the ladder in the east corner. Pull the large block to reveal a beam of light. Control Medli and use her harp to shine light on the translucent treasure chest, making it solid. Switch back to Link to open the chest and obtain Small Key #1. Be cautious, as Floormasters may appear; defeat them promptly to prevent Medli from being captured. Return to the previous room and use the small key to unlock the door on the opposite side.


The next chamber contains various ChuChus, including the purple variety that cannot be harmed directly. Use Fire Arrows to burn the red curtain on the west wall, allowing light to enter. Lure the purple ChuChus into the light to petrify them, then use the Skull Hammer to smash them. Stand on one of the floor switches and either play the Command Melody or carry Medli to position her on the other switch, transforming the east wall into a stairway. More purple ChuChus will appear; petrify and eliminate all but two.


Pick up the remaining petrified ChuChu’s and place them on the switches. Quickly, ascend the newly formed staircase and push down the large stone block to create a shortcut. Return to Medli, pick her up, and throw her towards the exit from the steps to the right. Follow her by climbing up using the stone block.


In the subsequent room, a Floormaster awaits. Cautiously approach and attack it with your sword when it attempts to grab you. Push the central block towards the wall, which will activate a weighted switch, opening a window above and allowing a beam of light to enter. Use Medli to shine light onto the statue atop the switch, causing it to disappear. Then, shine light onto the swirl marks on both the north and south walls to reveal two small side rooms: one containing a warp cauldron, the other containing a block.


Push the block in southeast corner of the room towards the wall to make a treasure chest appear. Then, pull the block from the newly available north room around the corner to trigger another switch, opening the exit door.


Climb the block on the east side to access the chest to loot the Compass. The Compass is super handy – now you can see unopened chests as yellow marks on your map, as well as the location of the boss door and the warp pots. It also marks Medli’s position with a pink icon, which is useful in case you get separated.

Before you move on, double-check that you’ve uncovered the warp jar (blow up its cover if you haven’t) and snag any hearts or items from the jars around. When ready, pick up Medli and carry her through the big door you just opened.

Deeper into the Crypts – Undead Foes and More Keys
Through the door, you enter a dark, misty crypt-like chamber. Almost immediately you’re ambushed by a group of enemies: two heavy Moblins and two ghostly Poes. The Poes are translucent ghosts carrying lanterns, cackling as they swoop around. This fight can be hectic because the Poes will drift through walls and attempt to possess you (when a Poe attacks, it may swirl into Link, causing temporary confusion), all while the Moblins charge with their spears. A good strategy is to focus on the Moblins first. Keep moving to avoid the Poes’ lunges – they’re invincible while transparent, so don’t waste time swinging at them until you can expose them. Use your shield to block a Moblin’s spear thrust, then counterattack with sword combos. Or utilize the parry attack prompt to leap over a Moblin and strike its back for a quick takedown.


Avoid the Poes for a moment (they move relatively slowly, so just keep your distance or circle around). Head toward the staircase on the east side. There are two elephant-headed stone statues blocking the top of these stairs. Now use the Command Melody to take control of Medli. Fly Medli up to the high ledge on the east side of the room, where you see a round spotlight on the floor – that’s a patch of light shining down (likely from the puzzle you solved in the previous room or a crack overhead). Land Medli in that light circle. From here, have Medli shine her harp light across the room to the west side, aiming at those two stone statues that were blocking the staircase. With a little careful positioning, you can hit both statues with light and dissolve them. This clears the staircase of obstacles and also might allow more light into the room, depending on the design. While you’re still controlling Medli, also turn her light down toward the Poes themselves. A Poe hit by a strong ray of light will be forced out of its transparent form and become solid and stunned, turning a pinkish color and dropping to the ground. Target and shine on each Poe until both ghosts are solid and flailing.


Quickly switch back to Link and run up the now-unblocked stairs to where the Poes fell or just chase them on the ground if they dropped there. Finish off the Poes by slashing them with your sword while they’re tangible. Two or three hits should do for each. If you take too long, a Poe might recover and turn invisible again – if that happens, just repeat the light exposure with Medli or even use Link’s new Mirror Shield (we’ll have that soon) to re-stun them. Once both Poes are vanquished, a small chest appears on a side ledge. Pop it open to collect a Joy Pendant (a nice extra treasure, especially if you’re collecting these for a certain Windfall Island teacher).


Now that the room is clear, take a breath. We have two doors up here on the upper level: one on the left (north) side of the room and one on the right (south) side. The left door is currently unlocked, so let’s start there to gather an important key. Make sure Medli is with you (carry or command her up the stairs). Head through the left door first.

The coffin crypt (Second Small Key)
You emerge on a ledge and then drop into a lower area that looks like an ancient crypt. This grim room is lined with large stone coffins standing upright. It’s very dark here, and as you walk forward, the heavy coffin lids will start to fall open one by one – and what comes out isn’t pretty. The coffins contain ReDeads, which are corpse-like zombies that can paralyze you with a scream. As you approach each coffin, be ready: the moment a coffin lid slams down, a ReDead may lurch out towards you.

There are five coffins in total arranged along the walls. The contents are as follows (from leftmost to rightmost): a ReDead, a Yellow Rupee, a ReDead, another ReDead, and the far-right coffin holds a ReDead and a small key. You need that key, but you’ll have to deal with the undead to get it safely.
These enemies are slow, but they are terrifying if they get close. When a ReDead notices you, it will emit a blood-curdling scream. If you’re within a few yards of it when it screams, Link will be frozen in fear for a moment, unable to move. The ReDead will then shamble over and attempt to latch onto you, chewing away your health. To avoid this, try to engage each ReDead from just outside their scream range. One strategy is to use a projectile: you can shoot a Fire Arrow or regular arrow at the ReDead from a distance to damage and momentarily stun it (it will still scream once it recovers, but hopefully you’ll be closer and attacking by then). Alternatively, inch forward to trigger its scream, quickly move back to avoid being caught, then rush in while it’s “recharging” and strike with your sword. The Master Sword can dispatch a ReDead in a handful of hits. Another tip: if you have the Hookshot (if you obtained it already on your quest), a hookshot can pull a ReDead or at least stun it momentarily, but in the Earth Temple you likely don’t have it yet, so stick to arrows and sword. Keep your distance until after it screams, then close in fast and combo with your sword. If a ReDead does manage to grab you, mash the control stick and buttons to shake free faster, then finish it off.
Proceed carefully, opening one coffin at a time if possible. After defeating the first ReDead, collect the Yellow Rupee from the second coffin as a small reward. Take out the remaining ReDeads in the third and fourth coffins. Now, the fifth coffin will drop its lid revealing the last ReDead and a shining Small Key on the coffin floor. Quickly take down that ReDead (using the same tactics) and grab the small key. This is your second small key in the dungeon.


When you defeat all the ReDeads, you’ll hear a mechanism – a ladder drops down into the pit, allowing you to climb back up to the door. Before leaving, ensure you didn’t miss any pots with hearts or magic, because those ReDead encounters can be rough. Once you’re ready, climb the ladder back to the entrance and exit the crypt room the way you came.


Back in the Moblin/Poe room (the two-poe ambush chamber), the coast should still be clear (enemies here do not respawn when you return, thankfully, since you left Medli up here). Now it’s time to use that key on the other door. Head to the right-side door on the upper ledge. There’s a locked door here which you can now open. Unlock it with your newly acquired key and step through. Get ready – there’s a mini-boss waiting.

Stalfos Showdown – Gaining the Mirror Shield
As you walk into the torch-lit crypt ahead, the door slams shut behind you, and an ominous rattling noise echoes. You’re about to face the mini-boss: a Stalfos. This hulking skeleton warrior emerges from the ground, wielding a massive club. Stalfos are tough and can only be defeated by breaking them apart completely.

Lock onto the Stalfos and stay mobile. The Stalfos will swing its club or sometimes try a spinning attack; if it hits, it does significant damage, so try to sidestep or backflip away from its swings. Aim for an opening between its attacks to strike with your sword. After a few hits, or a well-placed bomb, the Stalfos will collapse into a pile of bones – but it’s not dead yet! The skull will remain, bouncing around trying to rejoin its body. Quickly, target the skull. You have a few options: throw a Bomb at the pile (one bomb can blow a Stalfos apart in one go and even destroy the skull if timed right), or use the Boomerang to stun the skull in place. While the skull is stunned, smash it with your sword. You can also pull out the Skull Hammer and whack the skull for an instant kill if you land a hit; one solid Hammer strike will shatter the head. The key is to destroy the skull before the body pieces magically reassemble – otherwise the Stalfos will rise again for round two.


After you’ve pulverized the first Stalfos, two more Stalfos burst out from coffins in the corners of the room! Now you have two Stalfos at once to deal with. Try not to get sandwiched between them. A smart strategy here is to use bombs: you can drop or throw a Bomb at one Stalfos, then immediately focus on the other with your sword while the first one is momentarily blown apart. If both break into pieces around the same time, prioritize smashing at least one of the skulls quickly so that you only have one full Stalfos to contend with at a time. Keep moving to avoid their club swings – sometimes one might inadvertently hit the other while spinning, which can help you. You can also use the Skull Hammer in quick succession if you’re confident: a direct hammer hit will one-shot a Stalfos’s skull when it’s separated. Use whatever method works best for you to reduce them to bone piles and then dust.

When the last Stalfos clatters apart and stays down, the doors unlock and a big ornate treasure chest appears at the top of the room. Climb up and open it to receive the Mirror Shield! This is the special dungeon item of the Earth Temple. Link swaps out his old shield for this shiny new one, which has a polished reflective surface. The Mirror Shield allows Link to reflect beams of light, just like Medli’s harp has been doing. Now Link can actively participate in all the light-based puzzles (and even shine light onto enemies to stun or destroy them). It also looks pretty cool, with a sun motif design that gleams when it catches light.


Item: Mirror Shield
A polished shield that reflects light, allowing Link to solve puzzles and expose hidden secrets.
It’s time to test that new shield. Notice above the door you entered (the one now unlocked again) there’s a peculiar emblem – a half-sun/half-moon face symbol carved on the wall. This is a light-sensitive symbol that reacts to your Mirror Shield. Stand in the beam of light shining down in this room (there’s usually a shaft of light present after you win, often coming from a cracked ceiling or opened window). Face the symbol and hold up your Mirror Shield (on GameCube, hold R; on Wii U, hold ZL to target and the shield will raise automatically, or press the shield button). When the light reflects off your shield onto the sun/moon symbol, keep it directed there for a second. The symbol will glow and then vanish, causing the sealed door beneath it to unlock. You’ve effectively “burned” away the magical seal with light. Now you can leave the mini-boss chamber.


Before you go, make sure to break any pots for health or magic if you need. Then step back through the door to return to the previous room.
You’re back in the room where you fought the Moblins and Poes (the one with the staircase). Medli should be waiting here (if you left her safely, she might be standing where you last controlled her). The enemies here do respawn after the mini-boss, unfortunately: you may find that two Poes have reappeared in this room (and possibly the Moblins as well). Don’t panic – now that you have the Mirror Shield, these ghosts are much easier to deal with. If the Moblins are back too, you can either fight them again or try to ignore them and move quickly. An efficient tactic is to use Medli’s harp and Link’s shield in tandem: Position Medli in any available light patch and have her shine it on a Poe to pin it down, or simply use Link’s Mirror Shield to catch light and directly hit a Poe with it. Once a Poe is solid, cut it down. Repeat until the room is peaceful again. (If you choose to avoid fighting, you can also just grab Medli and make a beeline for the door back to the foggy idol room – but sometimes it’s more troublesome if an enemy follows or hits you while carrying Medli, so it’s often best to clear them out.)

Now that Link has the Mirror Shield, we can solve a puzzle we bypassed earlier in the large foggy idol chamber. Backtrack with Medli through the door to the west, which leads you into the big central foggy idol room where you got the Compass. This is the room with the giant stone statue and the blue fog on the ground. It’s time to clear that room’s curse completely. You’ve already opened the ceiling and dissolved a small statue here, but the giant idol in the center still sits there ominously and some fog remains around it. The idol’s face has two big eye sockets that are actually light-sensitive just like that sun symbol you just cleared. To remove the idol (and the fog it’s spewing), you must shine light into both of its eyes at the same time – which means using Link and Medli together.

Here’s how: There are two beams of light shining into this room (one from each of the ceiling shutters you opened earlier by pressing the floor switches). One beam is near the entrance where you came in, and the other is across the way. Split up your heroes: first, command Medli and guide her to one of the light beams. For example, have Medli stand in the light column on the east side of the room (near the statue’s base or on a ledge). Face her toward the idol’s giant face and press A to make her harp reflect light. Aim that beam right at the left eye of the idol. The eye will begin to glow when hit. Now, while Medli is holding that pose (she’ll keep the light trained as long as she’s facing it), switch back to Link. Take Link to the opposite side where the second light beam is shining (or wherever the other angle is) and angle your Mirror Shield to shine light into the right eye of the idol. When both eyes are simultaneously illuminated by light, the massive stone statue will start to rumble and then collapse (or sink into the ground) with a dramatic crash. All the remaining blue fog in the room instantly dissipates – the curse is lifted! On the floor where the idol stood, a staircase leading downward is revealed. Congratulations on clearing that tricky puzzle; from now on this central room won’t plague you with fog, and you can fight any enemies here without that handicap.


Before heading down, double-check the room: Now that the fog is gone, you might notice any missed items (for instance, if there was a chest on a ledge revealed by a sun symbol earlier that you couldn’t reach before, you can get it now by climbing up blocks or using the Deku Leaf from the higher level). Use your map and Compass to see if any chests remain unopened (except the big key chest and boss, which will be marked but are ahead). If you revealed a chest on a ledge (like the one from shining the sun symbol earlier), you can climb on the blocks by the walls to reach it, or use Medli’s flight. One such chest holds another Joy Pendant if you want it. When you’re ready to proceed, make sure Medli is with you and descend the staircase leading down into the depths of the temple.

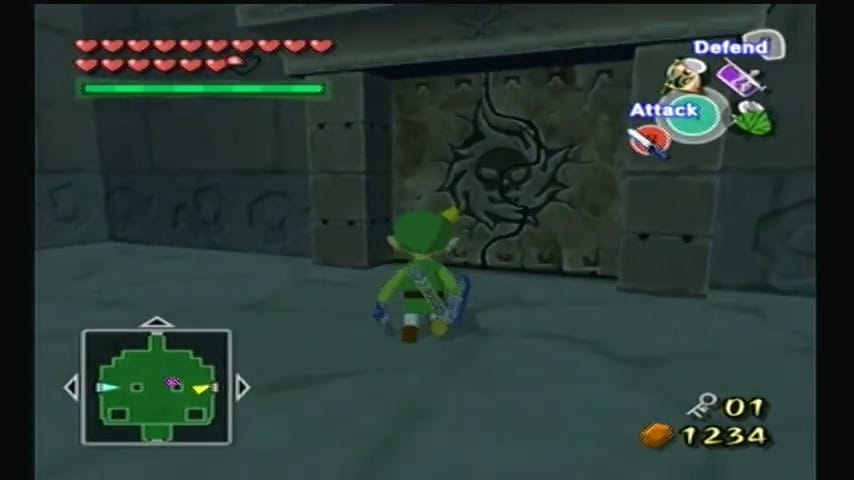
The lower dungeon and Treasure Chart #20
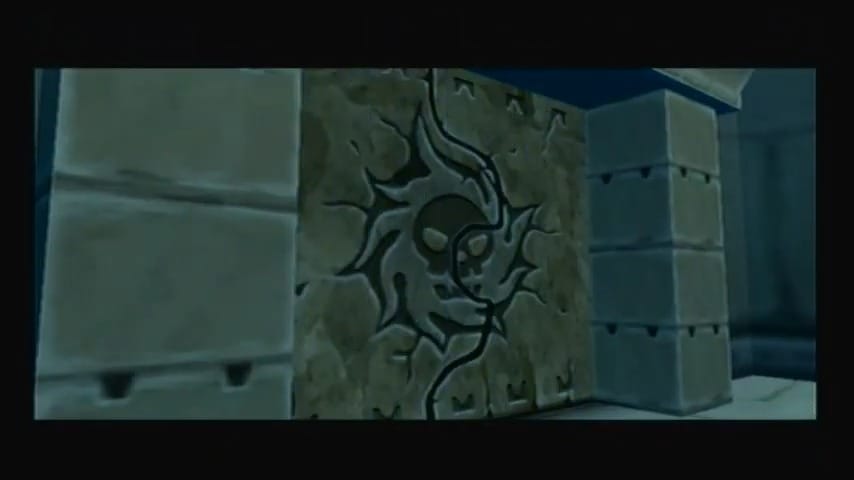
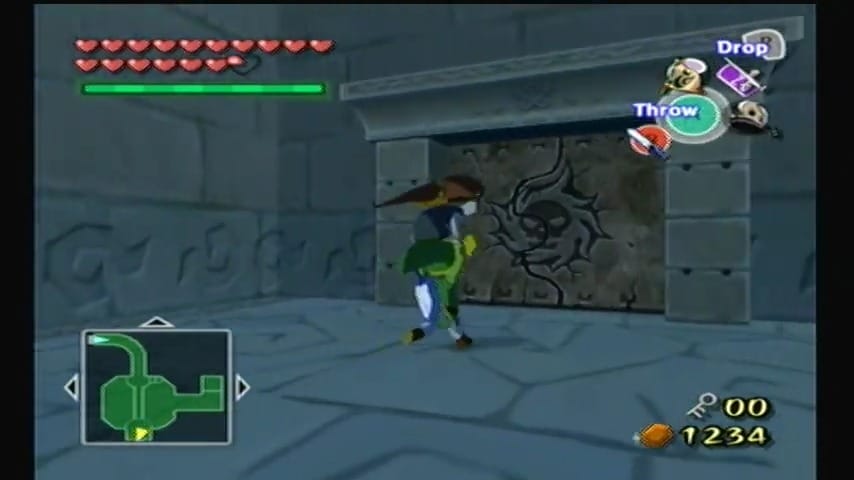
At the bottom of the staircase, you enter a new section of the temple’s basement. There’s a sealed stone door with an engraving here. This is another Sage seal, meaning you’ll need Medli’s help and the Earth God’s Lyric to open it. Stand on the Triforce symbol in front of the stone door and conduct the Earth God’s Lyric. Medli will stand beside you and play her harp in unison. The song causes the heavy stone door (marked with the Sage emblem) to glow and crumble away, unblocking the passage. Continue through with Medli.


In the next room, you step into what appears to be a small crypt chamber. There’s a big block in the middle with a statue on top, and the room is dim except for a beam of light in one corner. As you move in, two ReDeads drop from the ceiling or step out from alcoves, ready to attack. Quickly defeat or evade them using the same tactics as before (stun with an arrow and slash, or bait their scream and then rush). With the undead dealt with, turn your attention to the puzzle in here.

There’s a ray of light shining down near the wall. That light is your tool. Use Link’s Mirror Shield to reflect the light onto the small statue perched on the block in the center. Once again, the concentrated light will destroy the statue, just like previous ones. Now you can push or pull that central block if needed (though you might not need to here). More importantly, look at the far end of the room (to the right from where you entered): there’s a large stone slab door decorated with a carved design. Shine your light onto it and you’ll find it’s also a kind of magical barrier – with enough light, it will fade away entirely. Do so, and you reveal a doorway behind where the slab was.


Go through this newly revealed doorway and be on guard. You find yourself in a narrow maze-like room filled with blue fog on the floor – yes, the curse mist is back in this area. The maze corridors are tight, and to make matters worse, multiple Floormasters lurk here. In the dense fog, you can’t swing your sword, so a confrontation will put you at a disadvantage. It’s often best to avoid the Floormasters altogether while the fog is intact. If you see a shadow or hear the rustling noise of a Floormaster, take a turn to dodge it. The maze isn’t too large, but it’s easy to stumble right into a Floormaster if you’re not cautious. Hug the walls and move deliberately, watching the ground for those telltale dark shadows and claw marks.

The objective is to reach the opposite side of the maze. If you get grabbed by a Floormaster in the fog, you can’t fight back, so you’ll likely be dragged off – possibly thrown back to an earlier room. To prevent that, you can use your Deku Leaf to blow the fog away in front of you temporarily, just as you did before, giving you a clear, safe path to quickly run through (the fog will return after a few moments, but it’s enough to slip by danger). Weave through the maze, using whichever path seems open. Eventually you’ll see a treasure chest sitting in an alcove at the far end of the maze. Make a beeline for it once you spot it. Open the chest to obtain another Small Key (this is the third and final small key of the dungeon). The moment you take the key, something changes – light suddenly floods into the maze. The ceiling above cracks open or a shutter slides, allowing sunlight to pour down. The blue fog dissipates under the sunlight, and now you can freely use your items and sword. That’s good, because the Floormasters here are surely coming for you now!

Now that you’re not helpless, turn the tables on the Floormasters. To safely take them out, you can shoot them from a distance with arrows (a couple of hits with the Hero’s Bow will destroy each hand), or approach and bait their grab, then slash them when their hand is extended. With ample light, you could also try reflecting light on them with the Mirror Shield, but generally steel or arrows do the job.

Treasure Chart #20 (Collectible #38 of 41)
Clear out every Floormaster in the maze. When you defeat all of them, a treasure chest materializes near the center of the maze floor. Go open it to claim Treasure Chart #20!. This chart isn’t needed to finish the dungeon, but it’s a nice collectible that will lead you to sunken treasure later, so it’s great to grab now while you’re here.


With the maze cleared and key in hand, exit back to the previous room (the one where you shattered the statue on the block). You might notice this room has a high ledge with a mirror mounted on the wall. We’re not done with puzzles here yet. Now that light is streaming in from the maze (since you opened the path), position Link or Medli in the beam and look to the left side of the room (if your back is to the maze door). There’s a statue or emblem blocking another alcove on that side. Actually, the design here is a large mirror set at an angle behind a statue. What you need to do is redirect light onto that side wall. Stand in the light and reflect it with your Mirror Shield toward the left wall where you see a sun symbol or statue. When you hit it, you’ll cause another stone statue to disintegrate, revealing yet another door. This new door leads to a small side chamber.


Head through the door, leaving Medli in the previous room. In this side room, you find a pit with a lower floor and a ledge on the far side. Down below, a lone Floormaster waits in the center. There’s also a tall ladder or ledge on the other side with a heavy looking statue on top of a switch (marked by a blue pattern). Here’s the plan: you need to get to that far side and manipulate the statue. Run across the fog, avoiding the floormaster.
Now, on this far ledge you have a large stone mirror statue.Pull the statue onto the marked spot fully.

There’s also a wooden peg (stake) nearby, sticking out of the floor on this ledge. Pull out the Skull Hammer and give that stake a good pound. Hammering the stake causes yet another mechanism to trigger – this will open another shutter to let light shine onto the statue, reflecting into the previous room.


Now our tasks in this side room are done. Return through the door to the statue-block room. There is a ledge high up on the east side of the room (above the door you originally came in from). That’s our next destination. To get Medli up there, stand on the central block and throw Medli up onto the high ledge. She’s very light and will flutter down gently if you miss, so aim carefully. Once Medli is up on the ledge, climb up yourself (the block gives you the height needed to reach it). Now with Medli, go through the door on this high ledge.


As you enter the chamber, a beam of light from the adjacent mirror illuminates the room. Seizing the opportunity, you raise your Mirror Shield, directing the light to stun the lurking Poes. With swift strikes, you eliminate each ghostly foe. Turning your attention to the ornate elephant statues lining the walls, you reflect the light onto them, causing them to crumble and reveal hidden treasures—magic energy and rupees await behind their stony façades.


However, one statue remains out of reach. To tackle this, you guide Medli into the beam of light, positioning her with her back to the obstinate statue. Using the Command Melody, you take control of Medli and angle her harp to reflect the light onto the stubborn statue. The statue disintegrates, unveiling a concealed doorway.


With the path now clear, you and Medli proceed through the newly revealed passage, ready to face the challenges that lie ahead in the Earth Temple.

As you step into the crypt, rows of ominous caskets line the walls. Approach them cautiously—each lid crashes down as you near, so stay alert and ready to dodge. Inside, you’ll confront a mix of Keese, Stalfos, and ReDeads. Utilize your Boomerang or Grappling Hook to dispatch the flying Keese efficiently. After clearing the room, open the treasure chest to claim 20 rupees.


A stone seal blocks the northern exit. Stand before it and play the Earth God’s Lyric (down, down, center, left, right, center) to dissolve the barrier. Proceed through the door and descend the stairway into a towering hall. Toss a bomb at the warp cauldron to activate it for future use.


Avoid leaping directly into the pit below. Instead, carry Medli down the stairs, gliding to the lowest platform, and exit through the north door. If you happen to fall, defeat the Floor Masters below, then have Medli fly up to the platform. Follow her by climbing the vines.

The giant mirror chamber (Treasure Chart #12 and Big Key)
You and Medli now enter a grand circular room that looks like a ceremonial chamber. There’s a large sun emblem on the floor (resembling the Triforce symbol) and several mirrors mounted on pedestals around the room. At one end stands a huge statue with glowing eyes, similar to the idol from earlier, and at the other end (where you came in) are large stone carvings. This is the giant light mirror puzzle of the Earth Temple. It’s the final gauntlet of puzzles standing between you and the boss. We’re going to have to redirect beams of light using both Link and Medli, moving mirrors into place to shine light on various targets.
First, use the Command Melody to control Medli and fly her atop the central structure. Step on the switch to unveil a beam of light. Jump down to the southeast corner of the room and aim her beam of light at the statue behind the chest to remove it.


Return to Link and move the mirrors on the east side of the room to positions where they reflect light from each other across the room. stand on the pedestal within the light beam. Use the Mirror Shield to direct the light at the treasure chest to loot a purple rupee.


Use the Command Melody to switch to Medli. Climb onto the tall pedestal in the northwest and shine light onto the treasure chest to obtain a Joy Pendant. Have Medli shine a light directly at the small nearby pedestal. Switch to Link and direct the light at the four wall markings to reveal another mirror.


Now, extract the statue from the central structure and maneuver it around the corner to establish a continuous light beam. A chime will confirm the correct alignment of mirrors on this side.


Climb onto the tall pedestal in the northwest corner of the room and use your Mirror Shield to reflect light onto the nearby treasure chest, which contains a Joy Pendant inside. From the same position, reflect light to the statue behind it to remove it, revealing another mirror statue. Move the mirror statue revealed to its position.


Treasure Chart #12 (Collectible #39 of 41)
Head into the opening behind the statue we destroyed. This leads to a secret side room – a small crypt much like the earlier coffin room. Here you’ll find two coffins against the wall and, unsurprisingly, a couple of Stalfos waiting to attack (they may burst from the coffins or appear as you enter). Yes, more Stalfos! If you have bombs left, this is a great time to use them – chuck a bomb at a Stalfos to scatter it, then hammer the skull. You could also lure them back toward the doorway one at a time to fight in close quarters rather than both at once.
Defeat the Stalfos duo using the techniques you’ve mastered (they’re the last ones, promise!). Once they’re in pieces, look along the back wall of this side room. There’s a large block set into the wall with a handle. Pull that block out; doing so creates a climbable step to the upper ledge of this room. Climb on top of the block you pulled. You’ll see a shiny treasure chest up on a high ledge now accessible. Open it up to obtain Treasure Chart #12. Another chart for your collection! (Treasure Chart #12 will lead you to sunken treasure outside later; picking it up now means you won’t have to come back for it.)


Position Link on the nearby small pedestal, then have Medli shine a light directly at him from the tall pedestal.
Switch to Link and direct the light at the four wall markings to reveal another mirror. Pull it out and eliminate the final statue, completing the mirror alignment puzzle.


It’s time for one last instance of double-light teamwork. Just as you did before, have Medli stand in one beam so her harp light hits one of the statue’s eyes, and simultaneously use Link’s Mirror Shield to direct light into the statue’s other eye. When both eyes are lit up together, the huge statue will shake and then sink into the ground, opening the path behind it. You’ve solved the giant mirror puzzle – nice work! A long hallway is now revealed, leading deeper in.


Proceed down the newly opened corridor. Defeat the two flying skulls using your Deku Leaf to bring them down and your sword to eliminate them. Then, focus on the Darknut knight. Utilize your special “A” counterattack to defeat it. Once the enemies are vanquished, the northern cage door will open. Open the treasure chest inside to acquire the Big Key. This key will allow you to unlock the boss door back in the mirror chamber, where the giant statue used to be. You’ve got everything needed to face the boss now.


Exit this room through the door you entered (since the opposite door is the boss door and you need to approach it from the other side). You’ll find yourself back in the large mirror puzzle room. It’s time to head for the boss.
Remember that long staircase that appeared when the statue sank? It’s along the side of the mirror chamber, starting near where the statue’s face was. Climb up those tall stairs. Midway, there’s a break in the staircase – but some climbable vines are on the wall. Hop onto the vines and climb up to the next section of the stairway. Continue ascending until you reach the top ledge.

From the top, you can see the ornate boss door across a gap. It’s too far to jump normally. If Medli is still following, you can actually leave her here – she won’t be joining the boss fight, and a cutscene will have her stay behind anyway. If you really want to bring her to the door, you could throw her across first (she can safely flutter down onto the platform). In any case, to get Link across, you’ll need to glide. Face the boss door platform, equip your Deku Leaf, and perform a jump then quickly pull out the leaf to glide on the wind. Float across the gap to land in front of the boss door. Alternatively, if you still had Medli in hand, jumping with her could also work as she glides, but since she won’t go in with you, it’s fine to leave her.

Up on the boss door ledge, you’ll find some final pots. Smash them to refill any last-minute needs: there are usually hearts, magic jars, and sometimes another fairy. Get yourself to full health and ensure you have that fairy in a bottle if you want the safety net. When you’re ready, use the Big Key on the mighty door. The door’s locks will release, and you can push it open. Step through to face the boss of the Earth Temple.
Jalhalla Boss Battle

Jalhalla, Protector of the Seal
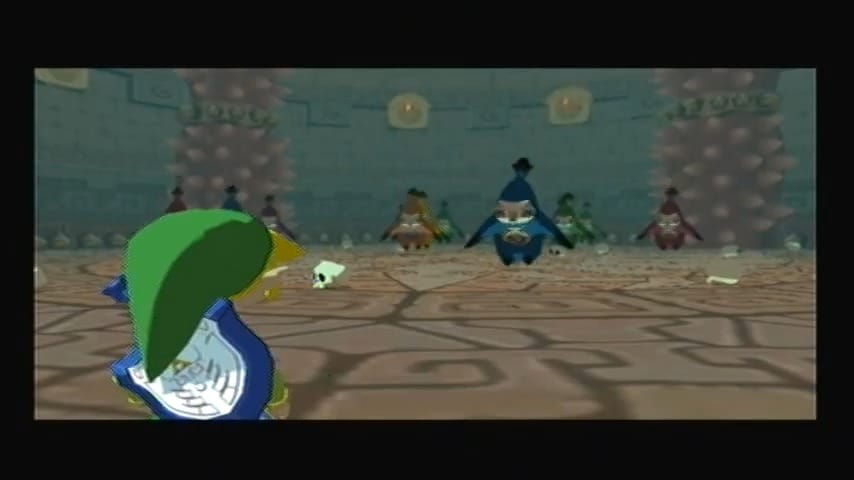
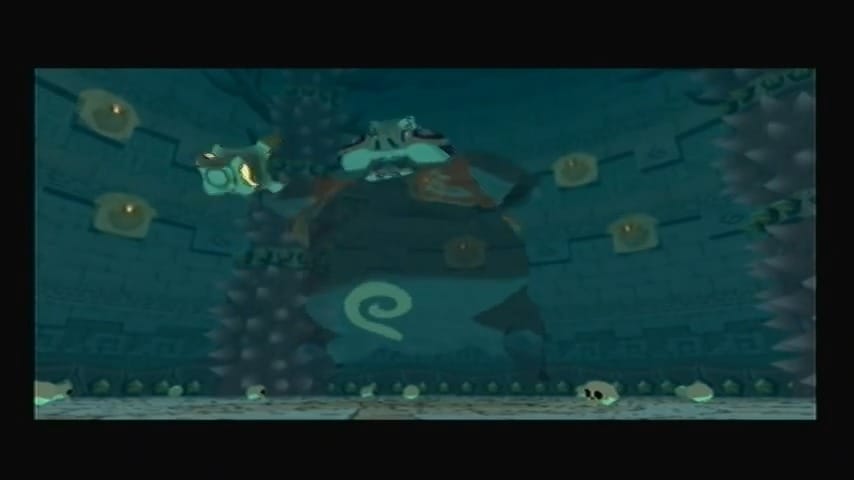
Inside the dark boss chamber, a short cutscene plays: dozens of Poes (the same ghostly figures you’ve been fighting, but many more of them) swirl together at the center of the room, merging into one enormous phantom with a grin on its mask.
This is Jalhalla, the Giant Poe and the boss of the Earth Temple. He’s a rotund ghost in a mask and cape, carrying a lantern. He may look a bit comical, but don’t underestimate him – he’s quite dangerous if you’re not careful. The fight is all about using light to expose Jalhalla’s true form, and then using your strength (and Power Bracelets) to smash him apart.
The arena: You’re in a circular room with tall walls. Around the edges stand several large spiked pillars (kind of like spiked columns). These are important for your offense. There are also plenty of little skulls lying on the floor, which you can pick up and throw if needed (though they don’t do much to Jalhalla directly). Most crucially, look at the ceiling: there are holes in the ceiling that let in beams of light, similar to spotlights. However, only one beam of light is active at any given time, shining down in a particular location on the floor. Every so often, that active beam will turn off and another will turn on somewhere else in the room. So the available light moves around periodically. Keep track of where the lit patch is – you’ll need to use it to harm Jalhalla.
Phase 1 – Expose Jalhalla
Jalhalla starts off invisible and invulnerable, floating around the room. To damage him, you first need to make him tangible by hitting him with light. There are two ways to do this:
- Lure him into the light. If a light beam is on the floor, you can stand in it and get Jalhalla to come toward you. Jalhalla will try to either inhale air to suck you closer or stomp towards you to attack. As he nears the beam of light, lock onto him and raise your Mirror Shield to catch the light. Angle it so the light shines onto Jalhalla’s body.
- Position yourself in the light such that when Jalhalla charges, he passes through the beam. This can be trickier, but an alternative if he’s aggressive.
The easier method is usually the first: stand in the beam and reflect it onto him. When the light hits Jalhalla, he reacts as all Poes do – his spectral form becomes solid. He’ll turn a solid white/pinkish color and drop to the ground with a thud, now dazed and vulnerable.


Phase 2 – Knock him down and break him apart
As soon as Jalhalla is solid and stunned, run up to him and press the A button to grab him. Thanks to your Power Bracelets, Link can lift this giant ghost without problem (time to put that strength to use!). Once you have Jalhalla hoisted over your head, throw him as hard as you can into one of the spiked pillars along the walls. Aim for a pillar that’s relatively close so you don’t miss – Link will toss Jalhalla like a huge bowling ball. When Jalhalla’s body strikes the spikes, he bursts apart into a crowd of about ten smaller Poes, the ones that form his essence.


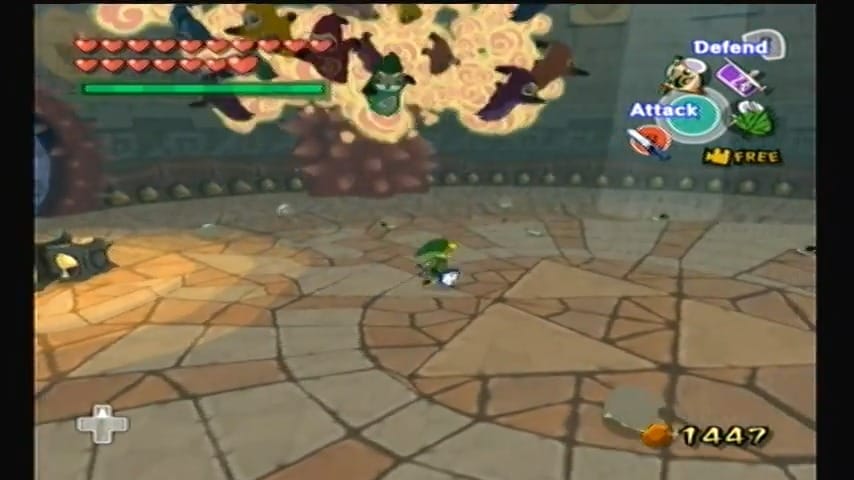
Now it’s your chance to do damage. The little Poes will be momentarily scattered and running around in a panic. Quickly pull out your sword and start slashing the mini-Poes. Each one only takes a single hit to defeat (two at most). The more of these you destroy now, the fewer will recombine to form Jalhalla again – essentially, each Poe you kill is a bit of Jalhalla’s health gone. Swing fast and try to take out as many as possible before they start to flicker and disappear. You likely won’t get them all in one go, because after a few seconds, any remaining Poes will magically pull back together, re-merging into Jalhalla’s giant form for the next round. Jalhalla will have fewer Poes composing him now, meaning he’s taken significant damage.


Repeat the cycle: With Jalhalla reformed (now a bit smaller in mass, but still the same look), repeat the process: find the active light beam, lure him or position yourself, and shine the Mirror Shield to stun him solid. Then grab him and slam him into the spikes again, scattering more Poes, and slice them up. Each cycle will eliminate a chunk of his ghostly count.
It typically takes three to four cycles to fully defeat Jalhalla, depending on how many Poes you manage to destroy each time. If you’re efficient and take out say 4-5 Poes each round, you might only need three throws. If you get fewer each time, it might be four throws. You’ll know you’re getting close when Jalhalla reforms with noticeably fewer Poes making up his body (his size might slightly reduce and there will be fewer Poes to kill each time).
Jalhalla’s attacks: Of course, Jalhalla isn’t just going to sit there. He has a few attacks to watch for:
- Body Slam (flattening attack): Jalhalla might suddenly float up a bit and then drop his big body down in an attempt to squash you like a pancake. If you see him hovering over you or wiggling, run away from that spot or roll to the side quickly. If you fail to dodge, Link will get flattened underneath Jalhalla’s girth. Being squished doesn’t do a ton of direct damage, but it causes a comedic effect where Link becomes paper-thin and “possessed” or confused for a short while. The controls will reverse (left becomes right, forward becomes back, etc.) because Link is dazed. It can be very disorienting! If this happens, don’t panic. One way to cure the curse quickly is to run into one of the light beams – the purifying light will pop Link back to normal size and orientation. Otherwise, just wait a few moments and the effect will wear off on its own, and controls will return to normal. Try not to get squished in the first place by keeping an eye on Jalhalla’s movements and staying out from directly underneath him.
- Flame breath / fireballs: Jalhalla can also take a deep breath and spew out streams of fire or fireball projectiles from his lantern. If you see him inhale or his lantern start to glow with flame, be prepared to sidestep or keep moving to avoid where he’s aiming. The fire attack can travel in a line, so just moving out of its path will keep you safe. The good news is these flames are relatively slow-moving and easy to run away from. Just don’t stand still when he’s trying to toast you.
- Possession (Poe swarm): On occasion, instead of merging fully, Jalhalla might send a few of his Poe underlings to attack you even while he’s together, or when he breaks apart they might deliberately rush Link. If a small Poe latches onto you, it’s similar to being cursed – Link may move sluggishly or the controls get mirrored briefly. Wiggle away and slash it. This is not so much a separate attack as a result of either getting swarmed by the little guys if you stand idle. Keep moving and they shouldn’t pile on you.
- Invisibility and charging: Jalhalla can vanish and reappear; sometimes he might go invisible and then suddenly charge at you, trying to collide. Listen for audio cues (a telltale laugh) and be ready to side-jump if needed. When he’s invisible, you can’t hurt him until he materializes or until you catch him in light.
Throughout the battle, maintain a steady pattern: avoid his attacks by staying mobile, quickly move to wherever the current light beam is shining, and use your Mirror Shield to stun him whenever you have a clear shot. If the active light is across the room and Jalhalla is between you and it, you can try to coax him over, or wait for the beam to shift to a more convenient spot. Keep your camera pointed at him so you can react to his moves.
After a few rounds, all the tiny Poes will have been sliced apart, and Jalhalla will have no essence left to reform. With a final wail, the giant ghost is defeated.
Upon Jalhalla’s defeat, the room’s lights come on fully and the remains of the Poes vanish. A Heart Container drops onto the floor, shining brightly. Don’t forget to pick it up! This Heart Container permanently increases your life by one heart and fully restores your health. It’s the well-earned reward for overcoming the boss.


Once you’ve grabbed the heart, Medli will appear, running into the arena (in the post-battle cutscene). A glowing blue portal opens at the center of the room. Step into the portal’s light while Medli stands with you. Link conducts the Earth God’s Lyric one last time, and Medli performs it, causing the sage’s emblem to shine. In a beautiful scene, the power of the Earth Sage flows into the Master Sword, restoring part of its lost power. The dungeon is now truly complete.


Medli thanks you for your help and says she must remain here at the Earth Temple, praying for the Master Sword’s power. She encourages you to seek out the Wind Sage next (her friend Makar) and complete the restoration of the Master Sword in the Wind Temple. Say your goodbyes, and step into the portal to return to the outside of the temple.

Congratulations! You’ve conquered the Earth Temple. You solved its light puzzles, collected all its treasures (Dungeon Map, Compass, Mirror Shield, three Small Keys, Treasure Charts #12 and #20, the Big Key, and a Heart Container), and defeated the malevolent Jalhalla. With the Earth Sage’s prayers rekindled, the Master Sword grows stronger. Now it’s time to head to Gale Isle for the Wind Temple – another adventure awaits!