


The Wind Waker 100% Completion Walkthrough
- Prologue: Outset Island: Introduction to Link’s home, initial quests, and obtaining the Hero’s Sword and Shield.
- Forsaken Fortress (First Visit): Stealth mechanics and rescuing Aryll.
- Windfall Island: Acquiring the Sail, meeting key characters, and side quests.
- Dragon Roost Island & Cavern: Assisting the Rito tribe, dungeon exploration, and obtaining Din’s Pearl.
- Forest Haven & Forbidden Woods: Meeting the Great Deku Tree, aiding the Koroks, and securing Farore’s Pearl.
- Post-Forbidden Woods Exploration: Collect charts, heart pieces, and upgrades across the southern sea.
- Greatfish Isle & Nayru’s Pearl: Story progression and obtaining the final pearl.
- Great Sea Side Quest Adventure: Explore islands and complete Windfall quests for key upgrades and collectibles.
- Tower of the Gods: Dungeon challenges and gaining access to Hyrule.
- Hyrule Castle: Discovering the Master Sword and storyline developments.
- Post-Hyrule Castle Exploration: Complete trading quests for heart pieces, treasure charts, and the Magic Armor.
- The Forest Water Challenge: Locating and saving each withered tree for a heart piece.
- Forsaken Fortress (Second Visit): Confronting the Helmaroc King and rescuing Aryll.
- Reef Special Charts & Windfall Side Quests: Six-Eye Reefs, Treasure Charts, and Windfall Island side quests.
- Fire Mountain & Ice Ring Isle: Obtain the Power Bracelets and Iron Boots from these elemental islands to access the next temples.
- Earth Temple: Venture with Medli into the Earth Temple to cleanse evil and claim the Mirror Shield.
- Wind Temple: Enter Gale Isle, team up with Makar, and conquer the Wind Temple.
- Triforce Shard Quest: Locating Triforce Charts, deciphering them, and retrieving Triforce shards.
- Ganon’s Tower: Final challenges, boss rematches, and the ultimate confrontation with Ganondorf.
Table of Contents
Treasure Chart #25: Salvaged for 200 Rupees
Sail to the northwestern corner of the Great Sea, where the Forsaken Fortress broods under perpetual night. Along the way, look for a glowing ring on the ocean’s surface marking Treasure Chart #25 – haul it up with your Grappling Hook to snag a Silver Rupee worth 200 Rupees.


As you near the fortress’s outer wall, searchlights will sweep the water and cannons may fire warning shots. Ignore the hostile warships and steer toward the large wooden gate barring the entrance. Now that you have Bombs, you can blast open the boarded gate with your ship’s cannon. After a few direct hits, the barricade splinters apart, clearing a path – sail inside to finally storm the Forsaken Fortress once more!


Phantom Ganon and the Skull Hammer
Work your way up through the fortress’s twisting corridors and ladders, retracing the same general route you took on your first visit. The layout hasn’t changed – there’s essentially one main path leading upward – but you’ll immediately notice some new obstacles this time. Huge wooden pegs barricade certain staircases, and you won’t be able to proceed until you find a way to smash them.
Keep moving through the dim halls, dispatching any Bokoblins that try to slow you down (you’re no longer weaponless, so they pose little threat). Before long, you’ll enter an open-air central courtyard passage… and the doors suddenly slam shut behind you. A chilling, shadowy figure appears with a menacing laugh – it’s Phantom Ganon! The ghostly specter of Ganondorf has returned to challenge you.

Mini-Boss Battle – Phantom Ganon
Lock onto the hovering Phantom Ganon as he launches glowing orbs of dark magic at you. It’s time for some dead man’s volley! Reflect the energy balls back at him with well-timed sword swings. Each time you bat an orb back, the phantom swats it to-and-fro faster, so be ready – this deadly tennis match speeds up with each volley.
Keep your rhythm and eventually an orb will strike Phantom Ganon, knocking him out of the air and stunning him on the ground. Rush in and land a flurry of sword strikes before he can recover. Phantom Ganon may also teleport behind you occasionally; if you suddenly lose sight of him, quickly spin around and strike to interrupt his sneak attack. It may take a few rounds of volleys and follow-up hits, but stay patient and Phantom Ganon will fall.


With an echoing laugh, the defeated phantom fades away – leaving behind a large treasure chest as your prize. Open the chest to obtain the Skull Hammer.

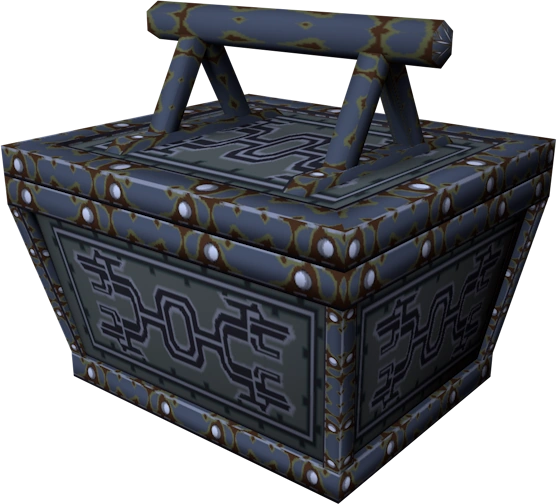
Item: Skull Hammer
A comically oversized mallet that packs a punch. This new item is exactly what you need to continue your ascent. With the Skull Hammer, Link can smash those giant wooden pegs blocking the stairways, pounding them flush into the ground. Swinging the hammer is also effective in combat – it will flatten Miniblins in a single blow and even flip certain larger enemies onto their backs. With this mighty tool in hand, you’re ready to storm the rest of the fortress and reach the tower where Aryll is held.


Reaching Aryll’s Cell
Press onward through the fortress, now able to access areas that were previously sealed off. Follow the familiar route up toward the prison tower at the top – you’ll recognize many rooms and hallways from your first infiltration. Use the Skull Hammer to smash any large wooden pegs or barricades blocking your way.


Most of the path is the same as before, but there are a few differences to keep you on your toes: for instance, some of the rope bridges you swung on during the first visit have been removed. If you encounter a gap where a rope used to be, simply hop and glide across with your Deku Leaf. Also, be prepared for endless Miniblins to pop out of jars or scurry in through holes in certain areas. These little green critters attack in droves now; a quick Spin Attack or a swipe of your sword will take them out, but they can be annoying if you stand still. It’s usually best to keep moving and swat them aside as you go.


As you climb higher, Moblins and Bokoblins along the route won’t slow you down much – the Master Sword makes quick work of even the bulkiest Moblin guards. (It’s a far different vibe blasting through these enemies with full power, as opposed to sneaking around them last time!) Beware of one lingering threat: in one of the narrow hallways, a Floormaster (a giant, shadowy hand) lurks, waiting to snatch unwary heroes. If that disembodied hand grabs you, it will drag you off and toss you into a lower prison cell – forcing you to backtrack out of jail again. To avoid this, watch for the telltale clawed shadow and either take out the Floormaster from a distance (a couple of arrows will do) or carefully bait it and run past when it lunges. With that caution in mind, continue ascending the fortress. Pound down any peg barriers with the Skull Hammer, climb ladders, and sidle or leap across ledges where needed. Eventually, after smashing a final giant wooden stake out of the way, you’ll reach the door to the prison chamber at the top of the fortress.


Entering the prison room triggers a welcome scene: Link rushes to his sister Aryll’s cell, ready to finally free her. A brief reunion ensues as Aryll recognizes her brother. But before Link can break the cell open, Tetra and her pirate crew dramatically burst onto the scene! A cutscene plays out as Tetra playfully scolds you for taking so long and explains how they kept that “big bird” distracted so you could get inside. The pirates quickly spring into action – Gonzo and company unlock Aryll’s cage along with the two other captive girls from Windfall (Mila and Maggie), escorting them all to safety. Tetra orders her crew to take Aryll back to their ship immediately, reassuring Link that his little sister is safe at last. Aryll gives you a heartfelt smile and promises to wait for you back home. Tetra flashes Link a confident grin and says she’ll be back for you once you’ve “taken care of” the enemy up ahead. It’s a triumphant moment – Aryll is finally free, fulfilling the promise you made to Grandma. But the celebration is short-lived… that “big bird” Tetra mentioned is about to crash the party!


Missable Pictograph Warning: Helmaroc King
If you are intending to complete the Nintendo Gallery Figurine side quest, be sure to snap a picture of the Helmaroc King before you defeat him. Once this encounter is complete, he will be inaccessible in the future.

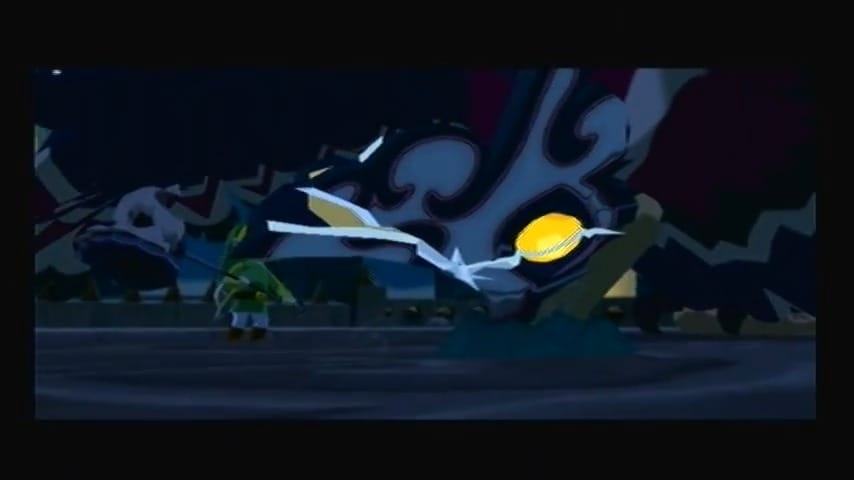
Showdown with the Helmaroc King
Just as the last pirate hustles Aryll out, an ear-splitting screech echoes from below. The Helmaroc King – the gigantic armored bird that once kidnapped your sister – suddenly bursts up into the tower. The room shakes as water begins flooding the lower levels of the tower staircase! It’s boss fight time, and this battle comes in two distinct phases. First, you’ll need to outrun the rising water and the Helmaroc King’s onslaught as you race up the spiral ramp inside the tower. Then, you’ll face the Helmaroc in a final one-on-one duel on the fortress rooftop.

Escape the Flood (Phase 1)
As soon as you regain control, dash up the spiral staircase that winds around the interior tower wall. Don’t hesitate – the water level is climbing rapidly from below, and the Helmaroc King is in hot pursuit! If you’re confident, roll forward to move at top speed. The Helmaroc will smash through walls and platforms in its rage, knocking out sections of the stairs as it chases you. If you’re too slow, the giant bird can even crash into the platform you’re on and send you tumbling down. Should you fall, don’t panic – the rising water will lift you, and you can use your Grappling Hook on the wooden poles above gapped stairways to swing back up. As you sprint upward, Bokoblins may leap out of pots on the stairs to attack, but it’s best to ignore them in this frantic climb (many will simply get swept away by the flood or knocked aside by Helmaroc’s attacks). Keep your focus on moving up. Whenever a staircase segment is destroyed, use the Grappling Hook or a well-timed jump once the water rises enough to reach the next ledge. It’s a thrilling race against the flood and the furious bird behind you – but if you keep moving, you’ll reach the summit in time. At the very top, just as you approach the exit to the roof, the Helmaroc King will lunge one last time and shove its massive head through the doorway, trying to block your escape. Don’t hold back – whack the Helmaroc’s masked face with your Skull Hammer as hard as you can! One solid hit to that metal mask will stun the beast and send it plummeting back down the shaft with an angry squawk. With the way briefly clear, climb the ladder and exit through the door to emerge onto the fortress rooftop under the open night sky.


Rooftop Arena (Phase 2)
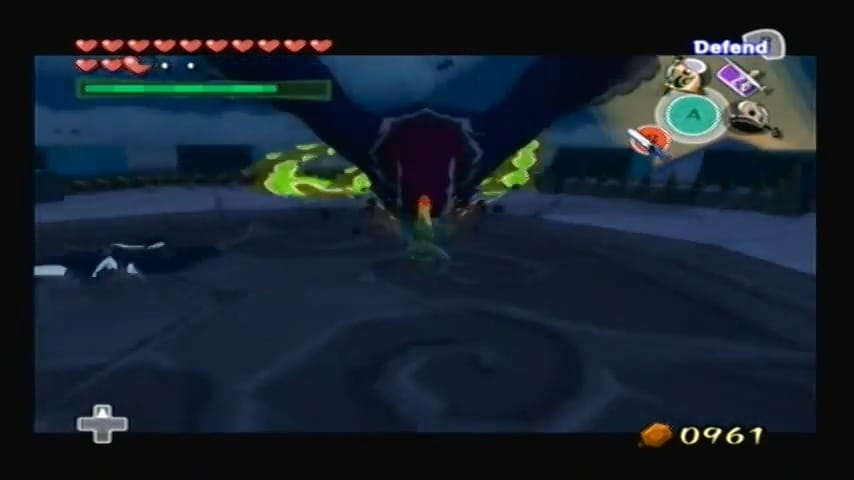
Now the real duel begins. You stand on the broad roof of the Forsaken Fortress, a circular arena bordered by a low wall lined with sharp wooden spikes. The Helmaroc King swoops overhead in the darkness, poised to attack. Stay on your toes and be mindful of those spiky walls – falling or getting knocked into them will hurt. The Helmaroc King has a few signature attacks in this phase, and recognizing them is key to surviving and creating openings for your counterattack:
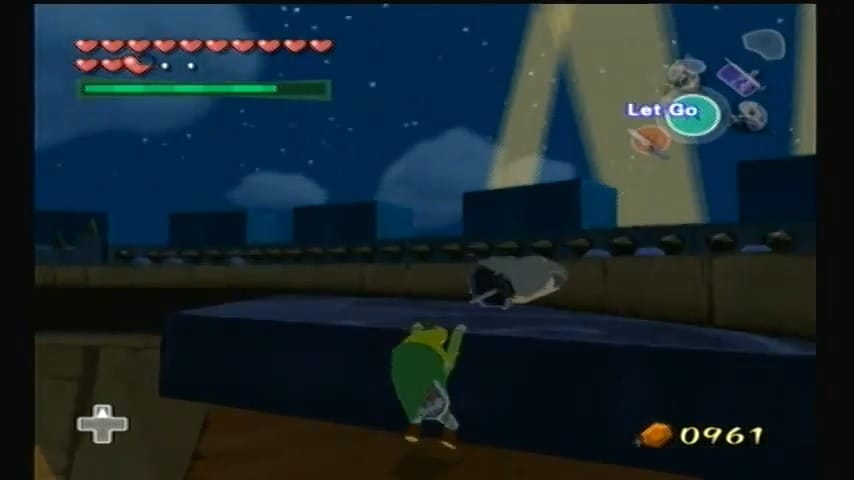
- Talon Sweep (Dive Attack): The Helmaroc King might suddenly dive straight at you, skimming low over the arena with its talons outstretched. It’s a fast charge, but you can see it coming as the bird circles and lines up its approach. When you notice it swooping toward you, sidestep or roll aside at the last moment to avoid getting clawed. The boss will usually need to pull up and circle around after a missed dive, giving you a moment to reposition away from the walls.
- Wing Gust: If the Helmaroc King hovers in place and beats its gigantic wings, it’s generating a powerful gust of wind. These gusts push you across the roof, threatening to slam you into the ring of spikes. To avoid a painful poke, run toward the Helmaroc King or perpendicular to the wind rather than trying to run away with it. By moving counter to the gale, you can resist being blown back. Alternatively, quickly crouch with your shield up – the wind won’t budge you while guarding. Stay out of the direct path of the gale if possible, and be ready to regain footing if you get knocked off balance.
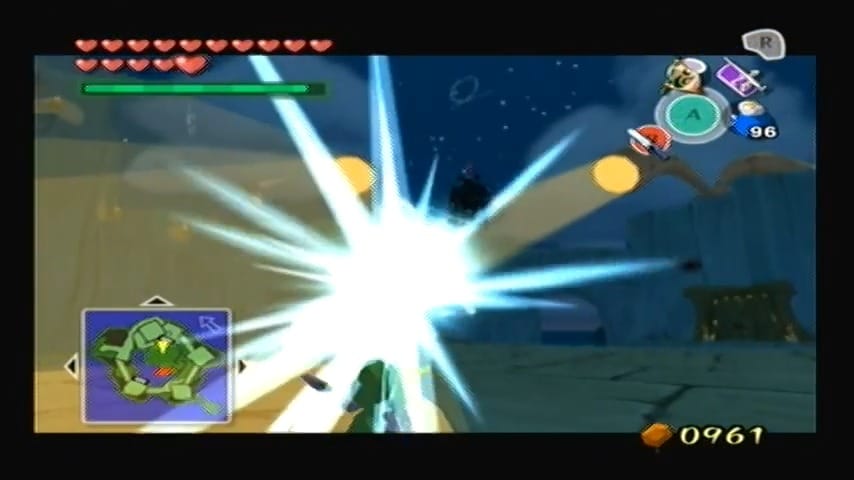
- Beak Peck: This is the opening you’ve been waiting for. The Helmaroc King will land on the platform and march towards you, then thrust its gigantic beak forward in an attempt to peck you into the ground. Bait this attack by keeping a medium distance and strafing to one side. The moment the bird lunges, sprint or roll to the side to dodge it – the Helmaroc’s beak will slam down and get stuck in the rooftop for a brief moment! This is your chance: run up to that embedded beak and smash the Helmaroc King’s faceplate with your Skull Hammer as hard as you can. You’ll see the bird’s thick metal mask crack a little with each successful hammer blow.
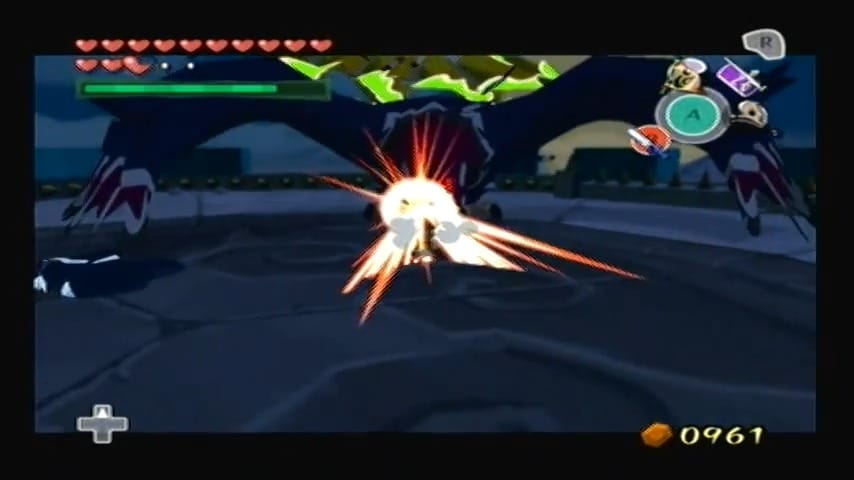

After each successful hammer hit, the Helmaroc King will screech and yank its head free, taking to the sky again. It will resume attacking with more furious dives and wind gusts, so repeat the process: avoid its swooping strikes and cyclones, and watch for the next peck opportunity. It takes about five direct hammer strikes to significantly damage the Helmaroc’s mask. After a handful of hits, the iron mask shatters off the Helmaroc King’s face, falling away in pieces. Now you can finally wound the beast directly. Switch to your sword (the Master Sword, or any sword will do) and get ready to finish the fight. The Helmaroc King, now maskless, will become even more enraged but also vulnerable – it may try the same attacks as before. Counter its moves as you did earlier: dodge the dives and wind, and when the bird stomps down and pecks (it can still do this even without the mask), evade and retaliate. Without armor protecting it, the Helmaroc’s exposed head can be injured by your blade. Jump attacks or slashes to the face will rapidly deplete its remaining health. Only a few well-placed sword hits are required now. After enough punishment, the giant bird will let out one last defeated shriek, rise up into the air, and explode in a burst of dark smoke, signaling the end of the battle.
As the Helmaroc King collapses, the ring of wooden spikes around the arena retracts down, no longer a hazard. Take a moment to celebrate your victory, then claim the Heart Container left behind by the Helmaroc King’s defeat. This will fully heal you and permanently increase your maximum hearts. With the fortress’s monstrous guardian vanquished, a path is now clear up to the highest platform of the tower – the area that served as Ganondorf’s base of operations.


Aftermath: Return to Hyrule Castle
When you’re ready, head up the ramp and go through the door into the tower keep for a final confrontation. Sword in hand, Link enters the chamber at the top of the fortress and finally comes face-to-face with Ganondorf himself. A tense cutscene unfolds as the evil king casually applauds your courage but reveals some dire news. Link valiantly lunges at Ganondorf to fulfill his role as hero, but the Master Sword fails to harm the Dark Lord – with a cruel smile, Ganondorf explains that by removing the blade from its pedestal, Link unwittingly broke the seal that had been restraining Ganondorf’s magic, and the sword has lost the power to repel evil.
Ganondorf easily swats Link aside, knocking him down. As the villain moves in to finish Link off, Tetra suddenly appears, true to her word to come back for you. Tetra throws herself into the fray, momentarily distracting Ganondorf with a dagger strike. But Ganondorf quickly overpowers her, snatching Tetra by the throat. At that moment, the Triforce charm that Tetra wears around her neck (a piece of the Triforce of Wisdom from her mother) glows bright. Ganondorf’s Triforce of Power resonates in response, and his eyes widen in realization – Tetra is Princess Zelda in disguise! The pirate captain herself is baffled by this revelation, but there’s no time to sort it out.


Before Ganondorf can act on this discovery, help arrives in epic fashion. Prince Komali and Quill – your Rito allies from Dragon Roost – suddenly swoop in through the ceiling, striking Ganondorf and forcing him to drop Tetra. An instant later, the sky above the fortress erupts in flames as the great dragon Valoo looms overhead and rains down fire upon the tower.
Ganondorf is engulfed in the blazing onslaught and must shield himself, buying just enough time for the Rito to grab Link and Tetra. The heroic pair of Rito carry you both out of the collapsing Forsaken Fortress as Valoo’s inferno reduces Ganondorf’s stronghold to ruins. You’ve made a narrow escape, and Ganondorf is left roaring furiously amid the flames. The curse of endless night he had cast over the Great Sea is broken at last, and dawn begins to light the sky as you fly to safety.

In the aftermath, Link and Tetra reunite with the King of Red Lions (your talking boat companion) near the Tower of the Gods. The pirates have already taken Aryll and the other girls safely back home, so everyone you set out to rescue is now free and sound. But your adventure is not over – far from it. The King of Red Lions brings Link and a bewildered Tetra back beneath the sea, returning to the hidden Hyrule Castle for an important meeting.


There, in the castle’s basement chamber where the Master Sword once rested, the mysterious boat reveals his true identity as Daphnes Nohansen Hyrule, the ancient King of Hyrule. In a solemn moment, the King joins Tetra’s necklace shard with its counterpart, completing the Triforce of Wisdom. The piece hangs in the air and then bathes Tetra in a divine light, transforming her into the legendary Princess Zelda before Link’s eyes.
Tetra at last understands her lineage as the heir of Hyrule. The King explains the gravity of the situation: for the Master Sword to regain its power and for Ganondorf to be defeated, the two dormant Sages must be awakened to infuse the blade with their prayers, and the scattered shards of the Triforce of Courage (which once resided in Link) must be recovered. Princess Zelda (Tetra) will remain hidden here in the safety of the ancient chamber, and the King entrusts Link with this next leg of the journey.


After these stunning revelations, Link returns to the surface of the Great Sea to continue his quest. You’ve accomplished a tremendous feat – rescuing Aryll and vanquishing the Helmaroc King – closing this chapter on a high note. Congratulations! With new goals set before you (re-energizing the Master Sword and assembling the Triforce of Courage), the world of Wind Waker opens up even more. Take a moment to appreciate the now-bright skies (the perpetual night is gone) and the peace you’ve brought to the Forsaken Fortress. When you’re ready, set sail for your next destination – the Earth and Wind Temples await, and the fate of Hyrule hangs in the balance. Good luck, and happy adventuring!


