


The Wind Waker 100% Completion Walkthrough
- Prologue: Outset Island: Introduction to Link’s home, initial quests, and obtaining the Hero’s Sword and Shield.
- Forsaken Fortress (First Visit): Stealth mechanics and rescuing Aryll.
- Windfall Island: Acquiring the Sail, meeting key characters, and side quests.
- Dragon Roost Island & Cavern: Assisting the Rito tribe, dungeon exploration, and obtaining Din’s Pearl.
- Forest Haven & Forbidden Woods: Meeting the Great Deku Tree, aiding the Koroks, and securing Farore’s Pearl.
- Post-Forbidden Woods Exploration: Collect charts, heart pieces, and upgrades across the southern sea.
- Greatfish Isle & Nayru’s Pearl: Story progression and obtaining the final pearl.
- Great Sea Side Quest Adventure: Explore islands and complete Windfall quests for key upgrades and collectibles.
- Tower of the Gods: Dungeon challenges and gaining access to Hyrule.
- Hyrule Castle: Discovering the Master Sword and storyline developments.
- Post-Hyrule Castle Exploration: Complete trading quests for heart pieces, treasure charts, and the Magic Armor.
- The Forest Water Challenge: Locating and saving each withered tree for a heart piece.
- Forsaken Fortress (Second Visit): Confronting the Helmaroc King and rescuing Aryll.
- Reef Special Charts & Windfall Side Quests: Six-Eye Reefs, Treasure Charts, and Windfall Island side quests.
- Fire Mountain & Ice Ring Isle: Obtain the Power Bracelets and Iron Boots from these elemental islands to access the next temples.
- Earth Temple: Venture with Medli into the Earth Temple to cleanse evil and claim the Mirror Shield.
- Wind Temple: Enter Gale Isle, team up with Makar, and conquer the Wind Temple.
- Triforce Shard Quest: Locating Triforce Charts, deciphering them, and retrieving Triforce shards.
- Ganon’s Tower: Final challenges, boss rematches, and the ultimate confrontation with Ganondorf.
Table of Contents
Five-Eye Reef to Stone Watcher Island
Leaving Outset Island, sail one square north to reach Five-Eye Reef.
Sea Chart Info #24 of 49: Five-Eye Reef
As you approach the walled ring of stone, bait the Fishman to mark it on your Sea Chart (Sea Chart Info #24). Five-Eye Reef is guarded by high rock walls with cannon emplacements inside, but you can save the combat for later.


For now, chart the location and continue northward. Soon you’ll spot a massive steel island ahead – this is the Islet of Steel.
Sea Chart Info #25 of 49: Islet of Steel
Feed the Fishman here as well to record Islet of Steel (Sea Chart Info #25).


The islet is essentially a fortified metal fortress. You’ll hear warships patrolling inside its walls; note this place for later, as a Triforce Chart lies within its locked interior that we’ll claim in due time. For now, chart it and turn your boat eastward.
Sail one quadrant east to Stone Watcher Island, a small island dominated by a giant stone head.
Sea Chart Info #26 of 49: Stone Watcher Island
Drop anchor and update your Sea Chart (Sea Chart Info #26).


Stone Watcher Island holds secrets of its own – that huge stone face guards a hidden trial cave containing a Triforce shard, but you won’t be able to lift it until you gain more strength. Make a mental note to return here once you have the Power Bracelets.

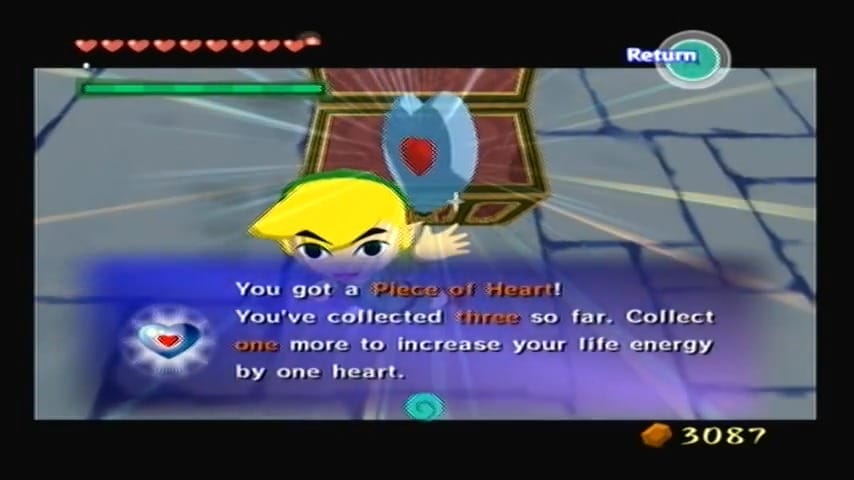
Heart Piece #15 of 44
Before departing, scout the waters around Stone Watcher. You’ll find an enemy lookout platform nearby, distinguished by its tall wooden stilts and ladder. Sail up and use your cannon to destroy all the mounted cannons on the platform’s underside. Once the cannons are blasted to bits, climb the ladder to the top. A treasure chest will have appeared on the platform. Pop it open to claim Piece of Heart #15! This extra Heart Piece inches you closer to another full Heart Container. With the platform cleared out, hop back into the King of Red Lions. It’s time to set sail for a more luxurious destination.


Private Oasis and the Cabana Treasure
From Stone Watcher, head due east for two squares until you arrive at a tiny, idyllic isle with a lone palm cabana – the Private Oasis.
Sea Chart Info #27 of 49: Private Oasis
Cruise up to the little dock and use your bait to feed the Fishman, adding Private Oasis to your map (Sea Chart Info #27).


The fish will gossip about some “golden Triumph Forks” chart hidden here – a cryptic hint about a Triforce Chart inside the cabana. Stepping onto the island, you’ll find a fancy locked Cabana belonging to Mrs. Marie (the Windfall school teacher). The door knocker (a talking butler face) refuses entry unless you show proof of ownership. We don’t have the deed yet, so for now you can only explore the exterior. Take note of Old Man Ho Ho standing on the beach peering through his telescope. He mentions the flock of seagulls circling out at sea, hinting that a Big Octo lurks nearby.
(Optional) If you’re feeling adventurous, you can tackle the Big Octo now. Look for the swarm of seagulls to the southwest of the Oasis. Sail into the seagulls to encounter a giant eight-eyed Big Octo. Immediately, you’ll be pulled into its whirlpool. To defeat this creature, target its glowing eyes. The Boomerang is very effective – toss it repeatedly to lock onto multiple eyes – or use your ship’s cannon to blast them one by one. Keep moving in the whirlpool to avoid getting sucked in as you pop all 8 eyes. Once the Big Octo is vanquished, it spits out a hefty Orange Rupee (100) as a reward. Use the Grappling Hook to salvage the floating treasure if you’d like a rupee bonus for your wallet.


Treasure Chart #27 (Collectible #14 of 41)
Back on the Private Oasis, there’s a treasure to grab even without entering the cabana. Face the cabana’s front door, then head around to the back side of the island’s main rock. You’ll notice a high cliff ledge behind the cabana with a chest visible atop it. To reach it, stand on the wooden railing of the little pier (or a nearby palm stump) and pull out the Wind Waker.
Conduct the Wind’s Requiem to set the wind blowing inland (toward the cabana). Now leap off and glide with your Deku Leaf, riding the breeze up to that high ledge. Run over to the chest on the summit of the isle and open it to obtain Treasure Chart #27! Mark that down – this chart will lead you to loot at the Star Belt Archipelago later.


With the Oasis fully explored (for now), return to your boat. Our next stop lies to the northwest.
Tingle Island and an Optional Big Octo
From Private Oasis, sail two squares west and two squares north (northwest) to find a strange tall island with a totem-like tower and colorful balloons. This is Tingle Island, home of the eccentric cartographer Tingle.
Sea Chart Info #28 of 49: Tingle Island
Feed the Fishman in the vicinity to chart Tingle Island on your map (Sea Chart Info #28).


Tingle’s brothers are using a giant rupee-shaped tower here to “channel Tingle’s magic,” but practically speaking this island will be useful later for deciphering Triforce Charts (at an exorbitant price). If you climb up the tower, you can chat with Tingle or his siblings – however, we handled freeing Tingle from Windfall’s jail earlier in the adventure, so for now there’s no urgent business with him. Once the map is updated, scan the ocean around Tingle Island for seagulls.
Heart Piece #16 of 44 – Big Octo
Yet another Big Octo makes its home not far from Tingle’s island. In fact, a flock of seagulls can be found just north of Tingle Island. If you approach them, a giant Big Octo will surface and drag you into a whirlpool battle. Use the same strategy as before – lock onto its many eyes (this one has a few more eyes than the last) and destroy them using your Boomerang or cannon.
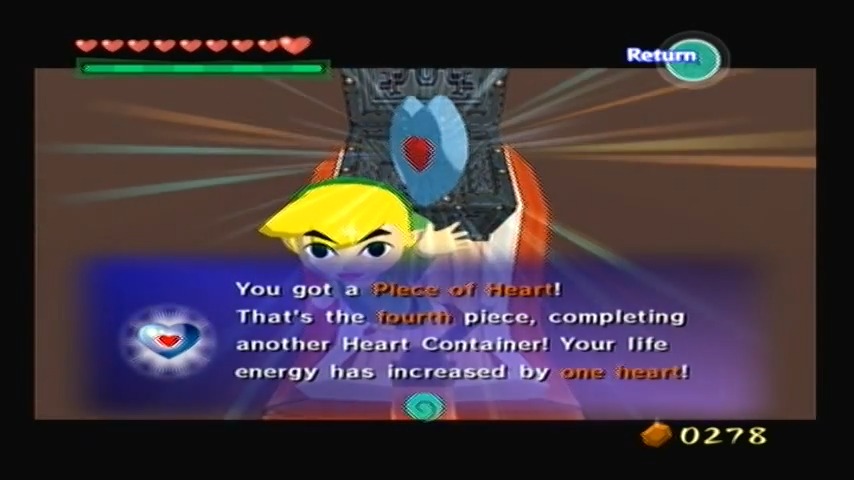
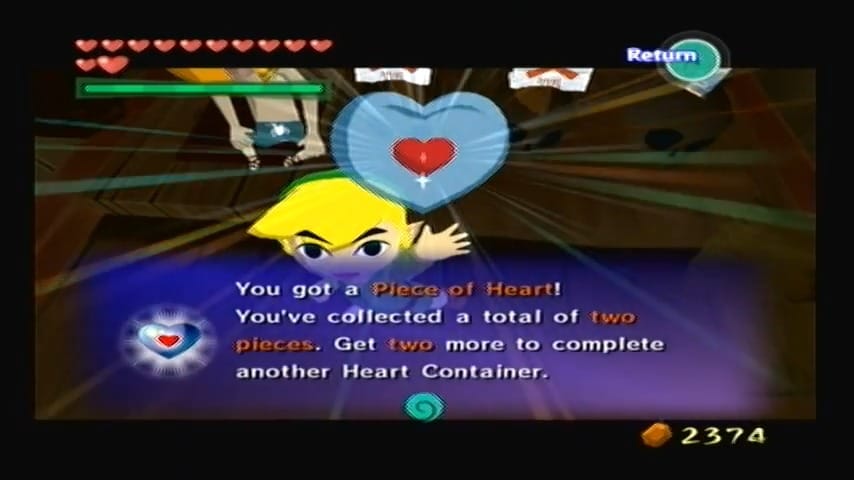
The Boomerang can hit multiple eyes at once, making quick work of the monster. Once all eyes are popped, the Big Octo collapses and a treasure chest floats up. Sail over the spot and use the Grappling Hook to haul up the chest, which contains Piece of Heart #16. This will complete another Heart Container, increasing your total health! If you’re keeping count with our route, that’s your 16th Piece of Heart (four full new Heart Containers so far). Enjoy the vitality boost.


With Tingle Island charted and optional dangers dispatched, set course northward for a bit of fun and games.
Spectacle Island Cannon Challenge
One square north of Tingle’s location you’ll find Spectacle Island, a small island with a lone lookout post and a houseboat.
Sea Chart Info #29 of 49: Spectacle Island
Chart it by feeding the Fishman (Sea Chart Info #29).


During the day, Spectacle Island is the site of a lively cannon-shooting mini-game run by none other than Salvatore (the same fellow who ran the Squid Battleship game on Windfall). Climb up the ladder to the platform and speak with the exuberant Salvatore (you’ll recognize his painted-on faux seagull face). He’ll let you play the Barrel Shoot mini-game for 50 Rupees per attempt.


The goal of the Barrel Shoot game is to hit five floating targets in the sea using the ship’s cannon. You have a limited number of bombs (10 shots) to hit all five barrels. It’s essentially an artillery accuracy challenge. Salvatore will provide goofy sound effects (“Sploosh! Kaboom!”) as you fire. To succeed, pay attention to the angle of your cannon – tilt the joystick up or down to adjust firing range, and left/right to aim. The targets are at varying distances, so you might start with a moderate angle for nearer barrels and increase the angle for farther ones. You’ll likely need a little trial and error, as there’s no aiming reticle. Watch where your bomb splashes (Salvatore’s commentary helps) and adjust your aim incrementally until you nail each target.

Heart Piece #17 of 44
When you manage to blast all 5 barrels within the allotted shots, Salvatore rewards you with Piece of Heart #17 for your first win. Congratulations!

Treasure Chart #17 (Collectible #15 of 41)
This mini-game is actually doubly lucrative – if you play again and win a second time, you’ll receive Treasure Chart #17 as an additional prize. Go ahead and attempt a second round, applying what you learned about the firing angles.

Once you’ve scored a second victory and pocketed Treasure Chart #17, any further wins will just net you 100 Rupees each. Feel free to cash in on extra rupees if you enjoy the game. Before leaving Spectacle Island, double-check around the base; at night a Blue ChuChu sometimes hides on the beach here, but you won’t be able to do much with it until you can collect its jelly. Otherwise, our next destination is just to the north.
Northern Fairy Island: Wallet Upgrade and Blue ChuChu
Sea Chart Info #30 of 49: Northern Fairy Island
Sail north from Spectacle Island to arrive at Northern Fairy Island, marked by its pink dome and four stone pillars (chart it as Sea Chart Info #30).


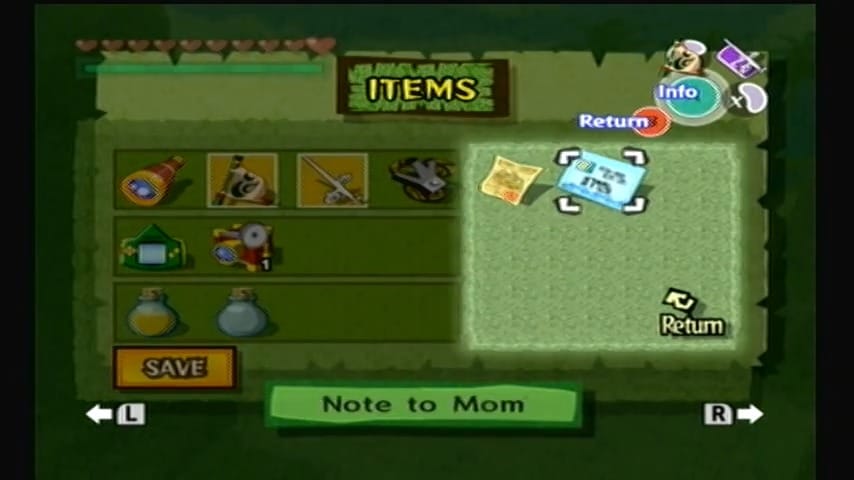
Wallet Upgrade #2: Northern Fairy Island
Land on the island and head through clam-shaped shell dome. Drop into the hole inside to meet the Great Fairy. She will grant you the Wallet Upgrade #2, which is the final wallet upgrade in the game. Your wallet capacity increases to a whopping 5,000 Rupees – the “Huge Wallet,” perfect for funding all the chart deciphering and auction bidding to come.


On your way out of the fairy chamber, be ready for a fight – a rare Blue ChuChu waits on this island’s surface. Blue ChuChus camouflage themselves as blue blobs and pop up when you approach. Defeat the jiggly creature by stunning it (your Boomerang works well) and then slashing with your sword before it reconstitutes. It will drop precious Blue Chu Jelly; grab it, since collecting 15 of these will let Doc Bandam on Windfall brew Blue Potions later. There is only one Blue ChuChu on Northern Fairy Island (and only a limited number in the whole world), so make it count.

Treasure Chart #22 (Collectible #16 of 41)
With that handled, scan the waters around the island for a submarine. Just off the island you’ll see a Submarine accompanied by a few rafts. Sail over and hop inside. The interior is dimly lit by lanterns, and the moment you drop to the lower floor you’ll be swarmed by a horde of Miniblins – the tiny spear-wielding little imps. They emerge in droves, chattering “Dah! Dah! DAH!” as they attack.
Don’t get overwhelmed; keep moving and use sweeping attacks (spin attacks are great) to hit many at once. After you cut down dozens of Miniblins, the onslaught will cease and a ladder will drop down. Climb up to the now-accessible higher platform. Here you need to use hanging ropes to reach the prize: target the dangling lantern ropes and swing across the gap one by one. Time your jumps carefully (stop swinging to reorient if needed, then start swinging again). At the far end, climb up to the final ledge and open the chest to claim Treasure Chart #22! This chart will point to a hidden treasure on a distant island, so add it to your collection.


(Optional) By now, you should have quite a few Joy Pendants from defeating Bokoblins throughout your journey. Before we head back to civilization, it’s a good idea to ensure you have 40 Joy Pendants in total. We’ll need 20 to satisfy a certain someone’s request, and an additional 20 for an even better reward. If you’re short, this is a great time to farm: sail to any Bokoblin-inhabited platforms or islands (the outlook platforms you cleared often have Bokoblins at night) and steal pendants using your Grappling Hook. You can also revisit Dragon Roost Cavern or the Forest Haven forests to hunt Bokoblins. Each Bokoblin has a Joy Pendant you can snag with the hook before defeating it. Grind up to 40 pendants (or at least 20 minimum) so you’re prepared for the Windfall Island sidequests ahead.

When ready, set sail for Windfall Island. It’s time to return to town and tie up a bunch of sidequests now that you have the necessary items and photos.
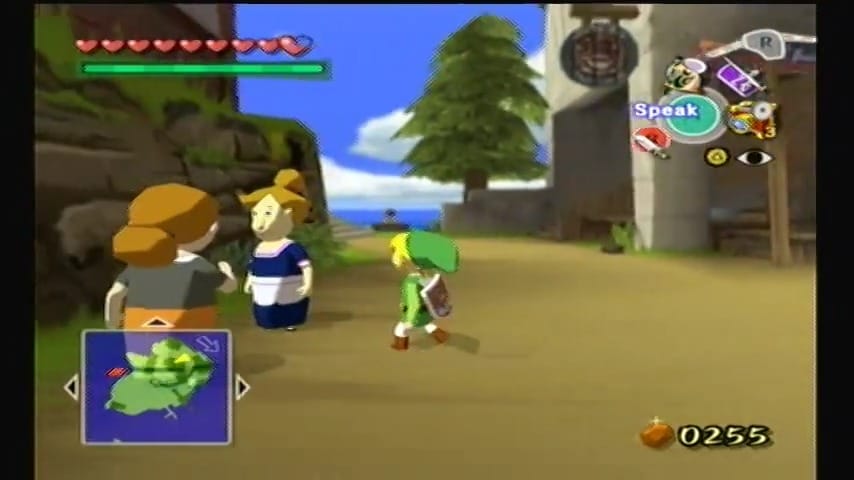
Windfall Island Sidequests (Song of Passing & Pictography)
After your great sea excursion, dock at Windfall Island. There are several tasks to tackle here with your Deluxe Picto Box in hand. First, pay a visit to the strange dancing man on the hill near the gravestone (to the right of the Potion Shop). This gyrating Elvis-lookalike is Tott, and he’s dancing both day and night. If you speak to him, he hints about wanting to dance “day and night,” but can’t without a legendary rhythm. The solution is simple: pull out the Wind Waker in front of Tott. Seeing your conductor’s baton, he’ll excitedly teach you a new song – the Song of Passing.


Wind Waker Song: Song of Passing
This catchy tune (left, right, down on the stick, twice in 3/4 time) allows you to change night into day, or day into night at will. It’s essentially Wind Waker’s version of the Sun’s Song. Now you won’t have to wait around for daybreak or nightfall to do time-specific quests – very handy!

Treasure Chart #33 (Collectible #17 of 41)
Next, let’s help a self-conscious lady nearby. During the daytime on Windfall, you’ll find Minenco, the woman in the orange dress and heavy makeup, loitering just outside the Chu Jelly Juice Shop. Chat with her and she’ll mention her desire to see a pictograph of a truly adorable young lass. (In truth, she wants to see a photo of herself – quite vain!)
Stand a few paces back and snap a pictograph of Minenco facing the camera. Make sure it’s a full-body shot and in color. Show Minenco the pictograph you just took of her. She’ll be thrilled by how beautiful she looks (“Is…is that me?!”) and as thanks, she rewards you with Treasure Chart #33. This chart leads to buried treasure in the Five-Star Isles quadrant. Nice work flattering her ego!


While you have your camera out, there are a few more pictography quests to do around town.
Treasure Chart #31 (Collectible #18 of 41)
Now that it’s daytime, look for the thin, melancholy man sitting on the steps by the walkway to the upper windmill – this is Kamo. He is only around during daylight, usually seated with a dejected posture. Talk to Kamo and he’ll tell you how much he loves staring at the moon. In fact, he’s utterly obsessed with seeing the full moon. Kamo asks if you could possibly capture the full moon in a pictograph for him.
This quest requires some patience (or manipulation of time). You’ll need a clear night when the moon is fully round. If the moon isn’t full tonight, play the Song of Passing to advance the day/night cycle until you get a night with a perfect full moon in the sky. When the full moon rises, pull out the Deluxe Picto Box and snap a nice clear photo of the moon (ensure the moon is centered and not obscured by clouds).
Once you have a beautiful pictograph of the full moon, return to Windfall and find Kamo (he’ll be back on his stairway perch in the daytime). Show him the moon photo. Kamo will be overjoyed at the sight – you’ve lifted his spirits with the beauty of the full moon. In gratitude, he gives you Treasure Chart #31! Check that off your list. (This chart will lead to a Piece of Heart hidden near Northern Fairy Island, which we’ll dig up later.)


Treasure Chart #24 (Collectible #19 of 41)
Our next target is the pair of gossiping women on Windfall. During the day, two women stand chatting near the town’s central tree (on the path toward the auction house). These ladies love juicy gossip, and we have just the scoop for them. If you’ve been following our guide up to this point, you should have the picture ready. Otherwise, it’s time to play paparazzi.
At night, head over to the Café bar (the upper entrance of the potion shop building, reachable via the winding path or by activating the windmill ferris wheel to ride up – though you can also angle a shot from ground level). Lenzo (the island’s pictographer) has a secret nightly rendezvous with none other than Minenco at the Café. Catch them in the act: wait until Lenzo and Minenco meet after dark (they’ll stand conversing on the balcony by the door). Make sure you stay unseen – you can hide and zoom with your Picto Box from a distance. Take a pictograph that clearly shows both Lenzo and Minenco together in the frame.
The image doesn’t need to be super close, but both should be identifiable. Once you’ve snapped a good photo of this clandestine meeting, wait until daytime and show it to the two gossiping women by the tree. Their eyes will widen at the sight – what?! Is that Lenzo and that Minenco together?! The scandal! They’re so shocked and delighted to have this bit of juicy gossip that they reward you with Treasure Chart #24. (According to them, a little romance gossip is worth a treasure chart!) This chart points to a treasure near the Cliff Plateau Isles. Enjoy your new trove of scandal-fueled loot.


Heart Piece #18 of 44
Lastly, we’ll play matchmaker for a lovesick couple on Windfall. You may have noticed a young woman in an orange dress named Linda who walks around the town square, and a young man named Anton (he’s the fellow with the blue cap who often strolls the perimeter of the island or stands near the mailbox). They seem to have eyes for each other but are too shy to connect. You can give fate a nudge using your Picto Box.
First, find Linda (daytime by the bench outside Salvatore’s shop or strolling the central plaza) and snap a nice pictograph of her. A full-body shot from the front works best. Now track down Anton – he’s often trotting around the town or loitering by the mailbox at the docks. Speak to Anton and then show him the pictograph of Linda. Anton is stunned by how lovely she looks in the photo and immediately realizes she’s interested in him. This inspires him to take action. Overjoyed, he runs off, determined to speak with her.
The next day, you’ll find Anton and Linda standing together, chatting happily outside the Café or near the bench by the windmill (their meeting spot can vary between day and evening as their relationship develops). Talk to them and you’ll see sparks are flying – they’ve hit it off thanks to your introduction. To ensure they solidify their bond, play the Song of Passing to skip another day ahead and speak to them yet again (now they’ll definitely be a couple). Linda is so grateful that she thanks you on the spot with Piece of Heart #18, crediting you as the one who brought them together. Love is in the air – and you earned another Heart Piece for your efforts!


Now that you’ve warmed so many hearts on Windfall, let’s turn our attention to that school teacher’s prized possessions. Head to Mrs. Marie’s School of Joy (the small building near the town entrance). Inside, the ever-polite Mrs. Marie is delighted to see you. If you completed the Killer Bees hide-and-seek earlier in the adventure, she already mentioned her love for Joy Pendants. It’s time to make her really joyful. Target Mrs. Marie and give her 20 Joy Pendants from your Spoils Bag. She’s beside herself with glee at the haul of jewelry. As a reward, Mrs. Marie hands over the Cabana Deed – a printed certificate with the Windfall seal – and insists that the Private Oasis cabana is now yours. That’s right, you are officially the new owner of that luxury island!


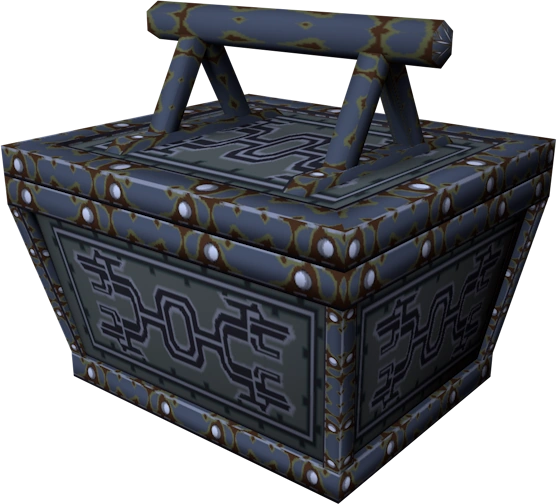
Item: Cabana Deed
You can even see the little drawing of Mrs. Marie on it in your Delivery Bag. This deed will let you access the cabana freely by showing it to the door-butler. But we’re not done. Mrs. Marie notices the bulging stack of remaining pendants you have.
If you give her another 20 Joy Pendants (for a total of 40), she’ll be so overjoyed that she presents you with the Hero’s Charm.


Item: Hero’s Charm
This mysterious mask-like artifact is a legendary item. The Hero’s Charm, when worn, allows you to see the life gauges of enemies – essentially letting you peer into their health (equip it on the Quest Status screen). This is an optional but fun item to use, especially if you want to know how close a tough enemy is to defeat. Mrs. Marie thanks you profusely for all the Joy Pendants; she has truly never been happier.
With the Cabana Deed and Hero’s Charm in hand, our Windfall business is concluded. Next up: we return to sea and put some of these new charts to use!
Crescent Moon Island Treasures
Warp or sail to Crescent Moon Island, located to the north-east region of the Great Sea (if you’re sailing from Windfall, it’s a few squares southeast).
Sea Chart Info #31: Crescent Moon Island
As you near the small crescent-shaped isle, feed the Fishman to mark it on your Sea Chart (Sea Chart Info #31). This tiny island curves in a crescent shape with a sandy middle section.


Pull up to the inner arch of the crescent and hop ashore. Immediately you’ll notice two Blue ChuChus hiding here – in fact, Crescent Moon Island is unique for having two of these rare creatures. As you approach the center, one Blue ChuChu will pop up on each side of the buried chest in the ground. Ready your Boomerang to stun them (or simply roll into them with your body to jolt them out of their jelly form), then cut them down with your sword while they’re solidified. Collect the Blue Chu Jelly drops for your collection.


Treasure Chart #10 (Collectible #20 of 41)
With the enemies cleared, go ahead and open the treasure chest on the middle sandbar. Inside you’ll find Treasure Chart #10! This chart points to sunken treasure at the Star Belt Archipelago (we’ll dig that up later).

Treasure Chart #9 (Collectible #21 of 41)
There’s more treasure hidden nearby, but not on the island itself. Scan the horizon from Crescent Moon’s shores and you’ll spot a Submarine floating in the distance (northwest of the island). Swim or sail over and climb into this submarine.
As soon as you drop inside, you’ll be greeted (and poked) by an army of Miniblins similar to the previous sub – only this time there are even more of them. They will continuously spawn from the dark corners, charging at you with tiny tridents.
Don’t let yourself get swarmed into a corner. Keep moving and use spin attacks or quick sword swings to thin them out. It may feel endless, but keep fighting; eventually you’ll defeat the final wave of Miniblins and an exit ladder will clatter down. With the coast clear, climb up and loot the waiting chest to obtain Treasure Chart #9. Yet another treasure map for your collection – this one was well earned after that Miniblin melee.


Back outside, it’s time to put one of your existing charts to use.
Heart Piece #19 of 44
Open your Sea Chart and switch to Treasure Chart #11 (which you should have acquired earlier from Dragon Roost Cavern). Chart #11’s map corresponds to Crescent Moon Island’s sector and indicates a hidden treasure in these waters. Sail around the island slowly while comparing the chart – position your boat at the spot marked by the X. You’ll likely find a bright ring of light on the ocean surface when you’re very close.
Stop the boat right over the glowing spot (use the Grappling Hook crane). When the glowing ring is centered next to your boat, press the button to salvage. The crane will descend; if you’ve positioned correctly, you’ll haul up a treasure chest. Crack it open to claim Piece of Heart #19! With this, you’ve started another Heart Container (three more pieces to go for the next full heart). Having cleaned out Crescent Moon Island’s goodies, let’s continue onward to a perilous set of islands in the far northeast.


Seven-Star Isles and Optional Challenges
Sail due east from Crescent Moon’s sector (or use a Windfall or Tower of the Gods warp if you have the Ballad of Gales, then sail northeast) to reach the Seven-Star Isles. This sector is in the northeastern quadrant of the Great Sea. As you arrive, you’ll see why it’s named so – Seven-Star Isles isn’t a single island but a cluster of tall sea spires (seven rocky pillars jutting from the water).
Sea Chart Info #32: Seven-Star Isles
Climb onto your talking boat’s hull and feed the Fishman some bait to chart the area (Sea Chart Info #32).


Be on guard; this region is often crawling with Wizzrobes and Kargarocs flying around the peaks, and there are a few lookout platforms as well. You can shoot down any harassing Kargaroc birds with your bow or ignore them for now. There’s no island per se to land on – just the rings of rock towers. However, there are a couple of optional tasks to consider here before moving on.
(Optional) By this point, make sure you have 20 Golden Feathers in your spoils. If not, the Seven-Star Isles area is a good place to farm them. The flying Kargaroc enemies around the platforms drop Golden Feathers (or more reliably, you can steal feathers from them with your Grappling Hook). Sail around the wooden platforms in this sector and use the Hook on any Kargaroc that swoops at you – you’ll snag a Golden Feather each time. The Bokoblins on the platforms might also have some in pots. These feathers are needed for a sidequest reward coming up very soon. Grind until you hit 20 total Golden Feathers in your Spoils Bag.


Heart Piece #20 of 44 – Big Octo
While at Seven-Star Isles, you have one more giant lurking beneath the waves: the most formidable Big Octo of the Great Sea. In these waters lives a 12-eyed Big Octo, the largest of them all. Search the ocean for seagulls flocking together (they might be a bit farther from the rock spires, so sail around the quadrant). When you find the seagull swarm, sail into it and prepare for battle.
This Big Octo has twelve eyes to take out, so immediately start targeting them. Your Boomerang is the weapon of choice – it can lock onto five eyes at once, allowing you to whittle them down efficiently. Keep tossing the Boomerang; as soon as it returns, throw it again, strafing around with your boat to line up shots. You can also fire Bombs, but the Boomerang tends to be faster and doesn’t consume ammo. If you destroy all 12 eyes before being sucked in, the giant octo will groan and sink beneath the waves. In its place, a big treasure chest floats up. Salvage it to obtain Piece of Heart #20! This piece should fill another Heart Container (if you’ve been collecting all optional pieces, #20 completes your fifth new container).


With the seas now free of giant octos (you’ve vanquished every one we set out to fight), and your health even higher, it’s time to turn southward. Our next stop is Dragon Roost, which lies just south of here. Double-check that you have those 20 Golden Feathers ready and any other spoils you might want to cash in.
Dragon Roost Island Deliveries
Sail one square south to return to Dragon Roost Island. Head up from the dock into the main Rito tribal compound. We have a delivery to make. Enter Dragon Roost Cavern’s postal center and make your way up to the second floor, near where the Rito Chieftain’s hall is. Standing guard by the chieftain’s room (or just outside it on a balcony) is a Rito guard, Kogoli, who previously mentioned his girlfriend’s obsession with Golden Feathers.

Missable Pictograph Warning: Kogoli
If you are intending to complete the Nintendo Gallery Figurine side quest, be sure to snap a picture of Cyclos before you offer him 20 Golden Feathers. Once this encounter is completed, he will be inaccessible in the future.
Speak to the guard and give him the 20 Golden Feathers you collected. He’s astonished and extremely grateful – this is more than enough to impress his sweetheart. As thanks, the guard immediately rewards you with 100 Rupees for your trouble. Nice! He promises to mail the feathers to his girlfriend at once. This also triggers a bonus reward that will arrive in the mail later, but we’ll handle that in a moment.


While at Dragon Roost, let’s finish the famed mail-sorting challenge. Drop down to the first floor of the postal center and talk to Koboli, the Rito behind the counter. He runs the mail sorting mini-game. If you haven’t already done the initial sorting practice, he’ll explain the rules: you must throw letters into the correct bins, each labeled with an icon corresponding to an address, as fast as you can.
The more letters you sort in the time limit, the better the reward. Start sorting and aim for at least 25 letters sorted within the time limit. (Tip: focus on accuracy first, then speed up; get into a rhythm matching the symbols to the correct slots.) Once you sort 25+ letters, Koboli will be shocked at your skill. He’ll mention that he knows of a young man looking for work who could really help with the mail – you’ve effectively proven the job can be done. Koboli then says he’ll call that part-timer in.


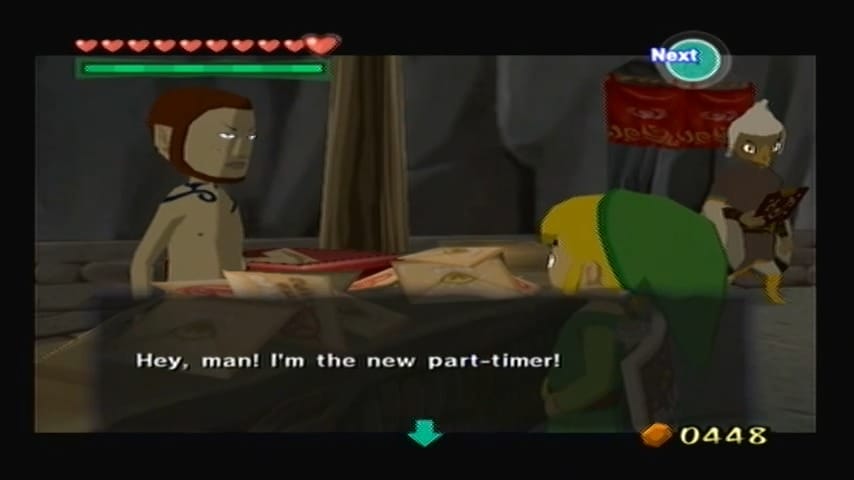
Exit and re-enter the room (or simply step outside and back in, or play Song of Passing to change the day) to find Baito, the new part-timer, now standing at the counter ready to work. Talk to Baito – he’s a Hylian who came all the way from a distant island to pursue his dream job in the mail service.
Baito is thankful for your help in getting him hired. He asks you for one more favor: deliver a letter to his mother to let her know he’s got a job and is doing well. He hands you Baito’s Letter, which is stamped and ready to mail (it’ll automatically be in your Delivery Bag).


Step outside to the red postbox (near the dock). Interact with the postbox and choose to mail Baito’s Letter. It costs 5 Rupees postage, which you happily pay to send the good news on its way. Now all that’s left is to wait for the replies from both the Rito guard’s girlfriend and Baito’s mother. Fortunately, with your Song of Passing, waiting is a cinch. Play the Song of Passing twice (day to night, then night to next morning) to advance a full day cycle.


When morning comes, the mailbox should be wiggling, indicating new mail. Check the postbox. You will receive two letters.
Heart Piece #21 of 44
The first letter is from the Rito guard’s girlfriend, thanking you for helping her boyfriend deliver the feathers. She includes Piece of Heart #21 as a token of gratitude for your kindness (she gushes about how happy she is with the beautiful Golden Feathers).


Heart Piece #22 of 44
The second letter is from Kashiko, Baito’s mother. In her heartfelt note, she thanks you for looking after her son and helping him find his way. Enclosed with her letter is Piece of Heart #22 – she says you deserve it for all you’ve done for Baito. Collect your rewards, and rejoice as your Heart Piece count climbs even higher. (These two pieces bring you to 22 in our list; just two more for another full container.)


Having completed the Dragon Roost sidequests – delivered feathers, mastered the mail sort, and played postal courier – you’ve wrapped up a huge number of errands. Before leaving Dragon Roost, consider stopping by the splintered postboxes near the main entrance to see if any other letters or reward notices are waiting (sometimes Beedle or others send mail too). Otherwise, it’s time for one final challenge on the Great Sea to round out this adventure-packed journey.
Flight Control Platform Challenge
Make sure it’s daytime (or not raining) and sail one square east from Dragon Roost Island to find the Flight Control Platform (Sea Chart Info #33). This isn’t a natural island, but rather a wooden platform structure built out at sea, home to the Rito brothers’ Bird-Man Contest.
Sea Chart Info #33: Flight Control Platform
Chart the location with the Fishman as usual.


Anchor the platform, and climb up the ladder to meet the Rito contest hosts. They’ll explain the rules of the Bird-Man Contest: for an entry fee of 10 Rupees, you get to jump off the platform and glide with your Deku Leaf, trying to cover as much distance as possible. If you can reach the distant goal or at least impress them with a record-breaking flight, you win a prize.
Before you take the leap, ensure you’re well prepared: set the wind to blow straight toward the target (open your Wind Waker and conduct the wind so it blows northwest, which is roughly the direction of the goal platform). Also, having the extended Magic Meter (double magic) is highly recommended here, as the Deku Leaf consumes magic power while gliding. If you haven’t gotten a magic upgrade, you can still suceed by being very efficient with the cyclones, but double magic makes it much easier.


Pay the fee and step up to the launch pad. The key to winning is using the updraft cyclones correctly. When you leap off, don’t deploy your Deku Leaf immediately; instead, jump at the very edge of the platform and catch some air time, then pop the Deku Leaf. You’ll see a series of cyclones (whirlwinds) spinning ahead of you over the water. Steer yourself so that you avoid the first, smaller cyclone and aim for the second (larger) whirlwind further out.
The first updraft, if taken, often won’t carry you far enough, but the second one is positioned to give you a big lift and forward boost. Glide straight into the center of the second whirlwind – it will lift you high up, restoring some altitude and essentially giving you a “second wind.” Once you’re in that updraft, keep your trajectory straight toward the distant goal banner. If you have magic to spare and there’s a third cyclone in line, you can catch that too, but usually hitting the second (and maybe one more) is enough to sail the rest of the distance.
Maintain your height as long as possible; if you start to drop, angle slightly up to prolong the glide (though not so much that you stall). With a favorable wind and good cyclone usage, you’ll soar across the sea and either land on the far platform or at least come extremely close.
Heart Piece #23 of 44
Crossing the finish line (or exceeding the minimum distance required) will excite the Rito brothers. They declare you the new champion of the Bird-Man Contest! Impressed by your gliding skills, they present you with Piece of Heart #23 as the grand prize. This prize not only brings you one piece closer to another full Heart Container, but also cements your reputation as a master of the skies (even without Rito wings). If you didn’t make it on the first attempt, don’t be discouraged – just pay another 10 Rupees and try again, adjusting your jump timing or wind direction as needed. Once you succeed, enjoy the well-earned Heart Piece.


Southern Voyage: Star Belt Archipelago to Ice Ring Isle
With bombs at your disposal, set sail for new horizons and riches.
Sea Chart Info #34: Star Belt Archipelago
Head due south to the Star Belt Archipelago and feed a Fishman some bait to chart it on your Sea Chart (Info #34 of 49).


This cluster of small islands is now marked on your map. Before moving on, open Treasure Chart #27 (which you should have picked up earlier at the Private Oasis) and scan the waters around the Star Belt isles. You’ll spot a glowing ring on the sea’s surface – sail over it and use your Grappling Hook to salvage a sunken chest containing 200 Rupees. Enjoy the haul, then prepare to continue your journey.


Now sail westward to the fiery silhouette of Fire Mountain. This volcanic isle spews flames and is too dangerous to climb at the moment (you’ll need a certain item later to cool it down). For now, chart Fire Mountain if you haven’t already by feeding the Fishman. You can’t access the mountain’s interior yet, but there’s something else of interest here.
Big Octo Battle near Fire Mountain
As you navigate the waters near Fire Mountain, keep an eye out for a flock of seagulls circling in one area. If you sail into their midst, an enormous Big Octo will surface and attack. This battle is optional, but it’s a chance to score some extra Rupees. Lock onto the Octo’s many eyes with your Boomerang (or arrows if you prefer) and hit all the eyes until the creature is defeated. Upon victory, a ring of light appears on the ocean. Salvage the treasure it marks to collect a spoils chest worth 100 Rupees. With the Big Octo vanquished and your wallet a bit heavier, continue on your way.


Continue west to Eastern Fairy Island (one square southeast of Windfall).
Sea Chart Info #35 of 49: Eastern Fairy Island
As usual, chart this island (Sea Chart Info #35) by feeding the Fishman.


Bomb Bag Upgrade
Eastern Fairy Island has a big cracked boulder sealing its lone cave. Sail up to the shore and blast the boulder with a Bomb from your boat (or set a Bomb on land and run). Once the entrance is clear, head inside. Approach the great fairy within and she will reward your courage with a Bomb Bag Upgrade, increasing your carrying capacity to 60 bombs. With a larger bomb bag, you’re well-prepared for future battles and obstacles.


Treasure Chart #3: Salvaged for 200 Rupees
Back outside Eastern Fairy’s waters, open Treasure Chart #3 and locate the corresponding ring of light in this sector. It shouldn’t be far from the fairy isle. Use the Grappling Hook to salvage a chest with 200 Rupees from the depths.


Next, set sail again. Your map shows an island to the south that is currently just open ocean – one that has not yet emerged in the world. (Spoiler: this spot will play a big role soon, but for now it’s an empty sea quadrant.)
Cruise to this unmarked location in the southern square and check your charts.
Treasure Chart #14: Salvaged for 200 Rupees
Treasure Chart #14 points to a sunken treasure here. Align your boat where the chart indicates (roughly where an island will eventually rise) and haul up another chest of 200 Rupees. Even though the island itself is inaccessible now, you’ve claimed its hidden loot in advance.


From these empty seas, turn east toward Eastern Triangle Island. This small triangular isle is one of the three locations meant for placing the Goddess Pearls, although you might not have done so just yet.
Treasure Chart #34: Salvaged for 200 Rupees
Just off the coast, open Treasure Chart #34 and seek out the sunken treasure indicated. The spot is a bit further east near Two-Eye Reef, but you can make the detour now. Sail until you find the ring of light on the ocean and salvage the chest for another 200 Rupees. With that done, return your course to the south.


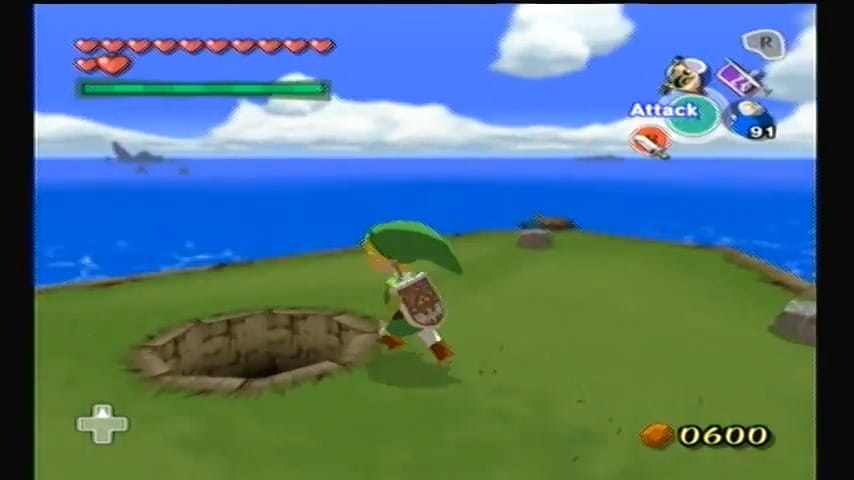
Your next destination is Bomb Island, a round, grassy island sitting by itself in the open sea. As the name implies, you’ll be using explosives. Land on Bomb Island and notice the large rock on top. Toss a Bomb or two to blow it to bits, revealing a hole. Drop down into the hidden cave for a fiery challenge.
Inside, a Magtail (a giant centipede-like magma creature) crawls toward you. Defeat the Magtail or smack it with your sword to make it curl up into a spiky ball. While it’s curled, pick it up and set it on the round floor switch nearby. The creature’s weight depresses the switch, triggering a door to open. Go through that newly opened door into the next room.


In this second chamber, you’ll see a narrow walkway and another floor switch across the room, beyond a gap. Step on the switch you find on your left as you enter; doing so causes two flames to ignite in the center of the room, each encircling a different switch. Now you need to press those two switches, but the rings of fire block direct access. Soon, more Magtails will emerge to attack.
When a Magtail charges, strike it so it rolls up, then carry the curled enemy and throw it into one of the flaming rings. Aim so that the Magtail lands in the fire and onto the switch inside, using its body to press the switch down. If done correctly, the flame will disappear as the switch activates. Repeat the process for the second ring of fire: lure or toss another Magtail into it so the creature presses that switch as well.


Heart Piece #24 of 44
Once both switches are held down, the remaining flames in the room will extinguish, including those guarding a treasure chest on a high platform. Climb up and open the chest to claim Piece of Heart #24! This hard-earned Heart Piece will complete another Heart Container (if you’ve been following along collecting others). With the prize in hand, exit the cavern.


Back on your boat, there’s still more treasure around Bomb Island’s sector. Pull out your charts and prepare for a salvage spree. You likely have a few treasure charts whose rewards you haven’t pulled up yet, and now is a good time to grab them for extra cash and prizes. Open them up and sail to each marked location one by one. Using the glowing light rings as your guide, haul up the sunken chests indicated by the following charts:
Heart Piece #25 of 44: Treasure Chart #31
Treasure Chart #31 yields a Piece of Heart (this is Piece of Heart #25 on your journey). The treasure is hidden in the northern sea (near Northern Fairy Island at sector A1). Make sure to snag this Heart Piece from the gleaming ring once you sail to the spot.


Heart Piece #26 of 44: Treasure Chart #33
Treasure Chart #33 yields another Piece of Heart (your Piece of Heart #26). The chest lies in the far southeast reaches of the Great Sea (around the Five-Star Isles sector). Head there and pull it up to further increase your Heart count.


Having obtained those Heart Pieces, continue salvaging to fatten your wallet. By the time you finish this treasure-hunting circuit, you should have amassed a hefty sum of Rupees. Your ship’s hold is also bursting with new collectibles and upgrades – and we’re not done yet!
Now plot a course for Ice Ring Isle, located in the chillier southern seas.
Sea Chart Info #36: Ice Ring Isle
As you approach the icy island, chart it on your map (Sea Chart Info #36) by feeding the Fishman.


The isle is engulfed in a frigid wind and coated in slippery ice. At this moment, you won’t be able to explore the island’s interior because everything is frozen solid. (You’ll eventually need a Fire Arrow to thaw the icy flames blocking the cave entrance here.) For now, simply mark Ice Ring Isle on your Sea Chart and note its location. We’ll return later when you have the means to dispel the cold.
Treasure Chart #17: Salvaged for 200 Rupees
Treasure Chart #17 – Pull up a 200 Rupee chest from the waters near Ice Ring Isle (sector E5).


Treasure Chart #1: Salvaged for 200 Rupees
Treasure Chart #1 – Salvage a 200 Rupee chest in the waters by the Private Oasis (sector B4).


There’s one more important upgrade to get in this region.
Sea Chart Info #36: Ice Ring Isle
As you approach the icy island, chart it on your map (Sea Chart Info #36) by feeding the Fishman.
Just a short sail to the southwest of Ice Ring Isle is Southern Fairy Island (one square north of Outset Island). In the waters surrounding the island, you’ll find a trio of wooden lookout platforms.
Treasure Chart #40 (Collectible #22 of 41)
Begin by using your ship’s cannon to destroy all the cannons mounted on these platforms. Once the defenses are down, board the platforms and defeat any Bokoblins you encounter. Two of the platforms have ladders for easy access. The third platform lacks a ladder, so use your Deku Leaf to glide from one of the taller platforms to this one. Upon landing, you’ll find a treasure chest containing Treasure Chart #40.


Head there and use a Bomb to blast open the capped fairy fountain (Southern Fairy Island has a stone gate that can be destroyed with your cannon or bombs). Just outside the fairy’s grotto, you’ll find a Blue ChuChu.


Bomb Bag Upgrade #2
Enter the fairy’s grotto and greet the Great Fairy inside. She will grant you Bomb Bag Upgrade #2, boosting your bomb capacity to 99 bombs – the maximum! Now you’ll never worry about running out of explosives on your adventures. With your arsenal fully enhanced and pockets full of Rupees, it’s time to turn northward and explore the other corners of the Great Sea.


Treasure Chart #40: Salvaged for 200 Rupees
Set sail to Headstone Island using Treasure Chart #40 and salvage a 200 Rupee chest.


Treasure Chart #40: Salvaged for 200 Rupees
Navigate to Horseshoe Island using Treasure Chart #9 and salvage a 200 Rupee chest.


Sail to Diamond Steppe Isle (A6). As you approach the area, watch for a conspicuous flock of seagulls circling above the sea—a clear indicator of the Big Octo’s presence. Once you navigate into the center of the seagull formation, the massive eight-eyed Big Octo will emerge, initiating the battle. Each of its eyes requires three hits to be destroyed. Upon successfully vanquishing the creature, it will leave behind a treasure chest containing a Silver Rupee worth 200 Rupees. Use your Grappling Hook to retrieve this reward from the depths.


Northern Explorations: Needle Rock to Windfall Island
Set sail north to Needle Rock Isle. This island is recognizable by the tall, needle-like spire jutting from its center and the ring of fire atop a nearby chest (which you can’t reach just yet without a certain seagull-assisted trick).
Treasure Chart #28: Salvaged for 200 Rupees
Before stepping onto Needle Rock, take care of a quick treasure: open Treasure Chart #28 and notice it marks a spot in these waters. Sure enough, near Needle Rock’s perimeter you’ll find a glowing beacon on the waves. Position the King of Red Lions above it and salvage the chest containing 200 Rupees.


Continue your journey northward to the Three-Eye Reef.
Sea Chart Info #37: Three-Eye Reef
As you approach this reef (distinguished by its square of high rock walls with three openings), be sure to chart it (Sea Chart Info #37) with the help of the Fishman.


From Three-Eye Reef, head further north to Western Fairy Island (west of the Mother & Child Isles).
Sea Chart Info #38: Western Fairy Island
Chart this island (Sea Chart Info #38) when you arrive.


Treasure Chart #8: Salvaged for 200 Rupees
There’s treasure to claim nearby. Just off Western Fairy’s coast, open Treasure Chart #8. The chart points to a sunken treasure right in this sector. Sail around until you spot the telltale ring of light on the water, then grapple up the chest for 200 Rupees. That’s yet another easy payout thanks to your growing collection of sea charts.


Keep sailing north.
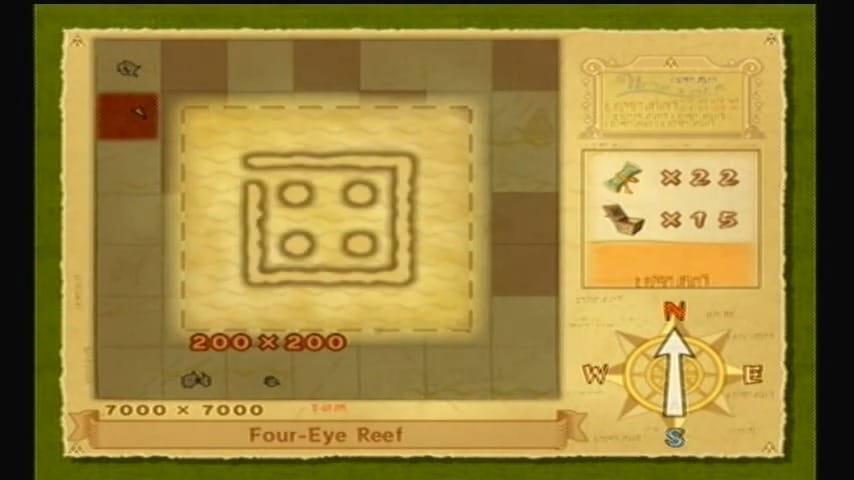
Sea Chart Info #39: Four-Eye Reef
Next stop: Four-Eye Reef, which you should chart on your Sea Chart (Info #39) as you pass by. Four-Eye Reef is another fortress-like cluster of rock, shaped vaguely like a square doughnut with four openings. You might see warships or cannon platforms around it. Again, you can clear the enemies out now or later; doing so would eventually net you a treasure chart, but it’s not required at this moment. For now, simply map the location and carry on.


Steer your boat to the east toward the Mother & Child Isles. This unique location actually consists of a large central island (“Mother”) surrounded by a few tiny islets (“Children”). You normally can’t land on the big central isle by boat (it’s completely enclosed by tall cliffs), but you can reach the small outer island.
Sea Chart Info #40: Mother & Child Isles
Feed the Fishman there to chart the Mother & Child Isles (Sea Chart Info #40). Mark it down, and note that this is a special place you’ll teleport into later with a certain warp song.


Treasure Chart #29: Salvaged for 200 Rupees
Before leaving the area, put your Grappling Hook to work one more time – Treasure Chart #29 has a prize for you here. According to the chart, a treasure lies in the waters near the Mother & Child Isles. Scan for the ring of light and salvage the chest, which holds 200 Rupees.


Now turn northward to Star Island, one of the northernmost islands on the Great Sea.
Sea Chart Info #41: Star Island
Chart Star Island (Sea Chart Info #41) with the Fishman’s help as you arrive. Star Island is a circular isle with several large boulders arranged on its grassy surface. There are secrets hidden here for those bold enough to blow things up.


Treasure Chart #7: Salvaged for 200 Rupees
First, while still offshore, open Treasure Chart #7 and fish out the treasure indicated nearby – it’s sitting in this very sector (Star Island’s quadrant). Grapple the chest from the water to snag 200 Rupees.


With that done, land on Star Island itself for a bit of spelunking. Be on the lookout for a Blue ChuChu on the surface.


Heart Piece #27 of 44
Equip your Bombs and blow up all the big boulders scattered around Star Island’s field. Under one of these rocks you’ll uncover a hidden hole in the ground. Drop down into the subterranean grotto. You’ll find yourself in a cavern arena where enemies ambush you. Be ready to fight: a couple of Moblins (the heavy spear-wielding pig warriors) will attack, accompanied by smaller Miniblin pests. Use your sword, shield, and dodge tactics to defeat all the enemies in the room. Once you’ve vanquished the lot, a treasure chest will materialize. Open it to claim Piece of Heart #27. Well done – the boulders above hid a valuable prize! Climb back out to your boat when you’re finished.


From Star Island, sail east to Northern Fairy Island (located at sector C1 on your map). There’s a sunken treasure to collect.
Treasure Chart #24: Salvaged for 200 Rupees
Open Treasure Chart #24, which reveals a hidden chest in the waters around Northern Fairy Island. Use the chart to guide you to the exact spot, then salvage the treasure to pocket another 200 Rupees.


With Northern Fairy Island taken care of, our next targets lie to the south. Cruise southward to Spectacle Island, easily identified by its two peaked rocks (resembling a pair of spectacles) and the game platform run by Salvatore. Chart this island earlier if you hadn’t (Spectacle is one square north of Tingle Island).
Treasure Chart #24: Salvaged for 200 Rupees
There’s a bit of treasure hunting to do here as well. Treasure Chart #22 points to a sunken chest in the vicinity of Spectacle Island. Sail around the island until you locate the glowing ring, then grapple up the chest for 200 Rupees.


From Spectacle Island, head directly south to Tingle Island, the tall totem-pole-like island where Tingle and his brothers reside (sector C3 on the chart).
Treasure Chart #24: Salvaged for 200 Rupees
Just offshore, there’s one more easy prize waiting beneath the waves. Open Treasure Chart #10, which highlights a treasure near Tingle Island. Line up your boat over the glowing spot and haul up a chest containing 200 Rupees. That’s the reward from Chart #10, adding to your ever-growing wallet. With Tingle Island covered, you’ve now charted and scoured a huge portion of the Great Sea!


Finally, sail east to Windfall Island, the bustling town island which should be just a short journey from Tingle’s spot. It’s time to take care of some business and side quests on Windfall now that you’ve returned with plenty of Rupees and new items.
Windfall Sidequests and Rock Spire Adventures
Back at Windfall Island, there are a couple of major optional activities you can undertake to snag more treasure charts and heart pieces. You’ve likely noticed the Auction House in the mansion (the big red door on the upper plaza) and some strange pedestals around town. Now is a great time to handle both the auction and the town decoration side quest.
At night, the wealthy mansion on Windfall hosts an auction run by Zunari. This is your chance to win exclusive items:
Treasure Charts #18 & 38
You can acquire these charts at Windfall Island’s nightly Auction House. Treasure Chart #38 is normally the first item up for bid, and Treasure Chart #18 is fourth.

Heart Piece #28 of 44
To obtain Piece of Heart #28 in The Legend of Zelda: The Wind Waker, participate in the nightly auction held at Windfall Island. The auction house is located behind the red door near Zunari’s stall. Each night, a random item is presented for bidding, which can include Treasure Charts, Joy Pendants, or a Piece of Heart. If the Piece of Heart isn’t available on your first visit, you may need to win other items before it appears in the rotation.

Save your game and make sure you have a hefty sum of Rupees on hand (preferably 300+ to be safe for all items). When you enter the Auction House after sunset, you’ll join a bidding war with the locals. Only one item is auctioned per night, and the item is randomly chosen. If the Piece of Heart isn’t offered the first time, you may get one of the treasure charts as the item instead – don’t worry, you’ll want those too. In fact, plan to attend multiple nights so you can win all three of these prizes in separate auctions.
Speak to Zunari to begin an auction. The key to winning is to wait until the final moments of the auction before making your move. At the start, refrain from bidding and let the other bidders squabble, which causes the clock to tick down. (Tap the A button repeatedly to speed up the auction timer if you like – you’ll see a timer bar running out.) When there are about 10 seconds left (the game will give a warning when time is nearly up), that’s your cue. Make a large bid increase (at least 10+ Rupees over the current highest bid).
For example, if the current bid is 120 Rupees, jump up to around 130–140 Rupees. Such a bold bid will stun the other bidders in shock. They’ll be incapacitated for several seconds, during which time the clock keeps running. If you timed it right, the clock will run out before they recover, meaning you win the auction as the highest bidder! Using this strategy, you can reliably win each item.
Once you’ve had your fill of the nighttime auction, play the Song of Passing (or simply wait until dawn) to make it daytime on Windfall. Now it’s time to beautify the town. Find Zunari (the parka-wearing trader on the stall in central Windfall) during the day and talk to him.
If you haven’t started it already, tell him you’re interested in helping spread joy around town. Zunari will introduce you to the idea of decorating Windfall Island with Shop Guru statuettes and flowers. He will give you a Town Flower as a starting gift (or you can now purchase Town Flowers from him for 10 Rupees apiece). These Town Flowers are small white flower pot decorations, and they are the cheapest ornament Zunari stocks.


Your goal is to place a Town Flower on each of the Joy Pedestals scattered around Windfall Island. There are 14 empty pedestals total, located all over town – along the main path, near the shop and cafe, by the beach, outside the Auction House, and even inside some buildings. Buy as many Town Flowers as you need (you’ll need 14 in total to fill every pedestal, so make sure you have around 140 Rupees, which you likely do). Now get to decorating: walk up to each pedestal (they look like round metal stands) and press the button prompt to set a Town Flower there. One by one, go around the island and place Town Flowers in all 14 pedestals.
You’ll see Windfall start to look more colorful with all these flowers adorning the streets and plazas. (Feel free to explore indoors as well – for example, there are pedestals inside the Windfall Auction House lobby that count toward this.) Once all 14 pedestals have been decorated with a Town Flower, you’ve completed the town beautification initiative.


Heart Piece #29 of 44
After planting the final flower, seek out the man sitting on the bench near Zunari’s stall in the central plaza. This gentleman (named Sam) has been eagerly watching your decorating effort. Talk to him and he’ll be delighted by how lovely the town looks now. As thanks for your hard work making Windfall beautiful, he will reward you with Piece of Heart #29! Another Heart Piece is yours, courtesy of the Joyous Volunteer Association. Give yourself a pat on the back – Windfall has never looked better.


With the Windfall side quests done, stock up on any supplies you need (potions, arrows, etc.) and then set sail for Rock Spire Isle to the west. From Windfall (sector D2), sail two squares west and one square south to reach Rock Spire Isle (located at sector B3 on your Sea Chart).
Sea Chart Info #42: Rock Spire Isle
As you approach, chart the island with the Fishman to mark Rock Spire Isle (Sea Chart Info #42). This island is immediately recognizable by the two huge stone spires towering from the sea, with narrow ledges spiraling around them. There’s a lot to do here, so park your boat and get ready for exploration and shopping.


First, sail up to Beedle’s Special Shop Ship, which is patrolling the waters around Rock Spire. This is a unique Beedle shop (you’ll notice Beedle wearing a helmet on this boat) that sells rare items – albeit at steep prices. Climb aboard the shop ship and check out the wares.


Empty Bottle #3
Purchase the Empty Bottle (#3) for a hefty price (around 500 Rupees). This is your third bottle, expanding your ability to carry potions, fairies, or other collectibles.

Heart Piece #30 of 44
Next, break open your wallet for the Piece of Heart (#30) on sale. It costs a whopping 950 Rupees, but it’s worth every bit for another Heart Piece.
Treasure Chart #4 (Collectible #25 of 41)
Lastly, if you have enough Rupees left, buy Treasure Chart #4 for about 900 Rupees. (This chart will lead you to yet another Piece of Heart later on, so it’s a good investment toward 100% completion.)

It’s quite an expensive shopping trip, but thanks to all the Rupee treasure you gathered earlier, you should be able to afford everything. Once you’ve cleaned out Beedle’s special stock, exit the shop ship.
Now, let’s explore Rock Spire Isle itself. The island’s paths are blocked by massive boulders along the narrow ledges. Equip your Bombs and blow up the large boulders that obstruct the pathways winding up the spire. Carefully hop and climb your way upward as you clear the debris. Partway up, you’ll find a broken bridge or gap – you might notice a high ledge across the way.
Normally, a Hookshot would be used here to reach higher ground, but you don’t have that item yet. Fortunately, you won’t need to go all the way to the top for our prize. As you bomb the rock barriers, look for a cave entrance revealed partway up the spire. (One of the blasted boulders uncovers the mouth of a hidden cave on the cliffside.) Hop into that opening to find a secret cavern inside the rock.


Treasure Chart #37 (Collectible #26 of 41)
Inside the dim cavern, Keese (bats) will swoop down to harass you. Take out the Keese with your sword, boomerang, or a quick spin attack. Once the room is clear of enemies, you’ll notice two unlit torches in the cave. Light both torches – you can do this by using a Deku Stick lit from an existing flame, or simply fire a couple of Fire Arrows at them if you have the Bow.
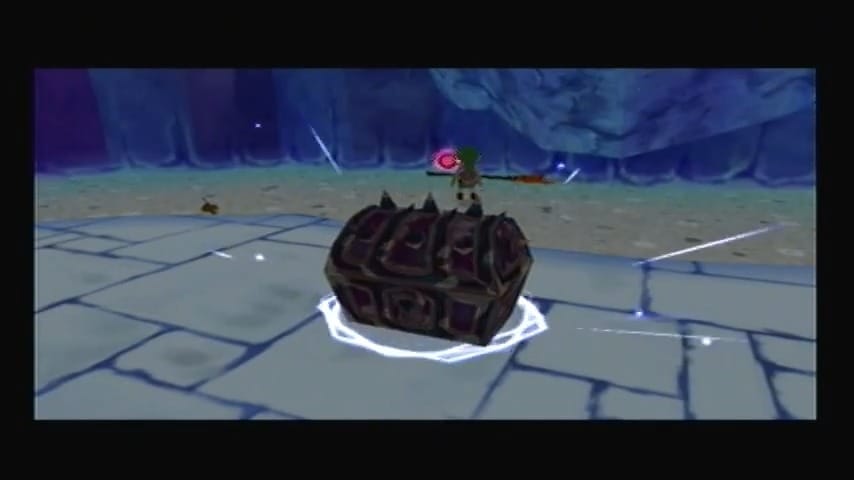
When both torches are burning, a treasure chest magically appears in the center of the cave. Open it up to obtain Treasure Chart #37! This chart will surely lead to something good later, so add it to your collection.


Exit the cave and finish any last look around Rock Spire’s exterior to find a Blue ChuChu.

Back aboard the King of Red Lions, there’s one more task here that you shouldn’t miss. Two enemy warships patrol the waters near Rock Spire Isle.
Heart Piece #31 of 44
These gunboats have been causing trouble, and they also carry spoils you’ll want. Sail out and engage the enemy ships – use your cannon to fire bombs and sink both warships. Keep moving to avoid their shots, and a few well-placed cannon blasts will send each ship to the seafloor.
When each warship is destroyed, it leaves behind a shining ring of light in the ocean where it went down. Sail to those spots and use your Grappling Hook to salvage the sunken spoils. One ship’s treasure is a cache of Rupees (you’ll snag an easy 100 Rupees), but the real prize is in the other: you’ll pull up a chest containing Piece of Heart #31! Collecting this Heart Piece brings you yet another step closer to a full heart container.


Having thoroughly scoured Rock Spire Isle’s offerings – from rare shop treasures to secret charts and enemy loot – you can now set your sights on the next adventure. Take a moment to admire your fully charted map section and healthier heart meter.
With pockets full of new items and upgrades, you’re well-prepared for whatever lies ahead. When you’re ready, chart a course for your next destination – the Great Sea still holds many secrets, and you’re steadily becoming the true hero of the winds! Enjoy the journey to come, knowing that no sunken treasure or island mystery can elude you for long. Happy sailing!