


The Wind Waker 100% Completion Walkthrough
- Prologue: Outset Island: Introduction to Link’s home, initial quests, and obtaining the Hero’s Sword and Shield.
- Forsaken Fortress (First Visit): Stealth mechanics and rescuing Aryll.
- Windfall Island: Acquiring the Sail, meeting key characters, and side quests.
- Dragon Roost Island & Cavern: Assisting the Rito tribe, dungeon exploration, and obtaining Din’s Pearl.
- Forest Haven & Forbidden Woods: Meeting the Great Deku Tree, aiding the Koroks, and securing Farore’s Pearl.
- Post-Forbidden Woods Exploration: Collect charts, heart pieces, and upgrades across the southern sea.
- Greatfish Isle & Nayru’s Pearl: Story progression and obtaining the final pearl.
- Great Sea Side Quest Adventure: Explore islands and complete Windfall quests for key upgrades and collectibles.
- Tower of the Gods: Dungeon challenges and gaining access to Hyrule.
- Hyrule Castle: Discovering the Master Sword and storyline developments.
- Post-Hyrule Castle Exploration: Complete trading quests for heart pieces, treasure charts, and the Magic Armor.
- The Forest Water Challenge: Locating and saving each withered tree for a heart piece.
- Forsaken Fortress (Second Visit): Confronting the Helmaroc King and rescuing Aryll.
- Reef Special Charts & Windfall Side Quests: Six-Eye Reefs, Treasure Charts, and Windfall Island side quests.
- Fire Mountain & Ice Ring Isle: Obtain the Power Bracelets and Iron Boots from these elemental islands to access the next temples.
- Earth Temple: Venture with Medli into the Earth Temple to cleanse evil and claim the Mirror Shield.
- Wind Temple: Enter Gale Isle, team up with Makar, and conquer the Wind Temple.
- Triforce Shard Quest: Locating Triforce Charts, deciphering them, and retrieving Triforce shards.
- Ganon’s Tower: Final challenges, boss rematches, and the ultimate confrontation with Ganondorf.
Table of Contents
Before pressing on with the next story destination, now is the perfect time to scour the Great Sea for optional treasures and upgrades. These side adventures will reward you with powerful tools and collectibles that make the journey ahead easier. If you’re eager to continue the main quest, you can skip ahead – but a true adventurer wouldn’t want to miss out on a warp song, extra Heart Pieces, and the Magic Armor!
Ballad of Gales & Sunken Treasure Hunt
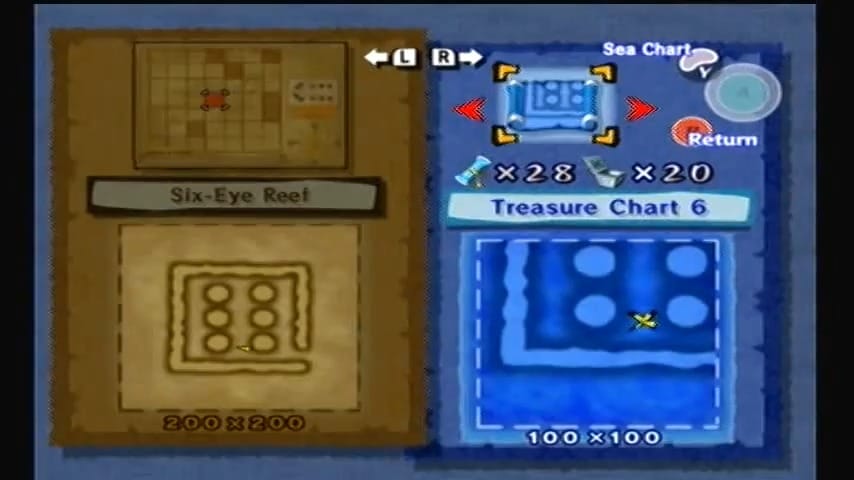
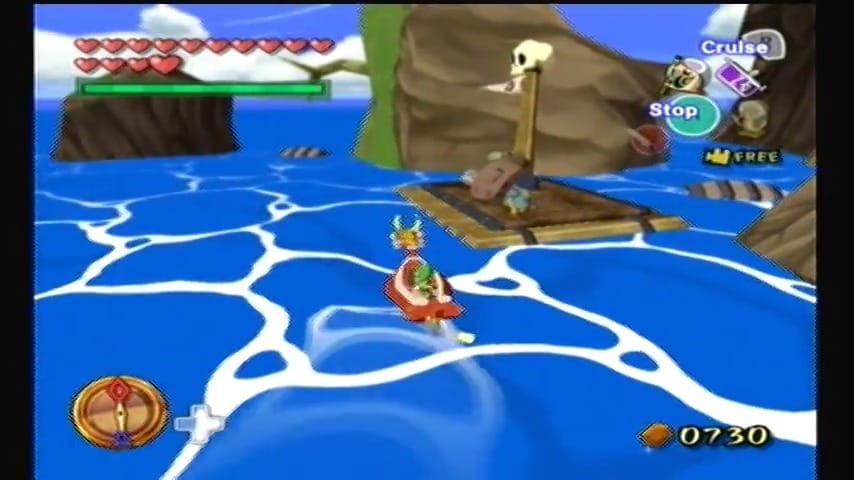
Back atop the Great Sea, you find yourself beside the Tower of the Gods under a darkening sky. Instead of sailing straight to the Forsaken Fortress, chart a course for some nearby bounty. Just west of the tower lies Six-Eye Reef, a ring of rock spires bristling with cannons.
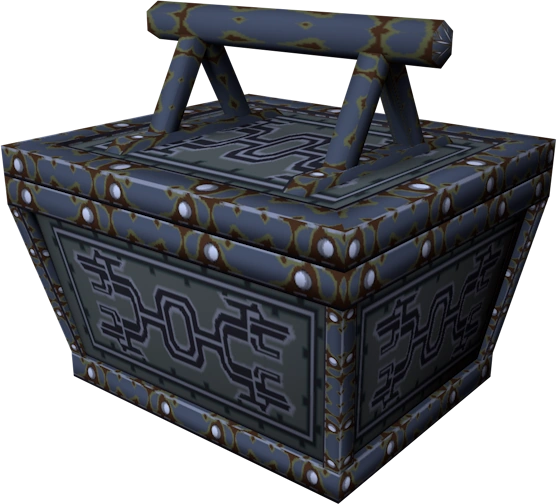
Treasure Chart #6: Salvaged for 200 Rupees
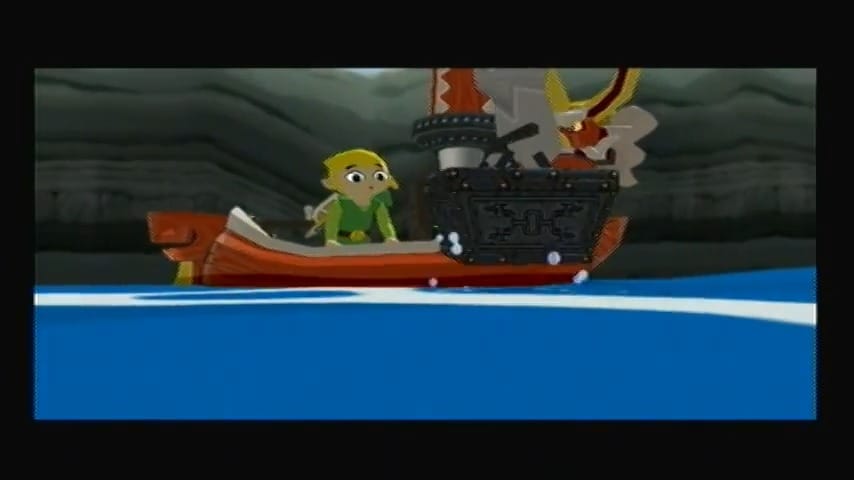
Sail into the reef’s quadrant carefully (you can avoid engaging the cannons for now) and open your Treasure Chart #6. Scan the waters for a glowing ring and use the Grappling Hook to salvage a sunken treasure. You haul up a heavy chest from the depths, crack it open, and pocket its prize – a whopping Silver Rupee worth 200 Rupees. Not a bad start for your sea scavenging!

From Six-Eye Reef, turn north toward Northern Triangle Island. As you approach the triangular islet, the weather suddenly shifts and the sea starts to churn. A colossal whirlwind appears, pulling you in – you’ve sailed straight into Cyclos’ cyclone! This encounter is optional, but highly recommended. Quickly equip your bow and shoot arrows at Cyclos, the frog-like wind deity perched in the cyclone.

Missable Pictograph Warning: Cyclos
If you are intending to complete the Nintendo Gallery Figurine side quest, be sure to snap a picture of Cyclos before you shoot him. Once this encounter is complete, he will be inaccessible in the future.
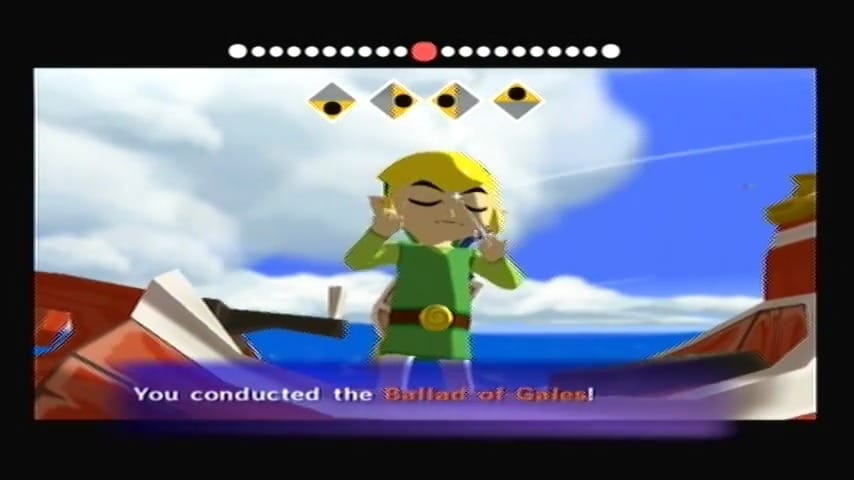
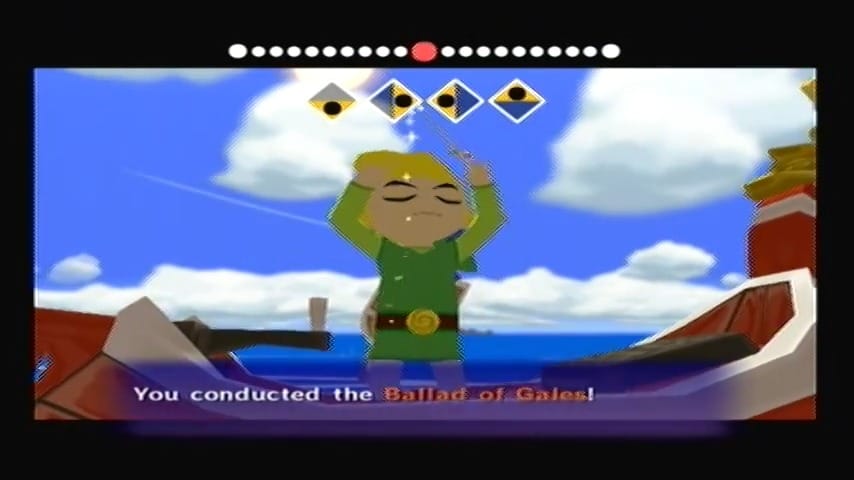
The trick is to land three hits with your arrows before the twister tosses you across the map. Aim true amid the driving winds – after a few well-placed shots, the giant frog god yields. Impressed by your marksmanship, Cyclos halts the storm and teaches you the Ballad of Gales, a new song for your Wind Waker.


Wind Waker Song: Ballad of the Gales
This triumphant tune allows you to warp to key locations across the Great Sea in the blink of an eye, an invaluable ability that will save you countless sailing hours.
Fresh off your victory over Cyclos, play your newly learned song and warp to Dragon Roost Island in a flash of cyclonic wind.


From Dragon Roost, sail directly south to the boiling volcano of Fire Mountain. The peak spews fire and molten rocks into the sky, making for an intimidating sight (you’ll tackle this fiery island itself later, once you have a way to cool it down).
Treasure Chart #37: Salvaged for 100 Rupees
For now, open Treasure Chart #37 and watch for the telltale glow on the ocean surface near Fire Mountain’s base. Steer the King of Red Lions into position and lower the crane to salvage the treasure indicated by Chart #37. You pull up another sunken chest, which bursts open to reveal an Orange Rupee — a handy infusion of 100 more Rupees for your wallet. Be wary of the falling volcanic rocks as you do this; a quick dodge can prevent any singe to your boat. With rupee riches in tow, you’re ready to continue your treasure hunt.


Let’s head to a new island and fill in more of your Sea Chart. Warp back to Dragon Roost, then sail westward. Before long, you’ll spot the low, grassy atoll known as Pawprint Isle on the horizon. This quirky little island is actually a ring of small islets encircling a larger “pawprint” shaped landmass in the middle. As you approach Pawprint Isle, be sure to take out some All-Purpose Bait and toss it overboard when you see the leaping Fishman nearby.
Sea Chart Info #44: Pawprint Isle
Charting this island will give you Sea Chart Info #44. The talkative Fishman gladly paints Pawprint Isle onto your Sea Chart and shares a fun bit of local lore: “Do you know what a ChuChu is, small fry?” he asks. “No, I’m not talking about smooching sounds! I mean those blobs of goo that hop at you. This island’s crawling with ChuChus, and I even see that potion brewer from Windfall Island come here sometimes… Now why would he do that, huh?” It seems Pawprint Isle is teeming with those slimy ChuChu creatures – a hint that someone might prize their Chu Jelly for potions.


Heart Piece #32: Salvaged from Treasure Chart #30
Thanking the Fishman for the tip, you set your sights on treasure next. Use the Wind’s Requiem on your boat to make the breeze blow toward the glowing spot in the water, and haul up the sunken chest marked on Treasure Chart #30. Inside is a very welcome prize: Piece of Heart #32! Adding this Piece of Heart to your collection brings you closer to an extra Heart Container (and if this happens to complete one, your maximum health will increase by one). With Pawprint Isle’s chart info collected and its treasure claimed, you sail on with renewed energy.


Our next stop is a bit more dangerous. Ride the winds (or warp to Dragon Roost again for convenience) and then sail north to the Seven-Star Isles. These waters, dotted with spiky rock pillars, are home to enemy lookout platforms loaded with Wizzrobe sentries. As you arrive, you’ll see three wooden lookout towers rising from the sea just south of the isles. Prepare for a fight: climb up the central platform via its ladder.
The moment you set foot on the tower, cackling Wizzrobes materialize in the air! These robed, bird-like magicians will fling fireballs and summon additional enemies if you give them the chance. Quickly draw your bow and shoot down the Wizzrobes as they appear on each platform. Use the Gales Boomerang or arrows to deal with any pesky Kargarocs or Miniblins they might summon, but prioritize the Wizzrobes before they overwhelm you.


Treasure Chart #16
With sharp aim and a few well-timed shots, you clear all the Wizzrobes on the three platforms. Each defeated foe triggers a chest to appear on its platform. Once the coast is clear, hop over to loot your rewards: one chest holds a Red Rupee, another contains a Golden Feather (a spoil valued by certain NPCs), and the grand prize on the last tower is Treasure Chart #16. Excellent! This new Treasure Chart #16 will lead you to yet another hidden loot, but we’ll need to go pick that up a bit later. For now, bask in your victory atop the high seas’ watchtowers.


Before moving on, there’s one more secret nearby to grab. Just east of the Seven-Star Isles is a lone structure sticking out of the water – the Flight Control Platform. This is the site of a mini-game where Rito challenge you to glide as far as possible for a prize. We’ll come back to try the flying challenge later; for now, there’s something underneath it. Near the wooden platform, you’ll find a humble Submarine bobbing in the water. Hop off your boat and climb into the rusty sub’s hatch to see what’s inside.
As soon as your eyes adjust to the dim light, a horde of enemies greets you – Miniblins start swarming and chattering, and a pair of wicked Wizzrobes pops up across the room. It’s cramped quarters in here, so be ready for close combat. Focus on the Wizzrobes first: target them and fire a couple of quick arrows to take them down before the Miniblins distract you too much. The Miniblins will keep coming in seemingly endless waves, gibbering and poking at you with tiny tridents.
Rather than trying to defeat every single one (they’ll just respawn), locate the ladder and climb up to the higher ledges where the Wizzrobes were. Once the summoners are gone, the infinite swarm will cease. Clear out any remaining minions and open the treasure chest that appears. Inside, you discover the Platform Chart.


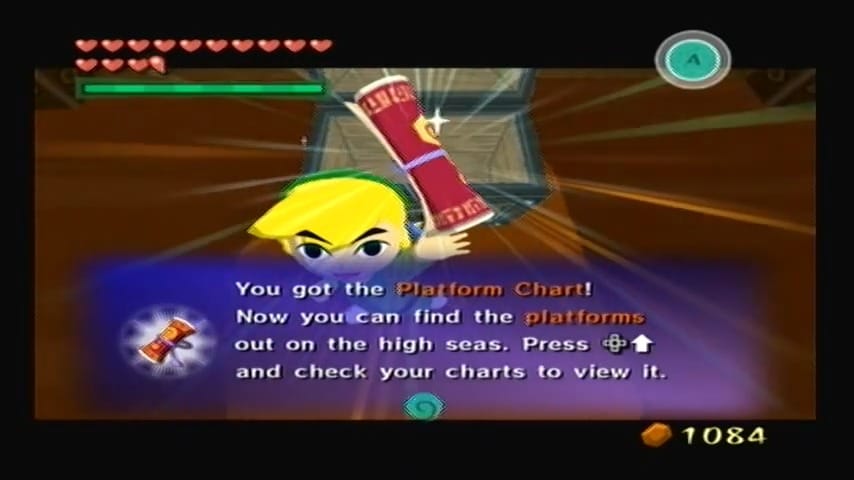

Special Chart: Platform Chart
A special sea chart that marks the location of every enemy lookout platform across the Great Sea. This chart is incredibly useful if you plan to systematically raid all those platforms for loot later on.
After pocketing the Platform Chart, exit the submarine. Your work in this region is done, and your map is richer for it. At this point, you’ve collected a new warp song, multiple Treasure Charts, a Heart Piece, and even a special chart – not a bad haul for optional adventuring! Next, let’s leverage your new fast-travel ability to conduct a global trading quest for an even bigger reward.
Merchant Trading Sequence for the Magic Armor
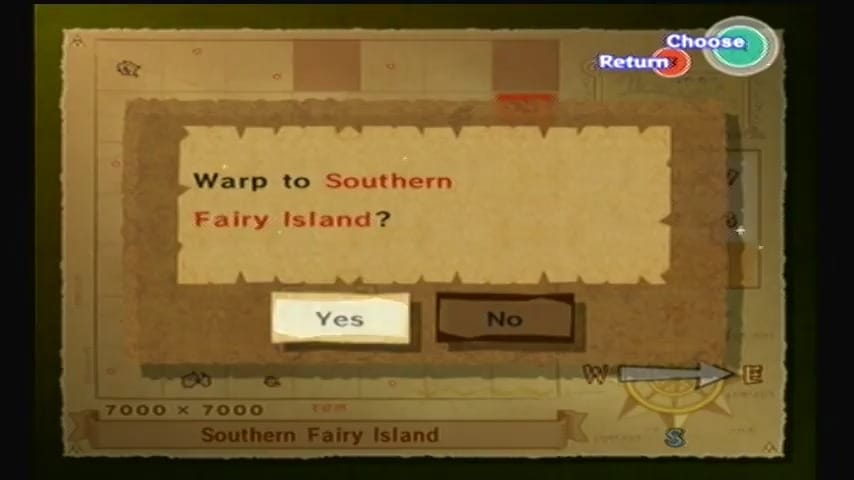
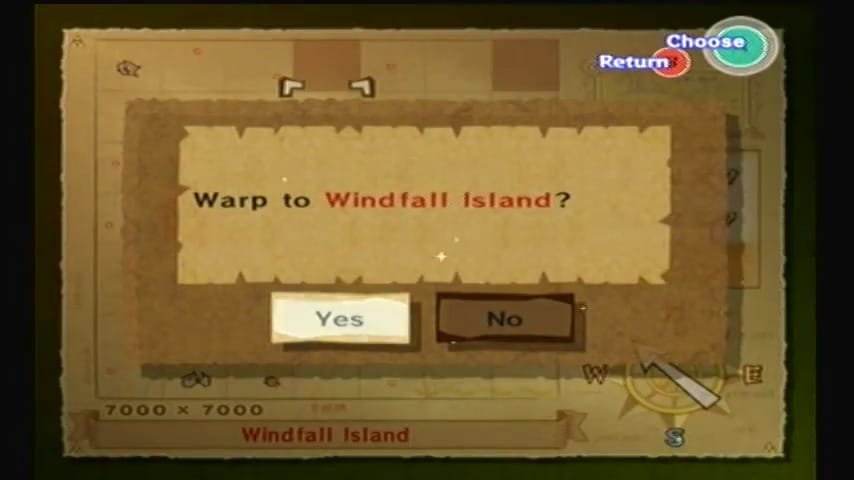
With the Ballad of Gales at your disposal, you can now quickly zip between far-flung islands – a huge help for the traveling merchant’s trading quest. This optional sequence of trades will ultimately reward you with another Piece of Heart and the coveted Magic Armor, a mystical relic that can shield you from harm. If you haven’t already started the trading sidequest, you might recall the shopkeeper Zunari on Windfall Island gave you a Town Flower (the little windmill-like flower in your Delivery Bag) when you first spoke to him about expanding his business. If you don’t have a Town Flower on hand, stop by Zunari’s stall on Windfall now and buy one for a few rupees – it’s the first item you’ll need to kick off the trades. Once you’re stocked with a Town Flower, play the Ballad of Gales and warp over to Southern Fairy Island (one square northeast of Outset Island).

Upon arriving at Southern Fairy Island’s quadrant, take a quick detour for treasure.
Heart Piece #33 of 44
Open up your Treasure Chart #4, which you might have acquired earlier from Beedle’s special shop ship at Rock Spire Isle. Scan the waters around Southern Fairy Island and locate the shining spot on the waves. Use the Grappling Hook to salvage the treasure marked by Chart #4, and you’ll reel in a chest containing Piece of Heart #33! This is another valuable heart piece toward your collection.


Southern Fairy Island itself houses a Great Fairy who upgrades your bombs, but you likely visited her earlier; if not, you can pop inside the shell-shaped island and get an upgrade now. Otherwise, back to the mission at hand: trading.
From Southern Fairy’s location, sail one square west to the distinctive Shark Island – you’ll know it by the four rock spires jutting out like a shark’s fin.
Sea Chart Info #45: Shark Island
As always, feed the Fishman some bait here to update your sea chart with Sea Chart Info #45. The Fishman paints Shark Island on your map and excitedly asks, “Have you ever been caught in one of those cyclones, small fry? The wind deity Cyclos uses them to zip around the sea, or so I’ve heard. If you had that power, you wouldn’t have to sail everywhere… wouldn’t that be nice, fry?!” He’s essentially hinting at the very ability you just earned by shooting Cyclos.


If you hadn’t already, this clue would urge you to seek out Cyclos for the warp song. With Shark Island charted, there’s treasure to grab here as well.
Treasure Chart #16: Salvaged for 200 Rupees
You recently obtained Treasure Chart #16 from the Seven-Star Isles platform battle, and it just so happens the treasure indicated on it is right here at Shark Island. Sail around the island (watch out for any patrolling enemies or cannon emplacements on the shore) until you spot the glowing light on the sea. Hoist up the treasure from Chart #16, and you’ll snag a generous Silver Rupee (200 Rupees) from the depths.


Shark Island also hides a tricky ground puzzle and secret cave that we can’t fully tackle until later (you’ll need a certain pair of heavy boots and a powerful hammer to solve it), so for now, continue onward with the trading quest.
Now that you’re in the southwest quadrant of the map, warp to Greatfish Isle in the far west. Greatfish Isle remains a shattered, rainy ruin ever since the tragedy that occurred there (when Jabun fled and the island was destroyed). Amidst the broken arches of Greatfish, you’ll find a traveling merchant on a raft, identifiable by the huge pack on his back and the bright Goron insignia on his merchandise flag. (Indeed, these merchants are Goron Traders far from home, though they wear disguises and never explicitly say so – a fun nod for series veterans!) Sail up to the merchant’s raft and climb aboard to initiate a trade. Show him your Town Flower. The merchant recognizes it and offers you a deal: he’ll trade you his Sea Flower for your Town Flower, if you pay a small delivery fee (likely 20 Rupees). Accept the offer to complete the first trade – you hand over the Town Flower and receive the exotic-looking Sea Flower in return.


Item: Sea Flower
A rare decorative flower obtained through merchant trading. Used to expand Zunari’s shop inventory on Windfall Island.
The Goron merchant cheerily mentions that your traded item (the Town Flower) will now start being stocked back at Zunari’s shop on Windfall. That means you’re helping expand Zunari’s product line with each trade. But we’re not done here: you can actually continue trading with this same merchant immediately. Take out the newly acquired Sea Flower and show it to the merchant on Greatfish. He’s interested in that as well!
This time he’ll offer to trade you a Exotic Flower (a strange, colorful plant) in exchange for the Sea Flower, plus another rupee fee (about 25 Rupees). Agree to the swap and you’ll obtain the Exotic Flower. Once again, the merchant promises that your traded item will appear in Zunari’s shop inventory. Two trades down, a few more to go!


Item: Exotic Flower
A vibrant and unusual bloom traded from a traveling merchant. One of Zunari’s premium shop items in Windfall’s merchant expansion quest.
Our next destination in the trading network is a short sail away and holds another treasure. From Greatfish, sail one square west (into the neighboring quadrant) to reach the Three-Eye Reef. This reef is similar to Six-Eye Reef you visited earlier but with a different layout of three large rock rings. As you arrive, beware of the warships and cannons guarding the reef’s perimeter – you can choose to engage them with your bombs or simply skirt around the danger.
Heart Piece #34 of 44
Open Treasure Chart #38, which you may have won from the Windfall Island auction previously, and search the waters around Three-Eye Reef for the glowing spot. Use the crane to salvage the treasure corresponding to Chart #38, and you’ll pull up Piece of Heart #34. Nice! (This particular treasure chart and heart piece were added in the Wii U HD version of the game, but in any version, finding an extra heart piece is rewarding.) With that, your heart piece tally grows yet again.


There’s also a hidden challenge inside Three-Eye Reef if you defeat all the enemies, but you can postpone that until later when we sweep all the reefs. For now, continue trading. Use the Ballad of Gales to warp to Forest Haven, then sail a short distance north to Bomb Island (a small round island marked by a giant Bomb-shaped rock). Bomb Island is directly north of Forest Haven’s quadrant. Once there, find the merchant on the tiny raft near the island’s shore. This is another Goron trader, offering different products.


Show him the Exotic Flower you got earlier. The Bomb Island merchant is willing to trade you a Sickle Moon Flag for it (this is a blue flag with a crescent moon design), asking for a modest rupee fee in return. Make the trade to obtain the Sickle Moon Flag, and bid goodbye to the Exotic Flower. As always, your traded item will be sent to Zunari’s shop stock.


Item: Sickle Moon Flag
A crescent-shaped banner acquired through merchant trading. Part of the Windfall Island shop expansion and key to progressing the merchant sidequest.
Now, don’t sail away yet – you can immediately conduct the next trade with the same merchant. Present the Sickle Moon Flag to the Bomb Island trader, and he’ll offer a big statue item: the Fountain Idol (a statue resembling an island spirit or fountain) in exchange. It’ll cost you a few more rupees for shipping, of course (likely around 40 Rupees). Accept the deal and add the Fountain Idol to your Delivery Bag.


Item: Fountain idol
A carved stone statue resembling a serene fountain spirit. Traded from a merchant as part of the shop expansion quest on Windfall Island.
With two more successful trades completed, Zunari’s shop is really expanding! That’s all we need from the Bomb Island merchant for now, so wave farewell and hop back on the King of Red Lions. Our journey now takes us to the northern seas. Warp to Windfall Island to quickly get close to our next targets.


Treasure Chart #18: Salvaged for 1 Rupee
There’s an easy little treasure you can collect: Treasure Chart #18. This chart (won from the Windfall auction earlier in the game) points to a spot right off Windfall’s coast. The reward is more novelty than utility, but completionists will want it. Sail just a bit out from Windfall’s dock, open Chart #18, and salvage the indicated treasure.
You’ll fish up a chest containing a mere Green Rupee (1 Rupee). Yes, you read that right – one rupee. Consider it a humorous keepsake; you can chuckle at the fact that some poor soul went through the trouble of locking a single rupee in a sea chest. At least it didn’t take much effort to grab! With that silly task done, it’s back to the trading quest.


Sail due west from Windfall for two squares (or west to Mother & Child Isles’ region). You cannot warp directly to Mother & Child Isles with the Ballad of Gales, since doing so lands you inside the Mother Isle where the Queen Fairy resides – and you can’t get your boat out from there. So you’ll have to reach Mother & Child Isles by normal sailing. The Mother & Child Isles quadrant consists of a large central island (Mother) and a smaller islet (Child) nearby.
It’s on that small Child isle that the last of the three traveling merchants has set up shop. Sail around the larger island and you’ll see the merchant’s raft next to the tiny islet. Climb aboard and show this Goron trader the Fountain Idol you got from Bomb Island. He’s intrigued and willing to trade you a Big Sale Flag for it. The Big Sale Flag is a bright red flag adorned with a drawing of a shop ship – it symbolizes commerce.
Pay the fee he asks (perhaps ~35 Rupees) and complete the deal to obtain the Big Sale Flag. The Fountain Idol is sent off to Windfall to grace Zunari’s storefront. If you chat with each merchant, you’ll hear how each item originates from a distant land; it’s fun flavor, but we have more trading to do, so let’s keep the momentum.


Item: Big Sale Flag
A bold red flag emblazoned with a shop ship emblem. Traded during the merchant quest to help expand Zunari’s inventory on Windfall Island.
Now we have the Big Sale Flag in hand. It’s time to visit our first merchant again to continue the cycle. Warp back to Greatfish Isle (the central warp will drop you at the same rainy ruins as before). Seek out the Greatfish Isle merchant on his raft.


Show him the Big Sale Flag, and he’ll gladly trade you his Hero’s Flag in exchange. The Hero’s Flag is a green banner emblazoned with a symbol of a courageous hero – perhaps inspired by you, Link! After a small rupee payment (likely around 75 Rupees for this leg), the Hero’s Flag is yours, and the Big Sale Flag goes to Windfall’s shop.


Item: Hero’s Flag
A flag bearing the mark of courage. Traded from a merchant as part of Zunari’s shop expansion quest on Windfall Island.
Don’t sail off yet; you can make another swap right away. Take out the Hero’s Flag and present it to the Greatfish merchant. He happens to have a rare item that he’ll trade for that: the Postman Statue. This statue is a cute figurine of a mailman (it resembles the Rito postmen, complete with uniform and letter). It’s a high-value item in Zunari’s trade sequence. The merchant will ask for a significant sum of Rupees for this trade (often 100 or more Rupees – inflation hits these last trades hard), but it’s worth it. Agree to the deal and receive the Postman Statue in return for the Hero’s Flag. At this point, Zunari’s shop on Windfall is becoming a veritable gallery of worldly curios, thanks to your efforts.


Item: Postman Statue
A detailed statue of a Rito postman, symbolizing dedication and service. Traded during the merchant quest to expand Zunari’s shop on Windfall Island.
Our penultimate trade awaits back at Mother & Child Isles. Sail (or warp to Tingle Island and then sail a short distance) to the Mother & Child region once more and find the merchant on the Child isle.


Show him the Postman Statue you just got. His eyes light up at the sight of it – he’s been looking for this item! In exchange, he offers the ultra-rare Shop Guru Statue. This statue is a golden bust of Zunari himself (the “shop guru”), and it’s the most valuable item in the entire trading sequence. The merchant will demand a hefty surcharge for the trade (around 200 Rupees), so make sure your wallet can handle it. Hand over the Postman Statue, pay the fee, and obtain the Shop Guru Statue, the final trading item.


Item: Shop Guru Statue
A golden statue of Zunari himself, representing ultimate commercial success. The final item in the merchant trading quest and key to earning a Piece of Heart.
With that, you’ve traded your way through a dozen exotic products across the sea. Only one step remains: claiming your rewards for all this hard work. Warp one last time to Greatfish Isle. The trader here on Greatfish mentioned sometime earlier that he’s heard of a legendary merchant’s artifact and would greatly desire to see it.

Heart Piece #35 of 44
The Shop Guru Statue you carry is exactly that. Find the Greatfish merchant and show him the Shop Guru Statue. Overjoyed, he proclaims this is the item he’s been seeking and gives you a Piece of Heart in gratitude – specifically, Piece of Heart #35!
This precious Heart Piece is the final payoff from the trading quest itself, and it might very well complete another Heart Container for you (increasing your maximum health again). Congratulations on completing the island trading sequence! You’ve connected distant merchants, expanded a shop’s inventory, and earned yourself a new Heart Piece. All that remains is to collect your ultimate prize from Zunari back at Windfall.


Play the Wind’s Requiem to set a favorable breeze (or just warp to Windfall if it’s available on your Ballad of Gales menu now that you’ve been there) and sail back to Windfall Island. It’s time to visit our old friend Zunari, the shopkeeper. Thanks to your mercantile adventures, Zunari’s stall is now brimming with exotic wares – all those flowers, flags, and statues you traded have made their way to his shop.

Speak to Zunari, and he will be astounded by the variety of products he can now sell. By fulfilling his request to find new merchandise and traveling merchants, you’ve turned his struggling business into a thriving shop. As a token of his gratitude, Zunari presents you with the Magic Armor! This mystical item appears as a snazzy red outfit or shield when equipped.


Item: Magic Armor
The Magic Armor is a one-of-a-kind defensive artifact – when you activate it (by toggling it on like you would an item), it envelops Link in a magical barrier that makes him invincible to enemy attacks as long as the magic lasts. The catch is that it consumes your Magic Meter while in use (in the GameCube version it drains magic continuously; in the HD version it instead drains rupees when you’re hit). Either way, it’s an incredibly useful tool for tough battles or dangerous areas.
With a sufficiently stocked magic (and perhaps a Green Potion or two for refill), you can shrug off damage using this armor. Zunari explains its power and wishes you well, delighted that his shop has become famous thanks to you.
Don’t forget to admire the array of items on his stall now – it’s quite satisfying to see all the fruits of your trades on display.
Next Up: The Forest Water Challenge