


The Wind Waker 100% Completion Walkthrough
- Prologue: Outset Island: Introduction to Link’s home, initial quests, and obtaining the Hero’s Sword and Shield.
- Forsaken Fortress (First Visit): Stealth mechanics and rescuing Aryll.
- Windfall Island: Acquiring the Sail, meeting key characters, and side quests.
- Dragon Roost Island & Cavern: Assisting the Rito tribe, dungeon exploration, and obtaining Din’s Pearl.
- Forest Haven & Forbidden Woods: Meeting the Great Deku Tree, aiding the Koroks, and securing Farore’s Pearl.
- Post-Forbidden Woods Exploration: Collect charts, heart pieces, and upgrades across the southern sea.
- Greatfish Isle & Nayru’s Pearl: Story progression and obtaining the final pearl.
- Great Sea Side Quest Adventure: Explore islands and complete Windfall quests for key upgrades and collectibles.
- Tower of the Gods: Dungeon challenges and gaining access to Hyrule.
- Hyrule Castle: Discovering the Master Sword and storyline developments.
- Post-Hyrule Castle Exploration: Complete trading quests for heart pieces, treasure charts, and the Magic Armor.
- The Forest Water Challenge: Locating and saving each withered tree for a heart piece.
- Forsaken Fortress (Second Visit): Confronting the Helmaroc King and rescuing Aryll.
- Reef Special Charts & Windfall Side Quests: Six-Eye Reefs, Treasure Charts, and Windfall Island side quests.
- Fire Mountain & Ice Ring Isle: Obtain the Power Bracelets and Iron Boots from these elemental islands to access the next temples.
- Earth Temple: Venture with Medli into the Earth Temple to cleanse evil and claim the Mirror Shield.
- Wind Temple: Enter Gale Isle, team up with Makar, and conquer the Wind Temple.
- Triforce Shard Quest: Locating Triforce Charts, deciphering them, and retrieving Triforce shards.
- Ganon’s Tower: Final challenges, boss rematches, and the ultimate confrontation with Ganondorf.
Table of Contents
A Warm Welcome to Windfall Island
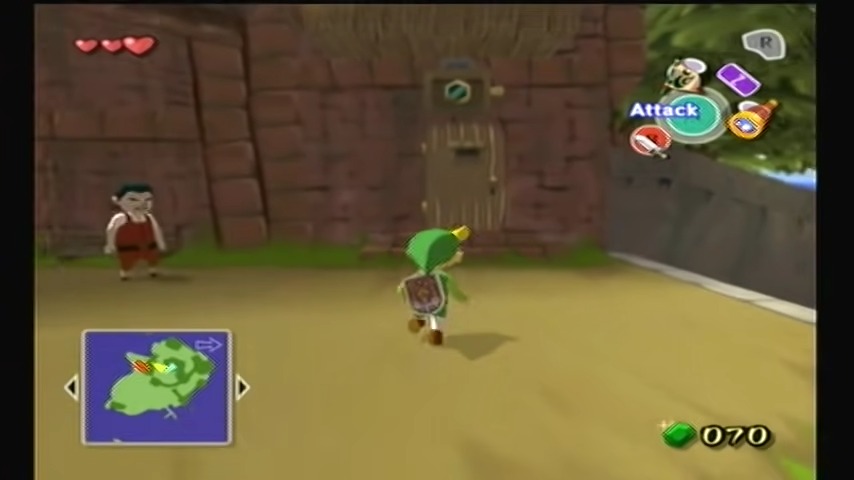
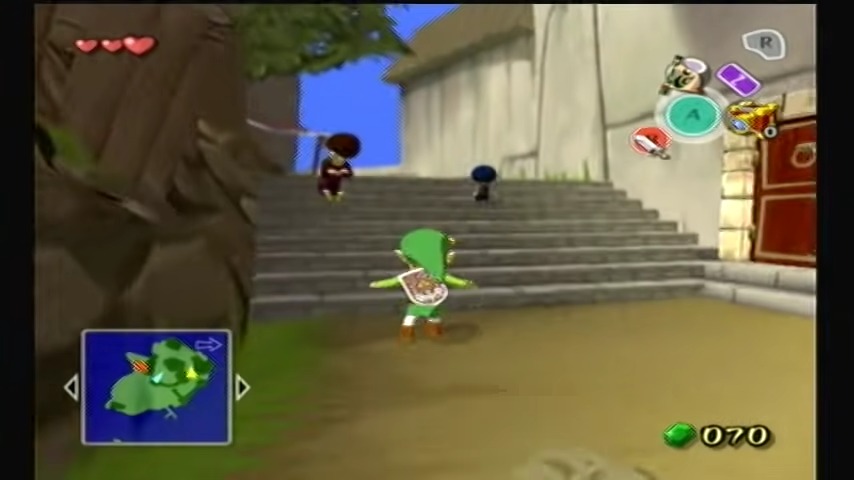
Stepping off the King of Red Lions, you find yourself on Windfall Island, a bustling port town brimming with colorful characters and secrets. The sea breeze carries lively music and chatter as you wander the cobblestone paths under red windmill sails. Take a moment to explore Windfall’s plazas and docks – chat with friendly locals, peek into shops, and soak in the cheerful atmosphere. Although your main goal is to find a sail for your boat, don’t rush. Windfall Island is full of optional adventures that will reward your curiosity and set you up for the journey ahead. Your talking boat hinted that someone here might sell a sail, but there’s no harm in enjoying the sights and gathering some rupees from pots and shrubs as you look around. This first visit balances story progress with side quests, giving you a taste of Windfall’s charm before you resume your hero’s quest.
Freeing Tingle and Finding the Picto Box
On the western cliff, you notice an odd man in a green suit locked behind bars in the Town Jail. This is Tingle, who excitedly mistakes you for a fairy and begs to be released. Enter the jail (the door is tucked behind the dancing Elvis-like fellow named Tott by the gravestone) and approach Tingle’s cell. To set him free, push aside the large pots in the corner opposite the cell door to reveal a hidden switch.
Step on the switch, and the cell door springs open. Tingle dances out in gratitude – you’ll witness his delightfully bizarre celebration as he thanks you. In the GameCube version, he hands you the Tingle Tuner and Tingle’s Chart. Before prancing off, Tingle promises to meet you on his island sometime, leaving you to explore his now-empty cell.


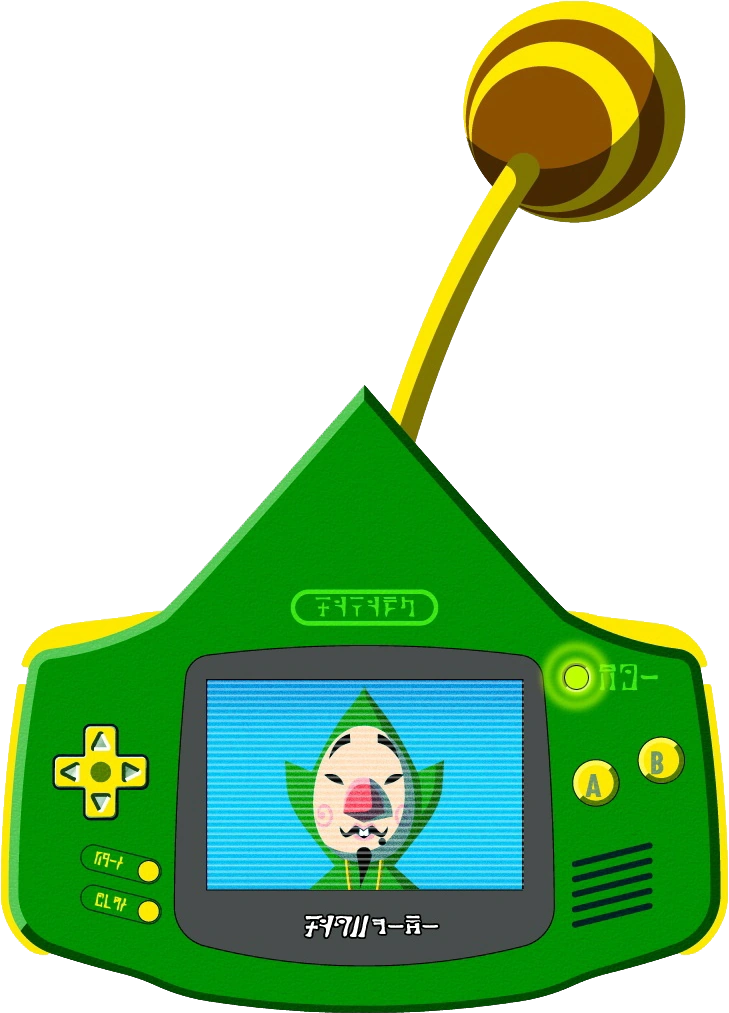
Item: Tingle Tuner
A tiny device that lets a second player (via Game Boy Advance) join in for hints and bonuses. (In the HD remake, this item is replaced by the Tingle Bottle for sending messages over Miiverse instead.)

Special Chart: Tingle Chart
A quirky, hand‑drawn sea chart given by Tingle. Makes a honking noise when closed. Marks two special island locations: Great Fairy fountains on Northern Fairy and Outset Islands, plus Tingle Island itself.
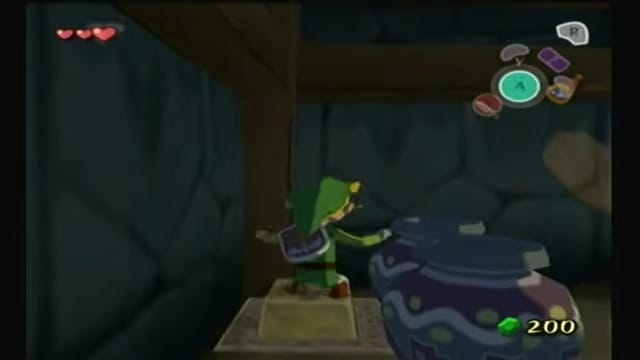
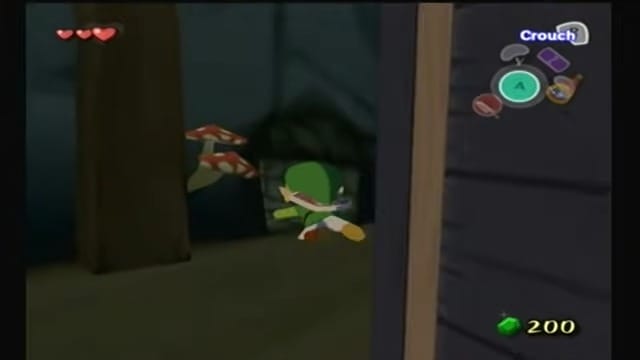
With Tingle gone, you’re free to poke around the jail cell – and there’s more here than meets the eye. Push the wooden crate against the far wall to uncover a small crawlspace. Duck down and crawl into a hidden tunnel. It’s dimly lit, with scurrying rats and a maze-like layout of dead ends, but keep your bearing and avoid the rat holes (falling into one dumps you back outside). By carefully winding through the tunnel (listen for squeaks and steer away from them), you’ll reach a secret chamber at the end.
Inside, open the treasure chest to claim the Picto Box, an antique camera for taking black-and-white photographs! The previous prisoner hid it here after “borrowing” it, and now it’s yours. This nifty Picto Box lets you snap pictures of people and scenery, a feature you’ll soon put to use. With a new gadget in hand and Tingle’s treasures collected, exit through the tunnel (or intentionally drop through a rat hole for a quick way out) and step back into the Windfall sunshine.


Item: Picto Box
A handheld contraption that lets Link snap nostalgic pictographs of people and places during his voyage. Initially stores up to 3 black-and-white shots (12 in HD), later upgradeable to the Deluxe Picto Box for full-color photos.
Setting Sail: Buying the Boat’s Sail
With Tingle rescued, it’s time to secure that boat sail and continue your quest. Head to the central market area where merchant stalls line the path. Near two gossiping women (Pompie and Vera), you’ll find a cheerful, parka-clad salesman named Zunari running an open-air stall. Speak to Zunari – he’s a traveling merchant who’s fallen on hard times and currently has nothing to display.
However, he’ll eagerly offer to sell you an old family heirloom for the right price. He’s a bit mysterious about it, but this island needs your business, so oblige him. Fork over 80 Rupees (if you’re short on rupees, now is the time to break more pots or check bushes around town for hidden Blue Rupees) and buy the heirloom. Surprise – it’s the Boat’s Sail! This sturdy sail is exactly what your red boat needs.


Item: Boat’s Sail
An essential item for navigating the Great Sea, the Sail allows Link to control the boat and travel between islands. It can be equipped on the King of Red Lions, the boat, and is necessary for progressing through the game’s expansive world.
With the sail in your inventory, you could return to your boat and depart immediately. But hold on – there are still more exciting activities on Windfall that can aid you on your journey. Before setting sail, consider tackling a fun mini-game and a few side quests around town. These are optional but highly recommended for the rewards they offer (extra Heart Pieces, treasure charts, and collectibles that will prove useful later).
“Sploosh Kaboom!” – Windfall’s Sinking Ships Mini-Game (Optional)
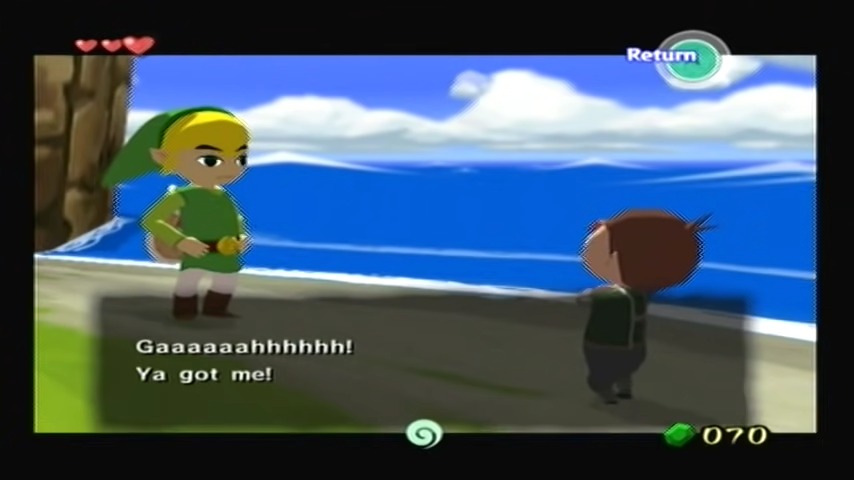
One diversion you shouldn’t miss is Salvatore’s Sinking Ships game – a battleship-style challenge that locals can’t stop talking about. On the hilltop plaza (near where the four children are playing), look for a door with two stone pillars and a ship’s mast motif. This leads to the lighthouse and Salvatore’s game parlour, marked by a sign depicting a squid. Step inside to find Salvatore, the laid-back proprietor leaning on the counter with an artistic flair.
For 10 Rupees per play, he’ll enthusiastically explain the rules through goofy drawings and sound effects (get ready for his famous “Sploosh!” when you miss and “KABOOM!” when you score a hit). The mini-game, known in-game as Squid-Hunt, works like the classic Battleship board game: you have a 8×8 grid representing the sea, and your goal is to find and “sink” the hidden squids (of lengths 2, 3, and 4). You have 24 cannonballs (shots) to fire each round. It’s a game of luck and logic – pick a square, fire, and listen for Salvatore’s dramatic results.


Keep playing until you manage to blast all three squids in one game.

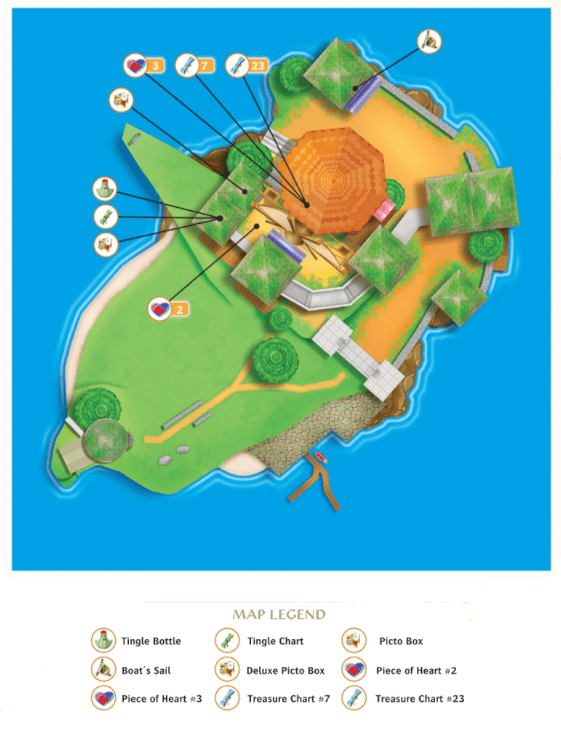
Heart Piece #2 of 44
On your first victory, if you sink all the squids within the 24-shot limit, Salvatore joyously awards you Piece of Heart #2. Congratulations – collecting this will extend your life energy once you gather enough pieces!


Treasure Chart #7 (Collectible #1 of 41)
Next, he encourages you to play again for more prizes. The second win nets you Treasure Chart #7, a sea chart that (when later opened) leads to a buried treasure worth a hefty 200 Rupees.


Treasure Chart #23 (Collectible #2 of 41)
But the real challenge is to set a record. If you can find all squids using fewer than 20 cannonballs, you’ll earn an extra reward: Treasure Chart #23. This chart points to a hidden Piece of Heart out on the Great Sea, making it well worth the effort. Salvatore will cheerfully hand over Chart #23 as a prize for your sharpshooting, along with an Orange Rupee (100 rupees) bonus for beating the high score.


It may take a few tries (listen carefully and strategize your shots), but the rewards are too good to pass up. Once you’ve claimed Piece of Heart #2, Treasure Chart #7, and Treasure Chart #23 from this mini-game, you’ll not only beef up your wallet and future treasure haul, but you’ll leave Windfall with a bigger smile (and maybe Salvatore’s quirky catchphrases echoing in your head).
A Budding Photographer: Lenzo’s Pictograph Trials
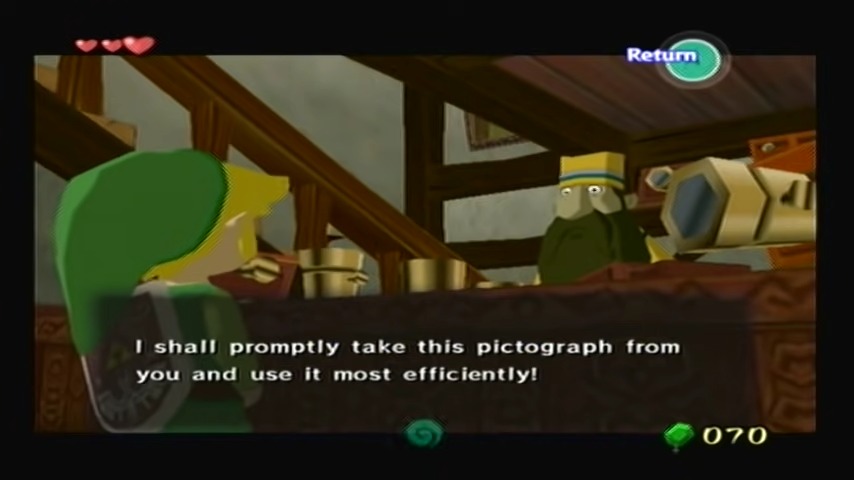
Now that you have a Picto Box, you can delve into Windfall’s famous photography side quest. Near Salvatore’s game house, you likely noticed a building with a wooden camera sign above the door. This is Lenzo’s Photo Shop, home of the island’s talented pictographer. Head inside and speak to Lenzo, the gentleman in the fancy purple coat. He immediately spots the Picto Box hanging around your neck and compliments you on your “fine” camera. Lenzo invites you upstairs to his gallery, where exotic pictographs adorn the walls – from far-off islands to fearsome creatures. Take your time browsing these photos; they hint at wonders across the Great Sea. Talk to Lenzo again upstairs, and he’ll stroke his beard, pondering if you might be the assistant he’s been looking for.


Begin examining photos in the gallery of the photo shop (Lenzo will have moved behind the counter now) to trigger the next step. When you speak with him again, Lenzo offers you a job as his research assistant, testing whether you have an eye for photography. If you accept, he presents three Pictograph challenges – essentially a scavenger hunt, but with a camera! These tasks must be done in order, and each involves snapping a particular moment on Windfall Island. The quests play out in real time, so be patient and ready your Picto Box at the right moments:


First Assignment – “A Lover’s Letter”
Lenzo wants a photo of an unlikely romantic – the young man who dutifully visits the red postbox to send love letters. Head toward the main gate near the docks to find Garrickson, the fellow in the red plaid shirt loitering by the postbox. Position yourself across the small lawn (behind the low bush by the archway) and wait. Before long, Garrickson will approach the mailbox. As he energetically flips open the postbox and stretches up on tiptoe to mail his letter, quickly snap a pictograph of him with the letter in hand (make sure his full body is in frame). Timing is key – capture the moment the letter is visible. If you miss it, don’t worry; he circles back periodically to try again. Once you’ve got the shot of his heartfelt mailing, return to Lenzo. Show him the pictograph (present it from your Picto Box), and Lenzo will nod in approval at your candid photography skills. Well done!


Second Assignment – “Caught in the Act (of Cowardice)“
Lenzo next describes the most cowardly resident of Windfall and tasks you with capturing that person’s moment of fear. The individual in question is Gossack, the lone patron in the Café Bar above Zunari’s shop. Head to the cafe via the stairs next to Zunari’s stall. It’s daytime, so the bar is quiet except for Gossack, the man in a shabby outfit sitting at the table upstairs. Here’s the trick: make a loud noise to startle him. Pick up one of the jars in the bar and throw it behind him – as the jar breaks, he’ll start trembling and freaking out! Immediately pull out the Picto Box and snap a picture of the frightened Gossack cowering (ensure you capture his whole body shaking). The poor guy can’t handle surprises, but his loss is your gain. Take the photo of this trembling townie back to Lenzo. Present it, and Lenzo will chuckle, acknowledging you’ve caught the essence of fear on film.


Third Assignment – “Love Unspoken”
For the final challenge, Lenzo speaks of two individuals who secretly adore each other but have never gathered the courage to confess. Your goal is to photograph these two stealing a glance at each other. The pair in question are Anton and Linda. Anton is the chap in the blue sailor shirt and goofy glasses who strolls aimlessly around Windfall’s main plaza, and Linda is the shy woman in the orange dress who often stands by the tree just outside Lenzo’s shop. This task requires a bit of observation and timing. First, find Linda near the tree or bench on the upper plaza (daytime). She’ll be gazing off toward the sea. Now watch Anton as he wanders the town; eventually his route will bring him up the steps and past Linda. There’s a magic moment when Anton walks by and both he and Linda will turn their heads subtly to glance at each other – you’ll see the spark of unspoken love. Quickly photograph them facing one another in the same frame. It might take a minute or two of trailing Anton and camera-readiness, but be patient. If you miss the moment, reposition and wait for Anton’s next circuit of the island. When you finally capture the sweet, fleeting eye contact between the two would-be lovebirds, take your pictograph to Lenzo for the final evaluation.


After reviewing your third photo, Lenzo beams with pride. You’ve proven yourself as a capable photographer who can capture life’s special moments. As a reward for completing all three trials, he gives you a Joy Pendant – a lovely little jeweled pendant that shimmers like joy incarnate. (This delight might seem small, but Joy Pendants are highly sought after by someone on this island… more on that soon.)
Lenzo declares you his assistant and hints that you now have access to even more advanced pictography. In the original GameCube version, your Picto Box remains in standard black-and-white mode for now – Lenzo mentions a rare Forest Firefly said to live in Forest Haven, which could illuminate your photos with color if you find it. (In the HD version, Lenzo will upgrade your camera to the Deluxe Picto Box immediately upon completing these trials, no Firefly needed. This lets you take color pictographs right away, which is especially handy if you plan to collect figurines later.)


Either way, congratulations on becoming a full-fledged pictographer! Not only did you gain a Joy Pendant, but you’ll also carry forward a deeper appreciation for the little stories happening around Windfall.
The Killer Bees and the School of Joy
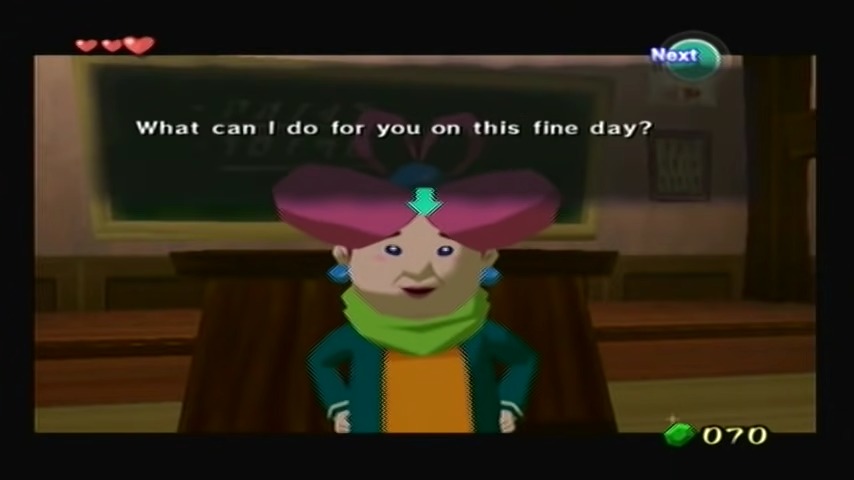
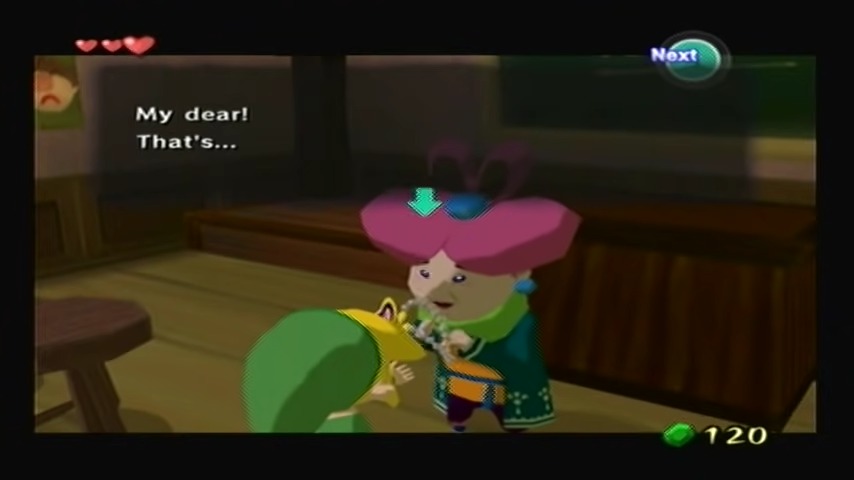
Now, let’s address the rascals you’ve probably seen running around town: the four energetic kids who call themselves the Killer Bees. You’ll find this pint-sized gang (Ivan, Jan, Jin, and Jun-Roberto) loitering and roughhousing outside the School of Joy, the bright building near the town’s central yard. If you talk to the boys, they’ll tease you, showing no respect for anyone – not even their poor teacher. To begin this side quest, step inside the school and speak with Miss Marie, the kindly schoolteacher.


She adores children but is at her wits’ end with the Killer Bees, who skip class and cause mischief. Miss Marie asks for your help in civilizing her rambunctious students. Agree to help, and then head back outside to confront the boys. When you tell Ivan (the leader with the oversized head) that you’re here on “teacher’s orders,” he’ll be impressed by your guts and propose a challenge instead of a fight. The Killer Bees want to play Hide-and-Seek. If you can find all four of them around Windfall Island, they promise to behave. The kids scatter with a cheer, and the hunt is on!


Search high and low around the island for the hidden children – they’re devious but not too far from the school. The moment you find a kid, they’ll leap up with a yelp and dash off, forcing you to give chase. Catch up and “tag” them (simply run into them) to count that child as caught. They run surprisingly fast, so use rolling to close the distance if needed. Here are their hiding spots (don’t worry, none leave the island boundaries):
Jan (girl with pigtails) – She’s hiding closest to the start: from the school door, head left (west) through the archway toward the plaza with the potion shop. The first shrub on the left conceals Jan. Walk around the bush and you’ll see her crouching behind it. As soon as you find her, she’ll take off running down the slope – sprint after her and corner her. One down!


Ivan (leader, in cap) – The bold Ivan has climbed onto the big tree in the center of town, just outside the gate near the dock. Go to the patch of grass by the town gate where a wealthy man stands, and you’ll see Ivan perched up in the tree branches above. Roll into the tree’s trunk with [A] to shake it; Ivan will tumble out of the tree in surprise. He’ll recover and run off toward the docks, so dash after him along the waterfront and snag him before he loops back around the gate. That’s two!


Jin (boy in orange cap) – This crafty boy hides behind the off-limits Bomb Shop. From the main plaza, take the path up behind the potion shop and follow it around to the back of the Bomb Shop building. You’ll reach a narrow ledge overlooking the sea. Sidle along the ledge (press against the wall and move carefully) behind the Bomb Shop to find Jin tucked away in the alley. Once discovered, he’ll sprint around the front side of the shop and toward the docks – give chase and tag him before he gets away. Another one caught!


Jun-Roberto (boy with pig-like nose) – The last hider is near the gravestone where Tott dances (the same area where you freed Tingle). From the school, go through the right-hand (east) archway toward the grassy area with the tombstone. Circle behind the stone to find Jun-Roberto trying to blend in with the gray wall. When exposed, he’ll make a run for it down the slope, past the potion shop. Hustle after him and grab him quick – he’s the final one!


Heart Piece #3 of 44
Once all four Killer Bees have been caught, the gang will reconvene by the school, panting in defeat. They’re actually thrilled by your skills and gladly acknowledge you as one of the gang now. Ivan is a boy of his word: as thanks for the fun (and as a token of respect), he hands you Piece of Heart #3 – another quarter fragment to boost your health. Congratulations on a job well done!


The children vow to stop causing trouble and urge you to let their teacher know they’ve reformed. Before heading inside, the now-friendly Bees also tip you off about their teacher’s birthday coming up and her love of Joy Pendants, suggesting that if you find any, Miss Marie would be ecstatic to receive them. Go into the School of Joy again and speak with Miss Marie to deliver the good news. She’s overjoyed to hear the kids are behaving. In gratitude, Miss Marie gives you a Purple Rupee (50) for your efforts – a nice boost to your wallet after all that running around.


As you’re leaving the School of Joy, you’ll run into the Killer Bees again and they’ll share how much Miss Marie adores Joy Pendants, practically drooling over the one on her desk. File that info away for later; it will become very important. For now, you’ve restored peace at the school and earned the children’s friendship (plus that Heart Piece reward). Not bad for a day’s work!

Optional: Collecting a Joy Pendant
Before you leave Windfall, you can grab an easy Joy Pendant (especially since Miss Marie hinted how much she loves them). Remember the tree where Ivan was hiding? Step outside the school and look toward the Bomb Shop by the docks – there’s a lone tall tree out front. Roll into the base of the tree and thump! – a small shiny Joy Pendant will drop from the branches. Pick up this glowing, butterfly-shaped pendant and stash it in your Spoils Bag. (If you completed Lenzo’s pictograph quest earlier, you already received one Joy Pendant from him, but there’s no harm in collecting another!) These trinkets aren’t useful in combat, but they are beloved by certain people.


In fact, if you show the Joy Pendant to Miss Marie right now, she’ll be astonished and give you a reward – albeit a modest one. (She’s so happy you brought her a pendant that she rewards you with 20 Rupees and mentions it’s her favorite item in the world.) Miss Marie then muses that she’d love to see 20 Joy Pendants someday for a big surprise. You don’t have to worry about that just yet, but it’s a clue that collecting these pendants will pay off later. From now on, keep an eye out for Joy Pendants dropped by monsters or hidden around the seas – you’ll need a bunch down the line. (Fun fact: In Wind Waker HD, collecting 20 Joy Pendants for Miss Marie yields the same reward as in the original, but collecting MORE (up to 41 total) will net HD players an additional item, the Hero’s Charm. GameCube players get that item elsewhere. Regardless of version, start hoarding those pendants!)

Next Stop: Pawprint Isle
With Windfall Island’s adventures wrapped up, it’s finally time to set sail and continue your main quest. By now you should have the Boat’s Sail, a Picto Box full of memories, a Tingle Tuner (or Tingle Bottle), a new Heart Container (from those pieces of heart), a couple of Treasure Charts, and a pocketful of other goodies. Head back to the dock where the King of Red Lions is patiently waiting. Climb aboard and equip the Sail to your boat. The talking vessel will instruct you on how to use it: set the Sail to a button, then press it to unfurl. The wind catches, and off you go! Point your boat toward the eastern horizon. Your next story destination is Dragon Roost Island, home of the Rito tribe, and the first stop to finding the Goddess Pearls.

As you sail eastward across the sparkling waves, keep your eyes peeled for a small isle along the way. About halfway to Dragon Roost, slightly to the right (south) of your path, you’ll spot Pawprint Isle – a cute little island shaped like an animal paw, ringed by a few palm trees. It’s marked on your Sea Chart (grid square B5) between Windfall and Dragon Roost. This optional stop is worth a visit. Pawprint Isle holds some surprises of its own, including a cave full of curious creatures and maybe even another Heart Piece if you explore carefully. Angle your boat toward the isle and disembark on its sandy shore. You’ve left the safety of Windfall’s port and are truly exploring the Great Sea now! In the next section of our journey, we’ll delve into Pawprint’s hidden cavern and then continue onward to the soaring peaks of Dragon Roost Island. For now, enjoy the open sea breeze – your adventure in The Wind Waker is just beginning, and you’ve already made Windfall Island a better place for its residents. Sail on, hero, to the next chapter of your legend!