





















| Entries | 107 enemies and hazards |
|---|---|
| Where | Hyrule, Lorule, every dungeon and the Treacherous Tower |
| Sorted by | Kind of enemy |
| Tools you need | Sword, shield, and the rods and items named in each entry |
This page lists 107 enemies, sub-bosses and hazards that you meet in A Link Between Worlds, grouped by kind. Each entry names the places where it shows up and the quickest way to beat it. Bosses have their own page, Boss Strategies; the weapons and rods used below are listed on Items and Equipment, and the floors of the Tower are covered in Treacherous Tower.
Two general rules help against nearly everything. Merge into a wall to dodge attacks that would otherwise hit you, and rent or buy the rod that exploits a weakness (the Fire Rod against ice enemies, the Ice Rod against fire enemies).
Table of Contents
Soldiers of Hyrule
Yuga brought painted soldiers to life around Hyrule Castle. They only react to what they see, never to the clang of your sword on a wall, and they will happily attack your painted form if you merge into a wall in front of them.
Short Sword Soldier
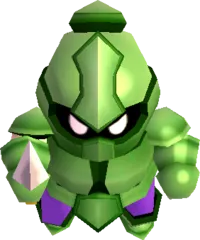
Where: Around Hyrule Castle. This green-armored guard carries a small blade. He chases you once he spots you but does not follow far, so sidestep his slash and cut him down from the flank.
Green Sword Soldier
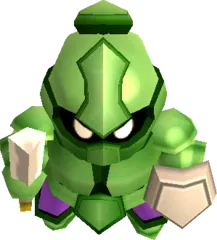
Where: Hyrule Castle, outside and in. A green-armored swordsman who charges when he sees you. Block or sidestep the first swing, then counter. He leaves a green Rupee behind.
Blue Sword Soldier
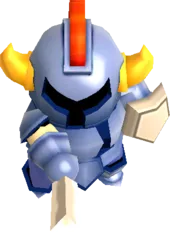
Where: Hyrule’s soldiers, and floor 27 of the Treacherous Tower’s Advanced course (with four Bow Soldiers). The stronger kind of sword soldier. Keep your shield up against his swing, answer with a hit, and back off. He drops a blue Rupee.
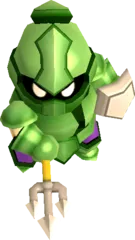
Spear Soldier
Where: Fields and roads across Hyrule. He charges with a trident held out in front. Step aside as he lunges and hit him from the side.
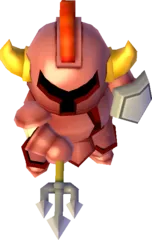
Red Spear Soldier
Where: Inside Hyrule Castle. A horned, red-armored Spear Soldier. He charges the same way but can take more hits, so dodge each lunge and punish him as he overshoots.
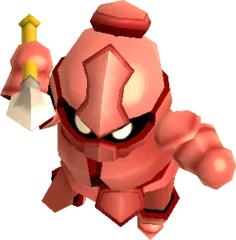
Spear Throwing Soldier
Where: Fields and Hyrule Castle. Called a Javelin Soldier in some places, he keeps his distance and throws spears. Dodge the throw, rush in and slash him, or dash at him with the Pegasus Boots between throws. The Bow and the Boomerang also reach him.
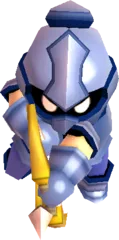
Blue Bow Soldier
Where: Around Hyrule Castle and the Graveyard; seven guard floor 7 of the Treacherous Tower’s Intermediate course and four stand on floor 27 of the Advanced course. He backs away and fires arrows at you. Block the arrows with your shield, close the gap and strike. A couple of sword hits finish him.
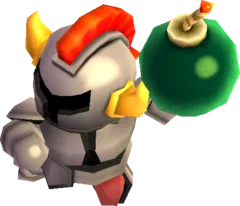
Bomb Soldier
Where: On the walls and ledges of Hyrule Castle, and inside it. He throws bombs from above and steps back if you approach. Run up and cut him down, shoot him with an arrow, or throw his own bomb back at him.
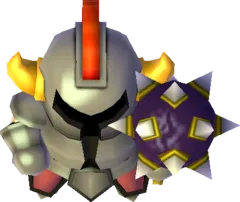
Grey Ball and Chain Soldier
Where: Hyrule Castle. He keeps a spiked flail whirling around himself, then throws it twice before swinging again. Stay clear of the circle, step in after the second throw and strike. If you keep firing arrows or Sword Beams he raises the flail as a shield, so switch to close attacks.
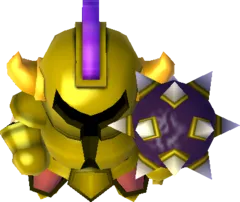
Gold Ball and Chain Trooper
Where: Inside Hyrule Castle. It behaves like the grey soldier, so use the same pattern: wait for the throws, then hit.
Soldiers of Lorule
Lorule’s guards are a separate breed. Some of them have deserted and now stand watch over the Dark Palace, others fight for the castle.
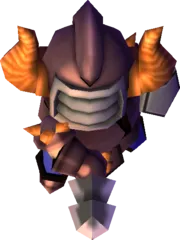
Lorule Soldier
Where: The Dark Ruins and Lorule Castle. In the Dark Ruins they act as sentries that you must avoid rather than fight. Inside Lorule Castle they are ordinary enemies: block, then counter.
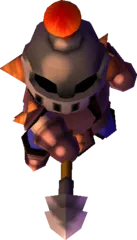
Lorule Spear Soldier
Where: Lorule. A spear-armed counterpart of Hyrule’s Spear Soldier. Dodge the thrust and strike from the side.
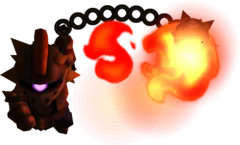
Lorule Ball and Chain Soldier
Where: Two serve as mini-bosses in Lorule Castle (one by the second-floor stairs, one in a dark fourth-floor room); another stands on floor 39 of the Treacherous Tower’s Advanced course. Its flail is on fire and lights dark rooms as it spins. Fight it like any Ball and Chain Soldier: wait for the throw, then attack. The second fight takes place beside bottomless pits, so avoid being knocked back.
Beasts and Brutes
Large ground enemies that charge, block or throw things.
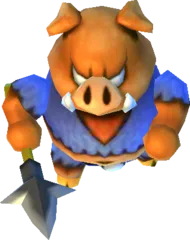
Moblin
Where: Fields and roads throughout Lorule. Two kinds exist. The spear thrower backs away and aims at you, so dodge and rush it. The armored kind charges with a sword or pitchfork and blocks from the front, so go around to its back.
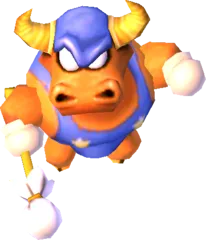
Blue Taros
Where: Spread across Lorule. A bull-headed warrior with a spear. It rams you and can block with its weapon, so hit it from the side.
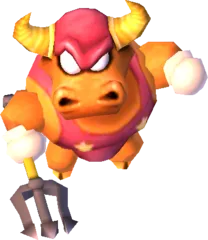
Red Taros
Where: Lorule. Armed with a trident, more aggressive than the blue one and able to take more damage. Sidestep its rush and strike as it recovers.
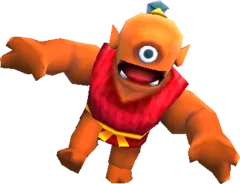
Hinox
Where: Across Lorule; a friendly one sits in a cave behind a waterfall in eastern Lorule and offers Rupees if you leave it alone. A hulking bomb thrower that also charges. Its bombs hurt and your own bombs no longer hurt it extra, so keep moving, strike between throws, and expect a long fight.
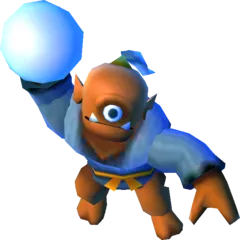
Snowball Hinox
Where: Death Mountain, the snowy part of Lorule. This coat-wearing Hinox throws snowballs that freeze you for a moment, leaving you open to a charge. Dodge them and hit it when it winds up.
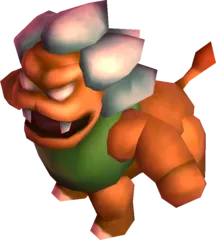
Lynel
Where: Death Mountain. It breathes a long stream of fire that costs three hearts and can only be blocked with the Hylian Shield. Move sideways and strike between breaths.
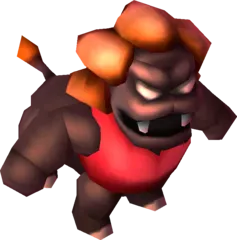
Black Lynel
Where: Floor 49 of the Treacherous Tower’s Advanced course. It has the same health and damage as a Lynel but can also spit single fireballs. Block with the Hylian Shield and attack between volleys.
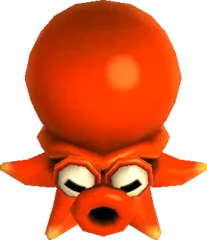
Octorok
Where: Eastern and southern Hyrule. It scurries about and stops to spit a single rock. Block the rock or sidestep it and slash.
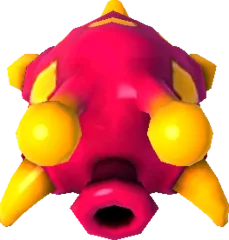
Slarok
Where: Near Lorule Lake and in the field west of the Dark Ruins. Lorule’s version of the Octorok. Avoid or block its rocks and cut it down.
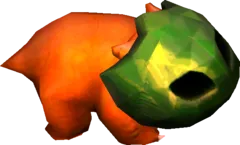
Helmasaur
Where: The Dark Palace. A mask guards its front, so attack its back. On narrow walkways, hit the mask to shove it off the edge instead.
Skeletons and Spirits
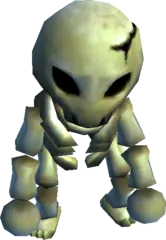
Stalfos
Where: Dungeons, where they rise from piles of bones the moment you enter a room. It jumps away from your blows and chases you. Corner it against a wall or strike right as it lands.
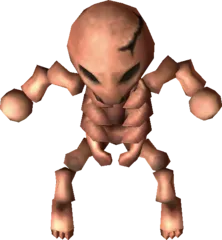
Red Stalfos
Where: The Tower of Hera, where five of them form the sixth-floor mini-boss. They run at you and throw bones from range. Block the bones and strike each one when it comes close. Defeating all five unlocks the door and opens a portal back to the entrance.
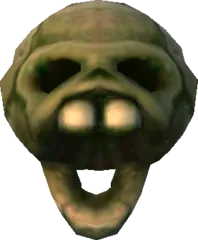
Stal
Where: Lorule. A skull enemy. Strike it with the Sword.
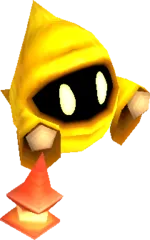
Poe
Where: The secret passage between the Graveyard and the Sanctuary, and the Lost Woods. A ghost that flies in loops and passes through walls. It takes several sword hits. In the Lost Woods nine Poes guide you to the Master Sword: follow the correct one, and if you take a wrong turn you must start over.
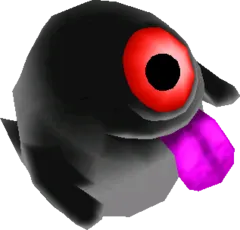
Dark Ghini
Where: The pitch-black corridors of the Dark Palace, and floor 32 of the Treacherous Tower’s Advanced course. It is visible in the dark but fades from view near light. It drifts in small circles, and you can hit it whether you see it or not.
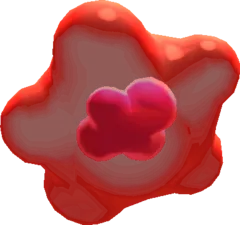
Gibo
Where: Turtle Rock. A gel-like cloud whose body moves first and core follows behind. Hit it with your sword.
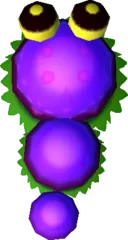
Purple Mini-Moldorm
Where: The Skull Woods. A purple version of the Mini-Moldorm. Keep your distance and hit it with the Sword.
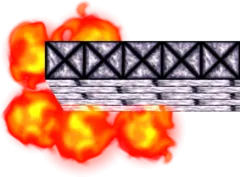
Winder
Where: One room of the Dark Palace, together with Red Kodongos. Avoid it entirely. The walls of that room only show in darkness, so move carefully.
Birds, Bats and Bees
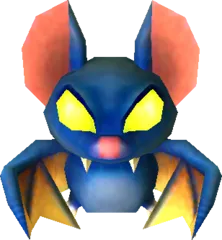
Keese
Where: Caves and dungeons. They perch quietly and take off when you approach. Any weapon stuns or kills them.
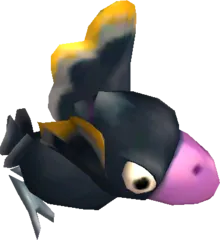
Crow
Where: Hyrule, and the Octoball Derby, where hitting three in a row makes one appear worth 20 points. It swoops down at you. Time a slash as it dives.
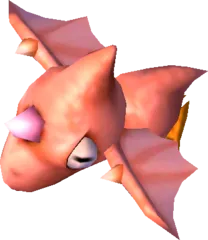
Dacto
Where: Lorule; the counterpart of the Crow. It swoops down in the same way. Cut it as it dives.
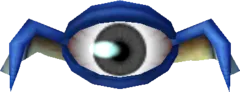
Chasupa
Where: Mostly Lorule, such as Thieves’ Town, and the Desert Palace. Hit it as it flies at you.
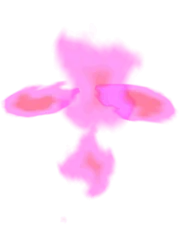
Blazing Bat
Where: Lorule Castle, during the Yuga Ganon fight. Whenever he retreats into his painting form, purple flaming bats shoot out of the walls. They cannot be hurt, so keep out of their way.
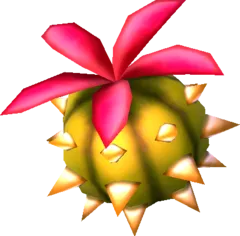
Peahat
Where: Released by Zaganaga during its boss fight. They swarm you, but unlike in earlier games you can hit them while they are in the air.
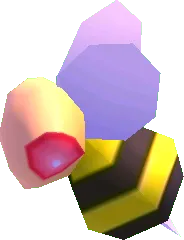
Bee
Where: Cut grass and bushes. Bees are hostile until you own the Bee Badge, after which they fight on your side. Catch one with the Bug Net and keep it in a bottle to release against enemies.
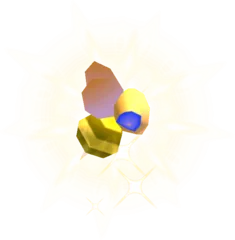
Golden Bee
Where: Rarely in grass and bushes; a man in the forest around the Lost Woods sells one for 888 Rupees. Catch it with the Bug Net and bring it to the Bee Guy for the Bee Badge. Further Golden Bees sell to him for 300 Rupees each.
Blobs, Rats and Crabs
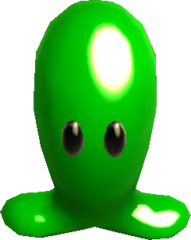
Blob
Where: Grassy places: the Lost Woods, the Graveyard, the Southern Ruins and the forests near your house. They are harmless. Two hits with the Forgotten Sword, or one with the Master Sword, defeat them.
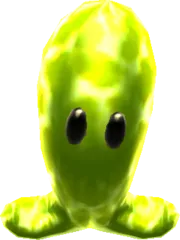
Buzz Blob
Where: The area around the Witch’s House. The glowing yellow kind shocks you when you touch it or hit it with the sword, so use arrows or another ranged item.
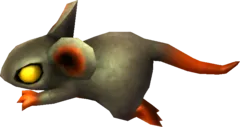
Rat
Where: The secret passage into the Sanctuary. A weak scurrying rodent; one or two hits will do.
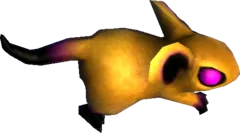
Dark Rat
Where: Lorule dungeons such as the Thieves’ Hideout, plus the Desert Palace in Hyrule. A yellow rat with twice the health and double the damage of a normal rat. Any weapon works.
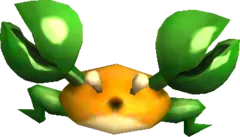
Sand Crab
Where: Hyrule, and the Octoball Derby, where hitting one makes the pots reappear. Walk around it and strike from the side.
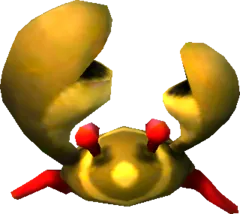
Karat Crab
Where: The Southern Ruins around the Swamp Palace and the area around Lorule Lake. The dark counterpart of the Sand Crab, with four times the damage. It moves slowly up and down but dashes sideways, so stay out of its row and hit it from above or below.
Bari, Biri and Eyes
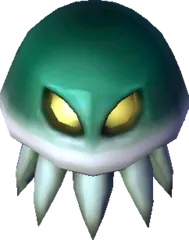
Blue Bari
Where: Dungeons. A floating jellyfish that sparks. It does not split when defeated. Keep clear while it sparks and use ranged attacks.
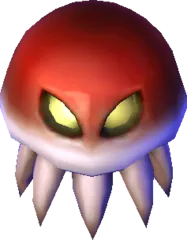
Red Bari
Where: Dungeons. Splits into two Biri when defeated. Use a ranged weapon.
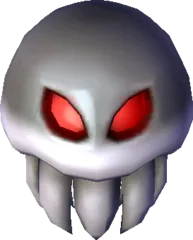
White Bari
Where: The Swamp Palace. Does not split. Attack from a distance or when it is not sparking.
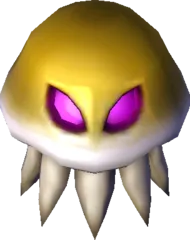
Yellow Bari
Where: The Swamp Palace. Splits into two Yellow Biri when defeated. Use ranged attacks.
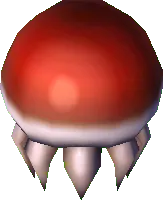
Red Biri
Where: Dungeons. A small electric floater that splits off a Red Bari. Attack when it is not sparking.
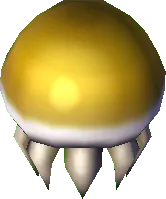
Yellow Biri
Where: The Swamp Palace, from Yellow Bari and from the Gigabari. It drifts around and electrifies itself now and then. Strike it only when it is not sparking.
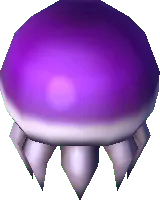
Purple Biri
Where: Lorule Castle, where the purple Gigabari splits into fifteen. Same as the Yellow Biri: avoid it while it sparks and attack between charges.
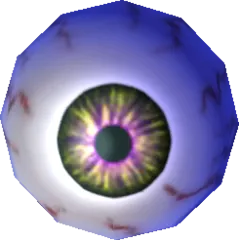
Arrgi
Where: The Swamp Palace boss fight against Arrghus. They are the eyes that cover Arrghus. Pull them away with the Hookshot and cut them down; once they are gone you can attack the boss.
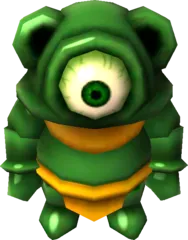
Green Eyegore
Where: Dungeons. A statue that wakes when you come close and charges. You no longer need the Bow; any weapon hurts it. Its eye glows in the dark.
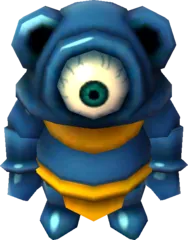
Blue Eyegore
Where: Dungeons. Behaves like the green one: it wakes when you approach and charges.
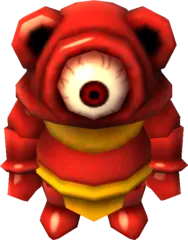
Red Eyegore
Where: The Thieves’ Hideout, where five fight you as a mini-boss in a dark room. Use the glow of their eyes to track them, and fight them one at a time if you can.
Fire, Ice and Stone
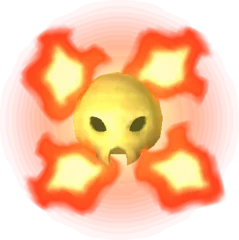
Fire Bubble
Where: Dungeons. A skull ringed with flames that bounces around the room. Keep your distance.
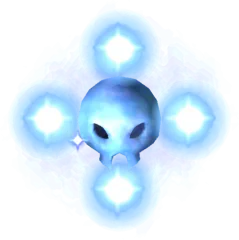
Ice Bubble
Where: The Ice Ruins. The same kind of skull, ringed with ice. Keep your distance.
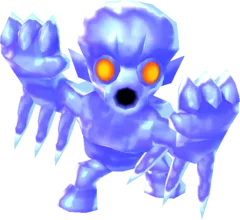
Freezor
Where: The Ice Ruins and the Treacherous Tower. It bursts out of walls and charges. Melt it with the Fire Rod.
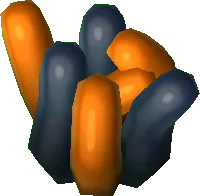
Popo
Where: Dungeons. It rises from the ground and homes in on you. Contact hurts, so strike first.
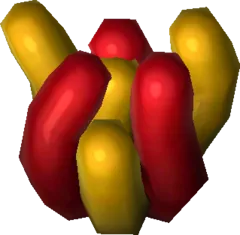
Red Popo
Where: Turtle Rock only. Has more health and deals more damage than a Popo. Keep moving and strike repeatedly.
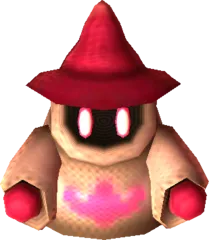
Fire Wizzrobe
Where: Turtle Rock and floor 24 of the Treacherous Tower’s Advanced course. It pops up, casts a fire spell and disappears. Rush at it as soon as it appears.

Ice Wizzrobe
Where: Turtle Rock. Works like the Fire Wizzrobe but throws balls of ice. Rush it the moment it appears.
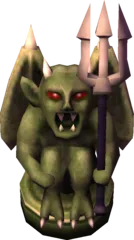
Gimos
Where: Lorule dungeons, plus the Desert Palace in Hyrule. A stone statue that comes alive. Several sword strokes defeat it. Dormant ones can be pushed or pulled onto floor switches.
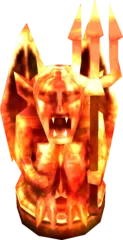
Fire Gimos
Where: Turtle Rock (one large and four small). Striking it directly reflects damage on you. Freeze it with the Ice Rod and then hit it, or blow out its flames briefly with the Tornado Rod.
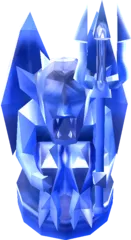
Ice Gimos
Where: Death Mountain. Melts instantly under the Fire Rod. Dormant ones block paths until melted; they lack the visible breath of the active ones.
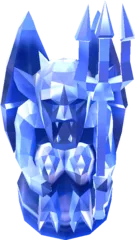
Big Ice Gimos
Where: Death Mountain (one near the western summit, one in the eastern cave). It leaps and slams down, often knocking you off the platform. It takes many sword hits but the Fire Rod ends it quickly.
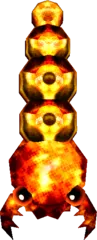
Flamola
Where: The lava of Turtle Rock. It leaps from the magma. Hit it with the Ice Rod or Sword Beams while it is in the air. Defeating them all makes a chest with a Silver Rupee appear.
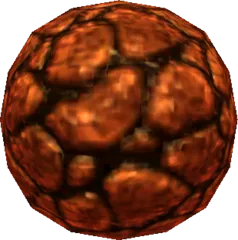
Great Ball of Fire
Where: Hyrule’s Death Mountain, on the way up. Great Balls of Fire rain down after the eruption. Dodge them; some break into green Rupees and others become Deadrocks.
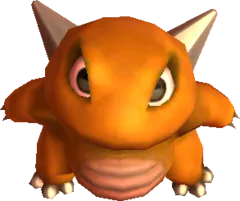
Deadrock
Where: Death Mountain, often spawned from falling boulders. Hitting it turns it to stone. Smash it with the Hammer or a bomb.
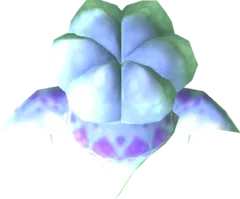
Keeleon
Where: Dungeons. It floats too high for the sword and spits bombs. Use the Fire Rod, the Ice Rod or throw bombs.
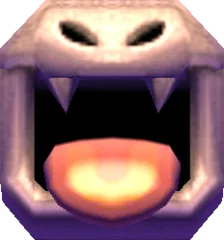
Medusa
Where: The Ice Ruins, Lorule Castle, the Treacherous Tower and Turtle Rock. A fixed statue that spits fireballs or freezing balls. Only the Ice Rod affects it, stunning it for a moment.
Desert and Swamp Dwellers
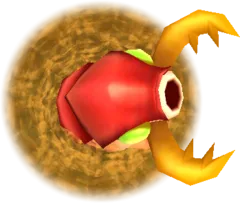
Devalant
Where: The sand of the Desert Palace. It digs a pit to pull you in. The Sand Rod drags it out so you can slash it.
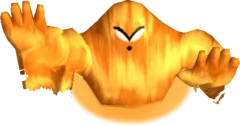
Geldman
Where: Desert sands. Use the Sand Rod to throw it out of the sand; it runs away and drops Rupees if you strike it.
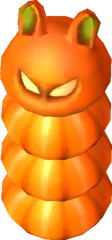
Hokkubokku
Where: The Desert Palace. It dives under the sand when you get close. The Sand Rod makes it erupt so you can fight it.
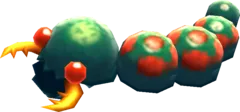
Swamola
Where: Misery Mire. A swamp dweller that behaves as it did in earlier games.
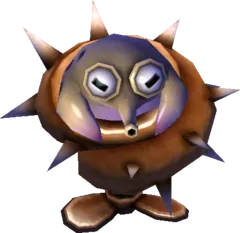
Gyorm
Where: The Swamp Palace. Invulnerable inside its spiked shell. Hookshot it out and cut it before it crawls back in. The empty shell can be thrown at enemies or switches.
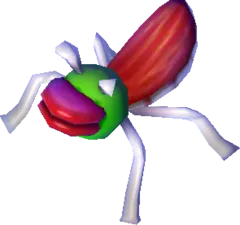
Water Tektite
Where: Only the Swamp Palace. Skates on water and is weaker than in older games. Strike it when it lands.
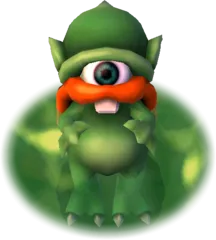
Ku
Where: Ku’s Domain in the northeast, and the Treacherous Tower. A turtle-shelled creature that rushes you on land. Defeat every Ku in Ku’s Domain to earn a Silver Rupee.
Pests, Pitfalls and Oddities
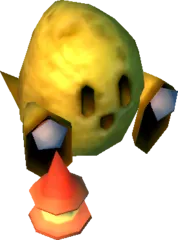
Hyu
Where: Thieves’ Town, the Skull Woods region and the Treacherous Tower (eight on floor 6 of the Advanced course, after four Poes). A quick flier. Time your strikes as it passes.
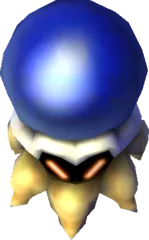
Blue Hardhat Beetle
Where: Dungeons. A spiky-shelled beetle that bumps you. Keep an eye on ledges so a bump does not knock you off.
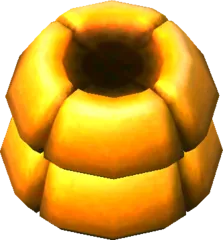
Like Like
Where: Lorule. It trails you slowly and swallows you when it faces you. Shake the Circle Pad to break free; if it eats you, you take two hearts of damage and lose your shield (never the Hylian Shield). Strike it from the side or from range.
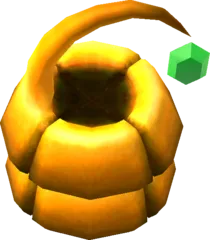
Green Rupee Like
Where: Fields in Hyrule and Lorule. It disguises itself as a Rupee, but its shadow is larger. If it swallows you it steals about 20 Rupees, and simply touching it costs half a heart. Strike it before it eats you.
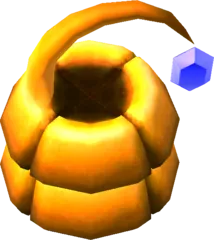
Blue Rupee Like
Where: Fields in Hyrule and Lorule. Behaves like the green one, with a Rupee of another colour on its stalk.
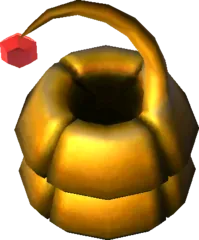
Red Rupee Like
Where: Fields in Hyrule and Lorule. Behaves like the green one, with a Rupee of another colour on its stalk.

Mole
Where: Mostly in the Tower of Hera. Hit a Mole into the ground and it springs back up, flinging you to a higher platform. Big Moles launch you to higher floors.
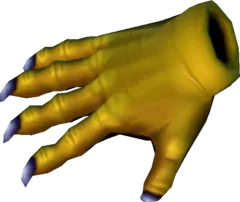
Wallmaster
Where: Lorule Castle, in the room of the Arrghus mini-boss. It floats above you and then drops. Merge into a wall to dodge it; it is stunned when it hits the floor. Its fall also crushes other enemies.
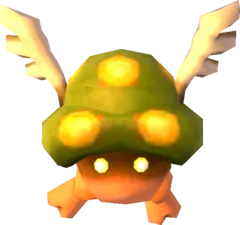
Zirro
Where: Lorule. Stays far away and lobs an explosive. Block it with your shield and attack.
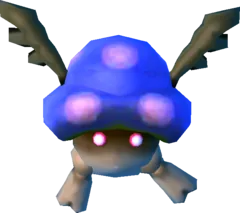
Snowball Zirro
Where: Death Mountain. The blue version of the Zirro. Handle it the same way.
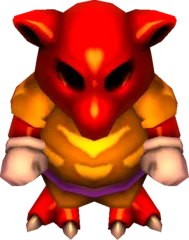
Red Goriya
Where: The Dark Palace, where one forms the mini-boss pair with a green Goriya, and the Treacherous Tower. Fight it with the Sword and heal up before moving on.
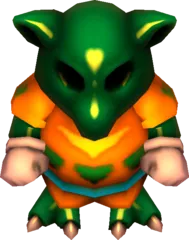
Green Goriya
Where: Dungeons and the Treacherous Tower (four, with three Red Goriyas, on floor 16 of the Advanced course). Fight it with the Sword.
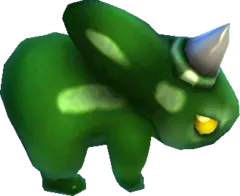
Green Kodongo
Where: Turtle Rock and the Treacherous Tower. A fire-breathing lizard. Avoid its breath and hit it from behind.
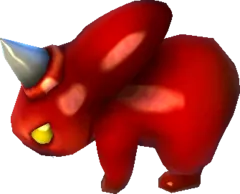
Red Kodongo
Where: The Dark Palace and the Treacherous Tower. It breathes fire. Avoid the flames and attack between breaths.
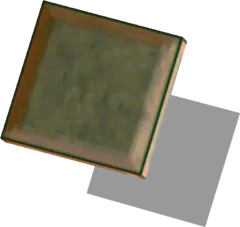
Flying Tile
Where: Desert Palace (32 in a row before two Devalants) and Lorule Castle. Floor tiles that rise up and fly at you. Cut them down as they pass.
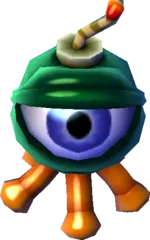
Bawb
Where: Thieves’ Hideout, Desert Palace, Swamp Palace and Lorule Castle. A bomb possessed by a monster that goes live when you attack it, and it can trip switches and blast open cracked floors. In the Desert and Swamp Palaces they home in on you; elsewhere they wander. Pick it up and throw it before it blows.
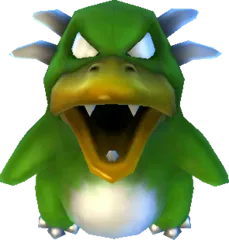
Pengator
Where: The Ice Ruins and the Treacherous Tower (six on floor 14 of the Advanced course). A penguin that slides at you. Strike it as it stops.
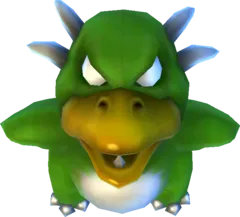
Big Pengator
Where: The Ice Ruins mini-boss and floor 18 of the Advanced course. A larger Pengator with the same moves, accompanied by four regular ones in the Ice Ruins. Defeat them all to open the door.
Traps and Rolling Hazards
These cannot be defeated, but you still have to get past them.
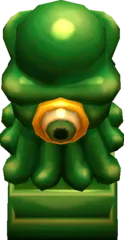
Beamos
Where: Dungeons. A stationary eye that fires a laser. Time your run past it.
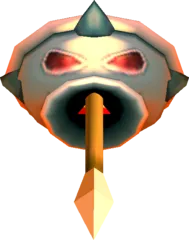
Arrow Trap
Where: Dungeons such as the Eastern Palace. A wall that shoots arrows. Block with your shield or dash across when it reloads.
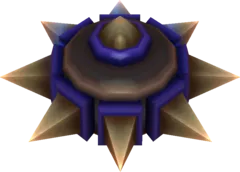
Blade Trap
Where: Dungeons. A spiked blade that slides along its track. Step aside or wait until it has passed.
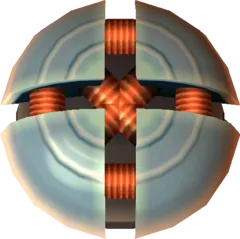
Bumper
Where: Dungeons. A round pad that bounces you away.
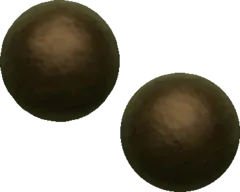
Brutal Ball
Where: Dungeon corridors. Rolls out of wall openings, either in a long stream from a large opening or one at a time from small ones. Stay out of its path.
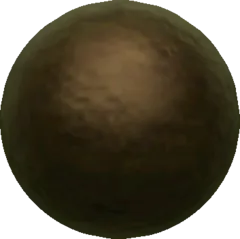
Gargantuan Ball
Where: Dungeons. A huge ball that sometimes comes from the larger openings. It hurts on contact.
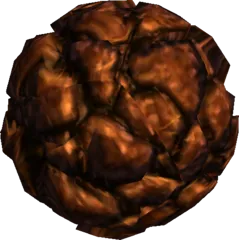
Boulder
Where: Dungeons and mountain paths. A rolling rock that hurts if it hits you; step out of the way.
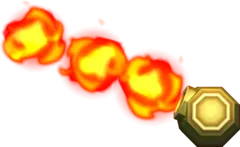
Guruguru Bar
Where: Dungeons. A spinning bar. Cross when it swings away.
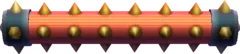
Rolling Pin
Where: The House of Gales, the Swamp Palace and Turtle Rock. In the House of Gales use the Tornado Rod to jump over it, in the Swamp Palace swim beneath it on the way to the Blue Mail, and in Turtle Rock simply dodge it.
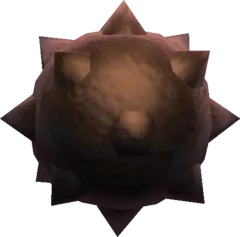
Spiked Ball
Where: Dungeon rooms. A hazard that rolls or drifts about. Keep clear.
Quick Reference
Every entry in one table, in the order of the page.
| # | Enemy | World | First thing to know |
|---|---|---|---|
| 1 | Short Sword Soldier | Hyrule | This green-armored guard carries a small blade |
| 2 | Green Sword Soldier | Hyrule | A green-armored swordsman who charges when he sees you |
| 3 | Blue Sword Soldier | Hyrule | The stronger kind of sword soldier |
| 4 | Spear Soldier | Hyrule | He charges with a trident held out in front |
| 5 | Red Spear Soldier | Hyrule | A horned, red-armored Spear Soldier |
| 6 | Spear Throwing Soldier | Hyrule | Called a Javelin Soldier in some places, he keeps his distance and throws spears |
| 7 | Blue Bow Soldier | Hyrule | He backs away and fires arrows at you |
| 8 | Bomb Soldier | Hyrule | He throws bombs from above and steps back if you approach |
| 9 | Grey Ball and Chain Soldier | Hyrule | He spins a spiked flail around himself, then throws it twice before swinging again |
| 10 | Gold Ball and Chain Trooper | Hyrule | It behaves like the grey soldier |
| 11 | Lorule Soldier | Lorule | In the Dark Ruins they act as sentries that you should avoid rather than fight |
| 12 | Lorule Spear Soldier | Lorule | A spear-armed counterpart of the Spear Soldier |
| 13 | Lorule Ball and Chain Soldier | Lorule | Its flail is on fire and lights dark rooms as it spins |
| 14 | Moblin | Lorule | Two kinds exist |
| 15 | Blue Taros | Lorule | A bull-headed warrior with a spear |
| 16 | Red Taros | Lorule | Armed with a trident and more aggressive than the blue one |
| 17 | Hinox | Lorule | A hulking bomb thrower that also charges |
| 18 | Snowball Hinox | Lorule | This coat-wearing Hinox throws snowballs that freeze you for a moment, leaving you open to a charge |
| 19 | Lynel | Lorule | It breathes a long stream of fire that costs three hearts and can only be blocked with the Hylian Shield |
| 20 | Black Lynel | Lorule | It has the same health and damage as a Lynel but can also spit single fireballs |
| 21 | Octorok | Hyrule | It scurries about and stops to spit a single rock |
| 22 | Slarok | Lorule | Lorule’s version of the Octorok |
| 23 | Helmasaur | Lorule | A mask guards its front, so attack its back |
| 24 | Stalfos | Both | It jumps away from your blows and chases you |
| 25 | Red Stalfos | Hyrule | They run at you and throw bones from range |
| 26 | Stal | Lorule | A skull enemy found in Lorule |
| 27 | Poe | Hyrule | A ghost that flies in loops and passes through walls |
| 28 | Dark Ghini | Lorule | It is visible in the dark but fades from view near light |
| 29 | Gibo | Lorule | A gel-like cloud whose body moves first and core follows behind |
| 30 | Purple Mini-Moldorm | Lorule | A purple version of the Mini-Moldorm |
| 31 | Winder | Lorule | Avoid it entirely |
| 32 | Keese | Both | They perch quietly and take off when you approach |
| 33 | Crow | Hyrule | It swoops down at you |
| 34 | Dacto | Lorule | It swoops down in the same way |
| 35 | Chasupa | Lorule | Hit it as it flies at you |
| 36 | Blazing Bat | Lorule | Purple flaming bats shoot out of the walls when Yuga Ganon retreats into his painting form |
| 37 | Peahat | Lorule | They swarm you, but unlike in earlier games you can hit them while they are in the air |
| 38 | Bee | Hyrule | Bees are hostile until you own the Bee Badge, after which they fight on your side |
| 39 | Golden Bee | Hyrule | Catch it with the Bug Net and bring it to the Bee Guy for the Bee Badge |
| 40 | Blob | Hyrule | They are harmless |
| 41 | Buzz Blob | Hyrule | The glowing yellow kind shocks you when you touch it or hit it with the sword, so use arrows or another ranged item |
| 42 | Rat | Hyrule | A weak scurrying rodent; one or two hits will do |
| 43 | Dark Rat | Lorule | A yellow rat with twice the health and double the damage of a normal rat |
| 44 | Sand Crab | Hyrule | Hit one in the Octoball Derby and the pots reappear |
| 45 | Karat Crab | Lorule | The dark counterpart of the Sand Crab, with four times the damage |
| 46 | Blue Bari | Both | A floating jellyfish that sparks and does not split |
| 47 | Red Bari | Both | Splits into two Biri when defeated |
| 48 | White Bari | Lorule | Does not split |
| 49 | Yellow Bari | Lorule | Splits into two Yellow Biri when defeated |
| 50 | Red Biri | Both | A small electric floater that splits off a Red Bari |
| 51 | Yellow Biri | Lorule | It drifts around and electrifies itself now and then |
| 52 | Purple Biri | Lorule | Same as the Yellow Biri: avoid it while it sparks and attack between charges |
| 53 | Arrgi | Lorule | They are the eyes that cover Arrghus |
| 54 | Green Eyegore | Both | A statue that wakes when you come close and charges |
| 55 | Blue Eyegore | Both | Behaves like the green one |
| 56 | Red Eyegore | Lorule | Five fight you as a mini-boss in a dark room |
| 57 | Fire Bubble | Both | A skull ringed with flames that bounces around the room |
| 58 | Ice Bubble | Lorule | The same kind of skull, ringed with ice |
| 59 | Freezor | Lorule | It bursts out of walls and charges |
| 60 | Popo | Lorule | It rises from the ground and homes in on you |
| 61 | Red Popo | Lorule | Has more health and deals more damage than a Popo |
| 62 | Fire Wizzrobe | Lorule | It pops up, casts a fire spell and disappears |
| 63 | Ice Wizzrobe | Lorule | Works like the Fire Wizzrobe but throws balls of ice |
| 64 | Gimos | Lorule | A stone statue that comes alive |
| 65 | Fire Gimos | Lorule | Striking it directly reflects damage on you |
| 66 | Ice Gimos | Lorule | Melts instantly under the Fire Rod |
| 67 | Big Ice Gimos | Lorule | It leaps and slams down, often knocking you off the platform |
| 68 | Flamola | Lorule | It leaps from the magma |
| 69 | Great Ball of Fire | Hyrule | Falls from the volcano after the eruption |
| 70 | Deadrock | Hyrule | Hitting it turns it to stone |
| 71 | Keeleon | Lorule | It floats too high for the sword and spits bombs |
| 72 | Medusa | Lorule | A fixed statue that spits fireballs or freezing balls |
| 73 | Devalant | Lorule | It digs a pit to pull you in |
| 74 | Geldman | Lorule | Use the Sand Rod to throw it out of the sand; it runs away and drops Rupees if you strike it |
| 75 | Hokkubokku | Lorule | It dives under the sand when you get close |
| 76 | Swamola | Lorule | A swamp dweller that behaves as in earlier games |
| 77 | Gyorm | Lorule | Invulnerable inside its spiked shell |
| 78 | Water Tektite | Lorule | Skates on water and is weaker than in older games |
| 79 | Ku | Lorule | A turtle-shelled creature that rushes you on land |
| 80 | Hyu | Lorule | A quick flier |
| 81 | Blue Hardhat Beetle | Both | A spiky-shelled beetle that bumps you |
| 82 | Like Like | Lorule | It trails you slowly and swallows you when it faces you |
| 83 | Green Rupee Like | Both | It disguises itself as a Rupee, but its shadow is larger |
| 84 | Blue Rupee Like | Both | Behaves like the green one, with a different Rupee on its stalk |
| 85 | Red Rupee Like | Both | Behaves like the green one, with a different Rupee on its stalk |
| 86 | Mole | Hyrule | Hit a Mole into the ground and it springs back up, flinging you to a higher platform |
| 87 | Wallmaster | Lorule | It floats above you and then drops |
| 88 | Zirro | Lorule | Stays far away and lobs an explosive |
| 89 | Snowball Zirro | Lorule | The blue version of the Zirro |
| 90 | Red Goriya | Lorule | Forms the Dark Palace mini-boss pair with a green Goriya |
| 91 | Green Goriya | Lorule | Found in dungeons and the Treacherous Tower |
| 92 | Green Kodongo | Lorule | A fire-breathing lizard |
| 93 | Red Kodongo | Lorule | It breathes fire |
| 94 | Flying Tile | Lorule | Floor tiles that rise up and fly at you |
| 95 | Bawb | Both | A bomb possessed by a monster |
| 96 | Pengator | Lorule | A penguin that slides at you |
| 97 | Big Pengator | Lorule | A larger Pengator with the same moves, accompanied by four regular ones in the Ice Ruins |
| 98 | Beamos | Both | A stationary eye that fires a laser |
| 99 | Arrow Trap | Both | A wall that shoots arrows |
| 100 | Blade Trap | Both | A spiked blade that slides along its track |
| 101 | Bumper | Both | A round pad that bounces you away |
| 102 | Brutal Ball | Both | Rolls out of wall openings, either in a long stream from a large opening or one at a time from small ones |
| 103 | Gargantuan Ball | Both | A huge ball that sometimes comes from the larger openings |
| 104 | Boulder | Both | A rolling rock that hurts if it hits you; step out of the way |
| 105 | Guruguru Bar | Both | A spinning bar |
| 106 | Rolling Pin | Both | In the House of Gales use the Tornado Rod to jump over it, in the Swamp Palace swim beneath it on the way to the Blue Mail, and in Turtle Rock simply dodge it |
| 107 | Spiked Ball | Both | A hazard that rolls or drifts about |
