





















Devices come out of dispensers as capsules that store in your inventory — pull one out, place it with Ultrahand and activate it. Devices run off your Energy Cells, so expanding your battery at the Crystal Refinery is what turns a 30-second flight into a cross-map trip.
Dispensers are capsule machines; each holds a fixed pool of four devices and gives a few capsules per charge or horn. The dispenser table at the bottom lists all 30 with their pools, odds and map links — the Big Battery is the only device no dispenser sells.
| Zonai devices | 27 |
|---|---|
| Devices with dispenser locations | 26 |
| Active time | How long the device runs once powered |
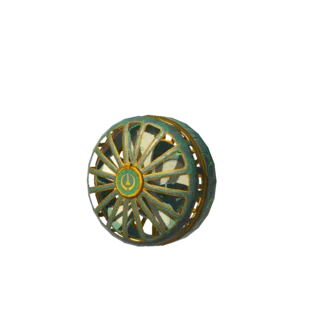
Fan
Generates a steady airflow — propulsion for vehicles, thrust for boats and balloons, and it blows enemies and sand piles around when fused to a shield.
When fused: attack power 1; effects: Fan, Fan While Guarding, Cannot Throw.
Device dispenser locations (11)
- Great Sky Island (South)
- Great Sky Island (East)
- East Hebra Sky Archipelago
- South Eldin Sky Archipelago
- Lanayru Sky Archipelago
- Wellspring Island
- Courage Island
- Thunderhead Isles
- Dragonhead Island
- Kakariko Village
- Hudson Construction Site
| Active time | 30 min |
|---|---|
| Energy consumption | 5.2 |
| Energy wells per second | 0.156 |
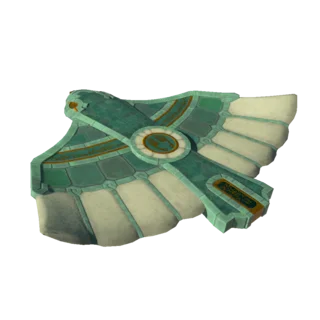
Wing
A glider you launch and stand on. It noses down after a while; a fan on the back turns it into a real aircraft.
When fused: attack power 1; effects: Wing, Shield Jump Higher.
Device dispenser locations (10)
- Great Sky Island (East)
- East Hebra Sky Archipelago
- Lanayru Sky Archipelago
- Wellspring Island
- Lightcast Island
- Tabantha Sky Archipelago
- North Necluda Sky Archipelago
- South Lanayru Sky Archipelago
- Dragonhead Island
- Left-Leg Depot
| Active time | 1 min 15 sec |
|---|---|
| Energy consumption | 0 |
| Energy wells per second | 0 |

Cart
A wheeled platform — the base of most land vehicles and minecart tracks.
When fused: attack power 1; effects: Fan.
Device dispenser locations (5)
- East Hebra Sky Archipelago
- Sokkala Sky Archipelago
- Lanayru Sky Archipelago
- West Necluda Sky Archipelago
- Dragonhead Island
| Energy consumption | 0 |
|---|---|
| Energy wells per second | 0 |

Balloon
Rises on hot air once lit. Lift for platforms, sky mining and reaching islands.
When fused: attack power 1; effects: Bouncy.
Device dispenser locations (5)
- Lightcast Island
- Courage Island
- West Necluda Sky Archipelago
- Kakariko Village
- Hudson Construction Site
| Active time | 2 min |
|---|---|
| Energy consumption | 0 |
| Energy wells per second | 0 |
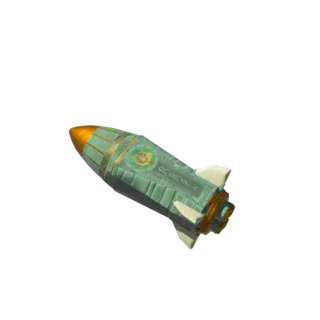
Rocket
A burst of thrust, one use. Cheap lift or a fast launch for a wing.
When fused: attack power 10; effects: Shatter Rock, Ignore Gravity, Rocket.
Device dispenser locations (4)
- West Hebra Sky Archipelago
- South Hyrule Sky Archipelago
- Hudson Construction Site
- Left-Leg Depot
| Active time | 3 sec |
|---|---|
| Energy consumption | 5 |
| Energy wells per second | 0.15 |
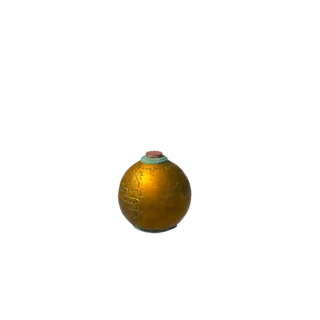
Time Bomb
Explodes after a fuse. Use it to trigger traps or blast rock when you are out of bomb flowers.
When fused: attack power 1; effects: Shield Surfing Spring.
Device dispenser locations (6)
- West Hebra Sky Archipelago
- Sky Mine
- Courage Island
- South Hyrule Sky Archipelago
- North Necluda Sky Archipelago
- Zonaite Forge Island
| Element | Bomb |
|---|---|
| Area attack (blast) | 30 |
| Uses | 1 |
| Energy consumption | 0 |
| Energy wells per second | 0 |
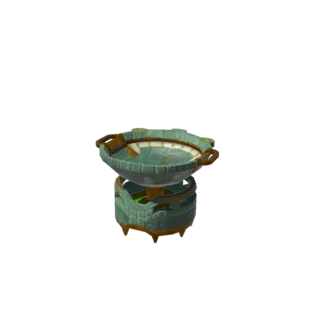
Portable Pot
A cooking pot you can place anywhere — one use each.
When fused: attack power 1; effects: Shatter Rock.
Device dispenser locations (7)
- Great Sky Island (South)
- Great Sky Island (East)
- West Hebra Sky Archipelago
- Courage Island
- Thunderhead Isles
- Gerudo Canyon Pass
- Death Mountain Depths
| Uses | 1 |
|---|---|
| Energy consumption | 0 |
| Energy wells per second | 0 |

Flame Emitter
Sprays fire continuously; fuses into a flamethrower weapon or lights torches and balloons.
When fused: attack power 1; effects: Fire Burst.
Device dispenser locations (5)
- Great Sky Island (South)
- Great Sky Island (East)
- West Hebra Sky Archipelago
- Bravery Island
- Zonaite Forge Island
| Element | Fire |
|---|---|
| Area attack (blast) | 0 |
| Active time | 30 min |
| Energy consumption | 6 |
| Energy wells per second | 0.18 |
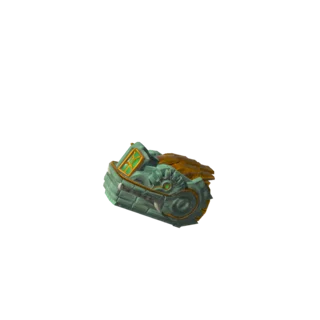
Frost Emitter
Sprays freezing air; freezes water into platforms and enemies into statues.
When fused: attack power 1; effects: Ice Burst.
Device dispenser locations (4)
- Tabantha Sky Archipelago
- Starview Island
- Zonaite Forge Island
- South Lanayru Sky Archipelago
| Element | Ice |
|---|---|
| Area attack (blast) | 0 |
| Active time | 30 min |
| Energy consumption | 6 |
| Energy wells per second | 0.18 |
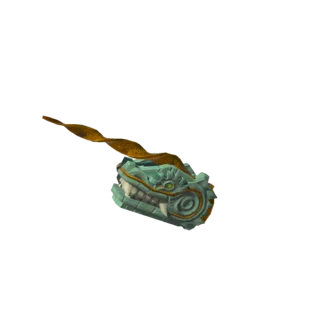
Shock Emitter
Fires lightning bursts; disarms enemies and powers circuits.
When fused: attack power 1; effects: Electric Burst, Expand Hitbox.
Device dispenser locations (3)
- North Hyrule Sky Archipelago
- Starview Island
- Thunderhead Isles
| Element | Electric |
|---|---|
| Area attack (blast) | 0 |
| Active time | 30 min |
| Energy consumption | 6 |
| Energy wells per second | 0.18 |
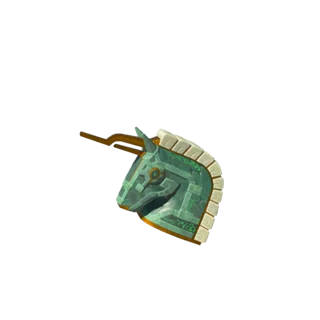
Beam Emitter
A steady damage beam — the backbone of turret builds on a Construct Head.
When fused: attack power 1.
Device dispenser locations (4)
- Lanayru Sky Archipelago
- East Gerudo Sky Archipelago
- Zonaite Forge Island
- Valor Island
| Element | Beam |
|---|---|
| Area attack (blast) | 12 |
| Active time | 30 min |
| Energy consumption | 6 |
| Energy wells per second | 0.18 |
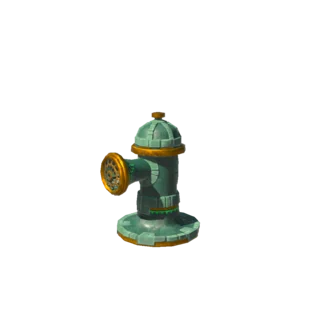
Hydrant
Sprays water; puts out fires, makes wet surfaces for Zora weapon boosts and grows splash fruit surfaces.
When fused: attack power 1; effects: Shatter Rock, Water Burst, Water Attack.
Device dispenser locations (4)
- South Eldin Sky Archipelago
- Sky Mine
- West Necluda Sky Archipelago
- Valor Island
| Element | Water |
|---|---|
| Area attack (blast) | 0 |
| Active time | 30 min |
| Energy consumption | 1 |
| Energy wells per second | 0.03 |
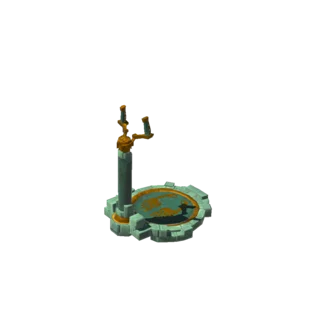
Steering Stick
Lets you drive a vehicle rather than just ride it — attach wheels and control direction.
When fused: attack power 1.
Device dispenser locations (8)
- North Hyrule Sky Archipelago
- East Gerudo Sky Archipelago
- Valor Island
- South Necluda Sky Archipelago
- Dragonhead Island
- Hudson Construction Site
- Death Mountain Depths
- Left-Leg Depot
| Energy consumption | 0 |
|---|---|
| Energy wells per second | 0 |
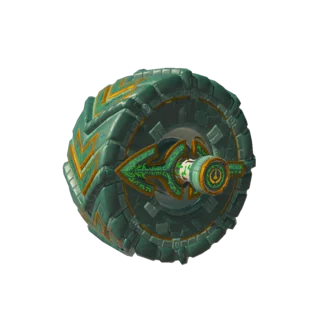
Big Wheel
Fast wheels for flat ground; pair with a steering stick for a proper car.
When fused: attack power 1; effects: Expand Shockwave.
Device dispenser locations (6)
- South Eldin Sky Archipelago
- Kakariko Village
- Hudson Construction Site
- Gerudo Canyon Pass
- Death Mountain Depths
- Left-Leg Depot
| Attack power | 1 |
|---|---|
| Active time | 30 min |
| Energy consumption | 0.5 |
| Energy wells per second | 0.015 |
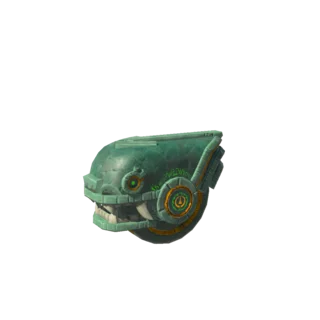
Small Wheel
Small powered wheels — lighter and cheaper than Big Wheels for compact builds.
When fused: attack power 1.
Device dispenser locations (5)
- Tabantha Sky Archipelago
- South Hyrule Sky Archipelago
- South Necluda Sky Archipelago
- Hudson Construction Site
- Left-Leg Depot
| Attack power | 1 |
|---|---|
| Active time | 30 min |
| Energy consumption | 0.5 |
| Energy wells per second | 0.015 |
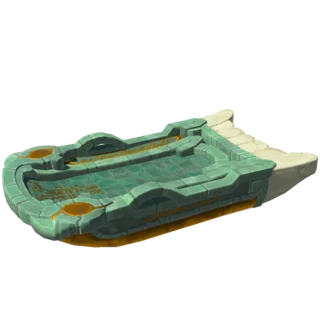
Sled
A frictionless skid plate; shieldsurf on it or slide vehicles over sand and snow.
When fused: attack power 1; effects: Fan.
Device dispenser locations (3)
- East Hebra Sky Archipelago
- Starview Island
- East Gerudo Sky Archipelago
| Energy consumption | 0 |
|---|---|
| Energy wells per second | 0 |

Battery
Stores charge for longer runs; devices drain it before your own cells.
When fused: attack power 1.
Device dispenser locations (7)
- Bravery Island
- South Eldin Sky Archipelago
- Wellspring Island
- South Lanayru Sky Archipelago
- Thunderhead Isles
- Gerudo Canyon Pass
- Death Mountain Depths
| Energy consumption | 0 |
|---|---|
| Energy wells per second | 0 |
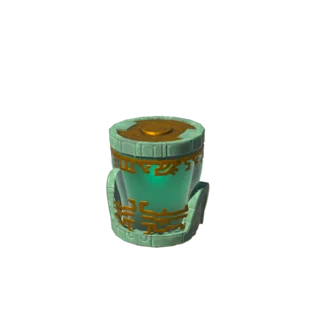
Big Battery
A large charge store. No dispenser sells it — get it from chests and certain enemies.
When fused: attack power 2.
No dispenser locations are listed for this device.
| Energy consumption | 0 |
|---|---|
| Energy wells per second | 0 |

Spring
Bounces whatever lands on it — pad for drops, launcher for balls.
When fused: attack power 1; effects: Bouncy, Shield Surfing Spring, Spring.
Device dispenser locations (4)
- Lightcast Island
- North Necluda Sky Archipelago
- Valor Island
- Gerudo Canyon Pass
| Attack power | 1 |
|---|---|
| Energy consumption | 0 |
| Energy wells per second | 0 |

Cannon
Fires explosive shells on a timer; mount it on a Construct Head for an auto-turret.
When fused: attack power 1; effects: Cannot Throw.
Device dispenser locations (3)
- Sokkala Sky Archipelago
- North Necluda Sky Archipelago
- South Necluda Sky Archipelago
| Element | Bomb |
|---|---|
| Area attack (blast) | 12 / 40 |
| Uses | 600 |
| Energy consumption | 900 / 3000 |
| Energy wells per second | 0.3 |
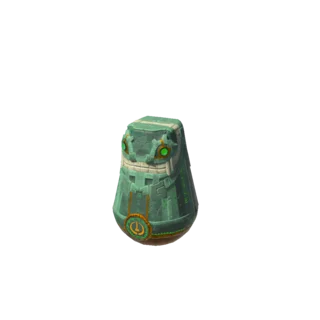
Stabilizer
Keeps whatever it is attached to upright — essential for hoverbikes and walkers.
When fused: attack power 5; effects: Shatter Rock.
Device dispenser locations (4)
- Wellspring Island
- Starview Island
- West Necluda Sky Archipelago
- Kakariko Village
| Active time | 30 min |
|---|---|
| Energy consumption | 1 |
| Energy wells per second | 0.03 |
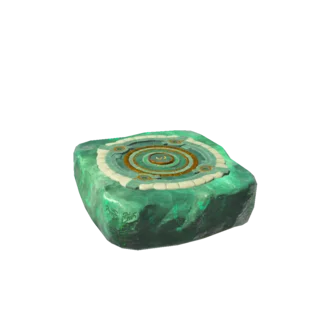
Hover Stone
A stone that hangs still in the air; a portable platform and mid-air workbench.
When fused: attack power 1; effects: Shatter Rock, Floating.
Device dispenser locations (3)
- Sky Mine
- Wellspring Island
- Lightcast Island
| Active time | 30 min |
|---|---|
| Energy consumption | 1 |
| Energy wells per second | 0.03 |

Light
A powered lamp for the Depths and caves — brighter than a torch and needs no fuel.
When fused: attack power 1.
Device dispenser locations (5)
- East Hebra Sky Archipelago
- North Hyrule Sky Archipelago
- Bravery Island
- South Hyrule Sky Archipelago
- South Necluda Sky Archipelago
| Active time | 30 min |
|---|---|
| Energy consumption | 1 |
| Energy wells per second | 0.03 |
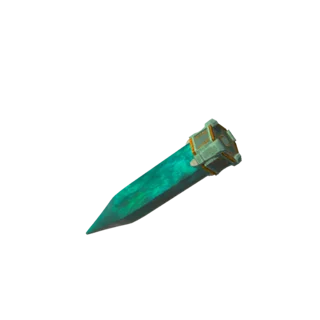
Stake
Pins into terrain or objects to anchor builds; holds platforms and wheels in place.
When fused: attack power 5; effects: Shatter Rock.
Device dispenser locations (4)
- Sokkala Sky Archipelago
- Starview Island
- East Gerudo Sky Archipelago
- Gerudo Canyon Pass
| Energy consumption | 0 |
|---|---|
| Energy wells per second | 0 |
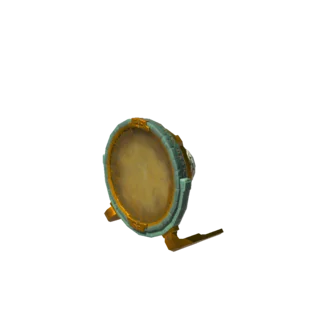
Mirror
Reflects sunlight for sun-puzzle shrines and can blind or burn enemies in a beam.
When fused: attack power 1.
Device dispenser locations (4)
- Lightcast Island
- Tabantha Sky Archipelago
- East Gerudo Sky Archipelago
- South Lanayru Sky Archipelago
| Active time | 30 min |
|---|---|
| Energy consumption | 0 |
| Energy wells per second | 0 |

Homing Cart
A cart that steers itself toward enemies — mobile base for emitter turrets.
When fused: attack power 1; effects: Shatter Rock.
Device dispenser locations (4)
- North Hyrule Sky Archipelago
- Sokkala Sky Archipelago
- Sky Mine
- Zonaite Forge Island
| Attack power | 1 |
|---|---|
| Active time | 30 min |
| Energy consumption | 1 |
| Energy wells per second | 0.03 |
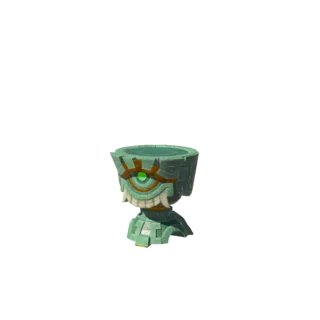
Construct Head
A turret head that aims whatever is mounted on it at the nearest enemy.
When fused: attack power 1.
Device dispenser locations (4)
- Bravery Island
- Sokkala Sky Archipelago
- West Necluda Sky Archipelago
- Left-Leg Depot
| Active time | 30 min |
|---|---|
| Energy consumption | 1 |
| Energy wells per second | 0.03 |
Device Dispensers (30)
Each dispenser takes Zonai charges or construct horns and returns a random pull of capsules from its four-device pool. The columns show each pool and the odds per device.
Every device dispenser with where it sits, which devices it can hand out and the chance of each. The data also lists fixed early payouts the first few times you use one.
| Location | Layer | Coordinates (X, Y, height) | Device pool (chance) | Fixed early drops | Map |
|---|---|---|---|---|---|
| Great Sky Island | Sky | 435, -1686, 1442 | Flame Emitter (20%), Fan (40%), Portable Pot (40%) | Fan, Flame Emitter | Map |
| Great Sky Island | Sky | 769, -1259, 1578 | Flame Emitter (15%), Wing (35%), Fan (30%), Portable Pot (20%) | Wing, Fan | Map |
| West Hebra Sky Archipelago | Sky | -3803, 2766, 701 | Rocket (30%), Flame Emitter (30%), Portable Pot (15%), Time Bomb (25%) | Flame Emitter, Rocket | Map |
| East Hebra Sky Archipelago | Sky | -1705, 3371, 947 | Wing (25%), Sled (30%), Fan (15%), Cart (15%), Light (15%) | — | Map |
| North Hyrule Sky Archipelago | Sky | 443, 2821, 1819 | Shock Emitter (20%), Light (30%), Steering Stick (30%), Homing Cart (20%) | Steering Stick, Light | Map |
| Bravery Island | Sky | 215, 1981, 754 | Light (25%), Flame Emitter (20%), Battery (30%), Construct Head (25%) | Light | Map |
| South Eldin Sky Archipelago | Sky | 1983, 1221, 1250 | Big Wheel (20%), Hydrant (40%), Battery (20%), Fan (20%) | Hydrant | Map |
| Sokkala Sky Archipelago | Sky | 3755, 1542, 1156 | Homing Cart (30%), Stake (20%), Cart (15%), Cannon (15%), Construct Head (20%) | Homing Cart | Map |
| Sky Mine | Sky | 4557, 2076, 1154 | Hover Stone (35%), Time Bomb (25%), Homing Cart (25%), Hydrant (15%) | — | Map |
| Lanayru Sky Archipelago | Sky | 2915, 502, 950 | Cart (30%), Wing (30%), Fan (20%), Beam Emitter (20%) | Wing, Beam Emitter, Cart | Map |
| Wellspring Island | Sky | 3430, 636, 1316 | Fan (15%), Hover Stone (35%), Wing (15%), Battery (15%), Stabilizer (20%) | Hover Stone | Map |
| Lightcast Island | Sky | -3612, 1066, 1655 | Mirror (35%), Balloon (15%), Spring (15%), Wing (20%), Hover Stone (15%) | Mirror | Map |
| Tabantha Sky Archipelago | Sky | -3455, 393, 1694 | Wing (30%), Frost Emitter (20%), Small Wheel (25%), Mirror (25%) | Frost Emitter | Map |
| Courage Island | Sky | -2370, 781, 610 | Balloon (30%), Fan (20%), Portable Pot (25%), Time Bomb (25%) | Balloon, Time Bomb | Map |
| Starview Island | Sky | -3457, -373, 1942 | Stake (20%), Shock Emitter (20%), Sled (25%), Stabilizer (15%), Frost Emitter (20%) | Frost Emitter | Map |
| East Gerudo Sky Archipelago | Sky | -1771, -2019, 1147 | Beam Emitter (15%), Sled (20%), Mirror (20%), Steering Stick (30%), Stake (15%) | Mirror | Map |
| South Hyrule Sky Archipelago | Sky | -1212, -1585, 1006 | Time Bomb (20%), Small Wheel (30%), Light (25%), Rocket (25%) | Small Wheel, Light | Map |
| North Necluda Sky Archipelago | Sky | 1778, -1096, 917 | Cannon (20%), Wing (20%), Spring (40%), Time Bomb (20%) | Spring | Map |
| Zonaite Forge Island | Sky | 2320, -1718, 1484 | Homing Cart (20%), Beam Emitter (20%), Flame Emitter (20%), Frost Emitter (20%), Time Bomb (20%) | — | Map |
| West Necluda Sky Archipelago | Sky | 1344, -2151, 584 | Construct Head (20%), Cart (20%), Balloon (20%), Stabilizer (20%), Hydrant (20%) | Construct Head | Map |
| Valor Island | Sky | 4510, -805, 1116 | Spring (30%), Hydrant (25%), Beam Emitter (20%), Steering Stick (25%) | — | Map |
| South Lanayru Sky Archipelago | Sky | 4675, -1029, 1788 | Frost Emitter (30%), Wing (20%), Battery (30%), Mirror (20%) | Frost Emitter | Map |
| South Necluda Sky Archipelago | Sky | 2851, -2958, 1211 | Steering Stick (30%), Small Wheel (30%), Cannon (20%), Light (20%) | Cannon, Steering Stick | Map |
| Thunderhead Isles | Sky | 1104, -3331, 827 | Shock Emitter (35%), Fan (35%), Portable Pot (15%), Battery (15%) | Shock Emitter | Map |
| Dragonhead Island | Sky | 1390, -3239, 416 | Wing (25%), Cart (25%), Fan (25%), Steering Stick (25%) | — | Map |
| Kakariko Village | Surface | 1838, -1093, 154 | Balloon (25%), Fan (20%), Big Wheel (20%), Stabilizer (35%) | Stabilizer | Map |
| Hudson Construction Site | Surface | 3807, 1561, 89 | Fan (15%), Small Wheel (20%), Balloon (15%), Big Wheel (15%), Rocket (15%), Steering Stick (20%) | Steering Stick | Map |
| Gerudo Canyon Pass | Surface | -1619, -1888, 1 | Stake (25%), Big Wheel (30%), Spring (15%), Portable Pot (15%), Battery (15%) | Stake | Map |
| Death Mountain Depths | Depths | 2190, 2640, -963 | Big Wheel (30%), Steering Stick (40%), Portable Pot (15%), Battery (15%) | Steering Stick | Map |
| Left-Leg Depot | Depths | 1058, -2320, -553 | Wing (15%), Small Wheel (15%), Big Wheel (20%), Rocket (15%), Steering Stick (20%), Construct Head (15%) | — | Map |
