
























Ocarina of Time Remake 100% Completion Walkthrough41 chapters
- Kokiri ForestFind the Kokiri Sword, buy the Deku Shield for 40 rupees and get past Mido to the Great Deku Tree.
- The Great Deku TreeFairy Slingshot, Dungeon Map, Compass, four Gold Skulltulas, Gohma and the Kokiri Emerald.
- Leaving Kokiri ForestSay goodbye to Mido and Saria, get the Fairy Ocarina, meet Kaepora Gaebora and cross Hyrule Field.
- Hyrule Castle TownGold Skulltula, Bazaar, Shooting Gallery seed bag, Potion Shop bottle and the Temple of Time.
- Hyrule CastleGet the Weird Egg, wake Talon, sneak in, meet Zelda, learn Zelda’s Lullaby and collect Zelda’s Letter.
- Kakariko VillageCucco Lady’s bottle, House of Skulltula, Adult’s Wallet and the rooftop Heart Piece.
- GraveyardDampé’s Grave-Diggin’ Tour Heart Piece, Sharp and Flat, the Royal Family’s Tomb and the Sun’s Song.
- Lon Lon RanchTalon’s cucco game, Lon Lon Milk, Epona’s Song, a Heart Piece and Gold Skulltula.
- Gerudo ValleyTwo Heart Pieces, Lon Lon milk from Miss Moo with Epona’s Song, and a Gold Skulltula token.
- Lake HyliaLakeside Laboratory, the scarecrow quest, a Gold Skulltula and the fishing Heart Piece.
- Lost Woods and Sacred GroveRichard’s Heart Piece, Happy Mask Shop, Skull Kid, Saria’s Song, Gold Skulltulas 16 to 19 and the Business Scrubs.
- Death Mountain Trail and Goron CityClimb to Goron City, win over Darunia with Saria’s Song and take the Goron Bracelet before Dodongo Cavern.
- Dodongo CavernDungeon Map, Compass, Bomb Bag, four Gold Skulltulas, King Dodongo and the Goron Ruby.
- Death Mountain Summit and CraterGoron City Heart Piece and Bigger Bomb Bag, Din’s Fire and magic meter, crater Heart Piece, Echo Gem.
- Bombchu Bowling and the Great Fairy of PowerWin the Bombchus, Biggest Bomb Bag and Heart Piece, then get the enhanced Spin Attack.
- Zora River and Zora DomainHeart Pieces, a Gold Skulltula, the Silver Scale, Ruto’s bottle in Lake Hylia and King Zora’s request.
- Lord Jabu-Jabu’s BellyFarore’s Wind, the Boomerang, Ruto, Barinade, the Heart Container and the Spiritual Stone of Water for child Link.
- Errands Before the Temple of TimeThe child errands before the Temple of Time in the Ocarina of Time Remake.
- Temple of TimeFind the Ocarina of Time, open the Door of Time, draw the Master Sword and earn the Light Medallion.
- Ingo Ranch and EponaIngo’s two horse races, winning Epona and teaching Bonooru the Scarecrow Song.
- Kakariko Village and the HookshotDampé’s race, the Hookshot, Song of Storms and Heart Pieces #17 to #19.
- Sacred Grove as an AdultGet past Mido with Saria’s Song, cross the Moblin maze, beat the Great Moblin.
- Forest TempleSmall keys, Fairy Bow, four Poe Sisters, Phantom Ganon, Heart Container and Forest Medallion.
- Poes, the Hall of Fallen Foes and Lake HyliaBigger Quiver, Prelude of Light, Big Poes, Golden Scale and three Heart Pieces.
- Goron City as an AdultHeart Pieces, a Gold Skulltula, the Goron Tunic from the small Goron.
- Fire TempleFree all nine Gorons, find the Megaton Hammer and Boss Key, beat Volvagia and earn the Fire Medallion.
- Double Magic and Death MountainCrater Great Fairy Fountain, doubled magic, Gold Skulltulas 60 to 62 and a Business Scrub Seed as adult Link.
- Ice CavernBlue Fire, Iron Boots, Serenade of Water, the Zora Tunic and two Heart Pieces.
- The Biggoron Sword RouteBuy the Giant’s Knife, trade from the Pocket Egg to Cojiro, and finish every step up to the Biggoron Sword.
- Water TempleTriforce doors, small keys, Longshot, Dark Link, Morpha, the Water Medallion and Gold Skulltulas 68 to 73.
- Kakariko Village and the Nocturne of ShadowLearn the Nocturne of Shadow and find two Gold Skulltulas and two Heart Pieces.
- Bottom of the WellLenses of Truth, Dungeon Map, Compass, both small keys, Dead Hand and Gold Skulltulas 76 to 78.
- Treasure Box Shop and the Way to the Shadow TempleWin the Piece of Heart with the Lenses of Truth, then warp to the Shadow Temple via the Nocturne.
- Shadow TempleFloors B1 to B4, Hover Boots, Bongo Bongo, Heart Container and the Shadow Medallion from Impa.
- Gerudo FortressRescue all four carpenters, win the Gerudo Pass, find Gold Skulltulas 84 and 85.
- Mirage Desert and Evil Desert ColossusPhantom Guide, Requiem of Spirit, five Gold Skulltulas, three Heart Pieces, Biggest Quiver, Nayru’s Love.
- Spirit TempleChild and adult routes, Silver Gauntlets, Mirror Shield, Boss Key, Iron Knuckle Nabooru, Twinrova.
- Gerudo Proving GroundsPay 30 rupees, solve every room, and claim the Ice Arrow and a Business Scrub Seed.
- Last Heart Pieces and Gold SkulltulasTokens 96 to 100, Heart Pieces 33 to 35, the Rich Man reward and Light Arrow.
- Ganondorf’s CastleClear the six barriers, get the Golden Gauntlets and the Great Fairy of Courage’s gift.
- Ganondorf and GanonTower climb, Boss Key, Ganondorf boss fight, the escape with Zelda and the Ganon boss fight.
| Covers | Frozen Zora Domain, Zora Fountain, Ice Cavern |
|---|---|
| Link | Adult |
| You need | Hookshot, Fairy Bow, Megaton Hammer, an empty bottle, Song of Time, Bolero of Fire to warp out |
| Rewards |  Iron Boots, Serenade of Water, 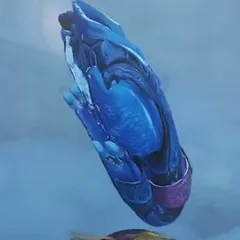 Zora Tunic, 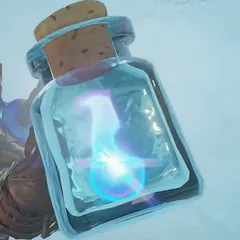 Blue Fire in a bottle, 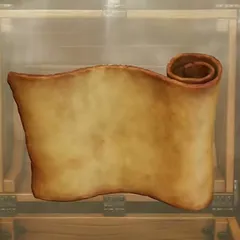 Dungeon Map, 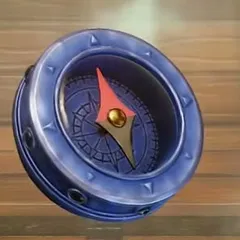 Compass, a Red Rupee,  Heart Pieces #25 and #26,  Gold Skulltulas #63 to #66 (4), one Fairy’s Thought |
Zora Domain is frozen solid and King Zora is trapped in pink ice. You cross the frozen domain and the Zora Fountain for a Heart Piece and a Gold Skulltula, then work through the Ice Cavern for Blue Fire, the Dungeon Map, the Compass and the Iron Boots. Sheik teaches you the Serenade of Water inside. Back outside, Blue Fire frees King Zora, who gives you the Zora Tunic, and the tunic opens an underwater Heart Piece.


Table of Contents
Frozen Zora Domain
Climb through the frozen domain
Enter Zora Domain and the Disaster in Zora Domain event begins. The waterfalls are frozen and a shivering “Br-r-r-cold” bubble pops up beside you. Follow the path up the icy stairs past the frozen falls, climb the next flight of steps toward the pink glow ahead and keep going through the ice cave. Nothing here can hurt you yet, but watch the walls for a Skulltula.


Gold Skulltula #63, frozen column
Where the cave opens onto the frozen bridge, look at the pillar standing beside the stonework. A Gold Skulltula clings to it, out of sword reach. Pull out the Hookshot, press Fire to aim up at the spider and let it drop. The token falls and you read “You’ve collected 63 tokens so far.”


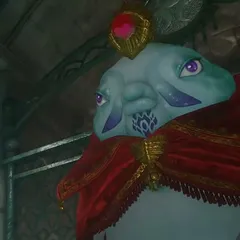
King Zora in the ice
Climb the steps to the pink ice block with King Zora inside. Navi calls out, “Oh… Oh NO! King Zora is frozen!” and wonders aloud whether it is getting colder the farther in you go. You can Check the block, but nothing you carry affects it yet. Leave him for now. The thing that melts pink ice is waiting in the Ice Cavern. You return to him near the end of this chapter.


Zora Fountain
Cross the ice floes
Walk past the frozen king and out of Zora Domain. The Zora Fountain banner appears. The lake is a field of ice blocks and floes with open water between them. Hop from block to block, climbing the taller slabs with a jump and a grab, and follow the line of ice that leads away from the shore.


Heart Piece #25, icy ledge
Cross the floes until you reach a ledge at the far side. A Piece of Heart waits on it. Taking it brings up “Four pieces form one container. Collect four of them to gain an additional heart!” This is Heart Piece #25. Keep climbing the stacked ice blocks beyond the ledge and cross the long icy bridge to the cavern mouth.


Ice Cavern, first rooms
Enter the Ice Cavern
The Ice Cavern banner appears as you step inside, and a “Brr… So cold…” bubble appears while the Disaster in Zora Domain event updates. The map in the corner shows the dungeon on floor 1F. Walk through the icicle-filled passage. Pink ice crystals sit around the cave. Blue Fire, which you collect later in this chapter, melts them.


Freezards
The first large room has statue-like Freezards. Navi tells you a Freezard’s breath turns anyone it hits into a solid block of ice and warns you to be extra careful when one starts to inhale icy air. Stay out of their line, hit them from the side and finish them before they breathe. Barred gates line the far wall of the room. They stay shut for now, so follow the passage that winds around them.


Gold Skulltula #64, frozen ruins
Keep moving through the cave. In the cavern beyond the gates, look up the ice wall for a Gold Skulltula. Aim the Hookshot with Fire and hit the spider to drop its token. You get “You’ve collected 64 tokens so far.” A frozen pool with round stone platforms lies just beyond, and past it an Ice Keese swoops in. Navi says it wraps itself in frost and flies straight at you, so stay calm and keep an eye on it.


Blue Fire and the Dungeon Map
Blue Fire in a bottle
Continue down the icy corridor to a short stone passage. A pool of blue flame burns on the floor, with pink ice crowded around it. Take out an empty bottle and use it on the flame. The game says, “You collected some blue fire in a bottle! This eerie flame can thaw ice that no other fire can melt.” The bottle menu then lists it as Blue Fire. Refill it at any blue flame you meet.


Dungeon Map
Walk back to the pink ice block that was in your way and take out the bottle again. Press Use to pour the Blue Fire over the ice. It melts and opens the way to a wooden chest. The chest holds the Dungeon Map, and the map screen now shows the Ice Cavern with the Zora Fountain on its edge.


Refill the bottle
Follow the passage to the second blue flame and fill your bottle again before moving on. Blue Fire has to be carried through most of this cavern. Whenever a pink block bars a doorway, melt it and refill at the next flame. Walk on across the icicle field, where spikes hang over the path.


Bow, Hookshot and Gold Skulltula #65
Shoot the ice targets
Take out the Fairy Bow in the next hall. Press Shoot Arrow while aiming at the blue-lit niches behind the bars on the far wall; a few stone pillars and ice blocks stand between you. Then push a carved ice block against a stone pillar, climb up and walk on, where another spider is waiting near the roof.


Gold Skulltula #65, ice walkway
Equip the Hookshot, line up on the Gold Skulltula and press Fire. The token drops and the box says “You’ve collected 65 tokens so far.” That is the third Gold Skulltula of this chapter.


Ice block rooms
Song of Time and the carved ice blocks
The next rooms are filled with ice blocks carved with a rune. Grab one with the action button and push it along the floor to build a path, then climb on top of it. Beside a blue flame, open the ocarina and play the Song of Time (A, L, R, A, L, R as the game shows it) to raise dark blue Time blocks and make the path you need. Hop across them to a ledge with a chest that holds a Red Rupee worth twenty rupees. Then work through the carved cubes, break the pink crystal on the way with Blue Fire and keep going to the far side.


Blue Fire before the wolf
Press on through the dark stone doorway to another blue flame. Top up the bottle, then melt the pink ice around the jars beyond it. A big pink crystal blocks the corridor ahead. Melt it as well and you come out in front of a barred gate with blue light behind it.


White Wolfos fight
White Wolfos boss fight
Walk toward the barred gate and a White Wolfos comes at you through the snow. Lock on, keep your shield up and watch for its lunge. Sidestep or block, then strike as soon as it lands. It circles and leaps, so stay in the open middle of the arena and do not back into the walls.

Keep chaining sword slashes after each dodge, or switch to the Megaton Hammer and use Hit when it stands still in front of you. After enough hits it falls, the barred gate lifts and a chest appears on the snowy floor.


Iron Boots
Iron Boots, chest behind the gate
Walk to the chest that appeared on the snowy floor. Open it and the message says “You found the Iron Boots!” The box says they are too heavy to run in and too heavy to float in. Equip them from the equipment screen, where the description says they make it impossible to run or swim but are excellent for sinking. You need these to sink in the Water Temple chapter, Water Temple.


Sheik and the Serenade of Water
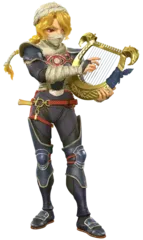
Sheik’s message
Sheik appears with “So, you’ve made it, Link…” and says he could free only the Zora princess, and she did not stay long. The freezing of Zora Domain comes from the monster in the Water Temple, and the ice will not thaw until it is dealt with. He asks you to go to the Water Temple, find Princess Ruto and aid her, then speaks a short rhyme about time passing and people changing, a young heart turning to noble ambition and the clear surface of the water reflecting growth.


Serenade of Water
Sheik plays the harp and the game prompts “Play the Serenade of Water.” Copy the notes on your ocarina. The game announces “You learned the Serenade of Water!” The song warps you to Lake Hylia and the Water Temple’s grounds. Sheik adds that you cannot explore the temple freely in your current state, that you need the abilities of a Zora and should speak to King Zora for help, then vanishes. Navi mutters about him running off and decides you have no choice but to trust him.


Compass and the way out
Refill and clear the last ice
Walk back out through the ice doorway. A new quest prompt tells you to Equip Boots, so keep the Iron Boots handy. Use the blue flame on the way to fill an empty bottle once more, melt the pink block ahead with Use, then switch to the Megaton Hammer. Smash the spiked traps and jars in your way with Hit to clear a route.


Compass
The hammer path ends at a chest. Open it for the Compass. The message tells you it finds the treasure chests and hidden secrets in this dungeon. An Ice Keese flaps around the cave beyond, so cut it down as it swoops.


Gold Skulltula #66
After the Compass chest, continue to the pink crystal in the next cave. A Gold Skulltula clings high on the ice wall nearby. Equip the Hookshot and press Fire. The box reads “You’ve collected 66 tokens so far.” Then melt the pink crystal with Blue Fire and refill your bottle at the flame beyond it.


Fairy’s Thought
Further along the corridor, Navi notices that a fairy’s thoughts are lingering. Press Check and she tells you them: “I do love my fair share of snow and ice. But it’s unreasonably cold in here!” and “I’d give anything for a few warm moments in the sun.” Walk on through the cold caves and past the frozen lake until the cavern lets you out at the Zora Fountain.


King Zora and the Zora Tunic
Free King Zora
Cross the frozen ledge and go back into Zora Domain. At the pink ice around King Zora, take out the Blue Fire bottle and press Use. The ice shatters. The king sits up shocked, asks “You… You’re Link?!” and says the Link who saved his domain has returned after seven years. He worries about Ruto exploring the Water Temple alone and apologizes for asking you to help her again.


Zora Tunic
King Zora guesses that you might find underwater activity difficult and gives you a Zora Tunic. The box says you can stay underwater as long as you want while wearing this adult-sized diving tunic. Equip it from the equipment screen. He then tells you the Water Temple is at Lake Hylia, and the Disaster in Zora Domain event updates.


Underwater Heart Piece
Dive under the frozen fountain
Walk down the frozen steps and out onto the Zora Fountain. Run across the ice ridges to the open water near the stone pillar. Hold the dive button to sink and swim down into the dark cave beneath the ice. Green rupees lie on the floor.


Heart Piece #26, cave under the lake
Swim through the cave and take the Piece of Heart waiting at the end, then collect the rupees around it. This is Heart Piece #26. Surface at the ice edge and climb onto the ledge. The tunic works here because you wear it, so you never need to come up for air.


Leaving the Fountain
Warp out with Bolero of Fire
Open the songbook and play the Bolero of Fire. Confirm “Warp to the Death Mountain Crater?” and the warp light carries you to the pedestal there. Goron City is the next stop, where the Biggoron Sword trading route begins. The Water Temple waits until later.


Chapter checklist
| Collectible | Type | Where |
|---|---|---|
| Gold Skulltula #63 | Gold Skulltula | Pillar by the frozen bridge in Zora Domain, Hookshot |
| Heart Piece #25 | Heart Piece | Icy ledge across the Zora Fountain floes |
| Gold Skulltula #64 | Gold Skulltula | Ice Cavern, frozen ruins, Hookshot |
| Blue Fire | Bottle content | Blue flame pool in the Ice Cavern |
| Dungeon Map | Dungeon item | Chest behind pink ice, Ice Cavern |
| Gold Skulltula #65 | Gold Skulltula | Ice Cavern, ice walkway, Hookshot |
| Iron Boots | Equipment | Chest behind the gate after the White Wolfos |
| Serenade of Water | Song | Taught by Sheik in the Ice Cavern |
| Compass | Dungeon item | Chest at the end of the hammer path, Ice Cavern |
| Red Rupee | Rupee | Chest on a ledge reached over the Time blocks, Ice Cavern |
| Fairy’s Thought | Hint | Corridor late in the Ice Cavern |
| Zora Tunic | Equipment | King Zora, Zora Domain |
| Heart Piece #26 | Heart Piece | Cave under the Zora Fountain, dive with the tunic |
| Gold Skulltula #66 | Gold Skulltula | Ice Cavern, high on the ice wall past the pink ice block, Hookshot |
With the Iron Boots, the Zora Tunic and the Serenade of Water you are equipped for the Water Temple. Before that, The Biggoron Sword Route starts in Goron City with a warp to Death Mountain Crater.
