
























Ocarina of Time Remake 100% Completion Walkthrough41 chapters
- Kokiri ForestFind the Kokiri Sword, buy the Deku Shield for 40 rupees and get past Mido to the Great Deku Tree.
- The Great Deku TreeFairy Slingshot, Dungeon Map, Compass, four Gold Skulltulas, Gohma and the Kokiri Emerald.
- Leaving Kokiri ForestSay goodbye to Mido and Saria, get the Fairy Ocarina, meet Kaepora Gaebora and cross Hyrule Field.
- Hyrule Castle TownGold Skulltula, Bazaar, Shooting Gallery seed bag, Potion Shop bottle and the Temple of Time.
- Hyrule CastleGet the Weird Egg, wake Talon, sneak in, meet Zelda, learn Zelda’s Lullaby and collect Zelda’s Letter.
- Kakariko VillageCucco Lady’s bottle, House of Skulltula, Adult’s Wallet and the rooftop Heart Piece.
- GraveyardDampé’s Grave-Diggin’ Tour Heart Piece, Sharp and Flat, the Royal Family’s Tomb and the Sun’s Song.
- Lon Lon RanchTalon’s cucco game, Lon Lon Milk, Epona’s Song, a Heart Piece and Gold Skulltula.
- Gerudo ValleyTwo Heart Pieces, Lon Lon milk from Miss Moo with Epona’s Song, and a Gold Skulltula token.
- Lake HyliaLakeside Laboratory, the scarecrow quest, a Gold Skulltula and the fishing Heart Piece.
- Lost Woods and Sacred GroveRichard’s Heart Piece, Happy Mask Shop, Skull Kid, Saria’s Song, Gold Skulltulas 16 to 19 and the Business Scrubs.
- Death Mountain Trail and Goron CityClimb to Goron City, win over Darunia with Saria’s Song and take the Goron Bracelet before Dodongo Cavern.
- Dodongo CavernDungeon Map, Compass, Bomb Bag, four Gold Skulltulas, King Dodongo and the Goron Ruby.
- Death Mountain Summit and CraterGoron City Heart Piece and Bigger Bomb Bag, Din’s Fire and magic meter, crater Heart Piece, Echo Gem.
- Bombchu Bowling and the Great Fairy of PowerWin the Bombchus, Biggest Bomb Bag and Heart Piece, then get the enhanced Spin Attack.
- Zora River and Zora DomainHeart Pieces, a Gold Skulltula, the Silver Scale, Ruto’s bottle in Lake Hylia and King Zora’s request.
- Lord Jabu-Jabu’s BellyFarore’s Wind, the Boomerang, Ruto, Barinade, the Heart Container and the Spiritual Stone of Water for child Link.
- Errands Before the Temple of TimeThe child errands before the Temple of Time in the Ocarina of Time Remake.
- Temple of TimeFind the Ocarina of Time, open the Door of Time, draw the Master Sword and earn the Light Medallion.
- Ingo Ranch and EponaIngo’s two horse races, winning Epona and teaching Bonooru the Scarecrow Song.
- Kakariko Village and the HookshotDampé’s race, the Hookshot, Song of Storms and Heart Pieces #17 to #19.
- Sacred Grove as an AdultGet past Mido with Saria’s Song, cross the Moblin maze, beat the Great Moblin.
- Forest TempleSmall keys, Fairy Bow, four Poe Sisters, Phantom Ganon, Heart Container and Forest Medallion.
- Poes, the Hall of Fallen Foes and Lake HyliaBigger Quiver, Prelude of Light, Big Poes, Golden Scale and three Heart Pieces.
- Goron City as an AdultHeart Pieces, a Gold Skulltula, the Goron Tunic from the small Goron.
- Fire TempleFree all nine Gorons, find the Megaton Hammer and Boss Key, beat Volvagia and earn the Fire Medallion.
- Double Magic and Death MountainCrater Great Fairy Fountain, doubled magic, Gold Skulltulas 60 to 62 and a Business Scrub Seed as adult Link.
- Ice CavernBlue Fire, Iron Boots, Serenade of Water, the Zora Tunic and two Heart Pieces.
- The Biggoron Sword RouteBuy the Giant’s Knife, trade from the Pocket Egg to Cojiro, and finish every step up to the Biggoron Sword.
- Water TempleTriforce doors, small keys, Longshot, Dark Link, Morpha, the Water Medallion and Gold Skulltulas 68 to 73.
- Kakariko Village and the Nocturne of ShadowLearn the Nocturne of Shadow and find two Gold Skulltulas and two Heart Pieces.
- Bottom of the WellLenses of Truth, Dungeon Map, Compass, both small keys, Dead Hand and Gold Skulltulas 76 to 78.
- Treasure Box Shop and the Way to the Shadow TempleWin the Piece of Heart with the Lenses of Truth, then warp to the Shadow Temple via the Nocturne.
- Shadow TempleFloors B1 to B4, Hover Boots, Bongo Bongo, Heart Container and the Shadow Medallion from Impa.
- Gerudo FortressRescue all four carpenters, win the Gerudo Pass, find Gold Skulltulas 84 and 85.
- Mirage Desert and Evil Desert ColossusPhantom Guide, Requiem of Spirit, five Gold Skulltulas, three Heart Pieces, Biggest Quiver, Nayru’s Love.
- Spirit TempleChild and adult routes, Silver Gauntlets, Mirror Shield, Boss Key, Iron Knuckle Nabooru, Twinrova.
- Gerudo Proving GroundsPay 30 rupees, solve every room, and claim the Ice Arrow and a Business Scrub Seed.
- Last Heart Pieces and Gold SkulltulasTokens 96 to 100, Heart Pieces 33 to 35, the Rich Man reward and Light Arrow.
- Ganondorf’s CastleClear the six barriers, get the Golden Gauntlets and the Great Fairy of Courage’s gift.
- Ganondorf and GanonTower climb, Boss Key, Ganondorf boss fight, the escape with Zelda and the Ganon boss fight.
| Covers | Hyrule Field road to Kakariko Village, the Cucco Lady, House of Skulltula, the carpenters’ yard, the Death Mountain Trail gate, and a second trip through the Royal Family’s Tomb and the Graveyard |
|---|---|
| Link | Child |
| You need | Zelda’s Letter, Fairy Slingshot with Deku Seeds, Deku Sticks or a sword, the Ocarina with the Sun’s Song from the Graveyard |
| Rewards | 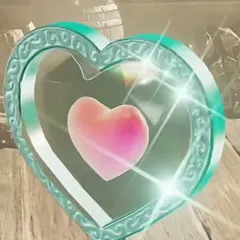 Heart Piece #1, 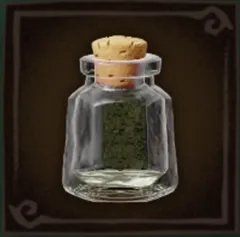 Empty Bottle, 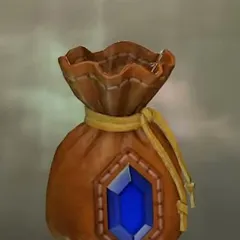 Adult’s Wallet, 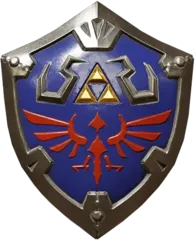 Hylian Shield,  Gold Skulltula tokens #7 to #11,  Blue Rupee, three Fairy’s Thoughts |
Kakariko Village is small but busy. Follow the road from Hyrule Castle to the village gate, return the Cucco Lady’s lost Cuccos and collect four Gold Skulltula tokens to free the Cursed Rich Man’s son for the Adult’s Wallet. A Cucco also carries you to a rooftop Heart Piece. Show Zelda’s Letter at the Death Mountain Trail gate, then finish the Royal Family’s Tomb and find the Hylian Shield in the Graveyard.


Table of Contents
Hyrule Field to Kakariko Village
Fairy’s Thoughts on the road
Leave Hyrule Castle and follow the stone path through Hyrule Field toward the mountains. Navi flutters over two glowing spots on the way: a mossy ruined wall beside a large tree and an overturned cart by the dirt road. Stand next to each one and Navi offers to share what the fairy was thinking; at the cart you choose “Yeah, let’s see!”. Each Fairy’s Thought counts as a secret found. Keep following the dirt road down the gorge toward the village.


Kakariko Village gate
Follow the trail until the “Kakariko Village” banner appears and a guard at the gate asks what you are doing out at this hour. Talk to him and let him finish. He says the Death Mountain Trail is just through town but closed because of falling debris, the Graveyard lies on the far side of the village, and a man named Dampé shows up there at night. Walk through the gate into the village, which is dark when you arrive.


Cucco Lady and the missing Cuccos
Meet the Cucco Lady
A short way past the gate, a red-haired woman in a blue dress stands at an empty pen beside a lamp post. She is the Cucco Lady, and all seven of her Cuccos flew out of the pen. Talk to her and choose “Do you need help?” Cuccos wander the lanes, stairs and walkways of the whole village, so you will find them as you go.


Carrying and gliding with Cuccos
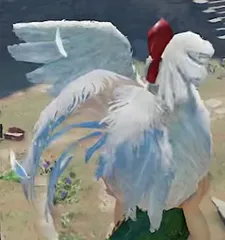
Walk up to a Cucco and pick it up. The prompts then read Throw and Set Down. While you hold a Cucco you can run along stairs and walkways, and stepping off a ledge makes Link flutter down slowly instead of falling. That glide reaches the rooftop later in this chapter. Bring each Cucco to the pen and set it down inside the fence.


House of Skulltula and the Adult’s Wallet
Gold Skulltula #7: the unfinished house
Ready the Fairy Slingshot and climb onto the wooden walkways around the brick house that is still being built, near the lamp. Look at the brick wall until a Gold Skulltula shows up on it, then fire a Deku Seed. It drops and you collect your seventh token: “You’ve collected 7 tokens so far.”


Gold Skulltula #8: the blue door
A signboard along the way reads “Dark! Narrow! Scary! Well of Three Features”, a place you cannot use yet. Walk on to the stone house with the blue door at the top of a short flight of steps. A golden glow flickers on the wall to the left of the door. Strike the Gold Skulltula and grab token number 8, then go inside. This is the House of Skulltula.


The Cursed Rich Man
A man twisted into a giant spider with a human face hangs in the middle of the room: the Cursed Rich Man. He begs you to collect Gold Skulltula tokens and offers two hints. Gold Skulltulas keep to dark, dreary places, and outdoors they appear only at night, sometimes under fresh soil, where releasing a bug from a bottle can lure one out. The second hint is that they climb into trees and fall out when you hit the trunk hard, and he suspects one is rustling in a tree in the village. Collect enough of them and the curse on his family lifts.


Gold Skulltula #9: the tree in the village square
Head to the cobbled village square, where the Master Craftsman’s Son sits on the ground muttering “I hate everyone.” A tall tree stands right beside him. Strike its trunk so the tree shakes and the Skulltula hiding in it drops. You pick up the ninth token: “You’ve collected 9 tokens so far.”


Gold Skulltula #10: the windmill
Find the windmill tower in the village. A Gold Skulltula sits on the tower above its ladder, out of reach. Shoot it with the Fairy Slingshot, then climb the ladder and take the token that drops. That is your tenth, and Navi asks whether you have found 10 already. Let Go or Jump drops you off the ladder. Navi then asks whether you have collected quite a few tokens and suggests the blue-door house, so head back there.


Adult’s Wallet
Walk back into the House of Skulltula. The Cursed Rich Man notices that you have 10 Gold Skulltula tokens and the curse on his children weakens. The screen reads “You got an Adult’s Wallet!”, and your wallet now holds up to 500 rupees. His freed fifth son thanks you and points out the Shooting Gallery. The Cursed Rich Man adds that a total of 20 tokens earns the next reward.


The village by day
Carpenters and the Master Craftsman
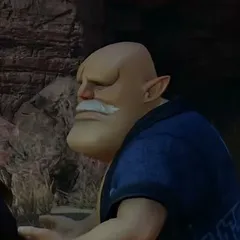
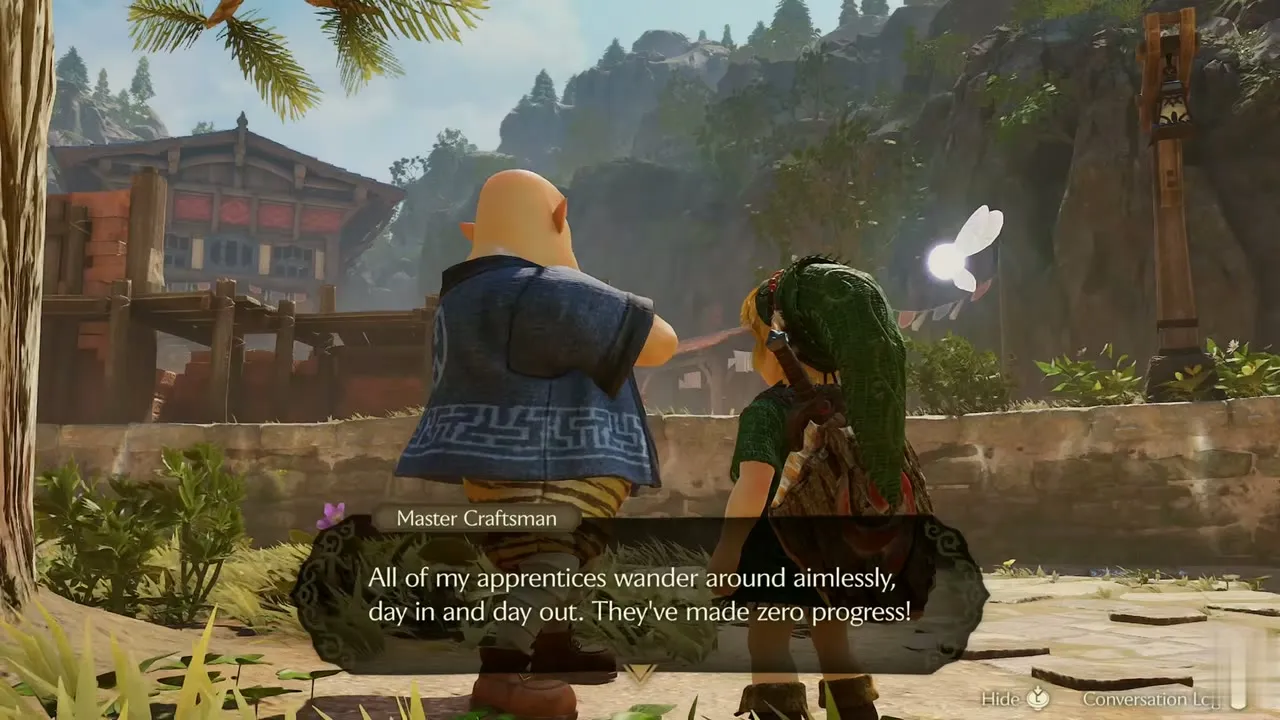
When you leave the house it is morning. Jiro, a large carpenter, and Ichiro, another, greet you along the paths. Neither gives you anything. Nearby the Master Craftsman is bawling out his apprentices for loafing. At a house with a red door a voice says “If you’re looking for my son, he’s out playing.” The closed Granny’s Cauldron shop has a sign reading “Gone field studying. Please visit another time.”



Blue Rupee in the hidden grotto
Past the closed shop, a round hole opens in the ground beside the steps. Drop in and you land on a Deku Flower in a small underground clearing. Open the chest in the shaft of light for a Blue Rupee, then step back onto the Deku Flower to climb out.


Rooftop Heart Piece and the Empty Bottle
Heart Piece #1: the rooftop
You need a Cucco for this one. Pick one up near the stone stairs and carry it uphill past the well, up the stone steps and along the wooden fence. Climb the ladder set against the high stone wall without the Cucco. At the top another Cucco waits on a grassy ledge. Lift it and keep going until the lane ends above the purple-tiled roofs.


Jump off the ledge with the Cucco in your arms and glide onto the purple rooftops. Follow the ivy-covered roof to the wall at the far end, where a red-haired man sits against a wooden hut. As you reach him the screen reads “You got a Piece of Heart!” That is Heart Piece #1. He says he has spent his days there studying Death Mountain since he first looked at it, and that he can’t get down.


Empty Bottle
Return to the village below with a Cucco in your arms and set it down in the Cucco Lady’s pen. When all seven are back, she thanks you and gives you “You got an empty bottle!” It holds many things, including bugs. The Cucco Lady adds that it is pretty and asks you to handle it with care.


Death Mountain Trail gate
Show Zelda’s Letter to the guard
Follow the dirt road that climbs from the carpenters’ yard to the stone gate, where a guard in armor says the trail is closed. Select Zelda’s Letter on the Items screen and show it. He recognizes the royal crest, reads the decree and lets you through. The Death Mountain Trail itself comes in a later chapter.


The guard warns that eruptions send debris flying, so a wooden shield will not do. In return he asks you to look in on the Happy Mask Shop, a new place in Hyrule Castle Town, when you pass the Bazaar. The “Spiritual Stone of Fire” quest banner appears as you leave. Walk back down the stone steps in the dark to the Graveyard.


Royal Family’s Tomb and the Graveyard, second visit
Out of the Royal Family’s Tomb
With the Sun’s Song learned, head back through the green poison room of the Royal Family’s Tomb. Navi warns you that you will pass out if you stay in the gas, so keep to the walkways and shoot Deku Seeds at what attacks. A glowing blue stone in the room holds a third Fairy’s Thought, about a song carved on a monument. Tall, stooped enemies shamble at you here. Play the Sun’s Song when one closes in. Golden light freezes it for a moment and you can strike it down. Continue through the dim hall, climb the stone stairs and cross the Triforce slab back up into the Graveyard.


Hylian Shield
A boy in the Graveyard tells you off for messing around, then chatters about Dampé’s “heart-pounding grave-digging tour”. Afterwards, stand on the path and play the Sun’s Song. Golden light sweeps the field, and one grave slab shows a Grab prompt. Pull it aside to open a hole in the ground.


Drop into the hole and land on a Deku Flower in a stone chamber. A tall enemy waits on a raised platform, so play the Sun’s Song again to freeze it and strike. Then open the chest. The box reads “Hylian soldiers love these shields. Don’t forget to equip it!” Equip the Hylian Shield on the Equipment screen. It is fire-resistant but a bit heavy for a child, and holding it upright while moving is tricky. Climb out and play the Sun’s Song at a second slab: that hole drops into a short passage that ends at a cracked wall, with nothing to collect in it.


Gold Skulltula #11 in the soft soil
Walk the path through the Graveyard toward the exit with the empty bottle. In the long grass a faint glow crawls over the ground. Catch it in the bottle and the box reads “You collected a bug in a bottle! To release it, just take the lid off.” Keep the bug in the bottle for now.


Near the Graveyard wall on the path back to Kakariko, Navi calls out “Oh, look! The soil here is soft!” Stand over the patch, open your bottle and let the bug crawl onto the soil. A Gold Skulltula bursts out and drops its token, just as the Cursed Rich Man hinted.


Chapter checklist
| Collectible | Type | Where |
|---|---|---|
| Fairy’s Thought | Secret | Hyrule Field, mossy ruined wall |
| Fairy’s Thought | Secret | Hyrule Field, overturned cart by the road |
| Fairy’s Thought | Secret | Royal Family’s Tomb, glowing blue stone in the poison room |
| Gold Skulltula #7 | Gold Skulltula | Kakariko Village, brick house walkway, Fairy Slingshot |
| Gold Skulltula #8 | Gold Skulltula | Kakariko Village, wall next to the blue door |
| Gold Skulltula #9 | Gold Skulltula | Kakariko Village, tree in the village square |
| Gold Skulltula #10 | Gold Skulltula | Kakariko Village, top of the windmill ladder |
| Adult’s Wallet | Item | House of Skulltula, for 10 tokens |
| Blue Rupee | Rupees | Chest in the hidden grotto near the red-doored house |
| Heart Piece #1 | Heart Piece | Kakariko Village, purple rooftops, reached with a Cucco |
| Empty Bottle | Bottle | Cucco Lady, for returning the Cuccos |
| Hylian Shield | Equipment | Chest in the grave opened with the Sun’s Song, Graveyard |
 Bug in a bottle | Bottle content | Grass in the Graveyard |
| Gold Skulltula #11 | Gold Skulltula | Graveyard, path back to Kakariko Village |
Next, head to Lon Lon Ranch for Talon’s Cucco game and Epona’s Song.


