
























The Legend of Zelda: A Link Between Worlds
Nintendo 3DS · 2013
Turn into a painting and discover new routes through Hyrule and Lorule. Browse A Link Between Worlds guides for dungeons, rented equipment, Maiamai locations, Heart Pieces, and more.
Explore the guide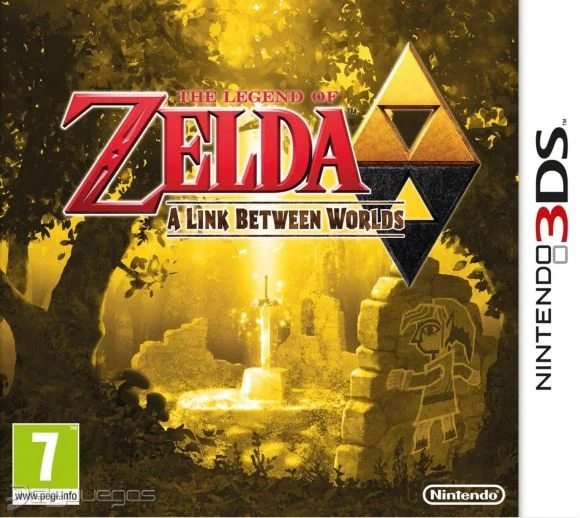
A strange sorcerer named Yuga is turning Hyrule’s people into paintings, and Link soon becomes one of his targets. But the ability to merge into walls gives Link a way to escape and opens paths into Lorule, a troubled kingdom whose fate is tied to Hyrule’s own.
A Link Between Worlds returns to the Hyrule introduced in A Link to the Past, with familiar landmarks and new secrets to uncover. Ravio’s item rental shop lets you tackle many dungeons in the order you choose, while moving along walls as a painting changes how you explore, solve puzzles, and reach hidden treasures.
Use our walkthrough, dungeon guides, and collectible locations to find the lost Maiamai, gather every Heart Piece, and help Link rescue the Seven Sages.
Walkthrough
Hyrule
- Opening and Sanctuary: Wake in Link’s House, deliver the captain’s sword, cross the Graveyard passage with the Lamp and meet Yuga.
- Hyrule Castle and Kakariko Village: Ravio’s Bracelet, Zelda’s Pendant of Courage, Kakariko shops, Sahasrahla and the free Bow rental.
- Eastern Palace: Every key, chest and rupee, the Compass, Big Key, Yuga boss fight and your first Heart Container.
- Pegasus Boots and Zora’s Flippers: Get the Pouch, Irene’s Bell, Power Glove, Pegasus Boots, Zora’s Flippers, Ravio’s rentals and Hyrule Heart Pieces.
- House of Gales: Rent the Tornado Rod, swim to Lake Hylia’s island, beat Margomill and take the Pendant of Wisdom.
- Death Mountain: Climb the boulder caves, find two Heart Pieces and a Bottle, and reach the Tower of Hera.
- Tower of Hera: Every floor, both Small Keys, Compass, Big Key, Moldorm boss fight, Heart Container and Pendant of Power.
- Master Sword and Lost Woods: Walkthrough for pulling the Master Sword in the Lost Woods, breaking the Hyrule Castle barrier.
Lorule
- Lorule and Dungeon Order: Hilda, the Blacksmith, fissures, Ravio’s Shop, Thieves’ Town side content and the dungeon order.
- Dark Palace: The guard maze, every key, the Compass, Big Key, Master Ore, Gemesaur King, Heart Container and Sage Gulley.
- Skull Woods: Keys, Compass, Big Key, Master Ore, Knucklemaster boss fight, Sage Seres and the Master Sword upgrade.
- Ice Ruins: The Hookshot route to Lorule’s Death Mountain, every floor, keys, the Stamina Scroll and Dharkstare.
- Thieves’ Hideout: The password song, the Thief Girl escort, Master Ore, Stalblind, Sage Osfala and the Sand Rod.
- Swamp Palace: Big Bomb Flower, Hookshot, water levels, keys, Compass, Blue Mail, Big Key, Arrghus and Sage Oren.
- Turtle Rock: Rescue the baby turtles, use the Ice Rod, find every key, beat Grinexx and free Sage Impa.
- Desert Palace: Reach it with the Sand Rod, find the Titan’s Mitt, beat Zaganaga and rescue Sage Irene.
- Lorule Castle: The Triforce of Courage, all four mini-bosses, the Compass, Red Mail and the way to the Throne Room.
Sage dungeon order
- Dark Palace: The guard maze, every key, the Compass, Big Key, Master Ore, Gemesaur King, Heart Container and Sage Gulley.
- Skull Woods: Keys, Compass, Big Key, Master Ore, Knucklemaster boss fight, Sage Seres and the Master Sword upgrade.
- Ice Ruins: The Hookshot route to Lorule’s Death Mountain, every floor, keys, the Stamina Scroll and Dharkstare.
- Thieves’ Hideout: The password song, the Thief Girl escort, Master Ore, Stalblind, Sage Osfala and the Sand Rod.
- Swamp Palace: Big Bomb Flower, Hookshot, water levels, keys, Compass, Blue Mail, Big Key, Arrghus and Sage Oren.
- Turtle Rock: Rescue the baby turtles, use the Ice Rod, find every key, beat Grinexx and free Sage Impa.
- Desert Palace: Reach it with the Sand Rod, find the Titan’s Mitt, beat Zaganaga and rescue Sage Irene.
Side Quests
- Heart Piece Locations: All 28 Pieces of Heart and 10 Heart Containers, with what you need to reach each, for 20 hearts.
- Maiamai Locations: Where Mother Maiamai is, every Nice upgrade she gives, and all 100 lost Maiamai in Hyrule and Lorule.
- Bottle Locations: Link can obtain up to five bottles, which are essential for storing potions, fairies, and other useful items. Each bottle is obtained through different tasks or discoveries.
- Master Ore Locations: Master Ore is a rare material used to upgrade the Master Sword. Locating all pieces allows Link to enhance his sword’s power, making combat more manageable.
- Ravio’s Shop: How renting works, rental and purchase prices for every item, when buying opens, and what Sheerow does when you fall.
- Treacherous Tower: Costs, rooms, floor-by-floor enemies and every prize, including the Piece of Heart, Super Lamp and Super Net.
- Mini-Games and Side Quests: Where to find it, what it costs, the rules and each prize, from Cucco Ranch to the Treacherous Tower.
- Weather Vanes: How to save and warp with Irene’s Bell, and the 9 Hyrule and 13 Lorule vanes.
Resources
- Boss Strategies: Tips and strategies for defeating game bosses.
- Enemies: Every regular enemy in A Link Between Worlds with where it appears and how to beat it.
- Items and Equipment: Details on Link’s usable items and gear.
- Characters: Guide to the characters of Hyrule and Lorule.
- MIDIs: MIDI renditions of the game’s themes.
- 100% Completion Checklist: 20 hearts, 100 Maiamai, 4 Master Ore, 5 Bottles, every item and mini-game prize, in plain lists.
The original adventure
The Legend of Zelda: A Link Between Worlds first released on Nintendo 3DS · 2013.
